Hitachi RH 650V Handling Instructions Manual
- Categorie
- Unelte electrice
- Tip
- Handling Instructions Manual

Read through carefully and understand these instructions before use.
Diese Anleitung vor Benutzung des Werkzeugs sorgfältig durchlesen und verstehen.
.
Przed uytkowaniem naley dokadnie przeczyta niniejsz instrukcj i zrozumie jej tre.
Használat eltt olvassa el fi gyelmesen a használati utasítást.
Ped použitím si peliv pette tento návod a ujistte se, že mu dobe rozumíte.
Aleti kullanmadan önce bu kılavuzu iyice okuyun ve talimatları anlayın.
Înainte de utilizare, citii cu atenie i înelegei prezentele instruciuni.
Pred uporabo natanno preberite in razumite ta navodila.
Pred použitím si dôkladne tieto pokyny preítajte a pochopte ich.
, , , .
.
Handling instructions
Bedienungsanleitung
Instrukcja obsugi
Kezelési utasítás
Návod k obsluze
Kullanım talimatları
Instruciuni de utilizare
Navodila za rokovanje
Pokyny na manipuláciu
RH 650V
Heat Gun
Heißluft Gebläse
Θερμοπίστολο
Opalarka
Hőlégfúvó
Horkovzdušná
pistole
Isı Tabancası
Pistol cu aer cald
Fen za vroč zrak
Teplov zdušná pištoľ
Термофен

2
123
456
789
10 11
1
3
4
1
0
@
9
5
8
9
!
2
3
8
1
1
2
6
7
8
!
[0] [1] [2]

3
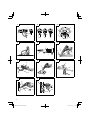
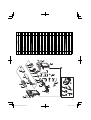
English Deutsch Polski
1
Switch Schalter Przecznik
2
Display Display Wywietlacz
3
Hot wind release nozzle Heißluftdüse
Dysza wydmuchu
ciepego powietrza
4
Increase Temperature
button
Knopf Temperatur
erhöhen
Przycisk zwikszania
temperatury
5
Decrease Temperature
button
Knopf Temperatur senken
Przycisk zmniejszania
temperatury
6
Increase wind power
button
Knopf zum Erhöhen der
Windkraft
Przycisk zwikszania siy
nadmuchu
7
Decrease wind power
button
Knopf zum Verringern der
Windkraft
Przycisk zmniejszania siy
nadmuchu
8
Nozzle (Plane) Düse (Flach) ()Dysza (paska)
9
Scraper Schaber Skrobak
0
Nozzle (Round) Düse (Rund) ()Dysza (okrga)
!
Nozzle (Curved surface) Düse (gebogene Fläche)
( )
Dysza
(powierzchnia zakrzywiona)
@
Nozzle (Glass protector) Düse (Glasschutz)
( )
Dysza (ochrona szka)
Magyar eština Türkçe Român
1
Kapcsoló Spína Anahtar Comutator
2
Kijelz Displej Ekran Afi aj
3
Forró leveg fúvóka Tryska horkého vzduchu Sıcak üfl eme aızlıı
Duz pentru ieirea
aerului cald
4
Hmérséklet növelés
gomb
Tlaítko zvýšení teploty Sıcaklık Artırma dümesi
Buton pentru creterea
temperaturii
5
Hmérséklet csökkentés
gomb
Tlaítko snížení teploty Sıcaklık Azaltma dümesi
Buton pentru reducerea
temperaturii
6
Légsugár teljesítmény
növelés gomb
Tlaítko zvýšení prtoku
vzduchu
Rüzgar gücü artırma
dümesi
Buton pentru creterea
puterii aerului sufl at
7
Légsugár teljesítmény
csökkentés gomb
Tlaítko snížení prtoku
vzduchu
Rüzgar gücü azaltma
dümesi
Buton pentru reducerea
puterii aerului sufl at
8
Fúvóka (Lapos) Tryska (plochá) Aızlık (düz yüzey) Duz (plan)
9
Kaparó Škrabka Kazıyıcı Raclet
0
Fúvóka (kerek) Tryska (kulatá) Aızlık (yuvarlak) Duz (rotund)
!
Fúvóka (Íves felület)Tryska (zakivená) Aızlık (kavisli yüzey) Duz (suprafa curbat)
@
Fúvóka (Üvegvéd) Tryska (s ochranou skla) Aızlık (cam koruyucu)
Duz
(de protecie a sticlei)
Slovenšina Slovenina Pycc
1
Stikalo
Spína
2
Zaslon
Displej
3
Šoba za izpust vroega
zraka
Tryska na uvonenie
horúceho vzduchu
4
Gumb za zvišanje
temperature
Tlaidlo zvýšenia teploty
5
Gumb za znižanje
temperature
Tlaidlo zníženia teploty
6
Gumb za poveanje moi
zraka
Tlaidlo zvýšenia objemu
vzduchu
7
Gumb za zmanjšanje moi
zraka
Tlaidlo zníženia objemu
vzduchu
8
Šoba (plošata) Tryska (rovná) () ()
9
Strgalo
Škrabka
0
Šoba (okrogla)
Tryska (oblá) ()
()
!
Šoba (ukrivljena površina)
Tryska
(na nerovný povrch)
( )
( )
@
Šoba (šitnik za steklo)
Tryska (na ochranu skla)
( )
( )

4
English Deutsch
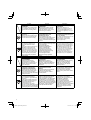
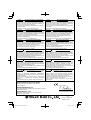
Symbols
WARNING
The following show symbols used
for the machine. Be sure that you
understand their meaning before
use.
Symbole
WARNUNG
Die folgenden Symbole werden
für diese Maschine verwendet.
Achten Sie darauf, diese vor der
Verwendung zu verstehen.
Σύμβολα
ΠΡΟΣΟΧΗ
.
.
Read all safety warnings and all
instructions.
Failure to follow the warnings and
instructions may result in electric
shock, fi re and/or serious injury.
Lesen Sie sämtliche
Sicherheitshinweise und
Anweisungen durch.
Wenn die Warnungen und
Anweisungen nicht befolgt werden,
kann es zu Stromschlag, Brand
und/oder ernsthaften Verletzungen
kommen.
Διαβάζετε όλες τις
προειδοποιήσεις ασφαλείας και
όλες τις οδηγίες.
, /
.
Only for EU countries
Do not dispose of electric tools
together with household waste
material!
In observance of European Directive
2002/96/EC on waste electrical
and electronic equipment and its
implementation in accordance with
national law, electric tools that have
reached the end of their life must be
collected separately and returned
to an environmentally compatible
recycling facility.
Nur für EU-Länder
Werfen Sie Elektrowerkzeuge nicht
in den Hausmüll!
Gemäss Europäischer
Richtlinie 2002/96/EG über
Elektro- und Elektronik-
Altgeräte und Umsetzung
in nationales Recht müssen
verbrauchte Elektrowerkzeuge
getrennt gesammelt und
einer umweltgerechaten
Wiederververtung zugeführt
werden.
!
2002/ 96/
,
.
Polski Magyar eština
Symbole
OSTRZEŻENIE
Nastpujce oznaczenia to
symbole uywane w instrukcji
obsugi maszyny. Upewnij si, e
rozumiesz ich znaczenie zanim
uyjesz narzdzia.
Jelölések
FIGYELEM
Az alábbiakban a géphez
alkalmazott jelölések vannak
felsorolva. A gép használata eltt
feltétlenül ismerje meg ezeket a
jelöléseket.
Symboly
UPOZORNĚNÍ
Následující text obsahuje symboly,
které jsou použity na zaízení.
Ujistte se, že rozumíte jejich
obsahu ped tím, než zanete
zaízení používat.
Należy dokładnie zapoznać się
ze wszystkimi ostrzeżeniami i
wskazówkami bezpieczeństwa.
Nieprzestrzeganie ostrzee oraz
wskazówek bezpieczestwa moe
spowodowa poraenie prdem
elektrycznym, poar i/lub odniesienie
powanych obrae.
Olvasson el minden biztonsági
fi gyelmeztetést és minden
utasítást.
A fi gyelmeztetések és utasítások
be nem tartása áramütést,
tüzet és/vagy súlyos sérülést
eredményezhet.
Přečtěte si všechna varování týkající
se bezpečnosti a všechny pokyny.
Nedodržení tchto varování a
pokyn mže mít za následek
elektrický šok, požár a/nebo vážné
zranní.
Dotyczy tylko pastw UE
Nie wyrzucaj elektronarzdzi
wraz z odpadami z gospodarstwa
domowego!
Zgodnie z Europejsk Dyrektyw
2002/96/WE w sprawie zuytego
sprztu elektrotechnicznego
i elektronicznego oraz
dostosowaniem jej do prawa
krajowego, zuyte elektronarzdzia
naley posegregowa i zutylizowa
w sposób przyjazny dla rodowiska.
Csak EU-országok számára Az
elektromos kéziszerszámokat ne
dobja a háztartási szemétbe!
A használt villamos és elektronikai
készülékekrl szóló 2002/96/EK
irányelv és annak a nemzeti jogba
való átültetése szerint az elhasznált
elektromos kéziszerszámokat külön
kell gyjteni, és környezetbarát
módon újra kell hasznosítani.
Jen pro státy EU Elektrické náadí
nevyhazujte do komunálního
odpadu! Podle evropské smrnice
2002/96/EG o nakládání
s použitými elektrickými a
elektronickými zaízeními a
odpovídajících ustanovení právních
pedpis jednotlivých zemí se
použitá elektrická náadí musí sbírat
oddlen od ostatního odpadu
a podrobit ekologicky šetrnému
recyklování.

5
Türkçe Român
Slovenšina
Simgeler
DİKKAT
Aaıda, bu alet için kullanılan
simgeler gösterilmitir. Aleti
kullanmadan önce bu simgelerin
ne anlama geldiini anladıınızdan
emin olun.
Simboluri
AVERTISMENT
În cele ce urmeaz sunt prezentate
simbolurile folosite pentru main.
Înainte de utilizare, asigurai-v c
înelegei semnifi caia acestora.
Simboli
OPOZORILO
V nadaljevanju so prikazani simboli,
uporabljeni pri stroju. Pred uporabo
se prepriajte, da jih razumete.
Tüm güvenlik uyarılarını ve tüm
talimatları okuyun.
Uyarılara ve talimatlara uyulmaması
elektrik çarpmasına, yangına ve/
veya ciddi yaralanmaya neden
olabilir.
Citiţi toate avertismentele privind
siguranţa și toate instrucţiunile.
Nerespectarea avertismentelor i a
instruciunilor poate avea ca efect
producerea de ocuri electrice,
incendii i/sau vtmri grave.
Preberite vas varnostna opozorila
in navodila.
Z neupoštevanjem opozoril in
navodil tvegate elektrini udar,
požar in/ali resne telesne poškodbe.
Sadece AB ülkeleri için Elektrikli
el aletlerini evdeki çöp kutusuna
atmayınız!
Kullanılmı elektrikli aletleri,
elektrik ve elektronikli eski
cihazlar hakkındaki 2002/96/EC
Avrupa yönergelerine göre ve bu
yönergeler ulusal hukuk kurallarına
göre uyarlanarak, ayrı olarak
toplanmalı ve çevre artlarına uygun
bir ekilde tekrar deerlendirmeye
gönderilmelidir.
Numai pentru rile membre UE
Nu aruncai aceast scul electric
împreun cu deeurile menajere!
În conformitate cu Directiva
European 2002/96/CE referitoare
la deeurile reprezentând
echipamente electrice i electronice
i la implementarea acesteia
în conformitate cu legislaiile
naionale, sculele electrice care au
ajuns la fi nalul duratei de folosire
trebuie colectate separat i duse la
o unitate de reciclare compatibil cu
mediul înconjurtor.
Samo za države EU
Elektrinih orodij ne zavržite skupaj
z gospodinjskimi odpadki!
V skladu z evropsko direktivo
2002/96/EC o odpadni elektrini
in elektronski opremi in izvedbi v
skladu z državnimi zakoni, je treba
elektrina orodja, ki so dosegla
življenjsko dobo loeno zbirati
in vrniti v z okoljem združljivo
ustanovo za recikliranje.
Slovenina Pycc
Symboly
VÝSTRAHA
V nasledujúcom sú zobrazené
symboly, ktoré sú vyobrazené na
náradí. Pred použitím náradia sa
oboznámte s významom týchto
symbolov.
Символи
ПОПЕРЕДЖЕННЯ
,
.
, ,
.
Символы
ПРЕДУПРЕЖДЕНИЕ
,
.
,
.
Prečítajte si všetky
bezpečnostné výstrahy a všetky
pokyny.
Nedodržanie výstrah a pokynov
môže vies k zasiahnutiu
elektrickým prúdom, požiaru a/
alebo vážnemu poraneniu osoby.
Прочитайте всі правила
безпеки та вказівки.
, /
.
Прочтите все правила
безопасности и инструкции.
,
/
.
Iba pre krajiny EÚ Elektrické
náradie nezneškodujte spolu
s komunálnym odpadom z
domácností!
Aby ste dodržali ustanovenia
európskej smernice 2002/96/
ES o odpadových elektrických a
elektronických zariadeniach a jej
implementáciu v zmysle národnej
legislatívy, je potrebné elektrické
zariadenie po uplynutí jeho doby
životnosti separova a dorui na
environmentálne prijatené miesto
recyklovania.
!
2002/96/EC
, ,
,
.
!
2002/96/
,
,
.

6
English
(Original instructions)
GENERAL POWER TOOL SAFETY WARNINGS
WARNING
Read all safety warnings and all instructions.
Failure to follow the warnings and instructions may result in
electric shock, fi re and/or serious injury.
Save all warnings and instructions for future reference.
The term “power tool” in the warnings refers to your
mains-operated (corded) power tool or battery-operated
(cordless) power tool.
1) Work area safety
a) Keep work area clean and well lit.
Cluttered or dark areas invite accidents.
b) Do not operate power tools in explosive
atmospheres, such as in the presence of
fl ammable liquids, gases or dust.
Power tools create sparks which may ignite the dust
or fumes.
c)
Keep children and bystanders away while
operating a power tool.
Distractions can cause you to lose control.
2) Electrical safety
a) Power tool plugs must match the outlet.
Never modify the plug in any way.
Do not use any adapter plugs with earthed
(grounded) power tools.
Unmodifi ed plugs and matching outlets will reduce
risk of electric shock.
b) Avoid body contact with earthed or grounded
surfaces, such as
pipes, radiators, ranges and
refrigerators.
There is an increased risk of electric shock if your
body is earthed or grounded.
c) Do not expose power tools to rain or wet
conditions.
Water entering a power tool will increase the risk of
electric shock.
d) Do not abuse the cord. Never use the cord for
carrying, pulling or unplugging the power tool.
Keep cord away from heat, oil, sharp edges or
moving parts.
Damaged or entangled cords increase the risk of
electric shock.
e) When operating a
power tool outdoors, use an
extension cord suitable for outdoor use.
Use of a cord suitable for outdoor use reduces the
risk of electric shock.
f) If operating a power tool in a damp location
is unavoidable, use a residual current device
(RCD) protected supply.
Use of an RCD reduces the risk of electric shock.
3) Personal safety
a) Stay alert, watch what you are doing and use
common sense when operating a power
tool.
Do not use a power tool while you are tired
or under the infl uence of drugs, alcohol or
medication.
A moment of inattention while operating power tools
may result in serious personal injury.
b) Use personal protective equipment. Always
wear eye protection.
Protective equipment such as dust mask, non-skid
safety shoes, hard hat, or hearing protection used
for appropriate conditions will reduce personal
injuries.
c) Prevent unintentional starting. Ensure the
switch is in the off position before connecting
to power source and/or
battery pack, picking
up or carrying the tool.
Carrying power tools with your fi nger on the switch
or energising power tools that have the switch on
invites accidents.
d) Remove any adjusting key or wrench before
turning the power tool on.
A wrench or a key left attached to a rotating part of
the power tool may result in personal injury.
e) Do not overreach. Keep proper footing and
balance at all times.
This enables better control of the power tool in
unexpected situations.
f) Dress properly. Do not wear loose clothing or
jewellery. Keep your hair, clothing
and gloves
away from moving parts.
Loose clothes, jewellery or long hair can be caught
in moving parts.
g) If devices are provided for the connection of
dust extraction and collection facilities, ensure
these are connected and properly used.
Use of dust collection can reduce dust related hazards.
4) Power tool use and care
a) Do not force the power tool. Use the correct
power tool for your application.
The correct power tool will do the job better and
safer at the rate for which it was designed.
b) Do
not use the power tool if the switch does not
turn it on and off .
Any power tool that cannot be controlled with the
switch is dangerous and must be repaired.
c) Disconnect the plug from the power source
and/or the battery pack from the power tool
before making any adjustments, changing
accessories, or storing power tools.
Such preventive safety measures reduce the risk of
starting the power tool accidentally.
d) Store idle power tools out
of the reach of
children and do not allow persons unfamiliar
with the power tool or these instructions to
operate the power tool.
Power tools are dangerous in the hands of untrained
users.
e) Maintain power tools. Check for misalignment
or binding of moving parts, breakage of parts
and any other condition that may aff ect the
power toolsʼ
operation.
If damaged, have the power tool repaired
before use.
Many accidents are caused by poorly maintained
power tools.
f) Keep cutting tools sharp and clean.
Properly maintained cutting tools with sharp cutting
edges are less likely to bind and are easier to control.
g) Use the power tool, accessories and tool bits
etc. in accordance with these instructions,
taking into account the working conditions and
the work to be performed.
Use of the power tool for operations diff erent from
those intended could result in a hazardous situation.
5) Service
a) Have your
power tool serviced by a qualifi ed
repair person using only identical replacement
parts.
This will ensure that the safety of the power tool is
maintained.

7
English
PRECAUTION
Keep children and infi rm persons away.
When not in use, tools should be stored out of reach
of children and infi rm persons.
HEAT GUN SAFETY WARNINGS
WARNING
1. Do not use the tool or touch the power plug with wet
hands.
Failure to observe this may result in electric shocks.
2. Always check the work area prior to use, and do not use
the tool if safety cannot be guaranteed.
Failure to observe this may result in infl ammable
articles concealed in or behind invisible areas (cases,
ceilings, fl oors, hollow areas) being ignited.
3. Do not use the tool in the vicinity of volatile substances
(thinner, gasoline, etc.)
Failure to observe this may result in the outbreak of fi re
or explosions.
4. Do not stand underneath when using the tool in elevated
locations.
Also, do not catch the power cord on anything, or allow
it to be pulled.
Failure to observe this may result in accidents.
5. Do not point the hot wind directly at people or animals.
Do not look into the nozzle. Do not use it as a hair dryer
under any circumstances.
Failure to observe this may result in accidents or injury.
6. There are cases in which highly toxic gas will be emitted
if used on plastic, lacquer or similar materials.
Always ensure that the work area is fully ventilated, and
wear a dust-protection mask.
7. Apply heat gently while moving the Heat Gun up, down,
left and right.
Aiming it constantly at a single location may result in the
outbreak of smoke or fi re.
8. Check the tool for damage, cracks or malformation in
the event of it being accidently dropped or subject to
impact.
Damage, cracks and malformation may result in injury.
9. Cease operations immediately in the event of the
tool not operating properly or if abnormal noises or
vibrations are noticed, and contact a Hitachi Authorized
Service Center to request inspections and repairs.
Continued use may result in injury.
10. Do not get away from the unit while it is switched on.
Failure to observe this may result in accidents.
CAUTION
1. Parts of the nozzle supplied are sharp, so use gloves
when removing them from the case and when attaching
or detaching them.
2. The hot wind release nozzle, the tip of the nozzle and
the material that was heated are extremely hot during
and immediately after using the tool, so use gloves and
avoid touching them directly.
3. Do not use inside boxes, drawers or other enclosed
spaces.
Aiming it constantly at a single location may result in the
outbreak of smoke or fi re.
4. Make sure the nozzle is at least 5cm away from the item
being heated when using the tool. Also, do not cover or
otherwise block the nozzle.
Failure to observe this may result in the Heat Gun
overheating, leading to malfunctions.
5. Do not switch the tool on and o repeatedly. Also, do not
use the tool with the power cord folded or twisted.
Failure to observe this may result in malfunctions.
6. Do not point the heat-wind release nozzle downwards
immediately after use.
Failure to observe this may result in the tool overheating,
leading to malfunctions.
7. Make sure that the Heat Gun has cooled completely
before storing it away.
Failure to observe this may result in burns or
malformation of the storage case.
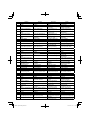
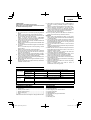
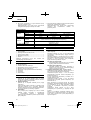
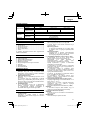
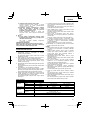
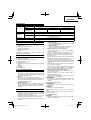
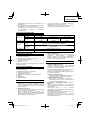
SPECIFICATIONS
Power supply
Type Can be used with both 50 Hz and 60 Hz single-phase current.
Voltage 110 V 120 V to 127 V 220 V to 240 V
Rated electrical
current
11.7 A 11.0 A 7.6 A
Power Input 1375 W 1500 W 2000 W
Capacity
Wind volume 0.25 m
3
/min to 0.5 m
3
/min (5-stage switch)
Wind temperature
50°C – 650°C
(In increments of 10°C)
Motor type Direct current motor
Weight 0.79 Kg
STANDARD ACCESSORIES
1 Nozzle (round) ............................................................. 1
2 Nozzle (fl at) ..................................................................1
3 Nozzle (curved surface) ...............................................1
4 Nozzle (glass protector) ...............................................1
5 Scraper (with grip) ........................................................1
6 Case .............................................................................1
Standard accessories are subject to change without notice.
APPLICATIONS
○ Peeling o paint
○ Softening adhesive
○ Removing putty from window frames
○ Forming resin pipes
○ Welding plastic
○ Heat wrapping using heat-shrink fi lm.
○ Soldering
○ Drying work
○ Defrosting work

8
English
PRIOR TO OPERATION
1. Power source
Ensure that the power source to be utilized conforms to the
power requirements specifi ed on the product nameplate.
2. Power switch
Ensure that the power switch is in the OFF position.
If the plug is connected to a receptacle while the power
switch is in the ON position, the power tool will start
operating immediately, which could cause a serious
accident.
3. Extension cord
When the work area is removed from the power source,
use an extension cord of su cient thickness and rated
capacity. The extension cord should be kept as short as
practicable.
BASIC FUNCTIONS
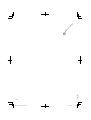
1. Switch Operations and Temperature Adjustments
(Fig. 1, Fig. 2)
Slide the knob upward to activate the switch and enable
continual operations even when your fi nger is removed.
Slide the knob downward as far as it will go to set the
switch at the [0] position and turn it o .
The position to which the switch is slid will alternate
between modes.
Switch [1] position:
Fixes the wind temperature at 50°C and enables the
wind power to be adjusted.
Switch [2] position:
Enables the wind temperature to be adjusted
between 50°C and 650°C, and enables the wind
power to be adjusted.
2. Adjusting the Temperature (Fig. 1, Fig. 2, Fig. 3)
The temperature can be adjusted between 50°C and
650°C when the switch is at the [2] position.
The temperature will rise by 10°C each time the
Increase Temperature button is pressed (to a maximum
of 650°C.)
Press the button continuously to increase the
temperature in increments of 10°C.
The temperature will decrease by 10°C each time the
Decrease Temperature button is pressed (to a minimum
of 50°C.)
The set temperature will be indicated on the display
when the Increase Temperature and Decrease
Temperature buttons are pressed, but this will return to
the hot wind temperature display after a few seconds.
The temperature will be fi xed at 50°C when the switch is
at the [1] position, and adjustment is not possible.
This is used to quickly cool material that is heat-
warping and to cool the nozzle when it reaches high
temperatures after using the tool.
3. Wind Power Adjustment (Fig.
1, Fig. 3)
The wind power can be adjusted in fi ve stages between
1 and 5. (0.25m
3
to 0.5m
3
)
Press the [+] button to increase wind power, and the [–]
button to decrease wind power.
The tool can be used with it stood pointing upward.
(Fig. 4)
CAUTION
Make sure the tool is placed on a stable surface so that
it won’t topple over when used pointing upward.
4. Attaching the Nozzle (Fig. 5)
CAUTION
The nozzle is extremely hot immediately after use, so
do not touch it.
NOTE
Make sure you do not drop the nozzle.
Replace the nozzle for a type that is suited to the job in hand.
Insert the nozzle supplied fi rmly into the hot wind release
nozzle until it can go no further.
5. Temperature Settings
WARNING
○ Do not use the tool in the vicinity of volatile substances
(thinner, gasoline, etc.)
○ Do not bring the hot wind release nozzle in close
contact with your hands or face during use.
The nozzle is extremely hot immediately after use, so
do not touch it.
Set the temperature in consideration of the article to be
heated.
Also, pay attention to the surrounding material that will be
heated at the same time.
First of all, apply the hot wind from a distance while checking
that there are no changes in the article being heated, and
then move it closer until it reaches an appropriate distance.
Heating infl ammable substances
(paper, wood, plastic, etc.)
Set the switch to the [1] position and apply the heat with
the nozzle at least 10cm away from the article being
heated.
Gently move the tip of the nozzle up, down, left and right
to apply the heat.
Applying heat constantly to one location may result in
malformation or the outbreak of smoke.
Heating non-fl ammable substances
(metal, stone, concrete, etc.)
Set the switch to the [1] position, and if there are no
problems, move it to the [2] position.
Apply the heat with the nozzle at least 5cm away from
the article being heated.
Holding the nozzle too close may result in the tool
overheating, leading to malfunctions.
WORK EXAMPLE
CAUTION
Parts of the nozzles supplied are sharp, so use gloves
when removing them from the case and when attaching
or detaching them.
Select the nozzle in consideration of the shape of the
article being heated and the area being heated.
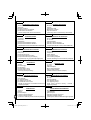
1. Peeling off paint (Fig. 6)
Use nozzle (fl at) or nozzle (round) to soften the paint
with the hot wind, and then remove it with the scraper
supplied.
Note that heating the paint too much may result in it
scorching and becoming harder, making it di cult to
scrape o .
2. Softening adhesive (Fig. 7)
Use nozzle (fl at) or nozzle (round) to soften the surface
and make it easy to peel, and then pull up one of the
edges, blow heat underneath it and gently peel it o so
that none of the adhesive remains.
3. Heat wrapping (Fig. 8)
Use nozzle (fl at) to heat-wrap shrink fi lm and tubes. The
material will change color or crack if hot air is blown onto
it from a close distance, so maintain an appropriate
distance while monitoring progress.

9
English
4. Forming resin pipes (Fig. 9)
Use nozzle (curved surface) to evenly heat the
circumference of the resin pipe.
To prevent the inside of the pipe from narrowing when
bending it, etc., pour sand inside, block both ends and
then gently bend it.
5. Removing putty from window frames (Fig. 10)
Use nozzle (glass protector) to soften the putty with heat,
and then remove the putty with the scraper supplied.
Note that glass may crack if heat is continually applied
to it.
6. Defrosting water pipes (Fig. 11)
Use nozzle (curved surface) to heat the frozen area from
the edge to the center. Do not mistake water pipes for
glass pipes.
Take care to avoid damaging frozen resin areas on
water pipes.
MAINTENANCE AND INSPECTION
1. Inspecting the mounting screws
Regularly inspect all mounting screws and ensure that
they are properly tightened. Should any of the screws
be loose, retighten them immediately. Failure to do so
could result in serious hazard.
2. Maintenance of the motor
The motor unit winding is the very “heart” of the power
tool.
Prevent any foreign objects, oil or water from getting
inside the intake.
3. Replacing supply cord
If the replacement of the supply cord is necessary, this
has to be done by Hitachi Authorized Service Center in
order to avoid a safety hazard.
4. Cleaning of the outside
When the tool is stained, wipe with a soft dry cloth or a
cloth moistened with soapy water. Do not use chloric
solvents, gasoline or paint thinner, as they melt plastics.
5. Service parts list
CAUTION
Repair, modifi cation and inspection of Hitachi Power
Tools must be carried out by a Hitachi Authorized
Service Center.
This Parts List will be helpful if presented with the tool to
the Hitachi Authorized Service Center when requesting
repair or other maintenance.
In the operation and maintenance of power tools, the
safety regulations and standards prescribed in each
country must be observed.
MODIFICATIONS
Hitachi Power Tools are constantly being improved
and modifi ed to incorporate the latest technological
advancements.
Accordingly, some parts may be changed without prior
notice.
GUARANTEE
We guarantee Hitachi Power Tools in accordance with
statutory/country specifi c regulation. This guarantee does
not cover defects or damage due to misuse, abuse, or
normal wear and tear. In case of complaint, please send
the Power Tool, undismantled, with the GUARANTEE
CERTIFICATE found at the end of this Handling instruction,
to a Hitachi Authorized Service Center.
NOTE
Due to HITACHI’s continuing program of research and
development, the specifi cations herein are subject to
change without prior notice.

10
Deutsch
(Übersetzung der Original-Gebrauchsanweisung)
ALLGEMEINE SICHERHEITSHINWEISE FÜR
ELEKTROGERÄTE
WARNUNG
Lesen Sie sämtliche Sicherheitshinweise und
Anweisungen durch.
Wenn die Warnungen und Anweisungen nicht befolgt
werden, kann es zu Stromschlag, Brand und/oder
ernsthaften Verletzungen kommen.
Bitte bewahren Sie alle Warnhinweise und
Anweisungen zum späteren Nachschlagen auf.
er Begriff „Elektrowerkzeug“ bezieht sich in den
Warnhinweisen auf Elektrowerkzeuge mit Netz-
(schnurgebunden) oder Akkubetrieb (schnurlos).
1) Sicherheit im Arbeitsbereich
a) Sorgen Sie für einen sauberen und gut
ausgeleuchteten Arbeitsbereich.
Zugestellte oder dunkle Bereiche ziehen Unfälle
förmlich an.
b) Verwenden Sie Elektrowerkzeuge niemals an
Orten, an denen Explosionsgefahr besteht – zum
Beispiel in der
Nähe von leicht entfl ammbaren
Flüssigkeiten, Gasen oder Stäuben.
Bei der Arbeit mit Elektrowerkzeugen kann es zu
Funkenbildung kommen, wodurch sich Stäube oder
Dämpfe entzünden können.
c) Sorgen Sie bei der Arbeit mit Elektrowerkzeugen
dafür, dass sich keine Zuschauer (insbesondere
Kinder) in der Nähe befi nden.
Wenn Sie abgelenkt werden, können Sie die
Kontrolle über das Werkzeug verlieren.
2) Elektrische Sicherheit
a) Elektrowerkzeuge müssen mit passender
Stromversorgung betrieben werden.
Nehmen Sie niemals irgendwelche Änderungen
am Anschlussstecker vor.
Verwenden
Sie bei Elektrowerkzeugen
mit Schutzkontakt (geerdet) niemals
Adapterstecker.
Stecker im Originalzustand und passende
Steckdosen reduzieren das Stromschlagrisiko.
b) Vermeiden Sie Körperkontakt mit geerdeten
Gegenständen wie Rohrleitungen, Heizungen,
Herden oder Kühlschränken.
Bei Körperkontakt mit geerdeten Gegenständen
besteht ein erhöhtes Stromschlagrisiko.
c) Setzen Sie Elektrowerkzeuge niemals Regen
oder sonstiger Feuchtigkeit aus.
Wenn Flüssigkeiten in ein Elektrowerkzeug
eindringen, erhöht sich das Stromschlagrisiko.
d) Verwenden Sie das Anschlusskabel
nicht missbräuchlich. Tragen Sie
das Elektrowerkzeug niemals an der
Anschlussschnur, ziehen Sie es
nicht damit
heran und ziehen Sie den Stecker nicht an der
Anschlussschnur aus der Steckdose.
Halten Sie die Anschlussschnur von
Hitzequellen, Öl, scharfen Kanten und
beweglichen Teilen fern.
Beschädigte oder verdrehte Anschlussschnüre
erhöhen das Stromschlagrisiko.
e) Wenn Sie ein Elektrowerkzeug im Freien
benutzen, verwenden Sie ein für den
Außeneinsatz geeignetes Verlängerungskabel.
Ein für den Außeneinsatz geeignetes Kabel
vermindert das Stromschlagrisiko.
f) Falls sich der Betrieb des
Elektrowerkzeuges
in feuchter Umgebung nicht vermeiden lässt,
verwenden Sie eine Stromversorgung mit
Fehlerstromschutzeinrichtung (Residual
Current Device, RCD).
Durch den Einsatz einer
Fehlerstromschutzeinrichtung wird das Risiko eines
elektrischen Schlages reduziert.
3) Persönliche Sicherheit
a) Bleiben Sie wachsam, achten Sie auf das, was
Sie tun, und setzen Sie Ihren Verstand ein,
wenn Sie mit Elektrowerkzeugen arbeiten.
Benutzen Sie keine Elektrowerkzeuge, wenn
Sie müde sind
oder unter Einfl uss von Drogen,
Alkohol oder Medikamenten stehen.
Bei der Arbeit mit Elektrowerkzeugen können
bereits kurze Phasen der Unaufmerksamkeit zu
schweren Verletzungen führen.
b) Benutzen Sie eine persönliche Schutzausrüstung.
Tra gen Sie immer einen Augenschutz.
Schutzausrüstung wie Staubmaske, rutschsichere
Sicherheitsschuhe, Schutzhelm und Gehörschutz
senken das Verletzungsrisiko bei angemessenem
Einsatz.
c) Vermeiden Sie unbeabsichtigtes Einschalten.
Achten Sie darauf, dass sich der Schalter
in der Aus- (Off -) Position befi ndet, ehe Sie
das Gerät mit der Stromversorgung
und/
oder Batteriestromversorgung verbinden, es
aufheben oder herumtragen.
Das Herumtragen von Elektrowerkzeugen mit
dem Finger am Schalter oder das Herstellen der
Stromversorgung bei betätigtem Schalter zieht
Unfälle regelrecht an.
d) Entfernen Sie sämtliche Einstellwerkzeuge
(Einstellschlüssel), ehe Sie das Elektrowerkzeug
einschalten.
Ein an einem beweglichen Teil des Elektrowerkzeugs
angebrachter Schlüssel kann zu Verletzungen
führen.
e) Sorgen Sie für einen festen Stand. Achten Sie
jederzeit darauf, sicher zu stehen und das
Gleichgewicht zu bewahren.
Dadurch haben Sie das Elektrowerkzeug in
unerwarteten Situationen besser im Griff .
f) Kleiden Sie sich richtig. Tragen Sie keine lose
Kleidung oder
Schmuck. Halten Sie Haar,
Kleidung und Handschuhe von beweglichen
Teilen fern.
Lose Kleidung, Schmuck oder langes Haar kann
von beweglichen Teilen erfasst werden.
g) Wenn Anschlüsse für Staubabsaug- und -
sammelvorrichtungen vorhanden sind, sorgen
Sie dafür, dass diese richtig angeschlossen
und eingesetzt werden.
Durch Entfernen des Staubes können
staubbezogene Gefahren vermindert werden.
4) Einsatz und Pfl ege von Elektrowerkzeugen
a) Überanspruchen Sie Elektrowerkzeuge nicht.
Benutzen Sie das richtige Elektrowerkzeug für
Ihren Einsatzzweck.
Das richtige Elektrowerkzeug erledigt seine Arbeit bei
bestimmungsgemäßem Einsatz besser und sicherer.
b) Benutzen Sie das Elektrowerkzeug nicht, wenn es
sich nicht am Schalter ein- und ausschalten lässt.
Jedes Elektrowerkzeug, das nicht mit dem Schalter
betätigt werden kann, stellt eine Gefahr dar und
muss repariert werden.

11
Deutsch
c) Stecken Sie den Stecker der Stromversorgung
oder Batteriestromversorgung vom Gerät ab, ehe
Sie Einstellarbeiten vornehmen, Zubehörteile
tauschen oder das Elektrowerkzeug verstauen.
Solche präventiven Sicherheitsmaßnahmen verhindern
den unbeabsichtigten Anlauf des Elektrowerkzeugs
und die damit verbundenen Gefahren.
d) Lagern Sie nicht benutzte Elektrowerkzeuge
außerhalb der Reichweite von Kindern, lassen
Sie nicht zu, dass Personen das Elektrowerkzeug
bedienen, die nicht mit dem Werkzeug selbst
und/oder diesen
Anweisungen vertraut sind.
Elektrowerkzeuge in ungeschulten Händen sind
gefährlich.
e) Halten Sie Elektrowerkzeuge in Stand. Prüfen
Sie auf Fehlausrichtungen, sicheren Halt
und Leichtgängigkeit beweglicher Teile,
Beschädigungen von Teilen und auf jegliche
andere Zustände, die sich auf den Betrieb des
Elektrowerkzeugs auswirken können.
Bei Beschädigungen lassen Sie das
Elektrowerkzeug reparieren, ehe Sie es benutzen.
Viele Unfälle mit Elektrowerkzeugen sind auf
schlechte Wartung zurückzuführen.
f) Halten Sie
Schneidwerkzeuge scharf und
sauber.
Richtig gewartete Schneidwerkzeuge mit scharfen
Schneidkanten bleiben weniger häufi g hängen und
sind einfacher zu beherrschen.
g) Benutzen Sie Elektrowerkzeuge,
Zubehör, Werkzeugspitzen und Ähnliches
in Übereinstimmung mit diesen
Anweisungen – beachten Sie dabei die
jeweiligen Arbeitsbedingungen und die Art und
Weise der auszuführenden Arbeiten.
Der Gebrauch des Elektrowerkzeuges für andere
als die vorgesehenen Anwendungen kann zu
gefährlichen Situationen führen.
5) Service
a) Lassen Sie Elektrowerkzeuge durch qualifi zierte
Fachkräfte und unter Einsatz passender,
zugelassener Originalteile
warten.
Dies sorgt dafür, dass die Sicherheit des
Elektrowerkzeugs nicht beeinträchtigt wird.
VORSICHT
Von Kindern und gebrechlichen Personen fernhalten.
Werkzeuge sollten bei Nichtgebrauch außerhalb der
Reichweite von Kindern und gebrechlichen Personen
aufbewahrt werden.
HEISSLUFTGEBLÄSE
SICHERHEITSWARNHINWEISE
WARNUNG
1. Benutzen Sie das Werkzeug nicht mit nassen Händen
und berühren Sie damit nicht den Netzstecker.
Wird das nicht beachtet, kann es zu Stromschlägen
führen.
2. Überprüfen Sie den Arbeitsbereich vor Verwendung
des Gerätes und benutzen Sie das Werkzeug nicht,
wenn die Sicherheit nicht gewährleistet werden kann.
Wird das nicht beachtet, können sich entzündbare
Gegenstände, die in oder hinter unsichtbaren Bereichen
(Schränken, Decken, Böden, Hohlstellen) sind, entzünden.
3. Benutzen Sie das Werkzeug nicht in Nähe von
fl üchtigen Sto en (Verdünner, Benzin usw.)
Wird dies nicht beachtet, kann das zum Ausbruch eines
Brandes oder Explosionen führen.
4. Stehen Sie bei Benutzung des Werkzeugs an
hochgelegenen Stellen nicht direkt unterhalb.
Achten Sie auch darauf, dass sich das Stromkabel nicht
irgendwo verfängt, oder dass daran gezogen wird.
Wird das nicht beachtet, kann es zu Unfällen führen.
5. Richten Sie die Heißluft nicht direkt auf Menschen
oder Tiere. Nicht in die Düse blicken. Benutzen Sie das
Gerät auf keinen Fall als Föhn.
Wird das nicht beachtet, kann es zu Unfällen oder
Verletzungen führen.
6. Es gibt Fälle, in denen hochgiftiges Gas freigesetzt
wird, wenn das Gerät auf Kunststo , Lack, oder
ähnlichen Sto en benutzt wird.
Stellen Sie immer sicher, dass der Arbeitsbereich gut
belüftet ist, und tragen Sie eine Staubschutzmaske.
7. Wenden Sie die Hitze behutsam an, indem Sie das
Heißluftgebläse nach oben, unten, links und rechts
bewegen.
Wird beständig auf eine einzige Stelle gezielt, kann das
zu Rauchentwicklung oder einem Brand führen.
8. Falls es versehentlich zu Boden fallen gelassen wurde,
oder Stößen ausgesetzt war, überprüfen Sie das
Werkzeug auf Schäden, Risse und Verformung.
Schäden, Risse und Verformung können zu
Verletzungen führen.
9. Falls das Heißluftgebläse nicht ordnungsgemäß
funktioniert, oder Sie anormale Geräusche oder
Vibrationen bemerken, stellen Sie die Arbeit sofort
ein und wenden Sie sich an einem einer von Hitachi
autorisierten Service-Werkstatt für Elektrogeräte, um
eine Inspektion und Reparaturen zu verlangen.
Eine Weiterbenutzung kann zu Verletzungen führen.
10. Entfernen Sie sich nicht vom Gerät, wenn es
eingeschaltet ist. Wenn dies nicht beachtet wird, kann
es zu Unfällen kommen.
VORSICHT
1. Teile der mitgelieferten Düse sind scharf. Benutzen Sie
daher Handschuhe, wenn Sie diese aus dem Gehäuse
nehmen und beim Anbringen bzw. Abmontieren.
2. Die Heißluftdüse, die Düsenspitze und das Material,
das erhitzt wurde, sind während und unmittelbar nach
Gebrauch des Werkzeugs extrem heiß. Benutzen Sie
also Handschuhe und vermeiden Sie, sie direkt zu
berühren.
3. Blasen Sie nicht in das Innere von Schachteln,
Schubladen oder andere umschlossene Flächen.
Wird beständig auf eine einzige Stelle gezielt, kann das
zu Rauchentwicklung oder einem Brand führen.
4. Achten Sie darauf, bei Gebrauch des Werkzeugs die
Düse in einem Abstand von mindestens 5 cm von dem
Gegenstand zu halten, der erhitzt wird. Decken Sie
auch die Düse nicht ab oder blockieren Sie sie nicht
anderweitig.
Wird dies nicht beachtet, kann es zu einer Überhitzung
des Heißluftgebläses und zu Fehlfunktionen führen.
5. Schalten Sie das Werkzeug nicht wiederholt ein
und aus. Benutzen Sie das Werkzeug auch nicht mit
gefaltetem oder verdrehtem Stromkabel.
Wird das nicht beachtet, kann es zu Fehlfunktionen
führen.
6. Richten Sie die Heißluftdüse nicht unmittelbar nach
Gebrauch nach unten.
Wird dies nicht beachtet, kann es zu einer Überhitzung
des Werkzeugs und zu Fehlfunktionen führen.
7. Vergewissern Sie sich, dass das Heißluftgebläse
vollkommen abgekühlt ist, bevor Sie es verstauen.
Wird dies nicht beachtet, kann das Verbrennungen
oder einer Verformung des Aufbewahrungsko ers
führen.

12
Deutsch
Schalterstellung [1]:
Legt die Heißlufttemperatur auf 50 °C fest und
ermöglicht das Einstellen der Windkraft.
Schalterstellung [2]:
Ermöglicht eine Einstellung der Heißlufttemperatur
zwischen 50 °C und 650 °C und das Einstellen der
Windkraft.
2. Einstellen der Temperatur (Abb. 1, Abb. 2, Abb. 3)
Die Temperatur kann zwischen 50 °C und 650 °C eingestellt
werden, wenn der Schalter auf [2] gestellt ist.
Die Temperatur steigt jedes Mal, wenn der Knopf
Temperatur erhöhen gedrückt wird jeweils um 10 °C
(bis maximal 650 °C).
Halten Sie den Knopf gedrückt, um die Temperatur in
Schritten zu 10° C zu erhöhen.
Die Temperatur sinkt jedes Mal, wenn der Knopf
Temperatur senken gedrückt wird jeweils um 10 °C (bis
zum Minimum von 50 °C).
Die eingestellte Temperatur wird auf dem Display
angezeigt, wenn der Knopf Temperatur erhöhen bzw.
der Knopf Temperatur senken gedrückt wird, aber diese
Anzeige kehrt nach wenigen Sekunden zur Anzeige der
Heißlufttemperatur zurück.
Wenn der Schalter auf [1] gestellt ist, ist die Temperatur
auf 50 °C festgelegt und es ist keine Einstellung möglich.
Dies dient dazu, Material, das sich durch Hitze verzieht,
rasch abzukühlen und zum Abkühlen der Düse, wenn
sie nach Gebrauch des Werkzeugs hohe Temperaturen
erreicht hat.
3. Einstellen der Windkraft (Abb. 1, Abb. 3)
Die Windkraft kann in fünf Stufen von 1 bis 5 eingestellt
werden. (0,25 m
3
bis 0,5 m
3
)
Drücken Sie den Knopf [+] zum Erhöhen der Windkraft
und den Knopf [–] zum Verringern der Windkraft.
Das Werkzeug kann mit der Mündung nach oben
gerichtet benutzt werden. (Abb. 4)
VORSICHT
Achten Sie darauf, dass das Werkzeug auf einer
stabilen Fläche steht, so dass es nicht umkippen kann,
wenn es mit der Mündung nach oben gerichtet benutzt
wird.
4. Anbringen der Düse (Abb. 5)
VORSICHT
Die Düse ist nach Gebrauch extrem heiß, berühren Sie
sie also nicht.
HINWEIS
Achten Sie darauf, die Düse nicht fallen zu lassen.
Tauschen Sie die Düse gegen einen Typ aus, der für die
anstehende Arbeit geeignet ist.
Schieben Sie die mitgelieferte Düse fest in die
Heißluftö nung bis zum Anschlag ein.
TECHNISCHE DATEN
Stromversorgung
Typ Kann mit einphasigem Strom zu 50 Hz und zu 60 Hz benutzt werden.
Spannung 110 V 120 V bis 127 V 220 V bis 240 V
Nennstromstärke 11,7 A 11,0 A 7,6 A
Leistungsaufnahme 1375 W 1500 W 2000 W
Kapazität
Heißluftvolumen 0,25 m
3
/ Min bis 0,5 m
3
/ Min (5-stufi ger Schalter)
Heißlufttemperatur
50 °C – 650 °C
(in Schritten zu 10 °C)
Motortyp Gleichstrommotor
Gewicht 0,79 Kg
STANDARDZUBEHÖR
1 Düse (rund)...................................................................1
2 Düse (fl ach) ..................................................................1
3 Düse (gebogene Fläche) .............................................1
4 Düse (Glasschutz)........................................................1
5 Schaber (mit Gri ) ........................................................1
6 Ko er ............................................................................1
Das Standardzubehör kann ohne vorherige
Bekanntmachung jederzeit geändert werden.
VERWENDUNG
○ Ablösen von Farbe
○ Aufweichen von Klebsto
○ Entfernen von Kitt von Fensterrahmen
○ Formen von Harzrohren
○ Verschweißen von Kunststo
○ Verpackung mit Heißschrump olie
○ Löten
○ Austrocknungsarbeiten
○ Entfrosten
VOR INBETRIEBNAHME
1. Stromquelle
Stellen Sie sicher, dass die Stromquelle, die verwendet
werden soll, den Anforderungen entspricht, die auf der
Gerätplakette des Produktes angegeben sind.
2. Einschaltknopf
Vergewissern Sie sich, dass der Einschaltknopf auf
AUS gestellt ist.
Wenn der Stecker in eine Steckdose gesteckt wird,
während der Einschaltknopf auf EIN ist, beginnt das
Elektrowerkzeug sofort zu arbeiten, was zu schweren
Unfällen führen könnte.
3. Verlängerungskabel
Wenn der Arbeitsbereich zu weit von der Stromquelle entfernt
ist, benutzen Sie ein Verlängerungskabel von ausreichender
Stärke und Nennkapazität. Das Verlängerungskabel sollte
so kurz wie möglich gehalten werden.
GRUNDFUNKTIONEN
1. Schalterfunktionen und Temperatureinstellungen
(Abb. 1, Abb. 2)
Schieben Sie den Knopf nach oben, um den Schalter
zu aktivieren und einen Dauerbetrieb zu ermöglichen,
auch wenn Sie ihn mit dem Finger loslassen.
Schieben Sie den Knopf bis zum Anschlag nach unten, um
den Schalter auf [0] zu stellen, und schalten Sie ihn aus.
Die Stellung, auf die der Schalter geschoben wird,
wechselt zwischen den Modi.

13
Deutsch
5. Temperatureinstellungen
WARNUNG
○ Benutzen Sie das Werkzeug nicht in Nähe von
fl üchtigen Sto en (Verdünner, Benzin usw.)
○ Bringen Sie die Heißluftdüse während des Gebrauchs
nicht in enge Berührung mit Ihren Händen oder Ihrem
Gesicht.
Die Düse ist nach Gebrauch extrem heiß, berühren Sie
sie also nicht.
Stellen Sie die Temperatur je nach dem Gegenstand ein,
der erhitzt werden soll.
Achten Sie auch auf das umgebende Material, das
gleichzeitig erhitzt wird.
Wenden Sie vor allem zuerst die Heißluft aus einer
Entfernung an und prüfen Sie dabei, ob es keine
Veränderungen an den Gegenständen gibt, die erhitzt
werden, und führen Sie sie dann näher heran, bis Sie einen
geeigneten Abstand erreicht haben.
Erhitzen von entzündbaren Stoff en
(Papier, Holz, Kunststo usw.)
Stellen Sie den Schalter auf Stellung [1] und wenden
Sie die Heißluft in einem Abstand von mindestens 10
cm von dem Gegenstand an, der erhitzt wird.
Bewegen Sie die Düsenspitze behutsam nach oben,
unten, links und rechts, um die Hitze anzuwenden.
Konstante Anwendung von Hitze auf nur eine Stelle kann
zu Verformungen oder zu Rauchentwicklung führen.
Erhitzen von nicht entzündbaren Stoff en
(Metall, Stein, Beton usw.)
Stellen Sie den Schalter auf Stellung [1], und wenn es
keine Probleme gibt, bewegen Sie ihn auf Stellung [2].
Wenden Sie die Hitze mit der Düse in einem Abstand von
mindestens 5 cm vom Gegenstand an, der erhitzt wird.
Wird dies nicht beachtet, kann es zu einer Überhitzung
des Werkzeugs und zu Fehlfunktionen führen.
ARBEITSBEISPIEL
VORSICHT
Teile der mitgelieferten Düsen sind scharf. Benutzen Sie
daher Handschuhe, wenn Sie diese aus dem Gehäuse
nehmen und beim Anbringen bzw. Abmontieren.
Wählen Sie die Düse je nach der Form des Gegenstands
und der Fläche aus, die erhitzt wird.
1. Ablösen von Farbe (Abb. 6)
Benutzen Sie die fl ache oder die runde Düse, um die
Farbe mit der Heißluft aufzuweichen, und entfernen Sie
die Farbe dann mit dem mitgelieferten Schaber.
Beachten Sie, dass die Farbe, wenn Sie zu stark erhitzt
wird, verschmort und härter wird, wodurch sie dann
schwer abzukratzen ist.
2. Aufweichen von Klebstoff (Abb. 7)
Benutzen Sie die fl ache oder runde Düse zum
Aufweichen der Oberfl äche, damit sie leicht ablösbar
wird, und ziehen Sie sie dann an einer der Kanten
etwas hoch, blasen Sie dann Hitze unter sie und ziehen
Sie sie behutsam ab, so dass kein Klebsto mehr
zurückbleibt.
3. Hitzeverpackung (Abb. 8)
Benutzen Sie die fl ache Düse, um mit Schrump olie
zu verpacken und Rohre. Das Material wird die Farbe
ändern oder Risse bekommen, wenn die Heißluft aus
zu nahem Abstand geblasen wird, halten Sie also
angemessenen Abstand und überwachen Sie dabei
den Vorgang.
4. Formen von Harzrohren (Abb. 9)
Benutzen Sie die Düse (gebogene Fläche), um den
Umfang des Harzrohres gleichmäßig zu erhitzen.
Schütten Sie Sand in das Rohr und verstopfen Sie beide
Enden, um zu verhindern, dass sich das Rohrinnere
beim Biegen verengt und biegen Sie das Rohr dann
behutsam.
5. Entfernen von Kitt von Fensterrahmen (Abb. 10)
Benutzen Sie die Düse (Glasschutz) zum Aufweichen
des Kitts mit Heißluft und entfernen Sie dann den Kitt
mit dem mitgelieferten Schaber.
Beachten Sie, dass Glas springen kann, wenn es
ständig Hitze ausgesetzt ist.
6. Entfrosten von Wasserrohren (Abb. 11)
Benutzen Sie die Düse (gebogene Fläche), um den
gefrorenen Bereich von außen zur Mitte hin zu erhitzen.
Verwechseln Sie Wasserrohre nicht mit Glasrohren.
Achten Sie darauf, gefrorene Harzbereiche an
Wasserrohren nicht zu beschädigen.
WARTUNG UND INSPEKTION
1. Inspektion der Befestigungsschrauben
Inspizieren Sie regelmäßig alle Befestigungsschrauben
und vergewissern Sie sich, dass sie ordnungsgemäß
angezogen sind. Sollte eine der Schrauben locker sein,
ziehen Sie diese sofort wieder fest. Wird das nicht
getan, kann das zu ernsthaften Gefahrensituationen
führen.
2. Wartung des Motors
Die Wicklung des Motors ist das "Herzstück" des
Elektrowerkzeugs.
Verhindern Sie, dass Fremdkörper, Öl, oder Wasser in
die Einlassö nung gelangen.
3. Austauschen des Stromkabels
Wenn das Stromkabel ausgetauscht werden muss,
dann muss das von der von Hitachi autorisierten
Service-Werkstatt durchgeführt werden, um
Sicherheitsrisiken zu vermeiden.
4. Außenreinigung
Wenn der Rasentrimmer schmutzig ist, mit einem
weichen trockenen Tuch oder einem mit Seifenwasser
befeuchteten Tuch abwischen. Kein Chlorlösungsmittel,
Benzin oder Farblösungsmittel verwenden, da sie
Kunststo e aufweichen.
5. Liste der Wartungsteile
VORSICHT
Reparatur, Modifi kation und Inspektion von Hitachi-
Elektrowerkzeugen müssen durch ein autorisiertes
Hitachi-Kundendienstzentrum durchgeführt werden.
Diese Teileliste ist hilfreich, wenn sie dem autorisierten
Hitachi-Kundendienstzentrum zusammen mit dem
Werkzeug für Reparatur oder Wartung ausgehändigt
wird.
Bei Betrieb und Wartung von Elektrowerkzeugen
müssen die Sicherheitsvorschriften und Normen
beachtet werden.
MODIFIKATIONEN
Hitachi-Elektrowerkzeuge werden fortwährend
verbessert und modifi ziert, um die neuesten
technischen Fortschritte einzubauen.
Dementsprechend ist es möglich, daß einige Teile
ohne vorherige Benachrichtigung geändert werden.

14
Deutsch
GARANTIE
Auf Hitachi-Elektrowerkzeuge gewähren wir eine Garantie
unter Zugrundelegung der jeweils geltenden gesetzlichen
und landesspezifi schen Bedingungen. Dieses Garantie
erstreckt sich nicht auf Gehäusedefekte und nicht auf
Schäden, die auf Missbrauch, bestimmungswidrigen
Einsatz oder normalen Verschleiß zurückzuführen
sind. Im Schadensfall senden Sie das nicht zerlegte
Elektrowerkzeug zusammen mit dem GARANTIESCHEIN,
den Sie am Ende der Bedienungsanleitung fi nden, an ein
von Hitachi autorisiertes Servicecenter.
HINWEIS
Aufgrund des ständigen Forschungs und Entwicklung
sprogramms von HITACHI sind änderungen der hierin
gemachten technischen Angaben vorbehalten.

15
Ελληνικά
ΓΕΝΙΚΕΣ ΠΡΟΕΙΔΟΠΟΙΗΣΕΙΣ ΑΣΦΑΛΕΙΑΣ
ΗΛΕΚΤΡΙΚΟΥ ΕΡΓΑΛΕΙΟΥ
ΠΡΟΣΟΧΗ
Διαβάζετε όλες τις προειδοποιήσεις ασφαλείας
και όλες τις οδηγίες.
Η μη τήρηση των προειδοποιήσεων και οδηγιών μπορεί
να προκαλέσει ηλεκτροπληξία, πυρκαγιά και/ή σοβαρό
τραυματισμό.
Φυλάξτε όλες τις προειδοποιήσεις και τις οδηγίες
για μελλοντική αναφορά.
Ο όρος “ηλεκτρικό εργαλείο” στις προειδοποιήσεις
αναφέρεται στο ηλεκτρικό εργαλείο (με καλώδιο) που
λειτουργεί στους
αγωγούς ή στο ηλεκτρικό εργαλείο που
λειτουργεί στη μπαταρία (χωρίς καλώδιο).
1) Ασφάλεια χώρου εργασίας
a) Διατηρείτε το χώρο εργασίας καθαρό και
καλά φωτισμένο.
Σε ακατάστατες ή σκοτεινές περιοχές μπορεί να
προκληθούν ατυχήματα.
b) Μην χρησιμοποιείτε τα ηλεκτρικά
εργαλεία σε περιβάλλον, στο οποίο μπορεί
να προκληθεί έκρηξη, όπως παρουσία
εύφλεκτων υγρών, αερίων ή σκόνης.
Τα ηλεκτρικά εργαλεία δημιουργούν σπινθήρες,
οι οποίοι μπορεί να αναφλέξουν τη σκόνη ή τον
καπνό.
c) Κρατήστε τα παιδιά και τους
παρευρισκόμενους μακριά όταν
χρησιμοποιείτε ένα ηλεκτρικό εργαλείο.
Αν αποσπαστεί η προσοχή σας, υπάρχει κίνδυνος
να χάσετε τον έλεγχο.
2) Ηλ άλεια
a) Τα φις
των ηλεκτρικών εργαλείων πρέπει να
είναι κατάλληλα για τις πρίζες.
Μην τροποποιήσετε ποτέ το φις με
οποιονδήποτε τρόπο.
Μη χρησιμοποιείτε φις προσαρμογής με
γειωμένα ηλεκτρικά εργαλεία.
Τα μη τροποποιημένα φις και οι κατάλληλες
πρίζες μειώνουν τον κίνδυνο ηλεκτροπληξίας.
b) Αποφύγετε τη σωματική επαφή με
γειωμένες επιφάνειες όπως σωλήνες,
θερμάστρες, μαγειρικές συσκευές και
ψυγεία.
Υπάρχει αυξημένος κίνδυνος ηλεκτροπληξίας
όταν το σώμα σας είναι γειωμένο.
c) Μην εκθέτετε τα ηλεκτρικά εργαλεία στη
βροχή ή σε συνθήκες υγρασίας.
Το νερό που εισέρχεται σε ένα ηλεκτρικό
εργαλείο αυξάνει τον κίνδυνο ηλεκτροπληξίας.
d) Μην ασκείτε δύναμη στο καλώδιο. Μη
χρησιμοποιείτε ποτέ το
καλώδιο για να
μεταφέρετε, να τραβήξετε ή να βγάλετε
από την πρίζα το ηλεκτρικό εργαλείο.
Κρατήστε το καλώδιο μακριά από θερμότητα,
λάδι, κοφτερές γωνίες και κινούμενα μέρη.
Τα κατεστραμμένα ή μπερδεμένα καλώδια
αυξάνουν τον κίνδυνο ηλεκτροπληξίας.
e) Όταν χρησιμοποιείτε το εργαλείο σε
εξωτερικό χώρο, χρησιμοποιήστε καλώδιο
προέκτασης
που προορίζεται για χρήση σε
εξωτερικό χώρο.
Η χρήση ενός καλωδίου κατάλληλου για εξωτερικό
χώρο μειώνει τον κίνδυνο ηλεκτροπληξίας.
f) Αν είναι αναπόφευκτη η λειτουργία ενός
ηλεκτρικού εργαλείου σε χώρο με υγρασία,
χρησιμοποιείτε διάταξη προστασίας
ρεύματος διαρροής (RCD).
Η χρήση της RCD μειώνει τον κίνδυνο
ηλεκτροπληξίας.
3) Προσωπική ασφάλεια
a) Να
είστε σε ετοιμότητα, να βλέπετε αυτό
που κάνετε και να χρησιμοποιείτε την κοινή
λογική όταν χρησιμοποιείτε ένα ηλεκτρικό
εργαλείο.
Μη χρησιμοποιείτε ηλεκτρικά εργαλεία
όταν είστε κουρασμένοι ή υπό την επήρεια
ναρκωτικών ουσιών, οινοπνεύματος ή
φαρμάκων.
Μια στιγμή απροσεξίας κατά τη χρήση ενός
ηλεκτρικού εργαλείου μπορεί να προκαλέσει
σοβαρό προσωπικό
τραυματισμό.
b) Χρησιμοποιείτε προσωπικό προστατευτικό
εξοπλισμό. Φοράτε πάντα προστασία για τα
μάτια.
Ο προστατευτικός εξοπλισμός, όπως μάσκα
για τη σκόνη, αντιολισθητικά παπούτσια,
σκληρό καπέλο ή προστασία για τα αυτιά, που
χρησιμοποιείται για ανάλογες συνθήκες μπορεί
να μειώσει τους τραυματισμούς.
c) Προλαμβάνετε τυχόν ακούσια εκκίνηση.
Βεβαιωθείτε ότι ο διακόπτης είναι
σε
θέση απενεργοποίησης πριν συνδέσετε
τη συσκευή με πηγή ρεύματος και/ή τη
θήκη της μπαταρίας, πριν σηκώσετε ή
μεταφέρετε το εργαλείο.
Η μεταφορά ηλεκτρικού εργαλείου με τα δάχτυλά
σας στο διακόπτη ή η ηλεκτροδότηση ηλεκτρικού
εργαλείου με ενεργοποιημένο το διακόπτη μπορεί
να προκαλέσουν ατυχήματα.
d) Να αφαιρείτε τυχόν
κλειδιά ρυθμιζόμενου
ανοίγματος ή τα απλά κλειδιά πριν θέσετε
σε λειτουργία το ηλεκτρικό εργαλείο.
.
e) Μην τεντώνεστε. Να διατηρείτε πάντοτε το
κατάλληλο πάτημα και την ισορροπία σας.
Με αυτόν τον τρόπο μπορείτε να ελέγχετε
καλύτερα το ηλεκτρικό εργαλείο σε μη
αναμενόμενες καταστάσεις.
f) Να είστε ντυμένοι κατάλληλα. Μη φοράτε
φαρδιά ρούχα ή κοσμήματα. Να κρατάτε τα
μαλλιά σας, τα ρούχα σας και τα γάντια σας
μακριά από κινούμενα μέρη.
Τα φαρδιά ρούχα, τα κοσμήματα και τα
μακριά
μαλλιά μπορεί να πιαστούν σε κινούμενα μέρη.
g) Αν παρέχονται εξαρτήματα για τη σύνδεση
συσκευών εξαγωγής και συλλογής σκόνης,
να βεβαιώνεστε ότι είναι συνδεδεμένα και
χρησιμοποιούνται με το σωστό τρόπο.
Η χρήση συλλέκτη σκόνης μειώνει τους
κινδύνους που προέρχονται από τη σκόνη.
4) Χρήση και φροντίδα ηλεκτρικών εργαλείων
a)
Μην ασκείτε δύναμη στο ηλεκτρικό
εργαλείο. Να χρησιμοποιείτε το ηλεκτρικό
εργαλείο που είναι κατάλληλο για το είδος
της εργασίας που εκτελείτε.
Το κατάλληλο ηλεκτρικό εργαλείο θα εκτελέσει
την εργασία καλύτερα και με μεγαλύτερη
ασφάλεια με τον τρόπο που σχεδιάστηκε.
(Μετάφραση των αρχικών οδηγιών)

16
Ελληνικά
b) Μη χρησιμοποιήσετε το ηλεκτρικό εργαλείο
αν ο διακόπτης λειτουργίας δεν ανοίγει και
δεν κλείνει.
Ένα ηλεκτρικό εργαλείο που δεν ελέγχεται από
το διακόπτη λειτουργίας είναι επικίνδυνο και
πρέπει να επισκευαστεί.
c) Αποσυνδέετε το βύσμα από την πηγή ισχύος
και/ή τη θήκη μπαταρίας από το ηλεκτρικό
εργαλείο πριν προβείτε
σε ρυθμίσεις,
αλλαγή εξαρτήματος ή αποθήκευση του
ηλεκτρικού εργαλείου.
Αυτά τα προληπτικά μέτρα ασφαλείας μειώνουν
τον κίνδυνο να ξεκινήσει το ηλεκτρικό εργαλείο
κατά λάθος.
d) Αποθηκεύετε τα εργαλεία που δεν
χρησιμοποιείτε μακριά από παιδιά και
μην αφήνετε τα άτομα που δεν είναι
εξοικειωμένα με το ηλεκτρικό εργαλείο ή
με αυτές
τις οδηγίες να χρησιμοποιούν το
ηλεκτρικό εργαλείο.
Τα ηλεκτρικά εργαλεία είναι επικίνδυνα στα χέρια
μη εκπαιδευμένων ατόμων.
e) Συντηρείτε τα ηλεκτρικά εργαλεία. Να
ελέγχετε την ευθυγράμμισή τους ή το
μπλοκάρισμα των κινούμενων μερών, τη
θραύση των εξαρτημάτων και οποιαδήποτε
άλλη κατάσταση που ενδέχεται να
επηρεάσει τη λειτουργία του ηλεκτρικού
εργαλείου.
Σε περίπτωση βλάβης, το ηλεκτρικό
εργαλείο πρέπει να επισκευαστεί πριν
χρησιμοποιηθεί.
Πολλά ατυχήματα προκαλούνται από ηλεκτρικά
εργαλεία που δεν έχουν συντηρηθεί σωστά.
f) Διατηρείτε τα εργαλεία κοπής κοφτερά και
καθαρά.
Τα κατάλληλα συντηρημένα εργαλεία κοπής με
κοφτερές γωνίες μπλοκάρουν πιο δύσκολα και
ελέγχονται πιο εύκολα.
g) Χρησιμοποιείτε
το ηλεκτρικό εργαλείο, τα
εξαρτήματα και τα μέρη κ.τ.λ. σύμφωνα με
τις παρούσες οδηγίες, λαμβάνοντας υπόψη
τις συνθήκες εργασίας και την εργασία που
θα εκτελέσετε.
Η χρήση του ηλεκτρικού εργαλείου για εργασίες
πέρα από εκείνες για τις οποίες προορίζεται,
ενδέχεται να δημιουργήσει κινδύνους.
5) Σέρβις
a) Να
δίνετε το ηλεκτρικό εργαλείο για σέρβις
σε κατάλληλα εκπαιδευμένα άτομα και να
χρησιμοποιείτε μόνο γνήσια ανταλλακτικά.
Με αυτόν τον τρόπο είστε σίγουροι για την
ασφάλεια του ηλεκτρικού εργαλείου.
ΠΡΟΦΥΛΑΞΗ
Μακριά από τα παιδιά και τους αναπήρους.
Όταν δεν χρησιμοποιούνται, τα εργαλεία πρέπει
να φυλάζονται μακριά από τα παιδιά και τους
αναπήρους.
ΠΡΟΕΙΔΟΠΟΙΗΣΕΙΣ ΑΣΦΑΛΕΙΑΣ ΓΙΑ ΤΟ
ΘΕΡΜΟΠΙΣΤΟΛΟ
ΠΡΟΣΟΧΗ
1.
.
.
2.
,
.
(, , ,
) .
3.
( , , .)
.
4.
.
,
.
.
5.
. .
.
.
6.
,
.
,
.
7.
, , .
.
8. ,
.
,
.
9.
,
() Hitachi
.
.
10.
.
.
ΠΡΟΕΙΔΟΠΟΙΗΣΗ
1.
,
.
2. ,
,
’
.
3.
,
.

17
Ελληνικά
.
4.
5cm
.
,
.
.
5. .
,
.
.
6.
.
.
7.
.
.
ΤΕΧΝΙΚΑ ΧΑΡΑΚΤΗΡΙΣΤΙΚΑ
50Hz 60Hz.
110 V 120 V 127 V 220 V 240 V
11,7 A 11,0 A 7,6 A
1375 W 1500 W 2000 W
I
0,25 m
3
/min 0,5 m
3
/min ( 5 )
50 °C 650 °C
( 10 °C)
0,79 Kg
ΒΑΣΙΚΑ ΕΞΑΡΤΗΜΑΤΑ
1 () .............................................1
2 () ..................................................1
3 ( ) ...................................1
4 ( ) .................................1
5 ( ) ..............................................1
6 ............................................................................1
.
ΕΦΑΡΜΟΓΕΣ
○
○
○
○
○
○
.
○
○
○
ΠΡΙΝ ΑΠΟ ΤΗ ΛΕΙΤΟΥΡΓΙΑ
1. Πηγή τροφοδοσίας
.
2. Διακόπτης τροφοδοσίας
(OFF).
(ON),
,
.
3. Καλώδιο επέκτασης
,
.
, .
ΒΑΣΙΚΕΣ ΛΕΙΤΟΥΡΓΙΕΣ
1. Λειτουργίες διακόπτη και ρυθμίσεις της
θερμοκρασίας (Εικ. 1, Εικ. 2)
.
[0]
.
.
Θέση διακόπτη [1]:
50 °C
.
Θέση διακόπτη [2]:
50 °C 650 °C,
.

18
Ελληνικά
2. Ρύθμιση της θερμοκρασίας (Εικ. 1, Εικ. 2, Εικ. 3)
50 °C
650 °C [2].
10 °C
( 650 °C.)
10 °C.
10 °C
( 50 °C.)
,
.
50 °C
[1],
.
.
3. Ρύθμιση της ισχύος του αέρα (Εικ. 1, Εικ. 3)
1 5. (0,25 m
3
0,5 m
3
)
[+]
, [-]
.
. (Εικ. 4)
ΠΡΟΕΙΔΟΠΟΙΗΣΗ
.
4. Προσαρτώντας το ακροφύσιο (Εικ. 5)
ΠΡΟΕΙΔΟΠΟΙΗΣΗ
, ' .
ΣΗΜΕΙΩΣΗ
.
.
5. Ρυθμίσεις θερμοκρασίας
ΠΡΟΣΟΧΗ
○
( , , .)
○
.
, ' .
.
' ,
,
.
Θερμαίνοντας εύφλεκτες ουσίες
(, , , .)
[1]
10 cm
.
, , .
.
Θέρμανση μη εύφλεκτων υλικών
(, , , .)
[1],
,
[2].
5 cm
.
.
ΠΑΡΑΔΕΙΓΜΑ ΕΡΓΑΣΙΑΣ
ΠΡΟΕΙΔΟΠΟΙΗΣΗ
,
.
.
1. Ξεφλούδισμα βαφής (Εικ. 6)
,
.
,
.
2. Μαλάκωμα της κόλλας (Εικ. 7)
,
,
.
3. Περιτύλιγμα θερμότητας (Εικ. 8)
.
,
.
4. Σχηματισμός σωλήνων ρητίνης (Εικ. 9)
(
)
.
, .,
,
.

19
Ελληνικά
5. Αφαίρεση στόκου από πλαίσια παραθύρων
(Εικ. 10)
( )
.
.
6. Απόψυξη υδροσωλήνων (Εικ. 11)
( )
.
.
.
ΣΥΝΤΗΡΗΣΗ ΚΑΙ ΕΛΕΓΧΟΣ
1. Επιθεωρώντας τις βίδες στερέωσης
.
,
.
.
2. Συντήρηση του μοτέρ
"" .
,
.
3. Αντικατάσταση του καλωδίου τροφοδοσίας
,
()
Hitachi
.
4. Καθαρισμός του εξωτερικού
,
.
,
,
.
5. Λίστα συντήρησης των μερών
ΠΡΟΕΙΔΟΠΟΙΗΣΗ
,
Hitachi
Hitachi.
Hitachi
.
,
.
ΤΡΟΠΟΠΟΙΗΣΗ
Hitachi
.
,
.
ΕΓΓΥΗΣΗ
Hitachi Power Tools
.
,
.
Power Tool
,
Hitachi.
ΣΗΜΕΙΩΣΗ
HITACHI
.

20
Polski
OGÓLNE WSKAZÓWKI BEZPIECZEŃSTWA
DOTYCZĄCE URZĄDZEŃ ELEKTRYCZNYCH
OSTRZEŻENIE
Należy dokładnie zapoznać się ze wszystkimi
ostrzeżeniami i wskazówkami bezpieczeństwa.
Nieprzestrzeganie ostrzeżeń oraz wskazówek
bezpieczeństwa może spowodować porażenie prądem
elektrycznym, pożar i/lub odniesienie poważnych obrażeń.
Ostrzeżenia i wskazówki bezpieczeństwa powinny
być przechowywane do użycia w przyszłości.
Wykorzystywane w treści wskazówek wyrażenie
“narzędzie elektryczne” dotyczy narzędzi zasilanych z
sieci (przewodowych) lub z baterii (bezprzewodowych).
1) Bezpieczeństwo stanowiska pracy
a) Miejsce pracy powinno być czyste i dobrze
oświetlone.
Brak porządku lub nieodpowiednie oświetlenie
miejsca pracy może być przyczyną wypadku.
b) Nie należy używać narzędzi elektrycznych
w miejscach zagrożonych wybuchem, na
przykład w pobliżu łatwopalnych cieczy,
gazów lub pyłów.
Pracujące narzędzie elektryczne wytwarza iskry
grożą
ce wybuchem.
c) Dzieci oraz osoby postronne powinny
pozostawać w bezpiecznej odległości od
pracującego urządzenia.
Dekoncentracja może spowodować utratę kontroli
nad urządzeniem.
2) Bezpieczeństwo elektryczne
a) Wtyczka narzędzia musi pasować do gniazda
zasilania.
Nie wolno przerabiać wtyczki.
Narzędzia posiadające uziemienie nie powinny
być używane
z wtyczkami przejściowymi.
Przestrzeganie powyższych zaleceń dotyczących
wtyczek i gniazdek pozwoli zmniejszyć ryzyko
porażenia prądem elektrycznym.
b) Należy unikać dotykania jakichkolwiek
powierzchni i elementów uziemionych, takich
jak rury, grzejniki, kuchenki lub urządzenia
chłodnicze.
Ryzyko porażenia prądem elektrycznym jest
wyższe, gdy ciało jest uziemione.
c) Nie należy narażać narzędzi elektrycznych na
działanie deszczu lub
wilgoci.
Obecność wody zwiększa niebezpieczeństwo
porażenia prądem elektrycznym.
d) Nie należy używać przewodu zasilającego
w sposób niezgodny z przeznaczeniem. Nie
wolno używać przewodu do przenoszenia lub
ciągnięcia urządzenia bądź wyłączania go z
prądu.
Przewód powinien znajdować się w
bezpiecznej odleg
łości od źródeł ciepła,
oleju, ostrych krawędzi lub poruszających się
części.
Uszkodzenie lub zapętlenie przewodu zwiększa
ryzyko porażenia prądem elektrycznym.
e) W przypadku używania narzędzia
elektrycznego na wolnym powietrzu należy
korzystać z przedłużaczy przeznaczonych do
takiego zastosowania.
Używanie odpowiednich przedłużaczy zmniejsza
ryzyko porażenia prądem elektrycznym.
f) W przypadku korzystania z narzędzia w
miejscu o dużej wilgotności należy zawsze
używać wyłącznika różnicowoprądowego.
Korzystanie z takiego wyłącznika zmniejsza ryzyko
porażenia prądem elektrycznym.
3) Bezpieczeństwo osobiste
a) Podczas korzystania z narzędzia
elektrycznego należy zawsze koncentrować
się na wykonywanej pracy i postępować
zgodnie z zasadami zdrowego rozsądku.
Narzędzia elektryczne nie powinny być
obsługiwane przez osoby zmęczone lub
znajdujące się pod wpływem substancji
odurzających, alkoholu bądź lekarstw.
Chwila nieuwagi podczas obsługi narzędzia
elektrycznego może spowodować odniesienie
poważnych obrażeń.
b) Zawsze używać odpowiedniego osobistego
wyposaż
enia ochronnego. Zawsze nosić
odpowiednie okulary ochronne.
Stosowane w odpowiednich warunkach
wyposażenie zabezpieczające, takie jak maska
przeciwpyłowa, obuwie antypoślizgowe, kask lub
nauszniki zmniejsza ryzyko odniesienia obrażeń
ciała.
c) Uniemożliwić nieoczekiwane uruchomienie
narzędzia. Przed podłączeniem narzędzia do
gniazda zasilania i/lub zestawu baterii, a także
przed podniesieniem lub przeniesieniem go,
należy upewnić się, że wy
łącznik znajduje się
w położeniu wyłączenia.
Ze względów bezpieczeństwa nie należy przenosić
narzędzi elektrycznych, trzymając palec na
wyłączniku, ani podłączać do zasilania urządzeń,
których wyłącznik znajduje się w położeniu
włączenia.
d) Przed włączeniem usunąć wszystkie klucze
regulacyjne.
Pozostawienie klucza regulacyjnego poczonego
z czci obrotow narzdzia moe spowodowa
odniesienie obrae.
e) Nie sięga
ć zbyt daleko. Należy zawsze stać
stabilnie, zachowując równowagę.
Zapewnia to lepsze panowanie nad narzędziem w
nieoczekiwanych sytuacjach.
f) Należy nosić odpowiednią odzież roboczą.
Nie nosić luźnych ubrań lub biżuterii. Trzymać
włosy, odzież i rękawice w bezpiecznej
odległości od ruchomych części urzą
dzenia.
Luźne ubrania, biżuteria lub długie włosy mogą
zostać wciągnięte przez ruchome części narzędzia.
g) Jeżeli wraz z narzędziem dostarczone zostało
wyposażenie służące do odprowadzania
pyłów, należy pamiętać o jego właściwym
podłączeniu i używaniu.
Właściwe zbieranie i odprowadzanie pyłu
zmniejsza zagrożenia związane z jego obecno
ścią.
4) Obsługa i konserwacja narzędzi elektrycznych
a) Nie używać narzędzia elektrycznego ze
zbyt dużą siłą. Należy stosować narzędzie
odpowiednie dla wykonywanej pracy.
Narzędzie przeznaczone do określonej pracy
wykona ją lepiej i w sposób bardziej bezpieczny,
pracując z zalecaną prędkością.
b) Nie należy używać narzędzia, którego
wyłącznik jest uszkodzony.
Każde urządzenie, które nie może być właściwie
włączane i wyłączane, stanowi zagrożenie i musi
zostać naprawione.
(Tłumaczenie oryginalnych instrukcji)
Pagina se încarcă ...
Pagina se încarcă ...
Pagina se încarcă ...
Pagina se încarcă ...
Pagina se încarcă ...
Pagina se încarcă ...
Pagina se încarcă ...
Pagina se încarcă ...
Pagina se încarcă ...
Pagina se încarcă ...
Pagina se încarcă ...
Pagina se încarcă ...
Pagina se încarcă ...
Pagina se încarcă ...
Pagina se încarcă ...
Pagina se încarcă ...
Pagina se încarcă ...
Pagina se încarcă ...
Pagina se încarcă ...
Pagina se încarcă ...
Pagina se încarcă ...
Pagina se încarcă ...
Pagina se încarcă ...
Pagina se încarcă ...
Pagina se încarcă ...
Pagina se încarcă ...
Pagina se încarcă ...
Pagina se încarcă ...
Pagina se încarcă ...
Pagina se încarcă ...
Pagina se încarcă ...
Pagina se încarcă ...
Pagina se încarcă ...
Pagina se încarcă ...
Pagina se încarcă ...
Pagina se încarcă ...
Pagina se încarcă ...
Pagina se încarcă ...
Pagina se încarcă ...
Pagina se încarcă ...
Pagina se încarcă ...
Pagina se încarcă ...
Pagina se încarcă ...
Pagina se încarcă ...
Pagina se încarcă ...
Pagina se încarcă ...
Pagina se încarcă ...
Pagina se încarcă ...
-
 1
1
-
 2
2
-
 3
3
-
 4
4
-
 5
5
-
 6
6
-
 7
7
-
 8
8
-
 9
9
-
 10
10
-
 11
11
-
 12
12
-
 13
13
-
 14
14
-
 15
15
-
 16
16
-
 17
17
-
 18
18
-
 19
19
-
 20
20
-
 21
21
-
 22
22
-
 23
23
-
 24
24
-
 25
25
-
 26
26
-
 27
27
-
 28
28
-
 29
29
-
 30
30
-
 31
31
-
 32
32
-
 33
33
-
 34
34
-
 35
35
-
 36
36
-
 37
37
-
 38
38
-
 39
39
-
 40
40
-
 41
41
-
 42
42
-
 43
43
-
 44
44
-
 45
45
-
 46
46
-
 47
47
-
 48
48
-
 49
49
-
 50
50
-
 51
51
-
 52
52
-
 53
53
-
 54
54
-
 55
55
-
 56
56
-
 57
57
-
 58
58
-
 59
59
-
 60
60
-
 61
61
-
 62
62
-
 63
63
-
 64
64
-
 65
65
-
 66
66
-
 67
67
-
 68
68


Hitachi RH 650V Handling Instructions Manual
- Categorie
- Unelte electrice
- Tip
- Handling Instructions Manual
în alte limbi
- Türkçe: Hitachi RH 650V
- slovenčina: Hitachi RH 650V
- polski: Hitachi RH 650V
Lucrări conexe
Alte documente
-
Hikoki RH650V Manual de utilizare
-
-
Sthor TO-79320 Instrucțiuni de utilizare
-
Bosch GHG 600 CE Instrucțiuni de utilizare
-
-
Bosch LCD Professional Manualul utilizatorului
-
Dolmar HP351 Manualul proprietarului
-
Worx WX041 Original Instructions Manual
-
STEINEL 70409 Manualul proprietarului
-