Parkside PDST 10 B3 Instrucțiuni de utilizare
- Tip
- Instrucțiuni de utilizare

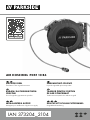
AIR HOSE REEL
Translation of the original instructions
TAMBUR PENTRU FURTUN
DE AER COMPRIMAT
Traducerea instrucţiunilor de utilizare original
ΜΠΑΛΑΝΤΈΖΑ ΑΈΡΟΣ
Μετάφραση των αυθεντικών οδηγιών λειτουργίας
PNEUMATSKO CRIJEVO
Prijevod originalnih uputa za uporabu
DRUCKLUFT-SCHLAUCHTROMMEL
Originalbetriebsanleitung
BUBANJ SA PNEUMATSKIM
CREVOM
Prevod originalnog uputstva za upotrebu
AIR HOSE REEL PDST 10 B3
IAN 373204_2104

GB / CY Translation of the original instructions Page 1
HR Prijevod originalnih uputa za uporabu Stranica 11
RS Prevod originalnog uputstva za upotrebu Strana 21
RO Traducerea instrucţiunilor de utilizare original Pagina 31
GR / CY Μετάφραση των αυθεντικών οδηγιών λειτουργίας Σελίδα 41
DE / AT / CH Originalbetriebsanleitung Seite 51
Before reading, unfold the page containing the illustrations and familiarise yourself with all functions of
the device.
Prije nego što pročitate tekst, otvorite stranicu sa slikama i upoznajte se na osnovu toga sa svim funkcijama
uređaja.
Pre čitanja rasklopite obe strane sa slikama te se upoznajte sa svim funkcijama uređaja.
Înainte de a citi instrucţiunile, priviţi imaginile şi familiarizaţi-vă cu toate funcţiile aparatului.
Πριν ξεκινήσετε την ανάγνωση, ανοίξτε τη σελίδα με τις εικόνες και εξοικειωθείτε με όλες τις λειτουργίες
της συσκευής.
Klappen Sie vor dem Lesen die Seite mit den Abbildungen aus und machen Sie sich anschließend mit allen
Funktionen des Gerätes vertraut.

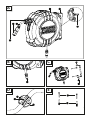
A
B C
D E

PDST 10 B3 GB│CY │ 1 ■
Contents
Introduction ............................................................2
Intended use ........................................................................2
Features ...........................................................................2
Package contents ....................................................................2
Technical specifications ...............................................................2
Safety instructions ...................................................... 3
Residual risk ...........................................................4
Before use ............................................................. 4
Installation ............................................................ 4
Finding an installation site .............................................................4
Mounting the compressed air hosereel ...................................................4
Commissioning .........................................................5
Connecting the compressed air hose reel to a compressed air source ...........................5
Connecting the compressed air hose reel to a compressed air tool ..............................5
Using the compressed air hose reel ......................................................5
Unrolling the hose ...................................................................5
Rolling up the hose ...................................................................5
Adjusting the hose stopper .............................................................6
Maintenance and cleaning ................................................6
Disposal ............................................................... 6
Kompernass Handels GmbH warranty .....................................7
Service ................................................................ 8
Importer ..............................................................8
Original Declaration of Conformity ........................................ 9

PDST 10 B3
■ 2 │ GB│CY
AIR HOSE REEL PDST 10 B3
Introduction
Congratulations on the purchase of your new
appliance. You have chosen a high-quality product.
The operating instructions are part of this product.
They contain important information about safety,
usage and disposal. Before using the product,
please familiarise yourself with all of the operating
and safety instructions. Use the product only as
described and for the range of applications speci-
fied. Please also pass these operating instructions
on to any future owner.
Intended use
The compressed air hose reel is used in conjunction
with a compressor to supply compressed air tools
with power. The compressed air hose reel is exclu-
sively for transporting compressed air. It is not suit-
able for transporting liquids. Use the product only
as described and for the range of applications
specified. Please keep these instructions in a safe
place for future reference. Pass all relevant docu-
ments to any future owner. Any use which deviates
from the intended use is prohibited and potentially
dangerous. Damage caused by failure to observe
the instructions or misuse is not covered by the
warranty and does not fall under the manufacturer's
liability. The appliance is designed for domestic use
and must not be used for commercial or industrial
purposes.
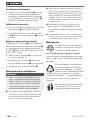
Symbols on the compressed air tool
WARNING! Read the operating instructions
before use.
Wear a dust mask.
Wear protective goggles.
Wear hearing protection.
Wear protective gloves.
Features
1 Drum housing
2 Pivoting mounting bracket
3 Hook for hanging
4 Hose stopper
5 Compressed air hose for compressed air tools
6 Quick-release coupling
7 Compressed air connection
8 Screws
9 Fastening screws
Mounting accessories
0 Mounting screws
q Wall plugs
Package contents
1 air Hose Reel
1 mounting accessories
(2x mounting screws, 2x wall plugs)
1 set of operating instructions
Technical specifications
Working pressure max. 10bar
Rewind system Automatic
Length of compressed air hose 10 m
Compressed air connection size 1/4" = 6.35 mm
Weight approx. 1.7 kg

PDST 10 B3 GB│CY │ 3 ■
WARNING!
Safety instructions
WARNING!
► PLEASE READ THE OPERATING INSTRUC-
TIONS CAREFULLY BEFORE USE. THEY ARE
A PART OF THIS APPLIANCE AND MUST BE
AVAILABLE AT ALL TIMES!
■ This appliance may be used by people aged
16 years and above and by people with limited
physical, sensory or mental capabilities or lack
of experience and knowledge, provided that
they are under supervision or have been told
how to use the appliance safely and are aware
of the potential risks. Do not allow children to
use the appliance as a toy. Cleaning and user
maintenance tasks may not be carried out by
children unless they are supervised.
■ The compressed air hose reel is used in conjunc-
tion with a compressor to supply compressed
air tools with power. The compressed air hose
reel is exclusively for transporting compressed
air. It is not suitable for transporting liquids.
■ The compressed air hose reel is designed to be
mounted on a suitable wall or ceiling; use
without mounting is not permitted.
■ The compressed air hose reel has not been
developed for commercial or industrial use or
use in workshops. This product is intended for
private use only. The compressed air hose reel
must only be used for its intended purpose.
Any other use deviating from this is prohibited!
■ Proper use also involves compliance with the
safety instructions as well as the assembly
instructions contained in the operating instruc-
tions. The manufacturer or dealer accepts no
liability for damage caused by improper or
incorrect use.
■ Use only accessories suitable for this product.
People who use the compressed air hose reel
and carry out any maintenance work must
familiarise themselves with it. They must also be
informed of potential hazards. The applicable
accident prevention regulations must be
observed correctly and conscientiously.
■ The manufacturer shall not be liable for
damage resulting from modifications made to
the compressed air hose reel.
■ Mount the compressed air hose reel before
using it to minimise the risk of injury.
■ The compressed air hose reel must only be used
with compressed air. Do not use the
compressed air hose reel with liquids.
■ Always allow the hose to roll up in a controlled
manner, since the compressed air hose reel
rewind mechanism is equipped with a tension
spring. A hose can cause injury while rolling up
if not used correctly. If the rewind mechanism is
damaged, the compressed air hose reel must be
taken out of operation immediately and repaired
by a specialist. Do not open the housing of the
compressed air hose reel yourself.
■ Only use accessories that are in perfect
condition and are designed for use with the
compressed air hose reel.
■ Never exceed the maximum working pressure of
the compressed air hose reel or the compressed
air tool being used.
■ Do not connect the compressed air hose reel to
compressed air lines until you have ensured that
the maximum permissible working pressure
cannot be exceeded by more than 10% (e.g.
by using a pressure reducer).
■ Always keep the compressed air hose away
from sharp edges, heat and oil.
■ Always check the compressed air hose before
using the compressed air hose reel.
■ The compressed air hose reel must only be used
in conjunction with a compressor. Operation
with compressed air cylinders is prohibited.
■ The use of pneumatic tools with flammable
gases is prohibited. There is a risk of an
explosion!
■ The compressed air hose reel must not be used
for other purposes.
■ Do not store the compressed air hose reel within
reach of children.
■ Never point the compressed air hose reel or its
hoses at people or animals.

PDST 10 B3
■ 4 │ GB│CY
■ Always use original spare parts for repairs.
Non-original spare parts can cause serious
damage.
■ When carrying out maintenance, adjustment
and repair work, always disconnect the
compressed air hose reel from the compressed
air supply first.
■ Do not make any modifications to the
compressed air hose reel.
■ Do not use the compressed air hose reel unless
it is in perfect condition. If in doubt, consult a
specialist before using the appliance.
■ Have all repairs carried out by qualified
professionals.
■ Never transport the compressed air hose reel
by holding onto the hoses.
■ Always hold the hose firmly in place when
disconnecting it from the compressed air source
or a compressed air tool.
Residual risk
Even if the appliance is operated properly, there
will still be residual risks. The following hazards
may occur in connection with the construction and
design of this compressed air hose reel:
– Danger caused by compressed air hoses
thrashing around.
– Risk of tripping due to compressed air hoses
lying around.
Reduce the residual risks by using the appliance
carefully and in accordance with the instructions.
Before use
■ Remove all parts from the packaging and check
whether the compressed air hose reel or the
individual parts are damaged. If this is the case,
do not use the compressed air hose reel.
Contact the manufacturer at the specified
service address.
■ Remove all protective films and other transport
packaging.
■ Check that the delivery is complete.
Installation
Finding an installation site
■ Mount the compressed air hose reel on a suit-
able ceiling or wall; use of the compressed air
hose reel without mounting is not permitted.
■ Select a location for mounting the compressed
air hose reel where it will not cause an obstruc-
tion.
■ With ceiling mounting, a mounting height of at
least 2.5 metres should be observed.
■ You will need the following tools to mount the
appliance: a drill, a suitable drill bit and a
screwdriver.
Mounting the compressed air
hosereel
WARNING! RISK OF INJURY!
► Incorrect installation of the compressed air
hose reel can lead to injuries.
■ Make sure that there are no cables or pipes at
the installation site. If necessary, use a detector
or contact a specialist.
■ Also observe the safety instructions for the drill
that is used.
NOTE! RISK OF DAMAGE!
► Incorrect installation can lead to damage.
■ Make sure that the support material (wall) at
the installation location is strong enough to
support the weight of the compressed air hose
reel. If you have any questions, please contact
a specialist.

PDST 10 B3 GB│CY │ 5 ■
1. Use the pivoting mounting bracket 2 as a
template. You can disconnect the mounting
bracket 2 from the compressed air hose reel
after you have removed the two screws 8 by
turning them anticlockwise (see fig. C).
Mark the position of the holes on the support
material with a pencil.
2. Drill the holes required for mounting in the
support material.
3. Mount the mounting bracket 2 with suitable
fixing material (see mounting accessories 0 q).
4. Reattach the compressed air hose reel to the
mounting bracket 2.
To do this, screw the screws 8 that you
removed in step 1 back in clockwise (see
FigureC).
Commissioning
Connecting the compressed air hose
reel to a compressed air source
♦ Plug the compressed air connection 7 of the
compressed air hose reel into the quick coupling
of the compressed air source.
Connecting the compressed air hose
reel to a compressed air tool
NOTE! RISK OF DAMAGE!
► Improper handling of the compressed air
hose reel can lead to damage.
■ Never exceed the maximum working pressure
of the compressed air hose reel and ensure that
the connectors used are compatible.
The compressed air hose can be immediately
connected to the compressed air tool via the air
inlet of the compressed air tool using the quick
coupling 6.
Using the compressed air hose reel
WARNING! RISK OF INJURY!
► The compressed air hose reel is equipped
with a return mechanism. This is operated by
a strong spring. If the compressed air hose 5
rolls up incorrectly, injuries may occur.
■ Never allow the compressed air hose 5 to
spring back in an uncontrolled way.
■ If the return mechanism is damaged, stop using
the compressed air hose reel immediately.
Have the damage repaired by a specialist.
■ The compressed air hose reel has a locking and
return mechanism. This makes it easy to pull out
and return the compressed air hose 5.
■ The locking device generates a clicking noise
when rolling up and unrolling. This is not a fault.
If the noise changes after using the equipment
numerous times and/or if there are problems
with the mechanism, seek expert assistance or
contact customer service.
Unrolling the hose
♦ Pull the compressed air hose 5 carefully out
ofthe drum housing to the desired working
length for the pneumatic tool. If you release
thecompressed air hose 5 after a click, the
locking device engages at this length.
Rolling up the hose
♦ A short pull on the compressed air hose 5
releases the lock.
♦ Make sure that the compressed air hose 5 rolls
back into the drum housing 1 in a controlled
manner.

PDST 10 B3
■ 6 │ GB│CY
Adjusting the hose stopper
The position of the hose stopper 4 can be
adjusted and interrupts the rolling up of the
compressed air hose 5 to the desired length. You
will need a Phillips screwdriver (not included) to
adjust the hose stopper 4.
♦ Undo the fastening screws 9 with the Phillips
screwdriver (see fig. D).
♦ Slide the hose stopper 4 along the
compressed air hose 5 to the desired position.
♦ Retighten the fastening screws 9.
Maintenance and cleaning
NOTE
► The compressed air hose reel must be
serviced regularly and overhauled to ensure
proper functioning and compliance with
safety requirements. Improper and incorrect
operation can lead to failures and damage
tothe appliance.
■ Never use harsh and/or abrasive cleaning
agents or solvents. These could damage the
plastic parts of the compressed air hose reel.
■ Never allow water to get inside the compressed
air hose reel. Make sure that the housing and
the compressed air hose remain free of dust and
dirt. To ensure this is the case, wipe the
compressed air hose reel regularly with a clean
cloth.
■ Before returning the compressed air hose to the
housing, clean the compressed air hose for
further use if possible.
■ Clean the compressed air hose reel and the
hose with a damp cloth and a little soap at
regular intervals.
Disposal
The packaging consists of environ-
mentally friendly material. It can be
disposed of in local recycling
containers.
Do not dispose of the appliance in the normal
domestic waste!
Your local community or municipal authorities can
provide information on how to dispose of the
worn-out appliance.
Dispose of the packaging in an envi-
ronmentally friendly manner. Note
the labelling on the packaging and
separate the packaging material
components for disposal if necessary. The pack-
aging material is labelled with abbreviations (a)
and numbers (b) with the following meanings:
1–7: plastics, 20–22: paper and cardboard,
80–98: composites.
Your local community or municipal
authorities can provide information on
how to dispose of the worn-out product.

PDST 10 B3 GB│CY │ 7 ■
Kompernass Handels GmbH
warranty
Dear Customer,
This appliance has a 3-year warranty valid from the
date of purchase. If this product has any faults, you,
the buyer, have certain statutory rights. Your statu-
tory rights are not restricted in any way by the
warranty described below.
Warranty conditions
The warranty period starts on the date of purchase.
Please keep your receipt in a safe place. This will
be required as proof of purchase.
If any material or manufacturing fault occurs within
three years of the date of purchase of the product,
we will either repair or replace the product for you
or refund the purchase price (at our discretion).
This warranty service requires that you present the
defective appliance and the proof of purchase
(receipt) within the three-year warranty period,
along with a brief written description of the fault
and of when it occurred.
If the defect is covered by the warranty, your
product will either be repaired or replaced by us.
The repair or replacement of a product does not
signify the beginning of a new warranty period.
Warranty period and statutory claims for
defects
The warranty period is not prolonged by repairs
effected under the warranty. This also applies to
replaced and repaired components. Any damage
and defects present at the time of purchase must be
reported immediately after unpacking. Repairs
carried out after expiry of the warranty period shall
be subject to a fee.
Scope of the warranty
This appliance has been manufactured in accord-
ance with strict quality guidelines and inspected
meticulously prior to delivery.
The warranty covers material faults or production
faults. The warranty does not extend to product
parts subject to normal wear and tear or to fragile
parts which could be considered as consumable
parts such as switches or parts made of glass.
The warranty does not apply if the product has
been damaged, improperly used or improperly
maintained. The directions in the operating instruc-
tions for the product regarding proper use of the
product are to be strictly followed. Uses and
actions that are discouraged in the operating
instructions or which are warned against must be
avoided.
This product is intended solely for private use and
not for commercial purposes. The warranty shall be
deemed void in cases of misuse or improper
handling, use of force and modifications / repairs
which have not been carried out by one of our
authorised Service centres.
The warranty period does not apply to
■ Normal reduction of the battery capacity
overtime
■ Commercial use of the product
■ Damage to or alteration of the product by the
customer
■ Non-compliance with safety and maintenance
instructions, operating errors
■ Damage caused by natural hazards

PDST 10 B3
■ 8 │ GB│CY
Warranty claim procedure
To ensure quick processing of your case, please
observe the following instructions:
■ Please have the till receipt and the item number
(IAN)373204_2104 available as proof of
purchase.
■ You will find the item number on the type plate
on the product, an engraving on the product,
on the front page of the operating instructions
(below left) or on the sticker on the rear or
bottom of the product.
■ If functional or other defects occur, please
contact the service department listed either by
telephone or by e-mail.
■ You can return a defective product to us free of
charge to the service address that will be
provided to you. Ensure that you enclose the
proof of purchase (till receipt) and information
about what the defect is and when it occurred.
You can download these instructions
along with many other manuals,
product videos and installation soft-
ware at www.lidl-service.com.
This QR code will take you directly to the Lidl
service page (www.lidl-service.com) where you
can open your operating instructions by entering
the item number (IAN) 373204_2104.
Service
Service Great Britain
Tel.: 0800 404 7657
E-Mail: kom[email protected]
CY Service Cyprus
Tel.: 8009 4409
E-Mail: kom[email protected]
IAN 373204_2104
Importer
Please note that the following address is not the
service address. Please use the service address
provided in the operating instructions.
KOMPERNASS HANDELS GMBH
BURGSTRASSE 21
44867 BOCHUM
GERMANY
www.kompernass.com

PDST 10 B3 GB│CY │ 9 ■
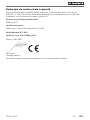
Original Declaration of Conformity
We, KOMPERNASS HANDELS GMBH, document officer: Mr Semi Uguzlu, BURGSTR. 21,
44867 BOCHUM, GERMANY, hereby declare that this product complies with the following standards,
normative documents and EC directives:
Machinery Directive
(2006/42/EC)
Type/appliance designation
Air Hose Reel PDST 10 B3
Year of manufacture: 07–2021
Serial number: IAN 373204_2104
Bochum, 19/07/2021
Semi Uguzlu
- Quality Manager -
We reserve the right to make technical changes in the context of further product development.

PDST 10 B3
■ 10 │ GB│CY

PDST 10 B3 HR │ 11 ■
Sadržaj
Uvod ................................................................12
Namjenska uporaba ................................................................12
Oprema ..........................................................................12
Opseg isporuke ....................................................................12
Tehnički podaci ....................................................................12
Sigurnosne napomene ..................................................13
Preostali rizik .........................................................14
Prije uključivanja ......................................................14
Montaža .............................................................14
Pronalaženja mjesta za montažu .......................................................14
Montaža koluta s pneumatskim crijevom .................................................15
Puštanje u rad ......................................................... 15
Priključivanje koluta s pneumatskim crijevom na izvor komprimiranog zraka ......................15
Priključivanje koluta s pneumatskim crijevom na pneumatski alat ...............................15
Korištenje koluta s pneumatskim crijevom .................................................15
Odmatanje crijeva ..................................................................16
Namatanje crijeva ..................................................................16
Postavljanje zaustavljača crijeva .......................................................16
Održavanje i čišćenje ...................................................16
Zbrinjavanje ..........................................................16
Jamstvo tvrtke Kompernass Handels GmbH ................................17
Servis ...............................................................18
Uvoznik ..............................................................18
Originalna izjava o sukladnosti ..........................................19

PDST 10 B3
■ 12 │ HR
PNEUMATSKO CRIJEVO
PDST 10 B3
Uvod
Čestitamo na kupnji Vašeg novog uređaja. Time
ste se odlučili za vrlo kvalitetan proizvod. Upute
za uporabu dio su opreme ovog proizvoda. One
sadrže važne napomene za sigurnost, rukovanje i
zbrinjavanje. Prije uporabe proizvoda upoznajte se
sa svim napomenama za rukovanje i svim sigurnos-
nim napomenama. Proizvod koristite isključivo na
opisani način i u navedenim područjima uporabe.
U slučaju predaje proizvoda trećim osobama
predajte i svu dokumentaciju.
Namjenska uporaba
Kolut s pneumatskim crijevom služi zajedno s
kompresorom za opskrbu pneumatskog alata.
Kolut s pneumatskim crijevom koristi se isključivo za
transport komprimiranog zraka. Nije pogodan za
transport tekućina. Proizvod koristite isključivo na
opisani način i u navedenim područjima uporabe.
Ove upute dobro sačuvajte. U slučaju predaje
proizvoda trećim osobama priložite i također
predajte i svu dokumentaciju. Zabranjena je i po-
tencijalno opasna svaka uporaba koja odstupa od
namjenske uporabe. Oštećenja nastala zbog zane-
marivanja ili zlouporabe nisu pokrivena jamstvom i
proizvođač za njih ne snosi odgovornost. Uređaj je
dizajniran za kućnu uporabu i ne smije se koristiti u
komercijalnim ili industrijskim okruženjima.
Simboli na alatu na komprimirani zrak
WARNING! Prije uključivanja uređaja pročitajte
upute za uporabu.
Nosite masku za zaštitu od prašine.
Nosite zaštitu za oči.
Nosite zaštitu od buke.
Nosite zaštitne rukavice
Oprema
1 Kućište bubnja
2 Okretni priključni nosač
3 Kuka za vješanje
4 Zaustavljač crijeva
5 Pneumatsko crijevo za pneumatski alat
6 Brza spojka
7 Priključak komprimiranog zraka
8 Vijci
9 Vijci za pričvršćivanje
Montažni pribor
0 Montažni vijci
q Tiple
Opseg isporuke
1 pneumatsko crijevo
1 montažni pribor (2x montažni vijci, 2x tiple)
1 upute za uporabu
Tehnički podaci
Radni tlak maks. 10 bara
Sustav namatanja Automatski
Duljina pneumatskog crijeva 10 m
Veličina pneumatskog
priključka 1/4“ = 6,35 mm
Težina otprilike 1,7 kg

PDST 10 B3 HR │ 13 ■
WARNING!
Sigurnosne napomene
UPOZORENJE!
► PRIJE UPORABE PAŽLJIVO PROČITAJTE
UPUTE ZA UPORABU. UPUTE SU SASTAVNI
DIO UREĐAJA I MORAJU BITI DOSTUPNE
U BILO KOJEM TRENUTKU!
■ Ovaj uređaj smiju koristiti osobe stare 16 godina
ili više, kao i osobe smanjenih fizičkih, osjetilnih
ili mentalnih sposobnosti ili s nedovoljno iskustva
i/ili znanja, ako su pod nadzorom ili su primile
poduku o sigurnom rukovanju uređajem te su
razumjele opasnosti koje proizlaze iz uporabe
uređaja. Djeca se ne smiju igrati uređajem.
Čišćenje i korisničko održavanje ne smiju obav-
ljati djeca bez odgovarajućeg nadzora.
■ Zajedno s kompresorom, kolut s pneumatskim
crijevom služi za opskrbu pneumatskog alata
energijom. Kolut s pneumatskim crijevom koristi
se isključivo za transport komprimiranog zraka.
Nije pogodan za transport tekućina.
■ Kolut s pneumatskim crijevom je zbog naprave
predviđen za montažu na prikladan zid ili strop;
uporaba bez montaže nije dopuštena.
■ Kolut s pneumatskim crijevom nije razvijen za
komercijalnu, industrijsku ili obrtničku uporabu.
Ovaj je proizvod predviđen samo za privatnu
uporabu. Kolut s pneumatskim crijevom smije se
koristiti isključivo u skladu s namjenom. Svaka
druga i drugačija uporaba je zabranjena!
■ Dio namjenske uporabe je pridržavanje sigur-
nosnih uputa sadržanih u uputama za uporabu,
kao i uputa za montažu. Za štete nastale uslijed
nenamjenske ili pogrešne uporabe, proizvođač
i prodavač ne preuzimaju nikakvu odgovornost.
■ Smije se koristiti samo pribor prikladan za ovaj
proizvod. Osobe koje koriste kolut s pneumat-
skim crijevom i po potrebi obavljaju radove
održavanja, obvezne su upoznati se s istim.
Nadalje, moraju biti informirane o potencijalnim
opasnostima. Potrebno je valjano i savjesno
pridržavati se važećih propisa o sprječavanju
nezgoda.
■ Svaka izmjena koluta s pneumatskim crijevom
isključuje odgovornost proizvođača za pritom
nastale štete.
■ Kolut s pneumatskim crijevom prije upotrebe
montirajte kako biste smanjili rizik od ozljeda.
■ Kolut s pneumatskim crijevom koristite isključivo
s komprimiranim zrakom. Nije dopušteno koristi-
ti kolut s pneumatskim crijevom za tekućine.
■ Uvijek pustite da se crijevo kontrolirano namota,
jer je kolut s pneumatskim crijevom opremljen
zateznom oprugom i mehanizmom za namata-
nja. Ako se ispravno ne koristi, crijevo koje se
namata može dovesti do ozljeda. Ako je meha-
nizam za namatanje oštećen, odmah prestanite
koristiti kolut s pneumatskim crijevom i predajte
ga stručnjaku na popravak. Nikada sami ne
otvarajte kućište koluta s pneumatskim crijevom.
■ Koristite samo pribor u besprijekornom stanju,
namijenjen za uporabu s kolutom s pneumat-
skim crijevom.
■ Nikada ne prekoračujte maksimalni radni tlak
koluta s pneumatskim crijevom ili korištenog
pneumatskog alata.
■ Kolut s pneumatskim crijevom smije se priključiti
samo na vodove za komprimirani zrak ako je
osigurano spriječavanje prekoračenja maksimal-
nog dopuštenog radnog tlaka za više od 10 %
(npr. pomoću redukcijskog ventila).
■ Pneumatsko crijevo uvijek držite podalje od
oštrih rubova, topline i ulja.
■ Uvijek provjerite pneumatsko crijevo prije
korištenja koluta s pneumatskim crijevom.
■ Kolut s pneumatskim crijevom koristite samo
zajedno s kompresorom. Zabranjen je rad
s cilindrima s komprimiranim zrakom.
■ Zabranjena je uporaba pneumatskih alata
sa zapaljivim plinovima. Postoji opasnost od
eksplozije!
■ Kolut s pneumatskim crijevom ne smije se koristiti
u druge svrhe.
■ Kolut s pneumatskim crijevom držite izvan
dohvata djece.

PDST 10 B3
■ 14 │ HR
■ Nikada ne usmjeravajte kolut s pneumatskim
crijevom odnosno njegovo crijevo na ljude ili
životinje.
■ Za popravke koristite samo originalne rezervne
dijelove. Neoriginalni rezervni dijelovi mogu
prouzročiti ozbiljna oštećenja.
■ Tijekom izvođenja radova na održavanju, po-
stavljanju i popravaka, uvijek prvo odvojite kolut
s pneumatskim crijevom od izvora komprimira-
nog zraka.
■ Zabranjene su izmjene koluta s pneumatskim
crijevom.
■ Kolut s pneumatskim crijevom koristite samo u
besprijekornom stanju. U slučaju dvojbe, prije
uporabe se posavjetujte sa stručnjakom.
■ Popravke uređaja smiju obavljati isključivo kvali-
ficirani stručnjaci.
■ Nikada ne transportirajte kolut s pneumatskim
crijevom držeći ga za crijevo.
■ Crijevo uvijek čvrsto držite u ruci kada ga odva-
jate od izvora komprimiranog zraka ili pneumat-
skog alata.
■ OPREZ UPOZORENJE: Mogućnost
strujnog udara ! Ne otvarati kućište proizvoda
Preostali rizik
Čak i ako uređaj propisno koristite, uvijek postoje
preostali rizici. Zbog dizajna i izvedbe ovog koluta
s pneumatskim crijevom mogu nastati sljedeće
opasnosti:
– Opasnost od nasumičnog udaranja pneumat-
skog crijeva.
– Opasnost od pada uslijed nasumičnog lamata-
nja pneumatskog crijeva.
Smanjite preostali rizik pažljivim i ispravnim korište-
njem uređaja.
Prije uključivanja
■ Izvadite sve dijelove iz pakiranja i provjerite
jesu li kolut s komprimiranim zrakom ili pojedi-
načni dijelovi slučajno oštećeni. U slučaju ošte-
ćenja ne koristite kolut s pneumatskim crijevom.
Obratite se servisu proizvođaču preko navede-
ne adrese servisa.
■ Uklonite sve zaštitne folije i ostalu transportnu
ambalažu.
■ Provjerite potpunost isporuke.
Montaža
Pronalaženja mjesta za montažu
■ Kolut s pneumatskim crijevom montirajte na
prikladan strop ili zid. Uporaba koluta s pneu-
matskim crijevom bez montaže nije dopuštena.
■ Odaberite mjesto za montiranje koluta s
pneumatskim crijevom tako da ne predstavlja
prepreku.
■ Prilikom montaže na strop treba obratiti pažnju
na visinu ugradnje od najmanje 2,5 metra.
■ Za ugradnju su potrebni sljedeći alati: bušilica,
prikladno svrdlo i odvijač.

PDST 10 B3 HR │ 15 ■
Montaža koluta s pneumatskim
crijevom
UPOZORENJE!
OPASNOST OD OZLJEDA!
► Nepravilna montaža koluta s pneumatskim
crijevom može uzrokovati ozljede.
■ Provjerite da na mjestu instalacije nema cijevi ili
vodova. Ako je potrebno, koristite detektor ili se
obratite stručnjaku.
■ Obratite također pažnju na sigurnosne napo-
mene korištene bušilice.
NAPOMENA!
OPASNOST OD OŠTEĆENJA!
► Neispravna montaža može uzrokovati
oštećenja.
■ Pazite da nosivi materijal na mjestu montaže
može nositi težinu koluta s pneumatskim crije-
vom. U slučaju pitanja, obratite se stručnjaku.
1. Kao predložak koristite okretni priključni no-
sač 2. Okretni priključni nosač 2 možete
odvojiti od koluta s pneumatskim crijevom
odvrtanjem oba vijka 8 u smjeru obrnutom
odsmjera kazaljke na satu (vidi sliku C).
Označite položaj rupa na podlozi pomoću
olovke.
2. Izbušite rupe potrebne za ugradnju u podlogu.
3. Montirajte priključni nosač 2 odgovarajućim
materijalom za pričvršćivanje (vidi montažni
pribor 0 q).
4. Kolut s pneumatskim crijevom ponovno pričvrstite
na priključni nosač 2.
U tu svrhu vijke 8, koje ste ukloniti u 1. koraku,
ponovno zategnite u smjeru kazaljke na satu.
(vidi sliku C)
Puštanje u rad
Priključivanje koluta s pneumatskim
crijevom na izvor komprimiranog
zraka
♦ Umetnite pneumatski priključak 7 koluta s
pneumatskim crijevom u brzu spojku izvora
komprimiranog zraka.
Priključivanje koluta s pneumatskim
crijevom na pneumatski alat
NAPOMENA!
OPASNOST OD OŠTEĆENJA!
► Nepravilno rukovanje kolutom s pneumatskim
crijevom može uzrokovati oštećenja.
■ Uvijek pazite na maksimalni radni tlak koluta s
pneumatskim crijevom i kompatibilnost korište-
nih priključaka. Pomoću brze spojke 6 pneu-
matskog crijeva moguće je crijevo brzo spojiti
na ulaz za zrak na pneumatskom alatu.
Korištenje koluta s pneumatskim
crijevom
UPOZORENJE!
OPASNOST OD OZLJEDA!
► Kolut s pneumatskim crijevom opremljen je
povratnim mehanizmom. Tim mehanizmom
upravlja jaka opruga. U slučaju neispravnog
namatanja pneumatskog crijeva 5 može
doći do ozljeda.
■ Nikada ne dopustite da se pneumatsko crijevo 5
nekontrolirano povlači u kolut.
■ Ako je povratni mehanizam oštećen, odmah
prestanite koristiti kolut s pneumatskim crijevom.
Nastalu štetu mora popraviti stručnjak.

PDST 10 B3
■ 16 │ HR
■ Kolut s pneumatskim crijevom posjeduje mehani-
zam za zaključavanje i povratni mehanizam. To
omogućava jednostavno izvlačenje i ponovno
namatanje pneumatskog crijeva 5.
■ Mehanizam za zaključavanje prilikom namata-
nja i odmatanja stvara zvuk čegrtaljke. To nije
greška. Ako se zvuk promijeni nakon velikog
broja korištenja i/ili ako postoje problemi
s mehanizmom, potražite stručnu pomoć ili
kontaktirajte službu za korisnike.
Odmatanje crijeva
♦ Pažljivo povucite pneumatsko crijevo 5 do že-
ljene radne duljine za pneumatski alat iz kućišta
koluta. Ako pneumatsko crijevo 5 pustite nakon
klika, mehanizam će ga zaključati na toj duljini.
Namatanje crijeva
♦ Kratkim povlačenjem pneumatskog crijeva 5
možete otpustiti mehanizam za zaključavanje.
♦ Pritom pazite da se pneumatsko crijevo 5
kontrolirano namata u kućištu koluta 1.
Postavljanje zaustavljača crijeva
Položaj zaustavljača crijeva 4 moguće je posta-
viti i prekida namatanje pneumatskog crijeva 5
na željenoj duljini. Za postavljanje zaustavljača
crijeva 4 potreban je križni odvijač (nije u opsegu
isporuke).
♦ Otpustite vijke za pričvršćivanje 9 pomoću
križnog odvijača (vidi sliku D).
♦ Gurnite zaustavljač crijeva 4 duž pneumat-
skog crijeva 5 u željeni položaj.
♦ Ponovno zategnite vijke za pričvršćivanje 9.
Održavanje i čišćenje
NAPOMENA
► Za ispravan rad i usklađenost sa sigurnosnim
zahtjevima, kolut s pneumatskim crijevom tre-
ba redovno održavati i popravljati. Neispra-
van i nepravilan rad može uzrokovati kvarove
i oštećenja uređaja.
■ Nikada ne koristite oštra i/ili abrazivna sred-
stva za čišćenje ili otapala. Ista mogu oštetiti
plastične dijelove koluta s pneumatskim crije-
vom.
■ Pazite da u unutrašnjost koluta s pneumatskim
crijevom nikada ne prodre voda. Pazite da na
kućištu i pneumatskom crijevu nema prašine i
prljavštine. U tu svrhu kolut s pneumatskim
crijevom redovito obrišite čistom krpom.
■ Prije vraćanja pneumatskog crijeva u kućište,
ako je moguće, očistite pneumatsko crijevo
za daljnju uporabu.
■ Periodično očistite kolut s pneumatskim crijevom i
crijevo vlažnom krpom s malo mekanog sapuna.
Zbrinjavanje
Ambalaža se sastoji od materijala
neškodljivih za okoliš. Možete je
zbrinuti u mjesnim kontejnerima za
recikliranje.
Uređaj ne bacajte u standardni kućanski
otpad!
O mogućnostima zbrinjavanja starih uređaja možete
saznati u gradskom ili općinskom poglavarstvu.
Ambalažu zbrinite na ekološki prihvat-
ljiv način. Pazite na oznake na različi-
tim materijalima ambalaže i po potrebi
ih zbrinite odvojeno. Materijali amba-
laže označeni su kraticama (a) i brojkama (b)
sljedećeg značenja: 1–7: Plastika, 20–22: Papir
i karton, 80–98: Kompozitni materijali.
O mogućnostima zbrinjavanja starih
uređaja možete se raspitati u grad-
skom ili općinskom poglavarstvu.

PDST 10 B3 HR │ 17 ■
Jamstvo tvrtke
Kompernass Handels GmbH
Poštovani kupci,
Za ovaj uređaj odobrava se jamstvo u trajanju od
3 godine od datuma kupnje. U slučaju nedostataka
ovoga proizvoda, Vama pripadaju zakonska prava
na teret prodavača proizvoda. U nastavku izlože-
no jamstvo ne ograničava ova zakonska prava.
Uvjeti jamstva
Jamstveni rok započinje danom kupnje. Molimo,
sačuvajte račun. Potreban je kao dokaz o kupnji.
Ako u roku od tri godine od datuma kupnje ovog
proizvoda nastupi greška na materijalu ili tvornička
greška proizvod će biti - po našem izboru - za Vas
besplatno popravljen ili zamijenjen, ili će Vam se
vratiti novac. Za takvo ispunjenje jamstvene obveze
potrebno je unutar trogodišnjeg roka predočiti
uređaj s nedostatkom i dokaz o kupnji (račun), te
pisanim putem ukratko opisati u čemu se sastoji
greška proizvoda i kada se pojavila.
Ako je kvar pokriven našim jamstvom, poslat ćemo
Vam popravljen ili novi proizvod.
1. U slučaju manjeg popravka jamstveni rok se
produljuje onoliko koliko je kupac bio lišen
uporabe stvari.
2. Međutim, kad je zbog neispravnosti stvari izvr-
šena njezina zamjena ili njezin bitni popravak,
jamstveni rok počinje teći ponovno od zamjene,
odnosno od vraćanja popravljene stvari.
3. Ako je zamijenjen ili bitno popravljen samo neki
dio stvari, jamstveni rok počinje teći ponovno
samo za taj dio.
Jamstveni rok i zakonsko pravo u slučaju
nedostataka
Korištenje prava na jamstvo ne produžuje jamstveni
rok. To vrijedi i za zamijenjene i popravljene
dijelove. Štete i nedostatke koji eventualno postoje
već prilikom kupnje treba javiti neposredno nakon
raspakiranja. Nakon isteka jamstvenog roka izvrše-
ni popravci se naplaćuju.
Opseg jamstva
Uređaj je pažljivo proizveden sukladno strogim
smjernicama u pogledu kvalitete i prije isporuke
brižljivo provjeren.
Ovo jamstvo vrijedi za greške u materijalu i izradi.
Ovo jamstvo ne pokriva dijelove proizvoda koji su
izloženi uobičajenom habanju i stoga se smatraju
dijelovima brzog habanja ili za štetu lomljivih dije-
lova, npr. prekidača ili dijelova koji su proizvedeni
iz stakla.
Ovo jamstvo propada ako je proizvod oštećen, i
ako nije stručno korišten ili servisiran. Za stručno
korištenje proizvoda potrebno je točno poštivati
sve naputke navedene u uputama za uporabu.
Uporabne namjene i radnje, koje se u uputama ne
preporučuju ili na koje se upozorava, obavezno se
moraju izbjegavati.
Proizvod je namijenjen isključivo za privatnu,
nekomercijalnu uporabu. Jamstvo prestaje vrijediti
u slučaju zloporabe, nenamjenskog korištenja,
primjene sile i zahvata na uređaju koje nije obavila
za to ovlaštena podružnica servisa.
Jamstveno razdoblje ne vrijedi u slučaju
■ normalnog trošenja kapaciteta baterije
■ komercijalne uporabe proizvoda
■ oštećenja ili izmjena proizvoda od strane kupca
■ zanemarivanja sigurnosnih uputa i propisa za
održavanje, te pogrešnog upravljanja
■ oštećenja uzrokovanih elementarnim nepogo-
dama
Pagina se încarcă...
Pagina se încarcă...
Pagina se încarcă...
Pagina se încarcă...
Pagina se încarcă...
Pagina se încarcă...
Pagina se încarcă...
Pagina se încarcă...
Pagina se încarcă...
Pagina se încarcă...
Pagina se încarcă...
Pagina se încarcă...
Pagina se încarcă...
Pagina se încarcă...
Pagina se încarcă...
Pagina se încarcă...
Pagina se încarcă...
Pagina se încarcă...
Pagina se încarcă...
Pagina se încarcă...
Pagina se încarcă...
Pagina se încarcă...
Pagina se încarcă...
Pagina se încarcă...
Pagina se încarcă...
Pagina se încarcă...
Pagina se încarcă...
Pagina se încarcă...
Pagina se încarcă...
Pagina se încarcă...
Pagina se încarcă...
Pagina se încarcă...
Pagina se încarcă...
Pagina se încarcă...
Pagina se încarcă...
Pagina se încarcă...
Pagina se încarcă...
Pagina se încarcă...
Pagina se încarcă...
Pagina se încarcă...
Pagina se încarcă...
Pagina se încarcă...
Pagina se încarcă...
Pagina se încarcă...
-
 1
1
-
 2
2
-
 3
3
-
 4
4
-
 5
5
-
 6
6
-
 7
7
-
 8
8
-
 9
9
-
 10
10
-
 11
11
-
 12
12
-
 13
13
-
 14
14
-
 15
15
-
 16
16
-
 17
17
-
 18
18
-
 19
19
-
 20
20
-
 21
21
-
 22
22
-
 23
23
-
 24
24
-
 25
25
-
 26
26
-
 27
27
-
 28
28
-
 29
29
-
 30
30
-
 31
31
-
 32
32
-
 33
33
-
 34
34
-
 35
35
-
 36
36
-
 37
37
-
 38
38
-
 39
39
-
 40
40
-
 41
41
-
 42
42
-
 43
43
-
 44
44
-
 45
45
-
 46
46
-
 47
47
-
 48
48
-
 49
49
-
 50
50
-
 51
51
-
 52
52
-
 53
53
-
 54
54
-
 55
55
-
 56
56
-
 57
57
-
 58
58
-
 59
59
-
 60
60
-
 61
61
-
 62
62
-
 63
63
-
 64
64


Parkside PDST 10 B3 Instrucțiuni de utilizare
- Tip
- Instrucțiuni de utilizare
în alte limbi
Lucrări înrudite
-
Parkside PDST 10 B3 Instructions Manual
-
Parkside PDST 10 A2 Operation and Safety Notes
-
-
Parkside PDMH 4500 A2 Operating Instructions Manual
-
-
Parkside PDEXS 150 A1 Operation and Safety Notes
-
-
Parkside PDSS 310 B5 Original Instructions Manual