
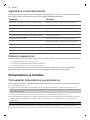
FC8715, FC8710,
FC8705, FC8700


FC8715
FC8710
FC8705
5
6
4
3
2
1
7
8
15
13
12
14
11
9 10
17
18
2021
19
16
1


English
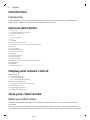
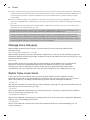
Introduction
Introduction
Congratulations on your purchase and welcome to Philips! To fully benefit from the support that
Philips offers, register your product at www.philips.com/welcome.
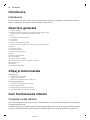
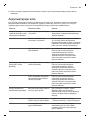
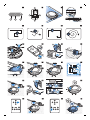
General description
1 Top cover
2 Handle of dust container lid
3 Dust container lid
4 Filter
5 Dust container
6 Fan
7 Bumper
8 Docking station sensor
9 Start/stop button (to start or stop the robot)
10 Display
11 Front wheel
12 Side brush shafts
13 Drop-off sensors
14 Wheels
15 Suction opening
16 Side brushes
17 Battery holder
18 Remote control (FC8715, FC8710, FC8705)
19 Small plug
20 Adapter
21 Docking station
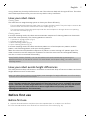
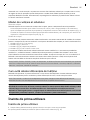
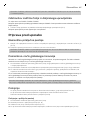
Display and remote control
Display (Fig. 2):
1 Warning indicator
2 Start/stop indicator
3 Dust container full indicator
Remote control (Fig. 3):
1 Navigation buttons and start/stop
2 Docking button
3 Cleaning time button
4 Cleaning mode buttons
How your robot works
What your robot cleans
This robot is equipped with features that make it a suitable cleaner to help you clean the floors in
your home.
The robot is especially suitable for cleaning hard floors, such as wooden, tiled or linoleum floors. It
may experience problems cleaning soft floors, such as carpet or rugs. If you use the robot on a carpet
6
English

or rug, please stay close by the first time to see if the robot can deal with this type of floor. The robot
also needs supervision when you use it on very dark or shiny hard floors.
How your robot cleans
Cleaning system
The robot has a 2-stage cleaning system to clean your floors efficiently.
-
The two side brushes help the robot clean in corners and along walls. They also help to remove dirt
from the floor and move it towards the suction opening (Fig. 4).
-
The suction power of the robot picks up loose dirt and transports it through the suction opening
into the dust container (Fig. 5).
Cleaning patterns
In its auto cleaning mode, the robot uses an automatic sequence of cleaning patterns to clean each
area of the room optimally. The cleaning patterns it uses are:
1 Z-pattern or zigzag pattern (Fig. 6)
2 Random pattern (Fig. 7)
3 Wall-following pattern (Fig. 8)
4 Spot-cleaning pattern (Fig. 9)
In its auto cleaning mode, the robot uses these patterns in a fixed sequence:z-pattern, random
pattern, wall-following pattern, and spot-cleaning pattern.
When the robot has completed this sequence of patterns, it starts moving in Z-pattern again. The
robot continues to use this sequence of patterns to clean the room until the rechargeable battery
runs low, or until it is switched off manually.
Note (FC8715, FC8710, FC8705): You can also select each mode individually by pressing the
appropriate button on the remote control. For more details, see chapter 'Using your robot', section
'Cleaning modes'.
How your robot avoids height differences
The robot has three drop-off sensors in its bottom. It uses these drop-off sensors to detect and avoid
height differences such as staircases.
Note: It is normal for the robot to move slightly over the edge of a height difference, as its front drop-
off sensor is located behind the bumper.
Caution: In some cases, the drop-off sensors may not detect a staircase or other height difference
in time. Therefore monitor the robot carefully the first few times you use it, and when you operate
it near a staircase or another height difference. It is important that you clean the drop-off sensors
regularly to ensure the robot continues to detect height differences properly (see chapter '
Cleaning and maintenance' for instructions).
Before first use
Before first use
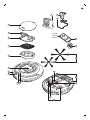
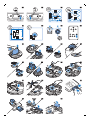
1 Unpack the side brushes and place the robot upside down on a table or on the floor.
2 Push the side brushes onto the shafts on the bottom of the robot (Fig. 10).
7
English

Note: Make sure you attach the side brushes properly. Press them onto the shaft until you hear
them lock into position with a click.
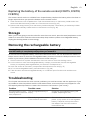
Removing the protection tag from the remote control
This only applies to FC8715, FC8710, FC8705.
The remote control works on a CR2025 coin-shaped battery. This battery is protected with a
protection tag that has to be removed before use.
1 Pull the battery protection tag out of the battery compartment of the remote control (Fig. 11).
Now the remote control is ready for use.
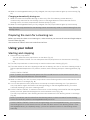
Preparing for use
Installing the docking station
1 Insert the small plug of the adapter into the socket on the docking station (1) and insert the adapter
into the wall socket (2) (Fig. 12).
2 Place the docking station on a horizontal, level floor against a wall.
Note: Make sure that there are no obstacles or height differences 80 cm in front, 30 cm to the right
and 100 cm to the left of the docking station (Fig. 13).
Important note: deep sleep mode
In deep sleep mode, the robot does not respond at all when you press a button. To reactivate the
robot when it is in deep sleep mode:
1 Press the start/stop button on the robot to bring the robot from deep sleep mode to standby
mode.
2 Press the start/stop button on the robot or on the remote control to start the robot.
3 If the robot does not start cleaning, place it on the plugged-in docking station to recharge its
rechargeable battery.
The robot enters deep sleep mode when you press the start/stop button for 3 seconds. It may also
enter the deep sleep mode when its battery is empty. The battery may, for instance, run empty if the
robot is unable to find its docking station.
Note: You cannot get the robot out of its deep sleep mode with the start/stop button on the remote
control. You need to press the on/off button on the robot.
Charging
-
When charging for the first time and when the rechargeable battery of the robot is empty, the
charging time is four hours.
-
When the rechargeable battery is fully charged, your robot can start cleaning.
-
Your robot can only be charged on the docking station.
Charging on the docking station
1 Press the start/stop button on the robot.
2 Place the robot on the plugged-in docking station (Fig. 14).
3 The start/stop indicator starts flashing slowly (Fig. 15).
8
English

4 When the rechargeable battery is fully charged, the start/stop indicator lights up continuously (Fig.
16).
Charging automatically during use
1 When the robot has finished cleaning or when only 15% of the battery power remains, it
automatically searches for the docking station to recharge. When the robot searches for the
docking station, the start/stop indicator flashes quickly (Fig. 18).
2 When the rechargeable battery is fully charged, the start/stop indicator lights up continuously.
Note: The robot only searches for the docking station automatically when it started cleaning from the
docking station.
Preparing the room for a cleaning run
Before you start the robot on its cleaning run, make sure that you remove all loose and fragile objects
from the floor (Fig. 20).
Also remove all cables, wires and cords from the floor.
Using your robot
Starting and stopping
1 Press the start/stop button.
-
You can press the start/stop button on the robot (Fig. 21).
-
FC8715, FC8710, FC8705: You can also press the start/stop button on the remote control (Fig.
22).
2 The start/stop indicator is continuously on and the robot starts cleaning (Fig. 16).
3 The robot cleans in the auto-cleaning mode until its battery runs low. In the auto-cleaning mode, it
follows repeated sequences of Z-pattern, random, wall-following and spot-cleaning patterns (Fig.
17).
FC8715, FC8710, FC8705:
Note: To select an individual mode, press one of the mode buttons on the remote control. See
section 'Cleaning mode selection' for more details.
4 When the battery runs low, the start/stop indicator starts flashing and the robot searches for the
docking station to recharge (Fig. 18).
5 You can also press the start/stop button to interrupt or stop the cleaning run. If you press the
start/stop button again and there is still enough energy in the rechargeable battery, the robot
continues cleaning in the auto-cleaning mode.
6 FC8715, FC8710, FC8705: To make the robot return to the docking station before the rechargeable
battery runs low, press the docking button on the remote control (Fig. 24).
The start/stop indicator starts flashing and the robot searches for the docking station to recharge
(Fig. 18).
Note: If you did not start the robot from the docking station, it does not search for the docking
station automatically when the rechargeable battery runs low.
FC8715, FC8710, FC8705: If there is still enough energy in the rechargeable battery, you can press
the docking button on the remote control to make the robot return to the docking station. If the
rechargeable battery is completely empty, you have to place the robot on the docking station
manually.
9
English

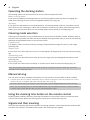
Operating the docking station
The docking station has two controls that can be used to operate the robot.
Battery full and go button
If you press the battery full and go button on the docking station while the robot is charging, the
robot starts cleaning as soon as the rechargeable battery is full (Fig. 26).
24h button
If you press the 24h button on the docking station, the docking station starts to count down the 24
hours until the next cleaning run. When the countdown is finished, the robot starts cleaning until its
battery runs low and then returns to the docking station automatically to recharge (Fig. 27).
Cleaning mode selection
Cleaning mode selection is only possible with the remote control (FC8715, FC8710, FC8705). Next to
the auto-cleaning mode, this robot has four individual cleaning modes that can each be activated by
pressing the appropriate button on the remote control.
Z-pattern mode
In Z-pattern mode, the robot cleans by making Z-shaped loops through the room to clean large
areas (Fig. 28).
Random mode
In this mode, the robot cleans the room in a mixed pattern of straight and crisscross movements (Fig.
29).
Wall-following mode
In this mode, the robot follows the walls of the room to give the area alongside the walls an extra
clean (Fig. 30).
Spot-cleaning mode
In this mode, the robot moves randomly on a small area to clean this area thoroughly (Fig. 31).
Note: The manually selected modes are only active for a couple of minutes. After that, the robot
switches to auto-cleaning mode.
Manual driving
You can drive the robot manually with buttons on the remote control (FC8715, FC8710, FC8705).
1 Use the arrow buttons above and below and to the left and right of the start/stop button on the
remote control to navigate the robot through the room. (Fig. 32)
Note: Be careful when you drive the robot manually close to height differences and staircases.
Note: The vacuuming function and the side brushes only work when the robot is driven forward.
The left, right or back buttons are only for maneuvering the robot.
Using the cleaning time button on the remote control
FC8715, FC8710, FC8700: Press the cleaning time button on the remote control to make the robot
clean for 35 minutes. When the cleaning time is finished, the robot stops (Fig. 33).
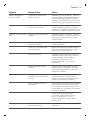
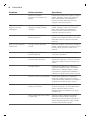
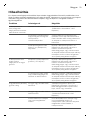
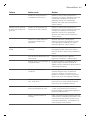
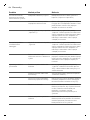
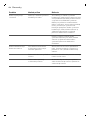
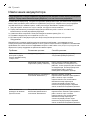
Signals and their meaning
The robot has a display with three indicators: a warning indicator, a start/stop indicator and the dust
container full indicator. The table below explains the meaning of the signals.
10
English

Signal Meaning
The start/stop indicator is on continuously. The robot is ready to clean.
The start/stop indicator flashes slowly. The robot is charging.
The start/stop indicator flashes quickly. The robot is searching for the docking station.
The rechargeable battery of the robot is low.
The dust container full indicator lights up. The dust container is full.
The warning indicator lights up. The robot was lifted while it was cleaning.
The bumper of the robot is stuck.
A wheel or side brush is stuck.
The top cover is not present or is not closed
properly.
The robot cannot find the docking station.
Clap response
The clap response is enabled when the robot enters sleep mode in the following situations:
-
when it stops cleaning due to an error
-
when it cannot find its docking station in 20 minutes
If you do not see the robot, you can locate it by clapping your hands once. The robot will respond by
beeping and by lighting up all icons on its display.
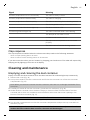
Cleaning and maintenance
Emptying and cleaning the dust container
Empty and clean the dust container when the dust container full indicator lights up continuously.
1 Remove the cover (Fig. 34).
2 Pull up the handle of the dust container lid and lift the dust container out of the dust container
compartment (Fig. 35).
Note: When you remove or reinsert the dust container, take care not to damage the blades of the
motor fan.
3 Carefully lift the lid off the dust container (1) and take out the filter (2) (Fig. 36).
4 Shake the dust container over a dustbin to empty it. Clean the filter and the inside of the dust
container with a cloth or a toothbrush with soft bristles. Also clean the suction opening in the
bottom of the dust container (Fig. 37).
Caution: Do not clean the dust container and the filter with water or in the dishwasher.
5 Put the filter back into the dust container (1). Then place the lid on the dust container(2) (Fig. 38).
6 Put the dust container back into the dust container compartment and put the top cover back on
the robot (Fig. 39).
Caution: Always make sure the filter is present inside the dust container. If you use the robot
without the filter inside the dust container, the motor will be damaged.
11
English

Cleaning the robot
To maintain good cleaning performance, you have to clean the drop-off sensors, the wheels, the side
brushes and the suction opening from time to time.
1 Place the robot upside down on a flat surface.
2 Use a brush with soft bristles (e.g. a toothbrush) to remove dust or fluff from the drop-off sensors.
(Fig. 40)
Note: It is important that you clean the drop-off sensors regularly. If the drop-off sensors are dirty,
the robot may fail to detect height differences or staircases.
3 Use a brush with soft bristles (e.g. a toothbrush) to remove dust or fluff from the front wheel and
side wheels (Fig. 41).
4 To clean the side brushes, grab them by the bristles and pull them off their shafts (Fig. 42).
5 Remove fluff, hairs and threads from the shaft and from the side brush with a soft brush (e.g. a
toothbrush) or a cloth (Fig. 43).
6 Clean the suction opening with a soft brush (e.g. a toothbrush) (Fig. 44).
7 Check the side brushes and the bottom of the robot for any sharp objects that could damage your
floor.
Ordering accessories
To buy accessories or spare parts, visit www.shop.philips.com/service or go to your Philips dealer.
You can also contact the Philips Consumer Care Center in your country (see the international
warranty leaflet for contact details).
Replacement
Replacing the filter
Replace the filter if it is very dirty or damaged. You can order a new filter under order number
FC8065. See 'Emptying and cleaning the dust container' in chapter 'Cleaning and maintenance' for
instructions on how to remove the filter from the dust container and how to place it in the dust
container.
Replacing the side brushes
Replace the side brushes after some time to ensure proper cleaning results.
Note: Always replace the side brushes when you notice signs of wear or damage. We also recommend
that you replace both side brushes at the same time. You can order a set of two side brushes and two
filters under type number FC8067.
1 To replace the side brushes, grab the old side brushes by the bristles and pull them off their shafts.
2 Push the new side brushes onto the shafts.
Replacing the rechargeable battery
The rechargeable battery of the robot may only be replaced by qualified service engineers. Take the
robot to an authorized Philips service center to have the battery replaced when you can no longer
recharge it or when it runs out of power quickly. You can find the contact details of the Philips
Consumer Care Center in your country in the international warranty leaflet.
12
English

Replacing the battery of the remote control (FC8715, FC8710,
FC8705)
The remote control works on a CR2025 coin-shaped battery. Replace the battery when the robot no
longer responds when you press the buttons on the remote control.
1 Hold the remote control upside down. Push the release button on the battery holder and at the
same time slide the battery holder out of the remote control (Fig. 45).
2 Remove the empty battery from the battery holder and place a new battery in the battery holder.
Then slide the battery holder back into the remote control (Fig. 46).
Storage
When you are not going to use the robot for more than one month, press the start/stop button on the
robot for 3 seconds to make the robot enter deep sleep mode to protect its rechargeable battery.
Unplug the docking station to save energy.
Removing the rechargeable battery
Warning: Only remove the rechargeable battery when you discard the appliance. Make
sure the battery is completely empty when you remove it.
To remove the rechargeable battery, follow the instructions below. You can also take the robot to a
Philips service center to have the rechargeable battery removed. Contact the Philips Consumer Care
Center in your country for the address of a service center near you.
1 Start the robot from a place somewhere in the room and not from the docking station.
2 Let the robot run until the rechargeable battery is empty to make sure that the rechargeable
battery is completely discharged before you remove it and dispose of it.
3 Undo the screws of the battery compartment lid and remove the lid (Fig. 47).
4 Lift out the rechargeable battery and disconnect it (Fig. 48).
5 Take the robot and the rechargeable battery to a collection point for electrical and electronic
waste.
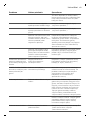
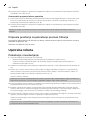
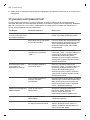
Troubleshooting
This chapter summarizes the most common problems you could encounter with the appliance. If you
are unable to solve the problem with the information below, visit www.philips.com/support for a list
of frequently asked questions or contact the Consumer Care Center in your country.
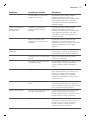
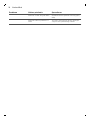
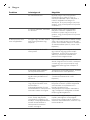
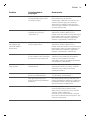
Problem
Possible cause Solution
The robot does not start
cleaning when I press the
start/stop button.
The rechargeable battery is
empty.
Charge the rechargeable battery (see
chapter 'Preparing for use').
The small plug is still inserted
in the socket on the robot.
The robot does not work on mains
power. It only works on its rechargeable
battery. Therefore, always disconnect
the adapter from the robot and the
mains before use.
13
English

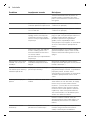
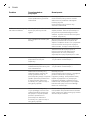
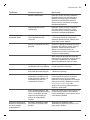
Problem Possible cause Solution
The power switch is not set to
'on' (I) position.
Press the power switch to 'on'. Place the
robot on the plugged-in docking station
or plug in the small plug of the adapter.
After a few seconds, the robot beeps
and the display lights up.
The robot does not
respond when I press
one of the buttons.
You set the on/off switch to
'off'.
Press the power switch to 'on'. Place the
robot on the plugged-in docking station
or plug in the small plug of the adapter.
After a few seconds, the robot beeps
and the display lights up.
The robot could not find the
docking station and the
battery ran out.
Place the robot on the plugged-in
docking station or plug in the small plug
of the adapter. After a few seconds, the
robot beeps and the display lights up.
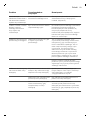
The warning indicator
flashes quickly.
One or both wheels are stuck. Set the power switch to 'off'. Remove
the fluff, hair, thread or wire that is
caught around the wheel suspension.
One or both side brushes are
stuck.
Clean the side brushes (see chapter
'Cleaning and maintenance').
The top cover is not present or
is not closed properly.
When the top cover is not present or is
not closed properly, the robot does not
work. Place the top cover on the robot
properly.
The bumper is stuck. Press the start/stop button. Lift the
robot so that its bumper comes free.
Place the robot at some distance from
the obstacle and press the start/stop
button to make it resume cleaning.
The robot was lifted while it
was cleaning.
Press the start/stop button. Place the
robot on the floor. Then press the
start/stop button to make the robot
resume cleaning.
The robot does not clean
properly.
The bristles of one or both side
brushes are crooked or bent.
Soak the brush or brushes in warm water
for a while. If this does not restore the
bristles to their proper shape, replace
the side brushes (see chapter
'Replacement').
The filter in the dust container
is dirty.
Clean the filter in the dust container with
a cloth or a toothbrush with soft bristles.
You can also clean the filter and dust
container with a regular vacuum cleaner
at a low suction power setting.
If brushing or vacuuming does not help
to clean the filter, replace the filter with
a new one. We advise you to replace the
filter at least once a year.
14
English

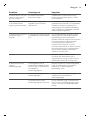
Problem Possible cause Solution
The suction opening in the
bottom of the dust container is
clogged.
Clean the suction opening (see chapter
'Cleaning and maintenance').
The front wheel is jammed
with hair or other dirt.
Clean the front wheel (see chapter
'Cleaning and maintenance').
The robot is cleaning a very
dark or shiny surface, which
triggers the drop-off sensors.
This causes the robot to move
in an unusual pattern.
Press the start/stop button and then
move the robot to a lighter colored
piece of the floor. If the problem
continues to occur on lighter colored
floors, please go to
www.philips.com/support or contact the
Consumer Care Center in your country.
The robot is cleaning a floor
that reflects sunlight quite
strongly. This triggers the drop-
off sensors and causes the
robot to move in an unusual
pattern.
Close the curtains to block sunlight from
entering the room. You can also start
cleaning when the sunlight is less bright.
The rechargeable battery
can no longer be charged
or runs empty very fast.
The rechargeable battery has
reached the end of its life.
Have the rechargeable battery replaced
by a Philips service center (see chapter
'Replacement').
FC8715, FC8710, FC8705:
The battery of the
remote control runs
empty too fast.
Perhaps you did not insert the
correct type of battery.
For the remote control, you need a
CR2025 coin-shaped battery. If the
problem persists, go to
www.philips.com/support or contact the
Consumer Care Center in your country.
The robot is moving in
circles.
The robot is in spot-cleaning
mode.
This is normal behavior. The spot-
cleaning mode can be activated when a
lot of dirt is detected on the floor for a
thorough clean. It is also part of the auto
cleaning mode. After approximately one
minute the robot resumes its normal
cleaning pattern. You can also stop the
spot-cleaning mode by selecting a
different cleaning mode on the remote
control.
FC8715, FC8710, FC8705: You can also
stop the spot-cleaning mode by
selecting a different cleaning mode on
the remote control.
The robot cannot find the
docking station.
There is not enough room for
the robot to navigate towards
the docking station.
Try to find another place for the docking
station. See 'Installing the docking
station' in chapter 'Preparing for use'.
The robot is still actively
searching.
Give the robot around 20 minutes to
return to the docking station.
15
English

Problem Possible cause Solution
The robot was not started from
the docking station.
If you want the robot to return to the
docking station after a cleaning run, start
it from the docking station.
16
English

Čeština
Úvod
Úvod
Společnost Philips Vám gratuluje ke koupi a vítá Vás! Chcete-li využívat všech výhod podpory
nabízené společností Philips, zaregistrujte svůj výrobek na stránkách www.philips.com/welcome.
Všeobecný popis
1 horní kryt
2 rukojeť víka nádoby na prach
3 víko nádoby na prach
4 Filtr
5 nádoba na prach
6 ventilátor
7 nárazník
8 čidlo dokovací stanice
9 tlačítko spuštění/zastavení (pro spuštění a zastavení robota)
10 Displej
11 přední kolečko
12 hřídele postranních kartáčků
13 senzory pádu
14 kolečka
15 sací otvor
16 postranní kartáčky
17 držák baterie
18 dálkový ovladač (FC8715, FC8710, FC8705)
19 Malá zástrčka
20 Adaptér
21 dokovací stanice
Displej a dálkový ovladač
Displej (obr. 2):
1 indikátor varování
2 Indikátor spuštění/zastavení
3 indikátor naplnění nádoby na prach
Dálkový ovladač (obr. 3):
1 navigační tlačítka a spuštění/zastavení
2 tlačítko dokování
3 tlačítko doby čištění
4 Tlačítka režimu čištění
Jak robot funguje
Co robot uklízí
Tento robot je vybaven funkcemi, které umožňují, aby se stal vaším praktickým pomocníkem při
úklidu podlah.
Robot je vhodný především pro čištění tvrdých podlah ze dřeva, dlaždic, linolea apod. Čištění
měkkých podlah, např. koberců, mu může činit potíže. Pokud robota používáte k čištění koberce,
17
Čeština

zůstaňte při prvním použití poblíž, abyste viděli, zda si dokáže s tímto typem podlahy poradit. Na
robota je také třeba dohlížet při používání na velmi tmavých nebo lesklých tvrdých podlahách.
Jak robot uklízí
Systém čištění
Robot je vybaven dvoufázovým systémem čištění, který zajišťuje efektivní úklid podlah.
-
Dva postranní kartáčky pomáhají robotovi při čištění dosáhnout do rohů a míst podél zdí. Také
pomáhají sbírat špínu ze země a posouvat ji směrem k sacímu otvoru (obr. 4).
-
Volnou špínu robot sebere díky dostatečně výkonnému sání a skrze sací otvor ji uloží do nádoby
na prach (obr. 5).
Schémata čištění
V režimu automatického čištění používá robot automatické pořadí úklidových schémat pro optimální
čištění jednotlivých oblastí místnosti. Používaná úklidová schémata jsou:
1 schéma (obr. 6) Z, nebo cik- cak
2 náhodné schéma (obr. 7)
3 schéma (obr. 8) pohybu podél zdi
4 schéma (obr. 9) bodového čištění
V režimu automatického čištění robot používá tato schémata v pevném pořadí: schéma Z, náhodné
schéma, schéma pohybu podél zdi a schéma bodového čištění.
Když robot dokončí toto pořadí schémat, začne se znovu pohybovat podle schématu Z. Robot bude
pokračovat v čištění místnosti pomocí tohoto pořadí schémat, dokud se jeho baterie skoro nevybije
nebo dokud ho ručně nevypnete.
Poznámka (FC8715, FC8710, FC8705): Jednotlivé režimy můžete také vybrat ručně stisknutím
příslušného tlačítka na dálkovém ovladači. Podrobnosti najdete v kapitole „Používání robota“ v části
„Režimy čištění“.
Jak se robot vyhýbá výškovým rozdílům
Ve spodní části je robot vybaven třemi senzory pádu. Tyto senzory pádu slouží k tomu, aby robot
rozpoznal výškové rozdíly, například schody.
Poznámka: Pokud se robot dostane mírně nad hranu stupně s výškovým rozdílem, je to normální,
protože senzory pádu jsou umístěny až za nárazníkem.
Upozornění: V některých případech senzory pádu nemusí schodiště nebo jiný výškový rozdíl
rozpoznat včas. Proto robota při několika prvních použitích a při provozu v blízkosti schodiště nebo
jiného výškového rozdílu bedlivě sledujte. Senzory pádu je důležité pravidelně čistit, aby si robot
zachoval schopnost správně rozpoznat výškové rozdíly (instrukce naleznete v kapitole „Čištění a
údržba“).
Před prvním použitím
Před prvním použitím
1 Vybalte postranní kartáčky a položte robota vzhůru nohama na stůl nebo na podlahu.
2 Nasaďte postranní kartáčky na hřídele ve spodní části robota (obr. 10).
18
Čeština

Poznámka: Ujistěte se, že jste postranní kartáčky upevnili správně. Nasaďte je na hřídel, až uslyšíte,
že s kliknutím zapadly na své místo.
Odebrání ochranného štítku z dálkového ovladače
Tento pokyn se týká pouze modelů FC8715, FC8710, FC8705.
Dálkový ovladač je napájen knoflíkovou baterií CR2025. Baterie je opatřena ochranným štítkem,
který je nutné před prvním použitím vyjmout.
1 Vytáhněte ochranný štítek z prostoru pro baterii dálkového ovladače (obr. 11).
Dálkový ovladač je připraven k použití.
Příprava k použití
Instalace dokovací stanice
1 Zapojte malou zástrčku adaptéru do zásuvky na dokovací stanici (1) a adaptér zapojte do zásuvky
ve zdi (2) (obr. 12).
2 Umístěte dokovací stanici na vodorovný povrch ke zdi.
Poznámka: Zkontrolujte, že ve vzdálenosti 80 cm vpředu, 30 cm napravo a 100 cm nalevo od
dokovací stanice (obr. 13) nejsou žádné překážky.
Důležitá poznámka: režim hlubokého spánku
Robot v režimu hlubokého spánku vůbec nereaguje na stisknutí tlačítka. Opětovná aktivace robota,
který je v režimu hlubokého spánku:
1 Stisknutím tlačítka spuštění/zastavení na robotovi přepnete robota z režimu hlubokého spánku do
pohotovostního režimu.
2 Robota spusťte stisknutím tlačítka spuštění/zastavení na robotovi nebo na dálkovém ovladači.
3 Pokud robot nezačne uklízet, umístěte jej do dokovací stanice připojené k elektrické zásuvce, aby
se znovu nabil jeho akumulátor.
Robot přejde do režimu hlubokého spánku, pokud stisknete tlačítko spuštění/zastavení po dobu
3 sekund. Do režimu hlubokého spánku může také přejít, pokud je vybitý akumulátor. K vybití
akumulátoru může například dojít, když robot nemůže najít svoji dokovací stanici.
Poznámka: Robota nelze z režimu hlubokého spánku probudit stisknutím tlačítka spuštění/zastavení
na dálkovém ovladači. Je nutno stisknout vypínač na robotu.
Nabíjení
-
První nabíjení robota, stejně jako nabíjení zcela vybitého akumulátoru, trvá čtyři hodiny.
-
Jakmile je akumulátor plně nabitý, může se robot pustit do úklidu.
-
Robota lze nabíjet pouze v dokovací stanici.
Nabíjení v dokovací stanici
1 Stiskněte tlačítko spuštění/zastavení na robotovi.
2 Umístěte robota do dokovací stanice (obr. 14) připojené k elektrické zásuvce.
3 Indikátor spuštění/zastavení začne pomalu blikat (obr. 15).
4 Když je akumulátor plně nabit, indikátor spuštění/zastavení nepřetržitě svítí (obr. 16).
19
Čeština

Automatické nabíjení při používání
1 Když robot dokončí čištění nebo když nabití akumulátoru klesne pod 15 %, robot automaticky
vyhledá dokovací stanici, aby dobil akumulátor. Když robot hledá dokovací stanici, indikátor
spuštění/zastavení rychle bliká (obr. 18).
2 Když je akumulátor plně nabit, indikátor spuštění/zastavení nepřetržitě svítí.
Poznámka: Robot dokovací stanici vyhledá pouze v případě, že čištění zahájil z ní.
Příprava místnosti na úklid
Než pošlete robota uklízet, seberte z podlahy všechny volné a křehké předměty (obr. 20).
Také ze země odstraňte veškeré kabely a dráty.
Používání robota
Spuštění a zastavení
1 Stiskněte tlačítko spuštění/zastavení.
-
Můžete stisknout tlačítko spuštění/zastavení na robotovi (obr. 21).
-
FC8715, FC8710, FC8705: Také lze stisknout tlačítko spuštění/zastavení na dálkovém ovladači
(obr. 22).
2 Indikátor spuštění/zastavení začne nepřetržitě svítit a robot začne uklízet (obr. 16).
3 Robot bude uklízet v režimu automatického čištění, dokud se baterie skoro nevybije. V režimu
automatického čištění robot opakuje předem dané pořadí schémat pohybu Z, náhodného čištění,
pohybu podél stěn a bodového čištění (obr. 17).
FC8715, FC8710, FC8705:
Poznámka: Chcete-li vybrat jeden režim, stiskněte příslušné tlačítko režimu čištění na dálkovém
ovladači. Další podrobnosti najdete v části „Výběr čisticího režimu“.
4 Když nabití baterie klesne pod stanovenou hodnotu, indikátor spuštění/zastavení začne blikat a
robot vyhledá dokovací stanici, aby se nabil (obr. 18).
5 Stisknutím tlačítka spuštění/zastavení lze také čištění přerušit nebo zastavit. Když tlačítko
spuštění/zastavení stisknete znovu a baterie je dostatečně nabitá, robot bude pokračovat v režimu
automatického čištění.
6 FC8715, FC8710, FC8705: Když budete chtít, aby se robot vrátil do dokovací stanice dříve, než bude
baterie skoro vybitá, stiskněte dokovací tlačítko na dálkovém ovladači (obr. 24).
Indikátor spuštění/zastavení začne blikat a robot vyhledá dokovací stanici, aby se nabil (obr. 18).
Poznámka: Pokud jste robota nespustili z dokovací stanice, při vybití baterie robot stanici
automaticky nevyhledá.
FC8715, FC8710, FC8705: Pokud je v baterii ještě dostatek energie, můžete stisknout dokovací
tlačítko na dálkovém ovladači, aby se robot vrátil do dokovací stanice. Pokud je baterie zcela
vybitá, musíte robota do dokovací stanice umístit ručně.
Ovládání dokovací stanice
Dokovací stanice má dva ovládací prvky, kterými lze robota ovládat.
Tlačítko plného nabití a spuštění
Pokud během nabíjení robota stisknete na dokovací stanici tlačítko plného nabití a spuštění, začne
robot po úplném nabití (obr. 26) baterie uklízet.
20
Čeština
Pagina se încarcă...
Pagina se încarcă...
Pagina se încarcă...
Pagina se încarcă...
Pagina se încarcă...
Pagina se încarcă...
Pagina se încarcă...
Pagina se încarcă...
Pagina se încarcă...
Pagina se încarcă...
Pagina se încarcă...
Pagina se încarcă...
Pagina se încarcă...
Pagina se încarcă...
Pagina se încarcă...
Pagina se încarcă...
Pagina se încarcă...
Pagina se încarcă...
Pagina se încarcă...
Pagina se încarcă...
Pagina se încarcă...
Pagina se încarcă...
Pagina se încarcă...
Pagina se încarcă...
Pagina se încarcă...
Pagina se încarcă...
Pagina se încarcă...
Pagina se încarcă...
Pagina se încarcă...
Pagina se încarcă...
Pagina se încarcă...
Pagina se încarcă...
Pagina se încarcă...
Pagina se încarcă...
Pagina se încarcă...
Pagina se încarcă...
Pagina se încarcă...
Pagina se încarcă...
Pagina se încarcă...
Pagina se încarcă...
Pagina se încarcă...
Pagina se încarcă...
Pagina se încarcă...
Pagina se încarcă...
Pagina se încarcă...
Pagina se încarcă...
Pagina se încarcă...
Pagina se încarcă...
Pagina se încarcă...
Pagina se încarcă...
Pagina se încarcă...
Pagina se încarcă...
Pagina se încarcă...
Pagina se încarcă...
Pagina se încarcă...
Pagina se încarcă...
Pagina se încarcă...
Pagina se încarcă...
Pagina se încarcă...
Pagina se încarcă...
Pagina se încarcă...
Pagina se încarcă...
Pagina se încarcă...
Pagina se încarcă...
Pagina se încarcă...
Pagina se încarcă...
Pagina se încarcă...
Pagina se încarcă...
Pagina se încarcă...
Pagina se încarcă...
Pagina se încarcă...
Pagina se încarcă...
Pagina se încarcă...
Pagina se încarcă...
Pagina se încarcă...
Pagina se încarcă...
Pagina se încarcă...
Pagina se încarcă...
Pagina se încarcă...
Pagina se încarcă...
Pagina se încarcă...
Pagina se încarcă...
Pagina se încarcă...
Pagina se încarcă...
Pagina se încarcă...
Pagina se încarcă...
Pagina se încarcă...
Pagina se încarcă...
Pagina se încarcă...
Pagina se încarcă...
Pagina se încarcă...
Pagina se încarcă...
Pagina se încarcă...
Pagina se încarcă...
Pagina se încarcă...
Pagina se încarcă...
Pagina se încarcă...
Pagina se încarcă...
Pagina se încarcă...
Pagina se încarcă...
Pagina se încarcă...
Pagina se încarcă...
Pagina se încarcă...
Pagina se încarcă...
Pagina se încarcă...
Pagina se încarcă...
Pagina se încarcă...
Pagina se încarcă...
Pagina se încarcă...
Pagina se încarcă...
Pagina se încarcă...
Pagina se încarcă...
Pagina se încarcă...
Pagina se încarcă...
Pagina se încarcă...
Pagina se încarcă...
Pagina se încarcă...
Pagina se încarcă...
Pagina se încarcă...
Pagina se încarcă...
Pagina se încarcă...
Pagina se încarcă...
Pagina se încarcă...
Pagina se încarcă...
Pagina se încarcă...
Pagina se încarcă...
Pagina se încarcă...
Pagina se încarcă...
Pagina se încarcă...
Pagina se încarcă...
Pagina se încarcă...
Pagina se încarcă...
Pagina se încarcă...
Pagina se încarcă...
Pagina se încarcă...
Pagina se încarcă...
Pagina se încarcă...
Pagina se încarcă...
Pagina se încarcă...
Pagina se încarcă...
Pagina se încarcă...
Pagina se încarcă...
Pagina se încarcă...
Pagina se încarcă...
Pagina se încarcă...
Pagina se încarcă...
Pagina se încarcă...
Pagina se încarcă...
Pagina se încarcă...
Pagina se încarcă...
Pagina se încarcă...
Pagina se încarcă...
Pagina se încarcă...
Pagina se încarcă...
Pagina se încarcă...
Pagina se încarcă...
Pagina se încarcă...
Pagina se încarcă...
Pagina se încarcă...
Pagina se încarcă...
Pagina se încarcă...
Pagina se încarcă...
Pagina se încarcă...
Pagina se încarcă...
Pagina se încarcă...
Pagina se încarcă...
Pagina se încarcă...
Pagina se încarcă...
Pagina se încarcă...
Pagina se încarcă...
-
 1
1
-
 2
2
-
 3
3
-
 4
4
-
 5
5
-
 6
6
-
 7
7
-
 8
8
-
 9
9
-
 10
10
-
 11
11
-
 12
12
-
 13
13
-
 14
14
-
 15
15
-
 16
16
-
 17
17
-
 18
18
-
 19
19
-
 20
20
-
 21
21
-
 22
22
-
 23
23
-
 24
24
-
 25
25
-
 26
26
-
 27
27
-
 28
28
-
 29
29
-
 30
30
-
 31
31
-
 32
32
-
 33
33
-
 34
34
-
 35
35
-
 36
36
-
 37
37
-
 38
38
-
 39
39
-
 40
40
-
 41
41
-
 42
42
-
 43
43
-
 44
44
-
 45
45
-
 46
46
-
 47
47
-
 48
48
-
 49
49
-
 50
50
-
 51
51
-
 52
52
-
 53
53
-
 54
54
-
 55
55
-
 56
56
-
 57
57
-
 58
58
-
 59
59
-
 60
60
-
 61
61
-
 62
62
-
 63
63
-
 64
64
-
 65
65
-
 66
66
-
 67
67
-
 68
68
-
 69
69
-
 70
70
-
 71
71
-
 72
72
-
 73
73
-
 74
74
-
 75
75
-
 76
76
-
 77
77
-
 78
78
-
 79
79
-
 80
80
-
 81
81
-
 82
82
-
 83
83
-
 84
84
-
 85
85
-
 86
86
-
 87
87
-
 88
88
-
 89
89
-
 90
90
-
 91
91
-
 92
92
-
 93
93
-
 94
94
-
 95
95
-
 96
96
-
 97
97
-
 98
98
-
 99
99
-
 100
100
-
 101
101
-
 102
102
-
 103
103
-
 104
104
-
 105
105
-
 106
106
-
 107
107
-
 108
108
-
 109
109
-
 110
110
-
 111
111
-
 112
112
-
 113
113
-
 114
114
-
 115
115
-
 116
116
-
 117
117
-
 118
118
-
 119
119
-
 120
120
-
 121
121
-
 122
122
-
 123
123
-
 124
124
-
 125
125
-
 126
126
-
 127
127
-
 128
128
-
 129
129
-
 130
130
-
 131
131
-
 132
132
-
 133
133
-
 134
134
-
 135
135
-
 136
136
-
 137
137
-
 138
138
-
 139
139
-
 140
140
-
 141
141
-
 142
142
-
 143
143
-
 144
144
-
 145
145
-
 146
146
-
 147
147
-
 148
148
-
 149
149
-
 150
150
-
 151
151
-
 152
152
-
 153
153
-
 154
154
-
 155
155
-
 156
156
-
 157
157
-
 158
158
-
 159
159
-
 160
160
-
 161
161
-
 162
162
-
 163
163
-
 164
164
-
 165
165
-
 166
166
-
 167
167
-
 168
168
-
 169
169
-
 170
170
-
 171
171
-
 172
172
-
 173
173
-
 174
174
-
 175
175
-
 176
176
-
 177
177
-
 178
178
-
 179
179
-
 180
180
-
 181
181
-
 182
182
-
 183
183
-
 184
184
-
 185
185
-
 186
186
-
 187
187
-
 188
188
-
 189
189
-
 190
190


Philips FC8700/01 Manual de utilizare
- Tip
- Manual de utilizare
în alte limbi
- slovenčina: Philips FC8700/01 Používateľská príručka
- eesti: Philips FC8700/01 Kasutusjuhend
Lucrări înrudite
-
Philips FC8796/01 Informații importante
-
Philips FC8796/01 Informații importante
-
-
-
-
Philips FC8776/01 Manual de utilizare
-
Philips FC8812/01 Manual de utilizare
-
-
-
Philips FC8776/01 Informații importante
Alte documente
-
Hisense RVCL144AB Manual de utilizare
-
Rowenta RR6825 Manualul proprietarului
-
AENO ARC0001S Robot Vacuum Cleaner Manual de utilizare
-
Rowenta RR7245WH Manualul proprietarului
-
-
Scarlett SC-VC80R14 Manual de utilizare
-
Scarlett SC-VC80R12 Manual de utilizare
-
Scarlett SC-VC80R11 Manual de utilizare
-
TP-LINK RV10 Lite Robot Vacuum Cleaner Manual de utilizare
-