Philips FC6055/01 Manual de utilizare
- Categorie
- Aspiratoare portabile
- Tip
- Manual de utilizare

FC6055

2

33
1

4

FC6055
ENGLISH 6
15
25
33
41
50
59
69
77
85
94
103
113
122
130
139

6
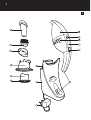
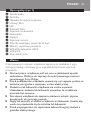
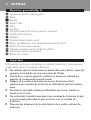
General description (Fig. 1)
A Crevice tool
B Brush tool
C Squeegee
D Filter holder
E Filter
F Filter ring
G Storage slots for accessories
H Charging unit
I Adapter
J Dust compartment
K Dust compartment release button
L Exhaust air openings
M Charging light (LED)
N On/off slide
O Contact strips
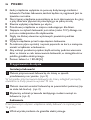
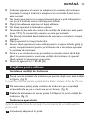
Important
Read these instructions for use carefully before using the appliance and
save them for future reference.
Do not use the appliance if it is damaged in any way. Take it to an
authorised Philips service centre for repair.
Check if the voltage indicated on the adapter corresponds to the
local mains voltage before you connect the appliance.
The adapter and the charging unit of this appliance cannot be
replaced. If the adapter or charging unit is damaged, the appliance
must be discarded.
Never suck up ammable substances or corrosive liquids and do
not suck up ashes until they are cold.
Never immerse the vacuum cleaner or the charging unit in water
and do not let water enter the motor unit or the charging unit.
Remove the adapter from the wall socket before cleaning the
charging unit.
,
,
,
,
,
,
ENGLISH

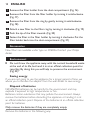
Only charge the vacuum cleaner with the adapter and charging unit
supplied. During charging, the adapter will feel warm to the touch.
This is normal.
Do not hold the appliance with the dust compartment pointing
upwards and do not tilt the appliance to one side when sucking up
liquids.
Always switch the vacuum cleaner off after use.
Keep the appliance out of the reach of children.
The voltage on the contact strips in the charging unit is low (max.
12 volts) and therefore not dangerous.
Never block the exhaust air openings during vacuuming.
Switch the appliance off when recharging it.
When the appliance has been used to suck up liquids, empty and
dry the dust compartment before storing the appliance in the
charging unit.
To avoid the risk of electric shock, be careful when drilling holes in
the wall to attach the charging unit, especially close to a wall socket.
Noise level: Lc = 80 dB [A]
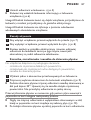
Preparing for use
Installing the charging unit
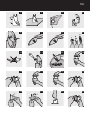
1 You can attach the charging unit to the wall as indicated in the
gure. (Fig. 2)
If you attach the charging unit to the wall, the space between the screw
holes should be 70 mm.
2 You can also place the charging unit on a horizontal surface (e.g. a
table or desk). (Fig. 3)
3 Excess mains cord can be wound round the charging unit. (Fig. 4)
Charging the appliance
Charge the appliance for at least 16 hours before you use it for the rst
time.
1 Insert the adapter into the wall socket.
,
,
,
,
,
,
,
,
,
,
ENGLISH 7

2 Place the vacuum cleaner on the charging unit. (Fig. 5)
The charging light will go on to indicate that the appliance is
charging. (Fig. 6)
Note:The charging light will stay on as long as the appliance is connected to
the charging unit and the adapter is in the wall socket.
Note:The charging light does not give any information about the charge level
of the built-in batteries.
1
Push the on/off slide forwards to switch the appliance on. (Fig. 7)
2 Push the on/off slide backwards to switch the appliance off. (Fig. 8)
3 Leave the adapter in the wall socket and always put the vacuum
cleaner back onto the charging unit immediately after use, even if
the batteries are still almost fully charged.
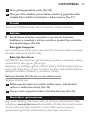
Brush, crevice tool and squeegee
This appliance comes with three accessories:
a brush tool to clean delicate surfaces;
a crevice tool to clean hard-to-reach places;
a squeegee to suck up liquids.
1 Take the accessory you want to use from the charging unit.
2 Attach the accessory to the nozzle of the appliance. (Fig. 9)
When sucking up liquids, hold the appliance with the nozzle
pointing downwards at an angle of 30
c. Make sure the squeegee
touches the surface to be cleaned. Do not tilt the appliance to one
side.
Stop sucking up liquids when the liquid level inside the dust
compartment has reached the maximum indication line.
Never hold the appliance with the on/off slide pointing downwards
when the dust compartment is lled with liquid. (Fig. 10)
Empty the dust compartment each time you have used the
appliance to suck up a liquid.
,
-
-
-
,
,
,
ENGLISH8

3 You can store all accessories by placing them in the storage slots in
the charging unit. (Fig. 11)
Cleaning
Always remove the adapter from the wall socket before cleaning the
charging unit.
When you have used the appliance to suck up liquids, empty and dry
the dust compartment.
1 Clean the appliance with a damp cloth.
Emptying the dust compartment
Make sure you empty the dust compartment and clean the lter regularly.
1 Hold the appliance over a dustbin and press the dust compartment
release button. (Fig. 12)
2 Remove the lter holder from the dust compartment. (Fig. 13)
3 Empty the dust compartment with your free hand.
4 Clean the lter and the lter holder. (Fig. 14)
Note:Remove the lter from the lter holder by turning it anticlockwise.
Note:Clean the lter with a brush or with a normal vacuum cleaner if it is
very dirty.
Note:If necessary, you can rinse the lter in cold or lukewarm water.
5 Fasten the lter in the lter holder by turning it clockwise and put
the lter holder into the dust compartment. Make sure you insert
the lter holder in the correct way. (Fig. 15)
Never use the vacuum cleaner if the lter is still wet.
Replacement
Replace the lter if it can no longer be cleaned properly (usually
after having been cleaned about 50 times).
,
ENGLISH 9

1 Remove the lter holder from the dust compartment. (Fig. 16)
2 Remove the lter from the lter holder by turning it anticlockwise.
(Fig. 17)
3 Remove the lter from the ring by gently turning it anticlockwise.
(Fig. 18)
4 Attach a new lter to the lter ring by turning it clockwise. (Fig. 19)
5 Push the tip of the lter inwards. (Fig. 20)
6 Fasten the lter in the lter holder by turning it clockwise. Put the
lter holder back into the dust compartment. (Fig. 21)
New lters are available under type no. FC8036. Contact your Philips
dealer.
Environment
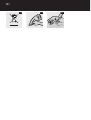
Do not throw the appliance away with the normal household waste
at the end of its life, but hand it in at an ofcial collection point for
recycling. By doing this you will help to preserve the environment.
(Fig. 22)
Saving energy
If you are not going to use the appliance for a longer period of time, we
advise you to remove the adapter from the wall socket to save energy.
Disposal of batteries
NiCd/NiMH batteries can be harmful to the environment and may
explode if exposed to high temperatures or re.
Batteries contain substances that may pollute the environment. Always
remove the batteries before discarding the appliance or handing it in at
an ofcial collection point. Dispose of the batteries at an ofcial collection
point for batteries.
Only remove the batteries if they are completely empty.
Remove the batteries in the following way.
,
ENGLISH10

1 Let the appliance run until it stops, undo the screws and open the
vacuum cleaner. (Fig. 23)
2 Cut the connecting wires one by one and remove the batteries.
(Fig. 24)
Guarantee & service
If you need information or if you have a problem, please visit the Philips
website at
www.philips.com or contact the Philips Customer Care
Centre in your country (you will nd its phone number in the worldwide
guarantee leaet). If there is no Customer Care Centre in your country,
turn to your local Philips dealer or contact the Service Department of
Philips Domestic Appliances and Personal Care BV.
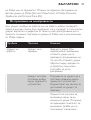
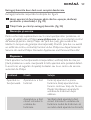
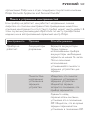
If the appliance does not work or does not work properly, rst check the
list below. If the problem is not mentioned in this list, the appliance
probably has a defect. In that case we advise you to take the appliance to
your dealer or to an authorised Philips service centre.
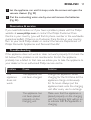
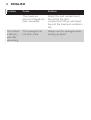
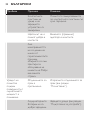
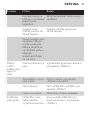
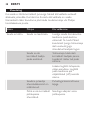
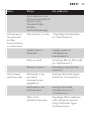
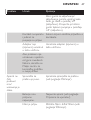
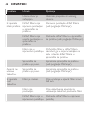
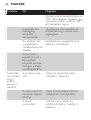
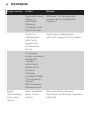
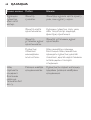
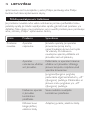
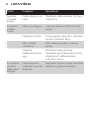
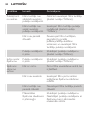
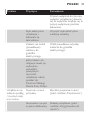
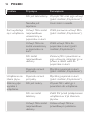
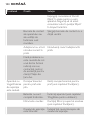
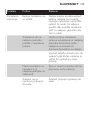
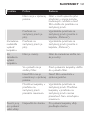
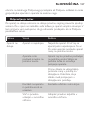
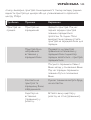
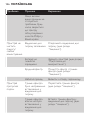
Problem Cause Solution
The
appliance
does not
work.
The appliance has
not been charged.
Charge the appliance. When
charging for the rst time, let the
appliance charge continuously
for 16 hours. Always put the
appliance back onto the charging
unit after every use to recharge.
The appliance has
not been placed
properly on the
charging unit.
Make sure that the appliance is
placed properly on the charging
unit. The charging light will go on
to indicate that the appliance is
charging.
ENGLISH 11

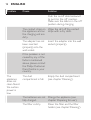
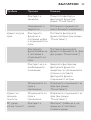
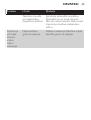
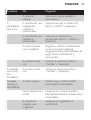
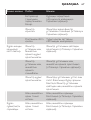
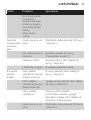
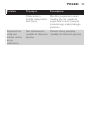
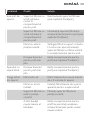
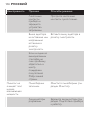
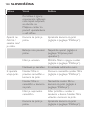
Problem Cause Solution
Push the on/off slide backward
to put it in the ‘off’ position.
Make sure the slide is in the ‘off’
position during charging.
The contact strips on
the appliance and on
the charging unit are
dirty.
Wipe the dirt off the contact
strips with a dry cloth.
The adapter has not
been inserted
(properly) into the
wall socket.
Insert the adapter into the wall
socket (properly).
If this problem is not
caused by any of the
factors mentioned
above, please contact
the Philips Customer
Care Centre in your
country.
The
appliance
does not
clean oors/
the suction
power is
low.
The dust
compartment is full.
Empty the dust compartment
(see chapter ‘Cleaning’).
The batteries are not
fully charged.
Charge the appliance (see
chapter ‘Preparing for use’).
The lter is dirty. Clean the lter and the lter
holder (see chapter ‘Cleaning’).
ENGLISH12

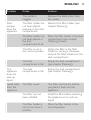
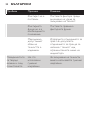
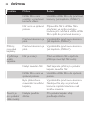
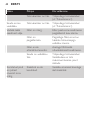
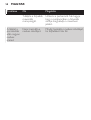
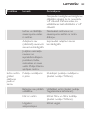
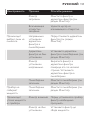
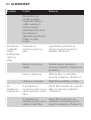
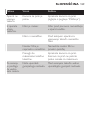
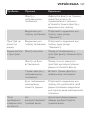
Problem Cause Solution
The nozzle is
clogged.
Remove the obstruction from
the nozzle.
Dust
escapes
from the
appliance.
The lter holder has
not been placed
properly in the dust
compartment.
Reinsert the lter holder (see
chapter ‘Cleaning’).
The lter holder has
not been placed in
the dust
compartment at all.
Place the lter holder in the dust
compartment (see chapter
‘Cleaning’)rtment.
The lter is not in
the correct position.
Fasten the lter in the lter
holder by turning it clockwise
and put the lter holder into the
dust compartment.
The dust
compartment is full.
Empty the dust compartment
(see chapter ‘Cleaning’).
The
appliance
does not
suck up
liquid.
The dust
compartment is full.
Empty the dust compartment
(see chapter ‘Cleaning’).
Liquid leaks
from the
appliance.
The lter is wet. The lter must be dry before
you place it back into the
appliance.
The lter has not
been installed.
Install the lter before switching
the appliance on to suck up
liquid.
The lter holder is
not in the correct
position.
Place the lter holder in the
correct position.
ENGLISH 13

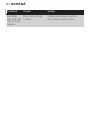
Problem Cause Solution
The maximum
amount of liquid has
been exceeded.
Empty the dust compartment.
Do not let the dust
compartment ll up with liquid
beyond the maximum indication
line.
The surface
is still very
wet after
vacuuming.
The squeegee has
not been used.
Always use the squeegee when
sucking up liquid.
ENGLISH14

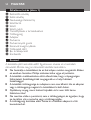
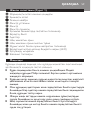
15
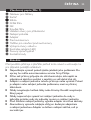
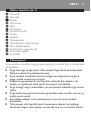
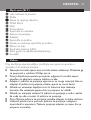
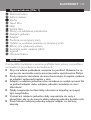
A Тесен накрайник
B Четка
C Гумен накрайник
D Държач на филтъра
E Филтър
F Филтърен фланец
G Място за прибиране на принадлежности
H Зарядно устройство
I Адаптер
J Отделение за прах
K Бутон за отваряне на отделението за прах
L Отвори за изходящ въздух
M Индикатор за зареждане (светодиод)
N Плъзгач включване/изключване
O Контактни пластини
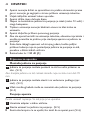
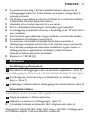
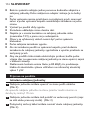
Преди да използвате уреда, прочетете внимателно това
ръководство за експлоатация и го запазете за справка в бъдеще.
Не използвайте уреда, ако има някаква повреда. Дайте го за
ремонт в упълномощен сервизен център на Philips.
Преди да свържете уреда, проверете дали напрежението,
посочено върху адаптера, отговаря на това на местната
електрическа мрежа.
Адаптерът и зарядното устройство на този уред не могат да се
сменят. Ако се повреди адаптерът или зарядното устройство,
уредът трябва да се изхвърли.
Не всмуквайте запалими вещества и разяждащи течности и не
всмуквайте пепел, преди да е изстинала.
Не потапяйте прахосмукачката и зарядното устройство във
вода и не допускайте попадане на вода в задвижващия блок и
зарядното устройство.
Изваждайте адаптера от мрежовия контакт, преди да
почиствате зарядното устройство.
,
,
,
,
,
,

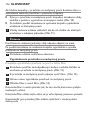
Зареждайте прахосмукачката само с влизащите в доставения
комплект адаптер и зарядно устройство. По време на
зареждането адаптерът е топъл на пипане. Това е нормално.
Не дръжте уреда с насочено нагоре отделение за прах и не
накланяйте уреда на една страна при засмукване на течности.
Винаги изключвайте прахосмукачката след употреба.
Дръжте уреда извън обсега на деца.
Напрежението на контактните пластини в зарядното
устройство е ниско (макс. 12 V) и затова не е опасно.
Никога не закривайте отворите за изходящ въздух при работа
на прахосмукачката.
Изключвайте уреда при зареждане.
Когато уредът е използван за всмукване на течности,
изпразнете и изсушете отделението за прах, преди да
приберете уреда в зарядното устройство.
За да избегнете опасност от електрически удар, внимавайте
при пробиване на дупки в стената за закачане на зарядното
устройство, особено в близост до контакт.
Ниво на шум: Lc= 80 dB [A]
1 Можете да закрепите зарядното устройство на стената, както е
показано на фигурата. (фиг. 2)
Ако закрепвате зарядното устройство към стената, разстоянието
между отворите за винтовете трябва да е 70 мм.
2 Можете също да поставите зарядното устройство върху
хоризонтална повърхност (напр. маса или бюро). (фиг. 3)
3 Излишната дължина на шнура може да се навие около
зарядното устройство. (фиг. 4)
Оставете уреда да се зарежда в продължение на поне 16 часа, преди
да го използвате за пръв път.
,
,
,
,
,
,
,
,
,
,
16

1 Включете адаптера в контакта.
2 Поставете прахосмукачката в зарядното устройство. (фиг. 5)
Индикаторът ще светне, за да покаже, че уредът се зарежда.
(фиг. 6)
Забележка:Индикаторът ще свети, докато уредът е свързан към
зарядното устройство и адаптерът е включен в мрежовия контакт.
Забележка:Индикаторът не дава никакви показания за нивото на
зареждане на вградените батерии.
1
Преместете плъзгача за включване напред, за да включите
уреда. (фиг. 7)
2 Преместете плъзгача за включване назад, за да изключите уреда.
(фиг. 8)
3 Оставете адаптера в контакта и поставяйте прахосмукачката
обратно върху зарядното устройство веднага след всяка
употреба, дори батериите да са още почти напълно заредени.
Този уред се предлага с три допълнителни принадлежности:
накрайник с четка, за почистване на деликатни повърхности;
тесен накрайник за почистване на трудни за достигане места;
гумен накрайник за засмукване на течности.
1 Вземете от зарядното устройство накрайника, който искате да
използвате.
2 Закрепете накрайника към мундщука на уреда. (фиг. 9)
Когато всмуквате течности, дръжте уреда с накрайника надолу
под ъгъл около 30c. Гуменият накрайник трябва да се допира
до почистваната повърхност. Не накланяйте уреда на една
страна.
,
-
-
-
,
17

Спрете засмукването на течност, когато нивото на течността в
отделението за прах е достигнало ограничителната линия на
индикатора.
Не дръжте уреда с насочен надолу плъзгач вкл./изкл., когато
отделението за прах е пълно с течност. (фиг. 10)
Изпразвайте отделението за прах след всяко използване на
уреда за засмукване на течност.
3 Можете да съхранявате всички принадлежности, като ги
слагате в местата за прибиране в зарядното устройство.
(фиг. 11)
Винаги изваждайте адаптера от мрежовия контакт, преди да
почиствате зарядното устройство.
След като сте използвали уреда за всмукване на течности,
изпразнете и изсушете отделението за прах.
1 Почистете уреда с влажна кърпа.
Погрижете се редовно да изпразвате отделението за прах и да
почиствате филтрите.
1 Като държите уреда над кофа за смет, натиснете бутона за
отваряне на отделението за прах. (фиг. 12)
2 Извадете филтърната фуния от отделението за прах. (фиг. 13)
3 Изпразнете отделението за прах със свободната си ръка.
4 Почистете филтъра и филтърната фуния. (фиг. 14)
Забележка:Извадете филтъра от филтърната фуния със завъртане
обратно на часовниковата стрелка.
Забележка:Почистете филтъра с четка или с обикновена
прахосмукачка, ако е много мръсен.
,
,
18

Забележка:Ако е необходимо, можете да изплакнете филтъра със
студена или хладка вода.
5 Закрепете филтъра към филтърната фуния със завъртане по
часовниковата стрелка и сложете филтърната фуния в
отделението за прах. Проверете дали сте поставили правилно
филтърната фуния. (фиг. 15)
Не използвайте прахосмукачката, ако филтърът е влажен.
Подменете филтъра, ако вече не може да бъде почистен добре
(обикновено след като е почистван около 50 пъти).
1 Извадете филтърната фуния от отделението за прах. (фиг. 16)
2 Извадете филтъра от филтърната фуния със завъртане обратно
на часовниковата стрелка. (фиг. 17)
3 Свалете филтъра от фланеца с леко завъртане обратно на
часовниковата стрелка. (фиг. 18)
4 Закрепете нов филтър към филтърния фланец със завъртане по
часовниковата стрелка. (фиг. 19)
5 Натиснете върха на филтъра навътре. (фиг. 20)
6 Закрепете филтъра във филтърната фуния със завъртане по
часовниковата стрелка. Върнете филтърната фуния на мястото й
в отделението за прах. (фиг. 21)
Новите филтри се предлагат под № на модела FC8036. Свържете се
с търговец на уреди на Philips.
,
19

След края на срока на експлоатация на уреда не го изхвърляйте
заедно с нормалните битови отпадъци, а го предайте в
официален пункт за събиране, където да бъде рециклиран. По
този начин вие помагате за опазването на околната среда.
(фиг. 22)
Ако по-продължително време няма да използвате уреда,
препоръчваме да извадите адаптера от контакта, за да пестите
енергия.
NiCd/NiMH батериите могат да бъдат опасни за околната среда и
могат да се пръснат, ако се изхвърлят при високи температури или в
огън.
Батериите съдържат вещества, които замърсяват околната среда.
Винаги изваждайте батериите, преди да изхвърлите уреда или да го
предадете в официален пункт за събиране. Изхвърляйте батериите в
официален пункт за събиране на батерии.
Изваждайте батериите само когато са напълно изтощени.
Изваждайте батериите по следния начин.
1 Оставете уреда да работи, докато не спре, разхлабете
винтовете и отворете прахосмукачката. (фиг. 23)
2 Срежете един по един свързващите проводници и извадете
батериите. (фиг. 24)
Ако се нуждаете от информация или имате проблем, посетете
Интернет сайта на Philips на адрес www.philips.com или се обърнете
към Центъра за обслужване на клиенти на Philips във вашата страна
(телефонния му номер можете да намерите в международната
гаранционна карта). Ако във вашата страна няма Център за
обслужване на клиенти, обърнете се към местния търговец на уреди
,
20
Pagina se încarcă...
Pagina se încarcă...
Pagina se încarcă...
Pagina se încarcă...
Pagina se încarcă...
Pagina se încarcă...
Pagina se încarcă...
Pagina se încarcă...
Pagina se încarcă...
Pagina se încarcă...
Pagina se încarcă...
Pagina se încarcă...
Pagina se încarcă...
Pagina se încarcă...
Pagina se încarcă...
Pagina se încarcă...
Pagina se încarcă...
Pagina se încarcă...
Pagina se încarcă...
Pagina se încarcă...
Pagina se încarcă...
Pagina se încarcă...
Pagina se încarcă...
Pagina se încarcă...
Pagina se încarcă...
Pagina se încarcă...
Pagina se încarcă...
Pagina se încarcă...
Pagina se încarcă...
Pagina se încarcă...
Pagina se încarcă...
Pagina se încarcă...
Pagina se încarcă...
Pagina se încarcă...
Pagina se încarcă...
Pagina se încarcă...
Pagina se încarcă...
Pagina se încarcă...
Pagina se încarcă...
Pagina se încarcă...
Pagina se încarcă...
Pagina se încarcă...
Pagina se încarcă...
Pagina se încarcă...
Pagina se încarcă...
Pagina se încarcă...
Pagina se încarcă...
Pagina se încarcă...
Pagina se încarcă...
Pagina se încarcă...
Pagina se încarcă...
Pagina se încarcă...
Pagina se încarcă...
Pagina se încarcă...
Pagina se încarcă...
Pagina se încarcă...
Pagina se încarcă...
Pagina se încarcă...
Pagina se încarcă...
Pagina se încarcă...
Pagina se încarcă...
Pagina se încarcă...
Pagina se încarcă...
Pagina se încarcă...
Pagina se încarcă...
Pagina se încarcă...
Pagina se încarcă...
Pagina se încarcă...
Pagina se încarcă...
Pagina se încarcă...
Pagina se încarcă...
Pagina se încarcă...
Pagina se încarcă...
Pagina se încarcă...
Pagina se încarcă...
Pagina se încarcă...
Pagina se încarcă...
Pagina se încarcă...
Pagina se încarcă...
Pagina se încarcă...
Pagina se încarcă...
Pagina se încarcă...
Pagina se încarcă...
Pagina se încarcă...
Pagina se încarcă...
Pagina se încarcă...
Pagina se încarcă...
Pagina se încarcă...
Pagina se încarcă...
Pagina se încarcă...
Pagina se încarcă...
Pagina se încarcă...
Pagina se încarcă...
Pagina se încarcă...
Pagina se încarcă...
Pagina se încarcă...
Pagina se încarcă...
Pagina se încarcă...
Pagina se încarcă...
Pagina se încarcă...
Pagina se încarcă...
Pagina se încarcă...
Pagina se încarcă...
Pagina se încarcă...
Pagina se încarcă...
Pagina se încarcă...
Pagina se încarcă...
Pagina se încarcă...
Pagina se încarcă...
Pagina se încarcă...
Pagina se încarcă...
Pagina se încarcă...
Pagina se încarcă...
Pagina se încarcă...
Pagina se încarcă...
Pagina se încarcă...
Pagina se încarcă...
Pagina se încarcă...
Pagina se încarcă...
Pagina se încarcă...
Pagina se încarcă...
Pagina se încarcă...
Pagina se încarcă...
Pagina se încarcă...
Pagina se încarcă...
Pagina se încarcă...
Pagina se încarcă...
Pagina se încarcă...
Pagina se încarcă...
Pagina se încarcă...
Pagina se încarcă...
Pagina se încarcă...
-
 1
1
-
 2
2
-
 3
3
-
 4
4
-
 5
5
-
 6
6
-
 7
7
-
 8
8
-
 9
9
-
 10
10
-
 11
11
-
 12
12
-
 13
13
-
 14
14
-
 15
15
-
 16
16
-
 17
17
-
 18
18
-
 19
19
-
 20
20
-
 21
21
-
 22
22
-
 23
23
-
 24
24
-
 25
25
-
 26
26
-
 27
27
-
 28
28
-
 29
29
-
 30
30
-
 31
31
-
 32
32
-
 33
33
-
 34
34
-
 35
35
-
 36
36
-
 37
37
-
 38
38
-
 39
39
-
 40
40
-
 41
41
-
 42
42
-
 43
43
-
 44
44
-
 45
45
-
 46
46
-
 47
47
-
 48
48
-
 49
49
-
 50
50
-
 51
51
-
 52
52
-
 53
53
-
 54
54
-
 55
55
-
 56
56
-
 57
57
-
 58
58
-
 59
59
-
 60
60
-
 61
61
-
 62
62
-
 63
63
-
 64
64
-
 65
65
-
 66
66
-
 67
67
-
 68
68
-
 69
69
-
 70
70
-
 71
71
-
 72
72
-
 73
73
-
 74
74
-
 75
75
-
 76
76
-
 77
77
-
 78
78
-
 79
79
-
 80
80
-
 81
81
-
 82
82
-
 83
83
-
 84
84
-
 85
85
-
 86
86
-
 87
87
-
 88
88
-
 89
89
-
 90
90
-
 91
91
-
 92
92
-
 93
93
-
 94
94
-
 95
95
-
 96
96
-
 97
97
-
 98
98
-
 99
99
-
 100
100
-
 101
101
-
 102
102
-
 103
103
-
 104
104
-
 105
105
-
 106
106
-
 107
107
-
 108
108
-
 109
109
-
 110
110
-
 111
111
-
 112
112
-
 113
113
-
 114
114
-
 115
115
-
 116
116
-
 117
117
-
 118
118
-
 119
119
-
 120
120
-
 121
121
-
 122
122
-
 123
123
-
 124
124
-
 125
125
-
 126
126
-
 127
127
-
 128
128
-
 129
129
-
 130
130
-
 131
131
-
 132
132
-
 133
133
-
 134
134
-
 135
135
-
 136
136
-
 137
137
-
 138
138
-
 139
139
-
 140
140
-
 141
141
-
 142
142
-
 143
143
-
 144
144
-
 145
145
-
 146
146
-
 147
147
-
 148
148
-
 149
149
-
 150
150
-
 151
151
-
 152
152


Philips FC6055/01 Manual de utilizare
- Categorie
- Aspiratoare portabile
- Tip
- Manual de utilizare
în alte limbi
- slovenčina: Philips FC6055/01 Používateľská príručka
Lucrări înrudite
-
Philips FC6150/01R1 Informații importante
-
Philips FC6144/01 Manual de utilizare
-
Philips FC6054/01 Manual de utilizare
-
Philips FC6092/01 Manual de utilizare
-
Philips FC6148/01 Manual de utilizare
-
Philips FC6149/01 Manual de utilizare
-
Philips FC6161/94 Manual de utilizare
-
Philips FC6091 Manual de utilizare
-
Philips FC6050/99 Manual de utilizare
-
Philips FC6132 Manual de utilizare