Makita DUN461W Manual de utilizare
- Categorie
- Aparate de tuns gard viu
- Tip
- Manual de utilizare

DUN461W
EN Cordless Pole Hedge Trimmer INSTRUCTION MANUAL 6
PL Akumulatorowe Nożyce Do
Żywopłotu Na Wysięgniku INSTRUKCJA OBSŁUGI 15
HU Akkumulátoros nyeles
sövénynyíró HASZNÁLATI KÉZIKÖNYV 25
SK Akumulátorový tyčový
plotostrih NÁVOD NA OBSLUHU 35
CS Akumulátorový plotostřih na
tyči NÁVOD K OBSLUZE 45
UK
Акумуляторна штангова
пила для підрізання
живоплоту
ІНСТРУКЦІЯ З
ЕКСПЛУАТАЦІЇ 54
RO Maşină de tuns gardul viu
înalt cu acumulator MANUAL DE INSTRUCŢIUNI 65
DE Akku-Heckenschneider BETRIEBSANLEITUNG 75

13
5
6
7
8
10
9
42
Fig.1
1
2
3
Fig.2
1
2
Fig.3
1
2
Fig.4
1
2
Fig.5
1
Fig.6
1
2
Fig.7
2

1
Fig.8
1
Fig.9
1
2
Fig.10
1
2
3
4
Fig.11
1
2
Fig.12
1
Fig.13
1
Fig.14
3

1
Fig.15
1
Fig.16
1
2
Fig.17
1
Fig.18
1
Fig.19
(1)
(2)
Fig.20
12
Fig.21
15 m
Fig.22
4

15 m
Fig.23
15 m
Fig.24
15 m
Fig.25
15 m
Fig.26
Fig.27
Fig.28
5

6ENGLISH
ENGLISH (Original instructions)
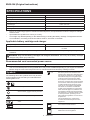
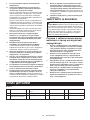
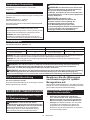
SPECIFICATIONS
Model: DUN461W
Blade length 460 mm
Strokes per minute 3,600 min-1
Cutting blade angle 135° (up 60°, down 75°)
Overall length 1,889 - 2,511 mm
Rated voltage D.C. 18 V
Net weight 3.0 - 3.3 kg
• Duetoourcontinuingprogramofresearchanddevelopment,thespecicationshereinaresubjecttochange
without notice.
• Specicationsmaydierfromcountrytocountry.
• Theweightmaydierdependingontheattachment(s),includingthebatterycartridge.Thelightestandheavi-
est combination, according to EPTA-Procedure 01/2014, are shown in the table.
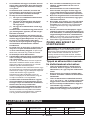
Applicable battery cartridge and charger
Batterycartridge BL1815N / BL1820B / BL1830B / BL1840B / BL1850B / BL1860B
Charger DC18RC / DC18RD / DC18RE / DC18SD / DC18SE / DC18SF /
DC18SH
• Someofthebatterycartridgesandchargerslistedabovemaynotbeavailabledependingonyourregionof
residence.
WARNING: Only use the battery cartridges and chargers listed above.Useofanyotherbatterycartridges
andchargersmaycauseinjuryand/orre.
Recommended cord connected power source
Portable power pack PDC01
• Thecordconnectedpowersource(s)listedabovemaynotbeavailabledependingonyourregionofresidence.
• Beforeusingthecordconnectedpowersource,readinstructionandcautionarymarkingsonthem.
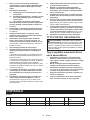
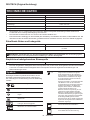
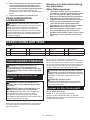
Symbols
Thefollowingsshowthesymbolswhichmaybeused
fortheequipment.Besurethatyouunderstandtheir
meaning before use.
Read instruction manual.
Do not expose to moisture.
Wear a helmet, goggles and ear protection.
DANGER-Keephandsawayfromblade.
Beware of electrical lines, risk of electrical
shock.
Keep distance at least 15 m.
Ni-MH
Li-ion
OnlyforEUcountries
Due to the presence of hazardous com-
ponents in the equipment, waste electrical
and electronic equipment, accumulators
andbatteriesmayhaveanegativeimpact
on the environment and human health.
Do not dispose of electrical and electronic
appliances or batteries with household waste!
In accordance with the European Directive
on waste electrical and electronic equip-
ment and on accumulators and batteries
and waste accumulators and batteries,
as well as their adaptation to national law,
waste electrical equipment, batteries and
accumulatorsshouldbestoredseparately
and delivered to a separate collection point
for municipal waste, operating in accor-
dance with the regulations on environmen-
tal protection.
Thisisindicatedbythesymbolofthe
crossed-out wheeled bin placed on the
equipment.
Guaranteed sound power level according
to EU Outdoor Noise Directive.
Sound power level according to Australia
NSW Noise Control Regulation

7ENGLISH
Intended use
The tool is intended for trimming hedges.
Noise
ThetypicalA-weightednoiseleveldeterminedaccord-
ing to EN62841-4-2:
Sound pressure level (LpA) : 74 dB(A)
Uncertainty(K):3dB(A)
Thenoiselevelunderworkingmayexceed80dB(A).
NOTE:
The declared noise emission value(s) has been
measured in accordance with a standard test method
andmaybeusedforcomparingonetoolwithanother.
NOTE:
Thedeclarednoiseemissionvalue(s)may
alsobeusedinapreliminaryassessmentofexposure.
WARNING: Wear ear protection.
WARNING: The noise emission during actual
use of the power tool can dier from the declared
value(s) depending on the ways in which the
tool is used especially what kind of workpiece is
processed.
WARNING: Be sure to identify safety mea-
sures to protect the operator that are based on an
estimation of exposure in the actual conditions of
use (taking account of all parts of the operating
cycle such as the times when the tool is switched
o and when it is running idle in addition to the
trigger time).
Vibration
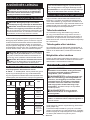
Applicable standard : EN62841-4-2
Left hand (Front grip) Right hand (Rear grip)
ah (m/s2)UncertaintyK(m/s2) ah (m/s2)UncertaintyK(m/s2)
2.5 m/s2 or less 1.5 2.5 m/s2 or less 1.5
NOTE: The declared vibration total value(s) has been measured in accordance with a standard test method and
maybeusedforcomparingonetoolwithanother.
NOTE:Thedeclaredvibrationtotalvalue(s)mayalsobeusedinapreliminaryassessmentofexposure.
WARNING: The vibration emission during actual use of the power tool can dier from the declared
value(s) depending on the ways in which the tool is used especially what kind of workpiece is processed.
WARNING: Be sure to identify safety measures to protect the operator that are based on an estimation
of exposure in the actual conditions of use (taking account of all parts of the operating cycle such as the
times when the tool is switched o and when it is running idle in addition to the trigger time).
EC Declaration of Conformity
For European countries only
TheECdeclarationofconformityisincludedasAnnexA
to this instruction manual.
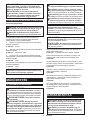
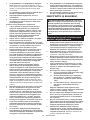
SAFETY WARNINGS
General power tool safety warnings
WARNING: Read all safety warnings, instruc-
tions, illustrations and specications provided
with this power tool. Failure to follow all instructions
listedbelowmayresultinelectricshock,reand/or
seriousinjury.
Save all warnings and instruc-
tions for future reference.
Theterm"powertool"inthewarningsreferstoyour
mains-operated(corded)powertoolorbattery-operated
(cordless) power tool.
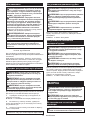
Cordless Pole Hedge Trimmer
Safety Warnings
1. Keep all parts of the body away from the blade.
Do not remove cut material or hold material
to be cut when blades are moving. Blades
continuetomoveaftertheswitchisturnedo.A
moment of inattention while operating the hedge
trimmermayresultinseriouspersonalinjury.
2. Carry the hedge trimmer by the handle with the
blade stopped and taking care not to operate
any power switch.Propercarryingofthehedge
trimmer will decrease the risk of inadvertent start-
ingandresultantpersonalinjuryfromtheblades.
3.
When transporting or storing the hedge trimmer, always
t the blade cover. Proper handling of the hedge trimmer
willdecreasetheriskofpersonalinjuryfromtheblades.
4.
When clearing jammed material or servicing the unit,
make sure all power switches are o and the battery
pack is removed or disconnected. Unexpected actua-
tionofthehedgetrimmerwhileclearingjammedmaterial
orservicingmayresultinseriouspersonalinjury.
5. Hold the hedge trimmer by insulated gripping
surfaces only, because the blade may contact
hidden wiring. Blades contacting a "live" wire
maymakeexposedmetalpartsofthehedgetrim-
mer "live" and could give the operator an electric
shock.

8ENGLISH
6. Keep all power cords and cables away from
cutting area.Powercordsorcablesmaybehid-
deninhedgesorbushesandcanbeaccidentally
cutbytheblade.
7. Do not use the hedge trimmer in bad weather
conditions, especially when there is a risk of
lightning. This decreases the risk of being struck
bylightning.
8. To reduce the risk of electrocution, never use
the pole hedge trimmer near any electrical
power lines. Contact with or use near power lines
maycauseseriousinjuryorelectricshockresult-
ing in death.
9. Always use two hands when operating the pole
hedge trimmer. Hold the pole hedge trimmer with
both hands to avoid loss of control.
10. Always use head protection when operating
the pole hedge trimmer overhead. Falling debris
canresultinseriouspersonalinjury.
Additional Safety Instructions
Preparation
1. THIS HEDGE TRIMMER CAN CAUSE SERIOUS
INJURIES. Read the instructions carefully
for the correct handling, preparation, main-
tenance, starting and stopping of the tool.
Become familiar with all controls and the
proper use of the tool.
2. Check the hedges and bushes for foreign
objects, such as wire fences or hidden wiring
before operating the tool.
3. The tool must not be used by children or
young persons under 18 years of age. Young
personsover16yearsofagemaybeexempted
fromthisrestrictioniftheyareundergoingtraining
under the supervision of an expert.
4. In the event of an emergency, switch o
the tool and remove the battery cartridge
immediately.
5. DANGER - Keep hands away from blade.
Contact with blade will result in serious personal
injury.
6. First-time users should have an experienced
user show them how to use the tool.
7. Before operation, examine the work area for
wire fences, stones, or other solid objects.
They can damage the blades.
8. Use the tool only if you are in good physical
condition.Ifyouaretired,yourattentionwillbe
reduced.Beespeciallycarefulattheendofa
workingday.Performallworkcalmlyandcarefully.
The user is responsible for all damages to third
parties.
9. Before starting work, check to make sure that
the tool is in good and safe working order.
Ensure guards are tted properly. The tool
must not be used unless fully assembled.
10. Avoid dangerous environment. Don't use the
tool in damp or wet locations or expose it to
rain. Water entering the tool will increase the
risk of electric shock.
Personal protective equipment
1. Work gloves of stout leather are part of the
basic equipment of the tool and must always
be worn when working with it. Also wear
sturdy shoes with anti-skid soles.
2. Wear ear protection such as ear mus to pre-
vent hearing loss.
3. Wear protective goggles, safety helmet and
protective gloves to protect yourself from
ying debris or falling objects.
4. When touching blades or adjusting the blade
angle, wear protective gloves. Blades can cut
barehandsseverely.
Operation
1. Always use two hands to operate the tool.
Using one hand could cause loss of control and
resultinseriouspersonalinjury.
2. While operating the tool, always ensure that
the operating position is safe and secure.
Overreaching with the tool, particularly from
a ladder, is extremely dangerous. Do not work
from anything wobbly or inrm.
3. Do not simultaneously wear multiple belt har-
nesses and/or shoulder harnesses when oper-
ating the tool.
4. During operation, keep bystanders or animals
at least 15 m away from the tool. Stop the tool
as soon as someone approaches.
5. If cutting tool strikes any object or the tool
starts making unusual noise or vibration,
switch o the tool and remove the battery car-
tridge immediately and allow the tool to stop.
And then take the following steps:
• inspect for damage
• check for, and tighten, any loose parts
• have any damaged parts replaced or
repaired with genuine spare parts.
6. Only use the tool for its intended purpose. Do
not use the tool for any other purpose.
7. Switch o the tool and remove the battery
cartridge before:
• cleaning or when clearing a blockage,
• checking, carrying out maintenance or
working on the tool,
• adjusting the working position of the
shear blades,
• leaving the tool unattended.
8. Ensure that the tool is correctly located in a
designated working position before starting
the tool.
9. Do not operate the tool with a damaged or
excessively worn shear blades.
10. Always be aware of your surroundings and
stay alert for possible hazards of which you
may not be aware due to the noise of the tool.
11. Be careful not to accidentally contact a metal
fence or other hard objects during operation.
Thebladewillbreakandmaycauseseriousinjury.
12. Avoid unintentional starting. Do not carry the
tool when the battery cartridge is installed
and with nger on the switch. Make sure that
the switch is o when installing the battery
cartridge.

9ENGLISH
13. Do not grasp the exposed cutting blades or
cutting edges when picking up or holding the
tool.
14. Do not force the tool.Itwilldothejobbetterand
withlesslikelihoodofariskofinjuryattheratefor
which it was designed.
15. Do not use the tool in the rain or in wet or
very damp conditions. The electric motor is not
waterproof.
16. Hold the tool rmly when using the tool.
17. Do not operate the tool at no-load
unnecessarily.
18. Before checking the shear blades, taking care
of faults, or removing foreign objects caught
in the shear blades, always switch o the tool
and remove the battery cartridge.
19. Never point the shear blades to yourself or
others.
20. If the blades stop moving due to the stuck of
foreign objects between the blades during
operation, switch o the tool and remove the
battery cartridge, and then remove the foreign
objects using tools such as pliers. Removing
theforeignobjectsbyhandmaycauseaninjury
forthereasonthatthebladesmaymoveinreac-
tiontoremovingtheforeignobjects.
Electrical and battery safety
1. Avoid dangerous environment. Don't use the
tool in dump or wet locations or expose it to
rain. Water entering the tool will increase the risk
of electric shock.
2. Do not dispose of the battery(ies) in a re.
Thecellmayexplode.Checkwithlocalcodesfor
possible special disposal instructions.
3. Do not open or mutilate the battery(ies).
Releasedelectrolyteiscorrosiveandmaycause
damagetotheeyesorskin.Itmaybetoxicif
swallowed.
4. Do not charge battery in rain, or in wet
locations.
5. Do not charge the battery outdoors.
6. Do not handle charger, including charger plug,
and charger terminals with wet hands.
Maintenance and storage
1. When the tool is stopped for servicing, inspec-
tion or storage, switch o the tool and remove
the battery cartridge, and make sure all mov-
ing parts have come to a stop. Allow the tool
to cool before making any inspections, adjust-
ment, etc.
2. Always allow the tool to cool down before
storing.
3. When not in use, attach the blade cover to the
tool and store the tool indoors in dry, and high
locked-up place, out of reach of children.
4. Maintain the tool with care. Keep cutting edge
sharp and clean for best performance and to
reduce the risk of injury. Follow instructions
for lubricating and changing accessories.
Keep grips dry, clean, and free from oil and
grease.
5. Check damaged parts. Before further use of
the tool, any part which is damaged should be
carefully checked to determine that it will oper-
ate properly and perform its intended function.
Check for alignment of moving parts, binding
of moving parts, breakage of parts, mounting
and any other condition that may aect its
operation. A guard or other part that is damaged
shouldbeproperlyrepairedorreplacedbyyour
authorized service center.
6. Use genuine spare parts only.
7. When moving the tool to another location,
including during work, always remove the
battery cartridge and put the blade cover on
the shear blades. Never carry or transport the
tool with the blades running. Never grasp the
blades with your hands.
8. Clean the tool and especially the shear blades
after use, and before putting the tool into stor-
age for extended periods. Lightly oil the shear
blades and put on the blade cover.
9. Do not dispose of the battery(ies) in a re. The
cell may explode. Check with local codes for
possible special disposal instructions.
10. Do not open or mutilate the battery(ies).
Released electrolyte is corrosive and may
cause damage to the eyes or skin. It may be
toxic if swallowed.
11. Do not charge battery in rain, or in wet
locations.
SAVE THESE INSTRUCTIONS.
WARNING: DO NOT let comfort or familiarity
with product (gained from repeated use) replace
strict adherence to safety rules for the subject
product. MISUSE or failure to follow the safety
rules stated in this instruction manual may cause
serious personal injury.
Important safety instructions for
battery cartridge
1.
Before using battery cartridge, read all instruc-
tions and cautionary markings on (1) battery char-
ger, (2) battery, and (3) product using battery.
2. Do not disassemble or tamper with the battery
cartridge.Itmayresultinare,excessiveheat,
or explosion.
3. If operating time has become excessively
shorter, stop operating immediately. It may
result in a risk of overheating, possible burns
and even an explosion.
4. If electrolyte gets into your eyes, rinse them
out with clear water and seek medical atten-
tion right away. It may result in loss of your
eyesight.
5. Do not short the battery cartridge:
(1) Do not touch the terminals with any con-
ductive material.
(2) Avoid storing battery cartridge in a con-
tainer with other metal objects such as
nails, coins, etc.
(3) Do not expose battery cartridge to water
or rain.

10 ENGLISH
A battery short can cause a large current
ow, overheating, possible burns and even a
breakdown.
6. Do not store and use the tool and battery car-
tridge in locations where the temperature may
reach or exceed 50 °C (122 °F).
7. Do not incinerate the battery cartridge even if
it is severely damaged or is completely worn
out. The battery cartridge can explode in a re.
8. Do not nail, cut, crush, throw, drop the battery
cartridge, or hit against a hard object to the
battery cartridge.Suchconductmayresultina
re,excessiveheat,orexplosion.
9. Do not use a damaged battery.
10. The contained lithium-ion batteries are subject
to the Dangerous Goods Legislation require-
ments.
Forcommercialtransportse.g.bythirdparties,
forwarding agents, special requirement on pack-
aging and labeling must be observed.
For preparation of the item being shipped, consult-
ing an expert for hazardous material is required.
Pleasealsoobservepossiblymoredetailed
national regulations.
Tapeormaskoopencontactsandpackupthe
batteryinsuchamannerthatitcannotmove
around in the packaging.
11. When disposing the battery cartridge, remove
it from the tool and dispose of it in a safe
place. Follow your local regulations relating to
disposal of battery.
12. Use the batteries only with the products
specied by Makita. Installing the batteries to
non-compliantproductsmayresultinare,exces-
siveheat,explosion,orleakofelectrolyte.
13. If the tool is not used for a long period of time,
the battery must be removed from the tool.
14. During and after use, the battery cartridge may
take on heat which can cause burns or low
temperature burns. Pay attention to the han-
dling of hot battery cartridges.
15. Do not touch the terminal of the tool imme-
diately after use as it may get hot enough to
cause burns.
16. Do not allow chips, dust, or soil stuck into the
terminals, holes, and grooves of the battery
cartridge.Itmayresultinpoorperformanceor
breakdownofthetoolorbatterycartridge.
17. Unless the tool supports the use near
high-voltage electrical power lines, do not use
the battery cartridge near high-voltage electri-
cal power lines.Itmayresultinamalfunctionor
breakdownofthetoolorbatterycartridge.
18. Keep the battery away from children.
SAVE THESE INSTRUCTIONS.
CAUTION: Only use genuine Makita batteries.
Use of non-genuine Makita batteries, or batteries that
havebeenaltered,mayresultinthebatterybursting
causingres,personalinjuryanddamage.Itwill
alsovoidtheMakitawarrantyfortheMakitatooland
charger.
Tips for maintaining maximum
battery life
1. Charge the battery cartridge before completely
discharged. Always stop tool operation and
charge the battery cartridge when you notice
less tool power.
2. Never recharge a fully charged battery car-
tridge. Overcharging shortens the battery
service life.
3. Charge the battery cartridge with room tem-
perature at 10 °C - 40 °C (50 °F - 104 °F). Let
a hot battery cartridge cool down before
charging it.
4. When not using the battery cartridge, remove
it from the tool or the charger.
5. Charge the battery cartridge if you do not use
it for a long period (more than six months).
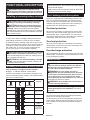
PARTS DESCRIPTION
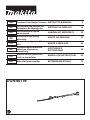
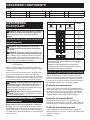
►Fig.1
1Head 2Angleadjustmentbutton 3Lock-lever 4Thumb nut
5Front grip 6Rear grip 7Batterycartridge 8Switch trigger
9Lock-obutton 10 Shear blades ----

11 ENGLISH
FUNCTIONAL DESCRIPTION
CAUTION: Always be sure that the tool is
switched o and the battery cartridge is removed
before adjusting or checking function on the tool.
Installing or removing battery cartridge
CAUTION: Always switch o the tool before
installing or removing of the battery cartridge.
CAUTION: Hold the tool and the battery car-
tridge rmly when installing or removing battery
cartridge.Failuretoholdthetoolandthebattery
cartridgermlymaycausethemtoslipoyourhands
andresultindamagetothetoolandbatterycartridge
andapersonalinjury.
►Fig.2: 1. Red indicator 2. Button 3.Batterycartridge
Toremovethebatterycartridge,slideitfromthetool
while sliding the button on the front of the cartridge.
Toinstallthebatterycartridge,alignthetongueonthe
batterycartridgewiththegrooveinthehousingandslip
itintoplace.Insertitallthewayuntilitlocksinplace
withalittleclick.Ifyoucanseetheredindicatoras
showninthegure,itisnotlockedcompletely.
CAUTION: Always install the battery cartridge
fully until the red indicator cannot be seen. If not,
itmayaccidentallyfalloutofthetool,causinginjuryto
youorsomeonearoundyou.
CAUTION: Do not install the battery cartridge
forcibly.Ifthecartridgedoesnotslideineasily,itis
notbeinginsertedcorrectly.
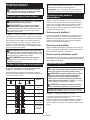
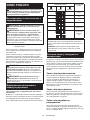
Indicating the remaining battery capacity
Only for battery cartridges with the indicator
►Fig.3: 1. Indicator lamps 2. Check button
Pressthecheckbuttononthebatterycartridgetoindi-
catetheremainingbatterycapacity.Theindicatorlamps
light up for a few seconds.
Indicator lamps Remaining
capacity
Lighted O Blinking
75% to 100%
50% to 75%
25% to 50%
0% to 25%
Charge the
battery.
Thebattery
mayhave
malfunctioned.
NOTE: Depending on the conditions of use and the
ambienttemperature,theindicationmaydierslightly
fromtheactualcapacity.
NOTE:Therst(farleft)indicatorlampwillblinkwhen
thebatteryprotectionsystemworks.
Tool / battery protection system
Thetoolisequippedwithatool/batteryprotectionsys-
tem.Thissystemautomaticallycutsopowertothe
motortoextendtoolandbatterylife.Thetoolwillauto-
maticallystopduringoperationifthetoolorbatteryis
placed under one of the following conditions:
Overload protection
Whenthetoolorbatteryisoperatedinamannerthat
causesittodrawanabnormallyhighcurrent,thetool
automaticallystops.Inthissituation,turnthetoolo
and stop the application that caused the tool to become
overloaded. Then turn the tool on to restart.
Overheat protection
Whenthetoolorbatteryisoverheated,thetoolstops
automatically.Inthiscase,letthetoolandbatterycool
before turning the tool on again.
Overdischarge protection
Whenthebatterycapacityisnotenough,thetoolstops
automatically.Inthiscase,removethebatteryfromthe
toolandchargethebattery.
Switch action
WARNING: Before installing the battery car-
tridge into the tool, always check to see that the
switch trigger actuates properly and returns to
the "OFF" position when released.
WARNING: For your safety, this tool is
equipped with the lock-o button which prevents
the tool from unintended starting. Never use the
tool if it starts when you pull the switch trigger
without pressing the lock-o button.Askyourlocal
Makita Service Center for repairs.
WARNING: Never disable the lock function or
tape down the lock-o button.
NOTICE: Do not pull the switch trigger forcibly
without pressing the lock-o button. The switch
maybreak.
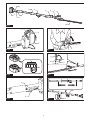
►Fig.4: 1.Lock-obutton2. Switch trigger
Topreventtheswitchtriggerfrombeingaccidentally
pulled,alock-obuttonisprovided.
Tostartthetool,pressthelock-obuttonandpullthe
switch trigger. Release the switch trigger to stop. The
lock-obuttoncanbepressedfromeithertherightor
left side.

12 ENGLISH
Adjusting the cutting angle
CAUTION: Always be sure that the tool is
switched o before folding or unfolding the head.
CAUTION: When folding the head for carrying
the tool or after using the tool, be sure to attach
the blade cover before folding the head.
CAUTION: When folding the head, be careful
not to pinch your ngers between the head and
the tool body.
Theangleoftheheadcanbeadjustedin10steps.To
change the angle of the head, follow the steps below.
1. Holdtheheadandthetoolbodyasshowninthe
gure.
►Fig.5: 1. Head 2.Angleadjustmentbutton
2. Adjusttheangleoftheheadwhileholdingdown
theangleadjustmentbutton,andthenreleasetheangle
adjustmentbutton.
3. Movetheheadslightlyuntilitislockedwithaclick.
NOTE:Makesurethattheheadissecurelylocked
before operating the tool.
Adjusting the pipe length
CAUTION: Always be sure that the tool is
switched o before adjusting the pipe length.
CAUTION: When adjusting the pipe length,
be sure to attach the blade cover before adjusting
the pipe length.
CAUTION: When adjusting the pipe length, be
careful not to pinch your ngers.
CAUTION: Make sure that the lock-lever is
locked securely.
Loosenthelock-lever,thenadjustthelengthofthepipe,
and then lock the lock-lever.
►Fig.6: 1. Lock-lever
Adjusting the front grip position
CAUTION: Always be sure that the tool is
switched o before adjusting the position of the
front grip.
CAUTION: When adjusting the position of the
front grip, be careful not to pinch your ngers.
CAUTION: Make sure that the thumb nut is
tightened securely.
CAUTION: Do not move the front grip beyond
the arrow mark.
Toadjustthepositionofthefrontgrip,loosenthethumb
nutbyturningitcounterclockwise,thenadjusttheposi-
tionofthefrontgrip,andthentightenthethumbnutby
turning it clockwise.
►Fig.7: 1. Thumb nut 2. Arrow mark
ASSEMBLY
CAUTION: Always be sure that the tool is
switched o and the battery cartridge is removed
before carrying out any work on the tool.
CAUTION: When replacing the shear blades,
always wear gloves so that your hands do not
directly contact the blades.
Installing or removing the shear blades
CAUTION: Attach the blade cover before
removing or installing the shear blades.
NOTICE: When replacing the shear blades, do
not wipe o grease from the gear and crank.
NOTE: Before installing or removing the shear
blades, unfold the head of the tool so that the head is
straighttothetoolbody.
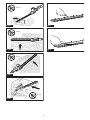
1. Place the tool upside down.
2. Remove 4 screws with a screwdriver and remove
the shear blades.
►Fig.8: 1. Screw
3. Remove the crank from the shear blades.
►Fig.9: 1. Crank
NOTE:Thecrankmayremaininthetool.
4. Prepare the crank and new shear blades.
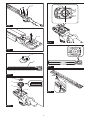
►Fig.10: 1. Crank 2. Shear blades
5. Remove the blade cover, and then attach it to the
new shear blades.
6.
Applyasmallamountofgreasetotheperipheryofthe
crank. Attach the washer, gear, and the crank to the pin in order.
►Fig.11: 1. Crank 2. Gear 3. Washer 4. Pin
7.
Adjustthecranksothatthe2smallholesonthecrank
arelineduponthealignmentlineasshowninthegure.
►Fig.12: 1. Alignment line 2. Small hole
8.
Slide the shear blades so that the hole on the guide
plate is positioned at the center of the rings of blades.
►Fig.13: 1. Guide plate
9. Insert the screw removed in step 2 into the hole on
the shear blades through the hole on the blade cover.
►Fig.14: 1. Hole
10. Attach the shear blades to the tool, and then
tighten 3 screws with the screwdriver.
►Fig.15: 1. Screw
11.
Remove the screw inserted into the hole on the shear
bladesinstep9,andthentightenittoxtheshearblades.
NOTICE: If the shear blades do not operate prop-
erly, the blades are not engaging the crank prop-
erly. Remove the blades and install them again.
NOTICE: If the parts other than the shear blades
such as the crank are worn out, ask Makita
Authorized Service Centers for parts replacement
or repairs.

13 ENGLISH
Installing or removing the chip receiver
Optional accessory
CAUTION: When installing or removing the
chip receiver, always wear gloves so that your
hands do not directly contact the shear blades.
CAUTION: Attach the blade cover before
installing or removing the chip receiver.
The chip receiver gathers discarded leaves and makes
clean-up afterward much easier. It can be installed on
either side of the tool.
1. Align the holes on the chip receiver with the nuts
on the shear blades.
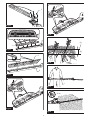
►Fig.16: 1. Nut
2. Hook the claws of the chip receiver to the groove
on the shear blades.
►Fig.17: 1. Claw 2. Groove
3.
Press the levers on the chip receiver, and then hook the
claws on the other side to the groove on the shear blades.
►Fig.18: 1. Lever
To remove the chip receiver, press the levers to release
the claws.
►Fig.19: 1. Lever
NOTICE: Never try to remove the chip receiver
by an excessive force with its claws locked in the
grooves of the shear blades.
OPERATION
Operating the tool
WARNING: Do not use the tool near any
electrical power lines. Contacting with power lines
orusingthetoolnearpowerlinesmaycauseserious
injuryorelectricshockresultingindeath.
WARNING:
Keep hands away from shear blades.
WARNING:
Be extremely careful to maintain
control of the tool at all times. Do not allow the tool
to be deected toward you or anyone in the work
vicinity. Failure to keep control of the tool could result
inseriousinjurytothebystanderandtheoperator.
CAUTION: Avoid operating the tool in very
hot weather as much as practicable. When operat-
ing the tool, be careful of your physical condition.
CAUTION:
Be careful not to accidentally con-
tact a metal fence or other hard objects while trim-
ming.Theshearbladesmaybreakandcauseaninjury.
CAUTION:
Be careful not to allow the shear blades
to contact the ground.Thetoolmayrecoilandcauseaninjury.
CAUTION:
Overreaching with a hedge trimmer,
particularly from a ladder, is extremely dangerous.
Donotworkwhilestandingonanythingwobblyorinrm.
NOTICE: Do not attempt to cut branches thicker
than 10 mm in diameter with the tool. Cut branches
to 10 cm lower than the cutting height using branch
cutters before using the tool.
►Fig.20: (1) Cutting height (2) 10 cm
NOTICE: Do not cut down dead trees or similar
hard objects.Doingsomaydamagethetool.
NOTICE: Do not trim the grass or weeds while
using the shear blades.Theshearbladesmay
become tangled in the grass or weeds.
Holdthetoolwithbothhandsbyholdingthefrontgrip
and the rear grip.
►Fig.21: 1. Front grip 2. Rear grip
Pulltheswitchtriggerwhilepressingthelock-obutton,
and then move the tool forward.
►Fig.22
For basic operation, tilt the shear blades toward the
trimmingdirectionandmoveitcalmlyandslowlyatthe
speed rate of 3 to 4 seconds per meter.
►Fig.23
Tocutahedgesideevenly,cutfromthebottomtotop.
►Fig.24
When trimming to make a round shape (trimming box-
wood or rhododendron, etc.), trim from the root to the
topforabeautifulnish.
►Fig.25
If the chip receiver is attached to the shear blades, it
gathers discarded leaves and makes clean-up after-
ward much easier.
►Fig.26
MAINTENANCE
CAUTION: Always be sure that the tool is
switched o and the battery cartridge is removed
before attempting to perform inspection or
maintenance.
CAUTION: When inspecting or maintaining
the tool, always put the tool down. Assembling or
adjustingthetoolinanuprightpositionmayresultin
seriousinjury.
To maintain product SAFETY and RELIABILITY,
repairs,anyothermaintenanceoradjustmentshould
beperformedbyMakitaAuthorizedorFactoryService
Centers,alwaysusingMakitareplacementparts.
Cleaning the tool
Cleanthetoolbywipingodustwithadryclothorone
dippedinsoapywaterandwrungout.
NOTICE: Never use gasoline, benzine, thinner,
alcohol or the like. Discoloration, deformation or
cracks may result.

14 ENGLISH
Shear blade maintenance
Before the operation or once per hour during operation,
applylow-viscosityoil(machineoil,orspray-typelubri-
cating oil) to the shear blades.
►Fig.27
After operation, remove dust from both sides of the
shearbladeswithawiredbrush,wipeitowithacloth
andthenapplylow-viscosityoil(machineoil,orspray-
typelubricatingoil)totheshearblades.
►Fig.28
NOTICE: Do not wash the shear blades in water.
Doingsomaycauserustordamagetothetool.
NOTICE: Dirt and corrosion cause excessive
blade friction and shorten the operating time per
battery charge.
Storage
Attach the blade cover to the shear blades so that the
blades are not exposed. Store the tool out of the reach
of children. Store the tool in a place not exposed to
moisture or rain.
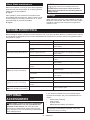
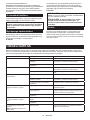
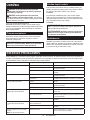
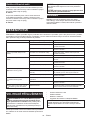
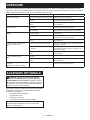
TROUBLESHOOTING
Beforeaskingforrepairs,conductyourowninspectionrst.Ifyoundaproblemthatisnotexplainedinthemanual,
donotattempttodismantlethetool.Instead,askMakitaAuthorizedServiceCenters,alwaysusingMakitareplace-
ment parts for repairs.
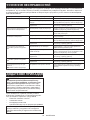
State of abnormality Probable cause (malfunction) Remedy
Motor does not run. Batterycartridgeisnotinstalled. Installthebatterycartridge.
Batteryproblem(undervoltage) Rechargethebattery.Ifrechargingisnoteective,
replacebattery.
Thedrivesystemdoesnotwork
correctly. Askyourlocalauthorizedservicecenterforrepair.
Motor stops running after a little use. Battery'schargelevelislow. Rechargethebattery.Ifrechargingisnoteective,
replacebattery.
Overheating. Stop using of tool to allow it to cool down.
Tool does not reach maximum RPM. Batteryisinstalledimproperly. Installthebatterycartridgeasdescribedinthis
manual.
Batterypowerisdropping. Rechargethebattery.Ifrechargingisnoteective,
replacebattery.
Thedrivesystemdoesnotwork
correctly. Askyourlocalauthorizedservicecenterforrepair.
Shear blades do not move:
stopthemachineimmediately!
Inappropriate angle of shear blades. Makesurethattheheadisproperlyxedinthe
operational angle.
Foreignobjectsarecaughtbetweenthe
shear blades. Switchothetoolandremovethebatterycartridge,
andthenremovetheforeignobjectsusingtools
such as pliers.
Thedrivesystemdoesnotwork
correctly. Askyourlocalauthorizedservicecenterforrepair.
Abnormal vibration:
stopthemachineimmediately!
Shear blades are broken, bent or worn. Replace the shear blades.
Thedrivesystemdoesnotwork
correctly. Askyourlocalauthorizedservicecenterforrepair.
Shear blades and motor cannot stop:
Removethebatteryimmediately!
Electric malfunction. Removethebatteryandaskyourlocalauthorized
service center for repair.
OPTIONAL
ACCESSORIES
CAUTION: These accessories or attachments
are recommended for use with your Makita tool
specied in this manual.Theuseofanyother
accessories or attachments might present a risk of
injurytopersons.Onlyuseaccessoryorattachment
for its stated purpose.
Ifyouneedanyassistanceformoredetailsregard-
ingtheseaccessories,askyourlocalMakitaService
Center.
• Shearbladeassembly
• Chip receiver
• Grease vessel
• Makitagenuinebatteryandcharger
NOTE:Someitemsinthelistmaybeincludedinthe
toolpackageasstandardaccessories.Theymay
dierfromcountrytocountry.

15 POLSKI
POLSKI (Instrukcja oryginalna)
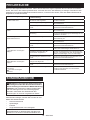
DANE TECHNICZNE
Model: DUN461W
Długośćostrza 460 mm
Liczbaoscylacjinaminutę 3 600 min-1
Kątostrzatnącego 135°(wgórę60°,wdół75°)
Długośćcałkowita 1 889–2 511 mm
Napięcieznamionowe Prądstały18V
Masa netto 3,0–3,3 kg
• Wzwiązkuzestaleprowadzonymprzeznasząrmęprogramembadawczo-rozwojowymniniejszedanemogą
uleczmianombezwcześniejszegopowiadomienia.
• Danetechnicznemogąróżnićsięwzależnościodkraju.
• Masamożebyćróżnawzależnościodosprzętu,wtymakumulatora.Wtabeliprzedstawionajestnajlżejszai
najcięższakonguracja,zgodniezprocedurąEPTA01/2014.
Kompatybilne akumulatory i ładowarki
Akumulator BL1815N / BL1820B / BL1830B / BL1840B / BL1850B / BL1860B
Ładowarka DC18RC / DC18RD / DC18RE / DC18SD / DC18SE / DC18SF /
DC18SH
•
Pewnezwymienionychpowyżejakumulatorówiładowarekmogąbyćniedostępnewregioniezamieszkaniaużytkownika.
OSTRZEŻENIE: Należy używać wyłącznie akumulatorów i ładowarek wymienionych powyżej.
Używanieinnychakumulatorówiładowarekmożestwarzaćryzykowystąpieniaobrażeńciałalubpożaru.
Zalecane źródło zasilania podłączane za pomocą przewodu
Przenośnajednostkazasilająca PDC01
• Wymienionepowyżejźródłozasilaniapodłączanezapomocąprzewodumożebyćniedostępnewregionie
zamieszkaniaużytkownika.
• Przedużyciemźródłazasilaniapodłączanegozapomocąprzewodunależyzapoznaćsięzinstrukcjąiumiesz-
czonyminanimznakamiostrzegawczymi.
Symbole
Poniżejpokazanosymbole,jakiemogąbyćzastoso-
wanenaurządzeniu.Przedrozpoczęciemużytkowania
należyzapoznaćsięzichznaczeniem.
Przeczytaćinstrukcjęobsługi.
Chronićprzedwilgocią.
Nosićkask,gogleorazochronnikisłuchu.
NIEBEZPIECZEŃSTWO—Niezbliżaćrąk
do ostrza.
Uważaćnaprzewodyelektryczne,ryzyko
porażeniaprądem.
Zachowaćodległośćconajmniej15m.
Ni-MH
Li-ion
DotyczytylkopaństwUE
Zuwaginaobecnośćwsprzęcienie-
bezpiecznychskładników,zużytysprzęt
elektryczny,elektroniczny,akumulatory
orazbateriemogąpowodowaćnegatywny
wpływnaśrodowiskoizdrowieludzi.
Niewyrzucajurządzeńelektrycznych,
elektronicznychlubakumulatorówwrazz
odpadami z gospodarstwa domowego!
ZgodniezEuropejskąDyrektywąwsprawie
zużytegosprzętuelektrycznegoielektronicz-
negoorazdotyczącąakumulatorówibaterii
orazzużytychakumulatorówibaterii,atakże
dostosowaniemichdoprawakrajowego,zużyte
urządzeniaelektryczne,elektroniczne,baterie
iakumulatory,należyskładowaćosobnoi
przekazywaćdopunktuselektywnejzbiórki
odpadówkomunalnych,działającegozgodniez
przepisamidotyczącymiochronyśrodowiska.
Informujeotymsymbolprzekreślonegokołowego
konteneranaodpadyumieszczonynasprzęcie.
Gwarantowanypoziommocyakustycznej
zgodniezdyrektywąUEwsprawiehałasu
nazewnątrz.
Poziommocyakustycznejzgodniez
australijskimiprzepisamidot.redukcji
hałasudlaNowejPołudniowejWalii

16 POLSKI
Przeznaczenie
Narzędzietojestprzeznaczonedoprzycinaniażywopłotów.
Hałas
TypowyrównoważnypoziomdźwiękuAokreślonyw
oparciuonormęEN62841-4-2:
Poziomciśnieniaakustycznego(LpA): 74 dB(A)
Niepewność(K):3dB(A)
Poziomhałasupodczaspracymożeprzekraczać80dB(A).
WSKAZÓWKA:
Deklarowanawartośćemisjihałasu
zostałazmierzonazgodniezestandardowąmetodątestową
imożnająwykorzystaćdoporównywanianarzędzi.
WSKAZÓWKA:
Deklarowanąwartośćemisjihałasu
możnatakżewykorzystaćwewstępnejocenienarażenia.
OSTRZEŻENIE: Nosić ochronniki słuchu.
OSTRZEŻENIE: Poziom hałasu wytwa-
rzanego podczas rzeczywistego użytkowania
elektronarzędzia może się różnić od wartości
deklarowanej w zależności od sposobu użytko-
wania narzędzia, a w szczególności od rodzaju
obrabianego elementu.
OSTRZEŻENIE: W oparciu o szacowane
narażenie w rzeczywistych warunkach użytkowa-
nia należy określić środki bezpieczeństwa w celu
zapewnienia ochrony operatora (uwzględniając
wszystkie elementy cyklu działania, tj. czas, kiedy
narzędzie jest wyłączone i kiedy pracuje na biegu
jałowym, a także czas, kiedy jest włączone).
Drgania
Obowiązującanorma:EN62841-4-2
Lewaręka(rękojeśćprzednia) Prawaręka(rękojeśćtylna)
ah (m/s2)NiepewnośćK(m/s2) ah (m/s2)NiepewnośćK(m/s2)
2,5 m/s2lubmniej 1,5 2,5 m/s2lubmniej 1,5
WSKAZÓWKA:Deklarowanawartośćpoziomudrgańzostałazmierzonazgodniezestandardowąmetodą
testowąimożnająwykorzystaćdoporównywanianarzędzi.
WSKAZÓWKA:Deklarowanąwartośćpoziomudrgańmożnatakżewykorzystaćwewstępnejocenienarażenia.
OSTRZEŻENIE:
Drgania wytwarzane podczas rzeczywistego użytkowania elektronarzędzia mogą się różnić od war-
tości deklarowanej w zależności od sposobu użytkowania narzędzia, a w szczególności od rodzaju obrabianego elementu.
OSTRZEŻENIE:
W oparciu o szacowane narażenie w rzeczywistych warunkach użytkowania należy okre-
ślić środki bezpieczeństwa w celu zapewnienia ochrony operatora (uwzględniając wszystkie elementy cyklu dzia-
łania, tj. czas, kiedy narzędzie jest wyłączone i kiedy pracuje na biegu jałowym, a także czas, kiedy jest włączone).
Deklaracja zgodności WE
Dotyczy tylko krajów europejskich
DeklaracjazgodnościWEjestdołączonajakozałącznik
Adoniniejszejinstrukcjiobsługi.
OSTRZEŻENIA
DOTYCZĄCE
BEZPIECZEŃSTWA
Ogólne zasady bezpiecznej
eksploatacji elektronarzędzi
OSTRZEŻENIE:
Należy zapoznać się z ostrze-
żeniami dotyczącymi bezpieczeństwa, instrukcjami,
ilustracjami i danymi technicznymi dołączonymi do
tego elektronarzędzia.Niezastosowaniesiędopoda-
nychponiżejinstrukcjimożeprowadzićdoporażenia
prądem,pożarui/lubpoważnychobrażeńciała.
Wszystkie ostrzeżenia i instruk-
cje należy zachować do wykorzy-
stania w przyszłości.
Pojęcie„elektronarzędzie",występującewwymienionychtu
ostrzeżeniach,odnosisiędoelektronarzędziazasilanegoz
siecielektrycznej(zprzewodemzasilającym)lubdoelektro-
narzędziaakumulatorowego(bezprzewoduzasilającego).
Ostrzeżenia dotyczące
bezpieczeństwa dla akumulatorowych
nożyc do żywopłotu na wysięgniku
1. Nie wolno zbliżać żadnych części ciała do
ostrza. Ciętego materiału nie wolno usuwać
ani przytrzymywać, kiedy ostrza są w ruchu.
Ostrzaporuszająsięnawetpowyłączeniunarzę-
dziazapomocąprzełącznika.Momentnieuwagi
podczaspracyznożycamidożywopłotumoże
spowodowaćpoważneobrażeniaciała.
2.
Nożyce do żywopłotu przenosić za pomocą
uchwytu po zatrzymaniu ostrza, zachowując
ostrożność, aby nie nacisnąć żadnego przełącz-
nika zasilania.Prawidłoweprzenoszenienożycdo
żywopłotuzmniejszyryzykoprzypadkowegourucho-
mieniaiobrażeńciałaspowodowanychprzezostrza.

17 POLSKI
3. Podczas transportu lub przechowywania
nożyc do żywopłotu zawsze należy założyć
osłonę na ostrze.Prawidłowepostępowaniez
nożycamidożywopłotuzmniejszyryzykoobrażeń
ciałaspowodowanychprzezostrza.
4.
Podczas usuwania zakleszczonego materiału lub
serwisowania urządzenia należy się upewnić, czy
wszystkie przełączniki zasilania są wyłączone
i czy akumulator został wyjęty lub odłączony.
Nieoczekiwaneaktywowanienożycdożywopłotupod-
czasusuwaniazakleszczonegomateriałulubserwiso-
waniamożedoprowadzićdopoważnychobrażeńciała.
5.
Ponieważ ostrze może zetknąć się z ukry-
tymi przewodami elektrycznymi, nożyce do
żywopłotu należy trzymać tylko za izolowane
uchwyty.Zetknięcieostrzyzprzewodemelektrycz-
nymznajdującymsiępodnapięciemspowoduje,że
odsłonięteelementymetalowenożycdożywopłotu
równieżznajdąsiępodnapięciem,stwarzając
ryzykoporażeniaoperatoraprądemelektrycznym.
6. Nie należy zbliżać przewodów zasilających
ani innych przewodów do obszaru cięcia.
Przewodyzasilającelubinneprzewodymogąbyć
ukrytewżywopłocielubkrzewachimogązostać
przypadkowoprzecięteprzezostrze.
7. Nie należy używać nożyc do żywopłotu przy
złej pogodzie, w szczególności, jeśli istnieje
ryzyko wyładowań atmosferycznych.Dzięki
temuzmniejszysięryzykoporażeniapiorunem.
8.
Aby zmniejszyć ryzyko porażenia prądem, nigdy
nie należy używać nożyc do żywopłotu na wysię-
gniku w pobliżu linii energetycznych. Kontakt z
liniamienergetycznymilubużycienarzędziawpobliżu
takichliniimożespowodowaćpoważneobrażenia
ciałalubśmierćwwynikuporażeniaelektrycznego.
9. Nożyce do żywopłotu na wysięgniku należy
zawsze obsługiwać oburącz.Przytrzymuj
nożycedożywopłotunawysięgnikuobiema
rękami,abyuniknąćutratykontroli.
10. Podczas korzystania z nożyc do żywopłotu
na wysięgniku zawsze należy nosić ochronę
głowy.Spadająceodpadkimogąspowodować
poważneobrażeniaciała.
Dodatkowe zalecenia dotyczące
bezpieczeństwa
Przygotowanie
1.
NOŻYCE DO ŻYWOPŁOTU MOGĄ
SPOWODOWAĆ POWAŻNE OBRAŻENIA CIAŁA.
Należy dokładnie zapoznać się z instrukcjami
objaśniającymi sposób prawidłowej obsługi,
przygotowania, konserwacji, uruchamiania i
zatrzymywania narzędzia. Należy zapoznać się
ze wszystkimi elementami sterowania i zasa-
dami poprawnego użytkowania narzędzia.
2. Przed uruchomieniem narzędzia należy spraw-
dzić, czy w żywopłocie lub krzewach nie ma
elementów takich jak ogrodzenia z drutu lub
niewidoczne przewody elektryczne.
3. Dzieciom i młodzieży poniżej 18 roku życia nie
wolno obsługiwać nożyc do żywopłotu.Młode
osobypowyżej16rokużyciamożnawyłączyćz
tegozastrzeżenia,jeżeliodbywająszkoleniepod
nadzorem fachowca.
4. W przypadku niebezpieczeństwa natychmiast
wyłączyć narzędzie i wyjąć akumulator.
5. NIEBEZPIECZEŃSTWO - Nie wolno zbliżać rąk
do ostrza.Kontaktzostrzemmożespowodować
poważneobrażeniaciała.
6. Osoba mająca praktyczne doświadczenie z
narzędziem powinna poinstruować użytkow-
nika, który jeszcze z nim nie pracował.
7. Przed rozpoczęciem eksploatacji należy
sprawdzić, czy w miejscu pracy nie ma drucia-
nych ogrodzeń, kamieni lub innych obiektów.
Mogą one uszkodzić ostrza.
8.
Nożyce do żywopłotu powinny być używane tylko
wtedy, gdy osoba ją obsługująca jest w odpo-
wiedniej formie zycznej.Wprzypadkuzmęczenia
koncentracjaoperatorajestobniżona.Zachować
szczególnąostrożnośćpodkoniecdniaroboczego.
Wszelkieczynnościpowinnybyćwykonywanespo-
kojnieiostrożnie.Użytkownikodpowiadazawszelkie
szkodywyrządzoneosobomtrzecim.
9.
Przed rozpoczęciem pracy należy się upewnić,
że nożyce są w dobrym i zapewniającym bezpie-
czeństwo stanie. Należy sprawdzić, czy osłony są
zamocowane prawidłowo. Nożyc do żywopłotu nie
wolno używać, jeśli nie są całkowicie zmontowane.
10. Unikać niebezpiecznych warunków pracy.
Nie wolno używać narzędzia w otoczeniu wil-
gotnym, mokrym ani narażać go na działanie
deszczu. Woda, która dostanie się do wnętrza
narzędzia, zwiększa ryzyko porażenia prądem
elektrycznym.
Środki ochrony osobistej
1. Rękawice robocze z grubej skóry należą do
podstawowego wyposażenia podczas pracy
z nożycami do żywopłotu i zawsze należy je
nosić. Należy też nosić mocne buty z antypo-
ślizgowymi podeszwami.
2. Stosować odpowiednią ochronę słuchu, taką
jak nauszniki, w celu zabezpieczenia słuchu
przed uszkodzeniem.
3. Nosić okulary ochronne, kask bezpieczeństwa
oraz rękawice ochronne w celu ochrony ciała
przed odrzucanymi w powietrze odpadkami lub
spadającymi przedmiotami.
4. Dotykając ostrzy lub regulując kąt ostrza,
nosić rękawice ochronne.Ostrzamogąpoważ-
niezranićodsłoniętedłonie.
Obsługa
1.
Narzędzie należy zawsze obsługiwać oburącz.
Przytrzymywaniejednąrękąmożedoprowadzićdo
utratykontroliispowodowaćpoważneobrażeniaciała.
2.
Podczas używania narzędzia zawsze należy się
upewnić, czy położenie robocze jest bezpieczne.
Sięganie narzędziem zbyt daleko, zwłaszcza
podczas pracy na drabinie, może być bardzo
niebezpieczne. Podczas pracy nie wolno stać na
niczym chwiejnym lub niestabilnym.
3. Podczas pracy z użyciem narzędzia nie należy
jednocześnie nosić kilku szelek z paskiem i/lub
szelek nośnych.
4. Podczas pracy z użyciem narzędzia należy
zachować odległość co najmniej 15 m od osób
postronnych i zwierząt. W przypadku zbliżania
się osoby trzeciej wyłączyć narzędzie.

18 POLSKI
5. Jeśli narzędzie tnące uderzy w jakiś obiekt
lub zacznie generować nietypowy dźwięk lub
wibracje, należy niezwłocznie wyłączyć narzę-
dzie, wyjąć akumulator i poczekać, aż narzę-
dzie się zatrzyma. Następnie należy wykonać
następujące kroki:
• sprawdzić, czy nie doszło do uszkodzeń,
• sprawdzić, czy nie doszło do poluzowania
części, i w razie potrzeby dokręcić je,
• wymienić lub naprawić uszkodzone
części z użyciem oryginalnych części
zamiennych.
6. Narzędzia należy używać tylko zgodnie z jego
przeznaczeniem. Nie wolno używać narzędzia
do żadnych innych celów.
7. Wyłączyć narzędzie i wyjąć z niego akumulator
przed:
• czyszczeniem lub podczas usuwania
blokady,
• sprawdzeniem, wykonaniem konserwacji
lub wykonaniem innych prac związanych
z narzędziem,
• skorygowaniem położenia roboczego
ostrzy nożyc,
• pozostawieniem narzędzia bez nadzoru.
8. Przed uruchomieniem narzędzia należy upew-
nić się, czy jest ono prawidłowo ustawione w
określonym położeniu roboczym.
9. Nie uruchamiać narzędzia z uszkodzonymi lub
nadmiernie zużytymi ostrzami nożyc.
10. Zawsze należy zwracać uwagę na otoczenie i
zachować czujność wobec możliwych zagro-
żeń, o których może nie być wiadomo na sku-
tek hałasu narzędzia.
11. Podczas pracy należy uważać, aby nie dotknąć
metalowego ogrodzenia lub innych twardych
przedmiotów.Ostrzemożesięzłamaćispowo-
dowaćpoważneobrażeniaciała.
12. Unikać przypadkowego uruchomienia. Nie
przenosić narzędzia z zamontowanym aku-
mulatorem i palcem na przełączniku. Podczas
zakładania akumulatora należy upewnić się, że
przełącznik jest wyłączony.
13. Podczas podnoszenia lub przenoszenia narzę-
dzia nigdy nie chwytać za nieosłonięte noże
lub krawędzie tnące.
14. Nie przeciążać narzędzia.Będzieonopracowało
lepiej,aryzykospowodowaniaobrażeńbędzie
mniejszepodczaspracyzprędkością,dlaktórej
zostałozaprojektowane.
15. Narzędzia nie wolno używać podczas deszczu,
kiedy występuje rosa ani w bardzo wilgot-
nych warunkach.Silnikelektrycznyniejest
wodoszczelny.
16. Narzędzie należy trzymać pewnie podczas
pracy.
17. Nie należy bez potrzeby uruchamiać narzędzia
bez obciążenia.
18. Przed sprawdzeniem ostrzy nożyc, usunięciem
uszkodzeń lub obiektów zablokowanych w
ostrzach nożyc należy zawsze wyłączyć narzę-
dzie i wyjąć akumulator.
19. Nigdy nie kierować ostrzy nożyc w swoją
stronę ani w stronę innych osób.
20. Jeśli podczas pracy ostrza przestaną się poru-
szać z powodu utknięcia między nimi przed-
miotów obcych, należy wyłączyć narzędzie,
wyjąć akumulator, a następnie usunąć przed-
mioty obce za pomocą odpowiednich narzędzi,
takich jak szczypce.Wyjmowanieprzedmiotów
obcychdłoniągroziodniesieniemobrażeń,ponie-
ważostrzamogąporuszyćsięwreakcjinausu-
nięcieprzedmiotuobcego.
Zasady bezpieczeństwa dotyczące urządzeń elek-
trycznych i akumulatora
1. Unikać niebezpiecznych warunków pracy. Nie
wolno używać narzędzia w otoczeniu wilgot-
nym lub mokrym ani narażać go na działanie
deszczu.Woda,któradostaniesiędownętrza
narzędzia,zwiększaryzykoporażeniaprądem
elektrycznym.
2. Nie wyrzucać akumulatorów do ognia. Ogniwo
możeeksplodować.Należyzapoznaćsięzobo-
wiązującymilokalnieprzepisami,któreokreślają
specjalnewytycznedotycząceutylizacjiodpadów.
3. Nie wolno otwierać ani niszczyć akumulato-
rów.Uwolnionyelektrolitjestsubstancjążrącą,
któramożespowodowaćuszkodzenieoczulub
skóry.Wprzypadkupołknięciamożebyćtrujący.
4. Akumulatora nie należy ładować w deszczu ani
w wilgotnym otoczeniu.
5. Nie ładować akumulatora na zewnątrz.
6. Nie dotykać ładowarki, w tym jej wtyczki i
styków, mokrymi rękami.
Konserwacja i przechowywanie
1. Jeśli narzędzie ma zostać zatrzymane w celu
przeprowadzenia serwisu, przeglądu lub prze-
kazania do magazynowania, należy je wyłączyć
i wyjąć akumulator, a następnie upewnić się,
czy wszystkie części ruchome się zatrzymały.
Przed rozpoczęciem przeglądów, regulacji itp.
należy pozostawić narzędzie do ostygnięcia.
2. Przed schowaniem narzędzia należy zawsze
odczekać, aż ostygnie.
3. Jeśli narzędzie nie jest używane, należy zamo-
cować osłonę ostrza i schować narzędzie w
suchym pomieszczeniu, w wysoko położonym,
zamkniętym i niedostępnym dla dzieci miejscu.
4. Starannie wykonywać czynności konserwa-
cyjne. Krawędź tnąca powinna być ostra i
czysta, co zapewni największą wydajność
i zredukuje ryzyko obrażeń. Przestrzegać
instrukcji smarowania i wymiany akcesoriów.
Utrzymywać rękojeści suche, czyste i nieza-
brudzone olejem ani smarem.
5. Sprawdzić uszkodzone części. Uszkodzoną
część należy dokładnie sprawdzić przed
dalszym użytkowaniem narzędzia, aby mieć
pewność, że będzie ona poprawnie działać
i spełniać swoją funkcję. Należy sprawdzić
narzędzie pod kątem nieprawidłowego usta-
wienia lub zablokowania elementów rucho-
mych, pęknięć części, zamocowania oraz
innych usterek, które mogą mieć wpływ na
jego działanie.Osłonalubinneuszkodzoneczę-
ścipowinnyzostaćnaprawionelubwymienione
przezautoryzowanypunktserwisowy.
6. Należy używać tylko oryginalnych części.

19 POLSKI
7.
Przed przeniesieniem narzędzia na inne miejsce,
także podczas pracy, należy wyjąć akumulator i
założyć osłonę na ostrza nożyc. Nie wolno prze-
nosić ani przewozić narzędzia, gdy ostrza są w
ruchu. Nigdy nie chwytać ostrzy rękami.
8.
Narzędzie, a zwłaszcza ostrza, należy wyczyścić
po pracy, a także przed odłożeniem narzędzia do
przechowania przez dłuższy czas. Ostrza nożyc
należy lekko naoliwić i nałożyć na nie osłonę.
9. Nie wolno wyrzucać akumulatorów do ognia.
Ogniwo może eksplodować. Należy zapoznać
się z obowiązującymi lokalnie przepisami,
które określają specjalne wytyczne dotyczące
pozbywania się odpadów.
10.
Nie wolno otwierać ani niszczyć akumulatorów.
Uwolniony elektrolit jest substancją żrącą, która
może spowodować uszkodzenie oczu lub skóry.
Może być on trujący w razie połknięcia.
11. Akumulatora nie należy ładować w deszczu ani
w wilgotnym otoczeniu.
ZACHOWAĆ NINIEJSZE
INSTRUKCJE.
OSTRZEŻENIE: NIE WOLNO pozwolić,
aby wygoda lub rutyna (nabyta w wyniku wielo-
krotnego używania urządzenia) zastąpiły ścisłe
przestrzeganie zasad bezpieczeństwa obsługi.
NIEWŁAŚCIWE UŻYTKOWANIE narzędzia lub
niestosowanie się do zasad bezpieczeństwa
podanych w niniejszej instrukcji obsługi może
prowadzić do poważnych obrażeń ciała.
Ważne zasady bezpieczeństwa
dotyczące akumulatora
1. Przed użyciem akumulatora zapoznać się ze
wszystkimi instrukcjami i znakami ostrze-
gawczymi na (1) ładowarce, (2) akumulatorze
i (3) produkcie, w którym będzie używany
akumulator.
2. Nie rozmontowywać ani modykować akumu-
latora.Możetospowodowaćpożar,przegrzanie
lubwybuch.
3. Jeśli czas działania uległ znacznemu skróce-
niu, należy natychmiast przerwać pracę. Może
bowiem dojść do przegrzania, ewentualnych
poparzeń, a nawet eksplozji.
4. W przypadku przedostania się elektrolitu do
oczu, przemyć je czystą wodą i niezwłocznie
uzyskać pomoc lekarską. Może on bowiem
spowodować utratę wzroku.
5. Nie doprowadzać do zwarcia akumulatora:
(1) Nie dotykać styków materiałami przewo-
dzącymi prąd.
(2) Unikać przechowywania akumulatora w
pojemniku z metalowymi przedmiotami,
takimi jak gwoździe, monety itp.
(3) Chronić akumulator przed deszczem lub
wodą.
Zwarcie prowadzi do przepływu prądu elek-
trycznego o dużym natężeniu i przegrzania
akumulatora, co w konsekwencji może grozić
poparzeniami a nawet awarią urządzenia.
6. Narzędzia i akumulatora nie wolno przechowy-
wać ani używać w miejscach, w których tempe-
ratura osiąga bądź przekracza 50°C (122°F).
7. Akumulatorów nie wolno spalać, również tych
poważnie uszkodzonych lub całkowicie zuży-
tych. Akumulator może eksplodować w ogniu.
8. Nie należy przecinać ani zgniatać akumulatora,
wbijać w niego gwoździ, rzucać nim, upusz-
czać, ani uderzać akumulatorem o twarde
obiekty.Takiedziałaniemożespowodowaćpożar,
przegrzanielubwybuch.
9. Nie wolno używać uszkodzonego akumulatora.
10. Stanowiące wyposażenie akumulatory lito-
wo-jonowe podlegają przepisom dotyczącym
produktów niebezpiecznych.
Napotrzebytransportukomercyjnego,np.świad-
czonegoprzezrmytrzecieczyspedycyjne,
należyprzestrzegaćspecjalnychwymagańw
zakresiepakowaniaioznaczaniaetykietami.
Przygotowanieproduktudowysyłkiwymaga
skonsultowaniasięzespecjalistąds.materiałów
niebezpiecznych.Należytakżeprzestrzegać
przepisówkrajowych,któremogąbyćbardziej
szczegółowe.
Zakleićtaśmąlubzaślepićotwartestykiakumula-
toraorazzabezpieczyćgo,abyniemógłsięprze-
suwaćwopakowaniu.
11. Jeśli zajdzie konieczność utylizacji akumula-
tora, należy wyjąć go z narzędzia i przekazać
w bezpieczne miejsce. Postępować zgodnie z
przepisami lokalnymi dotyczącymi utylizacji
akumulatorów.
12. Używać akumulatorów tylko z produktami
określonymi przez rmę Makita. Zastosowanie
akumulatorówwniezgodnychproduktachmoże
spowodowaćpożar,przegrzanie,wybuchlub
wyciekelektrolitu.
13. Jeśli narzędzie nie będzie używane przez dłuż-
szy czas, należy wyjąć z niego akumulator.
14. Przed użyciem akumulatora i po jego użyciu
akumulator może pozostawać nagrzany, co
może spowodować poparzenia lub poparzenia
w niskiej temperaturze. Z gorącym akumulato-
rem należy obchodzić się ostrożnie.
15. Nie należy dotykać styku narzędzia bezpośred-
nio po jego użyciu, ponieważ może on być na
tyle gorący, że spowoduje oparzenia.
16. Nie należy dopuszczać, aby wióry, kurz lub
błoto gromadziły się na stykach, w otworach
i rowkach akumulatora.Możetospowodować
obniżeniewydajnościlubuszkodzenienarzędzia
lub akumulatora.
17. Jeśli narzędzie nie jest przeznaczone do
użytku w pobliżu linii wysokiego napięcia,
nie należy korzystać z akumulatora w ich
sąsiedztwie.Możetospowodowaćnieprawidło-
wościwdziałaniulubuszkodzenienarzędzialub
akumulatora.
18. Przechowywać akumulator w miejscu niedo-
stępnym dla dzieci.
ZACHOWAĆ NINIEJSZE
INSTRUKCJE.

20 POLSKI
PRZESTROGA: Używać wyłącznie oryginal-
nych akumulatorów rmy Makita.Używanienie-
oryginalnychakumulatorówrminnychniżMakitalub
akumulatorów,którezostałyzmodykowane,może
spowodowaćwybuchakumulatoraipożar,obrażenia
ciałaorazzniszczeniemienia.Stanowitorównież
naruszeniewarunkówgwarancjirmyMakitadoty-
czącychnarzędziaiładowarki.
Wskazówki dotyczące zachowania
maksymalnej trwałości akumulatora
1.
Akumulator należy naładować zanim zostanie do końca
rozładowany. Po zauważeniu spadek mocy narzędzia
należy przerwać pracę i naładować akumulator.
2. Nie wolno ładować powtórnie w pełni nałado-
wanego akumulatora. Przeładowanie akumula-
tora skraca jego trwałość.
3.
Akumulator należy ładować w temperaturze poko-
jowej w przedziale 10–40°C (50–104°F). W przy-
padku gorącego akumulatora przed przystąpie-
niem do ładowania należy poczekać, aż ostygnie.
4. Jeśli akumulator nie jest używany, należy go
wyjąć z narzędzia lub ładowarki.
5. Akumulatory niklowo-wodorkowe należy nała-
dować po okresie długiego nieużytkowania
(dłuższego niż sześć miesięcy).
OPIS CZĘŚCI
►Rys.1
1Głowica 2Przyciskregulacjikąta 3Dźwigniablokady 4Nakrętkamotylkowa
5Przedniarękojeść 6Tylnarękojeść 7Akumulator 8Spustprzełącznika
9
Przyciskblokadywłączenia
10 Ostrzanożyc ----
OPIS DZIAŁANIA
PRZESTROGA: Przed przystąpieniem do regu-
lacji lub przeglądu narzędzia upewnić się, że jest
ono wyłączone, a akumulator został wyjęty.
Wkładanie i wyjmowanie akumulatora
PRZESTROGA: Przed włożeniem lub wyjęciem
akumulatora należy zawsze wyłączyć narzędzie.
PRZESTROGA:
Podczas wkładania lub wyjmowania
akumulatora należy mocno trzymać narzędzie i akumulator.
Wprzeciwnymraziemogąsięonewyślizgnąćzrąk,powodując
uszkodzenienarzędzialubakumulatoraiobrażeniaciała.
►Rys.2:
1.Czerwonywskaźnik2.Przycisk3. Akumulator
Abywyjąćakumulator,przesuńprzyciskznajdującysię
wprzedniejjegoczęściiwysuńakumulator.
Abywłożyćakumulator,wyrównaćwystępnaakumulatorzezrow-
kiemwobudowieiwsunąćgonaswojemiejsce.Akumulatornależy
wsunąćdooporu,ażsięzatrzaśnienamiejscu,cojestsygnalizowane
delikatnymkliknięciem.Jeślijestwidocznyczerwonywskaźnikpoka-
zanynarysunku,akumulatorniezostałcałkowiciezablokowany.
PRZESTROGA:
Akumulator należy włożyć do
końca, tak aby czerwony wskaźnik nie był widoczny. W
przeciwnymraziemożeprzypadkowowypaśćznarzędzia,
powodującobrażeniaoperatoralubosóbpostronnych.
PRZESTROGA: Nie wkładać akumulatora na
siłę.Jeśliakumulatorniedajesięswobodniewsunąć,
oznaczato,żezostałwłożonynieprawidłowo.
Wskazanie stanu naładowania akumulatora
Tylko w przypadku akumulatorów ze wskaźnikiem
►Rys.3: 1.Lampkiwskaźnika2.Przyciskkontrolny
Nacisnąćprzyciskkontrolnynaakumulatorzewcelu
wyświetleniastanunaładowaniaakumulatora.Lampki
wskaźnikazaświecąsięprzezkilkasekund.
Lampki wskaźnika Pozostała
energia
akumulatora
Świeci się Wyłączony Miga
75–100%
50–75%
25–50%
0–25%
Naładować
akumulator.
Akumulator
możenie
działać
poprawnie.
Pagina se încarcă...
Pagina se încarcă...
Pagina se încarcă...
Pagina se încarcă...
Pagina se încarcă...
Pagina se încarcă...
Pagina se încarcă...
Pagina se încarcă...
Pagina se încarcă...
Pagina se încarcă...
Pagina se încarcă...
Pagina se încarcă...
Pagina se încarcă...
Pagina se încarcă...
Pagina se încarcă...
Pagina se încarcă...
Pagina se încarcă...
Pagina se încarcă...
Pagina se încarcă...
Pagina se încarcă...
Pagina se încarcă...
Pagina se încarcă...
Pagina se încarcă...
Pagina se încarcă...
Pagina se încarcă...
Pagina se încarcă...
Pagina se încarcă...
Pagina se încarcă...
Pagina se încarcă...
Pagina se încarcă...
Pagina se încarcă...
Pagina se încarcă...
Pagina se încarcă...
Pagina se încarcă...
Pagina se încarcă...
Pagina se încarcă...
Pagina se încarcă...
Pagina se încarcă...
Pagina se încarcă...
Pagina se încarcă...
Pagina se încarcă...
Pagina se încarcă...
Pagina se încarcă...
Pagina se încarcă...
Pagina se încarcă...
Pagina se încarcă...
Pagina se încarcă...
Pagina se încarcă...
Pagina se încarcă...
Pagina se încarcă...
Pagina se încarcă...
Pagina se încarcă...
Pagina se încarcă...
Pagina se încarcă...
Pagina se încarcă...
Pagina se încarcă...
Pagina se încarcă...
Pagina se încarcă...
Pagina se încarcă...
Pagina se încarcă...
Pagina se încarcă...
Pagina se încarcă...
Pagina se încarcă...
Pagina se încarcă...
Pagina se încarcă...
Pagina se încarcă...
Pagina se încarcă...
Pagina se încarcă...
-
 1
1
-
 2
2
-
 3
3
-
 4
4
-
 5
5
-
 6
6
-
 7
7
-
 8
8
-
 9
9
-
 10
10
-
 11
11
-
 12
12
-
 13
13
-
 14
14
-
 15
15
-
 16
16
-
 17
17
-
 18
18
-
 19
19
-
 20
20
-
 21
21
-
 22
22
-
 23
23
-
 24
24
-
 25
25
-
 26
26
-
 27
27
-
 28
28
-
 29
29
-
 30
30
-
 31
31
-
 32
32
-
 33
33
-
 34
34
-
 35
35
-
 36
36
-
 37
37
-
 38
38
-
 39
39
-
 40
40
-
 41
41
-
 42
42
-
 43
43
-
 44
44
-
 45
45
-
 46
46
-
 47
47
-
 48
48
-
 49
49
-
 50
50
-
 51
51
-
 52
52
-
 53
53
-
 54
54
-
 55
55
-
 56
56
-
 57
57
-
 58
58
-
 59
59
-
 60
60
-
 61
61
-
 62
62
-
 63
63
-
 64
64
-
 65
65
-
 66
66
-
 67
67
-
 68
68
-
 69
69
-
 70
70
-
 71
71
-
 72
72
-
 73
73
-
 74
74
-
 75
75
-
 76
76
-
 77
77
-
 78
78
-
 79
79
-
 80
80
-
 81
81
-
 82
82
-
 83
83
-
 84
84
-
 85
85
-
 86
86
-
 87
87
-
 88
88


Makita DUN461W Manual de utilizare
- Categorie
- Aparate de tuns gard viu
- Tip
- Manual de utilizare
în alte limbi
- slovenčina: Makita DUN461W Používateľská príručka
- polski: Makita DUN461W Instrukcja obsługi
Lucrări înrudite
-
Makita EN402MP Manual de utilizare
-
Makita UH004G Manual de utilizare
-
Makita DUH506 Manual de utilizare
-
Makita DUN600L Manual de utilizare
-
Makita DUM166 Manual de utilizare
-
Makita DMP181 Manual de utilizare
-
-
Makita UH013G Manual de utilizare
-
Makita DUH502 Manual de utilizare
-