Makita UN460WD Manual de utilizare
- Categorie
- Aparate de tuns gard viu
- Tip
- Manual de utilizare

UN460WD
EN Cordless Pole Hedge Trimmer INSTRUCTION MANUAL 6
SL Brezžične škarje za živo mejo
na drogu NAVODILA ZA UPORABO 15
SQ Prerës shkurresh me bosht
me bateri MANUALI I PËRDORIMIT 24
BG Акумулаторен телескопичен
храсторез РЪКОВОДСТВО ЗА
ЕКСПЛОАТАЦИЯ 34
HR Bežične štapne škare za
živicu PRIRUČNIK S UPUTAMA 45
МК Безжична фреза за жива
ограда со продолжеток УПАТСТВО ЗА УПОТРЕБА 54
SR Бежични телескопски
тример за живу ограду УПУТСТВО ЗА УПОТРЕБУ 65
RO Maşină de tuns gardul viu
înalt cu acumulator MANUAL DE INSTRUCŢIUNI 75
UK
Акумуляторна штангова
пила для підрізання
живоплоту
ІНСТРУКЦІЯ З
ЕКСПЛУАТАЦІЇ 85
RU Аккумуляторный
Штанговый Кусторез РУКОВОДСТВО ПО
ЭКСПЛУАТАЦИИ 96

13
5
6
78
10
9
42
Fig.1
1
2
3
Fig.2
1
2
Fig.3
1
2
Fig.4
1
2
Fig.5
1
Fig.6
1
2
Fig.7
2

1
Fig.8
1
Fig.9
1
2
Fig.10
1
2
3
4
Fig.11
1
2
Fig.12
1
Fig.13
1
Fig.14
3

1
Fig.15
1
Fig.16
1
2
Fig.17
1
Fig.18
1
Fig.19
(1)
(2)
Fig.20
12
Fig.21
15 m
Fig.22
4

15 m
Fig.23
15 m
Fig.24
15 m
Fig.25
15 m
Fig.26
Fig.27
Fig.28
5

6ENGLISH
ENGLISH (Original instructions)
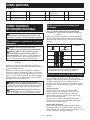
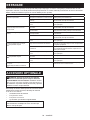
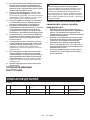
SPECIFICATIONS
Model: UN460WD
Blade length 460 mm
Strokes per minute 3,600 min-1
Cutting blade angle 135° (up 60°, down 75°)
Overall length 1,889 - 2,511 mm
Rated voltage D.C. 10.8 V - 12 V max
Net weight 2.8 - 3.0 kg
• Duetoourcontinuingprogramofresearchanddevelopment,thespecicationshereinaresubjecttochange
without notice.
• Specicationsmaydierfromcountrytocountry.
• Theweightmaydierdependingontheattachment(s),includingthebatterycartridge.Thelightestandheavi-
est combination, according to EPTA-Procedure 01/2014, are shown in the table.
Applicable battery cartridge and charger
Batterycartridge BL1016 / BL1021B / BL1041B
Charger DC10SA / DC10SB / DC10WC / DC10WD / DC18RE
• Someofthebatterycartridgesandchargerslistedabovemaynotbeavailabledependingonyourregionof
residence.
WARNING: Only use the battery cartridges and chargers listed above.Useofanyotherbatterycartridges
andchargersmaycauseinjuryand/orre.
Symbols
Thefollowingsshowthesymbolswhichmaybeused
fortheequipment.Besurethatyouunderstandtheir
meaning before use.
Read instruction manual.
Do not expose to moisture.
Wear a helmet, goggles and ear protection.
DANGER-Keephandsawayfromblade.
Beware of electrical lines, risk of electrical
shock.
Keep distance at least 15 m.
Ni-MH
Li-ion OnlyforEUcountries
Due to the presence of hazardous com-
ponents in the equipment, waste electrical
and electronic equipment, accumulators
andbatteriesmayhaveanegativeimpact
on the environment and human health.
Do not dispose of electrical and electronic
appliances or batteries with household
waste!
In accordance with the European Directive
on waste electrical and electronic equip-
ment and on accumulators and batteries
and waste accumulators and batteries,
as well as their adaptation to national law,
waste electrical equipment, batteries and
accumulatorsshouldbestoredseparately
and delivered to a separate collection point
for municipal waste, operating in accor-
dance with the regulations on environmen-
tal protection.
Thisisindicatedbythesymbolofthe
crossed-out wheeled bin placed on the
equipment.
Guaranteed sound power level according
to EU Outdoor Noise Directive.
Sound power level according to Australia
NSW Noise Control Regulation
Intended use
The tool is intended for trimming hedges.

7ENGLISH
Noise
ThetypicalA-weightednoiseleveldeterminedaccord-
ing to EN62841-4-2:
Sound pressure level (LpA) : 74 dB(A)
Uncertainty(K):3dB(A)
Thenoiselevelunderworkingmayexceed80dB(A).
NOTE: The declared noise emission value(s) has
been measured in accordance with a standard test
methodandmaybeusedforcomparingonetoolwith
another.
NOTE: The declared noise emission value(s)
mayalsobeusedinapreliminaryassessmentof
exposure.
WARNING: Wear ear protection.
WARNING: The noise emission during actual
use of the power tool can dier from the declared
value(s) depending on the ways in which the
tool is used especially what kind of workpiece is
processed.
WARNING: Be sure to identify safety mea-
sures to protect the operator that are based on an
estimation of exposure in the actual conditions of
use (taking account of all parts of the operating
cycle such as the times when the tool is switched
o and when it is running idle in addition to the
trigger time).
Vibration
Applicable standard : EN62841-4-2
Left hand (Front grip) Right hand (Rear grip)
ah (m/s2)UncertaintyK(m/s2) ah (m/s2)UncertaintyK(m/s2)
2.5 m/s2 or less 1.5 2.5 m/s2 or less 1.5
NOTE: The declared vibration total value(s) has been measured in accordance with a standard test method and
maybeusedforcomparingonetoolwithanother.
NOTE:Thedeclaredvibrationtotalvalue(s)mayalsobeusedinapreliminaryassessmentofexposure.
WARNING: The vibration emission during actual use of the power tool can dier from the declared
value(s) depending on the ways in which the tool is used especially what kind of workpiece is processed.
WARNING: Be sure to identify safety measures to protect the operator that are based on an estimation
of exposure in the actual conditions of use (taking account of all parts of the operating cycle such as the
times when the tool is switched o and when it is running idle in addition to the trigger time).
EC Declaration of Conformity
For European countries only
TheECdeclarationofconformityisincludedasAnnexA
to this instruction manual.
SAFETY WARNINGS
General power tool safety warnings
WARNING: Read all safety warnings, instruc-
tions, illustrations and specications provided
with this power tool. Failure to follow all instructions
listedbelowmayresultinelectricshock,reand/or
seriousinjury.
Save all warnings and instruc-
tions for future reference.
Theterm"powertool"inthewarningsreferstoyour
mains-operated(corded)powertoolorbattery-operated
(cordless) power tool.
Cordless Pole Hedge Trimmer
Safety Warnings
1. Keep all parts of the body away from the blade.
Do not remove cut material or hold material
to be cut when blades are moving. Blades
continuetomoveaftertheswitchisturnedo.A
moment of inattention while operating the hedge
trimmermayresultinseriouspersonalinjury.
2. Carry the hedge trimmer by the handle with the
blade stopped and taking care not to operate
any power switch.Propercarryingofthehedge
trimmer will decrease the risk of inadvertent start-
ingandresultantpersonalinjuryfromtheblades.
3. When transporting or storing the hedge trim-
mer, always t the blade cover. Proper handling
of the hedge trimmer will decrease the risk of
personalinjuryfromtheblades.
4. When clearing jammed material or servicing
the unit, make sure all power switches are o
and the battery pack is removed or discon-
nected. Unexpected actuation of the hedge trim-
merwhileclearingjammedmaterialorservicing
mayresultinseriouspersonalinjury.
5. Hold the hedge trimmer by insulated gripping
surfaces only, because the blade may contact
hidden wiring. Blades contacting a "live" wire
maymakeexposedmetalpartsofthehedgetrim-
mer "live" and could give the operator an electric
shock.

8ENGLISH
6. Keep all power cords and cables away from
cutting area.Powercordsorcablesmaybehid-
deninhedgesorbushesandcanbeaccidentally
cutbytheblade.
7. Do not use the hedge trimmer in bad weather
conditions, especially when there is a risk of
lightning. This decreases the risk of being struck
bylightning.
8. To reduce the risk of electrocution, never use
the pole hedge trimmer near any electrical
power lines. Contact with or use near power lines
maycauseseriousinjuryorelectricshockresult-
ing in death.
9. Always use two hands when operating the pole
hedge trimmer. Hold the pole hedge trimmer with
both hands to avoid loss of control.
10. Always use head protection when operating
the pole hedge trimmer overhead. Falling debris
canresultinseriouspersonalinjury.
Additional Safety Instructions
Preparation
1. THIS HEDGE TRIMMER CAN CAUSE SERIOUS
INJURIES. Read the instructions carefully
for the correct handling, preparation, main-
tenance, starting and stopping of the tool.
Become familiar with all controls and the
proper use of the tool.
2. Check the hedges and bushes for foreign
objects, such as wire fences or hidden wiring
before operating the tool.
3. The tool must not be used by children or
young persons under 18 years of age. Young
personsover16yearsofagemaybeexempted
fromthisrestrictioniftheyareundergoingtraining
under the supervision of an expert.
4. In the event of an emergency, switch o
the tool and remove the battery cartridge
immediately.
5. DANGER - Keep hands away from blade.
Contact with blade will result in serious personal
injury.
6. First-time users should have an experienced
user show them how to use the tool.
7. Before operation, examine the work area for
wire fences, stones, or other solid objects.
They can damage the blades.
8. Use the tool only if you are in good physical
condition.Ifyouaretired,yourattentionwillbe
reduced.Beespeciallycarefulattheendofa
workingday.Performallworkcalmlyandcarefully.
The user is responsible for all damages to third
parties.
9. Before starting work, check to make sure that
the tool is in good and safe working order.
Ensure guards are tted properly. The tool
must not be used unless fully assembled.
10. Avoid dangerous environment. Don't use the
tool in damp or wet locations or expose it to
rain. Water entering the tool will increase the
risk of electric shock.
Personal protective equipment
1. Work gloves of stout leather are part of the
basic equipment of the tool and must always
be worn when working with it. Also wear
sturdy shoes with anti-skid soles.
2. Wear ear protection such as ear mus to pre-
vent hearing loss.
3. Wear protective goggles, safety helmet and
protective gloves to protect yourself from
ying debris or falling objects.
4. When touching blades or adjusting the blade
angle, wear protective gloves. Blades can cut
barehandsseverely.
Operation
1. Always use two hands to operate the tool.
Using one hand could cause loss of control and
resultinseriouspersonalinjury.
2. While operating the tool, always ensure that
the operating position is safe and secure.
Overreaching with the tool, particularly from
a ladder, is extremely dangerous. Do not work
from anything wobbly or inrm.
3. Do not simultaneously wear multiple belt har-
nesses and/or shoulder harnesses when oper-
ating the tool.
4. During operation, keep bystanders or animals
at least 15 m away from the tool. Stop the tool
as soon as someone approaches.
5. If cutting tool strikes any object or the tool
starts making unusual noise or vibration,
switch o the tool and remove the battery car-
tridge immediately and allow the tool to stop.
And then take the following steps:
• inspect for damage
• check for, and tighten, any loose parts
• have any damaged parts replaced or
repaired with genuine spare parts.
6. Only use the tool for its intended purpose. Do
not use the tool for any other purpose.
7. Switch o the tool and remove the battery
cartridge before:
• cleaning or when clearing a blockage,
• checking, carrying out maintenance or
working on the tool,
• adjusting the working position of the
shear blades,
• leaving the tool unattended.
8. Ensure that the tool is correctly located in a
designated working position before starting
the tool.
9. Do not operate the tool with a damaged or
excessively worn shear blades.
10. Always be aware of your surroundings and
stay alert for possible hazards of which you
may not be aware due to the noise of the tool.
11. Be careful not to accidentally contact a metal
fence or other hard objects during operation.
Thebladewillbreakandmaycauseseriousinjury.
12. Avoid unintentional starting. Do not carry the
tool when the battery cartridge is installed
and with nger on the switch. Make sure that
the switch is o when installing the battery
cartridge.

9ENGLISH
13. Do not grasp the exposed cutting blades or
cutting edges when picking up or holding the
tool.
14. Do not force the tool.Itwilldothejobbetterand
withlesslikelihoodofariskofinjuryattheratefor
which it was designed.
15. Do not use the tool in the rain or in wet or
very damp conditions. The electric motor is not
waterproof.
16. Hold the tool rmly when using the tool.
17. Do not operate the tool at no-load
unnecessarily.
18. Before checking the shear blades, taking care
of faults, or removing foreign objects caught
in the shear blades, always switch o the tool
and remove the battery cartridge.
19. Never point the shear blades to yourself or
others.
20. If the blades stop moving due to the stuck of
foreign objects between the blades during
operation, switch o the tool and remove the
battery cartridge, and then remove the foreign
objects using tools such as pliers. Removing
theforeignobjectsbyhandmaycauseaninjury
forthereasonthatthebladesmaymoveinreac-
tiontoremovingtheforeignobjects.
Electrical and battery safety
1. Avoid dangerous environment. Don't use the
tool in dump or wet locations or expose it to
rain. Water entering the tool will increase the risk
of electric shock.
2. Do not dispose of the battery(ies) in a re.
Thecellmayexplode.Checkwithlocalcodesfor
possible special disposal instructions.
3. Do not open or mutilate the battery(ies).
Releasedelectrolyteiscorrosiveandmaycause
damagetotheeyesorskin.Itmaybetoxicif
swallowed.
4. Do not charge battery in rain, or in wet
locations.
5. Do not charge the battery outdoors.
6. Do not handle charger, including charger plug,
and charger terminals with wet hands.
Maintenance and storage
1. When the tool is stopped for servicing, inspec-
tion or storage, switch o the tool and remove
the battery cartridge, and make sure all mov-
ing parts have come to a stop. Allow the tool
to cool before making any inspections, adjust-
ment, etc.
2. Always allow the tool to cool down before
storing.
3. When not in use, attach the blade cover to the
tool and store the tool indoors in dry, and high
locked-up place, out of reach of children.
4. Maintain the tool with care. Keep cutting edge
sharp and clean for best performance and to
reduce the risk of injury. Follow instructions
for lubricating and changing accessories.
Keep grips dry, clean, and free from oil and
grease.
5. Check damaged parts. Before further use of
the tool, any part which is damaged should be
carefully checked to determine that it will oper-
ate properly and perform its intended function.
Check for alignment of moving parts, binding
of moving parts, breakage of parts, mounting
and any other condition that may aect its
operation. A guard or other part that is damaged
shouldbeproperlyrepairedorreplacedbyyour
authorized service center.
6. Use genuine spare parts only.
7. When moving the tool to another location,
including during work, always remove the
battery cartridge and put the blade cover on
the shear blades. Never carry or transport the
tool with the blades running. Never grasp the
blades with your hands.
8. Clean the tool and especially the shear blades
after use, and before putting the tool into stor-
age for extended periods. Lightly oil the shear
blades and put on the blade cover.
9. Do not dispose of the battery(ies) in a re. The
cell may explode. Check with local codes for
possible special disposal instructions.
10. Do not open or mutilate the battery(ies).
Released electrolyte is corrosive and may
cause damage to the eyes or skin. It may be
toxic if swallowed.
11. Do not charge battery in rain, or in wet
locations.
SAVE THESE INSTRUCTIONS.
WARNING: DO NOT let comfort or familiarity
with product (gained from repeated use) replace
strict adherence to safety rules for the subject
product. MISUSE or failure to follow the safety
rules stated in this instruction manual may cause
serious personal injury.
Important safety instructions for
battery cartridge
1.
Before using battery cartridge, read all instruc-
tions and cautionary markings on (1) battery
charger, (2) battery, and (3) product using battery.
2. Do not disassemble or tamper with the battery
cartridge.Itmayresultinare,excessiveheat,
or explosion.
3. If operating time has become excessively
shorter, stop operating immediately. It may
result in a risk of overheating, possible burns
and even an explosion.
4. If electrolyte gets into your eyes, rinse them
out with clear water and seek medical atten-
tion right away. It may result in loss of your
eyesight.
5. Do not short the battery cartridge:
(1) Do not touch the terminals with any con-
ductive material.
(2) Avoid storing battery cartridge in a con-
tainer with other metal objects such as
nails, coins, etc.
(3) Do not expose battery cartridge to water
or rain.

10 ENGLISH
A battery short can cause a large current
ow, overheating, possible burns and even a
breakdown.
6. Do not store and use the tool and battery car-
tridge in locations where the temperature may
reach or exceed 50 °C (122 °F).
7. Do not incinerate the battery cartridge even if
it is severely damaged or is completely worn
out. The battery cartridge can explode in a re.
8. Do not nail, cut, crush, throw, drop the battery
cartridge, or hit against a hard object to the
battery cartridge.Suchconductmayresultina
re,excessiveheat,orexplosion.
9. Do not use a damaged battery.
10. The contained lithium-ion batteries are subject
to the Dangerous Goods Legislation require-
ments.
Forcommercialtransportse.g.bythirdparties,
forwarding agents, special requirement on pack-
aging and labeling must be observed.
For preparation of the item being shipped, consult-
ing an expert for hazardous material is required.
Pleasealsoobservepossiblymoredetailed
national regulations.
Tapeormaskoopencontactsandpackupthe
batteryinsuchamannerthatitcannotmove
around in the packaging.
11. When disposing the battery cartridge, remove
it from the tool and dispose of it in a safe
place. Follow your local regulations relating to
disposal of battery.
12. Use the batteries only with the products
specied by Makita. Installing the batteries to
non-compliantproductsmayresultinare,exces-
siveheat,explosion,orleakofelectrolyte.
13. If the tool is not used for a long period of time,
the battery must be removed from the tool.
14. During and after use, the battery cartridge may
take on heat which can cause burns or low
temperature burns. Pay attention to the han-
dling of hot battery cartridges.
15. Do not touch the terminal of the tool imme-
diately after use as it may get hot enough to
cause burns.
16. Do not allow chips, dust, or soil stuck into the
terminals, holes, and grooves of the battery
cartridge.Itmayresultinpoorperformanceor
breakdownofthetoolorbatterycartridge.
17. Unless the tool supports the use near
high-voltage electrical power lines, do not use
the battery cartridge near high-voltage electri-
cal power lines.Itmayresultinamalfunctionor
breakdownofthetoolorbatterycartridge.
18. Keep the battery away from children.
SAVE THESE INSTRUCTIONS.
CAUTION: Only use genuine Makita batteries.
Use of non-genuine Makita batteries, or batteries that
havebeenaltered,mayresultinthebatterybursting
causingres,personalinjuryanddamage.Itwill
alsovoidtheMakitawarrantyfortheMakitatooland
charger.
Tips for maintaining maximum
battery life
1. Charge the battery cartridge before completely
discharged. Always stop tool operation and
charge the battery cartridge when you notice
less tool power.
2. Never recharge a fully charged battery car-
tridge. Overcharging shortens the battery
service life.
3. Charge the battery cartridge with room tem-
perature at 10 °C - 40 °C (50 °F - 104 °F). Let
a hot battery cartridge cool down before
charging it.
4. When not using the battery cartridge, remove
it from the tool or the charger.
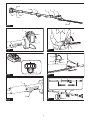
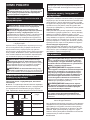
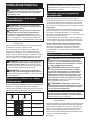
PARTS DESCRIPTION
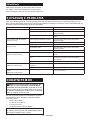
►Fig.1
1Head 2Angleadjustmentbutton 3Lock-lever 4Thumb nut
5Front grip 6Rear grip 7Batterycartridge 8Switch trigger
9Lock-obutton 10 Shear blades ----

11 ENGLISH
FUNCTIONAL
DESCRIPTION
CAUTION: Always be sure that the tool is
switched o and the battery cartridge is removed
before adjusting or checking function on the tool.
Installing or removing battery cartridge
CAUTION: Always switch o the tool before
installing or removing of the battery cartridge.
CAUTION: Hold the tool and the battery car-
tridge rmly when installing or removing battery
cartridge.Failuretoholdthetoolandthebattery
cartridgermlymaycausethemtoslipoyourhands
andresultindamagetothetoolandbatterycartridge
andapersonalinjury.
►Fig.2: 1. Red indicator 2. Button 3.Batterycartridge
Toremovethebatterycartridge,slideitfromthetool
while sliding the button on the front of the cartridge.
Toinstallthebatterycartridge,alignthetongueonthe
batterycartridgewiththegrooveinthehousingandslip
itintoplace.Insertitallthewayuntilitlocksinplace
withalittleclick.Ifyoucanseetheredindicatoras
showninthegure,itisnotlockedcompletely.
CAUTION: Always install the battery cartridge
fully until the red indicator cannot be seen. If not,
itmayaccidentallyfalloutofthetool,causinginjuryto
youorsomeonearoundyou.
CAUTION: Do not install the battery cartridge
forcibly.Ifthecartridgedoesnotslideineasily,itis
notbeinginsertedcorrectly.
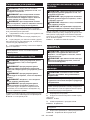
Indicating the remaining battery
capacity
Only for battery cartridges with the indicator
►Fig.3: 1. Indicator lamps 2. Check button
Pressthecheckbuttononthebatterycartridgetoindi-
catetheremainingbatterycapacity.Theindicatorlamps
light up for a few seconds.
Indicator lamps Remaining
capacity
Lighted O
75% to 100%
50% to 75%
25% to 50%
0% to 25%
NOTE: Depending on the conditions of use and the
ambienttemperature,theindicationmaydierslightly
fromtheactualcapacity.
Tool / battery protection system
Thetoolisequippedwithatool/batteryprotectionsys-
tem.Thissystemautomaticallycutsopowertothe
motortoextendtoolandbatterylife.Thetoolwillauto-
maticallystopduringoperationifthetoolorbatteryis
placed under one of the following conditions:
Overloaded:
The tool is operated in a manner that causes it to draw
anabnormallyhighcurrent.Inthissituation,turnthe
tooloandstoptheapplicationthatcausedthetoolto
become overloaded. Then turn the tool on to restart.
Ifthetooldoesnotstart,thebatteryisoverheated.Inthis
situation,letthebatterycoolbeforeturningthetoolonagain.
Low battery voltage:
Theremainingbatterycapacityistoolowandthetool
willnotoperate.Ifyouturnthetoolon,themotorruns
again but stops soon. In this situation, remove and
rechargethebattery.
Switch action
WARNING: Before installing the battery car-
tridge into the tool, always check to see that the
switch trigger actuates properly and returns to
the "OFF" position when released.
WARNING: For your safety, this tool is
equipped with the lock-o button which prevents
the tool from unintended starting. Never use the
tool if it starts when you pull the switch trigger
without pressing the lock-o button.Askyourlocal
Makita Service Center for repairs.
WARNING: Never disable the lock function or
tape down the lock-o button.
NOTICE: Do not pull the switch trigger forcibly
without pressing the lock-o button. The switch
maybreak.
►Fig.4: 1.Lock-obutton2. Switch trigger
Topreventtheswitchtriggerfrombeingaccidentally
pulled,alock-obuttonisprovided.
Tostartthetool,pressthelock-obuttonandpullthe
switch trigger. Release the switch trigger to stop. The
lock-obuttoncanbepressedfromeithertherightor
left side.
Adjusting the cutting angle
CAUTION: Always be sure that the tool is
switched o before folding or unfolding the head.
CAUTION: When folding the head for carrying
the tool or after using the tool, be sure to attach
the blade cover before folding the head.
CAUTION: When folding the head, be careful
not to pinch your ngers between the head and
the tool body.
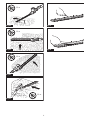
Theangleoftheheadcanbeadjustedin10steps.To
change the angle of the head, follow the steps below.
1. Holdtheheadandthetoolbodyasshowninthe
gure.
►Fig.5: 1. Head 2.Angleadjustmentbutton

12 ENGLISH
2. Adjusttheangleoftheheadwhileholdingdown
theangleadjustmentbutton,andthenreleasetheangle
adjustmentbutton.
3. Movetheheadslightlyuntilitislockedwithaclick.
NOTE:Makesurethattheheadissecurelylocked
before operating the tool.
Adjusting the pipe length
CAUTION: Always be sure that the tool is
switched o before adjusting the pipe length.
CAUTION: When adjusting the pipe length,
be sure to attach the blade cover before adjusting
the pipe length.
CAUTION: When adjusting the pipe length, be
careful not to pinch your ngers.
CAUTION: Make sure that the lock-lever is
locked securely.
CAUTION: When adjusting the pipe length,
lay the tool on its side.Ifyoustandthetoolupright,
theheadwillcomedownsuddenly,whichmaycause
aninjury.
Loosenthelock-lever,thenadjustthelengthofthepipe,
and then lock the lock-lever.
►Fig.6: 1. Lock-lever
Adjusting the front grip position
CAUTION: Always be sure that the tool is
switched o before adjusting the position of the
front grip.
CAUTION: When adjusting the position of the
front grip, be careful not to pinch your ngers.
CAUTION: Make sure that the thumb nut is
tightened securely.
CAUTION: Do not move the front grip beyond
the arrow mark.
Toadjustthepositionofthefrontgrip,loosenthethumb
nutbyturningitcounterclockwise,thenadjusttheposi-
tionofthefrontgrip,andthentightenthethumbnutby
turning it clockwise.
►Fig.7: 1. Thumb nut 2. Arrow mark
ASSEMBLY
CAUTION: Always be sure that the tool is
switched o and the battery cartridge is removed
before carrying out any work on the tool.
CAUTION: When replacing the shear blades,
always wear gloves so that your hands do not
directly contact the blades.
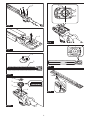
Installing or removing the shear blades
CAUTION: Attach the blade cover before
removing or installing the shear blades.
NOTICE: When replacing the shear blades, do
not wipe o grease from the gear and crank.
NOTE: Before installing or removing the shear
blades, unfold the head of the tool so that the head is
straighttothetoolbody.
1. Place the tool upside down.
2. Remove 4 screws with a screwdriver and remove
the shear blades.
►Fig.8: 1. Screw
3. Remove the crank from the shear blades.
►Fig.9: 1. Crank
NOTE:Thecrankmayremaininthetool.
4. Prepare the crank and new shear blades.
►Fig.10: 1. Crank 2. Shear blades
5. Remove the blade cover, and then attach it to the
new shear blades.
6.
Applyasmallamountofgreasetotheperipheryofthe
crank. Attach the washer, gear, and the crank to the pin in order.
►Fig.11: 1. Crank 2. Gear 3. Washer 4. Pin
7.
Adjustthecranksothatthe2smallholesonthecrank
arelineduponthealignmentlineasshowninthegure.
►Fig.12: 1. Alignment line 2. Small hole
8.
Slide the shear blades so that the hole on the guide
plate is positioned at the center of the rings of blades.
►Fig.13: 1. Guide plate
9. Insert the screw removed in step 2 into the hole on
the shear blades through the hole on the blade cover.
►Fig.14: 1. Hole
10. Attach the shear blades to the tool, and then
tighten 3 screws with the screwdriver.
►Fig.15: 1. Screw
11.
Remove the screw inserted into the hole on the shear
bladesinstep9,andthentightenittoxtheshearblades.
NOTICE: If the shear blades do not operate prop-
erly, the blades are not engaging the crank prop-
erly. Remove the blades and install them again.
NOTICE: If the parts other than the shear blades
such as the crank are worn out, ask Makita
Authorized Service Centers for parts replacement
or repairs.
Installing or removing the chip receiver
Optional accessory
CAUTION: When installing or removing the
chip receiver, always wear gloves so that your
hands do not directly contact the shear blades.
CAUTION: Attach the blade cover before
installing or removing the chip receiver.

13 ENGLISH
The chip receiver gathers discarded leaves and makes
clean-up afterward much easier. It can be installed on
either side of the tool.
1. Align the holes on the chip receiver with the nuts
on the shear blades.
►Fig.16: 1. Nut
2. Hook the claws of the chip receiver to the groove
on the shear blades.
►Fig.17: 1. Claw 2. Groove
3. Press the levers on the chip receiver, and then
hook the claws on the other side to the groove on the
shear blades.
►Fig.18: 1. Lever
To remove the chip receiver, press the levers to release
the claws.
►Fig.19: 1. Lever
NOTICE: Never try to remove the chip receiver
by an excessive force with its claws locked in the
grooves of the shear blades.
OPERATION
Operating the tool
WARNING: Do not use the tool near any
electrical power lines. Contacting with power lines
orusingthetoolnearpowerlinesmaycauseserious
injuryorelectricshockresultingindeath.
WARNING: Keep hands away from shear
blades.
WARNING: Be extremely careful to maintain
control of the tool at all times. Do not allow the
tool to be deected toward you or anyone in the
work vicinity. Failure to keep control of the tool
couldresultinseriousinjurytothebystanderandthe
operator.
CAUTION: Avoid operating the tool in very
hot weather as much as practicable. When operat-
ing the tool, be careful of your physical condition.
CAUTION: Be careful not to accidentally
contact a metal fence or other hard objects while
trimming.Theshearbladesmaybreakandcause
aninjury.
CAUTION: Be careful not to allow the shear
blades to contact the ground.Thetoolmayrecoil
andcauseaninjury.
CAUTION: Overreaching with a hedge trim-
mer, particularly from a ladder, is extremely
dangerous.Donotworkwhilestandingonanything
wobblyorinrm.
NOTICE: Do not attempt to cut branches thicker
than 10 mm in diameter with the tool. Cut branches
to 10 cm lower than the cutting height using branch
cutters before using the tool.
►Fig.20: (1) Cutting height (2) 10 cm
NOTICE: Do not cut down dead trees or similar
hard objects.Doingsomaydamagethetool.
NOTICE: Do not trim the grass or weeds while
using the shear blades.Theshearbladesmay
become tangled in the grass or weeds.
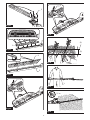
Holdthetoolwithbothhandsbyholdingthefrontgrip
and the rear grip.
►Fig.21: 1. Front grip 2. Rear grip
Pulltheswitchtriggerwhilepressingthelock-obutton,
and then move the tool forward.
►Fig.22
For basic operation, tilt the shear blades toward the
trimmingdirectionandmoveitcalmlyandslowlyatthe
speed rate of 3 to 4 seconds per meter.
►Fig.23
Tocutahedgesideevenly,cutfromthebottomtotop.
►Fig.24
When trimming to make a round shape (trimming box-
wood or rhododendron, etc.), trim from the root to the
topforabeautifulnish.
►Fig.25
If the chip receiver is attached to the shear blades, it gathers
discarded leaves and makes clean-up afterward much easier.
►Fig.26
MAINTENANCE
CAUTION:
Always be sure that the tool is
switched o and the battery cartridge is removed before
attempting to perform inspection or maintenance.
CAUTION:
When inspecting or maintaining the
tool, always put the tool down.Assemblingoradjusting
thetoolinanuprightpositionmayresultinseriousinjury.
To maintain product SAFETY and RELIABILITY,
repairs,anyothermaintenanceoradjustmentshould
beperformedbyMakitaAuthorizedorFactoryService
Centers,alwaysusingMakitareplacementparts.
Cleaning the tool
Cleanthetoolbywipingodustwithadryclothorone
dippedinsoapywaterandwrungout.
NOTICE: Never use gasoline, benzine, thinner,
alcohol or the like. Discoloration, deformation or
cracks may result.
Shear blade maintenance
Before the operation or once per hour during operation,
applylow-viscosityoil(machineoil,orspray-typelubri-
cating oil) to the shear blades.
►Fig.27
After operation, remove dust from both sides of the shear blades
withawiredbrush,wipeitowithaclothandthenapplylow-viscos-
ityoil(machineoil,orspray-typelubricatingoil)totheshearblades.
►Fig.28

14 ENGLISH
NOTICE: Do not wash the shear blades in water.
Doingsomaycauserustordamagetothetool.
NOTICE: Dirt and corrosion cause excessive
blade friction and shorten the operating time per
battery charge.
Storage
Attach the blade cover to the shear blades so that the
blades are not exposed. Store the tool out of the reach
of children. Store the tool in a place not exposed to
moisture or rain.
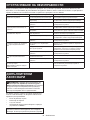
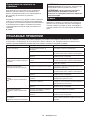
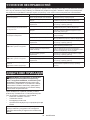
TROUBLESHOOTING
Beforeaskingforrepairs,conductyourowninspectionrst.Ifyoundaproblemthatisnotexplainedinthemanual,
donotattempttodismantlethetool.Instead,askMakitaAuthorizedServiceCenters,alwaysusingMakitareplace-
ment parts for repairs.
State of abnormality Probable cause (malfunction) Remedy
Motor does not run. Batterycartridgeisnotinstalled. Installthebatterycartridge.
Batteryproblem(undervoltage) Rechargethebattery.Ifrechargingisnoteective,
replacebattery.
Thedrivesystemdoesnotworkcorrectly.
Askyourlocalauthorizedservicecenterforrepair.
Motor stops running after a little use,
or motor does not run. Battery'schargelevelislow. Rechargethebattery.Ifrechargingisnoteective,
replacebattery.
Overheating. Stop using of tool to allow it to cool down.
Tool does not reach maximum RPM. Batteryisinstalledimproperly. Installthebatterycartridgeasdescribedinthis
manual.
Batterypowerisdropping. Rechargethebattery.Ifrechargingisnoteective,
replacebattery.
Thedrivesystemdoesnotworkcorrectly.
Askyourlocalauthorizedservicecenterforrepair.
Shear blades do not move:
stopthemachineimmediately! Inappropriate angle of shear blades. Makesurethattheheadisproperlyxedinthe
operational angle.
Foreignobjectsarecaughtbetweenthe
shear blades. Switchothetoolandremovethebatterycartridge,
andthenremovetheforeignobjectsusingtools
such as pliers.
Thedrivesystemdoesnotwork
correctly. Askyourlocalauthorizedservicecenterforrepair.
Abnormal vibration:
stopthemachineimmediately! Shear blades are broken, bent or worn. Replace the shear blades.
Thedrivesystemdoesnotworkcorrectly.
Askyourlocalauthorizedservicecenterforrepair.
Shear blades and motor cannot stop:
Removethebatteryimmediately! Electric malfunction. Removethebatteryandaskyourlocalauthorized
service center for repair.
OPTIONAL ACCESSORIES
CAUTION: These accessories or attachments
are recommended for use with your Makita tool
specied in this manual.Theuseofanyother
accessories or attachments might present a risk of
injurytopersons.Onlyuseaccessoryorattachment
for its stated purpose.
Ifyouneedanyassistanceformoredetailsregard-
ingtheseaccessories,askyourlocalMakitaService
Center.
• Shearbladeassembly
• Chip receiver
• Grease vessel
• Makitagenuinebatteryandcharger
NOTE:Someitemsinthelistmaybeincludedinthe
toolpackageasstandardaccessories.Theymay
dierfromcountrytocountry.

15 SLOVENŠČINA
SLOVENŠČINA (Originalna navodila)
TEHNIČNI PODATKI
Model: UN460WD
Dolžinarezila 460 mm
Hodi na minuto 3.600 min-1
Kot rezila 135° (navzgor 60°, navzdol 75°)
Celotnadolžina 1.889 - 2.511 mm
Nazivna napetost D.C. 10,8 V – 12 V
Netoteža 2,8 – 3,0 kg
• Kernenehnoopravljamoraziskaveinrazvijamosvojeizdelke,selahkotehničnipodatkivtemdokumentu
spremenijobrezobvestila.
• Tehničnipodatkiselahkorazlikujejooddržavedodržave.
• Težaselahkorazlikujegledenapriključke,vključnozakumulatorskobaterijo.Najlažjainnajtežjakombinacijav
skladu s postopkom EPTA 01/2014 sta prikazani v preglednici.
Uporabna akumulatorska baterija in polnilnik
Baterijskivložek BL1016 / BL1021B / BL1041B
Polnilnik DC10SA / DC10SB / DC10WC / DC10WD / DC18RE
• Nekaterezgorajnavedeneakumulatorskebaterijeinpolnilnikimordavvašidržaviprebivališčanisonavoljo.
OPOZORILO: Uporabljajte le zgoraj navedene akumulatorske baterije in polnilnike. Uporaba drugih
akumulatorskihbaterijinpolnilnikovlahkopovzročitelesnepoškodbein/alipožar.
Simboli
Naslednjisimboliselahkouporabljajovpovezavis
strojem.Preduporaboizdelkaseobveznoseznanitez
njihovimpomenom.
Preberite navodila za uporabo.
Neizpostavljajtevlagi.
Nositečelado,očalainzaščitozasluh.
NEVARNOST–zrokaminesegajtev
območjerezila.
Pazitenaelektričnevodnike,nevarnost
električnegaudara.
Ohranjajterazdaljonajmanj15m.
Ni-MH
Li-ion SamozadržaveEU
Zaradi prisotnosti nevarnih komponent v
opremiimajolahkouporabljenaelektrična
inelektronskaoprema,akumulatorjiin
baterijenegativenvplivnaokoljeinzdravje
ljudi.
Električnihinelektronskihnapravalibaterij
neodlagajtemedgospodinjskeodpadke!
Skladno z evropsko Direktivo o odpadni
električniinelektronskiopremi,oakumula-
torjihinbaterijahterodpadnihakumulator-
jihinbaterijahternjenouporabovdržavnih
zakonihmoraterabljenoelektričnoin
elektronskoopremo,baterijeinakumula-
torjezbiratiločenoterdostavitinaposebno
zbiralno mesto za komunalne odpadke, ki
delujeskladnospredpisizazaščitookolja.
Tonakazujesimbolprečrtanegasmetnjaka
skolesi,kijenatisnjennaopremi.
Zajamčenaravenzvočnemočivskladuz
direktivo EU o hrupu na prostem.
Ravenzvočnemočivskladuzavstralskim
predpisom o nadzoru hrupa NSW
Predvidena uporaba
Orodjejenamenjenorezanjuživemeje.

16 SLOVENŠČINA
Hrup
ObičajnaA-ovrednotenaravenhrupavskladuz
EN62841-4-2:
Ravenzvočnegatlaka(LpA): 74 dB (A)
Odstopanje(K):3dB(A)
Nivohrupameddelomlahkopreseže80dB(A).
OPOMBA:Navedenevrednostioddajanjahrupaso
bileizmerjenevskladusstandardnimimetodami
testiranjainselahkouporabljajozaprimerjavoorodij.
OPOMBA:Navedenevrednostioddajanjahrupa
selahkouporabljajotudipripredhodnioceni
izpostavljenosti.
OPOZORILO: Uporabljajte zaščito za sluh.
OPOZORILO: Oddajanje hrupa med dejansko
uporabo električnega orodja se lahko razlikuje od
navedenih vrednosti, odvisno od načina uporabe
orodja in predvsem vrste obdelovanca.
OPOZORILO: Upravljavec mora za lastno
zaščito poznati varnostne ukrepe, ki temeljijo
na oceni izpostavljenosti v dejanskih pogojih
uporabe (poleg časa proženja je treba upoštevati
celoten delovni cikel, vključno s časom, ko je
orodje izklopljeno, in časom, ko deluje v prostem
teku).
Vibracije
Veljavnistandard:EN62841-4-2
Levaroka(sprednjiročaj) Desnaroka(zadnjedržalo)
ah (m/s2)OdstopanjeK(m/s2) ah (m/s2)OdstopanjeK(m/s2)
2,5 m/s2alimanj 1,5 2,5 m/s2alimanj 1,5
OPOMBA:Navedeneskupnevrednostioddajanjavibracijsobileizmerjenevskladusstandardnimimetodami
testiranjainselahkouporabljajozaprimerjavoorodij.
OPOMBA:Navedeneskupnevrednostioddajanjavibracijselahkouporabljajotudipripredhodnioceni
izpostavljenosti.
OPOZORILO: Oddajanje vibracij med dejansko uporabo električnega orodja se lahko razlikuje od
navedenih vrednosti, odvisno od načina uporabe orodja in predvsem vrste obdelovanca.
OPOZORILO: Upravljavec mora za lastno zaščito poznati varnostne ukrepe, ki temeljijo na oceni izpo-
stavljenosti v dejanskih pogojih uporabe (poleg časa proženja je treba upoštevati celoten delovni cikel,
vključno s časom, ko je orodje izklopljeno, in časom, ko deluje v prostem teku).
Izjava o skladnosti ES
Samo za evropske države
IzjavaESoskladnostijevključenavdodatkuA,kije
priložentemnavodilomzauporabo.
VARNOSTNA
OPOZORILA
Splošna varnostna opozorila za
električno orodje
OPOZORILO: Preberite vsa varnostna opo-
zorila in navodila s slikami in tehničnimi podatki,
ki so dobavljeni skupaj z električnim orodjem.
Obneupoštevanjuspodajnavedenihnavodilobstaja
nevarnostelektričnegaudara,požarain/alihudih
telesnihpoškodb.
Shranite vsa opozorila in navo-
dila za poznejšo uporabo.
Izraz„električnoorodje“vopozorilihsenanašanavaše
električnoorodje(skablom)alibaterijskoelektrično
orodje(brezkabla).
Varnostna opozorila za brezžične
škarje za živo mejo na drogu
1. Ne približujte delov telesa rezilu. Ne odstra-
njujte odrezanega materiala in ne držite
materiala, ki ga boste rezali, kadar se rezila
premikajo.Koizključitestikalo,serezilašenekaj
časapremikajo.Trenuteknepazljivostipridelu
sškarjamizaživomejolahkoprivededohudih
telesnihpoškodb.
2. Škarje za živo mejo prenašajte z ročajem in
ustavljenim rezilom, pri tem pa pazite, da ne
pritisnete nobenega stikala za vklop/izklop.
Spravilnimprenašanjemškarijzaživomejo
zmanjšatetveganjezanenamerenzagon,kilahko
povzročitelesnepoškodbezaradirezil.
3. Kadar prenašate ali shranjujete škarje za živo
mejo, vedno namestite pokrov rezila. Ustrezno
rokovanjesškarjamizaživomejobozmanjšalo
tveganjezatelesnepoškodbezaradirezil.
4. Pri odstranjevanju zagozdenega materiala
ali servisiranju enote poskrbite za to, da so
vsa stikala za vklop/izklop izključena in da je
akumulatorska baterija odstranjena ali odklo-
pljena.Nepričakovanzagonškarijzaživomejo
medodstranjevanjemzagozdenegamateriala
aliservisiranjemlahkopovzročihudetelesne
poškodbe.

17 SLOVENŠČINA
5. Škarje za živo mejo držite samo na izoliranih
držalnih površinah, saj lahko rezilo prereže
skrito električno napeljavo. Ob stiku rezila z
vodnikipodnapetostjolahkodobijonapetostvsi
neizoliranikovinskideliškarijzaživomejo,zaradi
česarlahkouporabnikutrpielektričniudar.
6. Ne približujte napajalnih kablov območju reza-
nja.Napajalnikablisolahkoskritivživimejiali
grmovjuinjihlahkorezilonenamernoprereže.
7. Škarij za živo mejo ne uporabljajte ob slabem
vremenu, še posebej, kadar bliska. S tem
zmanjšatetveganje,davvasudaristrela.
8. Da zmanjšate tveganje za smrt zaradi električ-
nega udara, škarij za živo mejo na drogu nikoli
ne uporabljajte v bližini električnih vodov. Stik
zelektričnimvodomaliuporabavnjegovibližini
lahkopovzročihudopoškodboalielektričniudars
smrtnim izidom.
9. Škarje za živo mejo na drogu vedno držite z
obema rokama.Škarjezaživomejonadrogu
držitezobemarokama,daneizgubitenadzora.
10. Ko škarje za živo mejo na drogu uporabljate
nad glavo, vedno nosite zaščito za glavo.
Padajočiostankilahkopovzročijohudetelesne
poškodbe.
Dodatna varnostna navodila
Priprava
1. TE ŠKARJE ZA ŽIVO MEJO LAHKO
POVZROČIJO RESNE POŠKODBE. Pozorno
preberite navodila za pravilno ravnanje z orod-
jem ter njegovo pripravo, vzdrževanje, zaga-
njanje in zaustavljanje. Seznanite se z vsemi
funkcijami za upravljanje in pravilno uporabo
orodja.
2. Pred uporabo orodja preverite, da v živi meji
in grmičevju ni tujkov, kot so žične ograje ali
skrite žice.
3. Rezalnika za živo mejo ne smejo uporabljati
otroci ali mlajši od 18 let. Mladoletne osebe,
starejšeod16let,solahkoizvzeteizteomejitve,
česeusposabljajopodnadzoromstrokovnjaka.
4. V nujnem primeru takoj izklopite orodje in
odstranite akumulatorsko baterijo.
5. NEVARNOST - Ne približujte rok rezilu. Stik z
rezilompovzročihudetelesnepoškodbe.
6. Uporabnike, ki prvič uporabljajo orodje, naj
izkušeni uporabnik pouči o uporabi orodja.
7. Pred uporabo se prepričajte, da v delovnem
območju ni žičnih ograj, kamnov ali drugih
trdih predmetov. Ti lahko poškodujejo rezila.
8. Z rezalnikom za živo mejo delajte samo, če ste
v dobri zični kondiciji.Česteutrujeni,bovaša
zbranostzmanjšana.Šeposebejboditepozorni
obkoncudelovnegadne.Vsadelaopravljajte
mirnoinzbrano.Uporabnikjeodgovorenzavse
poškodbe,povzročenetretjimosebam.
9. Pred začetkom dela se prepričajte, da je
rezalnik v dobrem in varnem stanju za delo.
Zagotovite, da so ščitniki pravilno nameščeni.
Rezalnika za živo mejo ni dovoljeno uporab-
ljati, če ni v celoti sestavljen.
10. Izogibajte se nevarnemu okolju. Orodja ne
uporabljajte na vlažnih ali mokrih mestih in
ga ne izpostavljajte dežju. Voda, ki prodre v
orodje, bo povečala nevarnost električnega
udara.
Osebna zaščitna oprema
1. Delovne rokavice iz robustnega usnja so del
osnovne opreme rezalnika za živo mejo in jih
je pri delu treba vedno nositi. Prav tako nosite
močne čevlje z nedrsečim podplatom.
2. Uporabljajte zaščito za sluh, kot so naušniki,
da preprečite izgubo sluha.
3. Uporabljajte zaščitna očala, zaščitno čelado in
zaščitne rokavice, da se zaščitite pred letečimi
delci ali padajočimi predmeti.
4. Ob dotikanju rezil ali prilagajanju rezalnega
kota uporabljajte zaščitne rokavice. Rezila
lahkohudoporežejogoledlani.
Uporaba
1. Orodje vedno držite in uporabljajte z obema
rokama.Čegauporabljatesamozenoroko,
lahkoizgubitenadzorinpovzročitehudetelesne
poškodbe.
2. Med uporabo orodja vedno poskrbite za to,
da ste v varnem položaju. Previsoko seganje
z orodjem, še posebej z lestve, je izjemno
nevarno. Ne delajte tako, da stojite na majavih
ali nestabilnih podlagah.
3. Med uporabo orodja ne nosite hkrati več var-
nostnih pasov in/ali naramnih pasov hkrati.
4. Med uporabo naj bodo prisotne osebe ali živali
vsaj 15 m oddaljeni od orodja. Če se kdo prib-
liža, takoj ustavite orodje.
5. Če rezalno orodje zadane predmet ali se začne
nenavadno oglašati ali vibrirati, ga takoj izklo-
pite in odstranite akumulatorsko baterijo ter
pustite, da se zaustavi. Nato izvedite naslednje
ukrepe:
• preverite, ali je prišlo do poškodbe,
• preverite in pritrdite vse razrahljane dele,
• dajte poškodovane dele v popravilo ali jih
zamenjajte z originalnimi nadomestnimi
deli.
6. Orodje uporabljajte samo za njegov predvi-
deni namen. Orodja ne uporabljajte v druge
namene.
7. Izklopite orodje in odstranite akumulatorsko
baterijo pred:
• čiščenjem ali odstranjevanjem zagozde-
nih delov,
• preverjanjem, vzdrževanjem ali servisira-
njem orodja,
• prilagajanjem delovnega položaja rezil,
• tem, da pustite orodje brez nadzora.
8. Preden zaženete orodje, poskrbite za to, da je
pravilno postavljeno v predvidenem delovnem
položaju.
9. Če so rezila poškodovana ali prekomerno
izrabljena, orodja ne uporabljajte.
10. Vedno bodite pozorni na okolico in morebitne
nevarnosti, ki se jih morda ne zavedate zaradi
hrupa orodja.

18 SLOVENŠČINA
11. Pazite, da se med uporabo orodja nenamerno
ne dotaknete kovinske ograje ali drugih trdih
predmetov.Rezilosebozlomiloinlahkopovzroči
hudetelesnepoškodbe.
12. Preprečite nenameren zagon. Orodja ne prena-
šajte, če je vstavljena akumulatorska baterija
in imate prst na stikalu. Pri vstavljanju akumu-
latorske baterije poskrbite za to, da je stikalo
izključeno.
13. Kadar dvigujete ali držite orodje, ne prijemajte
izpostavljenih rezil ali rezalnih robov.
14. Ne uporabljajte čezmerne sile. Tako bo delo
boljeopravljenoinmanjšebotveganjeza
poškodbenaravnidelovanja,zakaterojeorodje
zasnovano.
15. Orodja ne uporabljajte v dežju ali v zelo vlažnih
pogojih.Električnimotornivodotesen.
16. Med uporabo trdno držite orodje.
17. Ne uporabljajte orodja brez obremenitve po
nepotrebnem.
18. Preden pregledate rezila, odpravite napake ali
odstranite tujke, ki so se ujeli v rezila, vedno
izklopite orodje in odstranite akumulatorsko
baterijo.
19. Rezil nikoli ne usmerite proti sebi ali drugim
osebam.
20. Če se med delovanjem rezila nehajo premikati,
ker so se med njih zataknili tujki, izklopite
orodje, odstranite akumulatorsko baterijo in
nato odstranite tujke z orodjem, kot so klešče.
Odstranjevanjetujkovzrokamilahkopovzroči
poškodbe,sajsezaradiodstranjevanjatujkov
lahkopremaknejorezila.
Električna zaščita in zaščita akumulatorja
1. Izogibajte se nevarnemu okolju. Orodja ne
uporabljajte na vlažnih ali mokrih mestih in ga
ne izpostavljajte dežju.Voda,kiprodrevorodje,
bopovečalanevarnostelektričnegaudara.
2. Akumulatorja/-ev ni dovoljeno metati v
ogenj. Celica lahko eksplodira. Preverite lokalne
predpise glede morebitnih posebnih navodil za
odstranjevanje.
3. Ne odpirajte ali spreminjajte akumulatorja/-ev.
Sproščenielektrolitjekoroziveninlahkopovzroči
poškodbeočialikože.Prizaužitjujelahko
strupen.
4.
Akumulatorja ne polnite v dežju ali na mokrih mestih.
5. Akumulatorja ne polnite na prostem.
6. Ne dotikajte se polnilnika, vtiča polnilnika in
priključkov polnilnika z mokrimi rokami.
Vzdrževanje in shranjevanje
1. Ko orodje zaustavite za servisiranje, pregled
ali shranjevanje, ga izklopite in odstranite aku-
mulatorsko baterijo ter se prepričajte, da so se
vsi premikajoči se deli zaustavili. Pred pregle-
dovanjem, prilagajanjem itd. pustite orodje, da
se ohladi.
2. Pred shranjevanjem vedno počakajte, da se
orodje ohladi.
3. Kadar orodja ne uporabljate, namestite pokrov
rezila na orodje in ga shranite v notranjem,
suhem prostoru na visokem mestu ali v zakle-
njenem vsebniku zunaj dosega otrok.
4. Orodje redno vzdržujte. Za najboljše delovanje
in zmanjšanje tveganja za poškodbe naj bodo
robovi rezila nabrušeni in čisti. Sledite navodi-
lom za mazanje in zamenjavo dodatkov. Ročaji
morajo biti suhi, čisti ter brez olja in masti.
5. Preverite poškodovane dele. Pred nadaljnjo
uporabo orodja je treba vsak poškodovan del
skrbno pregledati, da ugotovite, ali bo pravilno
deloval in služil svojemu namenu. Preglejte
poravnavo gibljivih delov, povezave gibljivih
delov, zlome delov, montažo in druga stanja,
ki lahko vplivajo na delovanje.Ščitnikalidrug
poškodovanidelmoraustreznopopravitializame-
njatipooblaščeniservisnicenter.
6. Uporabljajte samo originalne rezervne dele.
7. Kadar prenašate orodje na drugo lokacijo, tudi
med delom, vedno odstranite akumulatorsko
baterijo in namestite pokrov rezil. Nikoli ne
prenašajte ali prevažajte orodja, če se rezila
premikajo. Rezil nikoli ne prijemajte z rokami.
8. Po uporabi in pred shranjevanjem orodja za
dlje časa očistite orodje, še posebej rezila.
Rahlo naoljite rezila in namestite pokrov rezila.
9. Akumulatorja/-ev ni dovoljeno metati v ogenj.
Celica lahko eksplodira. Preverite lokalne
predpise glede morebitnih posebnih navodil za
odstranjevanje.
10. Ne odpirajte ali spreminjajte akumulatorja/-
-ev. Sproščeni elektrolit je koroziven in lahko
povzroči poškodbe oči ali kože. Pri zaužitju je
lahko strupen.
11. Akumulatorja ne polnite v dežju ali na mokrih
mestih.
SHRANITE TA NAVODILA.
OPOZORILO: NE dovolite, da bi zaradi udob-
nejšega dela ali znanja o uporabi izdelka (prido-
bljenega z večkratno uporabo) opustili strogo
upoštevanje varnostnih zahtev v okviru pravilne
uporabe orodja. ZLORABA ali neupoštevanje var-
nostnih zahtev v teh navodilih za uporabo lahko
povzroči resne telesne poškodbe.
Pomembna varnostna navodila za
akumulatorsko baterijo
1. Pred uporabo baterijskega vložka preberite
vsa navodila in opozorilne oznake na (1) pol-
nilniku akumulatorja, (2) akumulatorju in (3)
izdelku, ki uporablja akumulator.
2. Ne razstavljajte ali spreminjajte akumulatorske
baterije.Stemlahkopovzročitepožar,preko-
mernovročinoalieksplozijo.
3. Če se je čas delovanja občutno skrajšal, takoj
prenehajte uporabljati orodje. V nasprotnem
primeru lahko pride do pregretja, morebitnih
opeklin in celo eksplozije.
4. Če pride elektrolit v stik z očmi, jih sperite s
čisto vodo in takoj poiščite zdravniško pomoč.
Posledica je lahko izguba vida.

19 SLOVENŠČINA
5. Ne povzročite kratkega stika baterijskega
vložka:
(1) Ne dotikajte se priključkov s kakršnim
koli prevodnim materialom.
(2) Izogibajte se shranjevanju baterijskega
vložka v vsebniku z drugimi kovinskimi
predmeti kot so žeblji, kovanci itn.
(3) Ne izpostavljajte baterijskega vložka vodi
ali dežju.
Kratek stik akumulatorja lahko povzroči velik
električni tok, pregrevanje, morebitne opekline
in celo okvaro.
6. Ne shranjujte in uporabljajte orodja in akumu-
latorske baterije na mestih, kjer lahko tempera-
tura doseže ali preseže 50 °C (122 °F).
7. Ne sežigajte baterijskega vložka, tudi če je
hudo poškodovan ali v celoti izpraznjen.
Baterijski vložek lahko v ognju eksplodira.
8. Ne pribijajte, režite, drobite, mečite, spuščajte
akumulatorske baterije oziroma ne udarjajte
z akumulatorsko baterijo po trdem predmetu.
Takšnoravnanjelahkopovzročipožar,preko-
mernovročinoalieksplozijo.
9. Ne uporabljajte poškodovanih akumulatorjev.
10. Priložene litij-ionske baterije ustrezajo zahte-
vam zakonodaje v zvezi z nevarnim blagom.
Zakomercialneprevoze,npr.tiste,kijihopravljajo
tretjestrankeincarinskiposredniki,jetrebaupo-
števatiposebnezahtevevzvezizembalažoin
označevanjem.
Med postopkom priprave na odpremo izdelka se
jetrebaposvetovatisstrokovnjakomzanevarne
snovi.Pritemupoštevajtetudipodrobnejšenacio-
nalne predpise.
Odprtestikeoblepitezlepilnimtrakomalijihdru-
gačezaščitite,baterijopazapakirajtetako,dasev
embalažinemorepremikati.
11. Ko odstranjujete akumulatorsko baterijo, jo
vzemite iz orodja in varno zavrzite. Upoštevajte
lokalne uredbe glede odlaganja baterije.
12. Baterije uporabljajte le z izdelki, ki jih določi
Makita.Čenamestitebaterijevneskladneizdelke,
lahkopridedopožara,pregrevanja,eksplozijeali
puščanjaelektrolita.
13. Če orodja dlje časa ne uporabljate, morate iz
njega odstraniti baterijo.
14. Med uporabo in po uporabi lahko akumu-
latorska baterija postane vroča in povzroči
opekline. Z vročimi akumulatorskimi baterijami
ravnajte pazljivo.
15. Ne dotikajte se priključka orodja takoj po upo-
rabi, ker se lahko dovolj segreje, da povzroči
opekline.
16. Ne dovolite, da bi se v priključke, odprtine in
utore akumulatorske baterije zlepili ostružki,
prah ali zemlja.Umazanijalahkopovzročislabše
delovanjealiokvaroorodjaoziromaakumulator-
skebaterije.
17. Razen če orodje podpira uporabo v bližini
visokonapetostnih električnih vodov, akumula-
torske baterije ne uporabljajte v bližini visoko-
napetostnih električnih vodov.Takšnauporaba
lahkopovzročimotnjevdelovanjualiokvaro
orodjaoziromaakumulatorskebaterije.
18. Baterijo hranite izven dosega otrok.
SHRANITE TA NAVODILA.
POZOR: Uporabljajte le originalne baterije
Makita.ČeuporabljateneoriginalnebaterijeMakita
alibaterije,kisobilespremenjene,lahkopridedo
eksplozijebaterijeinposledičnodopožara,telesnih
poškodbalimaterialneškode.Stakšnouporabo
bostetudirazveljaviligarancijoMakitazaorodjein
polnilnik Makita.
Nasveti za ohranjanje največje
zmogljivosti akumulatorja
1. Napolnite baterijski vložek, preden se v celoti
izprazni. Ko opazite, da ima orodje manjšo
moč, vedno ustavite delovanje orodja in napol-
nite baterijski vložek.
2. Nikoli znova ne polnite popolnoma napol-
njenega baterijskega vložka. Prenapolnjenje
skrajša življenjsko dobo akumulatorja.
3. Baterijski vložek s sobno temperaturo pol-
nite pri temperaturi okolja od 10 °C do 40 °C.
Počakajte, da se vroč baterijski vložek pred
polnjenjem ohladi.
4. Ko akumulatorske baterije ne uporabljate, jo
odstranite iz orodja ali polnilnika.
OPIS DELOV
►Sl.1
1Glava 2Gumbzaprilagajanje
kota 3Zaklepnaročica 4Krilata matica
5Sprednjiročaj 6Zadnjiročaj 7Akumulatorskabaterija 8Sprožilec
9Sprostilni gumb 10 Rezila ----

20 SLOVENŠČINA
OPIS DELOVANJA
POZOR: Pred nastavljanjem ali preizkusom
delovanja orodja se prepričajte, ali je orodje
izključeno in ali je akumulatorska baterija
odstranjena.
Nameščanje ali odstranjevanje
akumulatorske baterije
POZOR: Vedno izklopite orodje, preden name-
stite ali odstranite akumulatorsko baterijo.
POZOR: Kadar nameščate ali odstranjujete
akumulatorsko baterijo, trdno držite orodje in
akumulatorsko baterijo.Čeorodjainakumulatorske
baterijenedržitetrdno,selahkozgodi,davamzdr-
snetaizrok,posledicapajelahkopoškodbaorodjain
akumulatorskebaterijetertelesnapoškodba.
►Sl.2: 1.Rdečiindikator2. Gumb 3.Baterijskivložek
Čeželiteodstranitiakumulatorskobaterijo,jopotisniteiz
orodja,pritempapomikajtegumbnasprednjistranivložka.
Akumulatorskobaterijovstavitetako,daporavnate
jezičeknabaterijizutoromnaohišjuinjopotisnetev
ležišče.Potisnitejodokonca,dasezaskoči.Čevidite
rdečiindikator,kotjeprikazanonasliki,seakumulator-
skabaterijaniustreznozaskočila.
POZOR:
Vedno namestite akumulatorsko bate-
rijo tako, da rdeči indikator ni več viden.Četega
neupoštevate,lahkobaterijanepričakovanopadeiz
orodjainpoškodujevasaliosebevneposrednibližini.
POZOR: Ne nameščajte akumulatorske bate-
rije s silo.Česeakumulatorskabaterijanezaskoči
zlahka,nipravilnovstavljena.
Prikazuje preostalo raven
napolnjenosti akumulatorja
Samo za akumulatorske baterije z indikatorjem
►Sl.3: 1.Indikatorskelučke2.Gumbzapreverjanje
Pritisnitegumbzapreverjanjenabaterijskemvložku,
dapreveriteravennapolnjenostiakumulatorja.
Indikatorskelučkenakratkozasvetijo.
Indikatorske lučke Prikaz pre-
ostale ravni
napolnjenosti
Sveti Ne sveti
od 75% do 100%
od 50% do 75%
od 25% do 50%
od 0% do 25%
OPOMBA:Odvisnoodpogojevuporabeinokoljske
temperatureseoznačbalahkonekolikorazlikujeod
dejanskenapolnjenosti.
Zaščitni sistem orodja/akumulatorja
Orodjejeopremljenozzaščitnimsistemomzaorodje/akumulator.
Sistemsamodejnoprekinenapajanjeorodja,dapodaljšaživljenjsko
doboorodjainakumulatorja.Orodjesesamodejnozaustavimed
delovanjem,čeorodjealiakumulatordelujetapodnaslednjimipogoji:
Preobremenjeno:
Orodjedelujenanačin,zaradikateregaprihajado
neobičajnovisokegatoka.Vtemprimeruizklopite
orodjeinprekinitedelo,kijepovzročilopreobremenitev
orodja.Natovklopiteorodje,dagaznovazaženete.
Česeorodjenevklopi,jeakumulatorpregret.Vtemprimeru
pustite,daseakumulatorohladi,predenznovavklopiteorodje.
Nizka napetost akumulatorja:
Napolnjenostakumulatorjajeprenizka,zatoorodjenedeluje.
Čevklopiteorodje,semotorzažene,vendarkmalutudizaus-
tavi. V tem primeru odstranite in napolnite akumulator.
Delovanje stikala
OPOZORILO:
Preden vstavite akumulatorsko bate-
rijo v orodje, se vedno prepričajte, da stikalo deluje brez-
hibno in se vrača v položaj za izklop (OFF), ko ga spustite.
OPOZORILO:
Za vašo varnost je to orodje
opremljeno s sprostilnim gumbom, ki preprečuje
nenamerni zagon orodja. Nikoli ne uporabljajte orodja,
kadar začne delovati, če pritisnete samo sprožilno
stikalo in pri tem ne pritisnete sprostilnega gumba. Za
popravilo se obrnite na lokalni servisni center Makita.
OPOZORILO: Nikoli ne onemogočite funkcije
zaklepa ali zalepite sprostilnega gumba.
OBVESTILO:
Ne pritiskajte sprožilca s silo, ne da bi
pri tem pritisnili sprostilni gumb. Stikalo se lahko zlomi.
►Sl.4: 1. Sprostilni gumb 2.Sprožilnostikalo
Zapreprečevanjenenamernesprožitvestikalajename-
ščensprostilnigumb.
Zazagonorodjahkratipritisnitesprostilnigumbin
sprožilec.Čeželiteustavitiorodje,spustitesprožilec.
Sprostilni gumb lahko pritisnete z desne ali leve strani.
Prilagoditev rezalnega kota
POZOR: Pred zapiranjem ali razpiranjem glave
se vedno prepričajte, da je orodje izključeno.
POZOR: Pri zapiranju glave za prenašanje
orodja ali po uporabi orodja se prepričajte, da
pred zapiranjem glave namestite pokrov rezila.
POZOR: Pri zapiranju glave pazite, da ne
stisnete prstov med glavo in ohišje orodja.
Kotglavelahkoprilagoditev10korakih.Čeželitespre-
menitikotglave,sleditespodnjimkorakom.
1.
Glavoinohišjeorodjadržite,kotjeprikazanonasliki.
►Sl.5: 1. Glava 2.Gumbzaprilagajanjekota
2.
Kotglaveprilagoditemedtemkodržitepritisnjengumbza
prilagajanjekota,natopagumbzaprilagajanjekotasprostite.
3.
Glavomalcepremaknite,doklersesklikomnezaskoči.
OPOMBA:Preduporaboorodjaseprepričajte,daje
glavavarnozaskočena.
Pagina se încarcă...
Pagina se încarcă...
Pagina se încarcă...
Pagina se încarcă...
Pagina se încarcă...
Pagina se încarcă...
Pagina se încarcă...
Pagina se încarcă...
Pagina se încarcă...
Pagina se încarcă...
Pagina se încarcă...
Pagina se încarcă...
Pagina se încarcă...
Pagina se încarcă...
Pagina se încarcă...
Pagina se încarcă...
Pagina se încarcă...
Pagina se încarcă...
Pagina se încarcă...
Pagina se încarcă...
Pagina se încarcă...
Pagina se încarcă...
Pagina se încarcă...
Pagina se încarcă...
Pagina se încarcă...
Pagina se încarcă...
Pagina se încarcă...
Pagina se încarcă...
Pagina se încarcă...
Pagina se încarcă...
Pagina se încarcă...
Pagina se încarcă...
Pagina se încarcă...
Pagina se încarcă...
Pagina se încarcă...
Pagina se încarcă...
Pagina se încarcă...
Pagina se încarcă...
Pagina se încarcă...
Pagina se încarcă...
Pagina se încarcă...
Pagina se încarcă...
Pagina se încarcă...
Pagina se încarcă...
Pagina se încarcă...
Pagina se încarcă...
Pagina se încarcă...
Pagina se încarcă...
Pagina se încarcă...
Pagina se încarcă...
Pagina se încarcă...
Pagina se încarcă...
Pagina se încarcă...
Pagina se încarcă...
Pagina se încarcă...
Pagina se încarcă...
Pagina se încarcă...
Pagina se încarcă...
Pagina se încarcă...
Pagina se încarcă...
Pagina se încarcă...
Pagina se încarcă...
Pagina se încarcă...
Pagina se încarcă...
Pagina se încarcă...
Pagina se încarcă...
Pagina se încarcă...
Pagina se încarcă...
Pagina se încarcă...
Pagina se încarcă...
Pagina se încarcă...
Pagina se încarcă...
Pagina se încarcă...
Pagina se încarcă...
Pagina se încarcă...
Pagina se încarcă...
Pagina se încarcă...
Pagina se încarcă...
Pagina se încarcă...
Pagina se încarcă...
Pagina se încarcă...
Pagina se încarcă...
Pagina se încarcă...
Pagina se încarcă...
Pagina se încarcă...
Pagina se încarcă...
Pagina se încarcă...
Pagina se încarcă...
-
 1
1
-
 2
2
-
 3
3
-
 4
4
-
 5
5
-
 6
6
-
 7
7
-
 8
8
-
 9
9
-
 10
10
-
 11
11
-
 12
12
-
 13
13
-
 14
14
-
 15
15
-
 16
16
-
 17
17
-
 18
18
-
 19
19
-
 20
20
-
 21
21
-
 22
22
-
 23
23
-
 24
24
-
 25
25
-
 26
26
-
 27
27
-
 28
28
-
 29
29
-
 30
30
-
 31
31
-
 32
32
-
 33
33
-
 34
34
-
 35
35
-
 36
36
-
 37
37
-
 38
38
-
 39
39
-
 40
40
-
 41
41
-
 42
42
-
 43
43
-
 44
44
-
 45
45
-
 46
46
-
 47
47
-
 48
48
-
 49
49
-
 50
50
-
 51
51
-
 52
52
-
 53
53
-
 54
54
-
 55
55
-
 56
56
-
 57
57
-
 58
58
-
 59
59
-
 60
60
-
 61
61
-
 62
62
-
 63
63
-
 64
64
-
 65
65
-
 66
66
-
 67
67
-
 68
68
-
 69
69
-
 70
70
-
 71
71
-
 72
72
-
 73
73
-
 74
74
-
 75
75
-
 76
76
-
 77
77
-
 78
78
-
 79
79
-
 80
80
-
 81
81
-
 82
82
-
 83
83
-
 84
84
-
 85
85
-
 86
86
-
 87
87
-
 88
88
-
 89
89
-
 90
90
-
 91
91
-
 92
92
-
 93
93
-
 94
94
-
 95
95
-
 96
96
-
 97
97
-
 98
98
-
 99
99
-
 100
100
-
 101
101
-
 102
102
-
 103
103
-
 104
104
-
 105
105
-
 106
106
-
 107
107
-
 108
108


Makita UN460WD Manual de utilizare
- Categorie
- Aparate de tuns gard viu
- Tip
- Manual de utilizare
Lucrări înrudite
-
Makita EN402MP Manual de utilizare
-
Makita DUM166 Manual de utilizare
-
Makita UH014 Manual de utilizare
-
Makita UH004G Manual de utilizare
-
Makita DUN600L Manual de utilizare
-
Makita UH013G Manual de utilizare
-
Makita DUH502 Manual de utilizare
-
-
Makita DUH551 Manual de utilizare
-
Makita DUH601Z Manual de utilizare