
PR 3-HVSG
English en
Ελληνικά el
Hrvatski hr
Srpski sr
Slovenščina sl
Български bg
Română ro
עברית he
Printed: 01.06.2017 | Doc-Nr: PUB / 5284910 / 000 / 00Printed: 01.06.2017 | Doc-Nr: PUB / 5354746 / 000 / 00

1
2
3
Printed: 01.06.2017 | Doc-Nr: PUB / 5284910 / 000 / 00Printed: 01.06.2017 | Doc-Nr: PUB / 5354746 / 000 / 00

4
5
6
7
Printed: 01.06.2017 | Doc-Nr: PUB / 5284910 / 000 / 00Printed: 01.06.2017 | Doc-Nr: PUB / 5354746 / 000 / 00

8
9
10
Printed: 01.06.2017 | Doc-Nr: PUB / 5284910 / 000 / 00Printed: 01.06.2017 | Doc-Nr: PUB / 5354746 / 000 / 00

PR 3-HVSG
en Original operating instructions . . . . . . . . . . . . . . . . . . . . . . . . . . . . . . . . . . . . . . . 1
el Πρωτότυπες οδηγίες χρήσης . . . . . . . . . . . . . . . . . . . . . . . . . . . . . . . . . . . . . . . 12
hr Originalne upute za uporabu . . . . . . . . . . . . . . . . . . . . . . . . . . . . . . . . . . . . . . . 24
sr Originalno uputstvo za upotrebu . . . . . . . . . . . . . . . . . . . . . . . . . . . . . . . . . . . . 35
sl Originalna navodila za uporabo . . . . . . . . . . . . . . . . . . . . . . . . . . . . . . . . . . . . . 46
bg Оригинално Ръководство за експлоатация . . . . . . . . . . . . . . . . . . . . . . . . . . . . 57
ro Manual de utilizare original . . . . . . . . . . . . . . . . . . . . . . . . . . . . . . . . . . . . . . . . 69
he הוראותהפעלהמקוריות . . . . . . . . . . . . . . . . . . . . . . . . . . . . . . . . . . . . . . . . . . . . 81
Printed: 01.06.2017 | Doc-Nr: PUB / 5284910 / 000 / 00Printed: 01.06.2017 | Doc-Nr: PUB / 5354746 / 000 / 00

Printed: 01.06.2017 | Doc-Nr: PUB / 5284910 / 000 / 00Printed: 01.06.2017 | Doc-Nr: PUB / 5354746 / 000 / 00

1
1 Information about the documentation
1.1 Explanation of signs used
1.1.1 Warnings
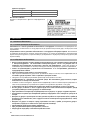
Warnings alert persons to hazards that occur when handling or using the product. The following signal words
are used in combination with a symbol:
DANGER! Draws attention to imminent danger that will lead to serious personal injury or fatality.
WARNING! Draws attention to a potentially dangerous situation that could lead to serious per-
sonal injury or fatality.
CAUTION! Draws attention to a potentially dangerous situation that could lead to slight personal
injury or damage to the equipment or other property.
1.1.2 Symbols
The following symbols are used:
Draws attention to instructions or other useful information.
Read the operating instructions before use.
Revolutions per minute
Revolutions per minute
1.1.3 Illustrations
The illustrations in these operating instructions are intended to convey a basic understanding and may differ
from the actual version of the product:
These numbers refer to the corresponding illustrations found at the beginning of these operating
instructions.
The numbering in the illustrations reflects the order of the work steps in the illustration and may
deviate from the numbering of work steps in the text.
Item reference numbers are used in the overview illustration. In the product overview section, the
numbers shown in the legend relate to these item reference numbers.
1.2 About this documentation
▶ Read these operating instructions before the product is used or operated for the first time. This is a is a
prerequisite for safe, trouble-free handling and use of the product.
▶ Observe the safety instructions and warnings printed in this documentation and on the tool.
▶ Always keep the operating instructions with the tool and make sure that the operating instructions are
with the tool when it is given to other persons.
We reserve the right to make changes. Errors excepted.
1.3 Product information
Hilti products are designed for professional use and may be operated, serviced and maintained only by
trained, authorized personnel. This personnel must be informed of any particular hazards that may be
encountered. The product and its ancillary equipment may present hazards when used incorrectly by
untrained personnel or when used not as directed.
• Make a note of the designation and serial number printed on the identification plate in the following table.
▶ Always quote this information when you contact a Hilti representative or Hilti Service to enquire about
the product.
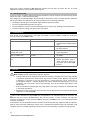
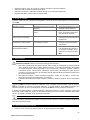
Product information
Rotating laser PR 3-HVSG
Generation 01
Printed: 01.06.2017 | Doc-Nr: PUB / 5284910 / 000 / 00Printed: 01.06.2017 | Doc-Nr: PUB / 5354746 / 000 / 00

2
Serial no.
On the type identification plate
Class 2 laser product. Do not stare into beam.
2 Safety
2.1 Safety instructions
2.1.1 Basic information concerning safety
Read all safety instructions and other instructions. Failure to observe the safety instructions and other
instructions may result in electric shock, fire and/or serious injury.
Retain all safety precautions and instructions for future reference. The term “electric tool” used in the
safety instructions refers to your mains-operated (corded) electric tool or battery-operated (cordless) electric
tool.
2.1.2 General safety instructions
▶ Stay alert, watch what you are doing and use common sense when operating an electric tool. Do
not use an electric tool while you are tired or under the influence of drugs, alcohol or medication.
A moment of inattention while operating the electric tool may result in serious personal injury.
▶ Do not render safety devices ineffective and do not remove information and warning notices.
▶ Keep laser tools out of reach of children.
▶ Laser radiation in excess of Class 2 may be emitted if the tool is opened without following the correct
procedures. Have the tool repaired only by Hilti Service.
▶ Laser beams should be projected well above or well below eye height.
▶ Take the influences of the surrounding area into account. Do not use the tool where there is a risk
of fire or explosion.
▶ Statement in accordance with FCC §15.21: Changes or modifications not expressly approved by Hilti
may restrict the user’s authorization to operate the equipment.
▶ You must check the accuracy of the tool after it has been dropped or subjected to other mechanical
stresses.
▶ When the tool is brought into a warm environment from very cold conditions, or vice-versa, allow
it to become acclimatized before use.
▶ Make sure that the tool is mounted securely when adapters or accessories are used.
▶ Keep the laser exit aperture clean to avoid measurement errors.
▶ Although the device is designed for the tough conditions of jobsite use, as with other optical and
electronic instruments (e.g. binoculars, spectacles, cameras) it should be treated with care.
▶ Although the device is protected to prevent entry of dampness, it should be wiped dry each time
before being put away in its transport container.
▶ Check the tool before using it for important measuring work.
▶ Check the accuracy of the measurements several times during use of the tool.
▶ Ensure that the workplace is well lit.
▶ Avoid touching the contacts.
▶ Maintain the tool carefully. Check for misalignment or binding of moving parts, breakage of parts
and any other condition that may affect the tool’s operation. Have damaged parts repaired before
using the tool. Many accidents are caused by poorly maintained tools.
2.1.3 Proper preparation of the working area
▶ Secure the area in which you will be taking measurements. Make sure that the laser beam is not
directed toward other persons or toward yourself while setting up the PR 3-HVSG.
Printed: 01.06.2017 | Doc-Nr: PUB / 5284910 / 000 / 00Printed: 01.06.2017 | Doc-Nr: PUB / 5354746 / 000 / 00

3
▶ Avoid unfavorable body positions when working from ladders. Make sure you work from a safe
stance and stay in balance at all times.
▶ Readings taken in the vicinity of reflective objects or surfaces, through panes of glass or similar materials
may produce incorrect results.
▶ Ensure that the tool is set up on a stable, level surface (not subject to vibration).
▶ Use the tool only within its specified limits.
▶ Use the tool and its accessories etc. in accordance with these instructions and in the manner
intended for the particular type of tool. Take the working conditions and the task to be performed
into account. Use of tools for applications different from those intended could result in a hazardous
situation.
▶ Use of the telescopic staff in the vicinity of overhead high voltage cables is not permissible.
▶ Take care to ensure that no other PR 3-HVSG is in use in the area.The IR control system may influence
the tool you are using. Check the equipment from time to time.
2.1.4 Electromagnetic compatibility
Although the tool complies with the strict requirements of the applicable directives, Hilti cannot exclude the
following possibilities:
• The tool may be negatively affected by powerful electromagnetic radiation, possibly leading to incorrect
operation.
In these cases, or if you are otherwise unsure, confirmatory measurements should be made by other
means.
• The tool may cause interference to other devices (e.g. aircraft navigation equipment).
Only for Korea:
This device is suitable for the electromagnetic radiation encountered in residential environments (Class B). It
is intended mainly for use in residential environments but may also be used in other environments.
2.1.5 Laser classification for Class 2 laser products
The tool complies with laser Class 2 as per IEC60825-1:2007 / EN60825-1:2007. This tool may be used
without need for further protective measures.
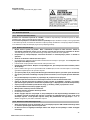
CAUTION
Risk of injury! Do not direct the laser beam toward persons.
▶ Never look directly into the source of the laser beam. In the event of direct eye contact, close your
eyes and move your head out of the path of the laser beam.
2.1.6 Careful use of battery-powered tools
▶ Do not expose batteries to high temperatures, the direct heat of the sun, and keep them away
from fire. There is a risk of explosion.
▶ Do not disassemble, squash or incinerate batteries and do not subject them to temperatures over
80°C (176°F). This presents a risk of fire, explosion or injury through contact with caustic substances.
▶ Do not subject the battery to hard mechanical impacts and do not throw the battery.
▶ Batteries must be kept out of reach of children.
▶ Avoid ingress of moisture. Ingress of moisture may cause a short circuit, resulting in burning injuries or
fire.
▶ Under abusive conditions, liquid may leak from the battery. Avoid contact with the liquid. If contact
accidentally occurs, flush with water. If the liquid contacts the eyes, also seek medical attention.
Liquid leaking from the battery may cause irritation or burns.
▶ Use only batteries of the type approved for use with the applicable tool. Use of other batteries or
use of the batteries for purposes for which they are not intended presents a risk of fire and explosion.
▶ Store the battery in a cool and dry place. Never store the battery where it is exposed to direct sunlight or
sources of heat, e.g. on heaters / radiators or behind glass.
▶ When not in use, keep the battery and the charger away from paper clips, coins, keys, nails,
screws or other small metal objects that could cause a short circuit at the battery terminals or the
charging contacts. Short-circuiting the contacts on a battery or charger may cause burning injuries or
start a fire.
▶ Do not charge or continue to use damaged batteries (e.g. batteries with cracks, broken parts, bent
or pushed-in and/or pulled-out contacts).
Printed: 01.06.2017 | Doc-Nr: PUB / 5284910 / 000 / 00Printed: 01.06.2017 | Doc-Nr: PUB / 5354746 / 000 / 00

4
▶ Recharge only with the charger specified by the manufacturer. A charger that is suitable for a certain
type of battery may present a risk of fire when used with other types of battery.
▶ Observe the special guidelines applicable to the transport, storage and use of Li-ion batteries.
▶ The battery must be insulated or removed from the tool before the tool is shipped or sent by mail.
Leaking batteries may damage the tool.
▶ If the battery gets noticeably hot when not in use, this may indicate that the battery or the tool / battery
system is faulty. In this case, place the tool in a non-flammable location, well away from flammable
materials, where it can be kept under observation and allowed to cool down.
3 Description
3.1 Overview of the product
3.1.1 PR 3-HVSG rotating laser 1
Key
@
Laser beam (plane of rotation)
;
90° reference beam
=
Rotary head
%
Grip
&
Liion battery
(
Control panel
)
Base plate with 5/8" thread
3.1.2 PR 3-HVSG control panel 2
Key
+
LED: Auto-leveling
§
Button: Shock warning deactivation
/
LED: Shock warning deactivation
:
LED: Inclination angle
∙
Button: Inclination angle
$
Button: Speed of rotation
£
Button: “On/off”
|
Battery status
3.1.3 PRA 2 remote control unit 3
Key
¡
LED: Command sent
Q
Button: Speed of rotation
W
Button: Line direction (left/right)
E
Button: Line function
R
Servo buttons (+/-)
3.2 Intended use
The product described is a rotating laser tool with a visible green rotating laser beam and a reference beam
set at 90° to the main beam. The rotating laser can be used vertically, horizontally and for inclined planes.
The tool is designed to be used to determine, transfer and check levels, verticals, slopes and right angles.
Examples of its uses are: transferring datum lines and height marks, determining right angles for walls,
vertical alignment on reference points and setting out slopes.
▶ Use only the Hilti B 12⁄2.6 Li-Ion battery for this product.
▶ Use only the Hilti C 4⁄1250 charger for this product.
3.3 Features
The tool allows a single person to level or align in any plane quickly and with great accuracy.
4 speeds of rotation are available for use (0, 90, 300, 600 /min). The preset speed of rotation is 300 /min.
The tool is equipped with the following operating status indicators: auto-leveling LED, inclination angle LED
and shock warning LED.
When automatic leveling is activated for one or both axes, the built-in servo system ensures that the specified
accuracy is maintained. An automatic cut-out is activated when the tool is unable to level itself (i.e. when
the tool is outside its self-leveling range or movement is blocked mechanically) or the tool is knocked off
level (by vibration or an impact). When the tool has switched itself off, rotation stops and all LEDs blink.
Depending on the working distance and ambient light, visibility of the laser beam may be impaired. Visibility
of the laser beam can be improved through use of the target plate. In situations where laser beam visibility
is reduced, e.g. in bright sunlight, use of the laser receiver (accessory) is recommended.
Printed: 01.06.2017 | Doc-Nr: PUB / 5284910 / 000 / 00Printed: 01.06.2017 | Doc-Nr: PUB / 5354746 / 000 / 00

5
Leveling
After switching on, the tool levels itself automatically within a range of ±5° by way of two built-in servo
motors. LEDs indicate the tool’s current operating status. The tool can be set up directly on the ground or
floor, on a tripod, or with the aid of suitable mounting brackets.
Vertical alignment is carried out automatically. The +/- buttons on the PRA 2 remote control unit can be
used to bring the vertical plane manually into alignment (pivot).
In inclined plane mode the inclination can be set manually within a range of ± 5° with the aid of the PRA 2
remote control unit. Alternatively, in inclined plane mode, the slope adapter can be used to achieve slopes
of up to 60%.
Thanks to its built-in shock warning function the tool switches to warning mode if knocked off level, e.g.due
to vibration or impact while in operation (warning mode becomes functional two minutes after completion of
self-leveling). All LEDs blink, the laser beam stops rotating and the laser is switched off.
Combination with other devices
The PRA 2 remote control unit can be used to control the rotating laser conveniently from a distance. The
remote control function can also be used to adjust alignment of the laser beam.
Hilti laser receivers can be used to detect and indicate the laser beam at great distances. For further
information, please refer to the operating instructions for the laser receiver.
3.4 LED indicators
The rotating laser is equipped with an LED display.
Status Meaning
All LEDs blink • The tool has been bumped, knocked off level or
is subject to some other error.
The auto-leveling LED blinks green • The tool is in the leveling phase.
The auto-leveling LED lights green constantly • The tool has leveled itself / is operating normally.
The shock warning LED lights orange constantly • Shock warning mode is deactivated.
The inclination LED lights orange constantly • Inclined plane mode is active.
3.5 Li-ion battery charge state display
The Li-ion battery features a charge status display.
Status Meaning
4 LEDs light. • Charge status: 75 % to 100 %
3 LEDs light. • Charge status: 50 % to 75 %
2 LEDs light. • Charge status: 25 % to 50 %
1 LED lights. • Charge status: 10 % to 25 %
1 LED blinks. • Charge status: < 10 %
Note
When the tool is in operation, battery charge state is indicated in the display on the tool.
When not in operation, battery charge state can be indicated by lightly pressing one if the release
buttons.
During charging, charge state is indicated by the LEDs on the battery (please refer to the operating
instructions for the charger).
3.6 Items supplied
PR 3-HVSG rotating laser, PRA 2 remote control, PRA 54 target plate, 2 batteries (size AA), 2 manufacturer’s
certificates, operating instructions.
Note
You can find other system products approved for your product at your local Hilti Center or online at:
www.hilti.com.
Printed: 01.06.2017 | Doc-Nr: PUB / 5284910 / 000 / 00Printed: 01.06.2017 | Doc-Nr: PUB / 5354746 / 000 / 00

6
4 Technical data
Receiving range (diameter)
150 m
(492 ft)
Communication range (PRA 2)
30 m
(98 ft - 10 in)
Accuracy at 10 m (under standard ambient con-
ditions in accordance with MILSTD810G)
±1 mm
(±0.04 in)
Laser class
Visible, laser Class 2, 510-530 nm/Po<4.85 mW ≥
300 ⁄min; EN 60825-1:2007; IEC 60825-1:2007
Operating temperature
−10 ℃ … 50 ℃
(14 ℉ … 122 ℉)
Storage temperature
−25 ℃ … 63 ℃
(−13 ℉ … 145 ℉)
Weight (including B12/2.6 battery)
2.4 kg
(5.3 lb)
Drop test height (under standard ambient condi-
tions in accordance with MILSTD810G)
1.5 m
(4 ft - 11 in)
Tripod thread
5/8 in
Protection class in accordance with IEC 60529
IP 56
5 Before use
5.1 Charging the battery
▶ Make sure that the outer surfaces of the battery are clean and dry before inserting it in the charger.
Note
The system switches itself off automatically when the battery is low.
5.2 Inserting the battery 4
CAUTION
Risk of injury Inadvertent starting of the product.
▶ Check that the product is switched off before fitting the battery.
CAUTION
Electrical hazard. Dirty contacts may cause a short circuit.
▶ Check that the contacts on the battery and on the tool are free from foreign objects before inserting
the battery.
CAUTION
Risk of injury. If the battery is not fitted correctly it may drop out and fall.
▶ Check that the battery is securely seated in the tool so that it cannot drop out and fall, thereby
presenting a hazard to other persons.
▶ Fit the battery and check that the battery is securely seated in the tool.
5.3 Removing the battery 5
▶ Remove the battery.
Printed: 01.06.2017 | Doc-Nr: PUB / 5284910 / 000 / 00Printed: 01.06.2017 | Doc-Nr: PUB / 5354746 / 000 / 00

7
6 Operation
6.1 Switching the tool on
▶ Press the ON / OFF button.
Note
After switching on, the tool begins to level itself automatically.
Check the accuracy of the tool before using it for important tasks, especially if it has been dropped
or subjected to unusual influences or impacts etc.
6.2 Working in the horizontal plane 6
1. Mount the tool on a suitable mounting device.
Note
A wall bracket or tripod may be used as mounting devices. The angle of inclination of the surface
on which it stands should not exceed ± 5°.
2. Press the ON / OFF button. The auto-leveling LED blinks green.
Note
The laser switches on, the beam begins to rotate and the “auto leveling” LED lights as soon as the
tool has leveled itself.
6.3 Working in the vertical plane 7
1. Place or mount the tool so that the control panel faces upwards.
Note
In order to ensure that the tool’s specified accuracy can be maintained, make sure that it is set up
on a level surface or mounted sufficiently level on the tripod or other accessory.
2. Use the visual sighting aids to adjust the tool so that its vertical axis is aligned in the required direction.
Note
The laser switches on, the beam begins to rotate and the “auto leveling” LED lights as soon as the
tool has leveled itself.
3. Press the on/off button. After the tool has leveled itself automatically, it projects a stationary laser beam
vertically downwards. This projected point is the reference point and is used to position the tool.
4. Press the rotation speed button in order to see the laser beam in the entire plane of rotation.
5. The vertically rotating beam can be moved to the left or right by up to 5° by pressing the + and − buttons
on the remote control unit.
6.4 Inclination
For optimum results, check that the PR 3-HVSG is correctly aligned. The best way to do this is by selecting
2 points, each at a distance of 5 m (16 ft), one to the left and one to the right of the tool, but parallel to the
tool axis. Mark the height of the horizontal plane and then, after setting the slope, mark the heights. The tool
is aligned optimally only when these heights are identical at both points.
6.4.1 Setting the slope manually
1. Set up the tool in a suitable position for the application, e.g. on a tripod.
2. Position the rotating laser either at the upper edge or lower edge of the inclined plane.
3. Position yourself behind the tool, facing the control panel.
4. With the aid of the target notch on the head of the tool, bring the tool roughly into alignment with the
inclined plane (parallel to the plane).
5. Switch the tool on and then press the inclined plane mode button. The inclined plane mode LED then
lights. The laser beam switches on as soon as the tool has leveled itself.
6. To incline the plane of rotation, press the + or − button on the remote control unit. Alternatively, the slope
adapter (accessory) can also be used.
7. To return to standard operating mode, the tool must be switched off and then restarted.
Printed: 01.06.2017 | Doc-Nr: PUB / 5284910 / 000 / 00Printed: 01.06.2017 | Doc-Nr: PUB / 5354746 / 000 / 00

8
6.4.2 Using the slope adapter to set the slope
1. Mount a suitable slope adapter on a tripod.
2. Position the tripod either at the upper edge or lower edge of the inclined plane.
3. Mount the rotating laser on the slope adapter and, with the aid of the target notch on the head of the
PR 3-HVSG, adjust the tool and slope adapter so that they are parallel to the inclined plane.
4. Make sure that the slope adapter is in the zero position (0°).
Note
The control panel of the PR 3-HVSG should face away from the direction of inclination.
5. Switch the tool on.
6. Press the inclined plane mode button. The inclined plane mode LED then lights on the control panel
of the rotating laser. The tool then begins automatic self-leveling. The laser switches on and begins to
rotate as soon as this is complete.
7. Set the slope adapter to the desired angle of inclination.
Note
When the angle of inclination is set manually, the PR 3-HVSG levels the laser plane once and then
fixes it. Vibration, changes in temperature or other influences that may occur during the course of
the day may affect the position of the laser plane.
6.5 Working with the PRA 2 remote control unit
The PRA 2 remote control unit makes working with the rotating laser more convenient and is required in
order to make use of certain functions.
Selecting the speed of rotation
After switching on, the rotating laser always begins to operate at a speed of 300 revolutions per minute. A
slow speed of rotation can make the laser beam appear much brighter. A high speed of rotation makes the
laser beam appear more stable. The speed of rotation can be adjusted by pressing the rotation speed button
several times.
Selecting the line function
The area covered by the laser beam can be reduced to a line by pressing the line function button on the remote
control unit. The laser beam then appears considerably brighter. The length of the line can be adjusted by
pressing the line function button several times. The length of the line depends on the distance of the laser tool
from the wall or surface. The laser line can be shifted as desired by pressing the direction buttons (right/left).
6.6 Deactivating the shock warning function
1. Switch the tool on.
2. Press the “Deactivate shock warning” button. The shock warning deactivation LED lights constantly,
indicating that the function has been deactivated.
3. To return to standard operating mode, switch the tool off and then switch it back on again.
6.7 Checking the main and transverse horizontal axes 8
1. Set up the tripod approx. 20 m (66 ft) from a wall and adjust the tripod head horizontally with a spirit level.
2. Mount the tool on the tripod and use the visual sighting method (front and rear sights) to aim the tool at
the wall.
3. Use the receiver to catch the laser beam and mark a point (point 1) on the wall.
4. Pivot the tool clockwise through 90° about its own axis. In doing so, ensure that the height of the tool
does not change.
5. Use the laser receiver to catch the laser beam and mark a second point (point 2) on the wall.
6. Repeat the two previous steps twice and use the laser receiver to catch the beam and mark points 3 and
4 on the wall.
Note
If the procedure has been carried out accurately, the vertical distance between the two marked
points 1 and 3 (main axis) or, points 2 and 4 (transverse axis), should each be less than 3 mm
(at 20 m) (0.12" at 66 ft). If the deviation is greater than this, the tool should be returned to Hilti
Service for calibration.
Printed: 01.06.2017 | Doc-Nr: PUB / 5284910 / 000 / 00Printed: 01.06.2017 | Doc-Nr: PUB / 5354746 / 000 / 00

9
6.8 Checking the vertical axis 9, 10
1. Place the tool in the vertical position on the floor or ground, which should be as flat as possible, approx.
20 m (66 ft) from a wall.
2. Adjust the position of the tool so that the grips are parallel to the wall.
3. Switch the tool on and mark the reference point (R) on the ground or floor.
4. With the aid of the receiver, mark point (A) low on the wall. Select medium speed.
5. With the aid of the receiver, mark point (B) at a height of approx. 10 m (33 ft).
6. Pivot the tool through 180° and realign it with the reference point (R) on the ground or floor and with point
(A) at the base of the wall.
7. With the aid of the receiver, mark point (C) at a height of approx. 10 m (33 ft).
Note
If the procedure has been carried out accurately, the horizontal distance between the two points
(B) and (C) marked at a height of ten meters should be less than 2 mm (at 10 m) (0.08" at 33 ft). If
the deviation is greater: Please return the tool to Hilti Service for calibration.
7 Care, maintenance, transport and storage
7.1 Cleaning and drying
▶ Blow any dust off the laser exit window.
▶ Do not touch the laser exit window with your fingers.
▶ Use only a soft, clean cloth to clean the tool. If necessary, moisten the cloth slightly with pure alcohol or
a little water.
Note
Abrasive cleaning materials may scratch the glass and impair the accuracy of the laser tool. Do not
use any liquids other than pure alcohol or water as these may damage the plastic components.
Observe the temperature limits when drying the equipment.
7.2 Storage
▶ Do not put the tool into storage when wet. Allow it to dry before putting it away.
▶ Always clean the tool, its transport container and accessories before putting them into storage.
▶ Check the accuracy of the equipment before it is used after a long period of storage or transportation.
▶ Observe the temperature limits when storing your equipment. This is particularly important in summer or
winter if the equipment is kept inside a motor vehicle.
7.3 Care of the Li-ion battery
▶ Keep the battery clean and free from oil and grease. Do not use cleaning agents containing
silicone.
▶ Clean the outer surfaces with a slightly damp cloth at regular intervals.
▶ Do not allow moisture to enter the interior.
▶ Charge the batteries using the Hilti chargers approved for use with Li-ion batteries.
7.4 Transport
Observe the special guidelines applicable to the transport, storage and use of Li-ion batteries.
The batteries must be insulated or removed from the tool before the tool is shipped or sent by mail. Leaking
batteries may damage the tool.
7.5 Hilti Measuring Systems Service
Hilti Measuring Systems Service checks the product and, if deviations from the specified accuracy are found,
recalibrates it and checks it again to ensure conformity with specifications. The service certificate provides
written confirmation of conformity with specifications at the time of the test. The following is recommended:
• A suitable test interval should be chosen in accordance with the degree of use.
• Have the product checked by Hilti Measuring Systems Service after exceptionally heavy use or subjection
to unusual conditions or stress, before important work or at least once a year.
Printed: 01.06.2017 | Doc-Nr: PUB / 5284910 / 000 / 00Printed: 01.06.2017 | Doc-Nr: PUB / 5354746 / 000 / 00

10
Having the product checked by Hilti Measuring Systems Service does not relieve the user of his/her
obligation to check the product before and during use.
7.6 Checking accuracy
In order to ensure compliance with the technical specifications, the tool should be checked regularly (at least
before each major / relevant measuring task).
After falling from considerable height, the tool should be checked for correct, accurate operation. When the
following conditions are fulfilled it can be assumed that the tool is operating faultlessly:
• The height of the fall did not exceed the height stated in the technical data.
• The tool operated faultlessly before the impact.
• The tool suffered no obvious mechanical damage from the impact (e.g. breakage of the pentaprism).
• The tool projects a rotating laser beam when in operation.
8 Troubleshooting
If the trouble you are experiencing is not listed in this table or you are unable to remedy the problem by
yourself, please contact Hilti Service.
Trouble or fault Possible cause Action to be taken
The tool doesn’t work. The battery is not fully inserted. ▶ Push the battery in until it
engages with an audible double
click.
Low battery. ▶ Change the battery and charge
the empty battery.
The battery runs down more
quickly than usual.
Very low ambient temperature. ▶ Warm up the battery slowly to
room temperature.
The battery doesn’t engage
with an audible click.
The retaining lugs on the battery
are dirty.
▶ Clean the retaining lugs and refit
the battery.
The tool or battery gets very
hot.
Electrical fault. ▶ Switch the tool off immediately,
remove the battery, keep it
under observation, allow it to
cool down and contact Hilti
Service.
9 Disposal
WARNING
Risk of injury. Hazards presented by improper disposal.
▶ Improper disposal of the equipment may have the following consequences: The burning of plastic
components generates toxic fumes which may present a health hazard. Batteries may explode
if damaged or exposed to very high temperatures, causing poisoning, burns, acid burns or
environmental pollution. Careless disposal may permit unauthorized and improper use of the
equipment. This may result in serious personal injury, injury to third parties and pollution of the
environment.
▶ Dispose of defective batteries right away. Keep them out of reach of children. Do not disassemble
or incinerate the batteries.
▶ Batteries that have reached the end of their life must be disposed of in accordance with national
regulations or returned to Hilti.
Most of the materials from which Hilti tools and appliances are manufactured can be recycled. The
materials must be correctly separated before they can be recycled. In many countries, your old tools,
machines or appliances can be returned to Hilti for recycling. Ask Hilti Service or your Hilti representative
for further information.
In accordance with the European Directive on waste electrical and electronic equipment and its implemen-
tation in conformance with national law, electric tools or appliances and batteries that have reached the end
of their life must be collected separately and returned to an environmentally compatible recycling facility.
Printed: 01.06.2017 | Doc-Nr: PUB / 5284910 / 000 / 00Printed: 01.06.2017 | Doc-Nr: PUB / 5354746 / 000 / 00

11
▶ Do not dispose of electronic measuring tools together with household waste.
To avoid pollution of the environment, tools or appliances and batteries must be disposed of in accordance
with the currently applicable national regulations.
10 Manufacturer’s warranty
▶ Please contact your local Hilti representative if you have questions about the warranty conditions.
11 FCC statement (applicable in US) / IC statement (applicable in Canada)
The product complies with part 15 of the FCC Rules and RSS210 of the IC.
Operation is subject to the following two conditions:
• This device shall cause no harmful interference.
• This device must accept any interference received, including interference that may cause undesired
operation.
Note
Changes or modifications not expressly approved by Hilti may restrict the user’s authorization to
operate the equipment.
12 EC declaration of conformity
Manufacturer
Hilti Aktiengesellschaft
Feldkircherstrasse 100
9494 Schaan
Liechtenstein
We declare, on our sole responsibility, that this product complies with the following directives and standards.
Designation Rotating laser
Type designation PR 3-HVSG
Generation 01
Year of design 2014
Applicable directives: • 2011/65/EU
• 2004/108/EC
• 2014/30/EU
• 2006/42/EC
• 2006/66/EC
Applicable standards: • EN ISO 12100
Technical documentation filed at: • Electric Tools Approval Department
Hilti Entwicklungsgesellschaft mbH
Hiltistraße 6
86916 Kaufering
Germany
Schaan, 4/2015
Paolo Luccini
(Head of BA Quality & Process Management /
Business Area Electric Tools & Accessories)
Edward Przybylowicz
(Head of BU Measuring Systems / BU Measuring
Systems)
Printed: 01.06.2017 | Doc-Nr: PUB / 5284910 / 000 / 00Printed: 01.06.2017 | Doc-Nr: PUB / 5354746 / 000 / 00

12
1 Στοιχεία για την τεχνική τεκμηρίωση
1.1 Επεξήγηση συμβόλων
1.1.1 Υποδείξεις προειδοποίησης
Οι υποδείξεις προειδοποίησης προειδοποιούν από κινδύνους κατά την εργασία με το προϊόν. Οι ακόλουθες
λέξεις επισήμανσης χρησιμοποιούνται σε συνδυασμό με ένα σύμβολο:
ΚΙΝΔΥΝΟΣ! Για μια άμεσα επικίνδυνη κατάσταση, που οδηγεί σε σοβαρό ή θανατηφόρο τραυ-
ματισμό.
ΠΡΟΕΙΔΟΠΟΙΗΣΗ! Για μια πιθανόν επικίνδυνη κατάσταση, που μπορεί να οδηγήσει σε σοβαρό ή
θανατηφόρο τραυματισμό.
ΠΡΟΣΟΧΗ! Για μια πιθανόν επικίνδυνη κατάσταση, που ενδέχεται να οδηγήσει σε ελαφρύ τραυ-
ματισμό ή υλικές ζημιές.
1.1.2 Σύμβολα
Χρησιμοποιούνται τα ακόλουθα σύμβολα:
Για υποδείξεις χρήσης και άλλες χρήσιμες πληροφορίες
Πριν από τη χρήση διαβάστε τις οδηγίες χρήσης
Στροφές ανά λεπτό
Στροφές ανά λεπτό
1.1.3 Εικόνες
Οι εικόνες στις παρούσες οδηγίες χρησιμεύουν στη βασική κατανόηση και ενδέχεται να διαφέρουν από την
πραγματική έκδοση:
Αυτοί οι αριθμοί παραπέμπουν στην εκάστοτε εικόνα στην αρχή αυτών των οδηγιών.
Η αρίθμηση στις εικόνες δείχνει τη σειρά των βημάτων εργασίας στην εικόνα και ενδέχεται να
διαφέρει από την αρίθμηση των βημάτων εργασίας στο κείμενο.
Οι αριθμοί θέσης χρησιμοποιούνται στην εικόνα Επισκόπηση. Στην ενότητα Συνοπτική παρουσί-
αση προϊόντος οι αριθμοί του υπομνήματος παραπέμπουν σε αυτούς τους αριθμούς θέσης.
1.2 Σχετικά με την παρούσα τεκμηρίωση
▶ Πριν από την πρώτη θέση σε λειτουργία διαβάστε αυτές τις οδηγίες χρήσης. Αποτελεί προϋπόθεση για
ασφαλή εργασία και απρόσκοπτο χειρισμό.
▶ Προσέξτε τις υποδείξεις ασφαλείας και προειδοποίησης στην παρούσα τεκμηρίωση και στο εργαλείο.
▶ Φυλάξτε τις οδηγίες χρήσης πάντα στη συσκευή και δίνετε τη συσκευή σε άλλα πρόσωπα μόνο μαζί με
αυτές τις οδηγίες χρήσης.
Με επιφύλαξη τροποποιήσεων και σφαλμάτων.
1.3 Πληροφορίες προϊόντος
Τα προϊόντα της Hilti προορίζονται για τον επαγγελματία χρήστη και ο χειρισμός, η συντήρηση και η επισκευή
τους επιτρέπεται μόνο από εξουσιοδοτημένο, ενημερωμένο προσωπικό. Το προσωπικό αυτό πρέπει να έχει
ενημερωθεί ειδικά για τους κινδύνους που ενδέχεται να παρουσιαστούν. Από το προϊόν και τα βοηθητικά
του μέσα ενδέχεται να προκληθούν κίνδυνοι, όταν ο χειρισμός τους γίνεται με ακατάλληλο τρόπο από μη
εκπαιδευμένο προσωπικό ή όταν δεν χρησιμοποιούνται με κατάλληλο τρόπο.
• Αντιγράψτε την περιγραφή και τον αριθμό σειράς από την πινακίδα τύπου στον ακόλουθο πίνακα.
▶ Αναφέρετε πάντα αυτές τις πληροφορίες κάθε φορά που απευθύνεστε με ερωτήματα για το προϊόν
στην αντιπροσωπεία μας ή στο σέρβις.
Στοιχεία προϊόντος
Χωροβάτης λέιζερ PR 3-HVSG
Γενιά 01
Printed: 01.06.2017 | Doc-Nr: PUB / 5284910 / 000 / 00Printed: 01.06.2017 | Doc-Nr: PUB / 5354746 / 000 / 00

13
Αρ. σειράς
Πάνω στην πινακίδα τύπου
Προϊόν λέιζερ κατηγορίας 2. Μην κοιτάτε στην ακτίνα.
2 Ασφάλεια
2.1 Υποδείξεις για την ασφάλεια
2.1.1 Βασικές επισημάνσεις για την ασφάλεια
Διαβάστε όλες τις υποδείξεις για την ασφάλεια και τις οδηγίες. Η παράβλεψη των υποδείξεων ασφαλείας
και των οδηγιών μπορεί να προκαλέσει ηλεκτροπληξία, πυρκαγιά και/ή σοβαρούς τραυματισμούς.
Φυλάξτε όλες τις υποδείξεις για την ασφάλεια και τις οδηγίες για μελλοντική χρήση. Ο όρος "ηλεκτρικό
εργαλείο" που χρησιμοποιείται στις υποδείξεις για την ασφάλεια αναφέρεται σε ηλεκτρικά εργαλεία που
λειτουργούν συνδέοντάς τα στο ηλεκτρικό δίκτυο (με καλώδιο τροφοδοσίας) και σε ηλεκτρικά εργαλεία που
λειτουργούν με επαναφορτιζόμενες μπαταρίες (χωρίς καλώδιο τροφοδοσίας).
2.1.2 Γενικά μέτρα ασφαλείας
▶ Να είσαστε πάντα προσεκτικοί, να προσέχετε τί κάνετε και να εργάζεστε με το ηλεκτρικό εργαλείο
με περίσκεψη. Μην χρησιμοποιείτε ηλεκτρικά εργαλεία, όταν είστε κουρασμένοι ή όταν βρίσκεστε
υπό την επήρεια ναρκωτικών ουσιών, οινοπνεύματος ή φαρμάκων. Μία στιγμή απροσεξίας κατά τη
χρήση του ηλεκτρικού εργαλείου μπορεί να οδηγήσει σε σοβαρούς τραυματισμούς.
▶ Μην καθιστάτε ανενεργά τα συστήματα ασφαλείας και μην απομακρύνετε τις πινακίδες υποδεί-
ξεων και προειδοποιήσεων.
▶ Κρατήστε τα παιδιά μακριά από τις συσκευές προβολής λέιζερ.
▶ Σε περίπτωση ακατάλληλου βιδώματος του εργαλείου ενδέχεται να προκληθεί ακτινοβολία λέιζερ, που
υπερβαίνει την κατηγορία 2. Αναθέστε την επισκευή του εργαλείου μόνο στα σημεία σέρβις της
Hilti.
▶ Οι ακτίνες λέιζερ θα πρέπει να διέρχονται σε μεγάλη απόσταση πάνω ή κάτω από το ύψος των ματιών.
▶ Λαμβάνετε υπόψη σας τις περιβαλλοντικές επιδράσεις. Μη χρησιμοποιείτε τη συσκευή όπου
υπάρχει κίνδυνος πυρκαγιάς ή εκρήξεων.
▶ Υπόδειξη σύμφωνα με το FCC §15.21: Τροποποιήσεις ή μετατροπές, που δεν έχουν επιτραπεί ρητά από
τη Hilti, μπορεί να περιορίσουν το δικαίωμα του χρήστη να θέσει σε λειτουργία τη συσκευή.
▶ Μετά από πτώση ή άλλες μηχανικές επιδράσεις πρέπει να ελέγξετε την ακρίβεια της συσκευής.
▶ Εάν μεταφέρετε το εργαλείο από πολύ κρύο σε πιο ζεστό περιβάλλον ή το αντίστροφο, πρέπει
να αφήσετε το εργαλείο να εγκλιματιστεί πριν από τη χρήση.
▶ Σε περίπτωση χρήσης με αντάπτορες και αξεσουάρ βεβαιωθείτε ότι το εργαλείο είναι καλά
στερεωμένο.
▶ Για να αποφύγετε εσφαλμένες μετρήσεις πρέπει να διατηρείτε καθαρή τη θυρίδα εξόδου ακτίνας
λέιζερ.
▶ Παρόλο που η συσκευή έχει σχεδιαστεί για σκληρή χρήση σε εργοτάξια, θα πρέπει να χρη-
σιμοποιείται σχολαστικά, όπως και κάθε οπτικός και ηλεκτρικός εξοπλισμός (κιάλια, γυαλιά,
φωτογραφικές μηχανές).
▶ Παρόλο που το εργαλείο είναι προστατευμένο από την εισχώρηση σκόνης, θα πρέπει να το
σκουπίσετε με στεγνό πανί πριν το τοποθετήσετε στη συσκευασία μεταφοράς του.
▶ Ελέγχετε τη συσκευή πριν από σημαντικές μετρήσεις.
▶ Κατά τη χρήση, ελέγχετε πολλές φορές την ακρίβεια.
▶ Φροντίστε για καλό φωτισμό της περιοχής εργασίας.
▶ Αποφύγετε να ακουμπάτε τις επαφές.
Printed: 01.06.2017 | Doc-Nr: PUB / 5284910 / 000 / 00Printed: 01.06.2017 | Doc-Nr: PUB / 5354746 / 000 / 00

14
▶ Φροντίζετε σχολαστικά το εργαλείο σας. Ελέγχετε, εάν τα κινούμενα μέρη του εργαλείου
λειτουργούν άψογα και δεν μπλοκάρουν, εάν έχουν σπάσει κάποια εξαρτήματα ή έχουν υποστεί
ζημιά επηρεάζοντας έτσι αρνητικά τη λειτουργία του εργαλείου. Αναθέτετε την επισκευή των
εξαρτημάτων που έχουν υποστεί ζημιά πριν από τη χρήση του εργαλείου.Πολλά ατυχήματα
οφείλονται σε κακά συντηρημένα εργαλεία.
2.1.3 Κατάλληλη οργάνωση των θέσεων εργασίας
▶ Αποκλείστε την περιοχή μέτρησης. Βεβαιωθείτε ότι κατά την τοποθέτηση του PR 3-HVSG δεν
στρέφετε την ακτίνα κόντρα σε άλλα άτομα ή στον εαυτό σας.
▶ Αποφεύγετε να παίρνετε αφύσικες στάσεις με το σώμα σας όταν εργάζεστε επάνω σε σκάλες.
Φροντίστε να έχετε καλή ευστάθεια και διατηρείτε πάντα την ισορροπία σας.
▶ Μετρήσεις κοντά σε αντικείμενα ή/και επιφάνειες με αντανάκλαση, μέσα από γυάλινες επιφάνειες ή
παρόμοια υλικά ενδέχεται να παραποιήσουν το αποτέλεσμα.
▶ Βεβαιωθείτε ότι η συσκευή έχει τοποθετηθεί επάνω σε στιβαρή επίπεδη επιφάνεια (χωρίς
δονήσεις!).
▶ Χρησιμοποιείτε το εργαλείο μόνο εντός των καθορισμένων ορίων χρήσης.
▶ Χρησιμοποιείτε το εργαλείο, τα αξεσουάρ, τα εξαρτήματα κτλ. σύμφωνα με τις παρούσες οδηγίες
και έτσι όπως προβλέπεται για τον εκάστοτε τύπο της συσκευής. Λαμβάνετε υπόψη τις συνθήκες
εργασίας και την εργασία που πρόκειται να εκτελεστεί.Η χρήση εργαλείων για εργασίες διαφορετικές
από τις προβλεπόμενες μπορεί να οδηγήσει σε επικίνδυνες καταστάσεις.
▶ Απαγορεύεται η εργασία με πήχεις μέτρησης κοντά σε καλώδια υψηλής τάσης.
▶ Βεβαιωθείτε ότι δεν χρησιμοποιείται άλλο PR 3-HVSG στον περιβάλλοντα χώρο. Ο έλεγχος υπερύθρων
μπορεί να επηρεάσει το εργαλείο σας.Ελέγξτε περιστασιακά τη διαμόρφωση.
2.1.4 Ηλεκτρομαγνητική συμβατότητα
Παρόλο που το εργαλείο ικανοποιεί τις αυστηρές απαιτήσεις των οδηγιών που ισχύουν, η Hilti δεν μπορεί
να αποκλείσει τα ακόλουθα:
• Το εργαλείο ενδέχεται να δέχεται παρεμβολές από έντονη ακτινοβολία, γεγονός που ενδέχεται να
προκαλέσει λανθασμένη λειτουργία.
Σε αυτές τις περιπτώσεις καθώς και σε περιπτώσεις άλλων αμφιβολιών, θα πρέπει να πραγματοποιούνται
δοκιμαστικές μετρήσεις.
• Το εργαλείο ενδέχεται να προκαλεί παρεμβολές σε άλλες συσκευές (π.χ. συστήματα πλοήγησης
αεροσκαφών).
Μόνο για την Κορέα:
Αυτή η συσκευή είναι κατάλληλη για ηλεκτρομαγνητικά κύματα που παρουσιάζονται σε χώρους κατοικίας
(κατηγορία B). Προβλέπεται κυρίως για εφαρμογές σε χώρους κατοικίας, μπορεί όμως να χρησιμοποιηθεί
και σε άλλες περιοχές.
2.1.5 Κατηγοριοποίηση λέιζερ για εργαλεία κατηγορίας λέιζερ 2
Το εργαλείο ανταποκρίνεται στην κατηγορία λέιζερ 2 κατά IEC60825-1:2007 / EN60825-1:2007. Τα
εργαλεία αυτά επιτρέπεται να χρησιμοποιούνται χωρίς περαιτέρω μέτρα προστασίας.
ΠΡΟΣΟΧΗ
Κίνδυνος τραυματισμού! Μην κατευθύνετε την ακτίνα λέιζερ σε ανθρώπους.
▶ Μην κοιτάτε ποτέ κατευθείαν τη πηγή φωτός του λέιζερ. Σε περίπτωση απευθείας επαφής με τα
μάτια, κλείστε τα μάτια και απομακρύνετε το κεφάλι από την περιοχή της ακτινοβολίας.
2.1.6 Επιμελής χρήση επαναφορτιζόμενων εργαλείων
▶ Κρατάτε τις επαναφορτιζόμενες μπαταρίες μακριά από υψηλές θερμοκρασίες, άμεση ηλιακή
ακτινοβολία και φωτιά. Υπάρχει κίνδυνος έκρηξης.
▶ Δεν επιτρέπεται να αποσυναρμολογείτε, να συμπιέζετε, να θερμαίνετε πάνω από τους 80°C
(176°F) ή να καίτε τις επαναφορτιζόμενες μπαταρίες. Διαφορετικά υπάρχει κίνδυνος πυρκαγιάς,
εκρήξεων και χημικών εγκαυμάτων.
▶ Μην εκθέτετε την επαναφορτιζόμενη μπαταρία σε έντονες μηχανικές κρούσεις και μην πετάτε
την επαναφορτιζόμενη μπαταρία.
▶ Οι μπαταρίες δεν επιτρέπεται να καταλήγουν στα χέρια παιδιών.
▶ Αποφύγετε την εισχώρηση υγρασίας. Η εισχώρηση υγρασίας ενδέχεται να προκαλέσει βραχυκύκλωμα
και να έχει ως συνέπεια εγκαύματα ή πυρκαγιά.
Printed: 01.06.2017 | Doc-Nr: PUB / 5284910 / 000 / 00Printed: 01.06.2017 | Doc-Nr: PUB / 5354746 / 000 / 00
Pagina se încarcă...
Pagina se încarcă...
Pagina se încarcă...
Pagina se încarcă...
Pagina se încarcă...
Pagina se încarcă...
Pagina se încarcă...
Pagina se încarcă...
Pagina se încarcă...
Pagina se încarcă...
Pagina se încarcă...
Pagina se încarcă...
Pagina se încarcă...
Pagina se încarcă...
Pagina se încarcă...
Pagina se încarcă...
Pagina se încarcă...
Pagina se încarcă...
Pagina se încarcă...
Pagina se încarcă...
Pagina se încarcă...
Pagina se încarcă...
Pagina se încarcă...
Pagina se încarcă...
Pagina se încarcă...
Pagina se încarcă...
Pagina se încarcă...
Pagina se încarcă...
Pagina se încarcă...
Pagina se încarcă...
Pagina se încarcă...
Pagina se încarcă...
Pagina se încarcă...
Pagina se încarcă...
Pagina se încarcă...
Pagina se încarcă...
Pagina se încarcă...
Pagina se încarcă...
Pagina se încarcă...
Pagina se încarcă...
Pagina se încarcă...
Pagina se încarcă...
Pagina se încarcă...
Pagina se încarcă...
Pagina se încarcă...
Pagina se încarcă...
Pagina se încarcă...
Pagina se încarcă...
Pagina se încarcă...
Pagina se încarcă...
Pagina se încarcă...
Pagina se încarcă...
Pagina se încarcă...
Pagina se încarcă...
Pagina se încarcă...
Pagina se încarcă...
Pagina se încarcă...
Pagina se încarcă...
Pagina se încarcă...
Pagina se încarcă...
Pagina se încarcă...
Pagina se încarcă...
Pagina se încarcă...
Pagina se încarcă...
Pagina se încarcă...
Pagina se încarcă...
Pagina se încarcă...
Pagina se încarcă...
Pagina se încarcă...
Pagina se încarcă...
Pagina se încarcă...
Pagina se încarcă...
Pagina se încarcă...
Pagina se încarcă...
Pagina se încarcă...
Pagina se încarcă...
Pagina se încarcă...
Pagina se încarcă...
-
 1
1
-
 2
2
-
 3
3
-
 4
4
-
 5
5
-
 6
6
-
 7
7
-
 8
8
-
 9
9
-
 10
10
-
 11
11
-
 12
12
-
 13
13
-
 14
14
-
 15
15
-
 16
16
-
 17
17
-
 18
18
-
 19
19
-
 20
20
-
 21
21
-
 22
22
-
 23
23
-
 24
24
-
 25
25
-
 26
26
-
 27
27
-
 28
28
-
 29
29
-
 30
30
-
 31
31
-
 32
32
-
 33
33
-
 34
34
-
 35
35
-
 36
36
-
 37
37
-
 38
38
-
 39
39
-
 40
40
-
 41
41
-
 42
42
-
 43
43
-
 44
44
-
 45
45
-
 46
46
-
 47
47
-
 48
48
-
 49
49
-
 50
50
-
 51
51
-
 52
52
-
 53
53
-
 54
54
-
 55
55
-
 56
56
-
 57
57
-
 58
58
-
 59
59
-
 60
60
-
 61
61
-
 62
62
-
 63
63
-
 64
64
-
 65
65
-
 66
66
-
 67
67
-
 68
68
-
 69
69
-
 70
70
-
 71
71
-
 72
72
-
 73
73
-
 74
74
-
 75
75
-
 76
76
-
 77
77
-
 78
78
-
 79
79
-
 80
80
-
 81
81
-
 82
82
-
 83
83
-
 84
84
-
 85
85
-
 86
86
-
 87
87
-
 88
88
-
 89
89
-
 90
90
-
 91
91
-
 92
92
-
 93
93
-
 94
94
-
 95
95
-
 96
96
-
 97
97
-
 98
98


Lucrări înrudite
-
Hilti PR 3-HVSG Instrucțiuni de utilizare
-
Hilti PR 35 Instrucțiuni de utilizare
-
-
Hilti PR 30 Instrucțiuni de utilizare
-
Hilti PR 30-HVSG A12 Instrucțiuni de utilizare
-
-
Hilti PR 2-HS-A12 Instrucțiuni de utilizare
-
Hilti PRI 36 Instrucțiuni de utilizare
-
-
Hilti PRI 2 Instrucțiuni de utilizare
