Makita PDC01 Portable Power Pack Manual de utilizare
- Tip
- Manual de utilizare

EN Portable Power Pack INSTRUCTION MANUAL 9
PTBR Adaptador de Baterias Tipo Mochila MANUAL DE INSTRUÇÕES 17
FR Support d’alimentation portable MANUEL D’INSTRUCTIONS 25
DE Rückentragbare Akku-Bank BETRIEBSANLEITUNG 34
IT Gruppo di alimentazione portatile ISTRUZIONI PER L’USO 43
NL Draagbare voedingseenheid GEBRUIKSAANWIJZING 52
ES Unidad Portátil de Alimentación Eléctrica MANUAL DE INSTRUCCIONES 61
PT Adaptador de Baterias Tipo Mochila MANUAL DE INSTRUÇÕES 70
DA Bærbar strømforsyning BRUGSANVISNING 78
EL 86
TR KULLANMA KILAVUZU 95
SV Bärbart strömpaket BRUKSANVISNING 103
NO Bærbar lader BRUKSANVISNING 111
FI Kannettava tehoyksikkö KÄYTTÖOHJE 119
LV LIETOŠANAS INSTRUKCIJA 126
LT NAUDOJIMO INSTRUKCIJA 134
ET Portatiivne akukomplekt KASUTUSJUHEND 142
PL 150
HU Hordozható tápegység HASZNÁLATI KÉZIKÖNYV 159
SK NÁVOD NA OBSLUHU 167
CS NÁVOD K OBSLUZE 175
SL Prenosna polnilna enota NAVODILA ZA UPORABO 183
SQ Paketë elektrike portative MANUALI I PËRDORIMIT 191
BG 199
HR 208
216
SR 225
RO Bloc de alimentare portabil 233
UK 241
RU 250
KK 259
ZHCN 便携电源装置 使用说明书 268
ZHTW 背負式電池搭載器 使用說明書 276
KO 4구 배부식 배터리 취급 설명서 284
ID Paket Daya Portabel PETUNJUK PENGGUNAAN 291
VI 300
TH 308
FA 324
AR 330
PDC01

1
2
4
5
6
7
8
10
11
12
13
3
3
9
Fig.1
2

1
2
Fig.2
1234
2
1
Fig.3
1
2
Fig.4
1
2
Fig.5
1
Fig.6
12
Fig.7
2
1
Fig.8
3

1
2
3
Fig.9
1 32
Fig.10
1
Fig.11
1
Fig.12
1
Fig.13
1
Fig.14
1
Fig.15
4

1
Fig.16
1
Fig.17
21
Fig.18
12
3
Fig.19
1
Fig.20
1
Fig.21
1
Fig.22
5

1
Fig.23
Fig.24
Fig.25
1
Fig.26
1
Fig.27
1
Fig.28
Fig.29
1
2
Fig.30
6

1
2
Fig.31
1
2
Fig.32
1
2
Fig.33
1
2
Fig.34
1
Fig.35
1
Fig.36
7

8
1
2
Fig.37
1
Fig.38

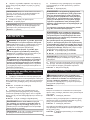
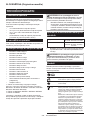
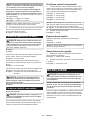
9ENGLISH
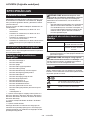
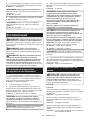
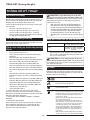
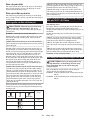
ENGLISH (Original instructions)
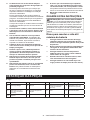
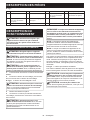
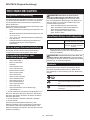
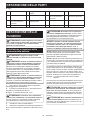
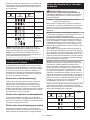
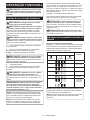
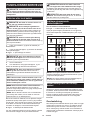
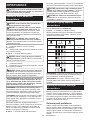
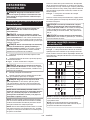
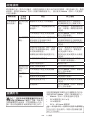
SPECIFICATIONS
Intended use
The portable power pack enables the batteries and the
tool or machine to be separated, making it suitable for a
long time work by switching the installed batteries.
This unit can be used with the following tools or
machines.
About this instruction manual
The term “unit” in this instruction manual refers to porta
ble power pack.
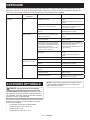
Compatible tool or machine
category
The compatible category of tool or machine is subject
manual for the information on the compatible category
of tool or machine.
WARNING: Never use this unit with tools or
machines categorized below.
sonal injury or malfunction.
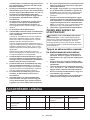
Applicable battery cartridge and
charger
above may not be available depending on your
region of residence.
WARNING: Only use the battery cartridges
and chargers listed above.
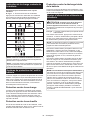
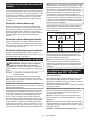
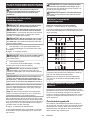
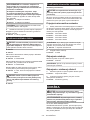
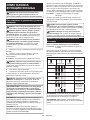
Symbols
The followings show the symbols which may be used
meaning before use.
To reduce the risk of injury, keep the cord
away from obstacles.
against ingress of water or rain.

10 ENGLISH
Li-ion
ponents in the equipment, waste electrical
and electronic equipment, accumulators
and batteries may have a negative impact
on the environment and human health.
appliances or batteries with household
waste!
on waste electrical and electronic equip
ment and on accumulators and batteries
and waste accumulators and batteries,
as well as their adaptation to national law,
waste electrical equipment, batteries and
accumulators should be stored separately
and delivered to a separate collection point
for municipal waste, operating in accor
dance with the regulations on environmen
tal protection.
This is indicated by the symbol of the
equipment.
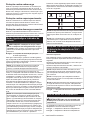
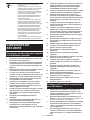
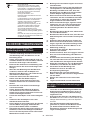
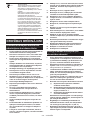
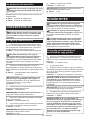
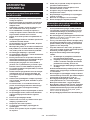
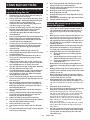
SAFETY WARNINGS
Portable power pack safety
warnings
Be sure to read the instruction manual of the
tool or machine before use.
Do not pick up or carry this unit by holding
only the cord. Do not pull the cord while you
are wearing or using this unit.
the socket from the tool or machine.
or remove the unit from your body.
Be careful not to trip over the cord during
operation.
unstable high places.
7. Do not use multiple units by connecting one
unit to another unit.
obstacles. The cord caught by obstacles may
9. Do not insert the adapters into the charger.
Do not install the adapters to the battery ports
of this unit.
This unit is designed exclusively for use with
18 V batteries. Do not use the batteries other
than 18 V batteries.
Authorized Service Center for repair.
sure to attach it slowly and securely.
Always make sure that the tool or machine is
before attempting to perform inspection or
maintenance of the tool or machine.
When using this unit with a tool equipped with
the blade.
may interfere the emergency detachment func-
tion of the unit.
Do not use this unit while you are climbing up
in a tree.
Do not use this unit when you are wearing
Do not expose this unit to sparks.
sure to lay down the unit.
Do not let water enter into the cover.
Be careful not to entangle the harness or belt
by the tool or machine.
cords with the tool or machine.
water away from the plug of the unit.
Do not use the tool or machine near high-volt-
age power lines.
Do not damage the case of the battery or place
anything on the unit.
Do not step on the unit or sit on the unit.
Store the unit indoors.
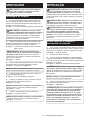
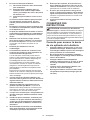
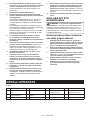
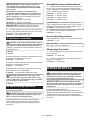
Important safety instructions for
battery cartridge
-
tions and cautionary markings on (1) battery
battery.
Do not disassemble or tamper with the battery
cartridge.
If operating time has become excessively
and even an explosion.
out with clear water and seek medical atten-
tion right away. It may result in loss of your
eyesight.
Do not short the battery cartridge:
Do not touch the terminals with any con-
ductive material.
Avoid storing battery cartridge in a con-
Do not expose battery cartridge to water
or rain.
A battery short can cause a large current
breakdown.
Do not store and use the tool and battery car-
tridge in locations where the temperature may
reach or exceed 50 °C (122 °F).

11 ENGLISH
7. Do not incinerate the battery cartridge even if
it is severely damaged or is completely worn
battery cartridge.
9. Do not use a damaged battery.
to the Dangerous Goods Legislation require-
ments.
forwarding agents, special requirement on pack
aging and labeling must be observed.
national regulations.
battery in such a manner that it cannot move
around in the packaging.
it from the tool and dispose of it in a safe
place. Follow your local regulations relating to
disposal of battery.
Use the batteries only with the products
Installing the batteries to
the battery must be removed from the tool.
take on heat which can cause burns or low
temperature burns. Pay attention to the han-
dling of hot battery cartridges.
Do not touch the terminal of the tool imme-
diately after use as it may get hot enough to
cause burns.
cartridge. It may result in poor performance or
breakdown of the tool or battery cartridge.
Unless the tool supports the use near
the battery cartridge near high-voltage electri-
cal power lines. It may result in a malfunction or
breakdown of the tool or battery cartridge.
Keep the battery away from children.
SAVE THESE INSTRUCTIONS.
CAUTION: Only use genuine Makita batteries.
have been altered, may result in the battery bursting
charger.
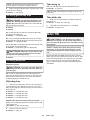
Tips for maintaining maximum
battery life
Charge the battery cartridge before completely
discharged. Always stop tool operation and
charge the battery cartridge when you notice
less tool power.
Never recharge a fully charged battery car-
tridge. Overcharging shortens the battery
service life.
Charge the battery cartridge with room tem-
perature at 10 °C - 40 °C (50 °F - 104 °F). Let
a hot battery cartridge cool down before
charging it.
it from the tool or the charger.
Charge the battery cartridge if you do not use
it for a long period (more than six months).
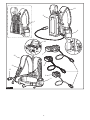
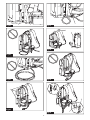
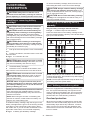
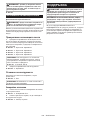
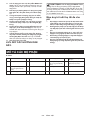
PARTS DESCRIPTION
Fig.1
7
9

12 ENGLISH
FUNCTIONAL
DESCRIPTION
CAUTION: Always be sure that the unit is
Installing or removing battery
cartridge
CAUTION:
installing or removing of the battery cartridge.
CAUTION: Hold the unit and the battery car-
cartridge.
and result in damage to the unit and battery cartridge
and a personal injury.
CAUTION: When installing or removing the
-
ble surface. Otherwise, the battery cartridge may fall
accidentally and cause an injury.
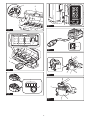
1.
2.
the lock button.
Fig.2: 1.2.
CAUTION: Make sure that the cover is locked
with the lock button securely. Otherwise, the cover
may close accidentally, and cause an injury.
3. Install the battery cartridges.
4.
then close the cover and lock the cover with the lever.
CAUTION: Make sure that the cover is closed
securely and locked. Otherwise, water or rain may
shock or malfunction.
NOTICE: When using this unit with 36 V (18 V x
battery to battery port 3 or 4.
NOTE: This unit automatically switches the batteries
to be used among the installed batteries. The unit
selects the appropriate battery every time the tool or
machine is turned on.
NOTE:
ered tool or machine, install at least one battery car
tridge to one of the battery ports.
To install the battery cartridge, align the tongue on the
battery cartridge with the groove in the housing and slip
it into place. Insert it all the way until it locks in place
with a little click. If you can see the red indicator on the
upper side of the button, it is not locked completely.
Fig.3: 1.2.
To remove the battery cartridge, slide it from the unit
while sliding the button on the front of the cartridge.
CAUTION: Always install the battery cartridge
fully until the red indicator cannot be seen. If not,
it may accidentally fall out of the unit, causing injury to
you or someone around you.
CAUTION: Do not install the battery cartridge
forcibly. If the cartridge does not slide in easily, it is
not being inserted correctly.
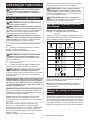
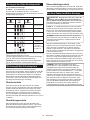
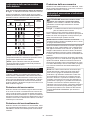
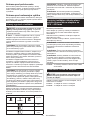
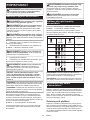
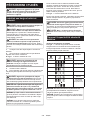
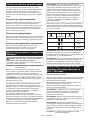
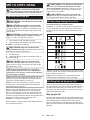
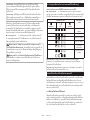
Indicating the remaining battery
capacity
Only for battery cartridges with the indicator
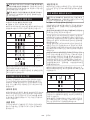
Fig.4: 1. Indicator lamps 2.
cate the remaining battery capacity. The indicator lamps
light up for a few seconds.
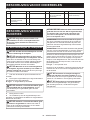
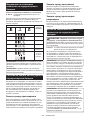
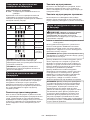
Indicator lamps Remaining
capacity
Lighted Blinking
battery.
The battery
may have
malfunctioned.
NOTE:
from the actual capacity.
NOTE:
the battery protection system works.
Tool / battery protection system
matically stop during operation if the tool or battery is
placed under one of the following conditions:
Overload protection
causes it to draw an abnormally high current, the tool
automatically stops without any indication. In this sit
caused the tool to become overloaded. Then turn the
tool on to restart.

13 ENGLISH
Overheat protection
automatically. In this case, let the tool and battery cool
before turning the tool on again.
Overdischarge protection
automatically. In this case, remove the battery from the
tool and charge the battery.
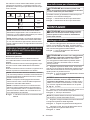
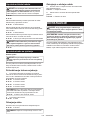
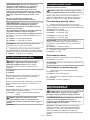
Power button and battery indicator
CAUTION: Make sure that the tool or machine
Otherwise,
the tool or machine may start suddenly and cause an
injury.
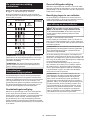
Fig.5: 1.2.
To turn the power on, press the power button. The main
press the power button for a few seconds.
NOTE: If the unit and connected tool or machine are
If the main power lamp blinks in green, the adapter is
not connected to the unit, or the batteries are empty. In
this case, connect the adapter to the unit, or charge the
batteries. If the lamp keeps blinking in green, refer to
the troubleshooting.
If the main power lamp blinks in red and green alter
If the main power lamp keeps blinking in red and green
alternately after turning the power on, ask your local
NOTE: If you turn on the main power switch of the
tool or machine just after turning on the portable
may show that the protection system is working. In
this situation, start the tool or machine once. If the
power lamp of the portable power pack and refer the
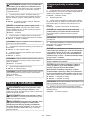
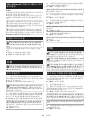
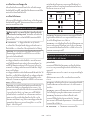
capacity. The indicator lamp that corresponds to each
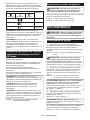
Indicator lamps Remaining
capacity
Lighted Blinking
battery.
NOTE: The indicator lamps for remaining battery
capacity is just for a reference. The actual bat
conditions.
NOTE: If the tool or machine has indicator lamps for
remaining battery capacity, do not refer to the indica
tor lamps of the tool or machine but to the indicator
lamps of this unit.
Low battery indication lamp of
Adapter for 36 V - 40 Vmax
Optional accessory
you of low or no battery capacity.
battery capacity gets low.
tion system is activated.
NOTE:
machine may automatically stop without blinking the
indication lamp during continuous operation.
NOTE: The timing when the indication lamp blinks
varies depending on the ambient temperature and
battery status.
NOTE: The indication lamp does not lights up even
when the battery cartridge currently used is depleted.
ing the battery cartridges to use.
Fig.6: 1.
Using the adapter pocket
CAUTION: Do not use this unit with the cord
adapter pocket.
You can put the adapters into the adapter pocket as
Fig.7: 1.2.
Fig.8: 1.2.
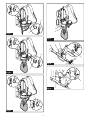
ASSEMBLY
CAUTION: Always be sure that the unit is
before carrying out any work on the unit.
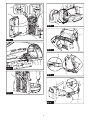
Assembling the unit
1.
Fig.9: 1.2.3.
CAUTION: Make sure that the battery box is
levers.
wear the unit or use the unit, and cause an injury.

14 ENGLISH
2.
height adjustment lever, then adjust the position of the
waist belt by sliding the base plate, and then return the
lever.
Fig.10: 1.2.
3.
NOTICE:
Otherwise, the height adjustment lever will not move.
Fig.11: 1.
3.
Fig.12: 1.
NOTE: The adapter pocket can be attached on either
left or right side of the waist belt.
4.
width adjustment belt.
Fig.13: 1.
5.
belt, and then adjust the length of the waist belt.
Fig.14: 1.
NOTE:
Fig.15: 1.
6.
Fig.16: 1.
NOTE:
Fig.17: 1.
OPERATION
CAUTION:
to put shoulder harness on your both shoulders.
Otherwise, the unit may fall when you wear the unit or
use the unit, and cause an injury.
CAUTION:
wear the unit on your back. Otherwise, the unit may
fall during operation and cause an injury.
CAUTION:
the plug of the adapter or power tool/machine to
the socket of the battery box. Otherwise, the tool or
machine may start suddenly and cause an injury.
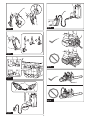
Connecting the unit to the tool or
machine
1.
Fig.18: 1.2.
2.
3.
that the arrow mark on the plug is aligned with that on
the socket.
Fig.19: 1.2.3.
NOTICE: When disconnecting the plug and
and socket. Otherwise, the cords may be damaged
and cause a malfunction of the unit.
NOTE: The plug and socket are disconnected if a
certain load is applied.
4. Install the adapters to the tool or machine in the
same way as the battery cartridge.
Fig.20: 1.
NOTICE: For 18 V battery-powered tool or
adapters for 36 V (18 V x 2). For 36 V - 40 Vmax
for 36 V - 40 Vmax.
adapter is required.
NOTICE: When installing adapters to the tool or
equipped with 2 cords cannot be inserted all the
-
bly. Otherwise, the tool or machine may be damaged.
Fig.21: 1.
Fig.22: 1.
NOTE: The direction of the cord of the adapter can be
5.
seconds.
Fig.23: 1.

15 ENGLISH
Using the cord holders
CAUTION: Attach only the cord of the battery
box to the cord holders. Do not attach the cord
of the adapters to the cord holders.
cord of the adapters may invite accident and cause
an injury.
Fig.24
Fig.25
Fig.26: 1.
You can also attach the cord using only the cord holder
Fig.27: 1.
The cord holders can be attached on either left or right
side of the shoulder harness and waist belt.
Fig.28: 1.
CAUTION: Be sure to attach the cord to the
shoulder harness on the left side only or right
side only so that the cord does not cross the
shoulder harness.
Fig.29
Using the hanging band
Optional accessory
CAUTION:
the hanging band is properly attached to the
hanger on the tool.
You can use the hanging band for cordless grass trim
mer, cordless string trimmer or cordless pole saw with
this unit.
Attaching the hanging band
1.
of the shoulder harness or waist belt as shown in the
method appropriate for your usage.
Fig.30: 1.2.
Fig.31: 1.2.
Fig.32: 1.2.
Fig.33: 1.2.
NOTE: If the tool is bike handle type, attach the band
so that the band passes through inside of the waist
Fig.34: 1.2.
2.
Fig.35: 1.
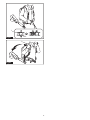
Detaching the tool
Fig.36: 1.
NOTE: The buckle is not equipped depending on the
type of band.
Emergency detachment
1.
unlock the buckle.
Fig.37: 1.2.
2.
and the unit.
Fig.38: 1.
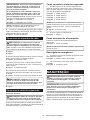
MAINTENANCE
CAUTION: Always be sure that the unit is
before attempting to perform inspection or
maintenance.
NOTICE:
cracks may result.
repairs, any other maintenance or adjustment should

16 ENGLISH
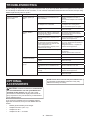
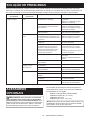
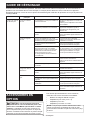
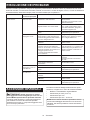
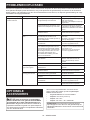
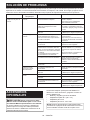
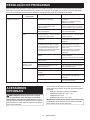
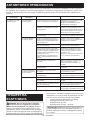
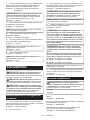
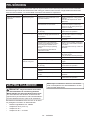
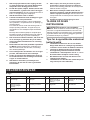
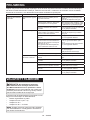
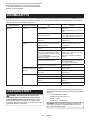
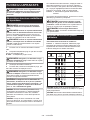
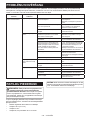
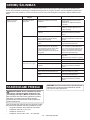
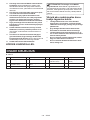
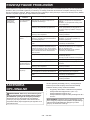
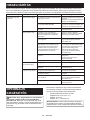
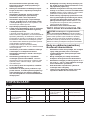
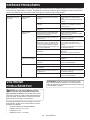
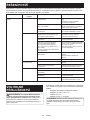
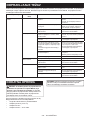
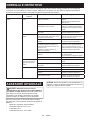
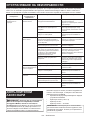
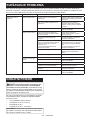
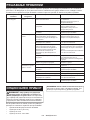
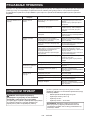
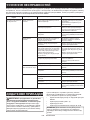
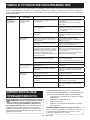
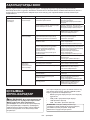
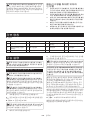
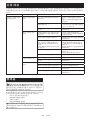
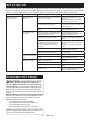
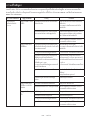
TROUBLESHOOTING
State of abnormality Main power lamp Cause Remedy
The tool or machine
does not start.
The lamp lights up in
green.
The adapters are not installed to the
tool or machine.
Install the adapters to the tool or
machine.
securely.
The tool or machine, or the cords of
the adapters are overheated.
The tool or machine, or the unit is
broken.
The lamp blinks in
green.
machine and the socket of the battery
connected securely.
The remaining battery capacity is not
enough.
batteries with charged ones.
Two batteries are not installed to
the unit when using the unit with the
The remaining battery capacity of two
batteries is not enough.
Install at least one battery to battery
batteries with charged ones.
The unit needs to switch the battery.
then back on.
The cord of the unit is overheated.
The lamp blinks in red
and green alternately.
The unit has detected an abnormality.
The tool or machine, or the unit is
broken.
The lamp does not
light up.
The unit is not turned on. Turn on the unit.
The batteries are not installed to the
unit.
Install the batteries to the unit.
The remaining battery capacity is not
enough.
batteries with charged ones.
The unit is broken.
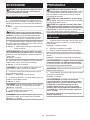
OPTIONAL
ACCESSORIES
CAUTION: These accessories or attachments
are recommended for use with your Makita tool
The use of any other
accessories or attachments might present a risk of
injury to persons. Only use accessory or attachment
for its stated purpose.
If you need any assistance for more details regard
NOTE:
tool package as standard accessories. They may

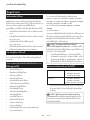
17 PORTUGUÊS DO BRASIL
ESPECIFICAÇÕES
O adaptador de baterias tipo mochila permite que as
o que o torna adequado para períodos prolongados de
trabalho com a substituição das baterias instaladas.
O termo “unidade” neste manual de instruções se refere
ao adaptador de baterias tipo mochila.
Categoria de máquinas ou
o manual de instruções mais recente para obter infor
mações sobre a categoria compatível da ferramenta ou
AVISO: Nunca use esta unidade com ferra-
mentas ou máquinas categorizadas abaixo. O uso
defeitos de funcionamento.
Bateria e carregador aplicáveis
acima podem não estar disponíveis na sua região
de residência.
AVISO: Use somente as baterias e carregado-
res listados acima. O uso de outras baterias e carre
Os símbolos mostrados a seguir podem ser usados
Li-ion
nos equipamentos, resíduos de equipamentos
elétricos e eletrônicos, acumuladores e bate
rias podem gerar impactos negativos sobre o
meio ambiente e a saúde humana.
aos resíduos de equipamentos elétricos e
eletrônicos, e a acumuladores, baterias e os
resíduos destes, bem como sua adaptação
como legislação nacional, resíduos de equi
pamentos elétricos e eletrônicos, baterias e
radamente e enviados para um ponto de coleta
de resíduos municipais separado, que opere
em conformidade com as regulamentações de
proteção ambiental.

18 PORTUGUÊS DO BRASIL
AVISOS DE SEGURANÇA
de baterias tipo mochila
ferramenta ou máquina antes do uso.
-
enquanto estiver com a unidade colocada no
corpo ou se a estiver usando.
Antes de colocar ou remover a unidade do
máquina.
-
vel ou em locais altos instáveis.
7.
às outras.
-
sérios.
9.
baterias desta unidade.
Esta unidade se destina exclusivamente ao
-
cite reparos ao centro de assistência técnica
autorizado Makita local.
Antes de realizar qualquer trabalho de ins-
os adaptadores foram removidos.
Quando usar esta unidade com uma ferra-
de manter o cabo afastado da lâmina.
nada que possa interferir com a funcionali-
ombro.
a bateria.
Quando usar esta unidade sem colocá-la no
horizontal.
tampa.
unidade.
Tome cuidado para que a correia ou o cinto
máquina.
plugue da unidade.
coloque nada sobre a unidade.
Guarde a unidade em áreas internas.
importantes para o cartucho da
bateria
-
usando a bateria.
Isto
-
com água limpa e procure assistência de um
médico imediatamente. Esse acidente pode
material condutor.
Um curto-circuito na bateria pode causar
-
em locais onde a temperatura possa atingir ou
ultrapassar 50°C.
7. -
explodir no fogo.
Isto poderia resultar em incêndio, aqueci
9.

19 PORTUGUÊS DO BRASIL
produtos perigosos.
terceiros e agentes de embarque, os requisitos
especiais referentes a embalagem e rotulação
devem ser obedecidos.
tações nacionais podem ser mais detalhadas e
devem ser obedecidas.
a bateria de maneira que não se mova dentro da
embalagem.
e descarte-a em um local seguro. Siga as regu-
baterias.
Use as baterias somente com os produtos
A bateria deverá ser retirada da ferramenta
tempo prolongado.
quente e causar queimaduras normais ou
queimaduras de baixa temperatura. Preste
-
queimaduras.
bateria. Isso poderia resultar no desempenho
bateria.
com o uso nas proximidades de linhas elétri-
Isso poderia resultar em problemas de funciona
mento ou em avarias da ferramenta ou da bateria.
Mantenha a bateria fora do alcance de
GUARDE ESTAS INSTRUÇÕES.
PRECAUÇÃO: Use somente baterias Makita
originais.
tanto para a ferramenta quanto para o carregador da
bateria.
Dicas para manter a vida útil
máxima da bateria
Carregue a bateria antes de uma descarga
-
menta e carregue a bateria quando notar perda
de potência.
Nunca recarregue uma bateria completamente
carregada. O carregamento demasiado dimi-
nuirá a vida útil da bateria.
Carregue a bateria em uma temperatura
ambiente entre 10°C e 40°C. Deixe a bateria
esfriar antes de carregá-la.
-
va-a da ferramenta ou do carregador.
DESCRIÇÃO DAS PEÇAS
Fig.1
7
9
largura

20 PORTUGUÊS DO BRASIL
DESCRIÇÃO FUNCIONAL
PRECAUÇÃO:
retirada.
PRECAUÇÃO: Desligue a unidade antes de
colocar ou retirar a bateria.
PRECAUÇÃO: Segure a unidade e a bateria
sofram danos e causem ferimentos pessoais.
PRECAUÇÃO: Para instalar ou remover a
plana e estável.
cair acidentalmente e causar ferimentos.
1.
baterias.
2.
tampa no botão de travamento.
Fig.2: 1.2.
PRECAUÇÃO:
provocar ferimentos.
3. Instale as baterias.
4.
PRECAUÇÃO:
baterias e provocar choque elétrico ou defeitos de
funcionamento.
OBSERVAÇÃO: Quando usar esta unidade com
uma ferramenta ou máquina acionada por bateria
no encaixe de bateria 1 ou 2 e pelo menos uma no
encaixe de bateria 3 ou 4.
NOTA:
unidade seleciona a bateria apropriada sempre que a
NOTA: Quando usar esta unidade com uma ferra
de bateria.
tamente travada.
Fig.3: 1.2.
PRECAUÇÃO: Coloque sempre a bateria
-
cador vermelho.
unidade acidentalmente e provocar ferimentos em
PRECAUÇÃO:
bateria.
das baterias
Somente para baterias com o indicador
Fig.4: 1.2.
checagem
doras acendem por alguns segundos.
Lâmpadas indicadoras Capacidade
restante
Acesa Desl Piscando
bateria.
pode ter
falhado.
NOTA:
peratura ambiente, a indicação pode ser um pouco
diferente da capacidade real.
NOTA:
bateria funciona.
bateria
mente a alimentação de energia do motor para prolon
para automaticamente durante a operação se uma das
seguintes condições ocorrer com ela ou com a bateria:
Pagina se încarcă...
Pagina se încarcă...
Pagina se încarcă...
Pagina se încarcă...
Pagina se încarcă...
Pagina se încarcă...
Pagina se încarcă...
Pagina se încarcă...
Pagina se încarcă...
Pagina se încarcă...
Pagina se încarcă...
Pagina se încarcă...
Pagina se încarcă...
Pagina se încarcă...
Pagina se încarcă...
Pagina se încarcă...
Pagina se încarcă...
Pagina se încarcă...
Pagina se încarcă...
Pagina se încarcă...
Pagina se încarcă...
Pagina se încarcă...
Pagina se încarcă...
Pagina se încarcă...
Pagina se încarcă...
Pagina se încarcă...
Pagina se încarcă...
Pagina se încarcă...
Pagina se încarcă...
Pagina se încarcă...
Pagina se încarcă...
Pagina se încarcă...
Pagina se încarcă...
Pagina se încarcă...
Pagina se încarcă...
Pagina se încarcă...
Pagina se încarcă...
Pagina se încarcă...
Pagina se încarcă...
Pagina se încarcă...
Pagina se încarcă...
Pagina se încarcă...
Pagina se încarcă...
Pagina se încarcă...
Pagina se încarcă...
Pagina se încarcă...
Pagina se încarcă...
Pagina se încarcă...
Pagina se încarcă...
Pagina se încarcă...
Pagina se încarcă...
Pagina se încarcă...
Pagina se încarcă...
Pagina se încarcă...
Pagina se încarcă...
Pagina se încarcă...
Pagina se încarcă...
Pagina se încarcă...
Pagina se încarcă...
Pagina se încarcă...
Pagina se încarcă...
Pagina se încarcă...
Pagina se încarcă...
Pagina se încarcă...
Pagina se încarcă...
Pagina se încarcă...
Pagina se încarcă...
Pagina se încarcă...
Pagina se încarcă...
Pagina se încarcă...
Pagina se încarcă...
Pagina se încarcă...
Pagina se încarcă...
Pagina se încarcă...
Pagina se încarcă...
Pagina se încarcă...
Pagina se încarcă...
Pagina se încarcă...
Pagina se încarcă...
Pagina se încarcă...
Pagina se încarcă...
Pagina se încarcă...
Pagina se încarcă...
Pagina se încarcă...
Pagina se încarcă...
Pagina se încarcă...
Pagina se încarcă...
Pagina se încarcă...
Pagina se încarcă...
Pagina se încarcă...
Pagina se încarcă...
Pagina se încarcă...
Pagina se încarcă...
Pagina se încarcă...
Pagina se încarcă...
Pagina se încarcă...
Pagina se încarcă...
Pagina se încarcă...
Pagina se încarcă...
Pagina se încarcă...
Pagina se încarcă...
Pagina se încarcă...
Pagina se încarcă...
Pagina se încarcă...
Pagina se încarcă...
Pagina se încarcă...
Pagina se încarcă...
Pagina se încarcă...
Pagina se încarcă...
Pagina se încarcă...
Pagina se încarcă...
Pagina se încarcă...
Pagina se încarcă...
Pagina se încarcă...
Pagina se încarcă...
Pagina se încarcă...
Pagina se încarcă...
Pagina se încarcă...
Pagina se încarcă...
Pagina se încarcă...
Pagina se încarcă...
Pagina se încarcă...
Pagina se încarcă...
Pagina se încarcă...
Pagina se încarcă...
Pagina se încarcă...
Pagina se încarcă...
Pagina se încarcă...
Pagina se încarcă...
Pagina se încarcă...
Pagina se încarcă...
Pagina se încarcă...
Pagina se încarcă...
Pagina se încarcă...
Pagina se încarcă...
Pagina se încarcă...
Pagina se încarcă...
Pagina se încarcă...
Pagina se încarcă...
Pagina se încarcă...
Pagina se încarcă...
Pagina se încarcă...
Pagina se încarcă...
Pagina se încarcă...
Pagina se încarcă...
Pagina se încarcă...
Pagina se încarcă...
Pagina se încarcă...
Pagina se încarcă...
Pagina se încarcă...
Pagina se încarcă...
Pagina se încarcă...
Pagina se încarcă...
Pagina se încarcă...
Pagina se încarcă...
Pagina se încarcă...
Pagina se încarcă...
Pagina se încarcă...
Pagina se încarcă...
Pagina se încarcă...
Pagina se încarcă...
Pagina se încarcă...
Pagina se încarcă...
Pagina se încarcă...
Pagina se încarcă...
Pagina se încarcă...
Pagina se încarcă...
Pagina se încarcă...
Pagina se încarcă...
Pagina se încarcă...
Pagina se încarcă...
Pagina se încarcă...
Pagina se încarcă...
Pagina se încarcă...
Pagina se încarcă...
Pagina se încarcă...
Pagina se încarcă...
Pagina se încarcă...
Pagina se încarcă...
Pagina se încarcă...
Pagina se încarcă...
Pagina se încarcă...
Pagina se încarcă...
Pagina se încarcă...
Pagina se încarcă...
Pagina se încarcă...
Pagina se încarcă...
Pagina se încarcă...
Pagina se încarcă...
Pagina se încarcă...
Pagina se încarcă...
Pagina se încarcă...
Pagina se încarcă...
Pagina se încarcă...
Pagina se încarcă...
Pagina se încarcă...
Pagina se încarcă...
Pagina se încarcă...
Pagina se încarcă...
Pagina se încarcă...
Pagina se încarcă...
Pagina se încarcă...
Pagina se încarcă...
Pagina se încarcă...
Pagina se încarcă...
Pagina se încarcă...
Pagina se încarcă...
Pagina se încarcă...
Pagina se încarcă...
Pagina se încarcă...
Pagina se încarcă...
Pagina se încarcă...
Pagina se încarcă...
Pagina se încarcă...
Pagina se încarcă...
Pagina se încarcă...
Pagina se încarcă...
Pagina se încarcă...
Pagina se încarcă...
Pagina se încarcă...
Pagina se încarcă...
Pagina se încarcă...
Pagina se încarcă...
Pagina se încarcă...
Pagina se încarcă...
Pagina se încarcă...
Pagina se încarcă...
Pagina se încarcă...
Pagina se încarcă...
Pagina se încarcă...
Pagina se încarcă...
Pagina se încarcă...
Pagina se încarcă...
Pagina se încarcă...
Pagina se încarcă...
Pagina se încarcă...
Pagina se încarcă...
Pagina se încarcă...
Pagina se încarcă...
Pagina se încarcă...
Pagina se încarcă...
Pagina se încarcă...
Pagina se încarcă...
Pagina se încarcă...
Pagina se încarcă...
Pagina se încarcă...
Pagina se încarcă...
Pagina se încarcă...
Pagina se încarcă...
Pagina se încarcă...
Pagina se încarcă...
Pagina se încarcă...
Pagina se încarcă...
Pagina se încarcă...
Pagina se încarcă...
Pagina se încarcă...
Pagina se încarcă...
Pagina se încarcă...
Pagina se încarcă...
Pagina se încarcă...
Pagina se încarcă...
Pagina se încarcă...
Pagina se încarcă...
Pagina se încarcă...
Pagina se încarcă...
Pagina se încarcă...
Pagina se încarcă...
Pagina se încarcă...
Pagina se încarcă...
Pagina se încarcă...
Pagina se încarcă...
Pagina se încarcă...
Pagina se încarcă...
Pagina se încarcă...
Pagina se încarcă...
Pagina se încarcă...
Pagina se încarcă...
Pagina se încarcă...
Pagina se încarcă...
Pagina se încarcă...
Pagina se încarcă...
Pagina se încarcă...
Pagina se încarcă...
Pagina se încarcă...
Pagina se încarcă...
Pagina se încarcă...
Pagina se încarcă...
Pagina se încarcă...
Pagina se încarcă...
Pagina se încarcă...
Pagina se încarcă...
Pagina se încarcă...
Pagina se încarcă...
Pagina se încarcă...
Pagina se încarcă...
Pagina se încarcă...
Pagina se încarcă...
Pagina se încarcă...
Pagina se încarcă...
Pagina se încarcă...
Pagina se încarcă...
Pagina se încarcă...
Pagina se încarcă...
Pagina se încarcă...
Pagina se încarcă...
Pagina se încarcă...
Pagina se încarcă...
Pagina se încarcă...
Pagina se încarcă...
Pagina se încarcă...
Pagina se încarcă...
Pagina se încarcă...
-
 1
1
-
 2
2
-
 3
3
-
 4
4
-
 5
5
-
 6
6
-
 7
7
-
 8
8
-
 9
9
-
 10
10
-
 11
11
-
 12
12
-
 13
13
-
 14
14
-
 15
15
-
 16
16
-
 17
17
-
 18
18
-
 19
19
-
 20
20
-
 21
21
-
 22
22
-
 23
23
-
 24
24
-
 25
25
-
 26
26
-
 27
27
-
 28
28
-
 29
29
-
 30
30
-
 31
31
-
 32
32
-
 33
33
-
 34
34
-
 35
35
-
 36
36
-
 37
37
-
 38
38
-
 39
39
-
 40
40
-
 41
41
-
 42
42
-
 43
43
-
 44
44
-
 45
45
-
 46
46
-
 47
47
-
 48
48
-
 49
49
-
 50
50
-
 51
51
-
 52
52
-
 53
53
-
 54
54
-
 55
55
-
 56
56
-
 57
57
-
 58
58
-
 59
59
-
 60
60
-
 61
61
-
 62
62
-
 63
63
-
 64
64
-
 65
65
-
 66
66
-
 67
67
-
 68
68
-
 69
69
-
 70
70
-
 71
71
-
 72
72
-
 73
73
-
 74
74
-
 75
75
-
 76
76
-
 77
77
-
 78
78
-
 79
79
-
 80
80
-
 81
81
-
 82
82
-
 83
83
-
 84
84
-
 85
85
-
 86
86
-
 87
87
-
 88
88
-
 89
89
-
 90
90
-
 91
91
-
 92
92
-
 93
93
-
 94
94
-
 95
95
-
 96
96
-
 97
97
-
 98
98
-
 99
99
-
 100
100
-
 101
101
-
 102
102
-
 103
103
-
 104
104
-
 105
105
-
 106
106
-
 107
107
-
 108
108
-
 109
109
-
 110
110
-
 111
111
-
 112
112
-
 113
113
-
 114
114
-
 115
115
-
 116
116
-
 117
117
-
 118
118
-
 119
119
-
 120
120
-
 121
121
-
 122
122
-
 123
123
-
 124
124
-
 125
125
-
 126
126
-
 127
127
-
 128
128
-
 129
129
-
 130
130
-
 131
131
-
 132
132
-
 133
133
-
 134
134
-
 135
135
-
 136
136
-
 137
137
-
 138
138
-
 139
139
-
 140
140
-
 141
141
-
 142
142
-
 143
143
-
 144
144
-
 145
145
-
 146
146
-
 147
147
-
 148
148
-
 149
149
-
 150
150
-
 151
151
-
 152
152
-
 153
153
-
 154
154
-
 155
155
-
 156
156
-
 157
157
-
 158
158
-
 159
159
-
 160
160
-
 161
161
-
 162
162
-
 163
163
-
 164
164
-
 165
165
-
 166
166
-
 167
167
-
 168
168
-
 169
169
-
 170
170
-
 171
171
-
 172
172
-
 173
173
-
 174
174
-
 175
175
-
 176
176
-
 177
177
-
 178
178
-
 179
179
-
 180
180
-
 181
181
-
 182
182
-
 183
183
-
 184
184
-
 185
185
-
 186
186
-
 187
187
-
 188
188
-
 189
189
-
 190
190
-
 191
191
-
 192
192
-
 193
193
-
 194
194
-
 195
195
-
 196
196
-
 197
197
-
 198
198
-
 199
199
-
 200
200
-
 201
201
-
 202
202
-
 203
203
-
 204
204
-
 205
205
-
 206
206
-
 207
207
-
 208
208
-
 209
209
-
 210
210
-
 211
211
-
 212
212
-
 213
213
-
 214
214
-
 215
215
-
 216
216
-
 217
217
-
 218
218
-
 219
219
-
 220
220
-
 221
221
-
 222
222
-
 223
223
-
 224
224
-
 225
225
-
 226
226
-
 227
227
-
 228
228
-
 229
229
-
 230
230
-
 231
231
-
 232
232
-
 233
233
-
 234
234
-
 235
235
-
 236
236
-
 237
237
-
 238
238
-
 239
239
-
 240
240
-
 241
241
-
 242
242
-
 243
243
-
 244
244
-
 245
245
-
 246
246
-
 247
247
-
 248
248
-
 249
249
-
 250
250
-
 251
251
-
 252
252
-
 253
253
-
 254
254
-
 255
255
-
 256
256
-
 257
257
-
 258
258
-
 259
259
-
 260
260
-
 261
261
-
 262
262
-
 263
263
-
 264
264
-
 265
265
-
 266
266
-
 267
267
-
 268
268
-
 269
269
-
 270
270
-
 271
271
-
 272
272
-
 273
273
-
 274
274
-
 275
275
-
 276
276
-
 277
277
-
 278
278
-
 279
279
-
 280
280
-
 281
281
-
 282
282
-
 283
283
-
 284
284
-
 285
285
-
 286
286
-
 287
287
-
 288
288
-
 289
289
-
 290
290
-
 291
291
-
 292
292
-
 293
293
-
 294
294
-
 295
295
-
 296
296
-
 297
297
-
 298
298
-
 299
299
-
 300
300
-
 301
301
-
 302
302
-
 303
303
-
 304
304
-
 305
305
-
 306
306
-
 307
307
-
 308
308
-
 309
309
-
 310
310
-
 311
311
-
 312
312
-
 313
313
-
 314
314
-
 315
315
-
 316
316
-
 317
317
-
 318
318
-
 319
319
-
 320
320
-
 321
321
-
 322
322
-
 323
323
-
 324
324
-
 325
325
-
 326
326
-
 327
327
-
 328
328
-
 329
329
-
 330
330
-
 331
331
-
 332
332


Makita PDC01 Portable Power Pack Manual de utilizare
- Tip
- Manual de utilizare
în alte limbi
Lucrări înrudite
-
Makita PDC1200 Manual de utilizare
-
Makita DUP361 Manual de utilizare
-
Makita UB001C Manual de utilizare
-
-
-
-
Makita TD110D Manual de utilizare
-
Makita ADP12 Manual de utilizare
-
Makita DFJ212A Manual de utilizare