Nilfisk AERO 26 M vacuum cleaner Manual de utilizare
- Tip
- Manual de utilizare

AERO 26 M
AERO 26 H - AERO 21 H
Instructions for use
107420200 A (12. 2021)
MM
HH

Operating instructions .................................................................................................... 1
Bedienungsanweisungen ............................................................................................. 10
Instructions de fonctionnement ................................................................................... 20
Gebruiksaanwijzingen ................................................................................................... 30
Istruzioni per l’uso ......................................................................................................... 40
Bruksanvisning .............................................................................................................. 50
Bruksanvisning .............................................................................................................. 59
Betjeningsvejledning .................................................................................................... 68
Käyttöohje ...................................................................................................................... 77
Instruccciones de funcionamiento .............................................................................. 86
Instruções de Funcionamento ..................................................................................... 95
Οδηγίες λειτουργίες .................................................................................................... 105
Kullanma Talimatları .....................................................................................................116
Navodila za delovanje ................................................................................................. 125
Upute za uporabu ........................................................................................................ 134
Návod na obsluhu ....................................................................................................... 143
Návod k obsluze .......................................................................................................... 153
Instrukcje dotyczące obsługi ..................................................................................... 162
Használati útmutató .................................................................................................... 172
Instrucţiuni de utilizare ................................................................................................ 182
Указания за експлоатация ........................................................................................ 192
Руководство по эксплуатации ................................................................................. 202
Tööjuhised ................................................................................................................... 213
Norādījumi par ekspluatāciju ...................................................................................... 222
Naudojimo instrukcija ................................................................................................. 231
作手順 ............................................................................................................................. 240
操作说明 ......................................................................................................................... 249
사용법 ............................................................................................................................. 256
คําแนะนําการใช้งาน ....................................................................................................... 264
Arahan Operasi ............................................................................................................. 272
DoC, UK-DoC, Regulatory North America EMC ......................................................... 282

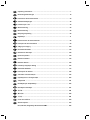
1
26-2M PC
21-0H PC
26-2H PC
33-2M IC Mobile
33-2H IC Mobile
44-2M IC Mobile
44-2H IC Mobile

2
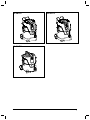
Operating elements
10
1
4
7
8
9
3
5
11
2
2
3
10
7
1
12
2
6

3
1A *) 2A
Ø
21
Ø
32
1
1
2
3
4
5
5
12
4
3
3
5
7
8
8
6

4
3A*)
ø21 ø21
ø32 ø32
Ø
21
Ø
32
1
2
3
60 mm
4A
1
2

5
1B
20 m/s
=
=
5A*)

6
2B
Ø
21
Ø
32
3x
Push&Clean
1C*)
MAX.
MIN.
Ø
21
Ø
32
A*)
B*)
1
1
23
2
2
3
4
2
2
3
4
5
6
7
1

7
1D
Ø
21
Ø
32
2D M
Ø
21
Ø
32
1212
3
3
4
3
3
4
5
6
7
7
8
8
6
5
7
8
M
5
6
7
8

1)OEL=Occupational Exposure Limit, *) Optional accessories / Option depending on model
Original instruction
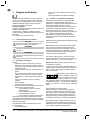
1
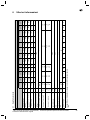
Quick reference guide
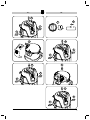
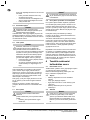
Operating elements:
1. Handle
2. Accessory positions
3. Latch
4. Castor
5. Container
6. Inlet fitting
7. Switch
8. Toolbox*)
9. Appliance socket*)
10. Filter cleaning button Push&Clean
11. Inlet cap*)
12. Wire/hose storage
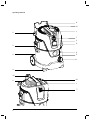
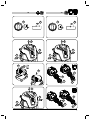
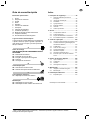
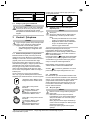
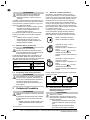
The pictorial quick reference guide
The pictorial quick reference guide is designed for
helping you when starting up, operating and storing
the unit. The guide are subdivided into 4 sections,
which are represented by symbols:
A
Before starting
DO READ OPERATING INSTRUCTIONS BEFORE USE!
1A - Unpack accessories
2A - Filter bag installation
3A - Hose insert & operations
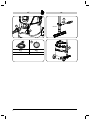
4A - Tube fixed
5A - Accessories placement
B
Control/Operation
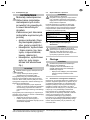
1B - Flow rate and filter warning
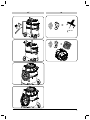
2B - Push&Clean filter cleaning system
C
Connecting electrical appliances
1C - Power tool adaption
D
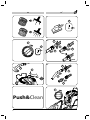
Maintenance:
1D - Filter bag replacement
2D - Filter replacement Dust Class M & H
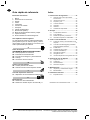
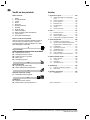
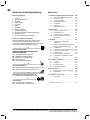
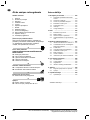
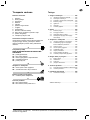
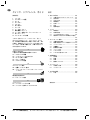
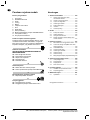
Contents
1 Safety instructions .................................... 2
1.1 Symbols used to mark instructions ............ 2
1.2 Instructions for use .................................... 2
1.3 Purpose and intended use ......................... 2
1.4 Electrical connection .................................. 3
1.5 Extension lead ........................................... 3
1.6 Guarantee .................................................. 3
1.7 Important warnings .................................... 3
2 Risks .......................................................... 4
2.1 Electrical components ................................ 4
2.2 Hazardous dust .......................................... 5
2.3 Spare parts and accessories ..................... 5
2.4 In explosive or inflammable atmosphere ... 5
3 Control / Operation .................................... 5
3.1 Starting and operating of the machine ....... 6
3.2 Auto-On/Off socket outlet for power tools*) 6
3.3 Push&Clean ............................................... 6
3.4 Flow rate warning ...................................... 6
3.5 Antistatic connection*) ................................ 6
3.6 Wet pick-up ................................................ 6
3.7 Dry pick-up ................................................. 7
3.8 Emptying after dry pick-up ......................... 7
4 After using the machine ........................... 7
4.1 After use .................................................... 7
4.2 Transport .................................................... 7
4.3 Storage ...................................................... 7
4.4 Recycling the machine ............................... 7
5 Maintenance ............................................... 7
5.1 Regular servicing and inspection ............... 7
5.2 Maintenance .............................................. 8
6 Further Informationen ............................... 9
6.1 Specifications ............................................. 9
Declaration of conformity .................................. 282

1)OEL=Occupational Exposure Limit, *) Optional accessories / Option depending on model
Original instruction
2
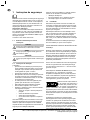
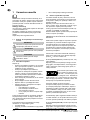
1 Safety instructions
This document contains the safety information re-
levant for the appliance along with a quick reference
guide. Before starting up your machine for the first
time, this instruction manual must be read through
carefully. Save the instructions for later use.
Further support
Further information on the appliance can be found
on our web site at www.Nilfisk.com.
For further queries, please contact the Nilfisk ser-
vice representative responsible for your country.
See reverse of this document.
1.1 Symbols used to mark instructions
DANGER
Danger that leads directly to serious or irre-
versible injuries, or even death.
WARNING
Danger that can lead to serious injuries or
even death.
CAUTION
Danger that can lead to minor injuries and
damage.
1.2 Instructions for use
The appliance must:
• only be used by persons, who have been in-
structed in its correct usage and explicitly com-
missioned with the task of operating it
• only be operated under supervision
• This appliance is not intended for use by per-
sons (including children) with reduced physical,
sensory or mental capabilities, or lack of experi-
ence and knowledge.
• Children shall be supervised to make sure that
they do not play with the appliance.
• Do not use any unsafe work techniques.
• Never use the appliance without a filter.
• Switch off the appliance and disconnect the
mains plug in the following situations:
• Prior to cleaning and servicing
• Prior to replacing components
• Prior to changing over the appliance
• If foam develops or liquid emerges
Besides the operating instructions and the binding
accident prevention regulations valid in the country
of use, observe recognised regulations for safety
and proper use.
Before starting work, the operating staff must be
informed on and trained within:
• use of the machine
• risks associated with the material to be picked
up
• safe disposal of the picked up material
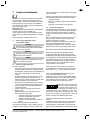
1.3 Purpose and intended use
This mobile dust extractor is designed, developed
and rigorously tested to function efficiently and
safely when properly maintained and used in ac-
cordance with the following instructions.
This machine is intended for commercial use, for ex-
ample in hotels, schools, hospitals, factories, shops,
offices and rental businesses.
This machine is also suitable for industrial use, such
as e.g. plants, construction sites and workshops.
Accidents due to misuse can only be prevented by
those using the machine.
READ AND FOLLOW ALL SAFETY INSTRUC-
TIONS.
Any other use is considered as improper use. The
manufacturer accepts no liability for any damage re-
sulting from such use. The risk for such use is borne
solely by the user. Proper use also includes proper
operation, servicing and repairs as specified by the
manufacturer.
The air flow in Safety Vacuum systems has to be
strictly controlled to achieve a minimum flow rate of
Vmin = 20 m/s in the suction hose.
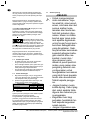
For Dust Class H machines (with type designation
-0H, -2H) following applies:
The appliance is suitable for picking up dry, non-
flammable dust, non flammable liquids, hazadous
dusts with OEL1) values, carcinogenic dusts, dusts
containing germs.
107420320
HH
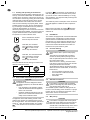
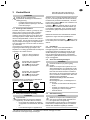
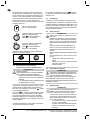
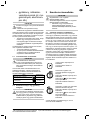
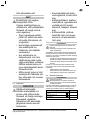
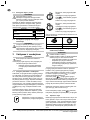
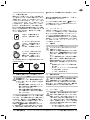
Dust Class H (IEC 60335-2-69).
The dusts which belong to this
class are: dusts with OEL values1),
all carcinogenic dusts and dusts which are mixed
with pathogenic agents. Vacuums for Dust Class H
are tested in their entirety and have a maximum de-
gree of permeability of 0.005%. The disposal must be
dust free.
The safety label on the machine warns:
This appliance contains dust hazardous to health.
Emptying and maintenance operations, including
removal of the dust collecting means, must only be
carried out by authorised personnel wearing suitable
personal protection. Operate only after the full filtra-
tion system has been fitted and checked.
For dust extractors, ensure adquate air change rate
H, when the exhaust air is returned to the room.
Observe national regulations before use.
For Dust Class M machines (with type designation
-2M) following applies:
The appliance is suitable for picking up dry, non-
flammable dust, non flammable liquids, sawdust and
hazadous dusts with OEL1) values > 0.1 mg/m³

1)OEL=Occupational Exposure Limit, *) Optional accessories / Option depending on model
Original instruction
3
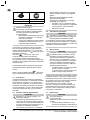
MM
Dust Class M (IEC 60335-2-69).
The dusts which belong to this
class are: dusts with OEL values1)
> 0.1 mg/m³ as well as saw dust. The machine is
tested in its entirety by vacuums for this dust class.
The maximum degree of permeability is 0.1% and
the disposal must be low dust.
For dust extractors, ensure adquate air change rate
M, when the exhaust air is returned to the room.
Observe national regulations before use.
1.4 Electrical connection
• It is recommended that the machine should be
connected via a residual current circuit breaker.
• US/Can only: - The machine shall be connected
via a residual current circuit breaker.
• Arrange the electrical parts (sockets, plugs and
couplings) and lay down the extension lead so
that the protection class is maintained.
• Connectors and couplings of power supply
cords and extension leads must be watertight.
1.5 Extension lead
1. As an extension lead, only use the version
specified by the manufacturer or one of a higher
quality.
2. When using an extension lead, check the mini-
mum cross-sections of the cable:
Cable lenth Cross section
< 16 A < 25 A
up to 20 m 1.5 mm22.5 mm2
20 to 50 m 2.5 mm24.0 mm2
1.6 Guarantee
Our general conditions of business are applicable
with regard to the guarantee.
Unauthorised modifications to the appliance, the use
of incorrect brushes in addition to using the appli-
ance in a way other than for the intended purpose
exempt the manufacturer from any liability for the
resulting damage.
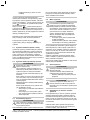
1.7 Important warnings
WARNING
• To reduce the risk of fire,
electric shock, or injury,
please read and follow
all safety instructions
and caution markings
before use. This ma-
chine is designed to be
safe when used for
cleaning functions as
specified. Should dam-
age occur to electrical or
mechanical parts, the
machine and / or acces-
sory should be repaired
by a competent service
center or the manufac-
turer before use in order
to avoid further damage
to the machine or physi-
cal injury to the user.
• Do not leave the ma-
chine when it is plugged
in. Unplug from the
socket when not in use
and before mainte-
nance.
• Outdoor use of the ap-
pliance shall be limited
to occasional use.
• Do not use with dam-
aged cord or plug. To
unplug grasp the plug,
not the cord. Do not
handle plug or machine
with wet hands. Turn off
all controls before un-
plugging.
• Do not pull or carry by
cord, use cord as a
handle, close a door on
cord, or pull cord around
sharp edges or cor ners.
Do not run machine over
cord. Keep cord away
from heated surfaces.
• Keep hair, loose cloth-
ing, fingers and all parts
of the body away from

1)OEL=Occupational Exposure Limit, *) Optional accessories / Option depending on model
Original instruction
4
ope nings and moving
parts. Do not put any
objects into openings
or use with opening
blocked. Keep openings
free of dust, lint, hair, and
anything else that could re-
du ce the flow of air.
• Do not use in outside ar-
eas at low temperature.
• Do not use to pick up
flammable or combus-
tible liquids such as
gasoline, or use in areas
where they may be pre-
sent.
• Do not pick up anything
that is burning or smok-
ing, such as cigarettes,
mat ches or hot ashes.
• Use extra care when
cleaning on stairs.
• Do not use unless filters
are fitted.
• If the machine is not
working properly or has
been dropped, da m-
a ged, left out doors, or
dropped into water, re-
turn it to a service center
or dealer.
• If foam or liquid es-
capes from the machine,
switch off immediately.
• The machine may not be
used as a water pump.
The machine is intended
for vacuuming air and
water mixtures.
• Connect the machine to
a properly earthed mains
supply. The socket outlet
and the extension cable
must have an operative
protective conductor.
• Provide for good ven-
tilation at the working
place.
• Do not use the machine
as a ladder or step lad-
der. The machine can tip
over and become dam-
aged. Danger of injury.
• Only use the socket out-
let on the machine for
purposes specified in
the instructions.
2 Risks
2.1 Electrical components
DANGER
The upper section of the
machine contains live com-
ponents.
Contact with live compo-
nents leads to serious or
even fatal injuries.
Never spray water on to
the upper section of the
machine.
DANGER
Electric shock due to faulty
mains connecting lead.
Touching a faulty mains
connecting lead can result
in serious or even fatal in-
juries.

1)OEL=Occupational Exposure Limit, *) Optional accessories / Option depending on model
Original instruction
5
• Do not damage the
mains power lead (e.g.
by driving over it, pulling
or crushing it).
• Regularly check whether
the power cord is dam-
aged or shows signs of
ageing.
• If the electric cable is
damaged, it must be re-
placed by an authorized
Nilfisk distributor or simi-
lar qualified person in or-
der to avoid a hazard.
• In no circumstances
should the power supply
cord be wrapped around
fingers or any part of the
operators person.
2.2 Hazardous dust
WARNING
Hazardous materials.
Vacuuming up hazardous
materials can lead to seri-
ous or even fatal injuries.
The following materials
must not be picked up by
the machine:
• hot materials (burning
cigarettes, hot ash, etc.)
• flammable, explosive,
aggressive liquids (e.g.
petrol, solvents, acids,
alkalis, etc.)
• flammable, explosive
dust (e.g. magnesium or
aluminium dust, etc.)
CAUTION
Materials picked up can present a hazard to
the environment.
• Dispose the dirt in accordance with legal
regulations.
In the case of asbestos abatement wear additional
single-use clothing. Wear a P2 breathing mask. Be-
fore removing the machine from the area contami-
nated with harmful substances:
• Clean the outside of the machine, wipe it
clean or pack the machine in well-sealed
packaging and avoid spreading deposited
harmful dust.
During maintenance and repair work all contami-
nated parts that could not be cleaned satisfactorily
must be:
• Packed in well-sealed bags
• Disposed of in a manner that complies with
valid regulations for such waste removal.
2.3 Spare parts and accessories
CAUTION
Spare parts and accessories.
The use of non-genuine spare parts, brushes
and accessories can impair the safety and or
function of the appliance.
Only use original spare parts and accessories from
Nilfisk. Spare parts that can affect health and safety
of the operator and or function of the appliance, are
specified below:
Description Order No.
Filter element Ø185 x 140 PET
M-Class M302000490
Filter PTFE Ø185 x 140
H-Class/HEPA 107420373
Filter bag set AERO 107419590
2.4 In explosive or inflammable atmosphere
CAUTION
This machine is not suitable for use in explo-
sive or inflammable atmospheres or where
such atmospheres are likely to be produced
by the presence of volatile liquid or inflamma-
ble gas or vapour.
3 Control / Operation
CAUTION
Damage due to unsuitable mains voltage.
The appliance can be damaged as a result of
being connected to an unsuitable mains volt-
age.
• Ensure that the voltage shown on the rat-
ing plate corresponds to the voltage of the
local mains power supply.

1)OEL=Occupational Exposure Limit, *) Optional accessories / Option depending on model
Original instruction
6
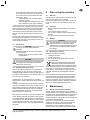
3.1 Starting and operating of the machine
Check that the electrical switch is switched off (in po-
sition 0). Check that suitable filter are installed in the
machine.Then connect the suction hose into the suc-
tion inlet at the machine by pushing the hose forward
until it fits firmly in place at the inlet. Then connect
the tubes with the hose handle, twist the tubes in
order to ensure that they are properly fitted. Attach
suitable nozzle to the tube. Choose nozzle depend-
ing on what type of material that is to be picked-up.
If used for dust extraction in connection
with dust producing tool then connect end of suction
hose with appropriate adapter. Connect the plug into
a proper electrical outlet. Put the electrical switch
into position I in order to start the motor.
Press I: Activate the machine.
Press 0: Stop the machine.
Hose Ø32, turn clockwise
Turn l: Activate the machine.
Turn : for AUTO on/off
Turn 0: Stop the machine.
Ø
21
Ø
32
Ø
21
Ø
32
Hose Ø21, turn counterclockwise
Turn l: Activate the machine.
Turn : for AUTO on/off
Turn 0: Stop the machine.
The hose diameter and the setting for suction hose
diameter must be the same.
Ø
21
Ø
32
ø21 ø21
ø32 ø32
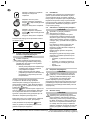
3.2 Auto-On/Off socket outlet for power tools*)
CAUTION
Appliance socket * )
The appliance socket is designed for electri-
cal auxiliary equipment; see technical data for
reference.
• Prior to plugging in an appliance, always
switch off the machine and the appliance
that is to be connected.
• Read the operating instructions to the ap-
pliance to be connected and observe the
safety notes contained in these.
An appliance socket with earthing contact is inte-
grated in the machine. An external power tool can
be connected there. The socket features permanent
power on*), when the electrical switch is in position
, i.e. the machine can be used as an extension
cord.
In position the machine can be switched on
and off by the power tool connected. Dirt is picked
up from the source of dust immediately. To comply
with regulations, only approved dust producing tools
should be connected.
The maximum power consumption of the connected
electrical appliance is stated in section “Specifica-
tions”.
Before turning the switch to position ensure
that the tool connected to the appliance socket is
switched off.
3.3 Push&Clean
The machine is equipped with a semi automatic filter
cleaning system, Push&Clean. The filter cleaning
system must be actuated latest when the suction
performance is no longer sufficient. Regular use of
the filter cleaning feature maintains suction perfor-
mance and increases the lifetime of the filter. For
instruction see quick reference guide.
3.4 Flow rate warning
CAUTION
Check that the filter is present and properly
fitted.
The machine is equipped with a system to
monitor air velocity. Before picking up dust
with occupational exposure limit values, check
the volume flow monitor.
When the motor is running, hold the suction
hose shut to reduce the volume flow. Acoustic
warning sound after some seconds.
Set the diameter setting to the actual hose size.
When the accustic sound starts, air velocity is
below 20 m/s.
• check if container or filter bag is full.
• check if air flow is reduced in suction
hose, tube/nozzle.
• Check filter.
3.5 Antistatic connection*)
CAUTION
The machine is equipped with an antistatic
system to discharge any static electricity that
may develop during dust pick-up.
The antistatic system creates an earth ground con-
nection to the inlet fitting of the container. For proper
function the use of an electrical conductive or anti-
static suction hose is recommended.
3.6 Wet pick-up
CAUTION
The machine is equipped with a float system
that shuts off the airflow through the machine
when the maximum liquid level is reached.
You will hear a noticeable change of the sound
from the motor and notice that the suction

1)OEL=Occupational Exposure Limit, *) Optional accessories / Option depending on model
Original instruction
7
power decreases. When this occurs, switch
the machine off. Disconnect the machine from
the socket. Never pick up liquid without the
float body in place.
• If foam appears, stop work immediately
and emty the tank.
• Clean the water level limiting device regu-
larly and examine it for signs of damage.
Before emptying the container, unplug the machine.
Disconnect the hose from the inlet by pulling out the
hose. Release the latch by pulling them outwards
so that the motor top is released. Lift up the motor
top from container. Always empty and clean the con-
tainer.
Empty by tilting the container backwards or side-
ways and pour the liquids into a floor drain or similar.
Put back the motor top to the container. Secure the
motor top with the latches.
3.7 Dry pick-up
CAUTION
Picking up environmentally hazardous
materials.
Materials picked up can present a hazard to
the environment.
• Dispose of the dirt in accordance with le-
gal regulations.
CAUTION*)
Dust Class M/H machines are equipped with
an upstream Dust Class M/H filter fitted on
bottom side of motor top.
3.8 Emptying after dry pick-up
Remove the electrical plug from the socket before
emptying after dry pick-up. Check the filters and
dustbag regularly. Release the latch by pulling them
outwards so that the motor top is released. Open up
the motor top from container.
Cartridge filter: To clean the filter you can either
shake, brush or wash it. Wait until it is dry before you
reuse it.
Dustbag: check bag to ensure the fill factor. Replace
dust bag if necessary. Remove the old bag. The new
bag is fitted by passing the carboard piece with the
rubber membrane through the vacuum inlet. Make
sure that the rubber membrane is passing past the
heightening at the vacuum inlet.
After emptying: Close motor top to the container and
secure the motor top with the latches. Never pick up
dry material without cartridge filter and dustbag fitted
in the machine. The suction efficiency of the vacuum
cleaner depends on the size and quality of the filter
and dust bag. Therefore - use only Original filter and
dust bags.
4 After using the machine
4.1 After use
After picking up hazardous dust, close the inlet cap
and clean the outside of the machine.
Remove the plug from the socket when machine is
not in use. Wind up the cord starting from the ma-
chine.
4.2 Transport
• Before transporting the machine, close all the
latches.
• Close the inlet with the inlet cap.
• Do not tilt the machine if there are liquids in the
dirt tank.
• Do not use a crane hook to lift the machine.
4.3 Storage
CAUTION
Store the appliance in a dry place, protected
from rain and frost. The machine shall be
stored indoors only. Wet filters and the interior
part of the liquid container shall be dried be-
fore storage.
4.4 Recycling the machine
Make the old machine unusable.
1. Unplug the machine.
2. Cut the power cord.
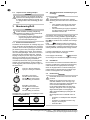
3. Do not discard of electrical appliances with
household waste.
Equipment marked with the crossed-out
wheeled bin symbol indicates that used
electrical and electronic equipment should
not be discarded together with unseparated house-
hold waste. To avoid negative effects on human
health and the environment the equipment must be
collected separately at the designated collection
points.
Users of electrical and electronic household equip-
ment must use the municipal collection schemes.
Please note that commercially used electrical and
electronic equipment, shall not be disposed of via
municipal collection schemes. We will be pleased to
inform you about suitable disposal options.
5 Maintenance
5.1 Regular servicing and inspection
Regular servicing and inspection of your machine
must be carried out by suitably qualified personnel in
accordance with relevant legislation and regulations.
In particular, electrical tests for earth continuity, in-
sulation resistance, and condition of the flexible cord
should be checked frequently.
In the event of any defect, the machine MUST be
withdrawn from service, completely checked and
repaired by an authorized service technician.
At least once a year, a Nilfisk technician or an in-
structed person must perform a technical inspection

1)OEL=Occupational Exposure Limit, *) Optional accessories / Option depending on model
Original instruction
8
including filters, air tightness and control mecha-
nisms. Appliances in Dust Class H must have their
filtration efficiency checked once a year. The result
must be presented upon request. If the effiency of
the filter does not fulfil the requirements for Dust
Class H, the filter must be replaced.
5.2 Maintenance
Remove the plug from the socket before performing
maintenance. Before using the machine make sure
that the frequency and voltage shown on the rating
plate correspond with the mains voltage.
The machine is designed for continuous heavy work.
Depending on the number of running hours – the
dust filter should be renewed. Keep the machine
clean with a dry cloth, and a small amount of spray
polish.
During maintenance and cleaning, handle the ma-
chine in such a manner that there is no danger for
maintenance staff or other persons.
In the maintenance area
• Use filtered compulsory ventilation
• Wear protective clothing
• Clean the maintenance area so that no harmful
substances get into the surroundings.
CAUTION
Before removing the machine from the area contami-
nated with harmful substances:
Clean the outside of the machine, wipe it clean or
pack the machine in well sealed packaging and
avoid spreading deposited harmful dust.
During maintenance and repair work all contami-
nated parts that could not be cleaned satisfactorily
must be:
• Packed in well sealed bags
• Disposed of in a manner that complies with valid
regulations for such waste removal.
For details of after sales service contact your
dealer or Nilfisk service representative responsible
for your country. See reverse of this document.

1)OEL=Occupational Exposure Limit, *) Optional accessories / Option depending on model
Original instruction
9
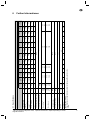
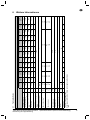
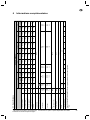
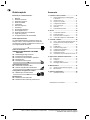
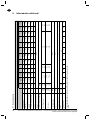
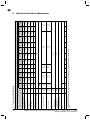
6.1 Specifications
AERO 21, AERO 26
EU GB AU/NZ CH US
21-0H 26-2M
26-W2M
26-2H
26-W2H
26-2M 26-2H 26-2M 26-2H 26-W2M 26-W2H 26-W2M 26-W2H 26-2M
26-W2M
26-2H
26-W2H
Possible voltage V 220-240 220-240 220-240 110 110 220-240 220-240 220-240 220-240 220-240 220-240 120 120
Power PIEC W 1200 1200 1200 1000 1000 1200 1200 1200 1200 1200 1200 1000 1000
Connected load for appliance
socket W-
2400/
1100**
2400/
1100** 750 750 1750 1750 1100 1100 1100 1100 800 800
Mains frequency Hz 50-60 50-60 50-60 50-60 50-60 50-60 50-60 50-60 50-60 50-60 50-60 50-60 50-60
Fuse A 16 16/10** 16/10** 16 16 13 13 10 10 10 10 15 15
Protection grade (moist, dust) IPX4
Protection class (electrical) II I
Max. Airflow*l/s
m3/h
CFM
60
216
127
62
222
131
60
216
127
62
222
131
60
216
127
Max. Vacuum
kPa
hPa
inH20
21
210
85
24,5
245
100
21
210
85
24,5
245
100
21
210
85
Sound pressure level LPA
(IEC 60335-2-69) dB(A) 69 ± 2
Working sound level dB(A) 61 ± 2
Vibration ISO 5349 ahm/s2≤ 2,5
Weight kg
lb
8,5
19
10
22
Dust class H M H M H M H M H M H M H
*Measured at turbine.
Specifications and details are subject to change without prior notice.
**DK.
6 Further Informationen

1)MAK=Maximale Arbeitsplatzkonzentration, *) Optionales Zubehör / Optionen sind modellabhängig.
Übersetzung der Originalanleitung
10
Kurzanleitung
Teile des Geräts:
1. Griff
2. Zubehörfach
3. Verschluss
4. Lenkrollen
5. Behälter
6. Einlassstutzen
7. Schalter
8. Werkzeugkasten*)
9. Zubehörstecker*)
10. Filterreinigungstaste (Push&Clean)
11. Einlasskappe*)
12. Kabel-/Schlauchaufbewahrung
Illustrierte Kurzanleitung
Die illustrierte Kurzanleitung soll Sie bei Inbe-
triebnahme, Benutzung und Lagerung des Geräts
unterstützen. Die Anleitung ist in vier Abschnitte ge-
gliedert, die durch die folgenden Symbole gekenn-
zeichnet sind:
A
Vorbereitung
LESEN SIE BITTE VOR DER BENUTZUNG DIE
BETRIEBSANLEITUNG!
1A - Zubehör auspacken
2A - Filterbeutel einsetzen
3A - Schlauch anschließen und Betrieb
4A - Rohr befestigen
5A - Zubehör einsetzen
B
Bedienung und Betrieb
1B - Durchflussmenge und Filterwarnung
2B - Push&Clean Filterreinigungssystem
C
Elektrogeräte anschließen
1C - Anschluss für Zusatzgeräte
D
Wartung:
1D - Filterbeutel austauschen
2D - Filter für Staubklasse M & H austauschen
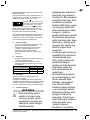
Inhalt
1 Sicherheitshinweise ................................ 11
1.1 Kennzeichnung von Hinweisen .................11
1.2 Benutzungsregeln .....................................11
1.3 Zweck und bestimmungsgemäße
Verwendung ..............................................11
1.4 Elektrischer Anschluss ............................. 12
1.5 Verlängerungskabel ................................. 12
1.6 Garantie ................................................... 12
1.7 Wichtige Warnhinweise ............................ 12
2 Gefahrenhinweise .................................. 14
2.1 Elektrische Teile ....................................... 14
2.2 Gefährlicher Staub ................................... 14
2.3 Ersatzteile und Zubehör ........................... 15
2.4 Explosionsgefährdete oder entflammbare
Umgebungen ........................................... 15
3 Bedienung und Betrieb ........................... 15
3.1 Einschalten und Bedienen des Geräts .... 15
3.2 Ein-/Ausschaltautomatik für
Elektrowerkzeuge*) ................................... 16
3.3 Push&Clean ............................................. 16
3.4 Volumenstrom-Überwachung .................. 16
3.5 Antistatischer Anschluss*) ....................... 16
3.6 Nasssaugen ............................................. 16
3.7 Trockene Stoffe saugen ........................... 17
3.8 Entleeren nach dem Trockensaugen ....... 17
4 Nach Gebrauch des Geräts .................... 17
4.1 Nach Gebrauch ........................................ 17
4.2 Transport .................................................. 17
4.3 Lagerung .................................................. 17
4.4 Recycling des Geräts ............................... 17
5 Wartung .................................................... 17
5.1 Regelmäßige Wartung und Inspektion..... 17
5.2 Wartung ................................................... 18
6 Weitere Informationen ............................ 19
6.1 Technische Daten .................................... 19
Konformitätserklärung ....................................... 282

1)MAK=Maximale Arbeitsplatzkonzentration, *) Optionales Zubehör / Optionen sind modellabhängig
Übersetzung der Originalanleitung
11
1 Sicherheitshinweise
Dieses Dokument enthält die Kurzanleitung sowie
wichtige Sicherheitsinformationen zum Gerät. Sie
müssen diese Bedienungsanleitung sorgfältig le-
sen, bevor Sie das Gerät zum ersten Mal in Betrieb
nehmen. Heben Sie diese Anleitung für die spätere
Verwendung auf.
Weitere Informationen
Weitere Informationen zum Gerät finden Sie auf
unserer Internetseite www.Nilfisk.com.
Bei Fragen wenden Sie sich bitte an den Nilfisk-
Service in Ihrem Land.
Siehe Rückseite dieses Dokuments.
1.1 Kennzeichnung von Hinweisen
GEFAHR
Eine Gefahr, die zu schweren Schäden und
Verletzungen, sogar tödlichen, führen kann.
WARNUNG!
Eine Gefahr, die zu schweren Verletzungen,
sogar tödlichen, führen kann.
VORSICHT
Eine Gefahr, die zu leichteren Verletzungen
und Schäden führen kann.
1.2 Benutzungsregeln
Das Gerät darf
• nur von Personen eingesetzt werden, die in der
korrekten Anwendung unterwiesen und explizit
mit der Bedienung beauftragt wurden
• nur unter Aufsicht betrieben werden
• Dieses Gerät darf nicht von Personen (ein-
schließlich Kindern) mit körperlichen oder geisti-
gen Einschränkungen oder ohne ausreichende
Erfahrungen und Kenntnisse benutzt werden.
• Kinder müssen beaufsichtigt werden, um sicher-
zustellen, dass sie nicht mit dem Gerät spielen.
• Keine unsicheren Arbeitsmethoden einsetzen.
• Verwenden Sie das Gerät niemals ohne Filter.
• In den folgenden Situationen das Gerät aus-
schalten und den Netzstecker ziehen:
• Vor Reinigung und Wartung
• Vor dem Auswechseln von Teilen
• Vor Änderungen am Gerät
• Falls sich Schaum entwickelt oder Flüs-
sigkeit austritt
Neben dieser Anleitung und den Bestimmungen zur
Unfallverhütung in Ihrem Land sind auch die Bestim-
mungen zur Sicherheit und verantwortungsvollen
Nutzung zu beachten.
Das Bedienpersonal des Gerätes ist vor der Arbeit
zu informieren ü ber:
• die Handhabung des Geräts
• vom aufzusaugenden Material ausgehende Ge-
fahren
• die sichere Beseitigung des aufgesaugten Ma-
terials
1.3 Zweck und bestimmungsgemäße
Verwendung
Dieser mobile Staubsauger wurde konstruiert, ent-
wickelt und sorgfältig getestet, damit er effizient und
sicher arbeitet, wenn er korrekt gewartet und gemäß
den folgenden Anweisungen benutzt wird.
Dieses Gerät ist ausschließlich für die kommerzielle
Nutzung, beispielsweise in Hotels, Schulen, Kran-
kenhäusern, Fabriken, Geschäften, Büros oder im
Verleihgeschäft geeignet.
Dieses Gerät ist auch für den industriellen Einsatz
wie in Fabriken, auf Baustellen und in Werkstätten
geeignet.
Unfälle durch missbräuchliche Benutzung können nur
durch die Benutzer des Geräts verhindert werden.
ALLE SICHERHEITSHINWEISE LESEN UND BE-
ACHTEN.
Jegliche andere Verwendung gilt als unsachgemäße
Verwendung. Der Hersteller übernimmt keinerlei
Haftung für Schäden aus einer solchen Nutzung.
Das Risiko für solche Nutzung obliegt allein dem
Benutzer. Die zweckmäßige Verwendung beinhaltet
den korrekten Betrieb sowie regelmäßige Wartung
und Reparatur gemäß Anleitung des Herstellers.
Der Luftstrom im Sicherheitsdrucksystem muss
genau kontrolliert werden, um eine minimale Luftge-
schwindigkeit von Vmin = 20 m/s im Saugschlauch zu
erreichen.
Für Geräte mit Staubklasse H (mit Typbezeichnun-
gen -0H, -2H) gilt Folgendes:
Das Gerät eignet sich zum Aufnehmen von trocke-
nem, nicht entflammbarem Staub, nicht entflamm-
bare Flüssigkeiten, gefährliche Stäube mit MAK-
Werten1), krebserregende Stäube und Stäube, die
mit Krankheitserregern behaftet sind.
107420320
HH
Staubklasse H (IEC 60335-2-69).
Zu dieser Staubklasse gehören
Stäube mit MAK-Werten1), sämtli-
che krebserregende Stäube und Stäube, die mit
Krankheitserregern behaftet sind Sauger dieser
Staubklasse werden als Gesamtgerät geprü ft. Der
maximale Durchlassgrad beträgt 0,005 %. Die Ent-
sorgung muss staubfrei erfolgen.
Der Sicherheitsaufkleber auf der Maschine enthält
folgende Warnhinweise:
Dieses Gerät enthält die Gesundheit gefährdenden
Staub. Entleerung und Wartungsarbeiten, ein-
schließlich Entfernen des Staubsammlers, dü rfen
nur durch Befugte durchgefü hrt werden, die dabei
geeignete Schutzbekleidung tragen. Der Betrieb
darf nur erfolgen, wenn zuvor die komplette Filteran-
lage eingebaut und geprü ft wurde.
Pagina se încarcă ...
Pagina se încarcă ...
Pagina se încarcă ...
Pagina se încarcă ...
Pagina se încarcă ...
Pagina se încarcă ...
Pagina se încarcă ...
Pagina se încarcă ...
Pagina se încarcă ...
Pagina se încarcă ...
Pagina se încarcă ...
Pagina se încarcă ...
Pagina se încarcă ...
Pagina se încarcă ...
Pagina se încarcă ...
Pagina se încarcă ...
Pagina se încarcă ...
Pagina se încarcă ...
Pagina se încarcă ...
Pagina se încarcă ...
Pagina se încarcă ...
Pagina se încarcă ...
Pagina se încarcă ...
Pagina se încarcă ...
Pagina se încarcă ...
Pagina se încarcă ...
Pagina se încarcă ...
Pagina se încarcă ...
Pagina se încarcă ...
Pagina se încarcă ...
Pagina se încarcă ...
Pagina se încarcă ...
Pagina se încarcă ...
Pagina se încarcă ...
Pagina se încarcă ...
Pagina se încarcă ...
Pagina se încarcă ...
Pagina se încarcă ...
Pagina se încarcă ...
Pagina se încarcă ...
Pagina se încarcă ...
Pagina se încarcă ...
Pagina se încarcă ...
Pagina se încarcă ...
Pagina se încarcă ...
Pagina se încarcă ...
Pagina se încarcă ...
Pagina se încarcă ...
Pagina se încarcă ...
Pagina se încarcă ...
Pagina se încarcă ...
Pagina se încarcă ...
Pagina se încarcă ...
Pagina se încarcă ...
Pagina se încarcă ...
Pagina se încarcă ...
Pagina se încarcă ...
Pagina se încarcă ...
Pagina se încarcă ...
Pagina se încarcă ...
Pagina se încarcă ...
Pagina se încarcă ...
Pagina se încarcă ...
Pagina se încarcă ...
Pagina se încarcă ...
Pagina se încarcă ...
Pagina se încarcă ...
Pagina se încarcă ...
Pagina se încarcă ...
Pagina se încarcă ...
Pagina se încarcă ...
Pagina se încarcă ...
Pagina se încarcă ...
Pagina se încarcă ...
Pagina se încarcă ...
Pagina se încarcă ...
Pagina se încarcă ...
Pagina se încarcă ...
Pagina se încarcă ...
Pagina se încarcă ...
Pagina se încarcă ...
Pagina se încarcă ...
Pagina se încarcă ...
Pagina se încarcă ...
Pagina se încarcă ...
Pagina se încarcă ...
Pagina se încarcă ...
Pagina se încarcă ...
Pagina se încarcă ...
Pagina se încarcă ...
Pagina se încarcă ...
Pagina se încarcă ...
Pagina se încarcă ...
Pagina se încarcă ...
Pagina se încarcă ...
Pagina se încarcă ...
Pagina se încarcă ...
Pagina se încarcă ...
Pagina se încarcă ...
Pagina se încarcă ...
Pagina se încarcă ...
Pagina se încarcă ...
Pagina se încarcă ...
Pagina se încarcă ...
Pagina se încarcă ...
Pagina se încarcă ...
Pagina se încarcă ...
Pagina se încarcă ...
Pagina se încarcă ...
Pagina se încarcă ...
Pagina se încarcă ...
Pagina se încarcă ...
Pagina se încarcă ...
Pagina se încarcă ...
Pagina se încarcă ...
Pagina se încarcă ...
Pagina se încarcă ...
Pagina se încarcă ...
Pagina se încarcă ...
Pagina se încarcă ...
Pagina se încarcă ...
Pagina se încarcă ...
Pagina se încarcă ...
Pagina se încarcă ...
Pagina se încarcă ...
Pagina se încarcă ...
Pagina se încarcă ...
Pagina se încarcă ...
Pagina se încarcă ...
Pagina se încarcă ...
Pagina se încarcă ...
Pagina se încarcă ...
Pagina se încarcă ...
Pagina se încarcă ...
Pagina se încarcă ...
Pagina se încarcă ...
Pagina se încarcă ...
Pagina se încarcă ...
Pagina se încarcă ...
Pagina se încarcă ...
Pagina se încarcă ...
Pagina se încarcă ...
Pagina se încarcă ...
Pagina se încarcă ...
Pagina se încarcă ...
Pagina se încarcă ...
Pagina se încarcă ...
Pagina se încarcă ...
Pagina se încarcă ...
Pagina se încarcă ...
Pagina se încarcă ...
Pagina se încarcă ...
Pagina se încarcă ...
Pagina se încarcă ...
Pagina se încarcă ...
Pagina se încarcă ...
Pagina se încarcă ...
Pagina se încarcă ...
Pagina se încarcă ...
Pagina se încarcă ...
Pagina se încarcă ...
Pagina se încarcă ...
Pagina se încarcă ...
Pagina se încarcă ...
Pagina se încarcă ...
Pagina se încarcă ...
Pagina se încarcă ...
Pagina se încarcă ...
Pagina se încarcă ...
Pagina se încarcă ...
Pagina se încarcă ...
Pagina se încarcă ...
Pagina se încarcă ...
Pagina se încarcă ...
Pagina se încarcă ...
Pagina se încarcă ...
Pagina se încarcă ...
Pagina se încarcă ...
Pagina se încarcă ...
Pagina se încarcă ...
Pagina se încarcă ...
Pagina se încarcă ...
Pagina se încarcă ...
Pagina se încarcă ...
Pagina se încarcă ...
Pagina se încarcă ...
Pagina se încarcă ...
Pagina se încarcă ...
Pagina se încarcă ...
Pagina se încarcă ...
Pagina se încarcă ...
Pagina se încarcă ...
Pagina se încarcă ...
Pagina se încarcă ...
Pagina se încarcă ...
Pagina se încarcă ...
Pagina se încarcă ...
Pagina se încarcă ...
Pagina se încarcă ...
Pagina se încarcă ...
Pagina se încarcă ...
Pagina se încarcă ...
Pagina se încarcă ...
Pagina se încarcă ...
Pagina se încarcă ...
Pagina se încarcă ...
Pagina se încarcă ...
Pagina se încarcă ...
Pagina se încarcă ...
Pagina se încarcă ...
Pagina se încarcă ...
Pagina se încarcă ...
Pagina se încarcă ...
Pagina se încarcă ...
Pagina se încarcă ...
Pagina se încarcă ...
Pagina se încarcă ...
Pagina se încarcă ...
Pagina se încarcă ...
Pagina se încarcă ...
Pagina se încarcă ...
Pagina se încarcă ...
Pagina se încarcă ...
Pagina se încarcă ...
Pagina se încarcă ...
Pagina se încarcă ...
Pagina se încarcă ...
Pagina se încarcă ...
Pagina se încarcă ...
Pagina se încarcă ...
Pagina se încarcă ...
Pagina se încarcă ...
Pagina se încarcă ...
Pagina se încarcă ...
Pagina se încarcă ...
Pagina se încarcă ...
Pagina se încarcă ...
Pagina se încarcă ...
Pagina se încarcă ...
Pagina se încarcă ...
Pagina se încarcă ...
Pagina se încarcă ...
Pagina se încarcă ...
Pagina se încarcă ...
Pagina se încarcă ...
Pagina se încarcă ...
Pagina se încarcă ...
Pagina se încarcă ...
Pagina se încarcă ...
Pagina se încarcă ...
Pagina se încarcă ...
Pagina se încarcă ...
Pagina se încarcă ...
Pagina se încarcă ...
Pagina se încarcă ...
Pagina se încarcă ...
Pagina se încarcă ...
Pagina se încarcă ...
Pagina se încarcă ...
Pagina se încarcă ...
Pagina se încarcă ...
Pagina se încarcă ...
Pagina se încarcă ...
Pagina se încarcă ...
Pagina se încarcă ...
Pagina se încarcă ...
Pagina se încarcă ...
Pagina se încarcă ...
Pagina se încarcă ...
Pagina se încarcă ...
Pagina se încarcă ...
Pagina se încarcă ...
Pagina se încarcă ...
Pagina se încarcă ...
Pagina se încarcă ...
Pagina se încarcă ...
-
 1
1
-
 2
2
-
 3
3
-
 4
4
-
 5
5
-
 6
6
-
 7
7
-
 8
8
-
 9
9
-
 10
10
-
 11
11
-
 12
12
-
 13
13
-
 14
14
-
 15
15
-
 16
16
-
 17
17
-
 18
18
-
 19
19
-
 20
20
-
 21
21
-
 22
22
-
 23
23
-
 24
24
-
 25
25
-
 26
26
-
 27
27
-
 28
28
-
 29
29
-
 30
30
-
 31
31
-
 32
32
-
 33
33
-
 34
34
-
 35
35
-
 36
36
-
 37
37
-
 38
38
-
 39
39
-
 40
40
-
 41
41
-
 42
42
-
 43
43
-
 44
44
-
 45
45
-
 46
46
-
 47
47
-
 48
48
-
 49
49
-
 50
50
-
 51
51
-
 52
52
-
 53
53
-
 54
54
-
 55
55
-
 56
56
-
 57
57
-
 58
58
-
 59
59
-
 60
60
-
 61
61
-
 62
62
-
 63
63
-
 64
64
-
 65
65
-
 66
66
-
 67
67
-
 68
68
-
 69
69
-
 70
70
-
 71
71
-
 72
72
-
 73
73
-
 74
74
-
 75
75
-
 76
76
-
 77
77
-
 78
78
-
 79
79
-
 80
80
-
 81
81
-
 82
82
-
 83
83
-
 84
84
-
 85
85
-
 86
86
-
 87
87
-
 88
88
-
 89
89
-
 90
90
-
 91
91
-
 92
92
-
 93
93
-
 94
94
-
 95
95
-
 96
96
-
 97
97
-
 98
98
-
 99
99
-
 100
100
-
 101
101
-
 102
102
-
 103
103
-
 104
104
-
 105
105
-
 106
106
-
 107
107
-
 108
108
-
 109
109
-
 110
110
-
 111
111
-
 112
112
-
 113
113
-
 114
114
-
 115
115
-
 116
116
-
 117
117
-
 118
118
-
 119
119
-
 120
120
-
 121
121
-
 122
122
-
 123
123
-
 124
124
-
 125
125
-
 126
126
-
 127
127
-
 128
128
-
 129
129
-
 130
130
-
 131
131
-
 132
132
-
 133
133
-
 134
134
-
 135
135
-
 136
136
-
 137
137
-
 138
138
-
 139
139
-
 140
140
-
 141
141
-
 142
142
-
 143
143
-
 144
144
-
 145
145
-
 146
146
-
 147
147
-
 148
148
-
 149
149
-
 150
150
-
 151
151
-
 152
152
-
 153
153
-
 154
154
-
 155
155
-
 156
156
-
 157
157
-
 158
158
-
 159
159
-
 160
160
-
 161
161
-
 162
162
-
 163
163
-
 164
164
-
 165
165
-
 166
166
-
 167
167
-
 168
168
-
 169
169
-
 170
170
-
 171
171
-
 172
172
-
 173
173
-
 174
174
-
 175
175
-
 176
176
-
 177
177
-
 178
178
-
 179
179
-
 180
180
-
 181
181
-
 182
182
-
 183
183
-
 184
184
-
 185
185
-
 186
186
-
 187
187
-
 188
188
-
 189
189
-
 190
190
-
 191
191
-
 192
192
-
 193
193
-
 194
194
-
 195
195
-
 196
196
-
 197
197
-
 198
198
-
 199
199
-
 200
200
-
 201
201
-
 202
202
-
 203
203
-
 204
204
-
 205
205
-
 206
206
-
 207
207
-
 208
208
-
 209
209
-
 210
210
-
 211
211
-
 212
212
-
 213
213
-
 214
214
-
 215
215
-
 216
216
-
 217
217
-
 218
218
-
 219
219
-
 220
220
-
 221
221
-
 222
222
-
 223
223
-
 224
224
-
 225
225
-
 226
226
-
 227
227
-
 228
228
-
 229
229
-
 230
230
-
 231
231
-
 232
232
-
 233
233
-
 234
234
-
 235
235
-
 236
236
-
 237
237
-
 238
238
-
 239
239
-
 240
240
-
 241
241
-
 242
242
-
 243
243
-
 244
244
-
 245
245
-
 246
246
-
 247
247
-
 248
248
-
 249
249
-
 250
250
-
 251
251
-
 252
252
-
 253
253
-
 254
254
-
 255
255
-
 256
256
-
 257
257
-
 258
258
-
 259
259
-
 260
260
-
 261
261
-
 262
262
-
 263
263
-
 264
264
-
 265
265
-
 266
266
-
 267
267
-
 268
268
-
 269
269
-
 270
270
-
 271
271
-
 272
272
-
 273
273
-
 274
274
-
 275
275
-
 276
276
-
 277
277
-
 278
278
-
 279
279
-
 280
280
-
 281
281
-
 282
282
-
 283
283
-
 284
284
-
 285
285
-
 286
286
-
 287
287
-
 288
288
-
 289
289
-
 290
290
-
 291
291
-
 292
292
-
 293
293
-
 294
294
-
 295
295
-
 296
296


Nilfisk AERO 26 M vacuum cleaner Manual de utilizare
- Tip
- Manual de utilizare
Alte documente
-
Nilfisk-ALTO AERO 21 Operating Instructions Manual
-
Milwaukee AS-30 LAC Manual de utilizare
-
-
Viper LSU155P Manualul proprietarului
-
Makita DVC860L Manual de utilizare
-
LG V-KC701HEU Manual de utilizare
-
-
LG V-KC402CTUQ Manual de utilizare
-
-
Milwaukee M18 FCVL Manual de utilizare