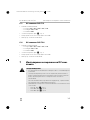
Dometic DC-Kit PP 12, DSP-T 12, DSP-T 24 Instrucțiuni de utilizare
- Tip
- Instrucțiuni de utilizare

DC-Kit PP 12, DSP-T 12, DSP-T 24
DC Extension Kit
Installation and Operating Manual. . . . . . . 10
DC-Erweiterungskit
Montage- und Bedienungsanleitung . . . . .26
Kit d'extension CC
Instructions de montage et de service . . . .42
Set de ampliación para CC
Instrucciones de montaje y de uso . . . . . . .58
Kit de expansão DC
Instruções de montagem e manual de
instruções . . . . . . . . . . . . . . . . . . . . . . . . . . .75
Kit di ampliamento per CC
Istruzioni di montaggio e d’uso . . . . . . . . . 91
DC-uitbreidingskit
Montagehandleiding en
gebruiksaanwijzing . . . . . . . . . . . . . . . . . . 107
DC-udvidelsessæt
Monterings- og betjeningsvejledning . . .123
DC-utbyggnadssats
Monterings- och bruksanvisning . . . . . . . 139
DC-utvidelsessett
Monterings- og bruksanvisning . . . . . . . . 155
DC-laajennussetti
Asennus- ja käyttöohje . . . . . . . . . . . . . . . 171
Комплект расширения для
постоянного тока
Инструкция по монтажу и эксплуатации 186
Zestaw uzupełniający DC
Instrukcja montażu i obsługi. . . . . . . . . . . 203
Rozširujúca súprava DC
Návod na montáž a uvedenie
do prevádzky. . . . . . . . . . . . . . . . . . . . . . . 220
Rozšiřující sada DC
Návod k montáži a obsluze . . . . . . . . . . . 236
Egyenáramú bővítőkészlet
Szerelési és használati útmutató . . . . . . . 252
Produžni komplet za istosmjernu
struju
Upute za montažu i uporabu . . . . . . . . . . 268
DC Genişletme Kiti
Montaj ve Kullanım Kılavuzu. . . . . . . . . . . 284
DC razširitveni komplet
Navodilo za montažo in uporabo . . . . . . 300
Kit de prelungire c.c.
Instrucţiuni de montaj şi operare . . . . . . . 316
DC комплект за удължаване
Инструкция за монтаж
и експлоатация . . . . . . . . . . . . . . . . . . . . . 333
Alalisvoolu-laienduskomplekt
Paigaldus- ja kasutusjuhend . . . . . . . . . . . 350
Κιτ επέκτασης DC
Οδηγίες τοποθέτησης και χειρισμού. . . 365
Nuolatinės srovės išplėtimo
rinkinys
Montavimo ir naudojimo vadovas . . . . . . 384
Līdzstrāvas pagarinātāja komplekts
Uzstādīšanas un lietošanas rokasgrāmata400
EN
DE
FR
ES
PT
IT
NL
DA
SV
NO
FI
RU
PL
SK
CS
HU
HR
TR
SL
RO
BG
ET
EL
LT
LV
AIR CONDITIONERS
ACCESSORIES
DC-Kit-PP12-DSP-T--IO-16s.book Page 1 Friday, June 23, 2023 5:13 PM

© 2023 Dometic Group. The visual appearance of the contents of this manual is
protected by copyright and design law. The underlying technical design and the
products contained herein may be protected by design, patent or be patent
pending. The trademarks mentioned in this manual belong to Dometic Sweden AB.
All rights are reserved.
DC-Kit-PP12-DSP-T--IO-16s.book Page 2 Friday, June 23, 2023 5:13 PM

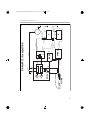
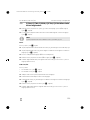
DC-Kit PP12, DSP-T12/24
3
UD+
Ua
Ue
GND D+
R+
E
D
PP1002
F
A
B
F
ECL-76
DC-Kit PP12 – FreshJet 1100
R–
150 A
Batt.1
Batt.2
+12 V
D+
Ubatt
150 A
FJ 1100
l4 l3 l2 l1 16 mm2
16 mm2
1 mm2
t 25 mm2
35 mm2
35 mm2
C
230 Vw
MCR9
1
DC-Kit-PP12-DSP-T--IO-16s.book Page 3 Friday, June 23, 2023 5:13 PM

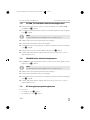
DC-Kit PP12, DSP-T12/24
4
t 25 mm2
DC-Kit DSP-T 12 – FreshJet, FreshLight, FreshWell
D+
+12 V
ECL-102
DSP1812T
FreshLight
C
B
A
F
F
DSP-RCT
E
D
UD+
Ubatt
GND D+
35mm2
35 mm2
1 mm2
l4
200 A
200 A
Batt.1
l5
R-
Batt.2
GND
l3 l2 l1
230 Vw
t 25 mm2
t 35 mm2
FreshWell
FreshJet
Ua
Ue
2
DC-Kit-PP12-DSP-T--IO-16s.book Page 4 Friday, June 23, 2023 5:13 PM

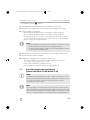
DC-Kit PP12, DSP-T12/24
5
DC-Kit DSP-T 24 – FreshJet, FreshLight, FreshWell
FreshLight
FreshWell
FreshJet
UD+
GND D+
l5
l4 l3 l2 l1
GND
100 A
100 A
Ubatt
DSP-RCT
R-
E
D
ECL-103
C
B
A
F
F
Batt.1
Batt.2
35 mm2
35 mm2
1 mm2
DSP1824T
230 Vw
t 16 mm2
t 16 mm2
t 25 mm2
D+
+24 V
3
DC-Kit-PP12-DSP-T--IO-16s.book Page 5 Friday, June 23, 2023 5:13 PM

DC-Kit PP12, DSP-T12/24
6
I5I2I1 I4I3
4
FreshJet
5
DC-Kit-PP12-DSP-T--IO-16s.book Page 6 Friday, June 23, 2023 5:13 PM

DC-Kit PP12, DSP-T12/24
7
6
DC-Kit-PP12-DSP-T--IO-16s.book Page 7 Friday, June 23, 2023 5:13 PM

DC-Kit PP12, DSP-T12/24
8
FreshLight
A
B
C
7
DC-Kit-PP12-DSP-T--IO-16s.book Page 8 Friday, June 23, 2023 5:13 PM

DC-Kit PP12, DSP-T12/24
9
8
DC-KitIR LIN1 12 VLIN2
POWER
9
0
DC-Kit-PP12-DSP-T--IO-16s.book Page 9 Friday, June 23, 2023 5:13 PM

EN
Explanation of symbols DC-Kit PP12, DSP-T12/24
10
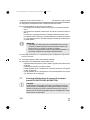
Please read these instructions carefully and follow all instructions, guidelines, and warnings included in this product manual in order to ensure
that you install, use, and maintain the product properly at all times. These instructions MUST stay with this product.
By using the product, you hereby confirm that you have read all instructions, guidelines, and warnings carefully and that you understand and
agree to abide by the terms and conditions as set forth herein. You agree to use this product only for the intended purpose and application
and in accordance with the instructions, guidelines, and warnings as set forth in this product manual as well as in accordance with all appli-
cable laws and regulations. A failure to read and follow the instructions and warnings set forth herein may result in an injury to yourself and
others, damage to your product or damage to other property in the vicinity. This product manual, including the instructions, guidelines, and
warnings, and related documentation, may be subject to changes and updates. For up-to-date product information, please visit
documents.dometic.com.
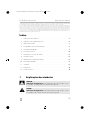
Table of contents
1 Explanation of symbols . . . . . . . . . . . . . . . . . . . . . . . . . . . . . . . . . . . . . . . . . .10
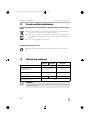
2 General safety instructions . . . . . . . . . . . . . . . . . . . . . . . . . . . . . . . . . . . . . . . 11
3 Scope of delivery . . . . . . . . . . . . . . . . . . . . . . . . . . . . . . . . . . . . . . . . . . . . . .12
4 Target group for this instruction manual . . . . . . . . . . . . . . . . . . . . . . . . . . . .14
5 Intended use . . . . . . . . . . . . . . . . . . . . . . . . . . . . . . . . . . . . . . . . . . . . . . . . . .14
6 Technical description . . . . . . . . . . . . . . . . . . . . . . . . . . . . . . . . . . . . . . . . . . .15
7 Installing and connecting the DC kit . . . . . . . . . . . . . . . . . . . . . . . . . . . . . . .18
8 Using the DC kit . . . . . . . . . . . . . . . . . . . . . . . . . . . . . . . . . . . . . . . . . . . . . . 22
9 Maintaining and cleaning the DC kit . . . . . . . . . . . . . . . . . . . . . . . . . . . . . . 23
10 Troubleshooting . . . . . . . . . . . . . . . . . . . . . . . . . . . . . . . . . . . . . . . . . . . . . . 24
11 Warranty . . . . . . . . . . . . . . . . . . . . . . . . . . . . . . . . . . . . . . . . . . . . . . . . . . . . 24
12 Disposal. . . . . . . . . . . . . . . . . . . . . . . . . . . . . . . . . . . . . . . . . . . . . . . . . . . . . 24
13 Technical data . . . . . . . . . . . . . . . . . . . . . . . . . . . . . . . . . . . . . . . . . . . . . . . . 25
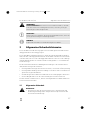
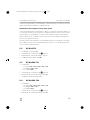
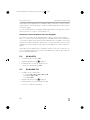
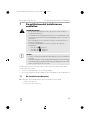
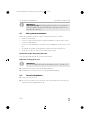
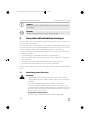
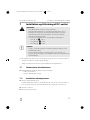
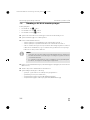
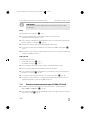
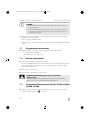
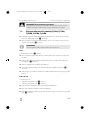
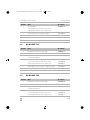
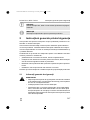
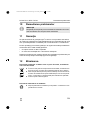
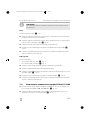
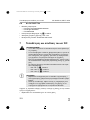
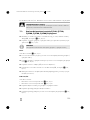
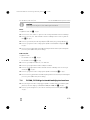
1 Explanation of symbols
D
!
DANGER!
Safety instruction: Indicates a hazardous situation that, if not avoided,
will result in death or serious injury.
WARNING!
Safety instruction: Indicates a hazardous situation that, if not avoided,
could result in death or serious injury.
DC-Kit-PP12-DSP-T--IO-16s.book Page 10 Friday, June 23, 2023 5:13 PM

EN
DC-Kit PP12, DSP-T12/24 General safety instructions
11
A
I
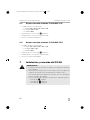
2 General safety instructions
This product is only suitable for the intended purpose and application in accordance
with these instructions.
This manual provides information that is necessary for proper installation and/or
operation of the product. Poor installation and/or improper operating or mainte-
nance will result in unsatisfactory performance and a possible failure.
The manufacturer accepts no liability for any injury or damage to the product
resulting from:
• Incorrect assembly or connection, including excess voltage
• Incorrect maintenance or use of spare parts other than original spare parts
provided by the manufacturer
• Alterations to the product without express permission from the manufacturer
• Use for purposes other than those described in this manual
Dometic reserves the right to change product appearance and product
specifications.
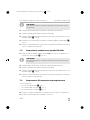
2.1 General safety
!WARNING!
• Observe the safety instructions in the installation and operating man-
ual for the components supplied and your Dometic air conditioner.
• Only use the device as intended.
• People whose physical sensory or mental capacities prevent them
from using this device safely should not operate it without the supervi-
sion of a responsible adult.
•Electrical devices are not toys!
Always keep and use the device out of the reach of children.
• Children must be supervised to ensure that they do not play with the
device.
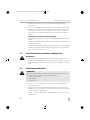
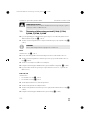
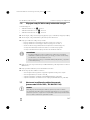
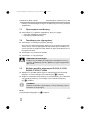
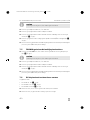
NOTICE!
Indicates a situation that, if not avoided, can result in property damage.
NOTE
Supplementary information for operating the product.
DC-Kit-PP12-DSP-T--IO-16s.book Page 11 Friday, June 23, 2023 5:13 PM

EN
Scope of delivery DC-Kit PP12, DSP-T12/24
12
• Maintenance and repair work may only be carried out by specialist
companies who are familiar with the risks involved and the relevant
regulations.
2.2 Safety when installing and repairing
!WARNING!
• Installing and repairing the device may only be performed by special-
ist companies that are familiar with the risks as well as the guidelines
and safety precautions to be applied.
2.3 Safe operation
!
• Only operate the system if you are certain that none of the housings
and cables are damaged.
• The DC power connection cables are designed for high levels of
current. Do not make any changes to the cables. If necessary, get a
specialist company to do this for you.
• Make sure the air inlets and outlets of the device are not covered.
• Ensure good ventilation. The inverter produces dissipated heat which
has to be diverted.
• Always disconnect the power supply when working on the device.
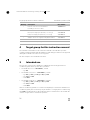
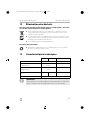
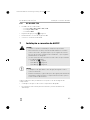
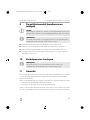
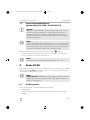
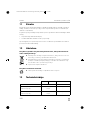
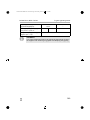
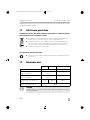
3Scope of delivery
Before starting up the system, check that all the parts belonging to the scope of
delivery are present.
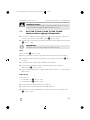
WARNING!
Note the following basic safety information when using electrical
devices to protect against:
•Electric shock
•Fire hazards
•Injury
DC-Kit-PP12-DSP-T--IO-16s.book Page 12 Friday, June 23, 2023 5:13 PM

EN
DC-Kit PP12, DSP-T12/24 Scope of delivery
13
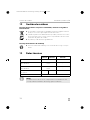
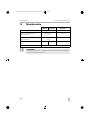
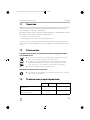
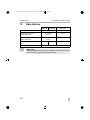
3.1 DC-Kit PP12
3.2 DC-Kit DSP-T12
3.3 DC-Kit DSP-T24
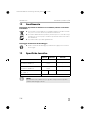
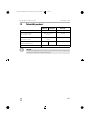
Quantity Description Ref. number
1 Charging current distributor ECL-76 9600000483
1 Inverter with priority circuit PP1002 9600000022
1 Connection cable
Black power supply line (35 mm², 1.5 m long)
Red power supply line (35 mm², 1.5 m long)
9600000270
1 Sensing cable for FreshJet/FreshLight 4441300221
1 Inverter adapter 9103530084
1 Remote control for inverter MCR9 9600000091
1 Installation and operating manual 4445101952
Quantity Description Ref. number
1 Charging current distributor ECL-102 9600000547
1 Inverter DSP1812T with priority circuit 9600002553
1 Remote control for inverter DSP-RCT
(including connection cable)
9600002564
1 Connection cable
Black power supply line (35 mm², 1.5 m long)
Red power supply line (35 mm², 1.5 m long)
4441300120
4441300119
1 Adapter cable for FreshJet/FreshLight/FreshWell 4441300221
1 Extension cable 4441300124
1 Installation and operating manual 4445101954
Quantity Description Ref. number
1 Charging current distributor ECL-103 9600000548
1 Inverter DSP1824T with priority circuit 9600002554
DC-Kit-PP12-DSP-T--IO-16s.book Page 13 Friday, June 23, 2023 5:13 PM

EN
Target group for this instruction manual DC-Kit PP12, DSP-T12/24
14
4 Target group for this instruction manual
The installation information in this instruction manual is intended for specialist
companies that are familiar with the guidelines and safety precautions to be applied
during the installation of vehicle accessory parts.
All other chapters are intended for the users.
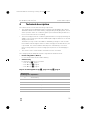
5 Intended use
The “DC kit” extension kit is suitable for equipping the following Dometic air
conditioning units for DC power drive operation:
• DC-Kit PP12 (ref. no. 9100300003), 12 Vg
– FJ1100
• DC-Kit DSP-T12 (ref. no. 9100300002), 12 Vg
– FJ1100, FJ1700, FJ2200, FJ2700, FJ3200
– FL1600, FL2200
–FW3000
• DC-Kit DSP-T24 (ref. no. 9100300073), 24 Vg
– FJ1100, FJ1700, FJ2200, FJ2700, FJ3200
– FL1600, FL2200
–FW3000
If the air conditioning unit does not have a heat pump (see instruction manual for air
conditioning unit), the inverter may only be used for cooling by the air conditioning
unit, not for heating mode, as the heating elements consume more current than the
inverter can generate in continuous operation.
1 Remote control for inverter DSP-RCT
(including connection cable)
9600002564
1 Connection cable
Black power supply line (35 mm², 1.5 m long)
Red power supply line (35 mm², 1.5 m long)
4441300120
4441300119
1 Adapter cable for FreshJet/FreshLight/FreshWell 4441300221
1 Extension cable 4441300124
1 Installation and operating manual 4445101956
Quantity Description Ref. number
DC-Kit-PP12-DSP-T--IO-16s.book Page 14 Friday, June 23, 2023 5:13 PM

EN
DC-Kit PP12, DSP-T12/24 Technical description
15
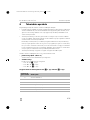
6 Technical description
The extension kit consists of the following components:
• The charging current distributor with low-voltage cut-off regulates the current
distribution between the starter battery, supply battery and light system, as well
as the operation of the air conditioning unit. It prevents the battery and the elec-
tronics in the vehicle from overloading.
• The inverter supplies the air conditioning unit with the necessary input voltage of
230 Vw. The inverter generates this 230 V input voltage from the DC on-board
supply in the vehicle.
The built-in priority circuit is intended for distributing voltages in vehicles with
two available current supplies. If there is mains voltage present at the device, this
is prioritized. This ensures that the limited power of the battery is not used
unnecessarily. If there is no mains voltage present, the DC on-board supply is
used.
• The remote control can be used to switch the inverter on and off.
The charging current distributor has two relays that are used as follows:
•Power relay (Batt. 1/Batt. 2)
to connect the starter and consumer battery
•Control relay
to switch the compressor on and off
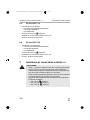
–ECL-76: fig.1, page 3
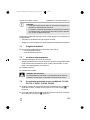
– ECL-102: fig. 2, page 4
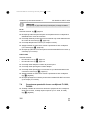
– ECL-103: fig. 3, page 5
Key for circuit diagrams in fig. 1, page 3 to fig. 3, page 5
Characters in
circuit diagram Explanation
A Starter battery
B Consumer unit battery
C Remote control
D Ua: switch-off voltage
E Ue: switch-on voltage
FFuse
DC-Kit-PP12-DSP-T--IO-16s.book Page 15 Friday, June 23, 2023 5:13 PM

EN
Technical description DC-Kit PP12, DSP-T12/24
16
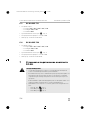
6.1 How the DC kit functions
The DC kit measures the light system voltage UD+ and compares this value against
the value of the switch-on voltage Ue.
The voltage value Ue can be adjusted for ECL-76 and ECL-102 (12.5 V – 14.0 V). For
ECL-103, the voltage value Ue is 26.6 V.
Supply from the battery with motor switched on
If the light system voltage exceeds the voltage value Ue (UD+ > Ue), relay contact
Batt. 1/Batt. 2 of the power relay closes. The starter battery and the consumer
battery are therefore connected in parallel with low resistance and are charged
together by the light system. In addition, the contact I2/I4 opens. This activates the
air conditioning unit.
If the light system voltage falls below the switch-off value Ua for the charging current
distributor due to the high load from the air conditioning unit, relay contact Batt. 1/
Batt. 2 opens and the parallel connection between the starter battery and the con-
sumer battery ends. The light system now charges the starter battery. If the vehicle
has a connecting cable between the two batteries, the consumer battery is also
charged.
In addition, the contact I2/I4 closes. This switches off the compressor of the air
conditioning unit. The air conditioning unit fan and the inverter remain in operation.
The lower limit value Ua can be adjusted for ECL-76 and ECL-102 (10.5 V – 12.5 V).
For ECL-103, the voltage value Ua is 23.4 V.
As soon as the voltage in the consumer battery has reached the switch-on value Ue
for the charging current distributor, the compressor of the air conditioning unit
switches on again.
If the voltage in the consumer battery drops further and falls below the switch-off
point for the inverter, the inverter switches off.
Supply from the battery with motor switched off
If the vehicle engine is switched off (UD+ = 0 V), relay contact Batt. 1/Batt. 2 and
relay contact I2/I4 are open. The air conditioning unit can be operated and only
takes power from the consumer battery. If the battery voltage falls below
Ubatt = 10.5 V/21 V, the inverter switches off. There is no longer any voltage at
the corresponding socket and the air conditioning unit switches off.
As soon as the power from the consumer battery reaches the inverter's switch-on
point, the socket is supplied with voltage again. The air conditioning unit has to be
switched back on manually.
DC-Kit-PP12-DSP-T--IO-16s.book Page 16 Friday, June 23, 2023 5:13 PM

EN
DC-Kit PP12, DSP-T12/24 Technical description
17
6.2 DC-Kit PP12
• Air conditioner: FreshJet1100
• Circuit diagram: fig. 1, page 3
• Charging current distributor: ECL-76
• Inverter: PerfectPower PP1002
6.3 DC-Kit DSP-T12
• Air conditioning units:
– FreshJet1100/1700/2200/2700/3200
– FreshLight1600/2200
– FreshWell3000
• Circuit diagram: fig. 2, page 4
• Charging current distributor: ECL-102
• Inverter: SinePower DSP1812T
6.4 DC-Kit DSP-T24
• Air conditioning units:
– FreshJet1100/1700/2200/2700/3200
– FreshLight1600/2200
– FreshWell3000
• Circuit diagram: fig. 3, page 5
• Charging current distributor: ECL-103
• Inverter: SinePower DSP1824T
DC-Kit-PP12-DSP-T--IO-16s.book Page 17 Friday, June 23, 2023 5:13 PM

EN
Installing and connecting the DC kit DC-Kit PP12, DSP-T12/24
18
7 Installing and connecting the DC kit
!
A
Observe the following instructions when selecting the location for installing the
components:
• Make sure the cables are of the correct length.
• Choose a well-ventilated installation location near the supply battery.
7.1 Preparing the installation
➤Disconnect the following voltage supplies in the vehicle:
– negative battery terminal
– external voltage supply
7.2 Installing components
➤Install the charging current distributor.
Attach the charging current distributor and the corresponding relay so that they
are installed firmly, are dry and well ventilated, ideally in the direct vicinity of the
inverter.
➤Install the inverter.
WARNING!
• The DC kit may only be installed by specialist companies.
• To prevent the risk of short circuits, always disconnect the negative
terminal of the vehicle’s electrical system before working on the vehi-
cle’s electrical system.
If the vehicle has a consumer battery, its negative terminal should
also be disconnected.
• The minimum cable cross sections are shown in the following dia-
grams:
–ECL-76: fig.1, page 3
–ECL-102: fig.2, page 4
–ECL-103: fig.3, page 5
NOTICE!
• Make sure that you route the on/off cable away from live power
cables.
• When installing, observe the information in the installation and
operating manual for the components supplied and your Dometic air
conditioner.
DC-Kit-PP12-DSP-T--IO-16s.book Page 18 Friday, June 23, 2023 5:13 PM

EN
DC-Kit PP12, DSP-T12/24 Installing and connecting the DC kit
19
➤Install the remote control.
D
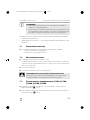
7.3 Connecting air conditioning unit FJ1100, FJ1700,
FJ2200, FJ2700, FJ3200
➤Remove the air outlet unit of the air conditioner; if necessary remove the top
cover (FreshJet) (fig. 5, page 6).
➤Connect the on/off cable for the FreshJet to the connection socket on the circuit
board (fig. 6, page 7).
I
PP12
Circuit diagram: fig. 1, page 3
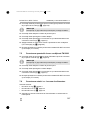
➤Route the on/off cable from the air conditioning unit to the charging current
distributor.
➤Connect the on/off cable to connections I4 and I2 on the charging current
distributor (fig. 4, page 6).
➤Connect the inverter adapter (Inverter Adapter).
➤Attach the air outlet unit of the air conditioner (FreshJet) (fig. 5, page 6).
➤Route the connecting cable for remote control MCR9 to the inverter and connect
it (inverter).
DSP-T12/24
Circuit diagram:
• DC-Kit DSP-T12: fig. 2, page 4
• DC-Kit DSP-T24: fig. 3, page 5
➤Connect the adapter cable to the on/off cable.
➤Connect the extension cable to the adapter cable.
➤Connect the extension cable to connections I2 and I5 on the charging current
distributor (fig. 4, page 6).
DANGER! Electric shock!
Only connect the battery once you have the completed all the installa-
tion work and you are certain it has been done properly.
NOTE
Guide the on/off cable carefully past the fan.
DC-Kit-PP12-DSP-T--IO-16s.book Page 19 Friday, June 23, 2023 5:13 PM

EN
Installing and connecting the DC kit DC-Kit PP12, DSP-T12/24
20
➤Attach the air outlet unit of the air conditioner (fig. 5, page 6).
➤Route the connecting cable for remote control DSP-RCT to the inverter and con-
nect it (inverter).
7.4 Connecting air conditioning unit FL1600, FL2200
➤Remove the air outlet unit of the air conditioner; if necessary remove the top
cover (FL1600, FL2200) (fig. 7, page 8).
➤Connect the on/off cable for the FreshLight to the connection socket on the
circuit board (fig. 8, page 9).
I
➤Connect the adapter cable to the on/off cable.
➤Connect the extension cable to the adapter cable.
➤Connect the extension cable to connections I2 and I5 on the charging current
distributor (fig. 4, page 6).
➤Attach the air outlet unit of the air conditioner (FreshLight) (fig. 7, page 8).
➤Route the connecting cable for remote control DSP-RCT to the inverter and
connect it (inverter).
7.5 Connecting air conditioning unit FW3000
➤Connect the on/off cable for FW3000 to the connection socket on the
connector panel (fig. 9, page 9).
I
➤Connect the adapter cable to the on/off cable.
➤Connect the extension cable to the adapter cable.
➤Connect the extension cable to connections I2 and I5 on the charging current
distributor (fig. 4, page 6).
➤Route the connecting cable for remote control DSP-RCT to the inverter and
connect it (inverter).
NOTE
Guide the on/off cable carefully past the fan.
NOTE
Guide the on/off cable carefully past the fan.
DC-Kit-PP12-DSP-T--IO-16s.book Page 20 Friday, June 23, 2023 5:13 PM
Pagina se încarcă...
Pagina se încarcă...
Pagina se încarcă...
Pagina se încarcă...
Pagina se încarcă...
Pagina se încarcă...
Pagina se încarcă...
Pagina se încarcă...
Pagina se încarcă...
Pagina se încarcă...
Pagina se încarcă...
Pagina se încarcă...
Pagina se încarcă...
Pagina se încarcă...
Pagina se încarcă...
Pagina se încarcă...
Pagina se încarcă...
Pagina se încarcă...
Pagina se încarcă...
Pagina se încarcă...
Pagina se încarcă...
Pagina se încarcă...
Pagina se încarcă...
Pagina se încarcă...
Pagina se încarcă...
Pagina se încarcă...
Pagina se încarcă...
Pagina se încarcă...
Pagina se încarcă...
Pagina se încarcă...
Pagina se încarcă...
Pagina se încarcă...
Pagina se încarcă...
Pagina se încarcă...
Pagina se încarcă...
Pagina se încarcă...
Pagina se încarcă...
Pagina se încarcă...
Pagina se încarcă...
Pagina se încarcă...
Pagina se încarcă...
Pagina se încarcă...
Pagina se încarcă...
Pagina se încarcă...
Pagina se încarcă...
Pagina se încarcă...
Pagina se încarcă...
Pagina se încarcă...
Pagina se încarcă...
Pagina se încarcă...
Pagina se încarcă...
Pagina se încarcă...
Pagina se încarcă...
Pagina se încarcă...
Pagina se încarcă...
Pagina se încarcă...
Pagina se încarcă...
Pagina se încarcă...
Pagina se încarcă...
Pagina se încarcă...
Pagina se încarcă...
Pagina se încarcă...
Pagina se încarcă...
Pagina se încarcă...
Pagina se încarcă...
Pagina se încarcă...
Pagina se încarcă...
Pagina se încarcă...
Pagina se încarcă...
Pagina se încarcă...
Pagina se încarcă...
Pagina se încarcă...
Pagina se încarcă...
Pagina se încarcă...
Pagina se încarcă...
Pagina se încarcă...
Pagina se încarcă...
Pagina se încarcă...
Pagina se încarcă...
Pagina se încarcă...
Pagina se încarcă...
Pagina se încarcă...
Pagina se încarcă...
Pagina se încarcă...
Pagina se încarcă...
Pagina se încarcă...
Pagina se încarcă...
Pagina se încarcă...
Pagina se încarcă...
Pagina se încarcă...
Pagina se încarcă...
Pagina se încarcă...
Pagina se încarcă...
Pagina se încarcă...
Pagina se încarcă...
Pagina se încarcă...
Pagina se încarcă...
Pagina se încarcă...
Pagina se încarcă...
Pagina se încarcă...
Pagina se încarcă...
Pagina se încarcă...
Pagina se încarcă...
Pagina se încarcă...
Pagina se încarcă...
Pagina se încarcă...
Pagina se încarcă...
Pagina se încarcă...
Pagina se încarcă...
Pagina se încarcă...
Pagina se încarcă...
Pagina se încarcă...
Pagina se încarcă...
Pagina se încarcă...
Pagina se încarcă...
Pagina se încarcă...
Pagina se încarcă...
Pagina se încarcă...
Pagina se încarcă...
Pagina se încarcă...
Pagina se încarcă...
Pagina se încarcă...
Pagina se încarcă...
Pagina se încarcă...
Pagina se încarcă...
Pagina se încarcă...
Pagina se încarcă...
Pagina se încarcă...
Pagina se încarcă...
Pagina se încarcă...
Pagina se încarcă...
Pagina se încarcă...
Pagina se încarcă...
Pagina se încarcă...
Pagina se încarcă...
Pagina se încarcă...
Pagina se încarcă...
Pagina se încarcă...
Pagina se încarcă...
Pagina se încarcă...
Pagina se încarcă...
Pagina se încarcă...
Pagina se încarcă...
Pagina se încarcă...
Pagina se încarcă...
Pagina se încarcă...
Pagina se încarcă...
Pagina se încarcă...
Pagina se încarcă...
Pagina se încarcă...
Pagina se încarcă...
Pagina se încarcă...
Pagina se încarcă...
Pagina se încarcă...
Pagina se încarcă...
Pagina se încarcă...
Pagina se încarcă...
Pagina se încarcă...
Pagina se încarcă...
Pagina se încarcă...
Pagina se încarcă...
Pagina se încarcă...
Pagina se încarcă...
Pagina se încarcă...
Pagina se încarcă...
Pagina se încarcă...
Pagina se încarcă...
Pagina se încarcă...
Pagina se încarcă...
Pagina se încarcă...
Pagina se încarcă...
Pagina se încarcă...
Pagina se încarcă...
Pagina se încarcă...
Pagina se încarcă...
Pagina se încarcă...
Pagina se încarcă...
Pagina se încarcă...
Pagina se încarcă...
Pagina se încarcă...
Pagina se încarcă...
Pagina se încarcă...
Pagina se încarcă...
Pagina se încarcă...
Pagina se încarcă...
Pagina se încarcă...
Pagina se încarcă...
Pagina se încarcă...
Pagina se încarcă...
Pagina se încarcă...
Pagina se încarcă...
Pagina se încarcă...
Pagina se încarcă...
Pagina se încarcă...
Pagina se încarcă...
Pagina se încarcă...
Pagina se încarcă...
Pagina se încarcă...
Pagina se încarcă...
Pagina se încarcă...
Pagina se încarcă...
Pagina se încarcă...
Pagina se încarcă...
Pagina se încarcă...
Pagina se încarcă...
Pagina se încarcă...
Pagina se încarcă...
Pagina se încarcă...
Pagina se încarcă...
Pagina se încarcă...
Pagina se încarcă...
Pagina se încarcă...
Pagina se încarcă...
Pagina se încarcă...
Pagina se încarcă...
Pagina se încarcă...
Pagina se încarcă...
Pagina se încarcă...
Pagina se încarcă...
Pagina se încarcă...
Pagina se încarcă...
Pagina se încarcă...
Pagina se încarcă...
Pagina se încarcă...
Pagina se încarcă...
Pagina se încarcă...
Pagina se încarcă...
Pagina se încarcă...
Pagina se încarcă...
Pagina se încarcă...
Pagina se încarcă...
Pagina se încarcă...
Pagina se încarcă...
Pagina se încarcă...
Pagina se încarcă...
Pagina se încarcă...
Pagina se încarcă...
Pagina se încarcă...
Pagina se încarcă...
Pagina se încarcă...
Pagina se încarcă...
Pagina se încarcă...
Pagina se încarcă...
Pagina se încarcă...
Pagina se încarcă...
Pagina se încarcă...
Pagina se încarcă...
Pagina se încarcă...
Pagina se încarcă...
Pagina se încarcă...
Pagina se încarcă...
Pagina se încarcă...
Pagina se încarcă...
Pagina se încarcă...
Pagina se încarcă...
Pagina se încarcă...
Pagina se încarcă...
Pagina se încarcă...
Pagina se încarcă...
Pagina se încarcă...
Pagina se încarcă...
Pagina se încarcă...
Pagina se încarcă...
Pagina se încarcă...
Pagina se încarcă...
Pagina se încarcă...
Pagina se încarcă...
Pagina se încarcă...
Pagina se încarcă...
Pagina se încarcă...
Pagina se încarcă...
Pagina se încarcă...
Pagina se încarcă...
Pagina se încarcă...
Pagina se încarcă...
Pagina se încarcă...
Pagina se încarcă...
Pagina se încarcă...
Pagina se încarcă...
Pagina se încarcă...
Pagina se încarcă...
Pagina se încarcă...
Pagina se încarcă...
Pagina se încarcă...
Pagina se încarcă...
Pagina se încarcă...
Pagina se încarcă...
Pagina se încarcă...
Pagina se încarcă...
Pagina se încarcă...
Pagina se încarcă...
Pagina se încarcă...
Pagina se încarcă...
Pagina se încarcă...
Pagina se încarcă...
Pagina se încarcă...
Pagina se încarcă...
Pagina se încarcă...
Pagina se încarcă...
Pagina se încarcă...
Pagina se încarcă...
Pagina se încarcă...
Pagina se încarcă...
Pagina se încarcă...
Pagina se încarcă...
Pagina se încarcă...
Pagina se încarcă...
Pagina se încarcă...
Pagina se încarcă...
Pagina se încarcă...
Pagina se încarcă...
Pagina se încarcă...
Pagina se încarcă...
Pagina se încarcă...
Pagina se încarcă...
Pagina se încarcă...
Pagina se încarcă...
Pagina se încarcă...
Pagina se încarcă...
Pagina se încarcă...
Pagina se încarcă...
Pagina se încarcă...
Pagina se încarcă...
Pagina se încarcă...
Pagina se încarcă...
Pagina se încarcă...
Pagina se încarcă...
Pagina se încarcă...
Pagina se încarcă...
Pagina se încarcă...
Pagina se încarcă...
Pagina se încarcă...
Pagina se încarcă...
Pagina se încarcă...
Pagina se încarcă...
Pagina se încarcă...
Pagina se încarcă...
Pagina se încarcă...
Pagina se încarcă...
Pagina se încarcă...
Pagina se încarcă...
Pagina se încarcă...
Pagina se încarcă...
Pagina se încarcă...
Pagina se încarcă...
Pagina se încarcă...
Pagina se încarcă...
Pagina se încarcă...
Pagina se încarcă...
Pagina se încarcă...
Pagina se încarcă...
Pagina se încarcă...
Pagina se încarcă...
Pagina se încarcă...
Pagina se încarcă...
Pagina se încarcă...
Pagina se încarcă...
Pagina se încarcă...
Pagina se încarcă...
Pagina se încarcă...
Pagina se încarcă...
Pagina se încarcă...
Pagina se încarcă...
Pagina se încarcă...
Pagina se încarcă...
Pagina se încarcă...
Pagina se încarcă...
Pagina se încarcă...
Pagina se încarcă...
Pagina se încarcă...
Pagina se încarcă...
Pagina se încarcă...
Pagina se încarcă...
Pagina se încarcă...
Pagina se încarcă...
Pagina se încarcă...
Pagina se încarcă...
Pagina se încarcă...
Pagina se încarcă...
Pagina se încarcă...
Pagina se încarcă...
Pagina se încarcă...
Pagina se încarcă...
Pagina se încarcă...
Pagina se încarcă...
Pagina se încarcă...
Pagina se încarcă...
Pagina se încarcă...
Pagina se încarcă...
Pagina se încarcă...
Pagina se încarcă...
Pagina se încarcă...
Pagina se încarcă...
Pagina se încarcă...
Pagina se încarcă...
Pagina se încarcă...
-
 1
1
-
 2
2
-
 3
3
-
 4
4
-
 5
5
-
 6
6
-
 7
7
-
 8
8
-
 9
9
-
 10
10
-
 11
11
-
 12
12
-
 13
13
-
 14
14
-
 15
15
-
 16
16
-
 17
17
-
 18
18
-
 19
19
-
 20
20
-
 21
21
-
 22
22
-
 23
23
-
 24
24
-
 25
25
-
 26
26
-
 27
27
-
 28
28
-
 29
29
-
 30
30
-
 31
31
-
 32
32
-
 33
33
-
 34
34
-
 35
35
-
 36
36
-
 37
37
-
 38
38
-
 39
39
-
 40
40
-
 41
41
-
 42
42
-
 43
43
-
 44
44
-
 45
45
-
 46
46
-
 47
47
-
 48
48
-
 49
49
-
 50
50
-
 51
51
-
 52
52
-
 53
53
-
 54
54
-
 55
55
-
 56
56
-
 57
57
-
 58
58
-
 59
59
-
 60
60
-
 61
61
-
 62
62
-
 63
63
-
 64
64
-
 65
65
-
 66
66
-
 67
67
-
 68
68
-
 69
69
-
 70
70
-
 71
71
-
 72
72
-
 73
73
-
 74
74
-
 75
75
-
 76
76
-
 77
77
-
 78
78
-
 79
79
-
 80
80
-
 81
81
-
 82
82
-
 83
83
-
 84
84
-
 85
85
-
 86
86
-
 87
87
-
 88
88
-
 89
89
-
 90
90
-
 91
91
-
 92
92
-
 93
93
-
 94
94
-
 95
95
-
 96
96
-
 97
97
-
 98
98
-
 99
99
-
 100
100
-
 101
101
-
 102
102
-
 103
103
-
 104
104
-
 105
105
-
 106
106
-
 107
107
-
 108
108
-
 109
109
-
 110
110
-
 111
111
-
 112
112
-
 113
113
-
 114
114
-
 115
115
-
 116
116
-
 117
117
-
 118
118
-
 119
119
-
 120
120
-
 121
121
-
 122
122
-
 123
123
-
 124
124
-
 125
125
-
 126
126
-
 127
127
-
 128
128
-
 129
129
-
 130
130
-
 131
131
-
 132
132
-
 133
133
-
 134
134
-
 135
135
-
 136
136
-
 137
137
-
 138
138
-
 139
139
-
 140
140
-
 141
141
-
 142
142
-
 143
143
-
 144
144
-
 145
145
-
 146
146
-
 147
147
-
 148
148
-
 149
149
-
 150
150
-
 151
151
-
 152
152
-
 153
153
-
 154
154
-
 155
155
-
 156
156
-
 157
157
-
 158
158
-
 159
159
-
 160
160
-
 161
161
-
 162
162
-
 163
163
-
 164
164
-
 165
165
-
 166
166
-
 167
167
-
 168
168
-
 169
169
-
 170
170
-
 171
171
-
 172
172
-
 173
173
-
 174
174
-
 175
175
-
 176
176
-
 177
177
-
 178
178
-
 179
179
-
 180
180
-
 181
181
-
 182
182
-
 183
183
-
 184
184
-
 185
185
-
 186
186
-
 187
187
-
 188
188
-
 189
189
-
 190
190
-
 191
191
-
 192
192
-
 193
193
-
 194
194
-
 195
195
-
 196
196
-
 197
197
-
 198
198
-
 199
199
-
 200
200
-
 201
201
-
 202
202
-
 203
203
-
 204
204
-
 205
205
-
 206
206
-
 207
207
-
 208
208
-
 209
209
-
 210
210
-
 211
211
-
 212
212
-
 213
213
-
 214
214
-
 215
215
-
 216
216
-
 217
217
-
 218
218
-
 219
219
-
 220
220
-
 221
221
-
 222
222
-
 223
223
-
 224
224
-
 225
225
-
 226
226
-
 227
227
-
 228
228
-
 229
229
-
 230
230
-
 231
231
-
 232
232
-
 233
233
-
 234
234
-
 235
235
-
 236
236
-
 237
237
-
 238
238
-
 239
239
-
 240
240
-
 241
241
-
 242
242
-
 243
243
-
 244
244
-
 245
245
-
 246
246
-
 247
247
-
 248
248
-
 249
249
-
 250
250
-
 251
251
-
 252
252
-
 253
253
-
 254
254
-
 255
255
-
 256
256
-
 257
257
-
 258
258
-
 259
259
-
 260
260
-
 261
261
-
 262
262
-
 263
263
-
 264
264
-
 265
265
-
 266
266
-
 267
267
-
 268
268
-
 269
269
-
 270
270
-
 271
271
-
 272
272
-
 273
273
-
 274
274
-
 275
275
-
 276
276
-
 277
277
-
 278
278
-
 279
279
-
 280
280
-
 281
281
-
 282
282
-
 283
283
-
 284
284
-
 285
285
-
 286
286
-
 287
287
-
 288
288
-
 289
289
-
 290
290
-
 291
291
-
 292
292
-
 293
293
-
 294
294
-
 295
295
-
 296
296
-
 297
297
-
 298
298
-
 299
299
-
 300
300
-
 301
301
-
 302
302
-
 303
303
-
 304
304
-
 305
305
-
 306
306
-
 307
307
-
 308
308
-
 309
309
-
 310
310
-
 311
311
-
 312
312
-
 313
313
-
 314
314
-
 315
315
-
 316
316
-
 317
317
-
 318
318
-
 319
319
-
 320
320
-
 321
321
-
 322
322
-
 323
323
-
 324
324
-
 325
325
-
 326
326
-
 327
327
-
 328
328
-
 329
329
-
 330
330
-
 331
331
-
 332
332
-
 333
333
-
 334
334
-
 335
335
-
 336
336
-
 337
337
-
 338
338
-
 339
339
-
 340
340
-
 341
341
-
 342
342
-
 343
343
-
 344
344
-
 345
345
-
 346
346
-
 347
347
-
 348
348
-
 349
349
-
 350
350
-
 351
351
-
 352
352
-
 353
353
-
 354
354
-
 355
355
-
 356
356
-
 357
357
-
 358
358
-
 359
359
-
 360
360
-
 361
361
-
 362
362
-
 363
363
-
 364
364
-
 365
365
-
 366
366
-
 367
367
-
 368
368
-
 369
369
-
 370
370
-
 371
371
-
 372
372
-
 373
373
-
 374
374
-
 375
375
-
 376
376
-
 377
377
-
 378
378
-
 379
379
-
 380
380
-
 381
381
-
 382
382
-
 383
383
-
 384
384
-
 385
385
-
 386
386
-
 387
387
-
 388
388
-
 389
389
-
 390
390
-
 391
391
-
 392
392
-
 393
393
-
 394
394
-
 395
395
-
 396
396
-
 397
397
-
 398
398
-
 399
399
-
 400
400
-
 401
401
-
 402
402
-
 403
403
-
 404
404
-
 405
405
-
 406
406
-
 407
407
-
 408
408
-
 409
409
-
 410
410
-
 411
411
-
 412
412
-
 413
413
-
 414
414
-
 415
415
-
 416
416


Dometic DC-Kit PP 12, DSP-T 12, DSP-T 24 Instrucțiuni de utilizare
- Tip
- Instrucțiuni de utilizare
în alte limbi
Lucrări înrudite
-
Dometic MF 5M Manual de utilizare
-
Dometic MF5M Instrucțiuni de utilizare
-
-
Dometic FJ 1700 Manual de utilizare
-
-
-
Alte documente
-
YATO YT-81490 Instrucțiuni de utilizare
-
Rebel URZ3163 Manual de utilizare
-
Rebel URZ3164-65 Manual de utilizare
-
Goodwe GW12KLV-MT Ghid de instalare
-
Yamaha DSP-R10 Manualul proprietarului
-
Goodwe GW5KL-ET Ghid de instalare
-
Goodwe GW2900D-NS Ghid de instalare
-
Goodwe GW4K-DT Ghid de instalare
-
Goodwe XS Series Grid-Tied PV Inverter Manual de utilizare
-
Yamaha PSR-S970 Manual de utilizare