Digital to Analogue
Audio Converter
TosLink + S/PDIF →
2x RCA + 3.5mm AUX
ACON2510BK
ned.is/acon2510bk

a Quick start guide 4
c Kurzanleitung 6
b Guide de démarrage rapide 9
d Snelstartgids 12
j Guida rapida all’avvio 14
h Guía de inicio rápido 17
i Guia de iniciação rápida 19
e Snabbstartsguide 22
g Pika-aloitusopas 24
f Hurtigguide 27
2 Vejledning til hurtig start 29
k Gyors beüzemelési útmutató 32
n Przewodnik Szybki start 34
x Οδηγός γρήγορης εκκίνησης 37

1 Rýchly návod 39
l Rychlý návod 42
y Ghid rapid de inițiere 44
1
2
4
3
5
7
6
A

4
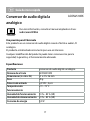
a Quick start guide
Digital to Analogue Audio Converter ACON2510BK
For more information see the extended manual online:
ned.is/acon2510bk
Intended use
This product is a converter for coaxial or toslink digital audio to analog L/R audio.
The product is intended for indoor use only.
Any modication of the product may have consequences for safety, warranty and
proper functioning.
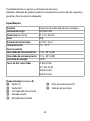
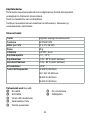
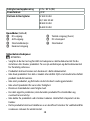
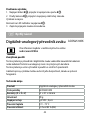
Specications
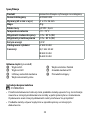
Product Digital to Analogue Audio Converter
Article number ACON2510BK
Dimensions (l x w x h) 51 x 41 x 26 mm
Weight 78 g
Power input 5.0 VDC ; 0.6 A
Operating temperature 0 °C - 70 °C
Operating humidity 10 % – 85 % (RH)
Storage humidity 10 % – 85 % (RH)
Power consumption 3.0 W
Supported bitrates 32 kHz 24-bit
44.1 kHz 24-bit
48 kHz 24-bit
96 kHz 24-bit

5
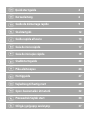
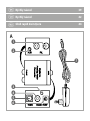
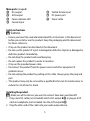
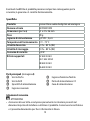
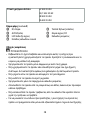
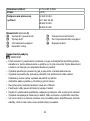
Main parts (image A)
1 R/L output
2 AUX output
3 Power indicator LED
4 Coaxial input
5 Toslink female input
6 DC power port
7 Power cable
Safety instructions
-
WARNING
• Ensure you have fully read and understood the instructions in this document
before you install or use the product. Keep the packaging and this document
for future reference.
• Only use the product as described in this document.
• Do not use the product if a part is damaged or defective. Replace a damaged or
defective product immediately.
• Do not drop the product and avoid bumping.
• Do not expose the product to water or moisture.
• Only use the provided power cable.
• Disconnect the product from the power source and other equipment if
problems occur.
• Do not unplug the product by pulling on the cable. Always grasp the plug and
pull.
• This product may only be serviced by a qualied technician for maintenance to
reduce the risk of electric shock.
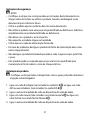
Installing the product
-
Make sure all the devices you want to connect have been switched o.
1. Plug a twin R/L cable (not included) into the R/L output A1 or plug an AUX
cable or headphone (not included) into the AUX output A2.
2. Plug the other end of the cable into your audio output device.

6
3. Plug a coaxial cable (not included) into the coaxial input A4 or plug a Toslink
cable into the Toslink female input A5.
4. Plug the other end of the cable into your audio output device.
Using the product
1. Plug the power cable A7 into the power port A6.
2. Plug the other end of A7 into a power outlet.
The product switches on.
The power indicator LED A3 lights up.
3. Switch on the connected audio devices.
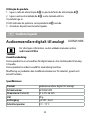
c Kurzanleitung
Digital-zu-Analog Audiokonverter ACON2510BK
Weitere Informationen nden Sie in der erweiterten Anleitung
online: ned.is/acon2510bk
Bestimmungsgemäße Verwendung
Dieses Produkt ist ein Konverter für digitales Koaxial- oder Toslink-Audio in
analoges L/R-Audio.
Das Produkt ist nur zur Verwendung innerhalb von Gebäuden gedacht.
Jegliche Modikation des Produkts kann Folgen für die Sicherheit, Garantie und
ordnungsgemäße Funktionalität haben.
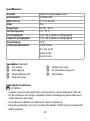
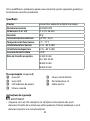
Spezikationen
Produkt Digital-zu-Analog Audiokonverter
Artikelnummer ACON2510BK
Größe (L x B x H) 51 x 41 x 26 mm

7
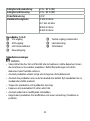
Gewicht 78 g
Stromeingang 5,0 VDC ; 0,6 A
Betriebstemperatur 0 °C - 70 °C
Betriebsfeuchtigkeit 10 % – 85 % (rel. Feuchte)
Lagerfeuchtigkeit 10 % – 85 % (rel. Feuchte)
Stromverbrauch 3,0 W
Unterstützte Bitraten 32 kHz 24-bit
44,1 kHz 24-bit
48 kHz 24-bit
96 kHz 24-bit
Hauptbestandteile (Abbildung A)
1 R/L-Ausgang
2 AUX-Ausgang
3 Betriebsanzeige-LED
4 Koaxialeingang
5 Toslink-Eingangsbuchse
6 DC-Stromanschluss
7 Stromkabel
Sicherheitshinweise
-
WARNUNG
• Vergewissern Sie sich, dass Sie die Anweisungen in diesem Dokument
vollständig gelesen und verstanden haben, bevor Sie das Produkt installieren
oder verwenden. Heben Sie die Verpackung und dieses Dokument zum
späteren Nachschlagen auf.
• Verwenden Sie das Produkt nur wie in diesem Dokument beschrieben.
• Verwenden Sie das Produkt nicht, wenn ein Teil beschädigt ist oder es einen
Mangel aufweist. Ersetzen Sie ein beschädigtes oder defektes Produkt
unverzüglich.
• Lassen Sie das Produkt nicht herunterfallen und vermeiden Sie Kollisionen.
• Setzen Sie das Produkt keinem Wasser oder Feuchtigkeit aus.

8
• Verwenden Sie nur das mitgelieferte Stromkabel.
• Trennen Sie das Produkt von der Stromquelle und anderer Ausrüstung, falls
Probleme auftreten.
• Ziehen Sie das Produkt niemals am Kabel aus der Steckdose. Halten Sie immer
den Stecker fest und ziehen Sie daran.
• Dieses Produkt darf nur von einem ausgebildeten Techniker gewartet werden,
um die Gefahr eines Stromschlags zu reduzieren.
Installation des Produkts
-
Stellen Sie sicher, dass alle Geräte, die Sie verbinden wollen, ausgeschaltet
sind.
1. Stecken Sie ein Doppel-RCA-Kabel (nicht im Lieferumfang enthalten) in den
R/L-Ausgang A1 oder stecken Sie ein AUX- oder Kopfhörerkabel (nicht im
Lieferumfang enthalten) in den AUX-Ausgang A2.
2. Schließen Sie das andere Ende des Kabels an Ihrem Audioausgabegerät an.
3. Stecken Sie ein Koaxialkabel (nicht im Lieferumfang enthalten) in den
Koaxialeingang A4 oder stecken Sie ein Toslink-Kabel in die Toslink-
Eingangsbuchse A5.
4. Schließen Sie das andere Ende des Kabels an Ihrem Audioausgabegerät an.
Verwenden des Produkts
1. Stecken Sie das Netzkabel A7 in den Stromanschluss A6.
2. Stecken Sie das andere Ende von A7 in eine Steckdose.
Das Produkt schaltet sich ein.
Die Betriebsanzeige-LED A3 leuchtet auf.
3. Schalten Sie die angeschlossenen Audiogeräte ein.

9
b Guide de démarrage rapide
Convertisseur audio numérique vers
analogique
ACON2510BK
Pour plus d'informations, consultez le manuel détaillé en ligne :
ned.is/acon2510bk
Utilisation prévue
Ce produit est un convertisseur audio numérique coaxial ou Toslink vers audio
analogique G/D.
Le produit est prévu pour un usage intérieur uniquement.
Toute modication du produit peut avoir des conséquences sur la sécurité, la
garantie et le bon fonctionnement.
Spécications
Produit Convertisseur audio numérique vers
analogique
Article numéro ACON2510BK
Dimensions (L x l x H) 51 x 41 x 26 mm
Poids 78 g
Alimentation électrique 5,0 VDC ; 0,6 A
Température fonctionnement 0 °C - 70 °C
Humidité en fonctionnement 10 % – 85 % (HR)
Humidité de stockage 10 % – 85 % (HR)
Consommation d'énergie 3,0 W

10
Débits pris en charge 32 kHz 24 bits
44,1 kHz 24 bits
48 kHz 24 bits
96 kHz 24 bits
Pièces principales (image A)
1 Sortie D/G
2 Sortie auxiliaire
3 Voyant LED d'alimentation
4 Entrée coaxiale
5 Entrée Toslink femelle
6 Voyant d’alimentation CC
7 Câble d'alimentation
Consignes de sécurité
-
AVERTISSEMENT
• Assurez-vous d'avoir entièrement lu et compris les instructions de ce document
avant d'installer ou d'utiliser le produit. Conservez l'emballage et le présent
document pour référence ultérieure.
• Utilisez le produit uniquement comme décrit dans le présent document.
• Ne pas utiliser le produit si une pièce est endommagée ou défectueuse.
Remplacez immédiatement un produit endommagé ou défectueux.
• Ne pas laisser tomber le produit et éviter de le cogner.
• Ne pas exposer le produit à l'eau ou à l'humidité.
• Utilisez uniquement le câble d’alimentation fourni.
• Débranchez le produit de la source d’alimentation et tout autre équipement en
cas de problème.
• Ne débranchez pas le produit en tirant sur le câble. Saisissez toujours la che et
tirez.
• Ce produit ne peut être réparé que par un technicien qualié an de réduire les
risques d'électrocution.

11
Installer le produit
-
Assurez-vous que tous les appareils que vous souhaitez connecter soient
hors tension.
1. Branchez un câble D/G (non inclus) sur la sortie D/G A1 ou branchez un
câble auxiliaire ou un casque (non inclus) sur la sortie AUX A2.
2. Branchez l'autre extrémité du câble sur votre appareil de sortie audio.
3. Branchez un câble coaxial (non inclus) sur l’entrée coaxiale A4 ou branchez
un câble Toslink sur l’entrée Toslink femelle A5.
4. Branchez l'autre extrémité du câble sur votre appareil de sortie audio.
Utiliser le produit
1. Branchez le câble d’alimentation A7 dans le port d'alimentation A6.
2. Branchez l'autre extrémité de A7 sur une prise de courant.
Le produit se met sous tension.
Le voyant LED d'alimentation A3 s'allume.
3. Mettez sous tension les appareils audio connectés.

12
d Snelstartgids
Digitaal naar analoog
audio-omvormer
ACON2510BK
Zie voor meer informatie de uitgebreide handleiding online:
ned.is/acon2510bk
Bedoeld gebruik
Dit product is een omvormer voor coaxiale of Toslink digitale audio naar analoge
L/R-audio.
Het product is enkel bedoeld voor gebruik binnenshuis.
Elke wijziging van het product kan gevolgen hebben voor de veiligheid, garantie
en correcte werking.
Specicaties
Product Digitaal naar analoog audio-omvormer
Artikelnummer ACON2510BK
Afmetingen (l x b x h) 51 x 41 x 26 mm
Gewicht 78 g
Stroomingang 5,0 VDC ; 0,6 A
Bedrijfstemperatuur 0 °C - 70 °C
Operationele vochtigheid 10 % – 85 % (RV)
Opslagvochtigheid 10 % – 85 % (RV)
Stroomverbruik 3,0 W

13
Ondersteunde bitrates 32 kHz 24-bit
44,1 kHz 24-bit
48 kHz 24-bit
96 kHz 24-bit
Belangrijkste onderdelen (afbeelding A)
1 R/L-uitgang
2 AUX-uitgang
3 Voedingsindicatie LED
4 Coaxiale ingang
5 Toslink vrouwelijke ingang
6 Voedingspoort gelijkstroom
7 Stroomkabel
Veiligheidsvoorschriften
-
WAARSCHUWING
• Zorg ervoor dat u de instructies in dit document volledig gelezen en begrepen
heeft voordat u het product installeert of gebruikt. Bewaar de verpakking en dit
document voor toekomstig gebruik.
• Gebruik het product alleen zoals in dit document beschreven.
• Gebruik het product niet als een onderdeel beschadigd of defect is. Vervang
een beschadigd of defect product onmiddellijk.
• Laat het product niet vallen en voorkom stoten.
• Stel het product niet bloot aan water of vocht.
• Gebruik alleen het meegeleverde netsnoer.
• Koppel het product los van de voedingsbron en van andere apparatuur als er
zich problemen voordoen.
• Trek de stekker niet uit het stopcontact door aan de kabel te trekken. Pak altijd
de stekker vast en trek eraan.
• Dit product mag voor onderhoud alleen worden geopend door een erkend
technicus om het risico op elektrische schokken te verkleinen.

14
Het product installeren
-
Controleer of alle apparaten die u wilt aansluiten uitgeschakeld zijn.
1. Sluit een dubbele R/L-kabel (niet meegeleverd) aan op de R/L-uitgang A1
of sluit een AUX-kabel of hoofdtelefoon (niet meegeleverd) aan op de AUX-
uitgang A2.
2. Sluit het andere uiteinde van de kabel aan op uw audio-uitgangsapparaat.
3. Sluit een coaxiale kabel (niet meegeleverd) aan op de coaxiale ingang A4 of
sluit een Toslink-kabel aan op de Toslink vrouwelijke ingang A5.
4. Sluit het andere uiteinde van de kabel aan op uw audio-uitgangsapparaat.
Het product gebruiken
1. Steek het netsnoer A7 in de voedingspoort A6.
2. Steek het andere uiteinde van A7 in een stopcontact.
Het product schakelt in.
Het stroomindicatorlampje A3 gaat branden.
3. Schakel de aangesloten geluidsapparaten in.
j Guida rapida all’avvio
Convertitore audio da digitale ad
analogico
ACON2510BK
Per maggiori informazioni vedere il manuale esteso online:
ned.is/acon2510bk
Uso previsto
Il presente prodotto è un convertitore audio da digitale coassiale o toslink ad
analogico L/R.
Il prodotto è inteso solo per utilizzo in interni.

15
Eventuali modiche al prodotto possono comportare conseguenze per la
sicurezza, la garanzia e il corretto funzionamento.
Speciche
Prodotto Convertitore audio da digitale ad analogico
Numero articolo ACON2510BK
Dimensioni (p x l x a) 51 x 41 x 26 mm
Peso 78 g
Ingresso di alimentazione 5,0 VDC ; 0,6 A
Temperatura di funzionamento 0 °C - 70 °C
Umidità d’esercizio 10 % – 85 % (RH)
Umidità di stoccaggio 10 % – 85 % (RH)
Consumo di corrente 3,0 W
Bitrate supportati 32 kHz 24 bit
44.1 kHz 24 bit
48 kHz 24 bit
96 kHz 24 bit
Parti principali (immagine A)
1 Uscita Dx/Sx
2 Uscita AUX
3 Spia LED di alimentazione
4 Ingresso coassiale
5 Ingresso femmina Toslink
6 Porta di alimentazione CC
7 Cavo di alimentazione
Istruzioni di sicurezza
-
ATTENZIONE
• Assicurarsi di aver letto e compreso pienamente le istruzioni presenti nel
documento prima di installare o utilizzare il prodotto. Conservare la confezione
e il presente documento per farvi riferimento in futuro.

16
• Utilizzare il prodotto solo come descritto nel presente documento.
• Non utilizzare il prodotto se una parte è danneggiata o difettosa. Sostituire
immediatamente un prodotto danneggiato o difettoso.
• Non far cadere il prodotto ed evitare impatti.
• Non esporre il prodotto all’acqua o all’umidità.
• Utilizzare esclusivamente il cavo di alimentazione in dotazione.
• Scollegare il prodotto dalla sorgente elettrica e da altre apparecchiature se si
vericano problemi.
• Non scollegare il prodotto tirandolo per il cavo. Aerrare sempre la presa e
tirare.
• Il prodotto può essere riparato e sottoposto a manutenzione esclusivamente da
un tecnico qualicato per ridurre il rischio di scosse elettriche.
Installazione del prodotto
-
Assicurarsi che tutti i dispositivi che si desidera collegare siano stati spenti.
1. Inserire un cavo doppio R/L (non incluso) nell’uscita R/L A1 o inserire un cavo
AUX o una cua (non inclusi) nell’uscita AUX A2.
2. Collegare l’altra estremità del cavo al dispositivo di uscita audio.
3. Inserire un cavo coassiale (non incluso) nell’ingresso coassiale A4 o inserire
un cavo Toslink nell’ingresso femmina Toslink A5.
4. Collegare l’altra estremità del cavo al dispositivo di uscita audio.
Utilizzo del prodotto
1. Collegare il cavo di alimentazione A7 alla porta di alimentazione A6.
2. Collegare l’altra estremità di A7 a una presa elettrica.
Il prodotto si accende.
La spia LED di alimentazione A3 si accende.
3. Accendere i dispositivi audio collegati.

17
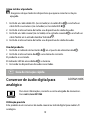
h Guía de inicio rápido
Conversor de audio digital a
analógico
ACON2510BK
Para más información, consulte el manual ampliado en línea:
ned.is/acon2510bk
Uso previsto por el fabricante
Este producto es un conversor de audio digital coaxial o Toslink a audio L/R
analógico.
El producto está diseñado únicamente para uso en interiores.
Cualquier modicación del producto puede tener consecuencias para la
seguridad, la garantía y el funcionamiento adecuado.
Especicaciones
Producto Conversor de audio digital a analógico
Número de artículo ACON2510BK
Dimensiones (L x An x Al) 51 x 41 x 26 mm
Peso 78 g
Potencia de entrada 5,0 VDC ; 0,6 A
Temperatura de
funcionamiento
0 °C - 70 °C
Humedad de funcionamiento 10 % – 85 % (HR)
Humedad de almacenamiento 10 % – 85 % (HR)
Consumo de energía 3,0 W

18
Tasas de bits compatibles 32 kHz 24 bits
44,1 kHz 24 bits
48 kHz 24 bits
96 kHz 24 bits
Partes principales (imagen A)
1 Salida R/L
2 Salida AUX
3 Indicador LED de alimentación
4 Entrada coaxial
5 Entrada hembra Toslink
6 Puerto de corriente CC
7 Cable de alimentación
Instrucciones de seguridad
-
ADVERTENCIA
• Asegúrese de que ha leído y entendido completamente las instrucciones en
este documento antes de instalar o utilizar el producto. Guarde el embalaje y
este documento para futuras consultas.
• Utilice el producto únicamente tal como se describe en este documento.
• No use el producto si alguna pieza está dañada o presenta defectos. Sustituya
inmediatamente un producto si presenta daños o está defectuoso.
• No deje caer el producto y evite que sufra golpes.
• No exponga el producto al agua o a la humedad.
• Utilice solamente el cable de alimentación suministrado.
• Desconecte el producto de la fuente de corriente y de otros equipos si surgen
problemas.
• No desenchufe el producto tirando del cable. Sujete siempre el enchufe y tire
de él.
• Este producto solo puede recibir servicio de un técnico cualicado para su
mantenimiento para así reducir el riesgo de descargas eléctricas.

19
Cómo instalar el producto
-
Asegúrese de que todos los dispositivos que quiere conectar se hayan
apagado.
1. Enchufe un cable doble R/L (no incluido) en la salida R/L A1 o enchufe un
cable AUX o auriculares (no incluidos) en la salida AUX A2.
2. Enchufe el otro extremo del cable a su dispositivo de salida de audio.
3. Enchufe un cable coaxial (no incluido) en la entrada coaxial A4 o enchufe un
cable Toslink en la entrada hembra Toslink A5.
4. Enchufe el otro extremo del cable a su dispositivo de salida de audio.
Uso del producto
1. Enchufe el cable de alimentación A7 en el puerto de alimentación A6.
2. Enchufe el otro extremo de A7 a una toma de corriente.
El producto se enciende.
El indicador LED de encendido A3 se ilumina.
3. Encienda los dispositivos de audio conectados.
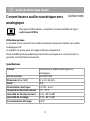
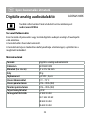
i Guia de iniciação rápida
Conversor de áudio digital para
analógico
ACON2510BK
Para mais informações, consulte a versão alargada do manual on-
line: ned.is/acon2510bk
Utilização prevista
Este produto é um conversor de áudio coaxial ou toslink digital para áudio L/R
analógico.

20
O produto destina-se apenas a utilização em interiores.
Qualquer alteração do produto pode ter consequências em termos de segurança,
garantia e funcionamento adequado.
Especicações
Produto Conversor de áudio digital para analógico
Número de artigo ACON2510BK
Dimensões (c x l x a) 51 x 41 x 26 mm
Peso 78 g
Entrada de alimentação 5,0 VDC ; 0,6 A
Temperatura de
funcionamento
0 °C - 70 °C
Humidade de funcionamento 10 % – 85 % (HR)
Humidade de armazenamento 10 % – 85 % (HR)
Consumo de energia 3,0 W
Taxas de bits suportadas 32 kHz 24-bit
44,1 kHz 24-bit
48 kHz 24-bit
96 kHz 24-bit
Peças principais (imagem A)
1 Saída L/R
2 Saída AUX
3 LED indicador de corrente
4 Entrada coaxial
5 Entrada fêmea Toslink
6 Porta de alimentação DC
7 Cabo de alimentação
Pagina se încarcă...
Pagina se încarcă...
Pagina se încarcă...
Pagina se încarcă...
Pagina se încarcă...
Pagina se încarcă...
Pagina se încarcă...
Pagina se încarcă...
Pagina se încarcă...
Pagina se încarcă...
Pagina se încarcă...
Pagina se încarcă...
Pagina se încarcă...
Pagina se încarcă...
Pagina se încarcă...
Pagina se încarcă...
Pagina se încarcă...
Pagina se încarcă...
Pagina se încarcă...
Pagina se încarcă...
Pagina se încarcă...
Pagina se încarcă...
Pagina se încarcă...
Pagina se încarcă...
Pagina se încarcă...
Pagina se încarcă...
Pagina se încarcă...
Pagina se încarcă...
-
 1
1
-
 2
2
-
 3
3
-
 4
4
-
 5
5
-
 6
6
-
 7
7
-
 8
8
-
 9
9
-
 10
10
-
 11
11
-
 12
12
-
 13
13
-
 14
14
-
 15
15
-
 16
16
-
 17
17
-
 18
18
-
 19
19
-
 20
20
-
 21
21
-
 22
22
-
 23
23
-
 24
24
-
 25
25
-
 26
26
-
 27
27
-
 28
28
-
 29
29
-
 30
30
-
 31
31
-
 32
32
-
 33
33
-
 34
34
-
 35
35
-
 36
36
-
 37
37
-
 38
38
-
 39
39
-
 40
40
-
 41
41
-
 42
42
-
 43
43
-
 44
44
-
 45
45
-
 46
46
-
 47
47
-
 48
48


în alte limbi
- slovenčina: Nedis ACON2510BK Užívateľská príručka
- italiano: Nedis ACON2510BK Guida utente
- dansk: Nedis ACON2510BK Brugervejledning
- português: Nedis ACON2510BK Guia de usuario
- Nederlands: Nedis ACON2510BK Gebruikershandleiding
Lucrări înrudite
-
Nedis HPWD410xxx On-ear Headphones Manualul utilizatorului
-
Nedis EXSOC415UFWT Manualul utilizatorului
-
-
-
-
-
Nedis DOORB212WT Manualul utilizatorului