
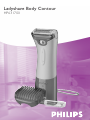
Ladyshave Body Contour
HP6317/01

2

3
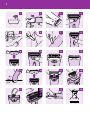
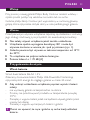
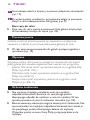
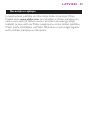
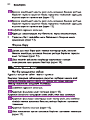
1 2 3 4
5 6 7 8
9 10 11 12
13 14 15 16
17 18 19 20

4


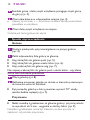
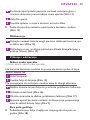
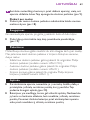
Introduction
With your new Philips ladyshave Body Contour you can quickly, easily
and comfortably remove unwanted hair from dry or wet skin.
The Philips ladyshave Body Contour is equipped with a floating shaving
head, which optimally adapts to the skin in order to ensure a perfectly
smooth shave.
Important
Read these instructions for use carefully before using the appliance and
save them for future reference.
◗ Do not use the appliance if it is damaged.
◗ The appliance complies with the internationally approved IEC
safety regulations and can be safely used in the bath or shower
(fig. 1).
◗ Use and store the appliance at a temperature between 15cC and
35cC.
◗ This appliance can only be operated on batteries.
◗ Noise level: Lc = 70 dB [A]
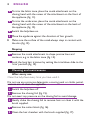
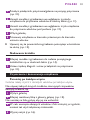
Preparing for use
Inserting batteries
Insert two R6 AA 1.5-volt batteries.
We strongly advise you to use Philips LR6 PowerLife batteries.They
supply sufficient energy for approx. 40 minutes of shaving.
◗ To avoid damage due to battery leakage:
- do not expose the ladyshave to direct sunlight;
- do not expose the appliance to temperatures higher than 35cC;
- remove the batteries if the appliance is not going to be used for a
month or more;
- do not leave empty batteries in the appliance.
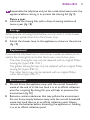
1 Make sure that your hands and the appliance are dry when you
insert the batteries.
ENGLISH6

2 Pull the upper part of the appliance off the lower part (fig. 2).
3 Insert the two batteries into the battery compartment (fig. 3).
B
Make sure the + and - marks on the batteries match those in the
battery compartment.
4 Reattach the lower part of the appliance to the upper part.
The ladyshave is now ready for use.
Using the appliance
Shaving
1 Set the trim/shave slide to the 'shave' position (fig. 4).
2 Put the desired shaving foil on the shaving head.
◗ Use the golden shaving foil to shave the underarms (fig. 5).
◗ Use the golden shaving foil to shave the bikini line (fig. 6).
◗ Use the silver shaving foil to shave the legs (fig. 7).
Do not use the silver shaving foil to shave the underarms and the
bikini line in order to reduce the risk of injuries.
3 Switch the ladyshave on (fig. 8).
4 Place the shaving unit gently on the skin and move the ladyshave
slowly against the direction of hair growth while pressing it lightly.
◗ The angle between the skin and the ladyshave should be 70c to
get the best results (fig. 7).
Trimming
◗ Put the comb attachment onto the shaving head to trim the hairs
to an even length (about 5 mm), e.g. in the bikini zone (fig. 9).
The comb attachment can be put onto the shaving head in different
directions, depending on the area to be trimmed.
1 Set the trim/shave slide to the 'trim' position (fig. 10).
ENGLISH 7

2 To trim the bikini zone, place the comb attachment on the
shaving head with the recess of the attachment on the front of
the appliance (fig. 11).
3 To trim the underarms, place the comb attachment on the
shaving head with the recess of the attachment on the back of
the appliance (fig. 12).
4 Switch the ladyshave on.
5 Move the appliance against the direction of hair growth.
◗ Make sure the surface of the comb always stays in contact with
the skin (fig. 13).
Shaping
1 Remove the comb attachment to shape precise lines and
contours, e.g. in the bikini zone (fig. 14).
2 Lock the long hair trimmer by setting the trim/shave slide to the
'trim' position (fig. 10).
Cleaning and maintenance
After every use
Clean the ladyshave every time you have used it.
Do not use any corrosive detergents, scouring pads or cloths, petrol,
acetone etc. to clean the appliance.
1 Switch the ladyshave off.
2 Remove the shaving foil (fig. 15).
Do not exert any pressure on the shaving foil to avoid damage.
3 Gently shake the shaving foil to remove hairs or clean it with the
brush supplied.
4 Remove the cutter block (fig. 16).
5 Clean the hair chamber with the brush supplied (fig. 17).
ENGLISH8

6 Reassemble the ladyshave and put the comb attachment onto the
appliance before storing it, to protect the shaving foil (fig. 9).
Twice a year
◗ Lubricate the shaving foils with a drop of sewing machine oil
twice a year (fig. 18).
Storage
When you are not using the ladyshave you can store it in the shower
by hanging it upside down from the shower loop.
◗ Attach the shower loop to the appliance as shown in the picture
(fig. 19).
Replacement
If you use the ladyshave two or more times a week, we advise you to
replace the shaving foils and cutter block every one to two years.
- The silver shaving foil may only be replaced with an original Philips
shaving foil (type HP6117/01).
- The golden shaving foil may only be replaced with an original Philips
shaving foil (type HP6121).
- The cutter block may only be replaced with an original Philips
cutter block (type HP6111).
Environment
◗ Do not throw the appliance away with the normal household
waste at the end of its life, but hand it in at an official collection
point for recycling. By doing this you will help to preserve the
environment (fig. 20).
◗ Batteries contain substances that may pollute the environment.
Do not throw empty batteries away with the normal household
waste, but hand them in at an official collection point.Always
remove the batteries before discarding the appliance or handing
it in at an official collection point.
ENGLISH 9

Guarantee & service
If you need information or if you have a problem, please visit the Philips
website at www.philips.com or contact the Philips Customer Care
Centre in your country (you will find its phone number in the
worldwide guarantee leaflet). If there is no Customer Care Centre in
your country, turn to your local Philips dealer or contact the Service
Department of Philips Domestic Appliances and Personal Care BV.
ENGLISH10

Wstęp
Przy pomocy nowej golarki Philips Body Contour możesz w łatwy i
szybki sposób pozbyć się włosków na mokro lub na sucho.
Golarka philips Body Contour jest wyposażony w ruchomą głowicę
golącą, która optymalnie dotyka skóry w celu perfekcyjnego golenia.
Ważne
Przed pierwszym użyciem urządzenia zapoznaj się dokładnie z instrukcją
jego obsługi i zachowaj ją na przyszłość, do ewentualnej konsultacji.
◗ Nie należy używać urządzenia jeżeli zostało uszkodzone.
◗ Urządzenie spełnia wymagania derektywy IEC i może być
używane zarówno w wannie jak i pod prysznicem (rys. 1).
◗ Golarka powinna być uzywana w zakresie temperatur od 15cC
do 35cC.
◗ To urządzenie ma jedynie zasilanie bateryjne.
◗ Poziom hałasu: Lc = 70 dB [A]
Przygotowanie do użycia
Wsuń baterie
Wsuń dwie baterie R6 AA 1.5 V.
Zalecamy stosowanie baterii Philips LR6 PowerLife. Dostarczają
optymalną ilość energii do ciągłego golenia w czasie 40 minut.
◗ Aby uniknąć uszkodzenia urządzenia poprzez wyciek z baterii
należy:
- nie wystawiaj golarki na bezpośrednio na słońce
- Prosimy nie przechowywać produktu w temperaturze powyżej
35cC;
- Pamiętaj o wyjęciu baterii jeżeli nie będziesz używał golarki przez
miesiac lub dłużej.
- Pamietaj o wyjęciu wyczerpanych baterii z golarki.
1 Musisz sie upewnić, że ręce i golarka są suche kiedy wkładasz
baterie.
POLSKI 11

2 Rozdziel górną i dolną część urządzenia pociągając część górną
do góry (rys. 2).
3 Wsuń obie baterie w odpowiednie miejsca (rys. 3).
B
Upewnij się że znaki + i - oznaczone na baterii zostały umieszczone
prawidłowo w urządzeniu.
4 Wsuń dolną część urządzenia na miejsce.
Golarka jest teraz gotowa do użycia
Sposób użycia urządzenia
Golenie
1 Przełącz przełącznik przycinanie/golenie na pozycji golenie
(rys. 4).
2 Załóż odpowiednią folię golacą na głowicę.
◗ Użyj złotej folii do golenia pach (rys. 5).
◗ Użyj złotej folii do golenia okolic bikini (rys. 6).
◗ Użyj srebrnej folii do golenia nóg (rys. 7).
Nie używaj srebrnej folii do golenia pach i okolic bikini - użyj złotej
folii w celu unikniecia podrażnień.
3 Włącz golarkę (rys. 8).
4 Delikatnie przesuwaj golarke po skórze w kierunku przeciwnym
do kierunku wzrostu włosków.
◗ Kąt pomiędzy golarką a skórą powinien wynosić 70c wtedy
rezultat bedzie najlepszy (rys. 7).
Przycinanie
◗ Nałóż nasadkę z grzebieniem na głowice golacą i przycinaj włoski
na wysokość ok. 5 mm - wygodne w okolicy bikini (rys. 9).
Nasadka z grzebieniem może być założona na dwa sposoby w
zależności od potrzeb przycinania.
POLSKI12

1 Przełącz przełącznik przycinanie/golenie na pozycję przycinanie
(rys. 10).
2 Umieść nasadkę z grzebieniem we wgłębieniu z przodu
urządzenia do przycinania włosków w okolicy bikini (rys. 11).
3 Umieść nasadkę z grzebieniem we wgłębieniu z tyłu urządzenia
do przycinania włosków pod pachami (rys. 12).
4 Włącz golarkę.
5 Przesuwaj urządzenie w kierunku przeciwnym do kierunku
wzrostu włosów.
◗ Upewnij się, że powierzchnia grzebienia pozosytaje w kontakcie
ze skórą (rys. 13).
Nadawanie kształtu
1 Zdejmij nasadke z grzebieniem do nadania precyzyjnego
kształtu/linii np. w okolicach bikini (rys. 14).
2 Ustaw rządaną długość i ustaw przełącznik na przycinanie
(rys. 10).
Czyszczenie i konserwacja urządzenia
Pamietaj po każdym użyciu
Golarke należy czyścić z obcietych włosków po każdym użyciu.
Nie używaj żadnych żrących środków, szorujących zmywaków,
benzyny, acetonu, itp.
1 Wyłącz golarkę
2 Zdejmij metalową folię z głowicy golącej (rys. 15).
Nie naciskaj na folię golącą, aby jej nie uszkodzić.
3 W celu usunięcia obciętych włosków z folii strząśnij je z golarki,
możesz też użyć załączonej szczoteczki.
4 Wyjmij nożyk (rys. 16).
POLSKI 13

5 Usuń obcięte włoski z komory za pomocą załączonej szczoteczki
(rys. 17).
6 Po wykorzystaniu urzadzenia i oczyszczeniu należy je ponownie
złozyć w celu zabezpoieczenia folii golacej (rys. 9).
Dwa razy do roku.
◗ Dwa razy do roku można posmarować folie golace kroplą oleju
do konserwacji maszyn do szycia (rys. 18).
Przechowywanie
Golarka może być przechowywana np. zawieszona na załączonej
zawieszce w kabinie prysznicowej skierowana głowicą do dołu
◗ W celu zamocowania zawieszki do golarki postępuj zgodnie z
rysunkiem (rys. 19).
Wymiana
Wymiana nożyka i folii powinna nastąpić po okresie roku do dwóch
jeżeli golarka jest używana regularnie dwa i wiecej razy w tygodniu.
- Srebrna folia może zostać wymieniona jedynie na oryginalną folię
Philips (typ HP6117/01)
- Złota folia może zostać wymieniona jedynie na oryginalną folię
Philips (typ HP6121)
- Nożyk może zostać wymieniony jedynie na oryginalny nożyk
Philipsa (typ HP6111).
Ochrona środowiska
◗ Nie wyrzucaj zużytego urządzenia wraz ze zwykłymi
odpadkami/śmieciami. Zanieś je do specjalnego punktu
zbierającego odpadki do utylizacji w celu ich utylizacji.W ten
sposób pomożesz chronić środowisko naturalne (rys. 20).
◗ Baterie zawierają substancje mogące zanieczyścić środowisko. Nie
wyrzucaj baterii ze zwykłymi odpadkami/śmieciami lecz zanieś je
do specjalnego punktu zbierajacego baterie do utylizacji.
Wszystkie punkty serwisu firmy Philips przyjmują baterie do
utylizacji.
POLSKI14

Gwarancja i serwis.
Jeśli chcesz skorzystać z serwisu lub potrzebujesz informacji, bądź jeśli
masz jakiś problem, odwiedź naszą stronę w Internecie: www.philips.pl
lub skontaktuj się z Działem Obsługi Klienta firmy Philips (numer
telefonu znajdziesz w ulotce gwarancyjnej).
POLSKI 15

Introducere
Cu noul aparat Philips Ladyshave puteţi îndepărta rapid, uşor şi
confortabil părul nedorit de pe pielea uscată sau umedă.
Aparatul Philips Ladyshave Body Contour este dotat cu un cap de
radere mobil, care se adaptează la forma corpului dvs., asigurând
eliminarea totală a părului.
Important
Citiţi aceste instrucţiuni de utilizare cu atenţie înainte de a folosi
aparatul şi păstraţi-le pentru consultare ulterioară.
◗ Nu utilizaţi aparatul dacă acesta este deteriorat.
◗ Aparatul corespunde normelor de securitate internaţionale IEC şi
poate fi folosit în cadă sau în duş (fig. 1).
◗ Utilizaţi şi păstraţi aparatul la o temperatură cuprinsă între 15cC
şi 35cC.
◗ Acest aparat funcţionează numai cu baterii.
◗ Nivel de zgomot: Lc = 70 dB [A]
Pregătirea pentru utilizare
Introducerea bateriilor
Introduceţi două baterii R6 (AA) de 1,5 V.
Vă sugerăm să utilizaţi baterii Philips LR6 PowerLife. Acestea oferă
energie suficientă pentru 40 de minute de utilizare.
◗ Pentru a evita deteriorarea cauzată de scurgerile din baterii:
- nu expuneţi aparatul Ladyshave la lumina directă a soarelui;
- nu expuneţi aparatul la temperaturi mai mari de 35cC;
- scoateţi bateriile dacă nu intenţionaţi să utilizaţi aparatul timp de o
lună sau mai mult.
- nu lăsaţi baterii descărcate în aparat.
1 Asiguraţi-vă că mâinile dvs. şi aparatul sunt uscate atunci când
introduceţi bateriile.
ROMÂNĂ16

2 Decuplaţi partea superioară a aparatului de partea inferioară
(fig. 2).
3 Introduceţi două baterii în compartimentul pentru baterii (fig. 3).
B
Asiguraţi-vă că semnele + şi - de pe baterii corespund marcajelor din
compartimentul pentru baterii.
4 Reataşaţi partea inferioară a aparatului la partea superioară.
În acest moment, aparatul este gata de utilizare.
Utilizarea aparatului
Raderea părului
1 Setaţi comutatorul pentru tundere/radere în poziţia 'radere'
(fig. 4).
2 Ataşaţi suprafaţa de radere dorită la capul de radere.
◗ Utilizaţi suprafaţa aurie pentru a vă rade în zona axilară (fig. 5).
◗ Utilizaţi suprafaţa aurie pentru a vă rade în zona inghinală (fig. 6).
◗ Utilizaţi suprafaţa argintie pentru a vă rade pe picioare (fig. 7).
Nu utilizaţi suprafaţa argintie pentru a vă rade în zona inghinală sau
axilară, pentru a reduce riscul rănirii accidentale.
3 Porniţi aparatul Ladyshave (fig. 8).
4 Plasaţi aparatul pe piele şi mişcaţi-l încet, în direcţie opusă
creşterii părului, apăsând uşor.
◗ Pentru rezultate optime, unghiul dintre piele şi aparatul Ladyshave
trebuie să fie de 70c (fig. 7).
Tunderea
◗ Ataşaţi pieptenele la capul de radere pentru a tunde părul la o
lungime egală (5 mm) de exemplu, în zona inghinală (fig. 9).
Pieptenele poate fi ataşat la capul de radere în moduri diferite, în
funcţie de zona care urmează a fi tunsă.
ROMÂNĂ 17

1 Setaţi comutatorul pentru tundere/radere în poziţia 'tundere'
(fig. 10).
2 Pentru a tunde părul din zona inghinală, montaţi pieptenele pe
capul de radere cu adâncitura în faţă (fig. 11).
3 Pentru a tunde părul din zona axilară, montaţi pieptenele pe capul
de radere cu adâncitura în spate (fig. 12).
4 Porniţi aparatul Ladyshave.
5 Deplasaţi aparatul în sens contrar direcţiei în care cresc firele de
păr.
◗ Suprafaţa pieptenelui trebuie să rămână în permanent contact cu
pielea (fig. 13).
Obţinerea conturului
1 Îndepărtaţi pieptenele pentru a putea realiza un anumit contur, de
ex. în zona inghinală (fig. 14).
2 Blocaţi lama pentru firele de păr lungi setând comutatorul pentru
tundere/radere în poziţia 'tundere' (fig. 10).
Curăţare şi întreţinere
După fiecare utilizare
Curăţaţi aparatul Ladyshave de fiecare dată când îl folosiţi.
Nu folosiţi agenţi abrazivi de curăţare, bureţi de sârmă, benzină,
acetonă etc. pentru a curăţa aparatul.
1 Opriţi aparatul.
2 Scoateţi suprafaţa de radere (fig. 15).
Pentru a nu deteriora suprafaţa, aceasta nu trebuie apăsată.
3 Scuturaţi uşor suprafaţa de radere pentru a îndepărta părul, sau
curăţaţi-o cu periuţa inclusă.
4 Scoateţi blocul de cuţite (fig. 16).
ROMÂNĂ18

5 Curăţaţi compartimentul pentru păr cu periuţa furnizată (fig. 17).
6 Reasamblaţi aparatul şi ataşaţi pieptenele înainte de a depozita
aparatul, pentru a proteja suprafaţa de radere (fig. 9).
De două ori pe an
◗ Lubrifiaţi suprafaţa de ras cu o picătură de ulei de maşină de
cusut de două ori pe an (fig. 18).
Depozitarea
Atunci când nu utilizaţi aparatul, acesta poate fi lăsat în duş, agăţat de
şnur.
◗ Ataşaţi şnurul după cum este indicat în figură (fig. 19).
Înlocuirea componentelor
Dacă utilizaţi aparatul Ladyshave de două ori pe săptămână sau mai
frecvent, vă sfătuim să înlocuiţi suprafaţa de ras şi blocul de cuţite o dată
pe an sau la doi ani.
- Suprafaţa de radere argintie poate fi înlocuită numai cu o suprafaţă
de radere Philips originală (tip HP6117/01).
- Suprafaţa de radere aurie poate fi înlocuită numai cu o suprafaţă de
radere Philips originală (tip HP6121).
- Blocul de cuţite poate fi înlocuit numai cu un bloc de cuţite Philips
original (tip HP6111).
Protejarea mediului
◗ Nu aruncaţi aparatul împreună cu gunoiul menajer la sfârşitul
duratei de funcţionare, ci predaţi-l la un punct de colectare
autorizat pentru reciclare. În acest fel, veţi ajuta la protejarea
mediului înconjurător (fig. 20).
◗ Bateriile conţin substanţe care pot polua mediul. Nu aruncaţi
bateriile uzate împreună cu gunoiul menajer, ci predaţi-le la un
punct de colectare autorizat pentru reciclare. Scoateţi
întotdeauna bateriile înainte de a casa aparatul sau înainte de a-l
preda la un punct de colectate.
ROMÂNĂ 19

Garanţie şi service
Pentru informaţii suplimentare sau în cazul apariţiei altor probleme, vă
rugăm să vizitaţi site-ul Philips www.philips.com sau să contactaţi
centrul de asistenţă pentru clienţi Philips din ţara dvs. (veţi găsi numărul
de telefon în broşura de garanţie internaţională). Dacă în ţara dvs. nu
există un astfel de centru, contactaţi furnizorul dvs. Philips sau
Departamentul de Service din cadrul Philips Domestic Appliances and
Personal Care BV.
ROMÂNĂ20
Pagina se încarcă...
Pagina se încarcă...
Pagina se încarcă...
Pagina se încarcă...
Pagina se încarcă...
Pagina se încarcă...
Pagina se încarcă...
Pagina se încarcă...
Pagina se încarcă...
Pagina se încarcă...
Pagina se încarcă...
Pagina se încarcă...
Pagina se încarcă...
Pagina se încarcă...
Pagina se încarcă...
Pagina se încarcă...
Pagina se încarcă...
Pagina se încarcă...
Pagina se încarcă...
Pagina se încarcă...
Pagina se încarcă...
Pagina se încarcă...
Pagina se încarcă...
Pagina se încarcă...
Pagina se încarcă...
Pagina se încarcă...
Pagina se încarcă...
Pagina se încarcă...
Pagina se încarcă...
Pagina se încarcă...
Pagina se încarcă...
Pagina se încarcă...
Pagina se încarcă...
Pagina se încarcă...
Pagina se încarcă...
Pagina se încarcă...
Pagina se încarcă...
Pagina se încarcă...
Pagina se încarcă...
Pagina se încarcă...
Pagina se încarcă...
Pagina se încarcă...
Pagina se încarcă...
Pagina se încarcă...
Pagina se încarcă...
Pagina se încarcă...
Pagina se încarcă...
Pagina se încarcă...
Pagina se încarcă...
Pagina se încarcă...
Pagina se încarcă...
Pagina se încarcă...
Pagina se încarcă...
Pagina se încarcă...
Pagina se încarcă...
Pagina se încarcă...
Pagina se încarcă...
Pagina se încarcă...
Pagina se încarcă...
Pagina se încarcă...
Pagina se încarcă...
Pagina se încarcă...
Pagina se încarcă...
Pagina se încarcă...
Pagina se încarcă...
Pagina se încarcă...
-
 1
1
-
 2
2
-
 3
3
-
 4
4
-
 5
5
-
 6
6
-
 7
7
-
 8
8
-
 9
9
-
 10
10
-
 11
11
-
 12
12
-
 13
13
-
 14
14
-
 15
15
-
 16
16
-
 17
17
-
 18
18
-
 19
19
-
 20
20
-
 21
21
-
 22
22
-
 23
23
-
 24
24
-
 25
25
-
 26
26
-
 27
27
-
 28
28
-
 29
29
-
 30
30
-
 31
31
-
 32
32
-
 33
33
-
 34
34
-
 35
35
-
 36
36
-
 37
37
-
 38
38
-
 39
39
-
 40
40
-
 41
41
-
 42
42
-
 43
43
-
 44
44
-
 45
45
-
 46
46
-
 47
47
-
 48
48
-
 49
49
-
 50
50
-
 51
51
-
 52
52
-
 53
53
-
 54
54
-
 55
55
-
 56
56
-
 57
57
-
 58
58
-
 59
59
-
 60
60
-
 61
61
-
 62
62
-
 63
63
-
 64
64
-
 65
65
-
 66
66
-
 67
67
-
 68
68
-
 69
69
-
 70
70
-
 71
71
-
 72
72
-
 73
73
-
 74
74
-
 75
75
-
 76
76
-
 77
77
-
 78
78
-
 79
79
-
 80
80
-
 81
81
-
 82
82
-
 83
83
-
 84
84
-
 85
85
-
 86
86


în alte limbi
- slovenčina: Philips HP6317/02 Používateľská príručka
Lucrări înrudite
-
Philips HP6317/01 Manual de utilizare
-
Philips HP6319/01 Manual de utilizare
-
Philips HP6350 Manual de utilizare
-
-
-
Philips TT2030/10 Manual de utilizare
-
Philips HP6368/00 Manual de utilizare
-
Philips HP6342/00 Manual de utilizare
-
-
Philips HP6335/00 Manual de utilizare