Philips FC6132/02 Manual de utilizare
- Categorie
- Aspiratoare portabile
- Tip
- Manual de utilizare

FC6132
FC6130
User manual


1


6
Introduction
Congratulations on your purchase and welcome to Philips! To benet fully
from the support that Philips offers, register your product at
www.philips.com/welcome.
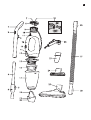
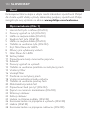
General description (Fig. 1)
1 Upper stick part with handle (FC6132)
2 On/off slide on stick (FC6132)
3 Cord winding hook (FC6132)
4 Lower stick part (FC6132)
5 Cord winding hook (FC6132)
6 Stick release button (FC6132)
7 Clean Air HEPA lter cover
8 Exhaust air openings
9 Clean Air HEPA lter
10 Mains cord
11 Shoulder strap attachment points
12 Handle
13 On/off slide on vacuum cleaner
14 Dust compartment release button
15 Inner lter
16 Outer lter
17 Dust compartment
18 Internal air inlet unit
19 Nosepiece release button
20 Detachable nosepiece
21 Attachment point for stick (FC6132)
22 Shoulder strap + clasps (FC6130)
23 Crevice tool
24 Brush tool
25 Floor nozzle (FC6132)
26 Appliance end of hose (FC6130)
27 Hose (FC6130)
28 Attachment end of hose (FC6130)
ENGLISH

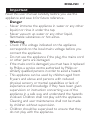
Important
Read this user manual carefully before you use the
appliance and save it for future reference.
Danger
- Never immerse the appliance in water or any other
liquid, nor rinse it under the tap.
- Never vacuum up water or any other liquid,
ammable substances or hot ashes.
Warning
- Check if the voltage indicated on the appliance
corresponds to the local mains voltage before you
connect the appliance.
- Do not use the appliance if the plug, the mains cord
or other parts are damaged.
- If the mains cord is damaged, you must have it replaced
by Philips, a service centre authorised by Philips or
similarly qualied persons in order to avoid a hazard.
- This appliance can be used by children aged from
8 years and above and persons with reduced
physical, sensory or mental capabilities or lack of
experience and knowledge if they have been given
supervision or instruction concerning use of the
appliance in a safe way and understand the hazards
involved. Children shall not play with the appliance.
Cleaning and user maintenance shall not be made
by children without supervision.
- Children should be supervised to ensure that they
do not play with the appliance.
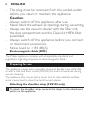
ENGLISH 7

- The plug must be removed from the socket-outlet
before you clean or maintain the appliance.
Caution
- Always switch off the appliance after use.
- Never block the exhaust air openings during vacuuming.
- Always use the vacuum cleaner with the lter unit,
the dust compartment and the Clean Air HEPA lter
assembled.
- Always switch off the appliance before you connect
or disconnect accessories.
- Noise level: Lc = 84 dB(A)
Electromagnetic elds (EMF)
This Philips appliance complies with all applicable standards and
regulations regarding exposure to electromagnetic elds.
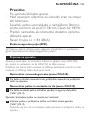
Preparing for use
The appliance comes with a shoulder strap and exible hose (FC6130)
or with a stick and oor nozzle (FC6132) for extra convenience during
vacuum cleaning.
The appliance also comes with a brush tool to clean delicate surfaces
and a crevice tool to clean the hard-to-reach places.
Attaching the shoulder strap (FC6130 only)
1 To attach the shoulder strap, connect the clasps to the attachment
points on the appliance.
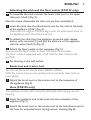
ENGLISH8

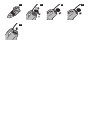
Attaching the stick and the oor nozzle (FC6132 only)
1 To assemble the stick, connect the lower stick part to the upper
stick part (‘click’) (Fig. 2).
Note: You cannot disassemble the stick once you have assembled it.
2 Insert the stick into the attachment point for the stick at the back
of the appliance (‘click’) (Fig. 3).
- Make sure the ridge on the stick aligns with the attachment point on
the appliance when the stick is inserted.
3 To detach the stick from the appliance, press the stick release
button with one hand (1) and pull the stick out of the appliance
with the other hand (2) (Fig. 4).
4 Attachtheoornozzletothenosepiece(Fig.5).
You can use the oor nozzle to clean hard oors and carpets.
The oor nozzle is equipped with a uff collector that removes hair
and uff.
5 Put the plug in the wall socket.
Brush tool and crevice tool
You can use the brush tool to clean delicate surfaces.
With the crevice tool, you can quickly and conveniently clean hard-to-
reach places.
1 Attach the brush tool or the crevice tool to the nosepiece of
the appliance (Fig. 6).
Hose (FC6130 only)
This appliance comes with a hose for extended reach during vacuum
cleaning.
1 Insert the appliance end of the hose into the nosepiece of the
appliance (Fig. 7).
2 Attach the brush tool or the crevice tool to the attachment end of
the hose for extended reach during vacuum cleaning (Fig. 8).
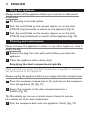
ENGLISH 9

Using the appliance
Always switch off the appliance before you connect or disconnect
accessories.
1 Put the plug in the wall socket.
2 Push the on/off slide on the vacuum cleaner or on the stick
(FC6132 only) forwards to switch on the appliance (Fig. 9).
3 Push the on/off slide on the vacuum cleaner or on the stick
(FC6132 only) backwards to switch off the appliance (Fig. 10).
Cleaning and maintenance
Never immerse the appliance in water or any other liquid, nor rinse it
under the tap.
1 Remove the plug from the wall socket before you clean the
appliance.
2 Clean the appliance with a damp cloth.
Emptying the dust compartment quickly
Make sure that you empty the dust compartment regularly to optimise
the performance of the appliance.
Always unplug the appliance before you empty the dust compartment.
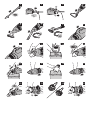
1 Press the nosepiece release button (1) and remove the nosepiece
from the appliance (2) (Fig. 11).
2 Empty the contents of the dust compartment into a
dustbin (Fig. 12).
Tip: Alternatively, you can use a normal vacuum cleaner to vacuum
the contents out of the dust compartment.
3 Push the nosepiece back onto the appliance (‘click’) (Fig. 13).
ENGLISH10

Cleaning the dust compartment thoroughly
1 Press the dust compartment release button (1) and remove
the dust compartment from the appliance (2) (Fig. 14).
2 Pullthelterunitoutofthedustcompartment(Fig.15).
3 Ifnecessary,cleanthelterunit.Seesection‘Cleaningthelterunit’.
4 Empty the dust compartment over a dustbin (Fig. 16).
5 If necessary, clean the dust compartment with a damp cloth.
6 Placethelterunitbackintothedustcompartment(Fig.17).
7 To reattach the dust compartment, align the slot on the dust
compartment with the projection on the appliance. First attach the
bottom of the dust compartment. Then push the top of the dust
compartment towards the appliance until it locks into place
(‘click’) (Fig. 18).
Cleaning the lter unit
1 Press the dust compartment release button (1) and remove
the dust compartment from the appliance (2) (Fig. 14).
2 Pullthelterunitoutofthedustcompartment(Fig.15).
3 Todetachtheouterlterfromtheinnerlter,turnthelterouter
lteranticlockwise(1)andpullitofftheinnerlter(2)(Fig.19).
4 Cleantheinnerlterandtheouterlterwithabrush.Ifthelters
are very dirty, clean them with a normal vacuum cleaner (Fig. 20).
5 Puttheouterlterbackontotheinnerlter(1)andturnthe
outerlterclockwisetolockit(2)(Fig.21).
6 Placethelterunitbackintothedustcompartment(Fig.17).
7 To reattach the dust compartment, align the slot on the dust
compartment with the projection on the appliance. First attach
the bottom of the dust compartment. Then push the top of the
dust compartment towards the appliance until it locks into place
(‘click’) (Fig. 18).
ENGLISH 11

Storage
1 Wind the cord round the body of the appliance (Fig. 22).
2 Fix the cord with the cord clip.
Replacement
Clean Air HEPA lter
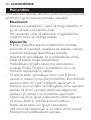
The appliance is equipped with the special Clean Air HEPA lter.
This lter removes small particles from the outlet air. This not only
includes normal house dust, but also harmful microscopic vermin such as
house dust mites and their excrements, which are well-known causes of
respiratory allergies.
1 PressthebuttontoreleasetheCleanAirHEPAltercover(1)
and remove the cover (2) (Fig. 23).
2 RemovetheoldCleanAirHEPAlteranddisposeofit(Fig.24).
3 PutanewCleanAirHEPAlterintheHEPAlter
compartment (Fig. 25).
4 ReattachtheCleanAirHEPAltercover(‘click’)(Fig.26).
Replacement lters
New inner lters are available under service code: 4222 459 45354.
Contact your Philips dealer or the Philips Consumer Care Centre in
your country.
New Clean Air HEPA outlet lters are available under service code:
4222 459 45355. Contact your Philips dealer or the Philips Consumer
Care Centre in your country.
ENGLISH12

Recycling
- This symbol on a product means that the product is covered by
European Directive 2012/19/EU. Inform yourself about the local
separate collection system for electrical and electronic products.
Follow local rules and never dispose of the product with normal
household waste. Correct disposal of old products helps prevent
negative consequences for the environment and human
health (Fig. 27).
Guarantee and support
If you need information or support, please visit www.philips.com/
support or read the separate worldwide guarantee leaet.
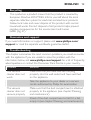
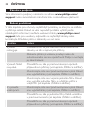
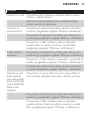
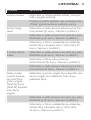
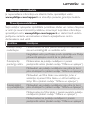
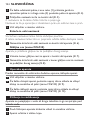
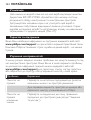
Troubleshooting
This chapter summarises the most common problems you could encounter
with the appliance. If you are unable to solve the problem with the
information below, visit www.philips.com/support for a list of frequently
asked questions or contact the Consumer Care Centre in your country.
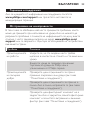
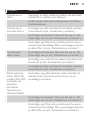
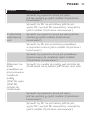
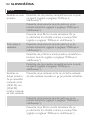
Problem Solution
The vacuum
cleaner does not
work.
Make sure that you have inserted the plug
properly into the wall socket and have switched
on the appliance.
Take the appliance to your dealer or a service
centre authorised by Philips for examination.
The vacuum
cleaner does not
vacuum properly.
Make sure that the dust compartment is attached
properly to the appliance (see chapter ‘Cleaning
and maintenance’).
Check if the dust compartment is full. If it is full,
empty it (see chapter ‘Cleaning and maintenance’).
ENGLISH 13

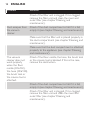
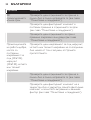
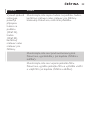
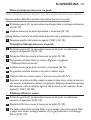
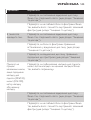
Problem Solution
Check if the lter unit is clogged. If it is clogged,
remove the lter unit and clean the inner and
outer lter (see chapter ‘Cleaning and
maintenance’).
Dust escapes from
the vacuum
cleaner.
Check if the dust compartment is full. If it is full,
empty it (see chapter ‘Cleaning and maintenance’).
Make sure that the lter unit is placed properly in
the dust compartment (see chapter ‘Cleaning and
maintenance’).
Make sure that the dust compartment is attached
properly to the appliance (see chapter ‘Cleaning
and maintenance’).
The vacuum
cleaner does not
work properly
when the oor
nozzle (FC6132),
the hose (FC6130),
the brush tool or
the crevice tool is
attached.
Check if the oor nozzle, the hose, the brush tool
or the crevice tool is blocked. If this is the case,
remove the obstruction.
Check if the dust compartment is full. If it is full,
empty it (see chapter ‘Cleaning and maintenance’).
Check if the lter unit is clogged. If it is clogged,
remove the lter unit and clean the inner and
outer lter (see chapter ‘Cleaning and
maintenance’).
ENGLISH14

15
Въведение
Поздравления за вашата покупка и добре дошли във Philips! За да се
възползвате изцяло от предлаганата от Philips поддръжка,
регистрирайте продукта си на адрес www.philips.com/welcome.
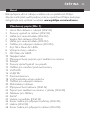
Общо описание (фиг. 1)
1 Горна част на пръта с дръжка (FC6132)
2 Плъзгач на пръта за включване/изключване (FC6132)
3 Скоба за навиване на шнура (FC6132)
4 Долна част на пръта (FC6132)
5 Скоба за навиване на шнура (FC6132)
6 Бутон за освобождаване на пръта (FC6132)
7 Капак на филтъра Clean Air HEPA
8 Отвори за изходящ въздух
9 Филтър Clean Air HEPA
10 Захранващ кабел
11 Места за закрепване на презрамката
12 Дръжка
13 Плъзгач за включване/изключване на прахосмукачката
14 Бутон за отваряне на отделението за прах
15 Вътрешен филтър
16 Външен филтър
17 Отделение за прах
18 Вътрешен отвор за приток на въздух
19 Бутон за освобождаване на удължения накрайник
20 Подвижен удължен накрайник
21 Място за закрепване на пръта (FC6132)
22 Презрамка + карабини (FC6130)
23 Тесен накрайник
24 Четка
25 Накрайник за под (FC6132)
26 Край на маркуча откъм уреда (FC6130)
27 Маркуч (FC6130)
28 Край на маркуча откъм приставките (FC6130)
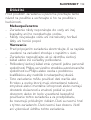
БЪЛГАРСКИ

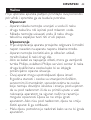
Важно
Преди да използвате уреда, прочетете внимателно
това ръководство за потребителя и го запазете за
справка в бъдеще.
Опасност
- Никога не потапяйте задвижващия блок във вода
или друга течност и не го мийте с течаща вода.
- Никога не всмуквайте вода или друга течност,
нито запалими вещества или гореща пепел.
Предупреждение
- Преди да включите уреда в електрически
контакт, проверете дали посоченото върху
уреда напрежение отговаря на това на местната
електрическа мрежа.
- Не използвайте уреда, ако щепселът,
захранващият кабел или други части са повредени.
- С оглед предотвратяване на опасност, при
повреда в захранващия кабел той трябва да бъде
сменен от Philips, оторизиран от Philips сервиз
или квалифициран техник.
- Този уред може да се използва от деца на
възраст над 8 години и от хора с намалени
физически възприятия или умствени недостатъци
или без опит и познания, ако са инструктирани за
безопасна употреба на уреда и са под
наблюдение с цел гарантиране на безопасна
употреба и ако са им разяснени евентуалните
БЪЛГАРСКИ16

опасности. Не позволявайте на деца да си играят
с уреда. Не позволявайте на деца да извършват
почистване или поддръжка на уреда без надзор.
- Наглеждайте децата, за да не си играят с уреда.
- Изключвайте щепсела от контакта преди
почистване или поддръжка на уреда.
Внимание
- След употреба винаги изключвайте уреда.
- Никога не закривайте отворите за изходящ
въздух при работа на прахосмукачката.
- Винаги използвайте прахосмукачката с
монтирани филтърен комплект, отделение за
прах и филтър Clean Air HEPA.
- Винаги изключвайте уреда, преди да слагате или
сваляте приспособления.
- Ниво на шум: Lc = 84 dB(A)
Електромагнитни излъчвания (EMF)
Този уред на Philips е в съответствие с нормативната уредба и
всички действащи стандарти, свързани с излагането на
електромагнитни излъчвания.
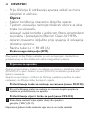
Подготовка за употреба
Уредът се предлага с презрамка и гъвкав маркуч (FC6130) или с прът
и накрайник за под (FC6132) за допълнително удобство по време на
почистване.
Уредът се предлага и с четка за почистване на нежни повърхности и
тесен накрайник за почистване на труднодостъпни места.
БЪЛГАРСКИ 17

Поставяне на презрамката (само за FC6130)
1 Задаприкрепитепрезрамката,свържетекарабинитекъм
точкитезазакрепваневърхууреда.
Поставяне на пръта и накрайника за под
(само за FC6132)
1 Задамонтиратепръта,свържетедолнатамучасткъмгорната
(сщракване)(фиг.2).
Забележка: След като веднъж бъде сглобен, прътът не може да бъде
разглобен.
2 Вкарайтепрътавточкатазазакрепваненапрътавзадниякрай
науреда(сщракване)(фиг.3).
- При вкарването на пръта се уверете, че реброто на пръта е
подравнено с точката за закрепване към уреда.
3 Задасвалитепрътаотуреда,натиснетебутоназа
освобождаванеседнатасиръка(1)иизтеглетепрътаотуреда
сдругата(2)(фиг.4).
4 Монтирайтенакрайниказаподкъмудължения
накрайник(фиг.5).
Можете да използвате накрайника за под за почистване на твърди
подови повърхности и мокети.
Накрайникът за под има приспособление за косми, с което се
почистват косми и мъх.
5 Включетещепселавконтакта.
Принадлежности: четка и накрайник за ъгли
Можете да използвате четката за почистване на нежни повърхности.
С тесния накрайник можете бързо и удобно да почиствате трудни
за достигане места.
1 Поставетечеткатаилитесниянакрайниккъмудължения
накрайникнауреда(фиг.6).
БЪЛГАРСКИ18

Маркуч (само за FC6130)
Този уред се предлага с маркуч, за да достигате по-далеч по време
на почистването.
1 Вкарайтекраянамаркучаоткъмуредавудължениянакрайник
науреда(фиг.7).
2 Поставетечеткатаилитесниянакрайниккъмкраянамаркуча
откъмприставките,зададостигатепо-далечеповремена
почистването(фиг.8).
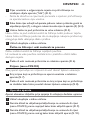
Използване на уреда
Винагиизключвайтеуреда,предидаслагатеилисваляте
приспособления.
1 Включетещепселавконтакта.
2 Натиснетенапредплъзгачанапрахосмукачкатаилитозина
пръта(самозаFC6132),задавключитеуреда(фиг.9).
3 Натиснетеназадплъзгачанапрахосмукачкатаилитозинапръта
(самозаFC6132),задаизключитеуреда(фиг.10).
Почистване и поддръжка
Никоганепотапяйтезадвижващияблоквъвводаилидруга
течностинегомийтестечащавода.
1 Винагиизваждайтещепселаотконтакта,предидапочиствате
уреда.
2 Почистетеуредасвлажнакърпа.
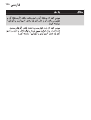
Бързо изпразване на отделението за прах
На всяка цена почиствайте отделението за прах редовно,
за да оптимизирате работата на уреда.
Винагиизключвайтеуредаотконтактапредиизпразванена
отделениетозапрах.
БЪЛГАРСКИ 19

1 Натиснетебутоназаосвобождаваненапредниякапак(1)
исвалетеудължениянакрайникотуреда(2)(фиг.11).
2 Изпразнетесъдържаниетонаотделениетозапрахвкофаза
смет(фиг.12).
Съвет: Другата възможност е да използвате обикновена
прахосмукачка, за да изчистите с нея съдържанието на отделението
за прах.
3 Натиснетеудължениянакрайникобратнонамястотомуна
уреда(сщракване)(фиг.13).
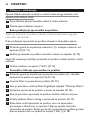
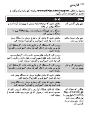
Старателно почистване на отделението за прах
1 Натиснетебутоназаосвобождаваненаотделениетозапрах
(1)исвалетеотуредаотделениетозапрах(2)(фиг.14).
2 Издърпайтефилтърниякомплектототделениетоза
прах(фиг.15).
3 Принеобходимостпочистетефилтърниякомплект.Вж.раздел
“Почистваненафилтърниякомплект”.
4 Изпразнетеотделениетозапрахвконтейнерза
отпадъци(фиг.16).
5 Принеобходимостпочиствайтеотделениетозапрахсвлажна
кърпа.
6 Сложетефилтърниякомплектнамястотомувотделениетоза
прах(фиг.17).
7 Задазакрепитеотновоотделениетозапрах,изравнетежлеба
наотделениетосиздаденатачастнауреда.Закачетепърво
дънотонаотделениетозапрах.Следтованатиснетегорната
частнаотделениетокъмуредатака,чедасезахванена
мястотоси(сщракване)(фиг.18).
БЪЛГАРСКИ20
Pagina se încarcă...
Pagina se încarcă...
Pagina se încarcă...
Pagina se încarcă...
Pagina se încarcă...
Pagina se încarcă...
Pagina se încarcă...
Pagina se încarcă...
Pagina se încarcă...
Pagina se încarcă...
Pagina se încarcă...
Pagina se încarcă...
Pagina se încarcă...
Pagina se încarcă...
Pagina se încarcă...
Pagina se încarcă...
Pagina se încarcă...
Pagina se încarcă...
Pagina se încarcă...
Pagina se încarcă...
Pagina se încarcă...
Pagina se încarcă...
Pagina se încarcă...
Pagina se încarcă...
Pagina se încarcă...
Pagina se încarcă...
Pagina se încarcă...
Pagina se încarcă...
Pagina se încarcă...
Pagina se încarcă...
Pagina se încarcă...
Pagina se încarcă...
Pagina se încarcă...
Pagina se încarcă...
Pagina se încarcă...
Pagina se încarcă...
Pagina se încarcă...
Pagina se încarcă...
Pagina se încarcă...
Pagina se încarcă...
Pagina se încarcă...
Pagina se încarcă...
Pagina se încarcă...
Pagina se încarcă...
Pagina se încarcă...
Pagina se încarcă...
Pagina se încarcă...
Pagina se încarcă...
Pagina se încarcă...
Pagina se încarcă...
Pagina se încarcă...
Pagina se încarcă...
Pagina se încarcă...
Pagina se încarcă...
Pagina se încarcă...
Pagina se încarcă...
Pagina se încarcă...
Pagina se încarcă...
Pagina se încarcă...
Pagina se încarcă...
Pagina se încarcă...
Pagina se încarcă...
Pagina se încarcă...
Pagina se încarcă...
Pagina se încarcă...
Pagina se încarcă...
Pagina se încarcă...
Pagina se încarcă...
Pagina se încarcă...
Pagina se încarcă...
Pagina se încarcă...
Pagina se încarcă...
Pagina se încarcă...
Pagina se încarcă...
Pagina se încarcă...
Pagina se încarcă...
Pagina se încarcă...
Pagina se încarcă...
Pagina se încarcă...
Pagina se încarcă...
Pagina se încarcă...
Pagina se încarcă...
Pagina se încarcă...
Pagina se încarcă...
Pagina se încarcă...
Pagina se încarcă...
Pagina se încarcă...
Pagina se încarcă...
Pagina se încarcă...
Pagina se încarcă...
Pagina se încarcă...
Pagina se încarcă...
Pagina se încarcă...
Pagina se încarcă...
Pagina se încarcă...
Pagina se încarcă...
Pagina se încarcă...
Pagina se încarcă...
Pagina se încarcă...
Pagina se încarcă...
Pagina se încarcă...
Pagina se încarcă...
Pagina se încarcă...
Pagina se încarcă...
Pagina se încarcă...
Pagina se încarcă...
Pagina se încarcă...
Pagina se încarcă...
Pagina se încarcă...
Pagina se încarcă...
Pagina se încarcă...
Pagina se încarcă...
Pagina se încarcă...
Pagina se încarcă...
Pagina se încarcă...
Pagina se încarcă...
Pagina se încarcă...
Pagina se încarcă...
Pagina se încarcă...
Pagina se încarcă...
Pagina se încarcă...
Pagina se încarcă...
Pagina se încarcă...
Pagina se încarcă...
Pagina se încarcă...
Pagina se încarcă...
Pagina se încarcă...
Pagina se încarcă...
Pagina se încarcă...
Pagina se încarcă...
Pagina se încarcă...
Pagina se încarcă...
Pagina se încarcă...
Pagina se încarcă...
Pagina se încarcă...
Pagina se încarcă...
Pagina se încarcă...
Pagina se încarcă...
Pagina se încarcă...
Pagina se încarcă...
Pagina se încarcă...
Pagina se încarcă...
Pagina se încarcă...
Pagina se încarcă...
-
 1
1
-
 2
2
-
 3
3
-
 4
4
-
 5
5
-
 6
6
-
 7
7
-
 8
8
-
 9
9
-
 10
10
-
 11
11
-
 12
12
-
 13
13
-
 14
14
-
 15
15
-
 16
16
-
 17
17
-
 18
18
-
 19
19
-
 20
20
-
 21
21
-
 22
22
-
 23
23
-
 24
24
-
 25
25
-
 26
26
-
 27
27
-
 28
28
-
 29
29
-
 30
30
-
 31
31
-
 32
32
-
 33
33
-
 34
34
-
 35
35
-
 36
36
-
 37
37
-
 38
38
-
 39
39
-
 40
40
-
 41
41
-
 42
42
-
 43
43
-
 44
44
-
 45
45
-
 46
46
-
 47
47
-
 48
48
-
 49
49
-
 50
50
-
 51
51
-
 52
52
-
 53
53
-
 54
54
-
 55
55
-
 56
56
-
 57
57
-
 58
58
-
 59
59
-
 60
60
-
 61
61
-
 62
62
-
 63
63
-
 64
64
-
 65
65
-
 66
66
-
 67
67
-
 68
68
-
 69
69
-
 70
70
-
 71
71
-
 72
72
-
 73
73
-
 74
74
-
 75
75
-
 76
76
-
 77
77
-
 78
78
-
 79
79
-
 80
80
-
 81
81
-
 82
82
-
 83
83
-
 84
84
-
 85
85
-
 86
86
-
 87
87
-
 88
88
-
 89
89
-
 90
90
-
 91
91
-
 92
92
-
 93
93
-
 94
94
-
 95
95
-
 96
96
-
 97
97
-
 98
98
-
 99
99
-
 100
100
-
 101
101
-
 102
102
-
 103
103
-
 104
104
-
 105
105
-
 106
106
-
 107
107
-
 108
108
-
 109
109
-
 110
110
-
 111
111
-
 112
112
-
 113
113
-
 114
114
-
 115
115
-
 116
116
-
 117
117
-
 118
118
-
 119
119
-
 120
120
-
 121
121
-
 122
122
-
 123
123
-
 124
124
-
 125
125
-
 126
126
-
 127
127
-
 128
128
-
 129
129
-
 130
130
-
 131
131
-
 132
132
-
 133
133
-
 134
134
-
 135
135
-
 136
136
-
 137
137
-
 138
138
-
 139
139
-
 140
140
-
 141
141
-
 142
142
-
 143
143
-
 144
144
-
 145
145
-
 146
146
-
 147
147
-
 148
148
-
 149
149
-
 150
150
-
 151
151
-
 152
152
-
 153
153
-
 154
154
-
 155
155
-
 156
156
-
 157
157
-
 158
158
-
 159
159
-
 160
160
-
 161
161
-
 162
162
-
 163
163
-
 164
164


Philips FC6132/02 Manual de utilizare
- Categorie
- Aspiratoare portabile
- Tip
- Manual de utilizare
în alte limbi
- slovenčina: Philips FC6132/02 Používateľská príručka
Lucrări înrudite
-
Philips FC6132 Manual de utilizare
-
Philips FC6161/94 Manual de utilizare
-
Philips FC6091 Manual de utilizare
-
Philips FC6149/01 Manual de utilizare
-
Philips FC6144/01 Manual de utilizare
-
Philips FC6148/01 Manual de utilizare
-
Philips FC6050/99 Manual de utilizare
-
-
Philips FC9166/01 Manual de utilizare
-