Makita DUT130 Manual de utilizare
- Categorie
- Burghiu electric
- Tip
- Manual de utilizare

DUT130
DUT131
EN Cordless Mixer INSTRUCTION MANUAL 5
PL Mieszarka Akumulatorowa INSTRUKCJA OBSŁUGI 11
HU Akkumulátoros keverő HASZNÁLATI KÉZIKÖNYV 17
SK Bezdrôtové miešadlo NÁVOD NA OBSLUHU 23
CS Akumulátorová míchačka NÁVOD K OBSLUZE 28
UK Акумуляторний міксер ІНСТРУКЦІЯ З
ЕКСПЛУАТАЦІЇ 34
RO Mixer cu acumulator MANUAL DE INSTRUCŢIUNI 40
DE Akku-Rührwerk BETRIEBSANLEITUNG 46

1
2
Fig.1
1
2
3
Fig.2
1
2
Fig.3
1
A B
Fig.4
12
3
Fig.5
1
2
Fig.6
1
2
Fig.7
2

12
Fig.8
1
2
Fig.9
1
2
Fig.10
1
2
Fig.11
1
2
3
Fig.12
1
Fig.13
1
2
3
1
2
3
Fig.14
1
2
3
Fig.15
3

2
1
2
Fig.16
4

5ENGLISH
ENGLISH (Original instructions)
SPECIFICATIONS
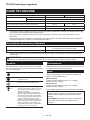
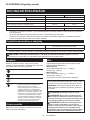
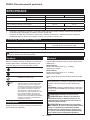
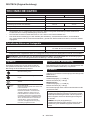
Model: DUT130 DUT131
No load speed High speed 0 - 1,300 min-1
Low speed 0 - 350 min-1
Maximum mixing blade diameter 165 mm
Overall length (without shaft and mixing blade) 320 mm 307 mm
Rated voltage D.C. 18 V
Net weight 2.5 - 2.8 kg 2.7 - 3.0 kg
• Duetoourcontinuingprogramofresearchanddevelopment,thespecicationshereinaresubjecttochange
without notice.
• Specicationsandbatterycartridgemaydifferfromcountrytocountry.
• Theweightmaydifferdependingontheattachment(s),includingthebatterycartridge.Thelightestandheavi-
est combination, according to EPTA-Procedure 01/2014, are shown in the table.
Applicable battery cartridge and charger
Batterycartridge BL1815N / BL1820 / BL1820B / BL1830 / BL1830B / BL1840 /
BL1840B / BL1850 / BL1850B / BL1860B
Charger DC18RC / DC18RD / DC18RE / DC18SD / DC18SE / DC18SF
• Someofthebatterycartridgesandchargerslistedabovemaynotbeavailabledependingonyourregionof
residence.
WARNING: Only use the battery cartridges and chargers listed above.Useofanyotherbatterycartridges
andchargersmaycauseinjuryand/orre.
Symbols
Thefollowingsshowthesymbolsusedfortheequip-
ment.Besurethatyouunderstandtheirmeaningbefore
use.
Read instruction manual.
Do not use the tool in the rain.
Do not clean the tool with water.
Ni-MH
Li-ion
OnlyforEUcountries
Donotdisposeofelectricequipmentor
batterypacktogetherwithhouseholdwaste
material!
In observance of the European Directives,
on Waste Electric and Electronic
EquipmentandBatteriesandAccumulators
and Waste Batteries and Accumulators
and their implementation in accordance
withnationallaws,electricequipmentand
batteriesandbatterypack(s)thathave
reached the end of their life must be col-
lectedseparatelyandreturnedtoanenvi-
ronmentallycompatiblerecyclingfacility.
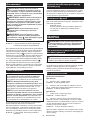
Intended use
The tool is intended for mixing wall materials, etc.
(exceptammablematerials).
Noise
ThetypicalA-weightednoiseleveldeterminedaccord-
ing to EN60745-2-1:
Model DUT130
Sound pressure level (LpA) : 74 dB(A)
Uncertainty(K):3dB(A)
Model DUT131
Sound pressure level (LpA) : 74 dB(A)
Uncertainty(K):3dB(A)
Thenoiselevelunderworkingmayexceed80dB(A).
NOTE:
The declared noise emission value(s) has been
measured in accordance with a standard test method
andmaybeusedforcomparingonetoolwithanother.
NOTE:
Thedeclarednoiseemissionvalue(s)mayalso
beusedinapreliminaryassessmentofexposure.
WARNING: Wear ear protection.
WARNING:
The noise emission during actual
use of the power tool can differ from the declared
value(s) depending on the ways in which the tool is
used especially what kind of workpiece is processed.
WARNING:
Be sure to identify safety measures
to protect the operator that are based on an estima-
tion of exposure in the actual conditions of use (tak-
ing account of all parts of the operating cycle such
as the times when the tool is switched off and when
it is running idle in addition to the trigger time).

6ENGLISH
Vibration
The vibration total value (tri-axial vector sum) deter-
mined according to EN60745-2-1:
Model DUT130
Work mode: operation without load
Vibration emission (ah) : 2.5 m/s2 or less
Uncertainty(K):1.5m/s2
Model DUT131
Work mode: operation without load
Vibration emission (ah) : 2.5 m/s2 or less
Uncertainty(K):1.5m/s2
NOTE: The declared vibration total value(s) has been
measured in accordance with a standard test method
andmaybeusedforcomparingonetoolwithanother.
NOTE:Thedeclaredvibrationtotalvalue(s)mayalso
beusedinapreliminaryassessmentofexposure.
WARNING:
The vibration emission during actual
use of the power tool can differ from the declared val-
ue(s) depending on the ways in which the tool is used
especially what kind of workpiece is processed.
WARNING:
Be sure to identify safety measures
to protect the operator that are based on an estima-
tion of exposure in the actual conditions of use (tak-
ing account of all parts of the operating cycle such
as the times when the tool is switched off and when
it is running idle in addition to the trigger time).
EC Declaration of Conformity
For European countries only
TheECdeclarationofconformityisincludedasAnnexA
to this instruction manual.
SAFETY WARNINGS
General power tool safety warnings
WARNING: Read all safety warnings, instruc-
tions, illustrations and specications provided
with this power tool. Failure to follow all instructions
listedbelowmayresultinelectricshock,reand/or
seriousinjury.
Save all warnings and instruc-
tions for future reference.
Theterm"powertool"inthewarningsreferstoyour
mains-operated(corded)powertoolorbattery-operated
(cordless) power tool.
Cordless mixer safety warnings
1. Hold the tool with both hands at the intended
handles. Loss of control can cause personal
injury.
2. Ensure sufcient ventilation when mixing am-
mable materials to avoid a hazardous atmo-
sphere.Developingvapourmaybeinhaledorbe
ignitedbythesparksthepowertoolproduces.
3. Do not mix food. Power tools and their accesso-
ries are not designed for processing food.
4. Ensure that the mixing container is placed in a
rm and secure position. A container that is not
properlysecuredmaymoveunexpectedly.
5.
Follow the instructions and warnings for the mate-
rial to be mixed.Materialtobemixedmaybeharmful.
6. Do not reach into the mixing container with
your hands or insert any other objects into it
while mixing.Contactwiththemixerblademay
leadtoseriouspersonalinjury.
7. Start up and run down the tool in the mixing
container only.Themixerblademaybendorspin
in an uncontrolled manner.
8.
Ensure that no liquid splashes against the hous-
ing of the power tool.Liquidthathaspenetrated
the power tool can cause damage to the tool.
9. Use auxiliary handles, if supplied with the tool.
Lossofcontrolmaycausepersonalinjury.
10.
Hold power tool by insulated gripping surfaces,
when performing an operation where the cutting
accessory may contact hidden wiring. Cutting
accessorycontactinga"live"wiremaymake
exposed metal parts of the power tool "live" and
could give the operator an electric shock.
11. Always be sure you have a rm footing. Be
sure no one is below when using the tool in
high locations.
12. Hold the tool rmly.
13. Keep hands away from rotating parts.
14. Do not leave the tool running. Operate the tool
only when you are holding it.
15. Some materials contain chemicals which may
be toxic. Take caution to prevent dust inhala-
tion and skin contact. Follow safety warnings
by supplier of the material.
16. When performing the mixing operation, place
the mixing container on a at and stable
surface.
SAVE THESE INSTRUCTIONS.
WARNING: DO NOT let comfort or familiarity
with product (gained from repeated use) replace
strict adherence to safety rules for the subject
product. MISUSE or failure to follow the safety
rules stated in this instruction manual may cause
serious personal injury.
Important safety instructions for
battery cartridge
1. Before using battery cartridge, read all instruc-
tions and cautionary markings on (1) battery
charger, (2) battery, and (3) product using
battery.
2. Do not disassemble battery cartridge.
3. If operating time has become excessively
shorter, stop operating immediately. It may
result in a risk of overheating, possible burns
and even an explosion.
4.
If electrolyte gets into your eyes, rinse them out
with clear water and seek medical attention right
away. It may result in loss of your eyesight.

7ENGLISH
5. Do not short the battery cartridge:
(1) Do not touch the terminals with any con-
ductive material.
(2) Avoid storing battery cartridge in a con-
tainer with other metal objects such as
nails, coins, etc.
(3) Do not expose battery cartridge to water
or rain.
A battery short can cause a large current
ow, overheating, possible burns and even a
breakdown.
6. Do not store the tool and battery cartridge in
locations where the temperature may reach or
exceed 50 °C (122 °F).
7. Do not incinerate the battery cartridge even if
it is severely damaged or is completely worn
out. The battery cartridge can explode in a re.
8. Be careful not to drop or strike battery.
9. Do not use a damaged battery.
10. The contained lithium-ion batteries are subject
to the Dangerous Goods Legislation require-
ments.
Forcommercialtransportse.g.bythirdparties,
forwardingagents,specialrequirementonpack-
aging and labeling must be observed.
For preparation of the item being shipped, consult-
inganexpertforhazardousmaterialisrequired.
Pleasealsoobservepossiblymoredetailed
national regulations.
Tape or mask off open contacts and pack up the
batteryinsuchamannerthatitcannotmove
around in the packaging.
11. Follow your local regulations relating to dis-
posal of battery.
12. Use the batteries only with the products
specied by Makita. Installing the batteries to
non-compliantproductsmayresultinare,exces-
siveheat,explosion,orleakofelectrolyte.
SAVE THESE INSTRUCTIONS.
CAUTION: Only use genuine Makita batteries.
Use of non-genuine Makita batteries, or batteries that
havebeenaltered,mayresultinthebatterybursting
causingres,personalinjuryanddamage.Itwill
alsovoidtheMakitawarrantyfortheMakitatooland
charger.
Tips for maintaining maximum
battery life
1. Charge the battery cartridge before completely
discharged. Always stop tool operation and
charge the battery cartridge when you notice
less tool power.
2. Never recharge a fully charged battery car-
tridge. Overcharging shortens the battery
service life.
3. Charge the battery cartridge with room tem-
perature at 10 °C - 40 °C (50 °F - 104 °F). Let
a hot battery cartridge cool down before
charging it.
4. Charge the battery cartridge if you do not use
it for a long period (more than six months).
FUNCTIONAL
DESCRIPTION
CAUTION: Always be sure that the tool is
switched off and the battery cartridge is removed
before adjusting or checking function on the tool.
Installing or removing battery
cartridge
CAUTION: Always switch off the tool before
installing or removing of the battery cartridge.
CAUTION: Hold the tool and the battery car-
tridge rmly when installing or removing battery
cartridge.Failuretoholdthetoolandthebattery
cartridgermlymaycausethemtoslipoffyourhands
andresultindamagetothetoolandbatterycartridge
andapersonalinjury.
CAUTION: Do not use this tool with the
battery adapter.Ifyouconnectthebatteryadapter
tothetool,thebatterycovercannotbeclosed,and
usingthetoolwithbatterycoveropenedmaycause
aninjury.
Openthebatterycoverwhilepressingthebuttononthe
batterycover.
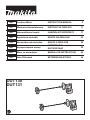
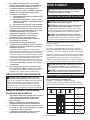
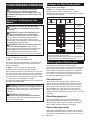
►Fig.1: 1. Button 2.Batterycover
Toremovethebatterycartridge,slideitfromthetool
while sliding the button on the front of the cartridge.
►Fig.2: 1. Red indicator 2. Button 3.Batterycartridge
Toinstallthebatterycartridge,alignthetongueonthe
batterycartridgewiththegrooveinthehousingandslip
itintoplace.Insertitallthewayuntilitlocksinplace
withalittleclick.Ifyoucanseetheredindicatoronthe
uppersideofthebutton,itisnotlockedcompletely.
Afterinstallingthebatterycartridge,closethebattery
coversecurely.
CAUTION: Always install the battery cartridge
fully until the red indicator cannot be seen. If not,
itmayaccidentallyfalloutofthetool,causinginjuryto
youorsomeonearoundyou.
CAUTION: Do not install the battery cartridge
forcibly.Ifthecartridgedoesnotslideineasily,itis
notbeinginsertedcorrectly.

8ENGLISH
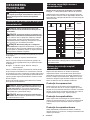
Indicating the remaining battery
capacity
Only for battery cartridges with the indicator
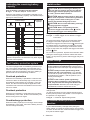
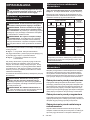
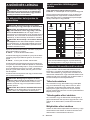
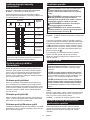
►Fig.3: 1. Indicator lamps 2. Check button
Pressthecheckbuttononthebatterycartridgetoindi-
catetheremainingbatterycapacity.Theindicatorlamps
light up for a few seconds.
Indicator lamps Remaining
capacity
Lighted Off Blinking
75% to 100%
50% to 75%
25% to 50%
0% to 25%
Charge the
battery.
Thebattery
mayhave
malfunctioned.
NOTE: Depending on the conditions of use and the
ambienttemperature,theindicationmaydifferslightly
fromtheactualcapacity.
Tool / battery protection system
Thetoolisequippedwithatool/batteryprotectionsys-
tem.Thissystemautomaticallycutsoffpowertothe
motortoextendtoolandbatterylife.Thetoolwillauto-
maticallystopduringoperationifthetoolorbatteryis
placed under one of the following conditions:
Overload protection
Whenthetoolorbatteryisoperatedinamannerthat
causesittodrawanabnormallyhighcurrent,thetool
automaticallystopswithoutanyindication.Inthissit-
uation, turn the tool off and stop the application that
caused the tool to become overloaded. Then turn the
tool on to restart.
Overheat protection
Whenthetoolorbatteryisoverheated,thetoolstops
automatically.Inthiscase,letthetoolandbatterycool
before turning the tool on again.
Overdischarge protection
Whenthebatterycapacityisnotenough,thetoolstops
automatically.Inthiscase,removethebatteryfromthe
toolandchargethebattery.
Switch action
CAUTION: Before installing the battery car-
tridge into the tool, always check to see that the
switch trigger actuates properly and returns to
the "OFF" position when released.
CAUTION: Switch can be locked in "ON" posi-
tion for ease of operator comfort during extended
use. Apply caution when locking tool in "ON"
position and maintain rm grasp on tool.
CAUTION: Do not install the battery cartridge
with the lock button engaged.
CAUTION: When not operating the tool,
depress the trigger-lock button from side to
lock the switch trigger in the OFF position.
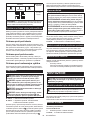
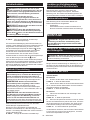
►Fig.4: 1. Trigger-lock button
►Fig.5: 1. Switch trigger 2. Lock button 3. Trigger-
lock button
Topreventtheswitchtriggerfromaccidentallypulled,
the trigger-lock button is provided. To start the tool,
depress the trigger-lock button from A ( ) side and pull
theswitchtrigger.Toolspeedisincreasedbyincreas-
ing pressure on the switch trigger. Release the switch
trigger to stop. After use, depress the trigger-lock button
from B ( ) side.
For continuous operation, depress the lock button while
pulling the switch trigger, and then release the switch
trigger.Tostopthetool,pulltheswitchtriggerfully,then
release it.
Speed change
NOTICE: Use the speed change knob only after
the tool comes to a complete stop. Changing the
toolspeedbeforethetoolstopsmaydamagethetool.
NOTICE: Always set the speed change knob
carefully into the correct position.Ifyouoperate
the tool with the speed change knob positioned half-
waybetweentheposition1andtheposition2,the
toolmaybedamaged.
NOTICE: If the rotation speed signicantly
decreases during operation in the high speed
mode, stop the tool and change the mode to the
low speed mode.Otherwise,themotormayget
overloadedandcauseamalfunctionorre.
Two speed ranges can be preselected with the speed
change knob.
To change the speed, turn the speed change knob so
that the pointer points to the position 1 for low speed or
the position 2 for high speed.
►Fig.6: 1. Pointer 2. Speed change knob
Accidental restart preventive
function
Ifyouinstallthebatterycartridgewhilepullingthe
switch trigger or locking the switch trigger, the tool does
not start. To start the tool, release the switch trigger, and
then pull the switch trigger.

9ENGLISH
Electronic function
Thetoolisequippedwiththeelectronicfunctionsfor
easyoperation.
• Soft start
The soft-start function minimizes start-up shock,
andmakesthetoolstartsmoothly.
ASSEMBLY
CAUTION: Always be sure that the tool is
switched off and the battery cartridge is removed
before carrying out any work on the tool.
Installing the front cover and side
grip
CAUTION: Tighten the side grip rmly.
Otherwise,thefrontcovermayfallandcausean
injury.
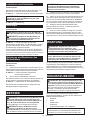
►Fig.7: 1. Front cover 2. Side grip
Attach the front cover to the tool and screw the side grip
onthetoolsecurely.
The side grip can be installed on either side of the tool.
Installing the shaft
Optional accessory
For DUT130
1. Tighten the shaft into the shaft holder.
►Fig.8: 1. Shaft 2. Shaft holder
2. Tighten the shaft with wrench 19 while holding the
shaft holder with another wrench 19.
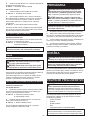
►Fig.9: 1. Shaft 2. Shaft holder
For DUT131
1. Insert the shaft into the chuck as far as it will go.
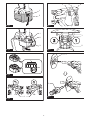
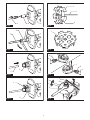
►Fig.10: 1. Shaft 2. Chuck
2. Tightenthechuckbyhand,andthenplacethe
chuckkeyineachofthreeholesandtightenitclock-
wise.Besuretotightenthechuckkeyatallthreeholes
evenly.
►Fig.11: 1.Chuckkey2. Chuck
Toremovetheshaft,turnthechuckkeycounterclock-
wiseatoneoftheholes,andthenloosenthechuckby
hand.
Installing the mixing blade
Optional accessory
Attach the mixing blade on the top of the shaft, and then
secure it with the hex bolt.
►Fig.12: 1. Mixing blade 2. Shaft 3. Hex bolt
NOTICE: Be sure to attach the mixing blade with
"UP" mark facing the tool.
►Fig.13: 1. Mark
Hook
Optional accessory
CAUTION: Always remove the battery when
hanging the tool with the hook.
CAUTION: Never hook the tool at high loca-
tion or on potentially unstable surface.
►Fig.14: 1. Groove 2. Hook 3. Screw
Thehookisconvenientfortemporarilyhangingthetool.
This can be installed on either side of the tool.
To install the hook, insert it into a groove in the tool
housing on either side and then secure it with a screw.
To remove, loosen the screw and then take it out.
Installing or removing the shaft
holder
Optional accessory
For DUT131
1. Insert the hex wrench into the chuck, and then
loosen the chuck with the hex wrench while holding the
spindle with the wrench.
►Fig.15: 1. Hex wrench 2. Chuck 3. Wrench
2. Tighten the shaft holder with a wrench 19 while
holding the spindle with another wrench 19.
►Fig.16: 1. Shaft holder 2. Wrench
To remove the shaft holder, perform the installation
procedure in reverse.
OPERATION
CAUTION: Do not mix ammable materials or
operate the tool around ammable materials such
as paint with thinner used as solvent. Failure to do
somaycauseaninjury.
CAUTION: Do not mix high viscosity material,
such as mortar or adhesive, in the high speed
mode.Youmaylosethecontrolofthetoolandcause
aninjury.
NOTICE: When you mix the material while the
mixing blade oating out of the material, be care-
ful not to splash the material.
1. Select high speed or low speed according to the
material to be mixed.
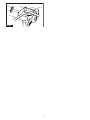
2. Hold the rear handle of the tool with one hand
andthegripwiththeotherhandrmly,placethemixing
bladeundermaterialfullyandturnonthetoolafter
makingsureworksitesafety.
3. Move the mixing blade up and down during the
mixing operation so that whole part of material can be
mixed.
4. Whennishingmixing,turnoffthetool,makesure
that the mixing blade has come to a complete stop, and
then pull it out of the mixing container.

10 ENGLISH
MAINTENANCE
CAUTION: Always be sure that the tool is
switched off and the battery cartridge is removed
before attempting to perform inspection or
maintenance.
NOTICE: Never use gasoline, benzine, thinner,
alcohol or the like. Discoloration, deformation or
cracks may result.
To maintain product SAFETY and RELIABILITY,
repairs,anyothermaintenanceoradjustmentshould
beperformedbyMakitaAuthorizedorFactoryService
Centers,alwaysusingMakitareplacementparts.
OPTIONAL
ACCESSORIES
CAUTION: These accessories or attachments
are recommended for use with your Makita tool
specied in this manual.Theuseofanyother
accessories or attachments might present a risk of
injurytopersons.Onlyuseaccessoryorattachment
for its stated purpose.
Ifyouneedanyassistanceformoredetailsregard-
ingtheseaccessories,askyourlocalMakitaService
Center.
• Mixing blade
• Shaft
• Shaft holder
• Hook
• Makitagenuinebatteryandcharger
NOTE:Someitemsinthelistmaybeincludedinthe
toolpackageasstandardaccessories.Theymay
differfromcountrytocountry.

11 POLSKI
POLSKI (Instrukcja oryginalna)
DANE TECHNICZNE
Model: DUT130 DUT131
Prędkośćbezobciążenia Biegwysoki 0–1 300 min-1
Bieg niski 0–350 min-1
Maksymalnaśrednicawirnikamieszającego 165 mm
Długośćcałkowita(bezdrążkaiwirnikamieszającego) 320 mm 307 mm
Napięcieznamionowe Prądstały18V
Masa netto 2,5–2,8 kg 2,7–3,0 kg
• Wzwiązkuzestaleprowadzonymprzeznasząrmęprogramembadawczo-rozwojowymniniejszedanemogą
uleczmianombezwcześniejszegopowiadomienia.
• Winnychkrajachurządzeniemożemiećodmienneparametrytechniczneimożebyćwyposażonewinny
akumulator.
• Masamożebyćróżnawzależnościodosprzętu,wtymakumulatora.Wtabeliprzedstawionajestnajlżejszai
najcięższakonguracja,zgodniezprocedurąEPTA01/2014.
Kompatybilne akumulatory i ładowarki
Akumulator BL1815N / BL1820 / BL1820B / BL1830 / BL1830B / BL1840 /
BL1840B / BL1850 / BL1850B / BL1860B
Ładowarka DC18RC / DC18RD / DC18RE / DC18SD / DC18SE / DC18SF
• Pewnezwymienionychpowyżejakumulatorówiładowarekmogąbyćniedostępnewregioniezamieszkania
użytkownika.
OSTRZEŻENIE: Należy używać wyłącznie akumulatorów i ładowarek wymienionych powyżej.
Używanieinnychakumulatorówiładowarekmożestwarzaćryzykowystąpieniaobrażeńciałalubpożaru.
Symbole
Poniżejpokazanosymbolezastosowanenaurządze-
niu.Przedrozpoczęciemużytkowanianależyzapoznać
sięzichznaczeniem.
Przeczytaćinstrukcjęobsługi.
Narzędzianienależyużywaćwczasie
opadówdeszczu.
Nienależyczyścićnarzędziawodą.
Ni-MH
Li-ion
DotyczytylkopaństwUE
Niewyrzucaćurządzeńelektrycznychani
akumulatorówwrazzodpadamizgospo-
darstwa domowego!
Zgodniezdyrektywamieuropejskimiw
sprawiezużytegosprzętuelektrycznegoi
elektronicznego oraz baterii i akumulato-
róworazzużytychbateriiiakumulatorów,
atakżedostosowaniemichdoprawa
krajowego,zużyteurządzeniaelektryczne,
baterieiakumulatory,należyskładować
osobnoiprzekazywaćdozakładurecy-
klingudziałającegozgodniezprzepisami
dotyczącymiochronyśrodowiska.
Przeznaczenie
Narzędziesłużydomieszaniamateriałówściennychitp.
(zwyjątkiemmateriałówłatwopalnych).
Hałas
TypowyrównoważnypoziomdźwiękuAokreślonyw
oparciuonormęEN60745-2-1:
Model DUT130
Poziomciśnieniaakustycznego(LpA): 74 dB(A)
Niepewność(K):3dB(A)
Model DUT131
Poziomciśnieniaakustycznego(LpA): 74 dB(A)
Niepewność(K):3dB(A)
Poziomhałasupodczaspracymożeprzekraczać80dB(A).
WSKAZÓWKA:Deklarowanawartośćemisjihałasu
zostałazmierzonazgodniezestandardowąmetodą
testowąimożnająwykorzystaćdoporównywania
narzędzi.
WSKAZÓWKA:Deklarowanąwartośćemisjihałasu
możnatakżewykorzystaćwewstępnejocenie
narażenia.

12 POLSKI
OSTRZEŻENIE: Nosić ochronniki słuchu.
OSTRZEŻENIE: Poziom hałasu wytwa-
rzanego podczas rzeczywistego użytkowania
elektronarzędzia może się różnić od wartości
deklarowanej w zależności od sposobu użytko-
wania narzędzia, a w szczególności od rodzaju
obrabianego elementu.
OSTRZEŻENIE: W oparciu o szacowane
narażenie w rzeczywistych warunkach użytkowa-
nia należy określić środki bezpieczeństwa w celu
zapewnienia ochrony operatora (uwzględniając
wszystkie elementy cyklu działania, tj. czas, kiedy
narzędzie jest wyłączone i kiedy pracuje na biegu
jałowym, a także czas, kiedy jest włączone).
Drgania
Całkowitawartośćpoziomudrgań(sumawektoróww3
osiach)określonazgodnieznormąEN60745-2-1:
Model DUT130
Trybpracy:pracabezobciążenia
Emisjadrgań(ah): 2,5 m/s2lubmniej
Niepewność(K):1,5m/s2
Model DUT131
Trybpracy:pracabezobciążenia
Emisjadrgań(ah): 2,5 m/s2lubmniej
Niepewność(K):1,5m/s2
WSKAZÓWKA:Deklarowanawartośćpoziomu
drgańzostałazmierzonazgodniezestandardową
metodątestowąimożnająwykorzystaćdoporówny-
wanianarzędzi.
WSKAZÓWKA:Deklarowanąwartośćpoziomu
drgańmożnatakżewykorzystaćwewstępnejocenie
narażenia.
OSTRZEŻENIE: Drgania wytwarzane pod-
czas rzeczywistego użytkowania elektronarzędzia
mogą się różnić od wartości deklarowanej w
zależności od sposobu użytkowania narzędzia,
a w szczególności od rodzaju obrabianego
elementu.
OSTRZEŻENIE: W oparciu o szacowane
narażenie w rzeczywistych warunkach użytkowa-
nia należy określić środki bezpieczeństwa w celu
zapewnienia ochrony operatora (uwzględniając
wszystkie elementy cyklu działania, tj. czas, kiedy
narzędzie jest wyłączone i kiedy pracuje na biegu
jałowym, a także czas, kiedy jest włączone).
Deklaracja zgodności WE
Dotyczy tylko krajów europejskich
DeklaracjazgodnościWEjestdołączonajakozałącznik
Adoniniejszejinstrukcjiobsługi.
OSTRZEŻENIA DOTYCZĄCE
BEZPIECZEŃSTWA
Ogólne zasady bezpiecznej
eksploatacji elektronarzędzi
OSTRZEŻENIE: Należy zapoznać się z
ostrzeżeniami dotyczącymi bezpieczeństwa,
instrukcjami, ilustracjami i danymi technicz-
nymi dołączonymi do tego elektronarzędzia.
Niezastosowaniesiędopodanychponiżejinstrukcji
możeprowadzićdoporażeniaprądem,pożarui/lub
poważnychobrażeńciała.
Wszystkie ostrzeżenia i instruk-
cje należy zachować do wykorzy-
stania w przyszłości.
Pojęcie„elektronarzędzie",występującewwymienio-
nychtuostrzeżeniach,odnosisiędoelektronarzędzia
zasilanegozsiecielektrycznej(zprzewodemzasilają-
cym)lubdoelektronarzędziaakumulatorowego(bez
przewoduzasilającego).
Ostrzeżenia dotyczące bezpieczeństwa
dla mieszarki akumulatorowej
1. Trzymać narzędzie obiema rękami za prze-
znaczone do tego celu uchwyty. Utrata kontroli
możespowodowaćobrażeniaciała.
2. Podczas mieszania materiałów łatwopalnych
należy zadbać o odpowiednią wentylację, aby
zapobiec powstaniu atmosfery wybuchowej.
Powstałeoparymogądostaćsiędodrógodde-
chowychlubzapalićsięodgenerowanychprzez
elektronarzędzieiskier.
3. Nie mieszać produktów spożywczych.
Elektronarzędziaorazichakcesorianiesąprze-
znaczonedokontaktuzżywnością.
4. Należy zadbać o to, aby pojemnik do mie-
szania był ustawiony w sposób stabilny i
odpowiednio zabezpieczony. Nieodpowiednio
zabezpieczonypojemnikmożesięnieoczekiwanie
poruszyć.
5. Należy stosować się do zaleceń oraz ostrzeżeń
dotyczących mieszanych materiałów. Mieszane
materiałymogąbyćszkodliwe.
6. Podczas mieszania nie wkładać do pojemnika
rąk ani żadnych przedmiotów.Kontaktzwirni-
kiemmieszającymmożespowodowaćpoważne
obrażeniaciała.
7. Uruchamiać i zatrzymywać narzędzie wyłącz-
nie wewnątrz pojemnika do mieszania. Wirnik
mieszającymożesięwygiąćlubzacząćsięobra-
caćwsposóbniekontrolowany.
8. Należy uważać, aby obudowa elektronarzędzia
nie została ochlapana płynem.Jeślidownętrza
elektronarzędziadostaniesiępłyn,możeonspo-
wodowaćuszkodzenienarzędzia.
9. Jeśli narzędzie wyposażone jest w uchwyty
dodatkowe, należy ich używać. Utrata kontroli
możespowodowaćobrażeniaciała.

13 POLSKI
10. Trzymać elektronarzędzie za izolowane
powierzchnie rękojeści podczas wykonywa-
nia prac, przy których osprzęt tnący mógłby
dotknąć niewidocznej instalacji elektrycznej.
Zetknięcieosprzętuzprzewodemelektrycznym
znajdującymsiępodnapięciemmożespowodo-
wać,żeodsłonięteelementymetaloweelektrona-
rzędziarównieżznajdąsiępodnapięciem,grożąc
porażeniemoperatoraprądemelektrycznym.
11.
Podczas pracy należy zadbać o stabilne oparcie
dla nóg. W przypadku pracy na wysokości upew-
nić się, że poniżej nie znajdują się żadne osoby.
12. Narzędzie należy trzymać mocno i pewnie.
13. Trzymać ręce z dala od części obrotowych.
14. Nie pozostawiać narzędzia włączonego.
Włączone narzędzie należy zawsze trzymać.
15.
Niektóre materiały zawierają substancje che-
miczne, które mogą być toksyczne. Unikać
wdychania pyłu i kontaktu pyłu ze skórą. Należy
stosować się do ostrzeżeń dotyczących bezpie-
czeństwa wydanych przez dostawcę materiału.
16. Przed rozpoczęciem mieszania pojemnik umie-
ścić na płaskiej i stabilnej powierzchni.
ZACHOWAĆ NINIEJSZĄ
INSTRUKCJĘ.
OSTRZEŻENIE: NIE WOLNO pozwolić,
aby wygoda lub rutyna (nabyta w wyniku wielo-
krotnego używania urządzenia) zastąpiły ścisłe
przestrzeganie zasad bezpieczeństwa obsługi.
NIEWŁAŚCIWE UŻYTKOWANIE narzędzia lub
niestosowanie się do zasad bezpieczeństwa
podanych w niniejszej instrukcji obsługi może
prowadzić do poważnych obrażeń ciała.
Ważne zasady bezpieczeństwa
dotyczące akumulatora
1.
Przed użyciem akumulatora zapoznać się ze
wszystkimi instrukcjami i znakami ostrzegaw-
czymi na (1) ładowarce, (2) akumulatorze i (3)
produkcie, w którym będzie używany akumulator.
2. Akumulatora nie wolno rozbierać.
3. Jeśli czas działania uległ znacznemu skróce-
niu, należy natychmiast przerwać pracę. Może
bowiem dojść do przegrzania, ewentualnych
poparzeń, a nawet eksplozji.
4. W przypadku przedostania się elektrolitu do
oczu, przemyć je czystą wodą i niezwłocznie
uzyskać pomoc lekarską. Może on bowiem
spowodować utratę wzroku.
5. Nie doprowadzać do zwarcia akumulatora:
(1) Nie dotykać styków materiałami przewo-
dzącymi prąd.
(2) Unikać przechowywania akumulatora w
pojemniku z metalowymi przedmiotami,
takimi jak gwoździe, monety itp.
(3) Chronić akumulator przed deszczem lub
wodą.
Zwarcie prowadzi do przepływu prądu elek-
trycznego o dużym natężeniu i przegrzania
akumulatora, co w konsekwencji może grozić
poparzeniami a nawet awarią urządzenia.
6. Narzędzia i akumulatora nie wolno przecho-
wywać w miejscach, w których temperatura
osiąga bądź przekracza 50°C (122°F).
7. Akumulatorów nie wolno spalać, również tych
poważnie uszkodzonych lub całkowicie zuży-
tych. Akumulator może eksplodować w ogniu.
8. Chronić akumulator przed upadkiem i
uderzeniami.
9. Nie wolno używać uszkodzonego akumulatora.
10. Stanowiące wyposażenie akumulatory lito-
wo-jonowe podlegają przepisom dotyczącym
produktów niebezpiecznych.
Napotrzebytransportukomercyjnego,np.świad-
czonegoprzezrmytrzecieczyspedycyjne,
należyprzestrzegaćspecjalnychwymagańw
zakresiepakowaniaioznaczaniaetykietami.
Przygotowanieproduktudowysyłkiwymaga
skonsultowaniasięzespecjalistąds.materiałów
niebezpiecznych.Należytakżeprzestrzegać
przepisówkrajowych,któremogąbyćbardziej
szczegółowe.
Zakleićtaśmąlubzaślepićotwartestykiakumula-
toraorazzabezpieczyćgo,abyniemógłsięprze-
suwaćwopakowaniu.
11. Postępować zgodnie z przepisami lokalnymi
dotyczącymi usuwania akumulatorów.
12. Używać akumulatorów tylko z produktami
określonymi przez rmę Makita. Zastosowanie
akumulatorówwniezgodnychproduktachmoże
spowodowaćpożar,przegrzanie,wybuchlub
wyciekelektrolitu.
ZACHOWAĆ NINIEJSZE
INSTRUKCJE.
PRZESTROGA: Używać wyłącznie oryginal-
nych akumulatorów rmy Makita.Używanienie-
oryginalnychakumulatorówrminnychniżMakitalub
akumulatorów,którezostałyzmodykowane,może
spowodowaćwybuchakumulatoraipożar,obrażenia
ciałaorazzniszczeniemienia.Stanowitorównież
naruszeniewarunkówgwarancjirmyMakitadoty-
czącychnarzędziaiładowarki.
Wskazówki dotyczące zacho-
wania maksymalnej trwałości
akumulatora
1. Akumulator należy naładować zanim zostanie
do końca rozładowany. Po zauważeniu spadek
mocy narzędzia należy przerwać pracę i nała-
dować akumulator.
2. Nie wolno ładować powtórnie w pełni nałado-
wanego akumulatora. Przeładowanie akumula-
tora skraca jego trwałość.
3. Akumulator należy ładować w temperaturze
pokojowej w przedziale 10–40°C (50–104°F). W
przypadku gorącego akumulatora przed przy-
stąpieniem do ładowania należy poczekać, aż
ostygnie.
4. Akumulatory niklowo-wodorkowe należy nała-
dować po okresie długiego nieużytkowania
(dłuższego niż sześć miesięcy).

14 POLSKI
OPIS DZIAŁANIA
PRZESTROGA: Przed przystąpieniem do regu-
lacji lub przeglądu narzędzia upewnić się, że jest
ono wyłączone, a akumulator został wyjęty.
Wkładanie i wyjmowanie
akumulatora
PRZESTROGA: Przed włożeniem lub wyjęciem
akumulatora należy zawsze wyłączyć narzędzie.
PRZESTROGA: Podczas wkładania lub wyjmo-
wania akumulatora należy mocno trzymać narzę-
dzie i akumulator.Wprzeciwnymraziemogąsięone
wyślizgnąćzrąk,powodującuszkodzenienarzędzia
lubakumulatoraiobrażeniaciała.
PRZESTROGA: Nie używać narzędzia z adap-
terem akumulatora.Popodłączeniudonarzędzia
adapteraakumulatoraniebędziemożnazamknąć
pokrywyakumulatora.Używanienarzędziazotwartą
pokrywąakumulatoramożespowodowaćobrażenia
ciała.
Otwórzpokrywęakumulatora,naciskającznajdującysię
naniejprzycisk.
►Rys.1: 1.Przycisk2.Pokrywaakumulatora
Abywyjąćakumulator,przesuńprzyciskznajdującysię
wprzedniejjegoczęściiwysuńakumulator.
►Rys.2: 1.Czerwonywskaźnik2.Przycisk
3. Akumulator
Abywłożyćakumulator,wyrównajwystępnaakumu-
latorzezrowkiemwobudowieiwsuńgonaswoje
miejsce.Akumulatornależywsunąćdooporu,ażsię
zatrzaśnienamiejscu,cojestsygnalizowanedelikat-
nymkliknięciem.Jeśliwgórnejczęściprzyciskujest
widocznyczerwonywskaźnik,akumulatorniezostał
całkowiciezatrzaśnięty.
Powłożeniuakumulatorazamknijizabezpieczpokrywę
akumulatora.
PRZESTROGA: Akumulator należy włożyć
do końca, tak aby czerwony wskaźnik nie był
widoczny.Wprzeciwnymraziemożeprzypadkowo
wypaśćznarzędzia,powodującobrażeniaoperatora
lubosóbpostronnych.
PRZESTROGA: Nie wkładać akumulatora na
siłę.Jeśliakumulatorniedajesięswobodniewsunąć,
oznaczato,żezostałwłożonynieprawidłowo.
Wskazanie stanu naładowania
akumulatora
Tylko w przypadku akumulatorów ze wskaźnikiem
►Rys.3: 1.Lampkiwskaźnika2.Przyciskkontrolny
Nacisnąćprzyciskkontrolnynaakumulatorzewcelu
wyświetleniastanunaładowaniaakumulatora.Lampki
wskaźnikazaświecąsięprzezkilkasekund.
Lampki wskaźnika Pozostała
energia
akumulatora
Świeci się Wyłączony Miga
75–100%
50–75%
25–50%
0–25%
Naładować
akumulator.
Akumulator
możenie
działać
poprawnie.
WSKAZÓWKA:Zależnieodwarunkówużytkowania
itemperaturyotoczenia,wskazywanypoziommoże
nieznaczniesięróżnićodrzeczywistegostanunała-
dowania akumulatora.
Układ zabezpieczenia narzędzia/
akumulatora
Narzędziejestwyposażonewukładzabezpieczenianarzędzia/
akumulatora.Układautomatycznieodcinazasilaniesilnikaw
celuwydłużeniatrwałościnarzędziaiakumulatora.Narzędzie
zostanieautomatyczniezatrzymanepodczaspracywnastępują-
cychsytuacjachzwiązanychznarzędziemlubakumulatorem:
Zabezpieczenie przed przeciążeniem
Wprzypadkuobsługinarzędzialubakumulatorawsposób
powodującynadmierniewysokipobórprądunarzędziezosta-
nieautomatyczniezatrzymanebezżadnegoostrzeżenia.W
takiejsytuacjinależywyłączyćnarzędzieizaprzestaćwyko-
nywaniaczynnościpowodującejjegoprzeciążenie.Następnie
należywłączyćnarzędziewceluponownegouruchomienia.
Zabezpieczenie przed przegrzaniem
Wprzypadkuprzegrzanianarzędzialubakumulatoranarzędzie
wyłączysięautomatycznie.Wtakiejsytuacjinależyodczekać,aż
narzędzieostygnieprzedjegoponownymwłączeniem.
Zabezpieczenie przed nadmiernym
rozładowaniem
Gdystannaładowaniaakumulatorastaniesięzbytniski,
narzędziezostanieautomatyczniezatrzymane.Wtakiejsytu-
acjinależywyjąćakumulatorznarzędziainaładowaćgo.

15 POLSKI
Działanie przełącznika
PRZESTROGA: Przed włożeniem akumulatora
do narzędzia należy zawsze sprawdzić, czy spust
przełącznika działa prawidłowo i czy powraca do
położenia wyłączenia po jego zwolnieniu.
PRZESTROGA: W celu ułatwienia obsługi i dla
wygody operatora podczas długotrwałej pracy z
użyciem narzędzia przełącznik można zablokować
w pozycji włączonej. Podczas pracy z przełączni-
kiem zablokowanym w pozycji włączonej należy
zachować ostrożność i pewnie trzymać narzędzie.
PRZESTROGA: Nie wkładać akumulatora z
wciśniętym przyciskiem blokady.
PRZESTROGA: Jeżeli narzędzie nie będzie
używane, należy wcisnąć przycisk blokady spustu
od strony , aby zablokować spust przełącznika
w pozycji wyłączenia.
►Rys.4: 1.Przyciskblokadyspustu
►Rys.5: 1.Spustprzełącznika2.Przyciskblokady
3.Przyciskblokadyspustu
Narzędziezostałowyposażonewprzyciskblokady
spustu,któryzapobiegaprzypadkowemupociągnięciu
zaspustprzełącznika.Abyuruchomićnarzędzie,należy
wcisnąćprzyciskblokadyspustuodstronyA( ) i
pociągnąćspustprzełącznika.Prędkośćnarzędzia
zwiększasięwrazzezwiększaniemnaciskunaspust
przełącznika.Wceluzatrzymaniaurządzeniawystarczy
zwolnićspustprzełącznika.Popracynależywcisnąć
przyciskblokadyspustuodstronyB( ).
Abywłączyćtrybpracyciągłej,należywcisnąćprzycisk
blokadyspustypodczaspociąganiazaspustprze-
łącznika,anastępniezwolnićspustprzełącznika.Aby
zatrzymaćnarzędzie,należypociągnąćdooporuspust
przełącznika,anastępniezwolnićgo.
Zmiana prędkości
UWAGA: Przełącznika zmiany prędkości można
użyć tylko po całkowitym zatrzymaniu narzędzia.
Zmianaprędkościprzedzatrzymaniemsięnarzędzia
grozijegouszkodzeniem.
UWAGA: Przełącznik zmiany prędkości należy
zawsze ustawiać starannie w wybranej pozycji. W
przypadkuuruchomienianarzędziaprzyprzełączniku
zmianyprędkościustawionymwpołowiemiędzy
pozycją1a2możedojśćdouszkodzenianarzędzia.
UWAGA: Jeśli podczas pracy w trybie wysokiej
prędkości nastąpi znaczny spadek prędkości
obrotowej, należy zatrzymać narzędzie i przełą-
czyć na tryb niskiej prędkości.Wprzeciwnymrazie
możedojśćdoprzeciążeniasilnika,comożespowo-
dowaćusterkęlubpożar.
Zapomocąprzełącznikazmianyprędkościmożna
wybraćjedenzdwóchzakresówprędkościobrotowej.
Abyzmienićprędkość,należyobrócićprzełącznik
zmianyprędkościtak,abywskaźnikwskazywałpozycję
1oznaczającąniskąprędkośćalbopozycję2oznacza-
jącąwysokąprędkość.
►Rys.6: 1.Wskaźnik2.Przełącznikzmiany
prędkości
Funkcja zapobiegająca
przypadkowemu uruchomieniu
Jeśliakumulatorzostaniezamontowanypodczaspocią-
ganiazaspustprzełącznikalubzablokowaniaspustu
przełącznika,narzędzienieuruchomisię.Abyurucho-
mićnarzędzie,należyzwolnićspustprzełącznika,a
następniepociągnąćzaniego.
Funkcja regulacji elektronicznej
Narzędziejestwyposażonewfunkcjeregulacjielektro-
nicznejułatwiającejegoobsługę.
• Funkcjałagodnegouruchamiania
Funkcjałagodnegouruchamianiaminimalizuje
wstrząspowstającypodczasnormalnegourucha-
miania,dziękiczemurozruchnarzędziajestpłynny.
MONTAŻ
PRZESTROGA: Przed przystąpieniem do prac
konserwacyjnych przy narzędziu upewnić się,
że jest ono wyłączone, a akumulator został wyjęty.
Montaż pokrywy przedniej i uchwytu
bocznego
PRZESTROGA: Należy dobrze dokręcić uchwyt
boczny.Wprzeciwnymraziepokrywaprzedniamoże
spaśćispowodowaćobrażenia.
►Rys.7: 1.Pokrywaprzednia2.Uchwytboczny
Założyćnanarzędziepokrywęprzedniąimocnoprzy-
kręcićuchwytbocznydonarzędzia.
Możnagozamontowaćzjednejlubzdrugiejstrony
narzędzia.
Montaż drążka
Osprzęt dodatkowy
Model DUT130
1. Przykręcićdrążekdouchwytudrążka.
►Rys.8: 1.Drążek2.Uchwytdrążka
2. Przykręcićdrążekkluczem19,trzymającuchwyt
drążkadrugimkluczem19.
►Rys.9: 1.Drążek2.Uchwytdrążka
Model DUT131
1. Umieścićdrążekjaknajgłębiejwuchwycie.
►Rys.10: 1.Drążek2.Uchwyt
2. Przykręcićuchwytręcznie,anastępniewkażdym
ztrzechotworówumieścićkluczykdouchwytuwiertar-
skiegoidokręcićwprawo.Kluczyknależydokręcićw
takimsamymzakresiewkażdymztrzechotworów.
►Rys.11: 1.Kluczykdouchwytuwiertarskiego
2.Uchwyt
Abywyjąćdrążek,należywjednymzotworówumieścić
kluczykdouchwytuwiertarskiegoiprzekręcićgow
lewo,anastępniepoluzowaćuchwytręką.

16 POLSKI
Montaż wirnika mieszającego
Osprzęt dodatkowy
Umieścićwirnikmieszającynakońcudrążkaizamoco-
waćgośrubąsześciokątną.
►Rys.12: 1.Wirnikmieszający2.Drążek3.Śruba
imbusowa
UWAGA: Podczas montażu wirnika mieszającego
należy upewnić się, że oznaczenie „UP” skiero-
wane jest w stronę narzędzia.
►Rys.13: 1.Symbol
Zaczep
Osprzęt dodatkowy
PRZESTROGA: Przed zawieszeniem narzędzia
za zaczep należy koniecznie wyjąć akumulator.
PRZESTROGA: Nie wolno wieszać narzę-
dzia wysoko lub na potencjalnie niestabilnej
powierzchni.
►Rys.14: 1. Rowek 2. Zaczep 3.Wkręt
Zaczepsłużydowygodnego,tymczasowegozawie-
szanianarzędzia.Możnagozamontowaćzjednejlubz
drugiejstronynarzędzia.
Abyzamontowaćzaczep,należywsunąćgowrowek
wobudowienarzędziaznajdującysięzobustron,a
następnieprzykręcićgowkrętem.Abywymontować
zaczep,należyodkręcićwkrętiwyjąćzaczep.
Zakładanie i zdejmowanie uchwytu
drążka
Osprzęt dodatkowy
Model DUT131
1. Wuchwycieumieścićkluczimbusowyipoluzować
uchwytkluczemimbusowym,jednocześnietrzymając
wrzeciono drugim kluczem.
►Rys.15: 1.Kluczimbusowy2.Uchwyt3.Klucz
2. Przykręcićuchwytdrążkakluczem19,jednocze-
śnietrzymającwrzecionodrugimkluczem19.
►Rys.16: 1.Uchwytdrążka2.Klucz
Abyzdjąćuchwytdrążka,należywykonaćprocedurę
zakładaniawodwrotnejkolejności.
OBSŁUGA
PRZESTROGA: Nie mieszać materiałów łatwo-
palnych ani nie uruchamiać narzędzia w pobliżu
materiałów łatwopalnych, takich jak farba z dodat-
kiem rozpuszczalnika.Niezastosowaniesiędotego
zaleceniamożespowodowaćobrażeniaciała.
PRZESTROGA: Nie mieszać materiałów o dużej
lepkości, takich jak zaprawa lub klej, w trybie
wysokiej prędkości.Grozitoutratąkontrolinad
narzędziemimożeskutkowaćobrażeniamiciała.
UWAGA: Kiedy podczas mieszania wirnik mie-
szający znajduje się poza mieszanym materiałem,
należy uważać, aby nie rozchlapywać materiału.
1. Wybórniskiejlubwysokiejprędkościnależydosto-
sowaćdomieszanegomateriału.
2. Mocnozłapaćjednąrękązauchwyttylnyidrugą
rękązauchwytboczny,zanurzyćwirnikmieszającycał-
kowiciewmaterialeiupewniwszysię,żemiejscepracy
jestodpowiedniozabezpieczone,uruchomićnarzędzie.
3. Podczasmieszaniaporuszaćwirnikiemmiesza-
jącymwgóręiwdół,takabycałośćmateriałubyła
dobrzewymieszana.
4. Poskończeniumieszaniawyłączyćnarzędziei,
upewniwszysię,żewirnikmieszającycałkowiciesię
zatrzymał,wyjąćgozpojemnikadomieszania.
KONSERWACJA
PRZESTROGA: Przed przystąpieniem do prze-
glądu narzędzia lub jego konserwacji upewnić się,
że jest ono wyłączone, a akumulator wyjęty.
UWAGA: Nie stosować benzyny, rozpuszczalni-
ków, alkoholu itp. środków. Mogą one powodo-
wać odbarwienia, odkształcenia lub pęknięcia.
W celu zachowania odpowiedniego poziomu
BEZPIECZEŃSTWAiNIEZAWODNOŚCIproduktu
wszelkienaprawyiróżnegorodzajupracekonserwa-
cyjnelubregulacjepowinnybyćprzeprowadzaneprzez
autoryzowanylubfabrycznypunktserwisowynarzędzi
Makita,zawszezużyciemoryginalnychczęścizamien-
nychMakita.
AKCESORIA
OPCJONALNE
PRZESTROGA: Zaleca się stosowanie wymie-
nionych akcesoriów i przystawek razem z narzę-
dziem Makita opisanym w niniejszej instrukcji.
Stosowanieinnychakcesoriówlubprzystawek
możebyćprzyczynąobrażeńciała.Akcesorialub
przystawkinależywykorzystywaćtylkozgodniezich
przeznaczeniem.
Wraziepotrzebywszelkiejpomocyiszczegółowych
informacjinatematniniejszychakcesoriówudzielą
PaństwulokalnepunktyserwisoweMakita.
• Wirnikmieszający
• Drążek
• Uchwytdrążka
• Zaczep
• OryginalnyakumulatoriładowarkarmyMakita
WSKAZÓWKA:Niektórepozycjeznajdującesięna
liściemogąbyćdołączonedopakietunarzędziowego
jakoakcesoriastandardowe.Mogątobyćróżne
pozycje,wzależnościodkraju.

17 MAGYAR
MAGYAR (Eredeti utasítások)
RÉSZLETES LEÍRÁS
Típus: DUT130 DUT131
Üresjáratifordulatszám Magasfordulatszám 0 - 1 300 min-1
Alacsonyfordulatszám 0 - 350 min-1
Keverőlapátmaximálisátmérője 165 mm
Teljeshossz(tengelyéskeverőlapátnélkül) 320 mm 307 mm
Névlegesfeszültség 18V,egyenáram
Nettótömeg 2,5 - 2,8 kg 2,7 - 3,0 kg
• Folyamatoskutató-ésfejlesztőprogramunkeredményekéntazittfelsorolttulajdonságokgyelmeztetésnélkül
megváltozhatnak.
• Aműszakiadatokésazakkumulátorországonkéntváltozhatnak.
• Asúlyafelszerelttartozékoktólfüggőenváltozhat,azakkumulátortisbeleértve.AzEPTA01/2014eljárás
szerintmeghatározottlegnehezebb,illetvelegkönnyebbkombinációatáblázatbanlátható.
Alkalmazható akkumulátorok és töltők
Akkumulátor BL1815N / BL1820 / BL1820B / BL1830 / BL1830B / BL1840 /
BL1840B / BL1850 / BL1850B / BL1860B
Töltő DC18RC / DC18RD / DC18RE / DC18SD / DC18SE / DC18SF
• Lakóhelyétőlfüggőenelőfordulhat,hogyafentfelsoroltakkumulátorokéstöltőknemérhetőkel.
FIGYELMEZTETÉS: Csak a fentiekben felsorolt akkumulátorokat és töltőket használja.Bármilyenmás
akkumulátorvagytöltőhasználatasérüléseketés/vagytüzetokozhat.
Szimbólumok
Akövetkezőkbenaberendezésenhasználtjelképek
láthatók.Aszerszámhasználataelőttbizonyosodjon
megarrólhogyhelyesenértelmeziajelentésüket.
Olvassaelahasználatiutasítást.
Nehasználjaaszerszámotesőben.
Netisztítsaaszerszámotvízzel.
Ni-MH
Li-ion
CsakEU-tagállamokszámára
Azelektromosberendezéseketésakkumu-
látorukatnedobjaaháztartásiszemétbe!
AzEurópaiUnióhasználtelektromos
éselektronikusberendezésekrevonat-
kozóirányelvei,illetveazelemekrőlés
akkumulátorokról,valamintahulladé-
kelemekrőlésakkumulátorokrólszóló
irányelv,továbbáazoknakanemzeti
jogbavalóátültetéseszerintazelhasznált
elektromosberendezéseket,elemeketés
akkumulátorokatkülönkellgyűjteni,és
környezetbarátmódonkellgondoskodni
újrahasznosításukról.
Rendeltetés
Aszerszámfalanyagok(kivévegyúlékonyanyagok),
stb.keveréséreszolgál.
Zaj
AtipikusA-súlyozásúzajszint,aEN60745-2-1szerint
meghatározva:
DUT130 típus
Hangnyomásszint(LpA): 74 dB(A)
Bizonytalanság(K):3dB(A)
DUT131 típus
Hangnyomásszint(LpA): 74 dB(A)
Bizonytalanság(K):3dB(A)
Azajszintamunkavégzéssoránmeghaladhatjaa80dB(A)
értéket.
MEGJEGYZÉS:Azajkibocsátásértékeaszabványos
vizsgálatieljárásnakmegfelelőenlettmérve,éssegít-
ségévelazelektromoskéziszerszámokösszehason-
líthatókegymással.
MEGJEGYZÉS:Azajkibocsátásértékéneksegítsé-
gévelelőzetesenmegbecsülhetőarezgésnekvaló
kitettségmértéke.

18 MAGYAR
FIGYELMEZTETÉS: Viseljen fülvédőt!
FIGYELMEZTETÉS: A szerszám zajkibocsá-
tása egy adott alkalmazásnál eltérhet a megadott
értéktől a használat módjától, különösen a feldol-
gozott munkadarab fajtájától függően.
FIGYELMEZTETÉS: Határozza meg a kez-
elő védelmét szolgáló munkavédelmi lépéseket,
melyek az adott munkafeltételek melletti vibrációs
hatás becsült mértékén alapulnak (gyelembe
véve a munkaciklus elemeit, mint például a gép
leállításának és üresjáratának mennyiségét az
elindítások száma mellett).
Vibráció
Avibrációteljesértéke(háromtengelyűvektorösszeg)
azEN60745-2-1szerintmeghatározva:
DUT130 típus
Üzemmód:töltésnélkülihasználat
Rezgéskibocsátás(ah): 2,5 m/s2vagykisebb
Bizonytalanság(K):1,5m/s2
DUT131 típus
Üzemmód:töltésnélkülihasználat
Rezgéskibocsátás(ah): 2,5 m/s2vagykisebb
Bizonytalanság(K):1,5m/s2
MEGJEGYZÉS:Arezgésteljesértékeaszabványos
vizsgálatieljárásnakmegfelelőenlettmérve,éssegít-
ségévelazelektromoskéziszerszámokösszehason-
líthatókegymással.
MEGJEGYZÉS:Arezgésteljesértékéneksegítsé-
gévelelőzetesenmegbecsülhetőarezgésnekvaló
kitettségmértéke.
FIGYELMEZTETÉS: A szerszám rezgéskibo-
csátása egy adott alkalmazásnál eltérhet a meg-
adott értéktől a használat módjától, különösen a
feldolgozott munkadarab fajtájától függően.
FIGYELMEZTETÉS: Határozza meg a kez-
elő védelmét szolgáló munkavédelmi lépéseket,
melyek az adott munkafeltételek melletti vibrációs
hatás becsült mértékén alapulnak (gyelembe
véve a munkaciklus elemeit, mint például a gép
leállításának és üresjáratának mennyiségét az
elindítások száma mellett).
EK Megfelelőségi nyilatkozat
Csak európai országokra vonatkozóan
AzEK-megfelelőséginyilatkozatazútmutató„A”mel-
lékletébentalálható.
BIZTONSÁGI
FIGYELMEZTETÉS
A szerszámgépekre vonatkozó
általános biztonsági
gyelmeztetések
FIGYELMEZTETÉS: Olvassa el a szerszám-
géphez mellékelt összes biztonsági gyelmezte-
tést, utasítást, illusztrációt és a műszaki adatokat.
Akövetkezőkbenleírtutasításokgyelmenkívül
hagyásaelektromosáramütést,tüzetés/vagysúlyos
sérülésteredményezhet.
Őrizzen meg minden gyelmez-
tetést és utasítást a későbbi tájé-
kozódás érdekében.
Agyelmeztetésekbenszereplő"szerszámgép"kife-
jezésazÖnhálózatról(vezetékes)vagyakkumulá-
torról(vezetéknélküli)működtetettszerszámgépére
vonatkozik.
Az akkumulátoros keverőre
vonatkozó biztonsági
gyelmeztetések
1. Tartsa a szerszámot mindkét kezével a
fogantyúinál fogva.Azirányításelvesztése
személyisérüléstokozhat.
2. Gyúlékony anyagok keverésekor biztosítson
megfelelő szellőzést, hogy elkerülje a veszé-
lyes légkört.Akeletkezőgőzöketbelélegezheti,
vagymeggyújthatjákazokatazelektromosszer-
számáltalkeltettszikrák.
3. Ne keverjen ételt.Azelektromosszerszámokat
éstartozékaikatnemételkezeléséretervezték.
4. Biztosítsa, hogy a keverőtartály stabil és
biztonságos pozícióba legyen helyezve. A
nemmegfelelőenrögzítetttartályváratlanul
elmozdulhat.
5. Kövesse a keverendő anyagokra vonatkozó
utasításokat és gyelmeztetéseket. A keve-
rendőanyagokártalmasaklehetnek.
6. Keverés közben ne nyúljon kézzel a keverő-
tartályba, és ne dugjon bele más tárgyakat. A
keverőlapátérintésesúlyosszemélyisérüléshez
vezethet.
7. Indítsa el, és csak a szerszámot merítse a
keverőtartályba.Akeverőlapátellenőrizetlen
módonhajolhatmegvagycsavarodhat.
8. Gondoskodjon róla, hogy semmilyen folyadék
ne loccsanjon az elektromos szerszámgép
házára.Azelektromosszerszámbaszivárgó
folyadékkártokozhataszerszámban.
9. Használja a szerszámhoz esetleg mellékelt
kisegítő fogantyúkat.Azirányításelvesztése
személyisérüléstokozhat.

19 MAGYAR
10. A szerszámgépet a szigetelt markolófelülete-
inél fogja, ha olyan műveletet végez, amikor
a vágóeszköz rejtett vezetékkel érintkezhet.
Áramalattlévővezetékekkelvalóérintkezéskora
szerszámfémalkatrészeiisáramalákerülhetnek,
ésmegrázhatjákakezelőt.
11. Mindig stabil helyzetben dolgozzon. A szer-
szám magasban történő használatkor győződ-
jön meg arról, hogy nem tartózkodik-e valaki
odalent.
12. Tartsa stabilan a szerszámot.
13. Ne nyúljon a forgó részekhez.
14. Ne hagyja a működő szerszámot felügyelet
nélkül. Csak olyankor működtesse a szerszá-
mot, amikor tartja.
15. Egyes anyagok mérgező vegyületeket tar-
talmazhatnak. Gondoskodjon a por belé-
legzése elleni és érintés elleni védelemről.
Kövesse az anyag szállítójának biztonsági
gyelmeztetéseit.
16. A keverési művelet végzésekor helyezze a
keverőtartályt sima és stabil felületre.
ŐRIZZE MEG EZEKET AZ
UTASÍTÁSOKAT.
FIGYELMEZTETÉS: NE HAGYJA, hogy (a
termék többszöri használatából eredő) kényelem
és megszokás váltsa fel a termék biztonsági
előírásainak szigorú betartását. A HELYTELEN
HASZNÁLAT és a használati útmutatóban sze-
replő biztonsági előírások megszegése súlyos
személyi sérülésekhez vezethet.
Fontos biztonsági utasítások az
akkumulátorra vonatkozóan
1. Az akkumulátor használata előtt tanulmá-
nyozza át az akkumulátortöltőn (1), az akkumu-
látoron (2) és az akkumulátorral működtetett
terméken (3) olvasható összes utasítást és
gyelmeztető jelzést.
2. Ne szerelje szét az akkumulátort.
3. Ha a működési idő nagyon lerövidült, azonnal
hagyja abba a használatot. Ez a túlmelegedés,
esetleges égések és akár robbanás veszélyé-
vel is járhat.
4. Ha elektrolit kerül a szemébe, mossa ki azt
tiszta vízzel és azonnal kérjen orvosi segítsé-
get. Ez a látásának elvesztését okozhatja.
5. Ne zárja rövidre az akkumulátort:
(1) Ne érjen az érintkezőkhöz elektromosan
vezető anyagokkal.
(2) Ne tárolja az akkumulátort más fémtár-
gyakkal, mint pl. szegekkel, érmékkel,
stb. egy helyen.
(3) Ne tegye ki az akkumulátort víznek vagy
esőnek.
Az akkumulátor rövidzárlata nagy áramerőssé-
get, túlmelegedést, égéseket, sőt akár meghi-
básodást is okozhat.
6. Ne tárolja a szerszámot vagy az akkumulátort
olyan helyen, ahol a hőmérséklet elérheti vagy
meghaladhatja az 50 °C-ot (122 °F).
7. Ne égesse el az akkumulátort még akkor
sem, ha az komolyan megsérült vagy teljesen
elhasználódott. Az akkumulátor a tűzben
felrobbanhat.
8. Vigyázzon, nehogy leejtse vagy megüsse az
akkumulátort.
9. Ne használjon sérült akkumulátort.
10. A készülékben található lítium-ion akkumuláto-
rokra a veszélyes árukkal kapcsolatos előírá-
sok vonatkoznak.
Atermékpl.harmadikfelek,fuvarozócégekstb.
általtörténőszállításaeseténmindenesetben
tartsaszemelőttacsomagolásonésacímkén
találhatóspeciáliskövetelményeket.
Atermékszállításratörténőfelkészítéseesetén
vegyefelakapcsolatotegyveszélyesanyagokkal
foglalkozószakemberrel.Kérjük,hogyazeset-
legesenszigorúbbnemzetielőírásokatisvegye
gyelembe.
Ragasszaleakiállóérintkezőket,illetveoly
módoncsomagoljabeazakkumulátort,hogyaz
netudjonelmozdulniacsomagolásban.
11. Az akkumulátor ártalmatlanításakor tartsa be a
helyi előírásokat.
12. Az akkumulátorokat csak a Makita által meg-
jelölt termékekhez használja. Ha az akkumu-
látorokatazokkalnemkompatibilistermékekbe
helyezi,aztűzhöz,túlmelegedéshez,robbanás-
hozvagyelektrolitszivárgáshozvezethet.
ŐRIZZE MEG EZEKET AZ
UTASÍTÁSOKAT.
VIGYÁZAT: Csak eredeti Makita akkumuláto-
rokat használjon. A nem eredeti Makita akkumu-
látorokvagymódosítottakkumulátorokhasználata
eseténazakkumulátorfelrobbanhat,amitüzet,
személyisérüléstésanyagikártokozhat.AMakita
szerszámraéstöltőrevonatkozóMakitagaranciátis
érvénytelenítheti.
Tippek az akkumulátor maximá-
lis élettartamának eléréséhez
1. Töltse fel az akkumulátort, mielőtt teljesen
lemerülne. Állítsa le a gépet, és töltse fel az
akkumulátort, ha a gép erejének csökkenését
észleli.
2. Soha ne töltse újra a teljesen feltöltött akku-
mulátort. A túltöltés csökkenti az akkumulátor
élettartamát.
3. Töltse az akkumulátort szobahőmérsékleten,
10 °C - 40 °C (50 °F - 104 °F) között. Töltés előtt
hagyja lehűlni a fölforrósodott akkumulátort.
4. Töltse fel az akkumulátort, ha hosszabb ideje
(több mint hat hónapja) nem használta azt.

20 MAGYAR
A MŰKÖDÉS LEÍRÁSA
VIGYÁZAT: Minden esetben ellenőrizze, hogy
a szerszám ki van kapcsolva és az akkumulátor
eltávolításra került mielőtt beállít vagy ellenőriz
valamilyen funkciót a szerszámon.
Az akkumulátor behelyezése és
eltávolítása
VIGYÁZAT: Mindig kapcsolja ki az eszközt,
mielőtt behelyezi vagy eltávolítja az akkumulátort.
VIGYÁZAT: Az akkumulátor behelyezésekor
vagy eltávolításakor erősen fogja meg a szerszá-
mot és az akkumulátort.Hanemfogjaerősena
szerszámotésazakkumulátort,azokkicsúszhatnaka
kezeiközül,amiaszerszámésazakkumulátorkáro-
sodásához,deakárszemélyisérüléshezisvezethet.
VIGYÁZAT: Ne használja a szerszámot akkumu-
látoradapterrel.Haakkumulátoradaptertcsatlakoz-
tataszerszámhoz,azakkumulátorfedeletnemlehet
lezárni,ésaszerszámhasználatanyitottakkumulá-
torfedéllelsérüléstokozhat.
Nyissakiazakkumulátorfedelet,miközbennyomjaaz
akkumulátorfedélenagombot.
►Ábra1: 1. Gomb 2.Akkumulátorfedél
Azakkumulátoregységkivételéheznyomjabeazakku-
mulátoregységelejéntalálhatógombot,éshúzzalea
gépről.
►Ábra2: 1.Pirosjel2. Gomb 3.Akkumulátor
Azakkumulátorbeszereléséhezillesszeazakkumulá-
tornyelvétaburkolatontalálhatóvájatbaéscsúsztassa
ahelyére.Egészenaddigtoljabe,amígazakkumulátor
egykiskattanássalahelyérenemugrik.Haláthatóa
pirosjelagombfelsőoldalán,akkoragombnemkat-
tantbeteljesen.
Azakkumulátorbehelyezéseutántegyerábiztonságo-
sanazakkumulátorfedelet.
VIGYÁZAT: Mindig tolja be teljesen az akku-
mulátort, amíg a piros jel el nem tűnik. Ha ez nem
történikmeg,akkorazakkumulátorkieshetaszer-
számból,ésÖnnekvagyakörnyezetébenmásnak
sérüléstokozhat.
VIGYÁZAT: Ne erőltesse az akkumulátort behe-
lyezéskor.Haazakkumulátornemcsúszikbeköny-
nyedén,akkornemmegfelelőenlettbehelyezve.
Az akkumulátor töltöttségének
jelzése
Csak állapotjelzős akkumulátorok esetén
►Ábra3: 1.Jelzőlámpák2.Check(ellenőrzés)gomb
Nyomjamegazellenőrzőgombot,hogyazakkumulá-
tortöltöttség-jelzőmegmutassaahátralévőakkumu-
látor-kapacitást.Ekkoratöltöttségiszint-jelzőlámpák
néhánymásodpercrekigyulladnak.
Jelzőlámpák Töltöttségi
szint
Világító
lámpa
KI Villogó
lámpa
75%-tól
100%-ig
50%-tól
75%-ig
25%-tól
50%-ig
0%-tól25%-ig
Töltsefelaz
akkumulátort.
Lehetséges,
hogyaz
akkumulátor
meghibáso-
dott.
MEGJEGYZÉS:Azadottmunkafeltételektőlésakör-
nyezethőmérsékletétőlfüggőenajelzetttöltöttségi
szintnémilegeltérhetaténylegestöltöttségiszinttől.
Szerszám-/akkumulátorvédő rendszer
Agépszerszám-/akkumulátorvédőrendszerrelvan
felszerelve.Arendszerautomatikusankikapcsoljaa
motoráramellátását,ígymegnöveliaszerszámésaz
akkumulátorélettartamát.Agéphasználatközbenauto-
matikusanleáll,haaszerszámvagyazakkumulátora
következőállapotokvalamelyikébekerül:
Túlterhelésvédelem
Haaszerszámotvagyakkumulátortúgyhasználják,
hogyazrendellenesennagyáramotveszfel,akkor
aszerszámmindenfajtajelzésnélkülleáll.Ilyenkor
kapcsoljakiagépet,ésfejezzebeaztaműveletet,
amelyikatúlterheléstokozza.Amunkaújrakezdéséhez
kapcsoljabeagépet.
Túlmelegedés elleni védelem
Haaszerszámvagyazakkumulátortúlmelegedett,a
gépautomatikusanleáll.Ilyenkorhagyjalehűlniaszer-
számotésazakkumulátort,mielőttismétmunkához
látna.
Mélykisütés elleni védelem
Amikorazakkumulátorkapacitásamáralacsony,agép
automatikusanleáll.Ebbenazesetbentávolítsaelaz
akkumulátortaszerszámbóléstöltsefel.
Pagina se încarcă...
Pagina se încarcă...
Pagina se încarcă...
Pagina se încarcă...
Pagina se încarcă...
Pagina se încarcă...
Pagina se încarcă...
Pagina se încarcă...
Pagina se încarcă...
Pagina se încarcă...
Pagina se încarcă...
Pagina se încarcă...
Pagina se încarcă...
Pagina se încarcă...
Pagina se încarcă...
Pagina se încarcă...
Pagina se încarcă...
Pagina se încarcă...
Pagina se încarcă...
Pagina se încarcă...
Pagina se încarcă...
Pagina se încarcă...
Pagina se încarcă...
Pagina se încarcă...
Pagina se încarcă...
Pagina se încarcă...
Pagina se încarcă...
Pagina se încarcă...
Pagina se încarcă...
Pagina se încarcă...
Pagina se încarcă...
Pagina se încarcă...
-
 1
1
-
 2
2
-
 3
3
-
 4
4
-
 5
5
-
 6
6
-
 7
7
-
 8
8
-
 9
9
-
 10
10
-
 11
11
-
 12
12
-
 13
13
-
 14
14
-
 15
15
-
 16
16
-
 17
17
-
 18
18
-
 19
19
-
 20
20
-
 21
21
-
 22
22
-
 23
23
-
 24
24
-
 25
25
-
 26
26
-
 27
27
-
 28
28
-
 29
29
-
 30
30
-
 31
31
-
 32
32
-
 33
33
-
 34
34
-
 35
35
-
 36
36
-
 37
37
-
 38
38
-
 39
39
-
 40
40
-
 41
41
-
 42
42
-
 43
43
-
 44
44
-
 45
45
-
 46
46
-
 47
47
-
 48
48
-
 49
49
-
 50
50
-
 51
51
-
 52
52


Makita DUT130 Manual de utilizare
- Categorie
- Burghiu electric
- Tip
- Manual de utilizare
în alte limbi
- slovenčina: Makita DUT130 Používateľská príručka
- polski: Makita DUT130 Instrukcja obsługi
Lucrări înrudite
-
Makita UT001G Cordless Mixer Manual de utilizare
-
-
Makita DHS680 Manual de utilizare
-
Makita HS003G Manual de utilizare
-
Makita DHS782 Manual de utilizare
-
Makita DLS714 Manual de utilizare
-
-
Makita DG001G Manual de utilizare
-
Makita VR001G Manual de utilizare