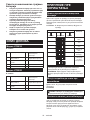
Makita UT001G Cordless Mixer Manual de utilizare
- Tip
- Manual de utilizare

UT001G
UT002G
EN Cordless Mixer INSTRUCTION MANUAL 6
SL Brezžični mešalnik NAVODILA ZA UPORABO 13
SQ Përzierës me bateri MANUALI I PËRDORIMIT 20
BG Акумулаторен миксер РЪКОВОДСТВО ЗА
ЕКСПЛОАТАЦИЯ 27
HR Bežična miješalica PRIRUČNIK S UPUTAMA 35
МК Безжичен миксер УПАТСТВО ЗА УПОТРЕБА 42
SR Бежична мешалица УПУТСТВО ЗА УПОТРЕБУ 50
RO Mixer cu acumulator MANUAL DE INSTRUCŢIUNI 58
UK Акумуляторний міксер ІНСТРУКЦІЯ З
ЕКСПЛУАТАЦІЇ 66
RU Аккумуляторный Миксер РУКОВОДСТВО ПО
ЭКСПЛУАТАЦИИ 74

2
56
1
1
8
7
4
10 9
2
3
7
Fig.1
56
1
1
8
4
2
3
7
7
Fig.2
12
Fig.3
Fig.4
Fig.5
12
Fig.6
12
Fig.7
12
Fig.8

3
2
1
Fig.9
1
Fig.10
1
2
3
4
Fig.11
1
2
3
4
Fig.12
2 1
Fig.13
3
2
11
Fig.14
1
23
Fig.15

4
3
2
1
3
Fig.16
1
Fig.17
1
332
Fig.18
1
2
3
Fig.19
1
2
3
Fig.20
1
2
Fig.21
2
3
2
1
Fig.22

5
2
3
1
4
Fig.23
2
3
2
1
Fig.24

6ENGLISH
ENGLISH (Original instructions)
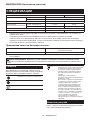
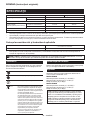
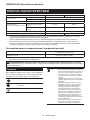
SPECIFICATIONS
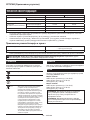
Model: UT001G UT002G
No load speed High speed mode 0 - 920 min-1
Low speed mode 0 - 500 min-1
Maximum mixing blade diameter 240 mm
Overall length
(without shaft and mixing blade) with battery cover S 373 mm 363 mm
with battery cover L 412 mm 403 mm
Rated voltage D.C. 36 V - 40 V max
Net weight 5.7 - 7.0 kg 5.8 - 7.2 kg
• Duetoourcontinuingprogramofresearchanddevelopment,thespecicationshereinaresubjecttochange
without notice.
• Specicationsandbatterycartridgemaydierfromcountrytocountry.
• Theweightmaydierdependingontheattachment(s),includingthebatterycartridge.Thelightestandheavi-
est combinations, according to EPTA-Procedure 01/2014, are shown in the table.
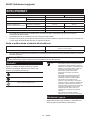
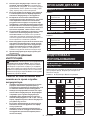
Applicable battery cartridge and charger
Battery cartridge BL4020 / BL4025 / BL4040* / BL4050F* / BL4080F*
* : Recommended battery
Charger DC40RA / DC40RB / DC40RC
•
Some of the battery cartridges and chargers listed above may not be available depending on your region of residence.
WARNING: Only use the battery cartridges and chargers listed above. Use of any other battery cartridges
andchargersmaycauseinjuryand/orre.
Symbols
The followings show the symbols which may be used
for the equipment. Be sure that you understand their
meaning before use.
Read instruction manual.
Do not use the tool in the rain.
Do not clean the tool with water.
Ni-MH
Li-ion Only for EU countries
Due to the presence of hazardous com-
ponents in the equipment, waste electrical
and electronic equipment, accumulators
and batteries may have a negative impact
on the environment and human health.
Do not dispose of electrical and electronic
appliances or batteries with household waste!
In accordance with the European Directive
on waste electrical and electronic equipment
and on accumulators and batteries and
waste accumulators and batteries, as well as
their adaptation to national law, waste elec-
trical equipment, batteries and accumulators
should be stored separately and delivered
to a separate collection point for municipal
waste, operating in accordance with the
regulations on environmental protection.
This is indicated by the symbol of the crossed-
out wheeled bin placed on the equipment.
Intended use
The tool is intended for mixing wall materials, etc.
(exceptammablematerials).
Noise
The typical A-weighted noise level determined accord-
ing to EN62841-2-10:
Model UT001G
Sound pressure level (LpA) : 81 dB (A)
Sound power level (LWA) : 92 dB (A)
Uncertainty (K) : 3 dB (A)
Model UT002G
Sound pressure level (LpA) : 81 dB(A)
Sound power level (LWA) : 92 dB (A)
Uncertainty (K) : 3 dB(A)
NOTE: The declared noise emission value(s) has
been measured in accordance with a standard test
method and may be used for comparing one tool with
another.
NOTE: The declared noise emission value(s)
may also be used in a preliminary assessment of
exposure.

7ENGLISH
WARNING: Wear ear protection.
WARNING: The noise emission during actual
use of the power tool can dier from the declared
value(s) depending on the ways in which the
tool is used especially what kind of workpiece is
processed.
WARNING: Be sure to identify safety mea-
sures to protect the operator that are based on an
estimation of exposure in the actual conditions of
use (taking account of all parts of the operating
cycle such as the times when the tool is switched
o and when it is running idle in addition to the
trigger time).
Vibration
The vibration total value (tri-axial vector sum) deter-
mined according to EN62841-2-10:
Model UT001G
Work mode: operation without load
Vibration emission (ah) : 2.5 m/s2 or less
Uncertainty (K) : 1.5 m/s2
Model UT002G
Work mode: operation without load
Vibration emission (ah) : 2.5 m/s2 or less
Uncertainty (K) : 1.5 m/s2
NOTE: The declared vibration total value(s) has been
measured in accordance with a standard test method
and may be used for comparing one tool with another.
NOTE: The declared vibration total value(s) may also
be used in a preliminary assessment of exposure.
WARNING: The vibration emission during
actual use of the power tool can dier from the
declared value(s) depending on the ways in which
the tool is used especially what kind of workpiece
is processed.
WARNING: Be sure to identify safety mea-
sures to protect the operator that are based on an
estimation of exposure in the actual conditions of
use (taking account of all parts of the operating
cycle such as the times when the tool is switched
o and when it is running idle in addition to the
trigger time).
EC Declaration of Conformity
For European countries only
The EC declaration of conformity is included as Annex A
to this instruction manual.
SAFETY WARNINGS
General power tool safety warnings
WARNING: Read all safety warnings, instruc-
tions, illustrations and specications provided
with this power tool. Failure to follow all instructions
listedbelowmayresultinelectricshock,reand/or
seriousinjury.
Save all warnings and instruc-
tions for future reference.
The term "power tool" in the warnings refers to your
mains-operated (corded) power tool or battery-operated
(cordless) power tool.
Cordless mixer safety warnings
1. Hold the tool with both hands at the intended
handles. Loss of control can cause personal
injury.
2. Ensure sucient ventilation when mixing am-
mable materials to avoid a hazardous atmo-
sphere. Developing vapour may be inhaled or be
ignited by the sparks the power tool produces.
3. Do not mix food. Power tools and their accesso-
ries are not designed for processing food.
4. Ensure that the mixing container is placed in a
rm and secure position. A container that is not
properly secured may move unexpectedly.
5. Follow the instructions and warnings for the
material to be mixed. Material to be mixed may
be harmful.
6. Do not reach into the mixing container with
your hands or insert any other objects into it
while mixing. Contact with the mixer blade may
leadtoseriouspersonalinjury.
7. Start up and run down the tool in the mixing
container only. The mixer blade may bend or spin
in an uncontrolled manner.
8.
Ensure that no liquid splashes against the
housing of the power tool. Liquid that has pene-
trated the power tool can cause damage to the tool.
9. Use auxiliary handles, if supplied with the tool.
Lossofcontrolmaycausepersonalinjury.
10.
Hold power tool by insulated gripping sur-
faces, when performing an operation where the
cutting accessory may contact hidden wiring.
Cutting accessory contacting a "live" wire may
make exposed metal parts of the power tool "live"
and could give the operator an electric shock.
11. Always be sure you have a rm footing. Be
sure no one is below when using the tool in
high locations.
12. Hold the tool rmly.
13. Keep hands away from rotating parts.
14. Do not leave the tool running. Operate the tool
only when you are holding it.
15. Some materials contain chemicals which may
be toxic. Take caution to prevent dust inhala-
tion and skin contact. Follow safety warnings
by supplier of the material.

8ENGLISH
16. When performing the mixing operation, place
the mixing container on a at and stable
surface.
SAVE THESE INSTRUCTIONS.
WARNING: DO NOT let comfort or familiarity
with product (gained from repeated use) replace
strict adherence to safety rules for the subject
product. MISUSE or failure to follow the safety
rules stated in this instruction manual may cause
serious personal injury.
Important safety instructions for
battery cartridge
1.
Before using battery cartridge, read all instruc-
tions and cautionary markings on (1) battery
charger, (2) battery, and (3) product using battery.
2. Do not disassemble or tamper with the battery
cartridge.Itmayresultinare,excessiveheat,
or explosion.
3. If operating time has become excessively
shorter, stop operating immediately. It may
result in a risk of overheating, possible burns
and even an explosion.
4. If electrolyte gets into your eyes, rinse them
out with clear water and seek medical atten-
tion right away. It may result in loss of your
eyesight.
5. Do not short the battery cartridge:
(1) Do not touch the terminals with any con-
ductive material.
(2) Avoid storing battery cartridge in a con-
tainer with other metal objects such as
nails, coins, etc.
(3) Do not expose battery cartridge to water
or rain.
A battery short can cause a large current
ow, overheating, possible burns and even a
breakdown.
6. Do not store and use the tool and battery car-
tridge in locations where the temperature may
reach or exceed 50 °C (122 °F).
7. Do not incinerate the battery cartridge even if
it is severely damaged or is completely worn
out. The battery cartridge can explode in a re.
8. Do not nail, cut, crush, throw, drop the battery
cartridge, or hit against a hard object to the
battery cartridge. Such conduct may result in a
re,excessiveheat,orexplosion.
9. Do not use a damaged battery.
10. The contained lithium-ion batteries are subject
to the Dangerous Goods Legislation require-
ments.
For commercial transports e.g. by third parties,
forwarding agents, special requirement on pack-
aging and labeling must be observed.
For preparation of the item being shipped, consult-
ing an expert for hazardous material is required.
Please also observe possibly more detailed
national regulations.
Tapeormaskoopencontactsandpackupthe
battery in such a manner that it cannot move
around in the packaging.
11. When disposing the battery cartridge, remove
it from the tool and dispose of it in a safe
place. Follow your local regulations relating to
disposal of battery.
12. Use the batteries only with the products
specied by Makita. Installing the batteries to
non-compliantproductsmayresultinare,exces-
sive heat, explosion, or leak of electrolyte.
13. If the tool is not used for a long period of time,
the battery must be removed from the tool.
14. During and after use, the battery cartridge may
take on heat which can cause burns or low
temperature burns. Pay attention to the han-
dling of hot battery cartridges.
15. Do not touch the terminal of the tool imme-
diately after use as it may get hot enough to
cause burns.
16. Do not allow chips, dust, or soil stuck into the
terminals, holes, and grooves of the battery
cartridge.Itmaycauseheating,catchingre,
burst and malfunction of the tool or battery car-
tridge,resultinginburnsorpersonalinjury.
17. Unless the tool supports the use near
high-voltage electrical power lines, do not use
the battery cartridge near a high-voltage elec-
trical power lines. It may result in a malfunction
or breakdown of the tool or battery cartridge.
18. Keep the battery away from children.
SAVE THESE INSTRUCTIONS.
CAUTION: Only use genuine Makita batteries.
Use of non-genuine Makita batteries, or batteries that
have been altered, may result in the battery bursting
causingres,personalinjuryanddamage.Itwill
also void the Makita warranty for the Makita tool and
charger.
Tips for maintaining maximum
battery life
1. Charge the battery cartridge before completely
discharged. Always stop tool operation and
charge the battery cartridge when you notice
less tool power.
2. Never recharge a fully charged battery car-
tridge. Overcharging shortens the battery
service life.
3. Charge the battery cartridge with room tem-
perature at 10 °C - 40 °C (50 °F - 104 °F). Let
a hot battery cartridge cool down before
charging it.
4. When not using the battery cartridge, remove
it from the tool or the charger.
5. Charge the battery cartridge if you do not use
it for a long period (more than six months).

9ENGLISH
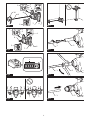
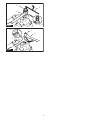
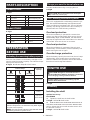
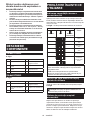
PARTS DESCRIPTION
Model UT001G
►Fig.1
1Switch trigger 2Lock-obutton
3Lock button 4Speedadjustingdial
5Speed change knob 6Battery cover
7Handle 8Shaft holder
9Shaft 10 Mixing blade
Model UT002G
►Fig.2
1Switch trigger 2Lock-obutton
3Lock button 4Speedadjustingdial
5Speed change knob 6Battery cover
7Handle 8Chuck
PREPARATION
BEFORE USE
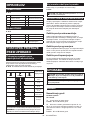
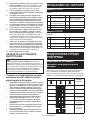
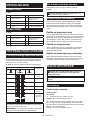
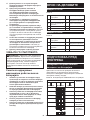
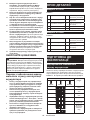
Indicating the remaining battery capacity
Press the check button on the battery cartridge to indi-
cate the remaining battery capacity. The indicator lamps
light up for a few seconds.
►Fig.3: 1. Indicator lamps 2. Check button
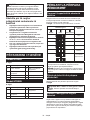
Indicator lamps Remaining
capacity
Lighted O Blinking
75% to 100%
50% to 75%
25% to 50%
0% to 25%
Charge the
battery.
The battery
may have
malfunctioned.
NOTE: Depending on the conditions of use and the
ambienttemperature,theindicationmaydierslightly
from the actual capacity.
NOTE:Therst(farleft)indicatorlampwillblinkwhen
the battery protection system works.
Things you need to know before use
Hold the handle when using or carrying the tool.
►Fig.4
CAUTION: Do not hold the sheet metal part.
Sharpareasmaycauseinjury.
Tool / battery protection system
The tool is equipped with a tool/battery protection sys-
tem.Thissystemautomaticallycutsopowertothe
motor to extend tool and battery life. The tool will auto-
matically stop during operation if the tool or battery is
placed under one of the following conditions:
Overload protection
When the tool/battery is operated in a manner that
causes it to draw an abnormally high current, the tool
automaticallystops.Inthissituation,turnthetoolo
and stop the application that caused the tool to become
overloaded. Then turn the tool on to restart.
Overheat protection
When the tool/battery is overheated, the tool stops
automatically. In this situation, let the tool/battery cool
before turning the tool on again.
Overdischarge protection
When the battery capacity becomes low, the tool stops
automatically. If the product does not operate even
when the switches are operated, remove the batteries
from the tool and charge the batteries.
HOW TO USE
CAUTION: Always be sure that the tool is
switched o and the battery cartridge is removed
before carrying out any work on the tool.
NOTICE: When you are not working, lay the
machine down and store it.
►Fig.5
Assembly
Installing the shaft
Optional accessory
For UT001G
1. Tighten the shaft into the shaft holder.
►Fig.6: 1. Shaft 2. Shaft holder
2. Holdtheatsontheshaftholderwithwrench19
sothattheshaftholdercannotrevolve.Withtheats
held so, tighten the hex nut with another wrench 19 in
the direction of arrow.
►Fig.7: 1. Shaft 2. Shaft holder

10 ENGLISH
For UT002G
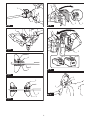
1. Insert the shaft into the chuck as far as it will go.
►Fig.8: 1. Shaft 2. Chuck
2. Tighten the chuck by hand, and then place the
chuck key in each of three holes and tighten it clock-
wise. Be sure to tighten the chuck key at all three holes
evenly.
►Fig.9: 1. Chuck key 2. Chuck
3. To remove the shaft, turn the chuck key coun-
terclockwise at one of the holes, and then loosen the
chuck by hand.
4. When not in use, store the chuck key as shown in
theguretokeepitfrombeinglost.
►Fig.10: 1. Chuck key
Installing the mixing blade
Optional accessory
Insert the mixing blade into the shaft and secure it with
the hex bolt. At this time, position it so that the top end
ofthehexboltalwayststotheatsurfaceontheshaft
and tighten the hex bolt with the provided wrench.
►Fig.11: 1. Hex bolt 2. Shaft 3. Flat surface 4. Mixing
blade
Wheninstallingthemixingbladesattwodierentposi-
tions, mount and secure the two mixing blades on the
atpartoftheshaftwiththehexboltssothatthesame
surface of the mixing blades faces each other as shown
inthegure.
►Fig.12: 1. Hex bolt 2. Shaft 3. Flat surface 4. Mixing
blade
NOTE: Ask your local Makita Service Center about
which is mixing blades are allowed.
Installing or removing battery
cartridge
CAUTION: Always switch o the tool before
installing or removing of the battery cartridge.
CAUTION: Hold the tool and the battery car-
tridge rmly when installing or removing battery
cartridge. Failure to hold the tool and the battery
cartridgermlymaycausethemtoslipoyourhands
and result in damage to the tool and battery cartridge
andapersonalinjury.
CAUTION: Do not use this tool with the
battery adapter. If you connect the battery adapter
to the tool, the battery cover cannot be closed, and
using the tool with battery cover opened may cause
aninjury.
CAUTION: Be careful not to pinch your n-
gers when opening or closing the battery cover.
NOTICE: Install a battery cover that matches the
size of the battery.
Open the battery cover while pressing the button on the
battery cover.
►Fig.13: 1. Button 2. Battery cover
To remove the battery cartridge, slide it from the tool
while sliding the button on the front of the cartridge.
►Fig.14: 1. Red indicator 2. Button 3. Battery
cartridge
To install the battery cartridge, align the tongue on the
battery cartridge with the groove in the housing and slip
it into place. Insert it all the way until it locks in place
with a little click. If you can see the red indicator as
showninthegure,itisnotlockedcompletely.
After installing the battery cartridge, close the battery
cover securely.
CAUTION: Always install the battery cartridge
fully until the red indicator cannot be seen. If not,
itmayaccidentallyfalloutofthetool,causinginjuryto
you or someone around you.
CAUTION: Do not install the battery cartridge
forcibly. If the cartridge does not slide in easily, it is
not being inserted correctly.
Switch action
WARNING: Before installing the battery car-
tridge into the tool, always make sure that the
switch trigger actuates properly and returns to
the "OFF" position by fully pulling and releasing
it.
WARNING: NEVER defeat the lock-o button
by taping down or some other means. A switch with
anegatedlock-obuttonmayresultinunintentional
operationandseriouspersonalinjury.
WARNING: NEVER use the tool if it runs when
you simply pull the switch trigger without press-
ing the lock-o button. A switch in need of repair
may result in unintentional operation and serious
personalinjury.ReturntooltoaMakitaservicecenter
for proper repairs BEFORE further usage.
WARNING: Do not install the battery cartridge
with the lock button engaged.
To prevent the switch trigger from being accidentally
pulled,alock-obuttonisprovided.Tostartthetool,
depressthelock-obuttonandpulltheswitchtrigger.
Tool speed is increased by increasing pressure on the
switch trigger. Release the switch trigger to stop.
For continuous operation, depress the lock button while
pulling the switch trigger, and then release the switch
trigger. To stop the tool, pull the switch trigger fully, then
release it.
►Fig.15: 1. Switch trigger 2.Lock-obutton3. Lock
button

11 ENGLISH
Operation of speed change knob
NOTICE: Use the speed change knob only after
the tool comes to a complete stop. Changing the
tool speed mode before the tool stops may damage
the tool.
NOTICE: Always set the speed change knob
carefully into the correct position. If you operate
the tool with the speed change knob positioned half-
way between the position 1 and the position 2, the
tool may be damaged.
NOTICE: If the rotation speed signicantly
decreases during operation in the high speed
mode, stop the tool and change the mode to the
low speed mode. Otherwise, the motor may get
overloadedandcauseamalfunctionorre.
Two speed ranges can be preselected with the speed
change knob.
Select the proper speed mode for the material to be
mixed.
To change the speed mode, turn the speed change
knob so that the pointer points to the dot at position
1 for low speed mode or the dot at position 2 for high
speed mode.
►Fig.16: 1. Pointer 2. Speed change knob 3. Dot
Operation of speed adjusting dial
Thetoolspeedcanbeadjustedsteplesslybyturning
thespeedadjustingdial.Thenoloadspeedwhenthe
switchtriggerisfullypulledcanbeadjusted270min-1
to 500 min-1 at low speed mode, 500 min-1 to 920 min-1
at high speed mode. Higher speed is obtained when
the dial is turned in the direction of number 5; lower
speed is obtained when it is turned in the direction of
number 1.
Select the proper speed for the material to be mixed.
►Fig.17: 1.Speedadjustingdial
NOTICE: The speed adjusting dial can be turned
only as far as 5 and back to 1. Do not force it past
5 or 1.
Accidental restart preventive
function
If you install the battery cartridge while pulling the
switch trigger or locking the switch trigger, the tool does
not start. To start the tool, release the switch trigger, and
then pull the switch trigger.
Electronic function
The tool is equipped with the following electronic func-
tion for easy operation.
Soft start
The soft-start function minimizes start-up shock, and
makes the tool start smoothly.
Basic operations
CAUTION: Do not mix ammable materials or
operate the tool around ammable materials such
as paint with thinner used as solvent. Failure to do
somaycauseaninjury.
CAUTION: Do not mix high viscosity material
in the high speed mode. You may lose the control of
thetoolandcauseaninjury.
CAUTION: Do not rotate the mixing blade
outside the stirring vessel.
CAUTION: If you hear an abnormal noise
during use, turn o the switch and stop using the
tool.
NOTICE: When you mix the material while the
mixing blade oating out of the material, be care-
ful not to splash the material.
NOTICE: Do not use the tool for any purpose
other than stirring mortar, concrete, etc.
1. Select high speed mode or low speed mode
according to the material to be mixed.
2.
Holdthetoolrmlywithbothhands.Placethemixing
blade under material fully. Check that the material is not
solidiedandthesafetyoftheworksite,thenturnonthetool.
3.
Move the mixing blade up and down during the mix-
ing operation so that whole part of material can be mixed.
4. Whennishingmixing,turnothetool.Makesure
that the mixing blade has come to a complete stop, and
then pull it out of the mixing container.
Applied operations
CAUTION: Always be sure that the tool is
switched o and the battery cartridge is removed
before adjusting or checking function on the tool.
Replacing battery cover
Optional accessory
Installoneofthebatterycoverstotthesizeofyour
battery cartridge.
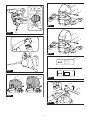
►Fig.18: 1. Battery cover S 2. Battery cover L
3. Button
1. Open the standard equipped battery cover while
pressing the button on the battery cover.
2. Loosen the screw securing the standard equipped
battery cover. Then remove the screw, sleeve and the
battery cover.
►Fig.19: 1. Screw 2. Sleeve 3. Battery cover (stan-
dard equipped)
NOTE: The sleeve may remain in the mounting holes.
In that case, pull it out using a screw or the like.
3. Align the mounting hole on the optional battery
cover with the mounting holes on the housing. Insert the
sleeve. Then tighten the screws to secure it in place.
►Fig.20:
1. Screw 2. Sleeve 3. Battery cover (optional)
4. Close the battery cover securely.

12 ENGLISH
Installing or removing the shaft
holder
country specic
For UT001G
Installoneoftheshaftholdersoptionallyavailabletot
your screw size of the shaft.
►Fig.21: 1. M12 shaft holder 2. M14 shaft holder
While holding the spindle with a wrench, loosen the
shaft holder with another wrench.
►Fig.22: 1. Shaft holder 2. Wrench 3. Spindle
To install the shaft holder, perform the removal proce-
dure in reverse.
For UT002G
1. Insert the hex wrench into the chuck, and then
loosen the chuck with the hex wrench while holding the
spindle with the wrench.
►Fig.23: 1. Hex wrench 2. Chuck 3. Wrench
4. Spindle
2. Tighten the shaft holder with a wrench while hold-
ing the spindle with another wrench.
►Fig.24: 1. Shaft holder 2. Wrench 3. Spindle
Handling after use
Useawetclothortheliketocarefullywipeothemate-
rial left on the tool after use. Extra care should be given
to thorough cleaning of the vents, switch area, cover
openings, etc.
NOTICE: Avoid cleaning the tool in water. Water
will get into the motor housing and cause motor
failure.
MAINTENANCE
CAUTION: Always be sure that the tool is
switched o and the battery cartridge is removed
before attempting to perform inspection or
maintenance.
NOTICE: Never use gasoline, benzine, thinner,
alcohol or the like. Discoloration, deformation or
cracks may result.
To maintain product SAFETY and RELIABILITY,
repairs,anyothermaintenanceoradjustmentshould
be performed by Makita Authorized or Factory Service
Centers, always using Makita replacement parts.
Troubleshooting
Before asking for repairs, check the following points.
1. Turnthetoolo,andthenturnitonagainto
restart.
2. Charge the battery(ies) or replace it/them with
recharged battery(ies).
3. Let the tool and battery(ies) cool down.
If no improvement can be found by restoring protection
system, then contact your local Makita Service Center.
OPTIONAL
ACCESSORIES
CAUTION: These accessories or attachments
are recommended for use with your Makita tool
specied in this manual. The use of any other
accessories or attachments might present a risk of
injurytopersons.Onlyuseaccessoryorattachment
for its stated purpose.
If you need any assistance for more details regard-
ing these accessories, ask your local Makita Service
Center.
• Mixing blade
• Shaft
• Battery cover
• Makita genuine battery and charger
NOTE: Some items in the list may be included in the
tool package as standard accessories. They may
dierfromcountrytocountry.

13 SLOVENŠČINA
SLOVENŠČINA (Originalna navodila)
TEHNIČNI PODATKI
Model: UT001G UT002G
Hitrost brez obremenitve Načinzvisokohitrostjo 0 – 920 min-1
Načinznizkohitrostjo 0 – 500 min-1
Maksimalni premer mešalne lopatice 240 mm
Skupnadolžina
(brez gredi in mešalne lopatice) spokrovomakumulatorjaS 373 mm 363 mm
spokrovomakumulatorjaL 412 mm 403 mm
Nazivna napetost D.C.največ36V–40V
Netoteža 5,7 – 7,0 kg 5,8 – 7,2 kg
• Kernenehnoopravljamoraziskaveinrazvijamosvojeizdelke,selahkotehničnipodatkivtemdokumentu
spremenijobrezobvestila.
• Tehničnipodatkiinbaterijskivložkiselahkorazlikujejogledenadržavouporabeizdelka.
• Težaselahkorazlikujegledenapriključke,vključnozakumulatorskobaterijo.Najlažjainnajtežjakombinacijav
skladu s postopkom EPTA 01/2014 sta prikazani v preglednici.
Uporabna akumulatorska baterija in polnilnik
Baterijskivložek BL4020 / BL4025 / BL4040* / BL4050F* / BL4080F*
*:Priporočeniakumulator
Polnilnik DC40RA / DC40RB / DC40RC
• Nekaterezgorajnavedeneakumulatorskebaterijeinpolnilnikimordavvašidržaviprebivališčanisonavoljo.
OPOZORILO: Uporabljajte le zgoraj navedene akumulatorske baterije in polnilnike. Uporaba drugih
akumulatorskihbaterijinpolnilnikovlahkopovzročitelesnepoškodbein/alipožar.
Simboli
Naslednjisimboliselahkouporabljajovpovezavis
strojem.Preduporaboizdelkaseobveznoseznanitez
njihovimpomenom.
Preberite navodila za uporabo.
Orodjaneuporabljajtevdežju.
Orodjanečistitezvodo.
Ni-MH
Li-ion SamozadržaveEU
Zaradi prisotnosti nevarnih komponent v
opremiimajolahkouporabljenaelektrična
inelektronskaoprema,akumulatorjiin
baterijenegativenvplivnaokoljeinzdravje
ljudi.
Električnihinelektronskihnapravalibaterij
neodlagajtemedgospodinjskeodpadke!
Skladno z evropsko Direktivo o odpadni
električniinelektronskiopremi,oakumula-
torjihinbaterijahterodpadnihakumulator-
jihinbaterijahternjenouporabovdržavnih
zakonihmoraterabljenoelektričnoin
elektronskoopremo,baterijeinakumula-
torjezbiratiločenoterdostavitinaposebno
zbiralno mesto za komunalne odpadke, ki
delujeskladnospredpisizazaščitookolja.
Tonakazujesimbolprečrtanegasmetnjaka
skolesi,kijenatisnjennaopremi.
Predvidena uporaba
Orodjejenamenjenozamešanjematerialovzananos
nasteneipd.(razenvnetljivihmaterialov).
Hrup
ObičajnaA-ovrednotenaravenhrupavskladuz
EN62841-2-10:
Model UT001G
Ravenzvočnegatlaka(LpA): 81 dB (A)
Ravenzvočnemoči(LWA): 92 dB (A)
Odstopanje(K):3dB(A)
Model UT002G
Ravenzvočnegatlaka(LpA): 81 dB (A)
Ravenzvočnemoči(LWA): 92 dB (A)
Odstopanje(K):3dB(A)
OPOMBA:Navedenevrednostioddajanjahrupaso
bileizmerjenevskladusstandardnimimetodami
testiranjainselahkouporabljajozaprimerjavoorodij.
OPOMBA:Navedenevrednostioddajanjahrupa
selahkouporabljajotudipripredhodnioceni
izpostavljenosti.

14 SLOVENŠČINA
OPOZORILO: Uporabljajte zaščito za sluh.
OPOZORILO: Oddajanje hrupa med dejansko
uporabo električnega orodja se lahko razlikuje od
navedenih vrednosti, odvisno od načina uporabe
orodja in predvsem vrste obdelovanca.
OPOZORILO: Upravljavec mora za lastno
zaščito poznati varnostne ukrepe, ki temeljijo
na oceni izpostavljenosti v dejanskih pogojih
uporabe (poleg časa proženja je treba upoštevati
celoten delovni cikel, vključno s časom, ko je
orodje izklopljeno, in časom, ko deluje v prostem
teku).
Vibracije
Skupnevrednostivibracij(vektorskavsotatrehosi)v
skladu z EN62841-2-10:
Model UT001G
Delovninačin:delovanjebrezobremenitev
Emisijevibracij(ah): 2,5 m/s2alimanj
Odstopanje(K):1,5m/s2
Model UT002G
Delovninačin:delovanjebrezobremenitev
Emisijevibracij(ah): 2,5 m/s2alimanj
Odstopanje(K):1,5m/s2
OPOMBA:Navedeneskupnevrednostioddajanja
vibracijsobileizmerjenevskladusstandardnimi
metodamitestiranjainselahkouporabljajozaprimer-
javoorodij.
OPOMBA:Navedeneskupnevrednostioddajanja
vibracijselahkouporabljajotudipripredhodnioceni
izpostavljenosti.
OPOZORILO: Oddajanje vibracij med
dejansko uporabo električnega orodja se lahko
razlikuje od navedenih vrednosti, odvisno
od načina uporabe orodja in predvsem vrste
obdelovanca.
OPOZORILO: Upravljavec mora za lastno
zaščito poznati varnostne ukrepe, ki temeljijo
na oceni izpostavljenosti v dejanskih pogojih
uporabe (poleg časa proženja je treba upoštevati
celoten delovni cikel, vključno s časom, ko je
orodje izklopljeno, in časom, ko deluje v prostem
teku).
Izjava o skladnosti ES
Samo za evropske države
IzjavaESoskladnostijevključenavdodatkuA,kije
priložentemnavodilomzauporabo.
VARNOSTNA OPOZORILA
Splošna varnostna opozorila za
električno orodje
OPOZORILO: Preberite vsa varnostna opo-
zorila in navodila s slikami in tehničnimi podatki,
ki so dobavljeni skupaj z električnim orodjem.
Obneupoštevanjuspodajnavedenihnavodilobstaja
nevarnostelektričnegaudara,požarain/alihudih
telesnih poškodb.
Shranite vsa opozorila in navo-
dila za poznejšo uporabo.
Izraz„električnoorodje“vopozorilihsenanašanavaše
električnoorodje(skablom)alibaterijskoelektrično
orodje(brezkabla).
Varnostna opozorila za brezžični
mešalnik
1. Orodje držite z obema rokama, in sicer ga pri-
mite za ročaja, predvidena za ta namen. Izguba
nadzoralahkopovzročitelesnepoškodbe.
2. Pri mešanju vnetljivih materialov zagotovite
zadostno prezračevanje, da se izognete
nevarni atmosferi.Obstajanevarnostvdihavanja
alivnetja(zaradiisker,kijihproizvajaelektrično
orodje)nastalihhlapov.
3. Izdelka ne uporabljajte za mešanje hrane.
Električnaorodjainnjihovadodatnaopremaniso
zasnovani za obdelavo hrane.
4. Zagotovite, da je posoda za mešanje ustrezno
in varno nameščena. Posoda, ki ni pravilno
nameščena,selahkonepričakovanopremakne.
5. Upoštevajte navodila in opozorila za material,
ki ga boste mešali. Material, ki ga boste mešali,
jelahkoškodljiv.
6. Ne segajte v posodo za mešanje z rokami in
vanjo med mešanjem ne vstavljajte nobenih
drugih predmetov. Stik z rezilom mešalnika lahko
povzročihudetelesnepoškodbe.
7. Orodje zaženite in ga uporabljajte le v posodi
za mešanje. Rezilo mešalnika se lahko nenadzo-
rovano upogiba ali vrti.
8. Zagotovite, da na ohišje električnega orodja
ne prši nobena tekočina.Tekočina,kiprodrev
električnoorodje,lahkopoškodujeorodje.
9.
Uporabite pomožne ročaje, če so dobavljeni z orod-
jem.Izgubanadzoralahkopovzročitelesnepoškodbe.
10.
Če obstaja nevarnost, da bi z rezilnim orodjem
prerezali skrito električno napeljavo, držite elek-
trično orodje na izoliranih držalnih površinah.Če
pridedostikazvodnikipodnapetostjo,sopodnape-
tostjovsineizoliranikovinskidelielektričnegaorodja,
zaradičesarlahkouporabnikutrpielektričniudar.
11.
Vedno zagotovite, da imate trden oprijem na
podlagi, kjer stojite. Kadar uporabljate orodje
na višini, se prepričajte, da pod vami ni nikogar.
12. Trdno držite orodje.
13. Ne približujte rok vrtečim se delom.

15 SLOVENŠČINA
14. Orodja ne pustite delovati brez nadzora. Z
orodjem upravljajte le, kadar ga držite.
15. Nekateri materiali vsebujejo kemikalije, ki so
lahko strupene. Bodite previdni in preprečite
vdihavanje prahu in stik s kožo. Upoštevajte
varnostna opozorila dobavitelja materiala.
16. Pri mešanju postavite posodo za mešanje na
ravno in stabilno površino.
SHRANITE TA NAVODILA.
OPOZORILO: NE dovolite, da bi zaradi udob-
nejšega dela ali znanja o uporabi izdelka (prido-
bljenega z večkratno uporabo) opustili strogo
upoštevanje varnostnih zahtev v okviru pravilne
uporabe orodja. ZLORABA ali neupoštevanje var-
nostnih zahtev v teh navodilih za uporabo lahko
povzroči resne telesne poškodbe.
Pomembna varnostna navodila za
akumulatorsko baterijo
1. Pred uporabo baterijskega vložka preberite
vsa navodila in opozorilne oznake na (1) pol-
nilniku akumulatorja, (2) akumulatorju in (3)
izdelku, ki uporablja akumulator.
2. Ne razstavljajte ali spreminjajte akumulatorske
baterije.Stemlahkopovzročitepožar,preko-
mernovročinoalieksplozijo.
3. Če se je čas delovanja občutno skrajšal, takoj
prenehajte uporabljati orodje. V nasprotnem
primeru lahko pride do pregretja, morebitnih
opeklin in celo eksplozije.
4. Če pride elektrolit v stik z očmi, jih sperite s
čisto vodo in takoj poiščite zdravniško pomoč.
Posledica je lahko izguba vida.
5.
Ne povzročite kratkega stika baterijskega vložka:
(1) Ne dotikajte se priključkov s kakršnim
koli prevodnim materialom.
(2) Izogibajte se shranjevanju baterijskega
vložka v vsebniku z drugimi kovinskimi
predmeti kot so žeblji, kovanci itn.
(3) Ne izpostavljajte baterijskega vložka vodi
ali dežju.
Kratek stik akumulatorja lahko povzroči velik
električni tok, pregrevanje, morebitne opekline
in celo okvaro.
6. Ne shranjujte in uporabljajte orodja in akumu-
latorske baterije na mestih, kjer lahko tempera-
tura doseže ali preseže 50 °C (122 °F).
7. Ne sežigajte baterijskega vložka, tudi če je
hudo poškodovan ali v celoti izpraznjen.
Baterijski vložek lahko v ognju eksplodira.
8. Ne pribijajte, režite, drobite, mečite, spuščajte
akumulatorske baterije oziroma ne udarjajte
z akumulatorsko baterijo po trdem predmetu.
Takšnoravnanjelahkopovzročipožar,preko-
mernovročinoalieksplozijo.
9. Ne uporabljajte poškodovanih akumulatorjev.
10. Priložene litij-ionske baterije ustrezajo zahte-
vam zakonodaje v zvezi z nevarnim blagom.
Zakomercialneprevoze,npr.tiste,kijihopravljajo
tretjestrankeincarinskiposredniki,jetrebaupoštevati
posebnezahtevevzvezizembalažoinoznačevanjem.
Med postopkom priprave na odpremo izdelka se
jetrebaposvetovatisstrokovnjakomzanevarne
snovi.Pritemupoštevajtetudipodrobnejšenacio-
nalne predpise.
Odprtestikeoblepitezlepilnimtrakomalijihdru-
gačezaščitite,baterijopazapakirajtetako,dasev
embalažinemorepremikati.
11. Ko odstranjujete akumulatorsko baterijo, jo
vzemite iz orodja in varno zavrzite. Upoštevajte
lokalne uredbe glede odlaganja baterije.
12. Baterije uporabljajte le z izdelki, ki jih določi
Makita.Čenamestitebaterijevneskladneizdelke,
lahkopridedopožara,pregrevanja,eksplozijeali
puščanjaelektrolita.
13. Če orodja dlje časa ne uporabljate, morate iz
njega odstraniti baterijo.
14. Med uporabo in po uporabi lahko akumu-
latorska baterija postane vroča in povzroči
opekline. Z vročimi akumulatorskimi baterijami
ravnajte pazljivo.
15. Ne dotikajte se priključka orodja takoj po upo-
rabi, ker se lahko dovolj segreje, da povzroči
opekline.
16. Ne dovolite, da bi se v priključke, odprtine in
utore akumulatorske baterije zlepili ostružki,
prah ali zemlja.Tolahkopovzročipregrevanje,
požar,razpočenjeinokvaroorodjaaliakumula-
torskebaterijeterprivededoopeklinalidrugih
telesnih poškodb.
17. Razen če orodje podpira uporabo v bližini
visokonapetostnih električnih vodov, akumula-
torske baterije ne uporabljajte v bližini visoko-
napetostnih električnih vodov. Takšna uporaba
lahkopovzročimotnjevdelovanjualiokvaro
orodjaoziromaakumulatorskebaterije.
18. Baterijo hranite izven dosega otrok.
SHRANITE TA NAVODILA.
POZOR: Uporabljajte le originalne baterije
Makita.ČeuporabljateneoriginalnebaterijeMakita
alibaterije,kisobilespremenjene,lahkopridedo
eksplozijebaterijeinposledičnodopožara,telesnih
poškodb ali materialne škode. S takšno uporabo
bostetudirazveljaviligarancijoMakitazaorodjein
polnilnik Makita.
Nasveti za ohranjanje največje
zmogljivosti akumulatorja
1. Napolnite baterijski vložek, preden se v celoti
izprazni. Ko opazite, da ima orodje manjšo
moč, vedno ustavite delovanje orodja in napol-
nite baterijski vložek.
2. Nikoli znova ne polnite popolnoma napol-
njenega baterijskega vložka. Prenapolnjenje
skrajša življenjsko dobo akumulatorja.
3. Baterijski vložek s sobno temperaturo pol-
nite pri temperaturi okolja od 10 °C do 40 °C.
Počakajte, da se vroč baterijski vložek pred
polnjenjem ohladi.
4. Ko akumulatorske baterije ne uporabljate, jo
odstranite iz orodja ali polnilnika.
5. Če baterijskega vložka ne uporabljate dalj časa
(več kot 6 mesecev), ga napolnite.

16 SLOVENŠČINA
OPIS DELOV
Model UT001G
►Sl.1
1Sprožilec 2Sprostilni gumb
3Gumb za zaklep 4
Številčnicazaizbirohitrosti
5
Gumb za spremembo hitrosti
6Pokrovakumulatorja
7Ročaj 8Držalogredi
9Gred 10 Mešalna lopatica
Model UT002G
►Sl.2
1Sprožilec 2Sprostilni gumb
3Gumb za zaklep 4
Številčnicazaizbirohitrosti
5
Gumb za spremembo hitrosti
6Pokrovakumulatorja
7Ročaj 8Vpenjalnaglava
POSTOPEK PRIPRAVE
PRED UPORABO
Prikazuje preostalo raven
napolnjenosti akumulatorja
Pritisnitegumbzapreverjanjenabaterijskemvložku,
dapreveriteravennapolnjenostiakumulatorja.
Indikatorskelučkenakratkozasvetijo.
►Sl.3: 1.Indikatorskelučke2.Gumbzapreverjanje
Indikatorske lučke Prikaz pre-
ostale ravni
napolnjenosti
Sveti Ne sveti Utripa
od 75 % do
100 %
od 50 % do
75 %
od 25 % do
50 %
od 0 % do
25 %
Napolnite
akumulator.
Akumulator
jemorda
okvarjen.
OPOMBA:
Odvisnoodpogojevuporabeinokoljsketemperature
seoznačbalahkonekolikorazlikujeoddejanskenapolnjenosti.
OPOMBA:Prvaopozorilnalučka(skrajnolevo)bo
utripala,kosistemzazaščitoakumulatorjadeluje.
Kaj morate vedeti pred uporabo
Držiteročaj,kouporabljatealinositeorodje.
►Sl.4
POZOR: Ne držite kovinske ploščice. Na ostrih
delihselahkopoškodujete.
Zaščitni sistem orodja/akumulatorja
Orodjejeopremljenozzaščitnimsistemomzaorodje/
akumulator.Sistemsamodejnoprekinenapajanje
orodja,dapodaljšaživljenjskodoboorodjainakumula-
torja.Orodjesesamodejnozaustavimeddelovanjem,
čeorodjealiakumulatordelujetapodnaslednjimi
pogoji:
Zaščita pred preobremenitvijo
Kadarorodje/akumulatoruporabljatenanačin,ki
povzročauporaboneobičajnovisokegatoka,seorodje
samodejnoustavi.Vtemprimeruizklopiteorodjein
prekinitedelo,kijepovzročilopreobremenitevorodja.
Natovklopiteorodje,dagaznovazaženete.
Zaščita pred pregrevanjem
Česeorodje/akumulatorpregreje,seorodjesamodejno
ustavi.Vtemprimerupustite,daseorodje/akumulator
ohladi,predenorodjeznovavklopite.
Zaščita pred izpraznjenjem
Kosezmogljivostakumulatorjazmanjša,seorodje
samodejnoustavi.Čeizdeleknedeluje,tudičeso
stikalavklopljena,odstraniteakumulatorizorodjainga
napolnite.
UPORABA
POZOR: Pred vsako izvedbo dela na orodju se
prepričajte, da je le to izključeno in da je akumula-
torska baterija odstranjena.
OBVESTILO: Ko ne uporabljate orodja, ga odlo-
žite in pospravite.
►Sl.5
Montaža
Nameščanje gredi
Dodatna oprema
Za UT001G
1. Privijtegrednadržalogredi.
►Sl.6: 1. Gred 2.Držalogredi
2. Ravnidelvdržalugredidržitesključemšt.19,
dasenemoreobrniti.Medtemkodržiteravnidel,pri-
vijtešestrobomaticozdrugimključemšt.19vsmeri
puščice.
►Sl.7: 1. Gred 2.Držalogredi

17 SLOVENŠČINA
Za UT002G
1. Vstavitegreddokoncavvpenjalnoglavo.
►Sl.8: 1. Gred 2.Vpenjalnaglava
2. Vpenjalnoglavoprivijtezroko,natovstavitevpe-
njalniključvvsakoodtrehodprtiningaobrnitevsmeri
urnegakazalca.Vpenjalniključzategnitevvsehtreh
odprtinah enakomerno.
►Sl.9: 1.Vpenjalniključ2.Vpenjalnaglava
3. Zaodstranjevanjegrediobrnitevpenjalniključv
nasprotni smeri urnega kazalca v eni od treh odprtin,
natopavpenjalnoglavoodvijteročno.
4. Kovpenjalnegaključaneuporabljate,gashranite,
kotjeprikazanonasliki,daganeizgubite.
►Sl.10: 1.Vpenjalniključ
Namestitev mešalne lopatice
Dodatna oprema
Vstavitemešalnolopaticovgredingaprivijtesšestro-
bimvijakom.Nastavitetako,dasezgornjikonecšestro-
begavijakavednoprileganaravnopovršinonagrediin
privijtešestrobivijakspriloženimključem.
►Sl.11: 1.Šestrobivijak2. Gred 3. Ravna površina
4. Mešalna lopatica
Kadarmešalnelopaticenameščatenarazličnimesti,
namestite in pritrdite obe mešalni lopatici na ravni del
gredisšestrobimivijaki,takodabostaenakipovršini
lopaticobrnjenidrugaprotidrugi,kotjeprikazanona
sliki.
►Sl.12: 1.Šestrobivijak2. Gred 3. Ravna površina
4. Mešalna lopatica
OPOMBA:Vprašajtevsvojemlokalnemservisnem
centruMakita,kateremešalnelopaticesodovoljene.
Nameščanje ali odstranjevanje
akumulatorske baterije
POZOR: Pred nameščanjem ali odstranje-
vanjem akumulatorske baterije vedno izklopite
orodje.
POZOR: Kadar nameščate ali odstranjujete
akumulatorsko baterijo, trdno držite orodje in
akumulatorsko baterijo.Čeorodjainakumulatorske
baterijenedržitetrdno,selahkozgodi,davamzdr-
snetaizrok,posledicapajelahkopoškodbaorodjain
akumulatorskebaterijetertelesnapoškodba.
POZOR: Tega orodja ne uporabljajte z adap-
terjem akumulatorja.Čezorodjempovežete
adapterakumulatorja,nemoretezapretipokrova
akumulatorjainuporabaorodjazodprtimpokrovom
akumulatorjalahkopovzročitelesnepoškodbe.
POZOR: Pazite, da si med odpiranjem ali
zapiranjem pokrova akumulatorja ne priščipnete
prstov.
OBVESTILO:Namestitepokrovakumulatorja,ki
ustrezavelikostiakumulatorja.
Pridržitegumbnapokrovuakumulatorjainodprite
pokrovakumulatorja.
►Sl.13: 1. Gumb 2.Pokrovakumulatorja
Čeželiteodstranitiakumulatorskobaterijo,jopotisnite
izorodja,pritempapomikajtegumbnasprednjistrani
vložka.
►Sl.14: 1.Rdečiindikator2. Gumb 3.Baterijski
vložek
Akumulatorskobaterijovstavitetako,daporavnate
jezičeknabaterijizutoromnaohišjuinjopotisnetev
ležišče.Potisnitejodokonca,dasezaskoči.Čevidite
rdečiindikator,kotjeprikazanonasliki,seakumulator-
skabaterijaniustreznozaskočila.
Konamestiteakumulatorskobaterijo,dobrozaprite
pokrovakumulatorja.
POZOR: Vedno namestite akumulatorsko
baterijo tako, da rdeči indikator ni več viden.Če
teganeupoštevate,lahkobaterijanepričakovano
padeizorodjainpoškodujevasaliosebevneposre-
dnibližini.
POZOR: Ne nameščajte akumulatorske bate-
rije s silo.Česeakumulatorskabaterijanezaskoči
zlahka,nipravilnovstavljena.
Delovanje stikala
OPOZORILO: Pred namestitvijo akumulator-
ske baterije v orodje se vedno prepričajte, da se
sprožilec pravilno sproži in vrne v položaj „OFF“
(izklopljeno), ko ga pritisnete do konca in nato
spustite.
OPOZORILO: NIKOLI ne onesposobite spro-
stilnega gumba tako, da ga zalepite ali podobno.
Stikalozonesposobljenimsprostilnimgumbomlahko
privededonenamernegadelovanjainresnihtelesnih
poškodb.
OPOZORILO: NIKOLI ne uporabljajte orodja,
kadar začne delovati, če povlečete samo spro-
žilno stikalo in pri tem ne pritisnete sprostilnega
gumba.Zaradistikala,kigajetrebapopraviti,lahko
pridedonenamernegadelovanjainhudihtelesnih
poškodb.PREDnadaljnjouporabovrniteorodjev
servisni center Makita v ustrezno popravilo.
OPOZORILO: Ne nameščajte akumulatorske
baterije, ko je gumb za zaklep aktiviran.
Zapreprečevanjenenamernegavlečenjasprožilnega
stikalajenameščensprostilnigumb.Zazagonorodja
hkratipritisnitesprostilnigumbinpovlecitesprožilec.
Zmočnejšimpritiskomnasprožilecsepovečahitrost
orodja.Čeželitezaustavitiorodje,spustitesprožilec.
Zaneprekinjenodelovanjepritisnitegumbzazaklepin
hkratipovlecitesprožilecternatospustitesprožilec.Za
zaustavitevorodjapovlecitesprožilecdokoncainga
nato spustite.
►Sl.15: 1.Sprožilec2. Sprostilni gumb 3. Gumb za
zaklep

18 SLOVENŠČINA
Upravljanje gumba za spremembo
hitrosti
OBVESTILO: Uporabite gumb za spremembo
hitrosti samo takrat, ko se orodje popolnoma
ustavi.Čespremenitenačinzanastavitevhitrosti
orodja,predenseorodjeustavi,selahkoorodje
poškoduje.
OBVESTILO: Gumb za spremembo hitrosti
vedno previdno potisnite v pravilen položaj.Če
vklopiteorodje,medtemkojegumbzaspremembo
hitrostivvmesnempoložajumedoznakama1in2,
lahkopridedookvareorodja.
OBVESTILO: Če se med delovanjem v načinu z
visoko hitrostjo hitrost vrtenja bistveno zmanjša,
ustavite orodje in preklopite v način z nizko hit-
rostjo. V nasprotnem primeru se lahko motor preo-
bremeniinpovzročiokvaroalipožar.
Zgumbomzaspremembohitrostilahkovnaprejizbe-
retedveobmočjihitrosti.
Izberiteustrezninačinzanastavitevhitrostizamaterial,
ki ga boste mešali.
Hitrostspremenitezobračanjemgumbazaspremembo
hitrostitako,dajekazalnikobrnjenprotipikinapoložaju
1zanačinznizkohitrostjoaliprotipikinapoložaju2za
načinzvisokohitrostjo.
►Sl.16: 1. Kazalnik 2. Gumb za spremembo hitrosti
3. Pika
Delovanje številčnice za izbiro
hitrosti
Hitrostorodjalahkobrezstopenjskonastavljatez
vrtenjemštevilčnicezaizbirohitrosti.Hitrostbrez
obremenitve,kodokoncapovlečetesprožilnostikalo,
lahko nastavite 270 min-1 na 500 min-1 prinačinuznizko
hitrostjo,500min-1 na 920 min-1 prinačinuzvisoko
hitrostjo.Višjohitrostnastavite,češtevilčnicoobrnetev
smerištevilke5;nižjohitrostnastavite,čejoobrnetev
smeri številke 1.
Izberite ustrezno hitrost za material, ki ga boste mešali.
►Sl.17: 1.Številčnicazaizbirohitrosti
OBVESTILO: Številčnico za izbiro hitrosti lahko
obrnete samo do 5 in nazaj do 1. Ne silite ga prek
5 ali 1.
Funkcija za preprečevanje
nenamernega ponovnega zagona
Čenameščateakumulatorskobaterijo,medtemko
vlečetesprožilecaligazaklepate,seorodjenezažene.
Zavkloporodjasprostitesprožilecingapovlecite.
Elektronska funkcija
Orodjejeopremljenoznaslednjoelektronskofunkcijo
zaenostavnodelovanje.
Mehki zagon
Funkcijamehkegazagonazmanjšasunekobzagonuin
omogočigladekzagonorodja.
Osnovna uporaba
POZOR:
Ne mešajte vnetljivih materialov ali
upravljajte z orodjem v bližini vnetljivih materialov,
kot je barva z razredčilom, ki se uporablja kot topilo.
V nasprotnem primeru lahko pride do telesnih poškodb.
POZOR:
Ne mešajte materiala z visoko stopnjo
viskoznosti v načinu z visoko hitrostjo. Lahko izgu-
bitenadzornadorodjeminpovzročitetelesnepoškodbe.
POZOR: Ne vrtite mešalne lopatice zunaj
mešalne posode.
POZOR:
Če zaslišite neobičajen zvok med upo-
rabo, izklopite stikalo in prenehajte uporabljati orodje.
OBVESTILO: Če mešate material in mešalna
lopatica štrli iz materiala, pazite, da ne škropite z
materialom.
OBVESTILO: Orodje uporabljajte samo za meša-
nje malte, betona itd.
1. Načinzvisokoalinizkohitrostjoizberitegledena
material, ki ga boste mešali.
2.
Orodječvrstodržitezobemarokama.Mešalnolopa-
tico povsem potopite v material. Preverite, da se material
nistrdilinsopogojizadelovarni,tervklopiteorodje.
3. Medmešanjempremikajtemešalnolopaticogorin
dol, da zmešate ves material.
4. Pokoncumešanjaizklopiteorodje.Prepričajtese,
dasejemešalnalopaticapopolnomaustavila,natopa
jopovleciteizposodezamešanje.
Možna dejanja
POZOR: Pred nastavljanjem ali preizkusom
delovanja orodja se prepričajte, ali je orodje
izključeno in ali je akumulatorska baterija
odstranjena.
Zamenjava pokrova akumulatorja
Dodatna oprema
Namestiteenegaodpokrovovakumulatorja,kiustreza
velikostivašeakumulatorskebaterije.
►Sl.18: 1.PokrovakumulatorjaS2. Pokrov akumula-
torjaL3. Gumb
1. Držitegumbnapokrovuakumulatorjainodprite
standardnodobavljenpokrovakumulatorja.
2. Zrahljajtevijak,kidržistandardnodobavljen
pokrovakumulatorja.Natoodstranitevijak,obojkoin
pokrovakumulatorja.
►Sl.19: 1.Vijak2.Obojka3.Pokrovakumulatorja
(standardnodobavljen)
OPOMBA:
Obojkalahkoostanevpritrdilnihodprtinah.
Vtemprimerujoizvlecitezvijakomaličimpodobnim.
3. Poravnajteodprtinovnosilcunaizbirnempokrovu
akumulatorjazodprtinamivnosilcunaohišju.Vstavite
obojko.Natozategnitevijaka,dagapritrdite.
►Sl.20:
1.Vijak2.Obojka3.Pokrovakumulatorja(izbirno)
4. Dobrozapritepokrovakumulatorja.

19 SLOVENŠČINA
Nameščanje ali odstranjevanje držala
gredi
odvisno od države
Za UT001G
Namestiteenegaoddržalgredi,kijeizbirnonavoljoin
seujemazvelikostjovijakanadržalu.
►Sl.21: 1.DržalogrediM122.DržalogrediM14
Medtemkodržitevretenosključem,zdrugimključem
popustitedržalogredi.
►Sl.22: 1.Držalogredi2.Ključ3. Vreteno
Držalogredinamestitevobratnemvrstnemredukot
postopek odstranitve.
Za UT002G
1. Imbusniključvstavitevvpenjalnoglavoinnato
vpenjalnoglavosprostitezimbusnimključem,pričemer
držitevretenosključem.
►Sl.23: 1.Imbusniključ2.Vpenjalnaglava3.Ključ
4. Vreteno
2. Privijtedržalogredisključem,hkratipazdrugim
ključemdržitevreteno.
►Sl.24: 1.Držalogredi2.Ključ3. Vreteno
Ravnanje po uporabi
Zmokrokrpoalipodobnimpripomočkompouporabi
previdnoobrišitevsesnovizorodja.Boditeposebej
previdnipričiščenjuprezračevalnihodprtin,območja
okoli stikala, odprtin pokrovov itd.
OBVESTILO: Orodja ne čistite v vodi. Voda bo
prodrlavohišjemotorjainpovzročilaokvaro.
VZDRŽEVANJE
POZOR: Preden se lotite pregledovanja ali
vzdrževanja orodja, se vedno prepričajte, da
je orodje izklopljeno in akumulatorska baterija
odstranjena.
OBVESTILO: Nikoli ne uporabljajte bencina,
razredčila, alkohola ali podobnega sredstva. V
tem primeru se lahko orodje razbarva ali defor-
mira oziroma lahko nastanejo razpoke.
VARNOinZANESLJIVOdelovanjetegaizdelkabo
zagotovljenole,čebostepopravila,vzdrževanjein
nastavitveprepustilipooblaščenemuservisuzaorodja
Makitaalitovarniškemuosebju,kivgrajujeizključno
originalne nadomestne dele.
Odpravljanje težav
Predenzahtevatepopravilo,preveritenaslednje:
1. Izklopiteorodjeinganatovklopite,dagaznova
zaženete.
2. Napolnitebaterijoalijozamenjajteznapolnjeno
baterijo(popotrebiponovitepostopekšezadrugo
baterijo).
3. Počakajte,daseorodjeinbaterijaohladita.
Čezobnovitvijosistemazaščiteneodpravitetežave,se
obrnite na lokalni servisni center Makita.
DODATNA OPREMA
POZOR: Ta dodatni pribor ali pripomočki so
predvideni za uporabo z orodjem Makita, ki je
opisano v teh navodilih za uporabo. Pri uporabi
drugegapriboraalipripomočkovobstajanevarnost
telesnihpoškodb.Dodatnipriboralipripomočke
uporabljajtesamozanavedeninamen.
Zavečinformacijododatniopremiseobrnitenanaj-
bližjipooblaščeniserviszaorodjaMakita.
• Mešalna lopatica
• Gred
• Pokrovakumulatorja
• Originalna akumulator in polnilnik Makita
OPOMBA: Nekateri predmeti na seznamu so lahko
priloženiorodjukotstandardnadodatnaoprema.
Lahkoserazlikujejooddržavedodržave.

20 SHQIP
SHQIP (Udhëzimet origjinale)
SPECIFIKIMET
Modeli: UT001G UT002G
Shpejtësiapangarkesë Regjimiishpejtësisësëlartë 0 - 920 min-1
Regjimiishpejtësisësëulët 0 - 500 min-1
Diametrimaksimalietëssëpërzierjes 240 mm
Gjatësiaepërgjithshme
(paboshtindheetënpërzierëse)
mekapakunebaterisëS 373 mm 363 mm
mekapakunebaterisëL 412 mm 403 mm
Tensioni nominal D.C. 36 V - 40 V maks.
Pesha neto 5,7 - 7,0 kg 5,8 - 7,2 kg
• Përshkaktëprogramittonëtëvazhdueshëmtëkërkim-zhvillimit,specikimetqëjepenkëtumundtë
ndryshojnëpadhënënjoftim.
• Specikimetdhekutiaebaterisëmundtëndryshojnësipasshtetit.
• Peshamundtëndryshojënëvarësitëaksesorit(ëve),përfshirëkutinëebaterisë.Kombinimimëilehtëdhemë
irëndë,sipasProcedurësEPTA01/2014,tregohetnëtabelë.
Kutia e aplikueshme e baterisë dhe karikuesi
Kutiaebaterisë BL4020 / BL4025 / BL4040* / BL4050F* / BL4080F*
* : Bateria e rekomanduar
Karikuesi DC40RA / DC40RB / DC40RC
• Disaprejkutivetëbaterivedhekarikuesvetërendituramëlartmundtëmosjenëtëdisponueshmenëvarësitë
zonëskujubanoni.
PARALAJMËRIM: Përdorni vetëm kutitë e baterisë dhe karikuesit e listuar më lart.Përdorimii
karikuesvedhekutivetëtjeratëbaterisëmundtëshkaktojëlëndimdhe/osezjarr.
Simbolet
Pjesëtnëvazhdimtregojnësimboletqëmundtë
përdorenpërpajisjen.Sigurohuniqëmerrnivesh
kuptiminetyrepërparapërdorimit.
Lexonimanualinepërdorimit.
Mosepërdorniveglënnëshi.
Mosepastroniveglënmeujë.
Ni-MH
Li-ion VetëmpërshteteteBE-së
Përshkaktëpranisësëkomponentëvetë
rrezikshëmnëpajisje,mbetjetepajisjeve
elektronikedheelektrike,akumulatorëtdhe
bateritë,mundtëkenëndikimnegativnë
mjedisdhenëshëndetinenjerëzve.
Mosihidhnipajisjetelektrikedhe
elektronikeosebateritëmembetjet
shtëpiake!
NëpërputhjemeDirektivënEvropiane
përmbetjetepajisjeveelektrikedhe
elektronike,akumulatorëtdhebateritë,
dhembetjeteakumulatorëvedhe
baterive,sidhepërfshirjenesajnëligjin
kombëtar,mbetjetepajisjeveelektrikedhe
elektronike,akumulatorëvedhebaterive,
duhettëmbahenveçmasdhetëdorëzohen
nënjëpikëgrumbullimitëveçantëpër
mbetjetkomunale,dukevepruarnë
përputhjemerregulloretembrojtjessë
mjedisit.
Kjotregohetngasimboliikoshittë
plehravemekryq,tëvendosurmbipajisje.
Përdorimi i synuar
Veglaështëprodhuarpërpërzierjenematerialevetë
muritetj.(përveçmaterialevetëndezshme).
Pagina se încarcă...
Pagina se încarcă...
Pagina se încarcă...
Pagina se încarcă...
Pagina se încarcă...
Pagina se încarcă...
Pagina se încarcă...
Pagina se încarcă...
Pagina se încarcă...
Pagina se încarcă...
Pagina se încarcă...
Pagina se încarcă...
Pagina se încarcă...
Pagina se încarcă...
Pagina se încarcă...
Pagina se încarcă...
Pagina se încarcă...
Pagina se încarcă...
Pagina se încarcă...
Pagina se încarcă...
Pagina se încarcă...
Pagina se încarcă...
Pagina se încarcă...
Pagina se încarcă...
Pagina se încarcă...
Pagina se încarcă...
Pagina se încarcă...
Pagina se încarcă...
Pagina se încarcă...
Pagina se încarcă...
Pagina se încarcă...
Pagina se încarcă...
Pagina se încarcă...
Pagina se încarcă...
Pagina se încarcă...
Pagina se încarcă...
Pagina se încarcă...
Pagina se încarcă...
Pagina se încarcă...
Pagina se încarcă...
Pagina se încarcă...
Pagina se încarcă...
Pagina se încarcă...
Pagina se încarcă...
Pagina se încarcă...
Pagina se încarcă...
Pagina se încarcă...
Pagina se încarcă...
Pagina se încarcă...
Pagina se încarcă...
Pagina se încarcă...
Pagina se încarcă...
Pagina se încarcă...
Pagina se încarcă...
Pagina se încarcă...
Pagina se încarcă...
Pagina se încarcă...
Pagina se încarcă...
Pagina se încarcă...
Pagina se încarcă...
Pagina se încarcă...
Pagina se încarcă...
Pagina se încarcă...
Pagina se încarcă...
-
 1
1
-
 2
2
-
 3
3
-
 4
4
-
 5
5
-
 6
6
-
 7
7
-
 8
8
-
 9
9
-
 10
10
-
 11
11
-
 12
12
-
 13
13
-
 14
14
-
 15
15
-
 16
16
-
 17
17
-
 18
18
-
 19
19
-
 20
20
-
 21
21
-
 22
22
-
 23
23
-
 24
24
-
 25
25
-
 26
26
-
 27
27
-
 28
28
-
 29
29
-
 30
30
-
 31
31
-
 32
32
-
 33
33
-
 34
34
-
 35
35
-
 36
36
-
 37
37
-
 38
38
-
 39
39
-
 40
40
-
 41
41
-
 42
42
-
 43
43
-
 44
44
-
 45
45
-
 46
46
-
 47
47
-
 48
48
-
 49
49
-
 50
50
-
 51
51
-
 52
52
-
 53
53
-
 54
54
-
 55
55
-
 56
56
-
 57
57
-
 58
58
-
 59
59
-
 60
60
-
 61
61
-
 62
62
-
 63
63
-
 64
64
-
 65
65
-
 66
66
-
 67
67
-
 68
68
-
 69
69
-
 70
70
-
 71
71
-
 72
72
-
 73
73
-
 74
74
-
 75
75
-
 76
76
-
 77
77
-
 78
78
-
 79
79
-
 80
80
-
 81
81
-
 82
82
-
 83
83
-
 84
84


Makita UT001G Cordless Mixer Manual de utilizare
- Tip
- Manual de utilizare
Lucrări înrudite
-
Makita DUT130 Manual de utilizare
-
Makita DMP181 Manual de utilizare
-
-
Makita MP001G Manual de utilizare
-
-
-
Makita DLS714 Manual de utilizare
-
-
-
Makita DHS680 Manual de utilizare