Raider Garden Tools RD-LM32 Manual de utilizare
- Categorie
- Cositoare
- Tip
- Manual de utilizare

USER’S MANUAL
RD-LM32
○ електрическа косачка
○ lawn mower
○ maşina de tuns iarbă
○ ηλεκτρικη μηχανη γκαζον
○ газонокосилка
Contents
2 BG схема
3 BG оригинална инструкция за експлоатация
11 EN instructions’ manual
17 RO instructiuni
24 EL οδηγίες
31 RU инструкция по применению
RAIDER
GARDEN TOOLS
www.raider.bg

2www.raider.bg
* Може да има разлика във външния
вид между машината от схемата и
вашият модел.
2
3
1
5
8
6
7
4
12
9
11
10
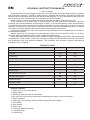
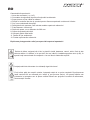
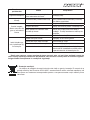
Прочетете ръководството преди употреба!
Refer to instruction manual / booklet!
Носете защитни антифони!
Always wear hearing protection!
Носете защитна маска!
Wear dust mask!
Носете защитни очила!
Wear safety glases!
Двойна изолация
Double isolation

3
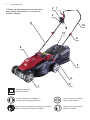
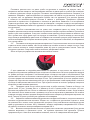
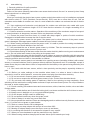
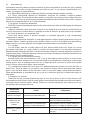
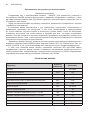
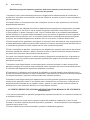
Изобразени елементи:
1. Лост на пусковия прекъсвач (Включено/Изключено).
2. Предпазен бутон против неволно включване.
3. Скоба за придържане на кабела към дръжката.
4. Гайки и самозаконтрящи болтове за закрепване на горната част на дръжката към долната.
5. Кош, в който се събира окосената трева.
6. Отвори, в които влизат двата края на дръжката.
7. Предни колела.
8. Задни колела.
9. Преден предпазен капак.
10. Ръкохватка на капака на коша за окосена трева.
11. Долна част на дръжката.
12. Горна част на дръжката.
Пояснение на релефните пиктограми върху задния капак на машината.
Преди косене се уверете, че в тревата няма камъни, пръчки, клони, бутилки, телове и
други чужди тела. При косене те могат да Ви наранят. Не косете, докато в непосредствена
близост се намират други лица, особено деца или домашни животни. Съхранявайте на
места недостъпни за деца.
Пазете захранващия кабел на безопасно разстояние от ножовете!
Пазете се от въртящите се елементите на машината. Изчакайте въртенето да спре
напълно. След изключване ножа продължава да се върти по инерция и може да предизвика
наранявания. Не поставяйте ръцете или краката си в близост или под въртящите се елементи.
При повреда или нараняване на захранващия кабел, веднага изключете щепсела от контакта.
BG

4www.raider.bg
Оригинална инструкция за употреба
Уважаеми потребители,
Поздравления за покупката на машина от най-бързоразвиващата се марка за електрически,
бензинови и пневматични машини - RAIDER. При правилно инсталиране и експлоатация, RAIDER са сигурни
и надеждни машини и работата с тях ще Ви достави истинско удоволствие. За Вашето удобство е изградена и
отлична сервизна мрежа с 45 сервиза в цялата страна.
Преди да използвате тази машина, моля, внимателно се запознайте с настоящата “Инструкция за
употреба”.
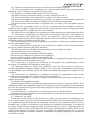
В интерес на Вашата безопасност и с цел осигуряване на правилната й употреба, прочетете
настоящите инструкции внимателно, включително препоръките и предупрежденията в тях. За избягване на
ненужни грешки и инциденти, важно е тези инструкции да останат на разположение за бъдещи справки на
всички, които ще ползват машината. Ако я продадете на нов собственик то “Инструкцията за употреба” трябва
да се предаде заедно с нея, за да може новия ползвател да се запознае със съответните мерки за безопасност
и инструкциите за работа.
“Евромастер Импорт Експорт” ООД е упълномощен представител на производителя и собственик
на търговската марка RAIDER. Адресът на управление на фирмата е гр. София 1231, бул. “Ломско шосе” 246,
тел. 02 934 33 33, 934 10 10, www.raider.bg; www.euromasterbg.com; e-mail: info@ euromasterbg.com.
От 2006 година във фирмата е въведена системата за управление на качеството ISO 9001:2008
с обхват на сертификацията: Търговия, внос, износ и сервиз на професионални и хоби електрически,
пневматични и механични инструменти и обща железария. Сертификатът е издаден от Moody International
Certication Ltd, England.
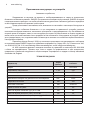
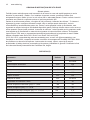
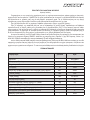
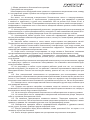
ТЕХНИЧЕСКИ ДАННИ
параметър мерна
единица стойност
Модел -RD-LM32
Захранващо напрежение V AC 230
Честота на променливия ток Hz 50
Номинална мощност W1600
Максимални обороти на двигателя без натоварване min-1 3500
Широчина на косене mm 360
Височина на косене mm 25-40-55
Обем на коша за трева L 40
Ниво на звуково налягане (LpA) K=3.0 dB dB 83
Ниво на звуково мощност (LwA), K=3.0 dB dB 96
Стойност на вибрационните ускорения (ah), K=1.5 m/s2m/s22.12
Клас на защита на електроизолацията II
Степен на защита - IP24

5
1. Общи указания за безопасна работа.
Прочетете внимателно всички указания.
Неспазването на приведените по-долу указания може да доведе до токов удар, пожар и/или
тежки травми. Съхранявайте тези указания на сигурно място.
1.1. Безопасност.
Задължително е включването на електрическата косачка за трева само в електрически
инсталации оборудвани с електрически прекъсвач Fi (прекъсвач за защитно изключване с
дефектнотокова защита), а токът на утечка, при който се задейства ДТЗ трябва да е не повече
от 30 mA, съгласно “Наредба 3 за устройство на електрическите уредби и електропроводните
линии“. Информацията относно напрежението на мрежата и типа ток на фирмената табелка
трябва да отговаря на данните на Вашата електрическа мрежа.
1.2. Използвайте влагоустойчив удължител предназначен за работа на открито, с
три проводен кабел със сечение 1,5 mm2 и максимална дължина 50 m. Имайте предвид, че
удължител с дължина над 30 m намалява на мощността на косачката.
1.3. Кабела на удължителя трябва да е напълно развит. Работата на машината при
намотан на макара или свободно навит удължител е опасна, защото по този начин удължителят
се превръща в бобина.
1.4. Предпазвайте захранващия кабел от нагряване, омасляване, допир до остри ръбове
или до подвижни звена на машини. Повредените или усукани кабели увеличават риска от
възникване на токов удар.
1.5. Не се разрешава използването на електрическата косачка за трева при положение,
че захранващият кабел или друг елемент на електрическата косачка за трева е повреден.
Повредени захранващи кабели увеличават риска от токов удар.
1.6. При косене постоянно наблюдавайте захранващия кабел дали е в безопасно
положение спрямо режещите механизми. Дръжте захранващия кабел на безопасно разстояние
от ножа.
1.7. Не се разрешава ползването на електрическата косачка за трева от деца. Вземете
необходимите мерки да предотвратите достъпа на деца до електрическата косачка за трева
или до захранващия кабел.
1.8. Трябва да се изключи електрическата косачка за трева от захранването преди
пристъпването към работи по поддръжката и. Не позволявайте електрическата косачка за
трева да бъде дърпана за захранващия кабел.
1.9. Не позволявайте в никакъв случай с машината да работят деца или лица, незапознати
с това ръководство за експлоатация. Възможно е възрастта на работещите с машината да е
ограничена от националното законодателство. Когато не използвате машината, я съхранявайте
така, че да е недостъпна за деца.
1.10. Тази електрическа косачка за трева не е предназначена да бъде ползвана от лица
(включително деца) с психични, сензорни или душевни ограничения, както и от лица без
достатъчен опит и/или знания, освен в случаите, в които те са под непосредствения контрол на
отговорно за безопасността им лице или се обучават от него как да я ползват.
1.11. В никакъв случай не косете, докато в непосредствена близост се намират други лица,
особено деца или домашни животни.
1.12. Преди да извършвате настройки по машината, когато я почиствате или когато я
оставяте без пряк надзор, дори и за кратко, я спирайте, изключвайте прекъсвача и изваждайте
щепсела на захранващия кабел от мрежовия контакт.
1.13. Не използвайте електрическата косачка за трева при неблагоприятни атмосферни
условия.
1.14. Не използвайте или не излагайте електрическата косачка за трева на дъжд.
Предпазвайте се от токов удар.
1.15. Не докосвайте въртящи елементи на машината. Изчакайте въртенето да спре
напълно. След изключване ножа продължава да се върти по инерция и може да предизвика
наранявания. Не поставяйте ръцете или краката си в близост или под въртящи се елементи.
1.16. Грижливо проверявайте предварително обработваната площ и отстранявайте
камъни, пръчки, клони, бутилки, телове и други чужди тела.

6www.raider.bg
1.17. Винаги преди употреба проверявайте застопоряващия болт на ножа да не е разхлабен
и дали ножа не е затъпен или износен.
1.18. Косете винаги на дневна светлина или при много добро изкуствено осветление.
1.19. На склонове, внимавайте винаги да стъпвате стабилно.
1.20. Не работете с машината, когато тревата е влажна!
1.21. Работете винаги със спокоен ход, никога не ходете бързо.
1.22. Никога не работете с машината, ако има повредени предпазни съоръжения или без
елементите за сигурност, като капака на отвора за окосената трева или коша за трева.
1.23. Работата по неравен терен може да бъде опасна.
1.24. Не косете по стръмни склонове с наклон повече от 20%.
1.25. По наклонен терен косете винаги напречно на наклона, никога надолу и нагоре.
1.26. При обръщане на посоката на движение по склонове бъдете особено внимателни!
1.27. Когато се движите назад или теглите машината бъдете особено внимателни!
1.28. При косене винаги бутайте машината напред. Никога не я дърпайте към тялото си.
1.29. Когато при пренасяне трябва да наклоните машината, когато прекосявате зони,
не засадени с трева и когато транспортирате машината към и от зоната, която ще косите,
машината трябва да е изключена и ножа трябва да е неподвижен.
1.30. Никога не повдигайте или пренасяйте машината при работещ електродвигател и
въртящ се нож.
1.31. Не накланяйте машината при включване на електродвигателя, освен, ако това
не е необходимо вследствие наличието на много висока трева. В такъв случай повдигнете
отдалечената страна на машината, като натиснете дръжката надолу и то само колкото е
необходимо. Когато пускате машината, я дръжте здраво с двете ръце.
1.32. При включване на електрическата косачка за трева внимавайте краката Ви да са на
безопасно разстояние от въртящите се елементи.
1.33. Не използвайте машината, когато сте боси или със сандали. Винаги работете със
здрави, затворени обувки и дълъг панталон.
1.34. Изключвайте прекъсвача на електрическата верига и изваждайте щепсела от
мрежовия контакт винаги:
• когато се отдалечавате от машината;
• преди отстраняване на елементи, блокирали машината;
• когато проверявате, почиствате или работите по машината;
• когато машината започне да вибрира необичайно силно.
• след влизане в съприкосновение с чуждо тяло незабавно проверете машината за
евентуални повреди и преди да я ползвате, осигурете отстраняването им;
1.35. Операторът или потребителят отговарят за нещастни случаи, наранявания спрямо
други лица или околната среда и причинени материални щети.
1.36. Електрическата косачка за трева е така проектирана, че всички подвижни части и
корпусът гарантират безопасни условия за употреба. За повреди причинени в резултат на
опитите за промяна на конструкцията на електрическата косачка за трева производителят не
носи отговорност.
1.37. С цел осигуряване на безопасност, следва да използвате само оригинални резервни
части или части препоръчвани от производителя.
1.38. Неспазването на дадените указания може да доведе до токов удар, пожар и/или тежки
травми.
2. Функционално описание и предназначение.
Електрическата косачка е ръчен електроинструмент с изолация втори клас. Тя се задвижва
от еднофазен колекторен двигател с променлив ток и е предназначена за косене трева
в домашни условия. Не се разрешава използването на електрическата косачка за трева за
дейности различни от нейното предназначение.
3. Сглобяване на елементите на електрическата косачка за трева и пускане в експлоатация.
Някои части на косачката са разглобени, за да се намали обема на опаковката при
транспортирането.
3.1. Монтиране на дръжката.

7
Поставете долната част на двете тръби на дръжката в отворите на корпуса така, че
напречните малки отвори за застопоряващите винтове в двата края на тръбите да съвпаднат
с малките странични отвори в корпуса. Поставете застопоряващите винтове в отворите и ги
завинтете. Вкарайте приспособлението за придържане на кабела на удължителя, в тръбата
на горната част на дръжката. Монтирайте горната част на дръжката, към долната дръжка
с помощта на самозаконтрящите болтове и гайките с ръкохватки. Прикрепете пусковия
прекъсвач в горната част на дръжката с помощта на два винта. Завинтете ги от вътрешната
страна на дръжката така, че отворите в нея да съвпаднат с отворите в корпуса на прекъсвача.
Захванете захранващия кабел към дръжката с помощта на скобата за придържане на кабела
към дръжката.
3.2. Сглобете пластмасовия кош за трева, като съедините двете му части. За целта
вкарайте крачетата на долната половина в съответните отвори в горната половина. Притиснете
докато чуете леко щракване. След като сглобите коша вдигнете нагоре капака и закачете под
него готовия кош върху двете куки на корпуса на машината. Пуснете капака да легне върху
коша. Винаги проверявайте дали коша за събиране на окосената трева е добре закрепен! Ако
не Ви е необходимо да събирате окосената трева, то може да косите и без коша, но непременно
със спуснат капак.
3.3. Поставете колелата на предната и задната ос. След това сложете на оста от външната
страна на всяко колело шайба, така че да можете да сложите шплент в отвора на оста. След
като пъхнете шплента в отвора изкривете двата му края в срещуположни посоки. Така ще
осигурите колелата. След това сложете външните декоративни тасове.
Лесно и бързо регулиране на желаната височина на косене.
С едно движение се настройва височината на предната, а след това и на задната ос. И
четирите колела винаги трябва да бъдат на една и съща височина. За целта предната и задната
ос трябва да бъдат настроени в съответния канал на корпуса на една и съща височина. При
преместване на оста на колелата в канала най-близо до земята (най-долния канал) косачката
ще коси тревата на максимална височина 55 mm. При преместване на оста в средния канал,
тревата ще бъде окосена на височина 40 mm, а при преместване в най-горния канал, косенето
ще бъде на най-ниската височина 25 mm. При първото косене за сезона е добре да настроите
косачката на най-голямата височина.
3.4. Проверете дали болта, който държи ножа е добре затегнат. Главата на болта е за
гаечен ключ 27 mm, а самия болт е с диаметър 8 mm и дясна резба със стъпка 1,25 mm.
Дължина на резбата 30 mm. Болта се завинтва на дясно и се отвинтва на ляво. За да отвиете
или затегнете болта хванете ножа с ръкавица, за да не се върти вала на машината. Не пъхайте
отвертка или друг метален предмет във вентилационните отвори за да блокирате въртенето на
вала. Така ще счупите лопатките на турбината за охлаждане.
3.5. Закрепете стабилно кабела на удължителя за приспособлението, след което включете
контакта на удължителя към щепсела. Убедете се, че кабела на удължителя е далеч от ножа
на косачката и от зоната, която ще започнете да косите. След това включете щепсела в другия
край на удължителя в контакт 220 V. Машини с обявено захранващо напрежение 230 V могат
да работят включени в електроснабдителна мрежа 220 V.
3.6. Включете електрическата косачка за трева, като натиснете предпазния бутон против
неволно включване и притиснете лоста на пусковия прекъсвач към дръжката. Пуснете
предпазния бутон. Никога не включвайте косачката, ако тя се намира във висока трева.

8www.raider.bg
3.7. Електрическата косачка за трева се изключва, като пуснете лоста на пусковия
прекъсвач и непременно изчакате ножа да спре да се върти!
Не включвайте косачката непосредствено след като сте я изключили.
4. Практични съвети:
4.1. Спазвайте общинските разпоредби за времето от деня, през което можете да
използвате машини на открито. В някои страни е забранено косенето сутрин преди 08.00 часа,
след обяд между 14.00-16.00 часа и вечер след 22.00 часа, за да се предпазят гражданите от
нежелан шум.
4.2. Често тревните площи са съставени от треви от различни сортове. При често косене
Вие ще усилите растежа на тези сортове, които образуват плътни чимове и силни корени.
Ако косите рядко Вашата морава, ще усилите и подобрите развитието на високо растящите
треви и бурени. Нормалната височина на тревата е около 4-5 cm. Добре е така да планирате
честотата на косенето, че с едно косене да намалявате най-много 1/3 от общата височина
на тревата. Ако не напоявате моравата си не косете тревата по ниско от 4 cm, защото при
евентуално засушаване тя ще се увреди.
4.3. Косете на най-ниската височина (25 mm) само, ако тревната Ви площ е много равна,
очаквате интензивни валежи или Ви предстои отпуска.
4.4. Средната височина на косене (40 mm) е най-добра, когато интервалите между
предишното и следващото косене не са продължителни.
4.5. Височината на косене от (55 mm) е подходяща при първото косене за сезона и когато
има суша.
4.6. Изпразвайте контейнера за събиране на окосената трева след напълване на 2/3 от
обема му, така ще осигурите по-ефективно косене и ще предпазите косачката от претоварване.
4.7. При работа в особено тежки условия внимавайте да не претоварвате електродвигателя.
При претоварване скоростта на въртене на електродвигателя пада и шума му се променя. В
такъв случай спрете, отпуснете лоста за включване и настройте по-голяма височина на косене.
В противен случай производителността ще се намали и машината може да се повреди.
4.8. При косене в близост до ръбове внимавайте да не захванете с косачката чужди
предмети.
4.9. Производителността на рязане зависи от гъстотата, влажността, дължината тревата,
както и от височината на рязане. Производителността на рязане намалява при често включване
и изключване на косачката по време на косене. За оптимизиране на производителността на
косене се препоръчва по-честото косене, увеличаването на височината на рязане и работата с
умерена скорост.
5. Обслужване, поддръжка и съхранение.
ВНИМАНИЕ! Винаги изключвайте електрическия контакт от щепсела преди да предприемете
дейности свързани с техническото обслужване или почистване!
След като машината бъде изключена, ножа продължава да се върти известно време
по инерция! Преди да започнете да работите по косачката, изчакайте въртенето на
електродвигателя и на ножа да спре напълно!
Никога не се опитвайте да спрете въртенето на ножа!
Когато трябва да извършвате дейности в близост до ножа, работете винаги с предпазни
ръкавици!
Изпълнявайте процедурите по поддръжка редовно, за да си осигурите дълготрайно и
надеждно ползване на косачката. Проверявайте я периодично за забележими дефекти, като
разхлабен или повреден нож и разхлабени винтови съединения. Уверете се, че капаците и
предпазните съоръжения са изправни и са монтирани правилно.
5.1. Почистване.
Най-лесно се почиства косачката веднага след косенето. След приключване на работа
почиствайте грижливо машината с мека четка и кърпа. Не използвайте вода и/или разтворители
и препарати. Отстранете всички частички от трева, особено от вентилационните отвори.
Поставете машината, легнала настрани и почистете зоната на ножа. Работете винаги с
предпазни ръкавици! Отстранете здраво полепналите частички с дървено или пластмасово
трупче.

9
5.2. Заточване или смяна на режещото острие.
Заменяйте затъпени или повредени ножове. Ножа се сваля, като отвинтите основния болт
в центъра на ножа с гаечен ключ 27. Преди да поставите нов нож или, след като сте заточили
стария, уверете се, че ножа е поставен правилно. След това затегнете болта и се уверете
отново, че няма луфтове и ножът е монтиран правилно. Използвайте само подходящи за
косачката ножове.
5.3. Винаги почиствайте основно косачката, когато я оставяте за по-дълго съхранение.
Особено през зимата. Намажете ножа с машинно масло за да го предпазите от ръжда. При
съхраняване на машината кошът за трева трябва да бъде демонтиран. За да спестите
пространство можете да разглобите дръжката. При разглобяване и сглобяване на горната и
долната част на дръжката внимавайте да не повредите захранващия кабел.
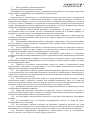
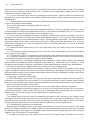
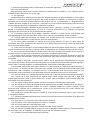
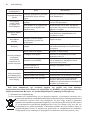
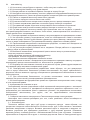
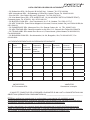
6. Неизправности и начини за отстраняването им.
Таблицата по-долу показва симптоми на неизправности и как можете да си помогнете, ако
косачката Ви престане да работи нормално. Ако не можете да откриете и отстраните проблема,
следвайки инструкциите в таблицата, обърнете се към оторизиран сервиз на Райдер.
Внимание: преди да започнете отстраняването на повреди, спрете косачката и я изключете от
захранващата мрежа.
Неизправности Причини Отстраняване
Косачката не
започва да
работи.
Захранващия кабел не е
свързан или е повреден.
Проверете кабела. При необходимост
го сменете.
Двигателят се
включва, но ножа
не се върти.
Косачката е във висока трева. При първоначално пускане винаги
поставяйте косачката в по-ниска
трева.
Възможно е косачката да
е зацапана и ножът да е
блокирал.
Изключете щепсела и проверете.
Сложете си предпазни ръкавици и
почистете и освободете ножа.
Двигателя
се изключва
внезапно.
Щепселът се е изтеглил. Проверете кабела. Уверете се, че е
добре закрепен в приспоблението и
го включете отново.
Необичаен шум.
Разхлабен е болта на ножа
или връзки между крепежни
елементи.
Затегнете частите.
Силни вибрации.
Изкривен и повреден нож. Веднага спрете косачката и
подменете ножа в специализиран
сервиз.
Неравно косене.
Двигателя работи
тежко и намаляват
оборотите.
Тревата е много висока. Увеличете височината на косене.
Ножа е затъпен. Сменете или наточете ножа. Вижте
т. 5.2.
Възможно е косачката да е
зацапана и блокирала.
Огледайте косачката отдолу и
я почистете. Работете винаги с
предпазни ръкавици.
Ножът може да е монтиран
неправилно.
Проверете. Вижте т. 5.2.

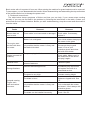
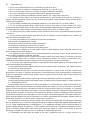
10 www.raider.bg
Неизправности Причини Отстраняване
Тревата остава на
земята и коша (6)
не се пълни.
Тревата е много влажна. Изчакайте тревните площи да
изсъхнат.
Изходния канал е задръстен. Изключете щепсела и го почистете.
Коша за трева е пълен. Изключете щепсела и изпразнете
коша.
Коша за трева е замърсен. Изключете щепсела Проверете и
го почистете. Коша винаги трябва
да бъде чист, за да може въздуха
свободно да преминава през него.
При необходимост, ремонтът на Вашата косачка да се извършва само от квалифицираните
специалисти в сервизите на RAIDER, където се използват само оригинални резервни части. По
този начин се гарантира тяхната безопасна работа.
7. Опазване на околната среда.
С оглед опазване на околната среда електроинструментът, допълнителните
приспособления и опаковката трябва да бъдат подложени на подходяща
преработка за повторното използване на съдържащите се в тях ценни суровини.
Не изхвърляйте електроинструменти при битовите отпадъци! Съгласно
Директивата на ЕС 2012/19/EC относно излезлите от употреба електрическ
и и електронни устройства и утвърждаването и като национален закон
електроинструментите, които не могат да се използват повече, трябва да се събират
отделно и да бъдат подлагани на подходяща преработка за оползотворяване на
съдържащите се в тях ценни суровини.

11
ORIGINAL INSTRUCTION MANUAL
Dear Customer,
Congratulations on the purchase of machinery from the fastest growing brand of electric, gasoline
and pneumatic machines - RAIDER. When properly installed and operating, RAIDER are safe and
reliable machines and work with them will deliver a real pleasure. For your convenience has been built
and excellent service network of 45 service station across the country.
Before using this machine, please carefully acquainted with these “instructions for use.
In the interest of your safety and to ensure proper use and read these instructions carefully,
including the recommendations and warnings in them. To avoid unnecessary errors and accidents,
it is important that these instructions will remain available for future reference to all who will use the
machine. If you sell it to a new owner “Instructions for Use” must be submitted along with it to enable
new users to become familiar with relevant safety and operating instructions.
Euromaster Import Export Ltd. is an authorized representative of the manufacturer and owner of
the trademark RAIDER.
Adress: Soa City 1231, Bulgaria “Lomsko shausse” Blvd. 246, tel 02 934 33 33, 934 10 10, www.
raider.bg; www.euromasterbg.com; e-mail: [email protected].
Since 2006 the company introduced the system of quality management ISO 9001:2008 with scope
of certication: Trade, import, export and servicing of hobby and professional electrical, mechanical
and pneumatic tools and general hardware. The certicate was issued by Moody International
Certication Ltd., England.
TECHNICAL DATA
parameter unit value
Model -RD-LM32
Current V AC 230
Frequency Hz 50
Rated Power W1600
Max engine rotations per minute (no-load) min-1 3500
Cutting width mm 360
Cutting height mm 25-40-55
Basket size L 40
Sound pressurе (LpA)dB 83
Sound Level (LwA)dB 96
Vibrations (ah) m/s22.12
Isolation Class II
Ingress Protection Rating - IP24
Product Features:
1. Switch lever of the on/o switch.
2. Safety button.
3. Bracket to hold the cable to the handle.
4. Nut with self locking levers and bolts for attaching the upper to the lower handle.
5. Grass container.
6. Openings in the housing, which includes both ends of the handle.
7. Front wheel.
8. Rear wheels.
9. Motor cover.
10. Outlet lid (deector guard).
11. Handle bottom.
12. Handle top.
EN

12 www.raider.bg
1. General guidelines for safe operation.
Read all instructions carefully.
Failure of the nature following instructions can cause electric shock, re and / or severe injuries. Keep
these instructions in a safe place.
1.1. Safety.
When you work with the electric lawn mower outdoor, switch the machine only in installations equipped
with electric switch “Fi” RCD (Residual Current Device). RCD must be no more than 30 mA. Use an
extension cord suitable for outdoor use. Use of a cord suitable for outdoor use reduces the risk of electric
shock.
1.2. Use moisture-proof extension cord designed for outdoor use with three wire cable with cross
section 1.5 mm2 and a maximum length of 50 m. Note that the extension of a length exceeding 30 m
reduces the power mower.
1.3. Cable’s extension must be mature. Operation of the machinery of the conductor wraps in free spool
or wound extension is dangerous, because in this way becomes a winding.
1.4. Protect the power cord from heat, oil, contact with sharp edges or points of mobile machines.
Damaged or twisted cables increase the risk of electric shock.
1.5. Not use the power mower for the grass if the power cord or other element of the power mower
grass is damaged. Damaged power cables increase the risk of electric shock.
1.6. When mowing constantly monitor the power cord if it is safe to position the cutting mechanisms.
Keep the power cord a safe distance from the knife.
1.7. Not permitted the use of electric grass mower by children. Take the necessary steps to prevent
children’s access to power grass mower or power cord.
1.8. Should be switching o the lawn mower from the mains electricity before moving on to maintenance
work in. Do not let the lawn mower to be pulling on the power cord.
1.9. Do not allow in any way with the machine to work children or persons unfamiliar with this operating
manual. It is possible that the age of the workers of the machine is limited by national legislation. When not
using the machine store so that it is inaccessible to children.
1.10. This electric mower grass is not intended to be used by persons (including children) with mental,
sensory or mental limitations, and by persons without sucient experience and / or knowledge, except in
cases where they are under direct control of responsible for their safety or the person being trained by him
how to use it.
1.11. Don’t work with the lawn mower, while in close proximity are the people, especially children or
pets.
1.12. Before you make settings on the machine when clean it or when to leave it without direct
supervision, even for a brief pause it, remove the power cord plug from the mains electricity.
1.13. Do not use electric mowers grass in adverse weather conditions.
1.14. Do not use or expose the electrical grass mower of rain. Protect from electrical shock.
1.15. Do not touch the rotating parts of machinery. Wait for the spinning to stop completely. Once
switching o the machine the cutting blade continues to spin and can cause injuries. Do not put hands or
feet near or under rotating parts.
1.16. Check carefully pre-treatment area and remove stones, sticks, branches, bottles, wires and other
foreign matter.
1.17. Always check before use of the knife locking bolt is not loose and that the knife is blunt or worn.
1.18. Always mow in daylight or in a very good articial lighting.
1.19. On the slopes, always careful to tread rmly.
1.20. Do not operate machinery when the grass is wet!
1.21. Work is always in a calm way, never walk fast.
1.22. Never operate the machine if there are damaged guards or without security features, such as the
cover (11) of the hole cut grass or grass basket.
1.23. Work on uneven terrain can be dangerous.
1.24. Not cutting on steep slopes with a slope of more than 20%.
1.25. Mowing on slopes always cross the slope, never up and down.
1.26. In reversing the direction of movement on slopes be very careful!
1.27. When you move backward or pull the machine be very careful!
1.28. When mowing machine always push forward. Never pull it towards your body.

13
1.29. Where transfer must tilt the machine when crossing zones without grass and when transporting
the machine to and from the area, which will mow, the machine must be switched o and the cutting blade
must be stopped.
1.30. Never lift or transport your lawn mower if the motor working and grass cutting blade is rotating.
1.31. Do not tilt the machine when the motor unless it is not necessary due to the presence of very
high grass. In this case, lift the remote side of the machine by pressing the handle down and then only as
necessary. When you run the machine, hold it rmly with both hands.
1.32. When you turn the power mower for grass to watch your feet are at a safe distance from rotating
parts.
1.33. Do not use the machine when you’re barefoot or in sandals. Always use a strong, closed shoes
and long trousers.
1.34. Switch o the On/O switch and remove the plug from the mains electricity always:
when moving away from the machine;
before removal of items, which blocked the machinery;
when checking, cleaning or working on machinery;
when the machine starts to vibrate abnormally;
after coming into contact with a foreign body immediately check the machine for damage before it
benet to removing them;
1.35. The operator or user responsible for accidents, injuries to others or the environment and caused
material damage.
1.36. Electric grass mower is designed so that all moving parts and hull ensure safe conditions for use.
For damage caused by attempts to change the structure of the electric grass mower manufacturer is not
liable.
1.37. In order to ensure safety should only use genuine parts or parts recommended by the manufacturer.
1.38. Failure to comply with the instructions may lead to electric shock, re and / or severe injuries.
2. Functional description and purpose.
Electric mower is a manual with power isolation second grade. It is driven by a collector single-phase
alternating current motor and is designed for cutting grass at home. Not use the power mower for grass
operations other than its intended purpose.
3. Assembly of the components of the electric grass mower and commissioning.
Some of the mower parts are dismantled in order to reduce the volume of container during transport.
3.1. Mounting the handle.
Place the bottom of the two tubes of the handle in the openings of the housing so that the small
transverse holes for locking screws at both ends of the tubes to coincide with the smaller side openings in
the housing. Insert locking screws into the holes and screw them. Plug the device for holding the extension
cord, the tube of the upper handle. Install the top of the handle to lower handle with self-locking screws
and nuts with handles. Attach the switch in the upper part of the handle by means of two screws. Screw
them on the inner side of the handle so that the openings therein are aligned with holes in the housing of
the On/O switch. Attach the power cord to the handle with clamp to hold the cable to the handle.
3.2. Assemble the plastic grass basket by joining the two parts. To this end, insert the pins of the lower
half in the corresponding holes in the upper half. Press until you hear a click. After assembling the basket
lift up the cover and attach underneath the nished basket on both hooks at the lown mower body. Submit
cover to lie on the basket. Always make sure the basket for collecting grass clippings is well secured! If
you do not need to collect the grass, it can mow without the basket, but necessarily with cover!
3.3. Place the wheels of the front and rear axles, put washer so that you can put cotter pin into the hole
in the axle. After inserting the cotter pin in the holeр distorted both ends in opposite directions. This will
ensure the wheels.
Easy and fast adjustment of the desired cutting height.
3.4. Check if the bolt that holds the blade is tight. Head bolt for spanner 27 mm, and the bolt itself has
a diameter of 8 mm and a right hand thread with step 1,25 mm. The length of the thread is 30 mm The bolt
is screwed to the right and to the left has been unscrewed. To unscrew or tighten the bolt catch with glove
the cutting blade to block the rotating of the shaft. Do not insert a screwdriver or other metal object into the
vent hole to block the rotation of the shaft. This will break the cooling turbine.
3.5. Firmly attached the extension cable for the device, then plug the extension cord plug to plug (2).

14 www.raider.bg
Make sure the extension cord is away from the blade of the mower and the area to mow. Then plug the
other end of the extension in the sockets 220 V. Machines with rated supply voltage 230 V can work
included in the electric supply 220 V.
3.6. Turn on the electric lawn mower by pressing the safety button against inadvertent switching on
and push the lever on the switch to the handle. Submit safety button. Never operate the mower if it is in
the high grass.
3.7. Switching o the electric lawn mower by release the lever of the On/O switch and necessarily wait
for the cutting blade to stop rotating!
Do not switch the mower immediately after you turn it o.
4. Practical tips:
4.1. Follow local regulations for the time of day during which you can use machines outdoors. In some
countries prohibit mowing morning before 08.00 hours, in the afternoon between 2:00 p.m. to 16:00 hours
and after 22:00 at night, to protect citizens from unwanted noise.
4.2. Often lawns are composed of grasses of dierent varieties. With frequent mowing you will boost
the growth of those species, which form dense sward and strong roots. If you mow your lawn frequently
will strengthen and improve the development of high - growing grasses and weeds. The normal height of
the grass is about 4-5 cm. Better to plan the frequency of mowing a lawn that can reduce up to 1/3 of the
total height of the grass. If you do not irrigate your lawn, mow grass lower than 4 cm, since a potential
drought it will degenerate.
4.3. Mow the lowest height (25 mm) only if your lawn area is very at, expect heavy rains or will leave
on vacation.
4.4. The average height of mowing (40 mm) is best when the interval between the previous and the
next mowing are not lengthy.
4.5. Cutting height (55 mm) is suitable for the rst mowing of the season and when there is a drought.
4.6. Empty the container for collecting grass clippings after lling 2/3 of its volume, this will provide a
more ecient mowing and prevent the mower from overloading.
4.7. When working in very dicult conditions not to overload the motor. When reloading the rotational
speed of the motor drops and noise is changed. In this case, stop, release the lever to include ( 1 ) and
set higher mowing height. Otherwise, performance will be reduced and the machine may be damaged.
4.8. When cutting close to edges careful not to pinch the mower foreign objects.
4.9. Cutting performance depend on the density, moisture content, length of the grass and the cutting
height. Cutting performance decreases with frequent switching on and o the mower while mowing. To
optimize the performance of the cutting recommended frequent cutting, increasing the height of the cutting
operation and at a moderate speed.
5. Servicing, maintenance and storage.
ATTENTION! Always disconnect the plug from the wall outlet before making activities related to
maintenance or cleaning! Once the machine is o, the blade continues to rotate for some time by inertia!
Before you start working on the mower, wait for the rotation of the motor and the blade to stop completely!
Never try to stop the rotation of the knife!
When you need to perform operations in the vicinity of the knife, always operate with gloves!
Perform maintenance procedures regularly to ensure your long-term and reliable use of the mower.
Check it periodically for visible defects such as loose or damaged knife and loosened screw connections.
Make sure the covers and guards are undamaged and are installed properly.
5.1. Cleaning.
The easiest way to clean the mower immediately after mowing. After working on the machine clean
thoroughly with a soft brush and cloth. Do not use water and / or solvents and detergents. Remove all
particles of grass, especially from vents. Place the machine on its side and clean the area of the blade.
Always wear protective gloves! Remove rmly adhering particles of wood or plastic block.
5.2. Sharpening or replacing the cutting blade.
Replace dull or damaged knives. Knife down and unscrew the main bolt in the center of the blade
spanner 27. Before inserting a new blade or after you have sharpened the old one, make sure the blade
is installed properly. Then tighten the bolt again and make sure that no gaps and the knife is properly
installed. Use only suitable for mower blades.
5.3. Always thoroughly clean the mower when to leave it for longer storage. Especially in the winter.

15
Brush cutter with oil to protect it from rust. When storing the machine for grass basket must be removed.
To save space, you can disassemble the handle. When disassembling and assembling the top and bottom
of the handle careful not to damage the power cord.
6. Faults and correct them.
The table below shows symptoms of failure and how you can help, if your mower stops working
normally. If you can not nd and x the problem by following the instructions in the table, contact your
authorized service Raider. Attention: Before you start troubleshooting, stop the mower and disconnect it
from the mains.
Faults Removal Reasons
Mower does not
start to work
Power cable is not connected or damaged Check cable. If necessary,
replace it.
The engine start
but the knife does
not rotate.
Mower is in a tall grass. Upon initial release always put
the mower in the grass
It is possible that the mower is fuzzy and
the blade is blocked.
Disconnect the plug and
check it. Put on your
protective gloves and clean
the knife and release
Engine is turned o
suddenly.
The power plug is withdrawn Check cable. Make sure it is
well enshrined in the device
and plug it again.
Unusual noise. Bolt of the blade is loose or connections
between fasteners. Fasten the parts.
Strong vibrations.
Distorted and damaged knife. Immediately stop the mower
and replace the knife in a
specialized service.
Unequal mowing.
Engine work
hard and reduce
turnovers.
The grass is very high. Increase mowing height.
The blade is blunt. Replace or tipped knife. See
5.2.
It is possible that the mower is fuzzy and
blocked
Look underneath the mower
and clean it. Work always with
protective gloves.
The blade can be installed incorrectly. Check. See 5.2

16 www.raider.bg
Faults Removal Reasons
The grass remains
on the ground and
the basket (6) is not
collecting it
The grass is very moist. Wait for grass areas to dry
Outlet is clogged Disconnect the plug and
clean it.
Grass baskets full Disconnect the plug and
empty the basket
Basket grass is contaminated. Switch o the power plug from
the mains electricity. Cleaning
the basket. Baskets should
always to be clean to allow air
to pass freely through it.
If necessary, repair your mower is best carried out only by qualied experts in workshops on
RAIDER, which used only original spare parts. Thus ensuring their safe operation.
7. Protection of the environment.
For the environmental protection of the power tool, the electrical appliances and packaging
must undergo appropriate processing for the re-use of the valuable raw materials contained
therein. Do not dispose of power tools in household waste! According to EU Directive 2012/19
/ EC on end-of-life electrical and electronic devices and the validation and as a national
law, power tools that can no longer be used must be separately collected and subjected to
appropriate processing for the recovery of the contents making them valuable raw materials.

17
Caracteristicile produsului:
1. Lever de comutator ( on / o ).
2. Comutator de siguranță împotriva funcționării accidentale.
3. Suport pentru a ține cablul la mânerul.
4. Piuliță cu incuietori de sine și șuruburi pentru xarea superioară a mânerului inferior.
5. Coș, care colectează decupaje.
6. Deschiderile din carcasa, care include ambele capete ale mânerului.
7. Fata Diametru 140mm roți.
8. Roțile din spate, cu un diametru de 200 mm.
9. Capac de protecție din față.
10. Acoperi găurile tăiat iarba.
11. Partea de jos amânerului.
12. Partea superioară a mânerului.
Explicarea pictogramelor relief pe capacul din spate al aparatului.
Înainte de tăiere, asigurați-vă că nici o piatră în iarbă, bastoane, ramuri, sticle, rele și alte
obiecte străine. La tăierea, ei te pot răni. Nu cosi când în imediata apropiere sunt și alții, în
special copii sau animale de companie. A nu se lăsa la îndemâna copiilor.
Protejați cablul de alimentare la o distanță sigură de lame!
Feriți-vă de părți ale mașinii rotative. Așteptați rotație la o oprire completă. După trecerea
lama continuă să se rotească prin inerție și pot provoca leziuni. Nu puneți mâinile sau
picioarele in apropiere sau la piese rotative.Daune sau prejudicii la cablul de alimentare,
deconectați-l imediat.
RO

18 www.raider.bg
ORIGINALE INSTRUCŢIUNI DE UTILIZARE
Stimate prieten,
Felicitări pentru achiziţionarea unei bormasini de la marca cu cea mai rapidă creştere pe scule
electrice si pneumatice - Raider. Cu o instalare si operare corecta, produsele Raider sunt
echipamente sigure, abile şi lucrul cu ele vă va oferi o adevarata placere. Pentru confort si servicii
excelente am construit o reţea de service-uri pe întreg teritoriul ţării.
Înainte de a utiliza acest produs, vă rugăm să citiţi cu atenţie “manualul de utilizare ”. În interesul
siguranţei şi pentru a asigura utilizarea corectă, citiţi cu atenţie aceste instrucţiuni, inclusiv
recomandările şi avertismentele pentru ele. Pentru a evita greşelile inutile şi accidentele, este
important ca aceste instrucţiuni să rămână disponibile pentru referinţe viitoare tuturor celor care vor
utiliza aparatul. Daca vindeti produsul “manualul de utilizare ” trebuie predat noului proprietar, astfel
incat acesta sa e familiarizat cu masurile de siguranta si instructiunile de utilizare. “Euromaster
Import Export” SRL este un reprezentant autorizat al producătorului şi proprietar al marcii Raider.
Adresa companiei este Soa 1231, B-dul “Lom Road” 246, tel 02 934
33 33 934 10 10, www.raider.bg; www.euromasterbg.com, e-mail: info @ euromasterbg. com
Începând cu anul 2006, compania a introdus un sistem de management al calităţii ISO 9001:2008
de certicare cu domeniul de aplicare: instrumente de comerţ, import, export şi de servicii
profesionale si hobby electrice, pneumatice şi de putere şi hardware-ul general. Certicatul a fost
emis de catre Moody International de Certicare Ltd, Anglia.
SPECIFICAȚII
parametru Unitate Valoare
Model -RD-LM32
Tensiunea de alimentare V AC 230
Frecvență ac Hz 50
Evaluare W1600
Turația maximă fără sarcină min-1 3500
Lățime de tăiere mm 360
Înălțime de tăiere mm 25-40-55
Capacitate de colectare a ierbii L 40
Nivelul de presiune acustică (lpa) k = 3,0 db dB 83
Nivelul de zgomot (lwa), k = 3,0 db dB 96
Valoarea accelerației vibrațiilor (ah), k = 1,5 m/s2 m/s22.12
Clasa de protecție izolare electrică II
Gradul de protecție - IP24

19
1. Instrucțiuni generale pentru funcționarea în condiții de siguranță.
Citiți toate instrucțiunile.
Nerespectarea instrucțiunilor poate conduce la electrocutare, incendii și / sau vătămări grave.
Pastrati aceste instructiuni intr-un loc sigur.
1.1. De siguranță.
Includerea electrice masina de tuns electrice, singurele sisteme de gazon echipate cu întrerupător
electric Fi ( comutator de oprire dispozitiv de curent rezidual de urgență ) și curentul de scurgere,
care este activat de la RCD trebuie să e nu mai mult de 30 mA, în conformitate cu “ Regulamentul 3
instalații electrice spațiale și linii electrice. “ Informații cu privire la tensiunea de rețea și tipul de curent
pentru plăcuța trebuie să corespundă cu datele de pe grila ta.
1.2. Utilizați prelungitor rezistent la apă proiectat pentru utilizare în exterior, cu trei cabluri de
sârmă cu o secțiune transversală de 1,5 mm2 și o lungime maximă de 50 m.. Rețineți că lungimea
prelungire este mai mare de 30 m reduceputereacositoare.
1.3. Prelungitor trebuie să e pe deplin dezvoltat. Utilizare a mașinii pentru rana bobina sau
prelungirea gratuit Reel este periculos, pentru că în acest fel la extinderea devine o bobină.
1.4. Protejați cablul de alimentare de căldură, ulei, muchii ascuțite sau componente în mișcare.
Cablurile deteriorate sau încurcate măresc riscul de electrocutare.
1.5. Nu este pentru utilizarea pe masina de tuns gazon electrice în cazul în care cablul de
alimentare sau orice alt element de masina de tuns iarba electrică este rupt. Cablurile deteriorate
cresc riscul de electrocutare.
1.6. Când cosit monitoriza în mod constant cablul de alimentare dacă acesta este într- o poziție
sigură a mecanismelor de tăiere. Păstrați cablul de alimentare la o distanță de siguranță de la lama.
1.7. Nu se permite utilizarea de tuns iarba electrice de copii. Ia măsurile necesare pentru a preveni
accesul copiilor la masina de tuns iarba de putere sau de cablul de alimentare.
1.8. Ar trebui să e excluse masina de tuns gazon electrice de la sursa de alimentare înainte de
a începe lucrările de întreținere inch Nu lasa masina de tuns iarba electrică să e tras la cablul de
alimentare.
1.9. Nu lăsați în orice caz, munca copiilor mașinii sau a persoanelor nefamiliarizate cu aceste
instrucțiuni de utilizare. Este posibil ca la vârsta de lucru a mașinii este limitată de legislația națională.
Atunci când nu utilizați aparatul, se păstrează astfel încât să e la îndemâna copiilor.
1.10. Aceasta masina de tuns gazon electrice nu este destinat a utilizat de către persoane (
inclusiv copii ) cu limitari mentale, senzoriale sau mentale, sau de către persoanele fără experiență
sucientă și / sau cunoștințe, cu excepția cazurilor în care acestea sunt sub controlul direct al unui
responsabil pentru siguranța lor sau persoana care este antrenat de el cum să-l folosească.
1.11. Nu cosi în timp ce în imediata apropiere sunt și alții, în special copii sau animale de companie.
1.12. Înainte de a face setările de pe aparat atunci când curățați sau când să -l lase fără
supraveghere directă, chiar și pentru scurt timp, se opri, opriți comutatorul și deconectați cablul de
alimentare de la priza electrică.
1.13. Nu folositi masina de tuns gazon electrice în condiții meteorologice nefavorabile.
1.14. Nu utilizați și nu expuneți mașină de tuns iarba electrice la ploaie. Protejați-vă de șoc electric.
1.15. Nu atingeți elementele rotative ale mașinii. Așteptați rotație la o oprire completă. După
trecerea lama continuă să se rotească prin inerție și pot provoca leziuni. Nu puneți mâinile sau
picioarele in apropiere sau la piese rotative.
1.16. Vericați cu atenție zona de pre - tratare și elimina pietre, bastoane, ramuri, sticle, cablurile
și alte obiecte străine.
1.17. Vericați întotdeauna înainte de a utiliza șurubul de xare lama nu este slăbit și că lama este
plictisitoare sau uzate.
1.18. Cosi mereu în lumina zilei sau foarte bune în iluminat.
1.19. Pe pante, mereu atent să benzii de rulare cu fermitate.
1.20. Nu folosiți aparatul când iarba este uda!
1.21. Lucra întotdeauna cu plimbare ușoară niciodată, merge repede.
1.22. Nu utilizați niciodată mașina în cazul în care există paznici deteriorate sau fără caracteristici
de securitate, cum ar capacul de tăiat iarba gaura sau de colectare a ierbii.
1.23. Munca pe teren accidentat poate periculos.

20 www.raider.bg
1.24. Nu cosi pe pante abrupte cu o înclinare mai mare de 20 %.
1.25. Pe un teren în pantă cosi întotdeauna în pantă, nu în sus și în jos.
1.26. Prin inversarea direcției de mișcare pe pante e deosebit de atenți!
1.27. Când inversarea sau tragerea mașinii să e deosebit de atenți!
1.28. La tăierea împinge întotdeauna mașina înainte. Nu -l trage spre corpul tau.
1.29. Când în tranzit trebuie să înclinați aparatul atunci când zonele de trecere nu cultivate cu
iarbă și când a transporta mașina la și de la zona să cosească, mașina trebuie să e oprită și cuțitul
trebuie să e staționar.
1.30. Nu ridicați niciodată sau transportați aparatul cu un motor de lucru și lamă rotativă.
1.31. Nu înclinați aparatul atunci când porniți motorul, dar dacă nu este necesar din cauza
prezenței de iarbă foarte mare. În acest caz, de ridicarepartea distală amașinii apăsând în jos mâner,
și numai după cum este necesar. Când postați mașină, țineți-l ferm cu ambele mâini.
1.32. Când porniți tuns iarba electrice viziona picioarele tale sunt în siguranță departe de piesele
în mișcare.
1.33. Nu utilizați mașina când sunteți desculți sau cu sandale. Lucra întotdeauna cu o puternică,
panto închise și pantaloni lungi.
1.34. Opriți întrerupătorul și scoateți din priză este întotdeauna:
atunci când vă îndepărtați de mașină ;
înainte de a scoate elementele mașinii de blocare ;
la vericarea, curățarea sau de lucru pe masina ;
Când aparatul începe să vibreze anormal de puternic.
după ce intră în contact cu un corp străin verica imediat aparatul pentru daunele înainte de al
utiliza, asigura eliminarea acestora ;
1.35. Operatorul sau utilizatorul este responsabil pentru accidente, leziuni la alte persoane sau
pentru mediu și pagubele materiale cauzate.
1.36. Electric masina de tuns iarba este conceput astfel încât toate părțile în mișcare și locuințe
asigura condiții sigure pentru utilizare. Pentru prejudiciile cauzate ca urmare a încercărilor de a
modica structura de producător masina de tuns iarba electrică nu este responsabil.
1.37. În scopul de a garanta siguranța ar trebui să folosească doar piese de schimb originale sau
piese recomandate de producător.
1.38. Nerespectarea instrucțiunilor poate conduce la electrocutare, incendii și / sau vătămări grave.
2. Descriere și scop funcțional.
Electric masina de tuns este un scule electrice manuale cu clasa izolat al doilea. Acesta este
propulsat de un motor cu colector monofazat cu curent alternativ și este proiectat pentru tăierea ierbii
acasă. Nu este pentru utilizarea pe masina de tuns gazon electrice pentru alte scopuri decât cele
destinate activităților.
3. Asamblarea componentelor masina de tuns iarba electrică și punerea în funcțiune.
Anumite părți alelawnmower demontate pentru a reducevolumul de ambalaje în timpul tranzitului.
3.1. Montarea mânerului.
Se punepartea de jos a celor două tuburi demânerul în oriciilecarcasei, astfel încât oriciile mici
transversale pentru blocare șuruburi la ambele capete ale tuburilor, pentru a coincide cu deschideri
laterale mai mici dinlocuințe. Introduceți șuruburile de tensionare în găuri și înșurubați -le. Conectați
dispozitivul, pentru care deține prelungitor, tubul de mânerul superior. Instalasuperioară amânerului
pentru a coborî mânerul cu șuruburi cu autoblocare și piulițe cu mânere. Atașațicomutatorul înpartea
superioară amânerului prin intermediul a două șuruburi. Racordați pepartea interioară amânerului,
astfel încât deschiderile din ele să e aliniate cu oriciile dincarcasa deîntrerupător. Atașați cablul de
alimentare la mânerul cu clema pentru a ține cablul la mânerul.
3.2. Asambla de colectare a ierbii din plastic, prin unirea celor două părți. În acest scop, introduceți
pinii din partea de jos în oriciile corespunzătoare din jumătatea superioară. Apăsați până când auziți
un clic. După asamblareacoșul ridicațicapacul și se atașează subcoșul nit pe ambele cârlige la
ambele capete aleaxei a capacului. Trimite capacul se aă pe coș. Întotdeauna asigurați-vă coșul
pentru colectarea iarba taiata este foarte bine securizat! Dacă nu aveți nevoie pentru a colecta
decupaje, se poate cosi fără coș, dar nu neapărat cu clapeta de aterizare
3.3. Amplasați roțile din față și din spate, a pus cele cu diametrul mai mic în față, și cele cu un
Pagina se încarcă...
Pagina se încarcă...
Pagina se încarcă...
Pagina se încarcă...
Pagina se încarcă...
Pagina se încarcă...
Pagina se încarcă...
Pagina se încarcă...
Pagina se încarcă...
Pagina se încarcă...
Pagina se încarcă...
Pagina se încarcă...
Pagina se încarcă...
Pagina se încarcă...
Pagina se încarcă...
Pagina se încarcă...
Pagina se încarcă...
Pagina se încarcă...
Pagina se încarcă...
Pagina se încarcă...
Pagina se încarcă...
Pagina se încarcă...
Pagina se încarcă...
Pagina se încarcă...
Pagina se încarcă...
Pagina se încarcă...
Pagina se încarcă...
Pagina se încarcă...
Pagina se încarcă...
Pagina se încarcă...
Pagina se încarcă...
Pagina se încarcă...
Pagina se încarcă...
Pagina se încarcă...
-
 1
1
-
 2
2
-
 3
3
-
 4
4
-
 5
5
-
 6
6
-
 7
7
-
 8
8
-
 9
9
-
 10
10
-
 11
11
-
 12
12
-
 13
13
-
 14
14
-
 15
15
-
 16
16
-
 17
17
-
 18
18
-
 19
19
-
 20
20
-
 21
21
-
 22
22
-
 23
23
-
 24
24
-
 25
25
-
 26
26
-
 27
27
-
 28
28
-
 29
29
-
 30
30
-
 31
31
-
 32
32
-
 33
33
-
 34
34
-
 35
35
-
 36
36
-
 37
37
-
 38
38
-
 39
39
-
 40
40
-
 41
41
-
 42
42
-
 43
43
-
 44
44
-
 45
45
-
 46
46
-
 47
47
-
 48
48
-
 49
49
-
 50
50
-
 51
51
-
 52
52
-
 53
53
-
 54
54


Raider Garden Tools RD-LM32 Manual de utilizare
- Categorie
- Cositoare
- Tip
- Manual de utilizare
Lucrări înrudite
-
Raider Garden Tools RD-LM36 Manual de utilizare
-
-
-
-
-
-
-
-
-