Linksys Linksys WET610N Manual de utilizare
- Categorie
- Puncte de acces WLAN
- Tip
- Manual de utilizare
Acest manual este potrivit și pentru

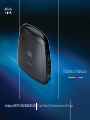
User Guide
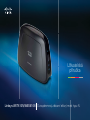
Linksys WET610N/WES610N Dual-Band N Entertainment Bridge

i
Contents
Linksys E-Series
i
Product Overview
LED panel . . . . . . . . . . . . . . . . . . . . . . . . . . . . . . . . . . .2
Ports panel . . . . . . . . . . . . . . . . . . . . . . . . . . . . . . . . . .3
Wireless Security Checklist
Change the default wireless network name or SSID 4
Change the default password 4
Enable MAC address filtering 4
Enable encryption 4
General Network Security Guidelines. . . . . . . . . . . . . . . . . .4
Additional Security Tips . . . . . . . . . . . . . . . . . . . . . . . . . .5
Advanced Configuration
How to access the browser-based utility . . . . . . . . . . . . . . . .6
Setup > Basic Setup . . . . . . . . . . . . . . . . . . . . . . . . . . . . .7
Language 7
Network Setup 7
Wireless > Basic Wireless Settings . . . . . . . . . . . . . . . . . . . .7
Basic Wireless Settings 8
Wireless Security 8
Wi-Fi Protected Setup 9
Wireless > Wireless Network Site Survey . . . . . . . . . . . . . . . 10
Wireless Network Site Survey 10
Wireless > WMM® . . . . . . . . . . . . . . . . . . . . . . . . . . . . . 11
WMM 12
Wireless > Advanced Wireless Settings . . . . . . . . . . . . . . . . 13
Advanced Wireless 13
Administration > Management . . . . . . . . . . . . . . . . . . . . 14
Management 14
Administration > Factory Defaults . . . . . . . . . . . . . . . . . . . 15
Factory Defaults 15
Administration > Upgrade Firmware . . . . . . . . . . . . . . . . . 15
Upgrade Firmware 15
Status > Bridge . . . . . . . . . . . . . . . . . . . . . . . . . . . . . . . 15
Bridge Information 16
Local Network 16
Status > Wireless . . . . . . . . . . . . . . . . . . . . . . . . . . . . . . 16
Wireless 16
Troubleshooting
WES610N/WET610N 17
Specifications
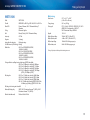
WES610N . . . . . . . . . . . . . . . . . . . . . . . . . . . . . . . . . . 18
WET610N . . . . . . . . . . . . . . . . . . . . . . . . . . . . . . . . . . 19
Contents

2
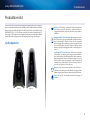
Product Overview
Linksys WES610N/WET610N
2
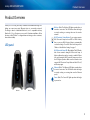
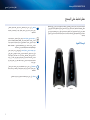
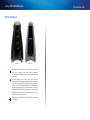
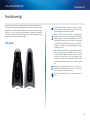
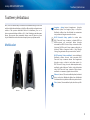
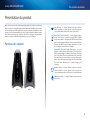
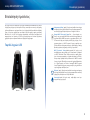
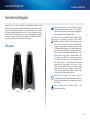
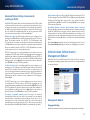
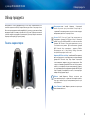
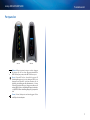
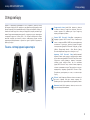
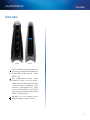
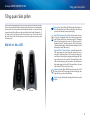
Thank you for choosing the Linksys Dual-Band N Entertainment Bridge. The
bridge can connect any wired, Ethernet device to your wireless network.
The bridge is based on dual-band Wireless-N, so it is compatible with any
Wireless-N, -G, -A, or -B router or access point. For first-time installation, follow
the steps on the CD folder. To configure advanced settings, use the convenient,
browser-based utility.
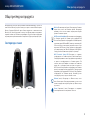
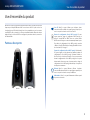
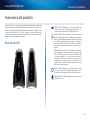
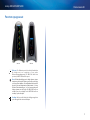
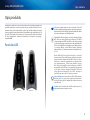
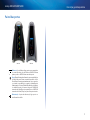
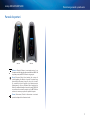
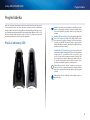
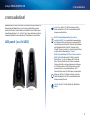
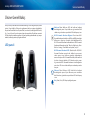
LED panel
WES610N WET610N
Wireless (Blue) The Wireless LED lights up when there is
a wireless connection. The LED flashes when the bridge
is actively sending or receiving data over the wireless
network.
Wi-Fi Protected Setup Button If your router supports
Wi-Fi Protected Setup and uses WPA or WPA2 security,
then you can use Wi-Fi Protected Setup to automatically
connect the bridge. To use Wi-Fi Protected Setup, refer to
“Wireless > Basic Wireless Settings” on page 7.
Wi-Fi Protected Setup LED (Blue/Amber) The LED flashes
blue for two minutes during Wi-Fi Protected Setup. It
lights up blue when wireless security is enabled. If there
is an error during the Wi-Fi Protected Setup process, then
the LED lights up amber. Make sure the network router
supports Wi-Fi Protected Setup. Wait until the LED is off,
and then try again.
Ethernet (Blue) The Ethernet LED lights up when there
is a wired connection. The LED flashes when the bridge
is actively sending or receiving data over the Ethernet
port(s).
Power (Blue) The Power LED lights up when the bridge
is powered on.
Product Overview

3
Product Overview
Linksys WES610N/WET610N
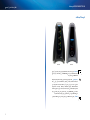
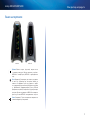
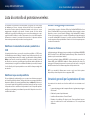
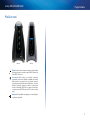
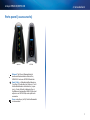
Ports panel
WES610N WET610N
Ethernet The Ethernet port(s) connects the bridge
to a computer or other Ethernet network device. The
WES610N has four ports, and the WET610N has a single
port.
Reset There are two ways to reset the bridge’s factory
defaults. Either press and hold the Reset button for
approximately five seconds, or restore the defaults
from Administration > Factory Defaults in the bridge’s
browser-based utility. The WES610N has a reset button
on the bottom, and the WET610N has a reset button on
the back port panel.
Power The Power port connects the bridge to the
included power adapter.

4
Wireless Security Checklist
Linksys WES610N/WET610N
4
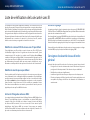
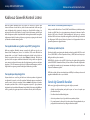
Wireless networks are convenient and easy to install, so homes with high-
speed Internet access are adopting them at a rapid pace. Because wireless
networking operates by sending information over radio waves, it can be more
vulnerable to intruders than a traditional wired network. Like signals from your
cellular or cordless phones, signals from your wireless network can also be
intercepted. Since you cannot physically prevent someone from connecting to
your wireless network, you need to take some additional steps to keep your
network secure.
Change the default wireless network name or SSID
Wireless devices have a default wireless network name or Service Set Identifier
(SSID) set by the factory. This is the name of your wireless network, and can
be up to 32 characters in length. Linksys wireless products use linksys as the
default wireless network name. You should change the wireless network name
to something unique to distinguish your wireless network from other wireless
networks that may exist around you, but do not use personal information (such
as your Social Security number) because this information may be available for
anyone to see when browsing for wireless networks.
Change the default password
For wireless products such as access points and routers, you will be asked for
a password when you want to change their settings. These devices have a
default password set by the factory. The Linksys default password is admin.
Hackers know these defaults and may try to use them to access your wireless
device and change your network settings. To thwart any unauthorized changes,
customize the device’s password so it will be hard to guess.
Enable MAC address filtering
Linksys routers give you the ability to enable Media Access Control (MAC)
address filtering. The MAC address is a unique series of numbers and letters
assigned to every networking device. With MAC address filtering enabled,
wireless network access is provided solely for wireless devices with specific MAC
addresses. For example, you can specify the MAC address of each computer in
your home so that only those computers can access your wireless network.
Enable encryption
Encryption protects data transmitted over a wireless network. Wi-Fi Protected
Access (WPA/WPA2) and Wired Equivalent Privacy (WEP) offer different levels of
security for wireless communication.
A network encrypted with WPA/WPA2 is more secure than a network encrypted
with WEP, because WPA/WPA2 uses dynamic key encryption. To protect the
information as it passes over the airwaves, you should enable the highest level
of encryption supported by your network equipment.
WEP is an older encryption standard and may be the only option available on
some older devices that do not support WPA.
General Network Security Guidelines
Wireless network security is useless if the underlying network is not secure.
• Password protect all computers on the network and individually
password protect sensitive files.
• Change passwords on a regular basis.
• Install anti-virus software and personal firewall software.
• Disable file sharing (peer-to-peer). Some applications may open file
sharing without your consent and/or knowledge.
Wireless Security Checklist

5
Wireless Security Checklist
Linksys WES610N/WET610N
Additional Security Tips
• Keep wireless routers, access points, or gateways away from exterior
walls and windows.
• Turn wireless routers, access points, or gateways off when they are not
being used (at night, during vacations).
• Use strong passphrases that are at least eight characters in length.
Combine letters and numbers to avoid using standard words that can be
found in the dictionary.

6
Advanced Configuration
Linksys WES610N/WET610N
6
After setting up the bridge by following the steps on the CD folder, the bridge
will be ready for use. However, if you want to change its advanced settings,
use the bridge’s browser-based utility. This chapter describes each web page
of the utility and each page’s key functions. You can access the utility via a web
browser on a computer networked with the bridge.
The browser-based utility has these main tabs: Setup, Wireless, Administration,
and Status. Additional tabs will be available after you click one of the main tabs.
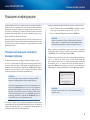
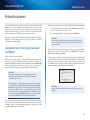
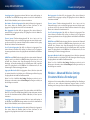
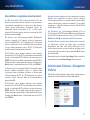
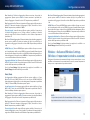
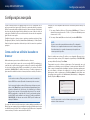
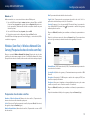
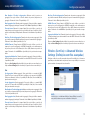
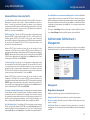
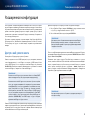
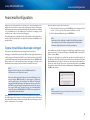
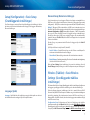
How to access the browser-based utility
Use a web browser to access the browser-based utility.
If the bridge is connected to a network with a DHCP server (usually the network
router), then the bridge will obtain its IP address from the DHCP server. If
there is no DHCP server, then the bridge will use its default static IP address,
169.254.1.250. (If you set a permanent static IP address on the bridge through
the browser-based utility, then enter the static IP address instead.)
NOTE
If you do not know the bridge’s IP address, then find its IP
address in the DHCP clients table of your router. (Refer to the
documentation for your router.)
If you cannot locate the bridge’s IP address, you can reset the bridge;
press the Reset button on the bridge for approximately five seconds,
using a straightened paper clip. This will reset the bridge back to
the factory default settings. The bridge will request an IP address
from the DHCP server (usually the network router). If no DHCP
server is found, then the bridge will use its default static IP address,
169.254.1.250, until it detects a DHCP server and is assigned a
dynamic IP address.
If the bridge is not associated with a router and is using the factory default
settings, connect a computer to the bridge using an Ethernet connection to
access the web-based utility. You will need to configure the Ethernet connection
on the computer with a static IP address and subnet mask.
The IP address of your Ethernet adapter should be set to a specific IP address.
1.
In the IP address field, enter 169.254.x.y (x should be replaced by a
number between 1 and 254, and y should be replaced by a number
between 0 and 255).
2.
In the Subnet mask field, enter 255.255.0.0.
NOTE
The steps to assign a static IP address to the Ethernet adapter on
your computer vary by operating system. For instructions, please
refer to the help documentation of your specific operating system.
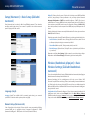
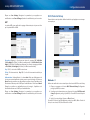
After you have assigned your Ethernet adapter with a static IP address, launch
your web browser, and enter the Adapter’s IP address (the default setting is
169.254.1.250)in the Address field. Press Enter.
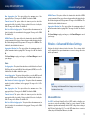
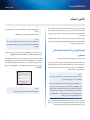
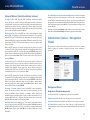
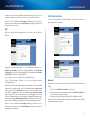
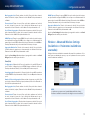
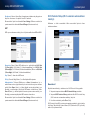
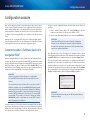
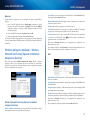
A password request screen appears. (Non-Windows XP users will see a similar
screen.) Leave the User name field blank. Enter the password you created
during the Setup Wizard. If you did not create a new password, use the default
password admin. (You can set a new password from the Administration >
Management screen.) Click OK to continue.
NOTE
If the password request screen does not appear, wait two minutes
and try again.
Advanced Configuration

7
Advanced Configuration
Linksys WES610N/WET610N
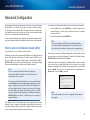
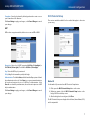
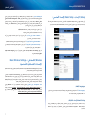
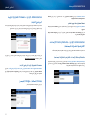
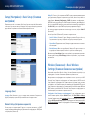
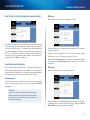
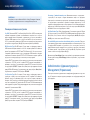
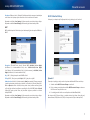
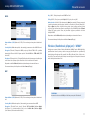
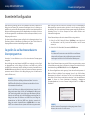
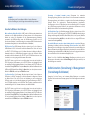
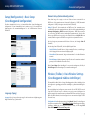
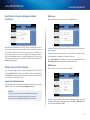
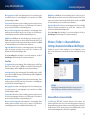
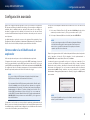
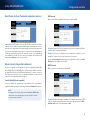
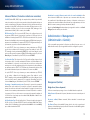
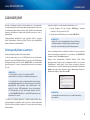
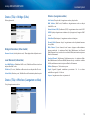
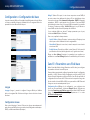
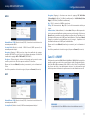
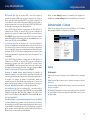
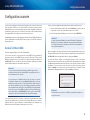
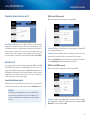
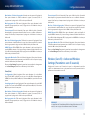
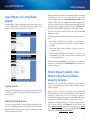
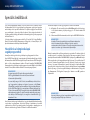
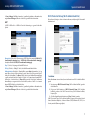
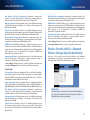
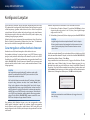
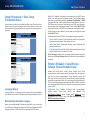
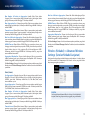
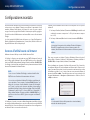
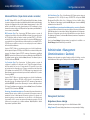
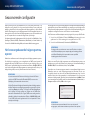
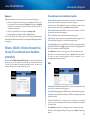
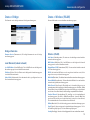
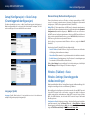
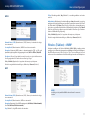
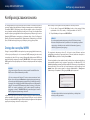
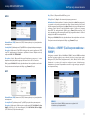
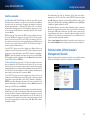
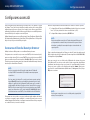
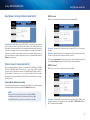
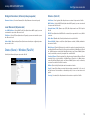
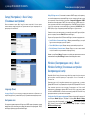
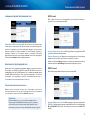
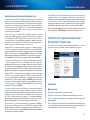
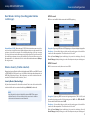
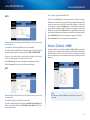
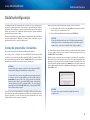
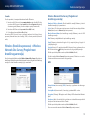
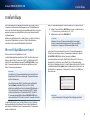
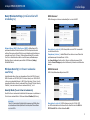
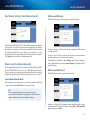
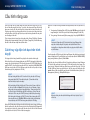
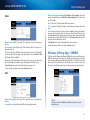
Setup > Basic Setup
The first screen that appears is the Basic Setup screen. Use this screen to change
the browser-based utility’s language, or to change the bridge’s wired, Ethernet
network settings.
Language
Language This is used to set the language displayed by the browser-based
utility. Select the desired language from the drop-down menu.
Network Setup
This section determines if the bridge’s IP address is obtained automatically
from a DHCP server, such as your network router (Automatic Configuration -
DHCP), or set manually (Static IP).
Bridge IP If your network has a DHCP server, such as your network router,
assigning IP addresses to your network devices, then keep the default,
Automatic Configuration - DHCP. The bridge will request an IP address from
the DHCP server (usually the network router). If no DHCP server is found, then
the bridge will use its default static IP address, 169.254.1.250, until it detects a
DHCP server and is assigned a dynamic IP address.
If you want to set a permanent static IP address for the bridge, then select
Static IP.
If you select Static IP, then complete the following fields:
• Static IP Address Enter a unique IP address that will be used to access the
browser-based utility.
• Subnet Mask Enter the subnet mask of your wired network.
• Default Gateway Enter the IP address of the default gateway for your
network (in most cases, this is your router).
Click Save Settings to apply your changes, or click Cancel Changes to cancel
your changes.
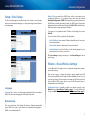
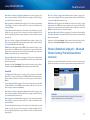
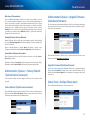
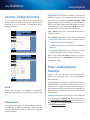
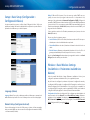
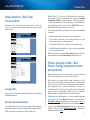
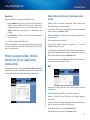
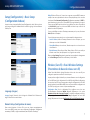
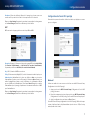
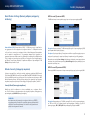
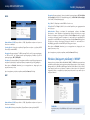
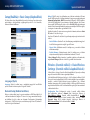
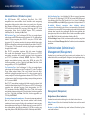
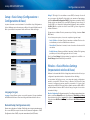
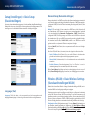
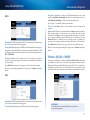
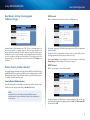
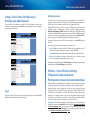
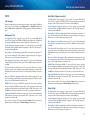
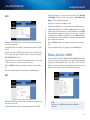
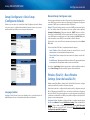
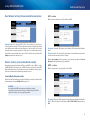
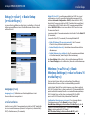
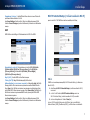
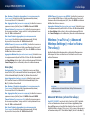
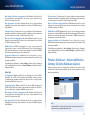
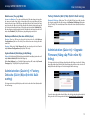
Wireless > Basic Wireless Settings
Use the Basic Wireless Settings screen to configure the bridge’s basic wireless
and security settings.
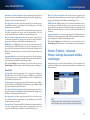
There are two ways to configure the bridge’s settings, manual and Wi-Fi
Protected Setup. Wi-Fi Protected Setup is a feature that makes it easy to set up
your wireless network. If your network router supports Wi-Fi Protected Setup
and uses WPA or WPA2 security, then you can use Wi-Fi Protected Setup to
automatically connect the bridge.
Configuration View To manually configure your wireless network, select
Manual. Refer to Basic Wireless Settings, page 8. To use Wi-Fi Protected
Setup, select Wi-Fi Protected Setup. Refer to Wi-Fi Protected Setup, page 9.

8
Advanced Configuration
Linksys WES610N/WET610N
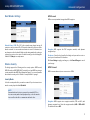
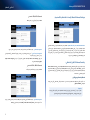
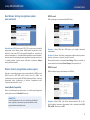
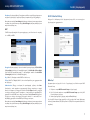
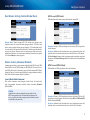
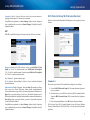
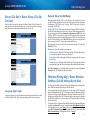
Basic Wireless Settings
Network Name (SSID) The SSID is the network name shared among all
points in a wireless network. The SSID must be identical for all devices in the
wireless network. It is case-sensitive and must not exceed 32 characters (use
any characters on the keyboard). Make sure this setting matches the setting on
your wireless router or access point. For added security, you should change the
default SSID (linksys) to a unique name.
Wireless Security
The bridge supports the following wireless security options: WPA Personal,
WPA2 Personal, and WEP. WPA (Wi-Fi Protected Access) and WPA2 are stronger
security methods than WEP (Wired Equivalent Privacy). For more information
about wireless security, refer to “Wireless Security Checklist” on page 4.
Security Mode
Select the security method for your wireless network. If you do not want to use
wireless security, keep the default, Disabled.
NOTE
Remember that each device in your wireless network MUST use
the same security method and passphrase/key, or else the wireless
devices will not be able to communicate with each other.
WPA Personal
WPA is a security standard stronger than WEP encryption.
Encryption WPA supports the TKIP encryption method, with dynamic
encryption keys.
Passphrase Enter the key shared by the bridge and your wireless router or
access point. It must have 8-63 characters.
Click Save Settings to apply your changes, or click Cancel Changes to cancel
your changes.
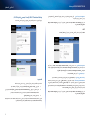
WPA2 Personal
WPA2 is a more advanced, more secure version of WPA.
Encryption WPA2 supports two encryption methods, TKIP and AES, with
dynamic encryption keys. Select the encryption method, AES or TKIP or AES.
The default selection is AES.

9
Advanced Configuration
Linksys WES610N/WET610N
Passphrase Enter the key shared by the bridge and wireless router or access
point. It must have 8-63 characters.
Click Save Settings to apply your changes, or click Cancel Changes to cancel
your changes.
WEP
WEP is a basic encryption method, which is not as secure as WPA or WPA2.
Encryption Select a level of WEP encryption, 40/64 bits (10 hex digits) or
104/128 bits (26 hex digits). The default is 40/64 bits (10 hex digits).
Key 1 Enter the WEP key of your network.
Tx Key Key 1 is the transmit key used by the bridge.
Authentication The default is Auto, which allows either Open system or Shared
key authentication to be used. Select Open to use open system authentication;
the sender and recipient do not use a WEP key for authentication. Select
Shared to use shared key authentication; the sender and recipient use a WEP
key for authentication.
Click Save Settings to apply your changes, or click Cancel Changes to cancel
your changes.
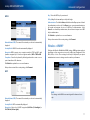
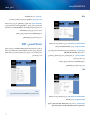
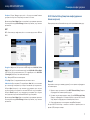
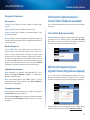
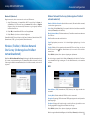
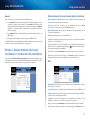
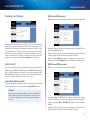
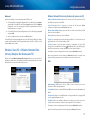
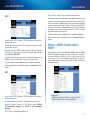
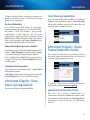
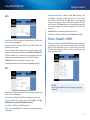
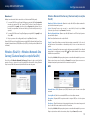
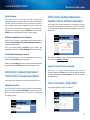
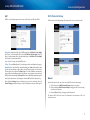
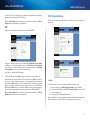
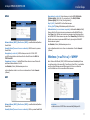
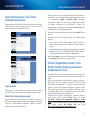
Wi-Fi Protected Setup
There are two methods available. Use the method that applies to the router
you are using.
Method #1
Use this method if your router has a Wi-Fi Protected Setup button.
1.
Click or press the Wi-Fi Protected Setup button on the router.
2.
Within two minutes, click the Wi-Fi Protected Setup button on the
bridge’s Wi-Fi Protected Setup screen.
3.
After the bridge has been configured, click Close.
The Wi-Fi Protected Setup screen displays the Link Status, Network Name (SSID),
and Security method.

10
Advanced Configuration
Linksys WES610N/WET610N
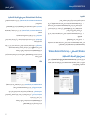
Method #2
Use this method if your router requests the PIN number of the bridge.
1.
On the router’s Wi-Fi Protected Setup screen, enter the PIN number on
the bridge’s Wi-Fi Protected Setup screen. Then click Register or the
appropriate button. (It is also listed on the label on the bottom of the
bridge.)
2.
On the bridge’s Wi-Fi Protected Setup screen, click OK.
3.
After the bridge has been configured, click Close.
The Wi-Fi Protected Setup screen displays the Link Status, Network Name (SSID),
and Security method.
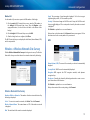
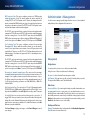
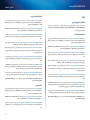
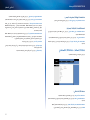
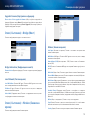
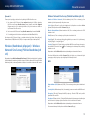
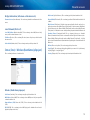
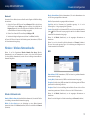
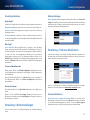
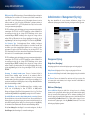
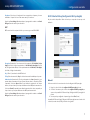
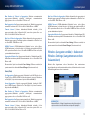
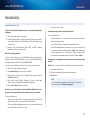
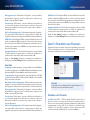
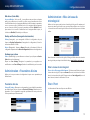
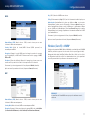
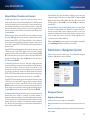
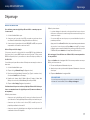
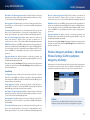
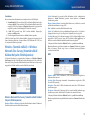
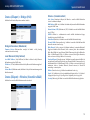
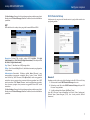
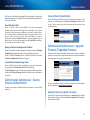
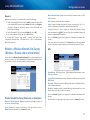
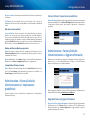
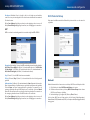
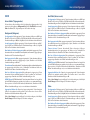
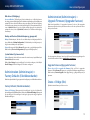
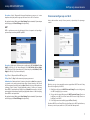
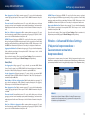
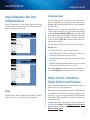
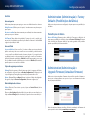
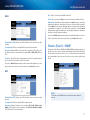
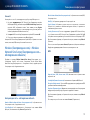
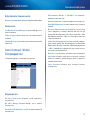
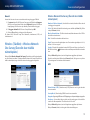
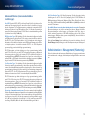
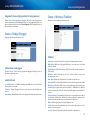
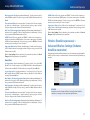
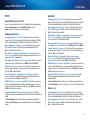
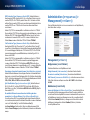
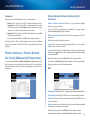
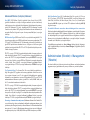
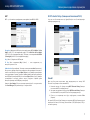
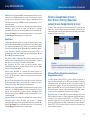
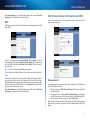
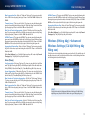
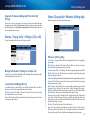
Wireless > Wireless Network Site Survey
Click the Wireless Network Site Survey tab to begin a site survey. The Wireless
Network Site Survey screen lists the wireless networks detected by the bridge.
Wireless Network Site Survey
Number of Wireless Networks The number of wireless networks detected by
the bridge is displayed.
Select To connect to a wireless network, click Select. Then click Connect.
Wireless Network Name The network name or SSID of the wireless network
is displayed.
GHz The radio band of the wireless network is displayed.
Signal The percentage of signal strength is displayed. 100% is the strongest
signal strength possible; 0% is the weakest possible.
Security
If
the network supports Wi-Fi Protected Setup, the Wi-Fi Protected
Setup icon
is displayed
. The security method used by the wireless network
is displayed.
Click Refresh to update the on-screen information.
After you have selected a network, click Connect. A new screen appears. Follow
the instructions for the security method of your network.
WPA
Network Name (SSID) The name of the network you selected is automatically
displayed.
Security Mode WPA Personal is automatically displayed.
Encryption WPA supports the TKIP encryption method, with dynamic
encryption keys.
Passphrase Enter the key shared by the bridge and wireless router or access
point. It must have 8-63 characters.
Click Refresh to update the on-screen information.
After you have entered the security settings, click Connect.

11
Advanced Configuration
Linksys WES610N/WET610N
WPA2
Network Name (SSID) The name of the network you selected is automatically
displayed.
Security Mode WPA2 Personal is automatically displayed.
Encryption WPA2 supports two encryption methods, TKIP and AES, with
dynamic encryption keys. Select the encryption method, AES or TKIP or AES.
Passphrase Enter the key shared by the bridge and wireless router or access
point. It must have 8-63 characters.
Click Refresh to update the on-screen information.
After you have entered the security settings, click Connect.
WEP
Network Name (SSID) The name of the network you selected is automatically
displayed.
Security Mode WEP is automatically displayed.
Encryption Select a level of WEP encryption, 40/64 bits (10 hex digits) or
104/128 bits (26 hex digits).
Key 1 Enter the WEP key of your network.
Tx Key Key 1 is the transmit key used by the bridge.
Authentication The default is Auto, which allows either Open system or Shared
key authentication to be used. Select Open to use open system authentication;
the sender and recipient do not use a WEP key for authentication. Select
Shared to use shared key authentication; the sender and recipient use a WEP
key for authentication.
Click Refresh to update the on-screen information.
After you have entered the security settings, click Connect.
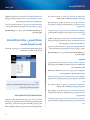
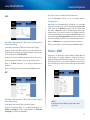
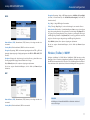
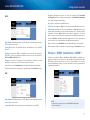
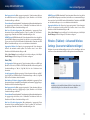
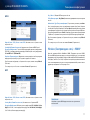
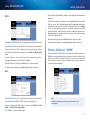
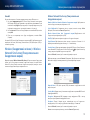
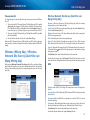
Wireless > WMM®
Configure the Wireless MultiMedia (WMM) settings. WMM prioritizes packets
depending on their respective access mode (traffic type): Background, Best
Effort, Video, or Voice. These settings should only be adjusted by an expert
administrator as incorrect settings can reduce wireless performance.
NOTE
The settings on the WMM screen are designed for advanced users
only.

12
Advanced Configuration
Linksys WES610N/WET610N
WMM
Access Mode
You can assign different settings to the four access modes available. Select the
mode you want to configure: Background, Best Effort, Video, or Voice. Follow
the instructions for the mode you select.
Background
Use Aggregation This option defines whether or not the Media Access Control
(MAC) layer will set up an Add Block Acknowledgement (ADDBA) session. The
default is No. Select Yes to enable this option.
Accept Aggregation This option defines whether or not the MAC layer will
accept an ADDBA request. The default is Yes. Select No to disable this option.
Max. Number of Packets in Aggregation This option defines the maximum
number of packets (sub-frames) in the aggregate. The range is 0 to 7. The
default is 7.
Max. Aggregation Size This option defines the maximum size of the
aggregate (in bytes). The range is 0 to 16000. The default is 12000.
Timeout Internal This option defines the timeout period in which the
aggregate should be closed with a “closing condition” before it is closed by the
timer. The range is 0 to 100 ms. The default is 3.
Min. Size of Packet in Aggregation This option defines the minimum size (in
bytes) of packets to be accumulated in the aggregate. The range is 0 to 1500.
The default is 10.
ADDBA Timeout This option defines the duration after which the ADDBA
setup is terminated, if there are no frame exchanges within this duration by the
Block Acknowledgement (ACK) agreement. The range is 0 to 65535 ms. The
default is 0, which disables the timeout.
Aggregation Window Size This option defines the maximum number of
packets transmitted without getting ACKs. The range is 0 to 64. The default is
64.
Click Save Settings to apply your changes, or click Cancel Changes to cancel
your changes.
Best Effort
Use Aggregation This option defines whether or not the Media Access Control
(MAC) layer will set up an Add Block Acknowledgement (ADDBA) session. The
default is Yes. Select No to disable this option.
Accept Aggregation This option defines whether or not the MAC layer will
accept an ADDBA request. The default is Yes. Select No to disable this option.
Max. Number of Packets in Aggregation This option defines the maximum
number of packets (sub-frames) in the aggregate. The range is 0 to 10. The
default is 10.
Max. Aggregation Size This option defines the maximum size of the
aggregate (in bytes). The range is 0 to 20000. The default is 16000.
Timeout Internal This option defines the timeout period in which the
aggregate should be closed with a “closing condition” before it is closed by the
timer. The range is 0 to 100 ms. The default is 3.
Min. Size of Packet in Aggregation This option defines the minimum size (in
bytes) of packets to be accumulated in the aggregate. The range is 0 to 1500.
The default is 10.
ADDBA Timeout This option defines the duration after which the ADDBA
setup is terminated, if there are no frame exchanges within this duration by the
Block Acknowledgement (ACK) agreement. The range is 0 to 65535 ms. The
default is 0, which disables the timeout.
Aggregation Window Size This option defines the maximum number of
packets transmitted without getting ACKs. The range is 0 to 64. The default is
64.
Click Save Settings to apply your changes, or click Cancel Changes to cancel
your changes.
Video
Use Aggregation This option defines whether or not the Media Access Control
(MAC) layer will set up an Add Block Acknowledgement (ADDBA) session. The
default is Yes. Select No to disable this option.
Accept Aggregation This option defines whether or not the MAC layer will
accept an ADDBA request. The default is Yes. Select No to disable this option.
Max. Number of Packets in Aggregation This option defines the maximum
number of packets (sub-frames) in the aggregate. The range is 0 to 7. The
default is 7.

13
Advanced Configuration
Linksys WES610N/WET610N
Max. Aggregation Size This option defines the maximum size of the
aggregate (in bytes). The range is 0 to 16000. The default is 12000.
Timeout Internal This option defines the timeout period in which the
aggregate should be closed with a “closing condition” before it is closed by the
timer. The range is 0 to 100 ms. The default is 3.
Min. Size of Packet in Aggregation This option defines the minimum size (in
bytes) of packets to be accumulated in the aggregate. The range is 0 to 1500.
The default is 10.
ADDBA Timeout This option defines the duration after which the ADDBA
setup is terminated, if there are no frame exchanges within this duration by the
Block Acknowledgement (ACK) agreement. The range is 0 to 65535 ms. The
default is 0, which disables the timeout.
Aggregation Window Size This option defines the maximum number of
packets transmitted without getting ACKs. The range is 0 to 64. The default is
64.
Click Save Settings to apply your changes, or click Cancel Changes to cancel
your changes.
Voice
Use Aggregation This option defines whether or not the Media Access Control
(MAC) layer will set up an Add Block Acknowledgement (ADDBA) session. The
default is Yes. Select No to disable this option.
Accept Aggregation This option defines whether or not the MAC layer will
accept an ADDBA request. The default is Yes. Select No to disable this option.
Max. Number of Packets in Aggregation This option defines the maximum
number of packets (sub-frames) in the aggregate. The range is 0 to 2. The
default is 2.
Max. Aggregation Size This option defines the maximum size of the
aggregate (in bytes). The range is 0 to 16000. The default is 10000.
Timeout Internal This option defines the timeout period in which the
aggregate should be closed with a “closing condition” before it is closed by the
timer. The range is 0 to 100 ms. The default is 10.
Min. Size of Packet in Aggregation This option defines the minimum size (in
bytes) of packets to be accumulated in the aggregate. The range is 0 to 1500.
The default is 10.
ADDBA Timeout This option defines the duration after which the ADDBA
setup is terminated, if there are no frame exchanges within this duration by the
Block Acknowledgement (ACK) agreement. The range is 0 to 65535 ms. The
default is 0, which disables the timeout.
Aggregation Window Size This option defines the maximum number of
packets transmitted without getting ACKs. The range is 0 to 64. The default is
64.
Click Save Settings to apply your changes, or click Cancel Changes to cancel
your changes.
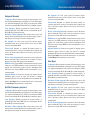
Wireless > Advanced Wireless Settings
Configure the bridge’s advanced wireless functions. These settings should
only be adjusted by an expert administrator as incorrect settings can reduce
wireless performance.
NOTE
The settings on the Advanced Wireless Settings screen are designed
for advanced users only.
Advanced Wireless
Use LDPC Low-Density Parity-Check Code (LDPC) enables or disables error
correction to reduce the probability of data loss in noisy channels. The Rate
Adaptation algorithm automatically disabled LDPC coding when working at
high PHY rates (higher than 162). To use the LDCP advanced error correction
scheme, keep the default, Yes. Otherwise, select No.

14
Advanced Configuration
Linksys WES610N/WET610N
ERP Protection Type This option configures protection of OFDM packets
despite the presence of 802.11b stations within the wireless network. By
sending RTS/CTS or CTS2Self packets in 802.11b rates, the bridge informs the
wireless network that OFDM packets are going to be transferred and protects
the packets in the wireless network. The RTS/CTS and CTS2Self packets create
overhead, which may result in lower throughputs.
The RTS/CTS option provides better coverage but lower throughputs when
compared to CTS2Self, because the RTS/CTS option includes acknowledgement
from the receiving device. To use the RTS/CTS option, keep the default, RTS/
CTS. The None option may cause collisions between OFDM and CCK packets. To
use the None option, select None. To use the CTS2Self option, select CTS2Self.
11n Protection Type This option configures protection from non-High
Throughput (HT) devices within the wireless network. In case the wireless
router (or access point) detects an association of a non-HT legacy device, it will
signal all the HT devices to use RTS/CTS or CTS2Self mechanisms before each
data transmission. This feature also supports all 802.11n standard protections,
including MIMO.
The RTS/CTS option provides better coverage but lower throughputs when
compared to CTS2Self, because the RTS/CTS option includes acknowledgement
from the receiving device. To use the RTS/CTS option, keep the default, RTS/
CTS. The None option may cause collisions between HT and legacy packets. To
use the None option, select None. To use the CTS2Self option, select CTS2Self.
Percentage of maximal transmit power This option sets the percentage
of maximal transmit power relative to the regulatory domain restrictions. For
example, if the regulatory domain restriction allows transmissions of up to
20 dB, then setting the percentage at 50% allows maximal transmit power of
10 dB. Select the percentage you want to use: 12%, 25%, 50%, or 100%. The
default is 100%.
QoS Classification Type This option sets 802.1D or 802.1Q mapping from the
IP DSCP/TOS field to WMM priorities (Background, Best Effects, Video, Voice).
Keep the default, 802.1D, or select 802.1Q, which is used by some IPTV streams.
Re-establish Ethernet connection when initiating wireless connection To
trigger DHCP discovery from the device that resides behind the bridge, the
bridge will reset the Ethernet link between the bridge and the device every
time a wireless connection is established. To disable this behavior, select No.
Otherwise, keep the default, Yes.
Click Save Settings to apply your changes, or click Cancel Changes to cancel
your changes.
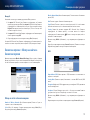
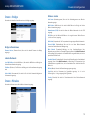
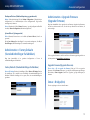
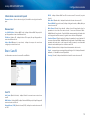
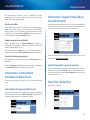
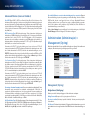
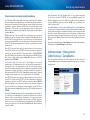
Administration > Management
Use this screen to manage specific bridge functions: access to the web-based
utility, backup of the configuration file, and reboot.
Management
Bridge Access
Use a password to protect access to the browser-based utility.
Bridge Password Enter a new Password for the bridge.
Re-enter to confirm Enter the Password again to confirm.
Idle Timeout The login times out after a period of inactivity that you specify.
The range is 60 to 3600 seconds. The default is 600.
Web Access
Access via Wireless If you are using the bridge in a public domain where you
are giving wireless access to your guests, you can disable wireless access to
the bridge’s browser-based utility. You will only be able to access the browser-
based utility via a wired connection if you disable the setting. Keep the default,
Enabled, to allow wireless access to the bridge’s browser-based utility, or select
Disabled to block wireless access to the utility.
Backup and Restore
Backup To back up the bridge’s configuration file, click Backup Configurations.
Then follow the on-screen instructions.

15
Advanced Configuration
Linksys WES610N/WET610N
Restore Click Browse and select the configuration file. Then click Restore
Configurations.
System Reboot
Reboot To reboot or restart the bridge, click Start to Reboot.
Click Save Settings to apply your changes, or click Cancel Changes to cancel
your changes.
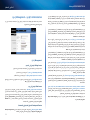
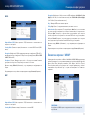
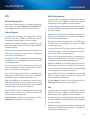
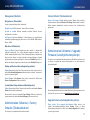
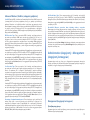
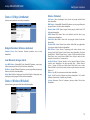
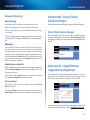
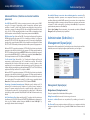
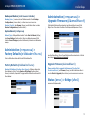
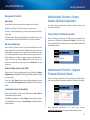
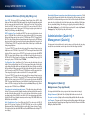
Administration > Factory Defaults
Use this screen to restore the bridge’s configuration to its factory default
settings.
Factory Defaults
Restore All Settings To reset the bridge’s settings to the factory defaults, click
Restore All Settings. Any settings you have saved will be lost when the default
settings are restored.
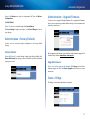
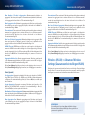
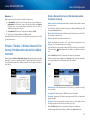
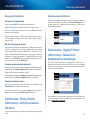
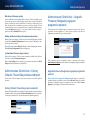
Administration > Upgrade Firmware
Use this screen to upgrade the bridge’s firmware. Do not upgrade the firmware
unless you are experiencing problems with the bridge or the new firmware has
a feature you want to use.
Before upgrading the firmware, download the bridge’s firmware upgrade file
from the Linksys website, www.Linksys.com/support.
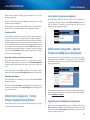
Upgrade Firmware
Please select a file to upgrade the firmware Click Browse and select the
firmware upgrade file. Then c
lick Start to Upgrade and follow the on-screen
instructions.
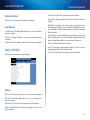
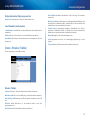
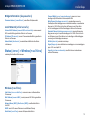
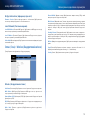
Status > Bridge
The bridge’s current status information is displayed.

16
Advanced Configuration
Linksys WES610N/WET610N
Bridge Information
Firmware Version The bridge’s current firmware is displayed.
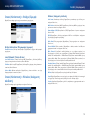
Local Network
Local MAC Address The bridge’s MAC Address, as seen on your local, Ethernet
network, is displayed.
IP Address The bridge’s IP Address, as seen on your local, Ethernet network,
is displayed.
Subnet Mask The Subnet Mask configured for your local network is displayed.
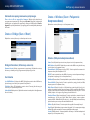
Status > Wireless
Information about your wireless network is displayed.
Wireless
Link Status The status of the connection to your wireless network is displayed.
MAC Address The bridge’s MAC Address, as seen on your local, wireless
network, is displayed.
Network Name (SSID) The wireless network name or SSID is displayed.
BSSID The wireless MAC address of the connected wireless router (or access
point) is displayed.
Radio Band The radio band of your wireless network is displayed.
Channel Width The channel width, in MHz, used by your wireless network is
displayed.
Wide Channel Depending on the channel settings of your network router,
the Wide Channel is displayed. If you selected Wide - 40MHz Channel for the
router’s Radio Band or Channel Width setting, then this will be your primary
Wireless-N channel.
Standard Channel The Standard Channel setting is displayed. If you selected
Wide – 40MHz Channel for the router’s Radio Band or Channel Width setting,
then the Standard Channel will be a secondary channel for Wireless-N.
Bit Rate The data transmission rate is displayed.
Signal The percentage of signal strength is displayed. 100% is the strongest
signal strength possible; 0% is the weakest possible.
Security The security method of your wireless network is displayed.

17
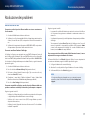
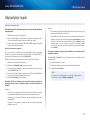
Troubleshooting
Linksys WES610N/WET610N
17
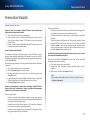
WES610N/WET610N
Your computer or other wired, Ethernet device cannot communicate with the
wireless router.
1.
Access the bridge’s browser-based utility.
2.
On the Basic Wireless Settings screen, make sure the Network Name (SSID)
matches the name of your wireless network.
3.
Make sure the security settings (WPA, WPA2, or WEP) match the security
settings of your wireless network.
The bridge’s IP address needs to be changed.
If the bridge is connected to a network with a DHCP server (usually the network
router), then the bridge will obtain its IP address from the DHCP server. If
there is no DHCP server, then the bridge will use its default, static IP address,
169.254.1.250.
If you want the bridge to always use a static IP address, then follow these
instructions:
1.
Access the bridge’s browser-based utility.
2.
Click the Network Setup tab.
3.
From the Network Connection Type drop-down menu, select Static IP.
4.
Complete the Static IP Address, Subnet Mask, and Default Gateway fields.
5.
Click Save Settings.
The bridge-enabled computer or other wired, Ethernet device will not
communicate with another wireless-enabled device (such as a computer or
printer).
Check the following:
• Make sure the wireless-enabled device is on the same wireless network
as the computer or other wired, Ethernet device connected to the bridge.
• Make sure that the same Network Name (SSID) is used for all devices on
the wireless network.
• Make sure all devices are on the same IP network, using compatible IP
addresses.
The browser-based utility does not accept your password.
Check the following:
• The password is case-sensitive. Make sure that you are using the correct
case(s) when entering the password.
• If you forget your password, you can reset the bridge to its factory
defaults.
Press and hold the bridge’s Reset button for approximately five seconds;
the password will be reset to its factory default, admin. All other bridge
settings will be reset to the factory defaults as well. (To access the
browser-based utility, enter admin in the Password field.)
After you make changes through the browser-based utility, the new settings
are not displayed on-screen.
On your web browser, click Refresh. If the new settings are not displayed, then
follow these instructions:
1.
Unplug the power adapter from the bridge.
2.
Wait five seconds, and then plug the power adapter back into the bridge.
3.
On your web browser, click Refresh.
WEB
If your questions are not addressed here, refer to the Linksys
website at Linksys.com/support
Troubleshooting

18
Specifications
Linksys WES610N/WET610N
18
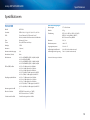
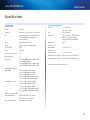
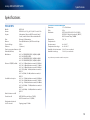
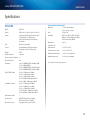
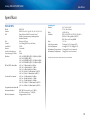
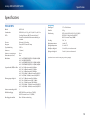
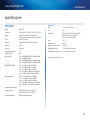
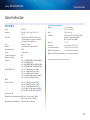
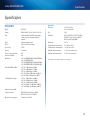
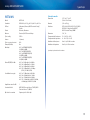
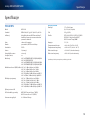
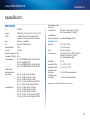
WES610N
Model WES610N
Standards IEEE 802.3u, 802.11g, 802.11b, 802.11a, 802.11n
LEDs Power, Ethernet, Wi-Fi Protected Setup™,
Wireless, individual Ethernet link and activity
Ports Ethernet (4), Power
Buttons Reset, Wi-Fi Protected Setup
Cabling Type CAT5e
Antennas 3 (internal)
Antenna Connector Type N/A
Detachable (Yes/No) No
Modulations 802.11a: OFDM/BPSK, QPSK, 16-QAM, 64-QAM
802.11b: CCK/QPSK, BPSK
802.11g: OFDM/BPSK, QPSK, 16-QAM, 64-QAM
802.11n: OFDM/BPSK, QPSK, 16-QAM, 64-QAM
RF Pwr (EIRP) in dBm 802.11a: 15 dBm (typical) @ 54Mbps
802.11b: 19 dBm (typical) @ 11 Mbps
802.11g: 16 dBm (typical) @ 54 Mbps
802.11n (2.4 GHz): 18 dBm (typical) @ MCS15
802.11n (5 GHz): 16 dBm (typical) @ MCS15
Receive Sensitivity 802.11a: -72 dBm (typical) @ 54 Mbps
802.11b: -85 dBm (typical) @ 11 Mbps
802.11g: -73 dBm (typical) @ 54 Mbps
802.11n (20 MHz): -75 dBm (typical) @ MCS15
802.11n (40 MHz): -69 dBm (typical) @ MCS15
Antenna Gain in dBi 1
Wireless Security WEP, Wi-Fi Protected Access™ (WPA),
Wi-Fi Protected Access™ 2 (WPA2)
Security Key Bits Up to 128-bit encryption
Environmental
Dimensions 6.97” x 5.04” x 2.68”
(177 x 128 x 68 mm)
Weight 0.65 lb (295 g)
Certification FCC, UL/cUL, ICES-003, RSS210, CE, Wi-Fi
(IEEE 802 11a/b/g/draft n), WPA2™,
Wi-Fi Protected Setup, WMM®
Power 12V, 1A
Operating Temperature 32 to 104ºF (0 to 40ºC)
Storage Temperature -4 to 140ºF (-20 to 60ºC)
Operating Humidity 10 to 85% Noncondensing
Storage Humidity 5 to 90% Noncondensing
Specifications are subject to change without notice.
Specifications

19
Specifications
Linksys WES610N/WET610N
19
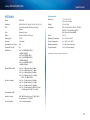
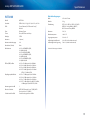
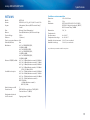
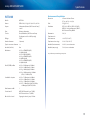
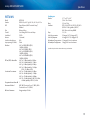
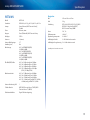
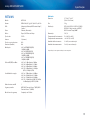
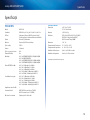
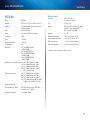
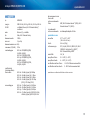
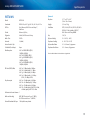
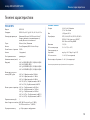
WET610N
Model WET610N
Standards IEEE 802.3u, 802.11g, 802.11b, 802.11a, 802.11n
LEDs Power, Ethernet, Wi-Fi Protected Setup™,
Wireless
Ports Ethernet, Power
Buttons Reset, Wi-Fi Protected Setup
Cabling Type CAT5e
Antennas 3 (internal)
Antenna Connector Type N/A
Detachable (Yes/No) No
Modulations 802.11a: OFDM/BPSK, QPSK,
16-QAM, 64-QAM
802.11b: CCK/QPSK, BPSK
802.11g: OFDM/BPSK, QPSK,
16-QAM, 64-QAM
802.11n: OFDM/BPSK, QPSK,
16-QAM, 64-QAM
RF Pwr (EIRP) in dBm 802.11a: 15 dBm (typical) @ 54Mbps
802.11b: 18 dBm (typical) @ 11 Mbps
802.11g: 16 dBm (typical) @ 54 Mbps
802.11n: 12 dBm (typical) @ 130 Mbps
(HT20), 270 Mbps (HT40)
Receive Sensitivity 802.11a: -72 dBm (typical) @ 54 Mbps
802.11b: -85 dBm (typical) @ 11 Mbps
802.11g: -73 dBm (typical) @ 54 Mbps
802.11n: -70 dBm (typical) @ MCS15/2.4 GHz,
-69 dBm (typical) @ MCS15/5.0 GHz
Antenna Gain in dBi 1
Wireless Security WEP, Wi-Fi Protected Access™ (WPA), Wi-Fi
Protected Access™ 2 (WPA2)
Security Key Bits Up to 128-bit encryption
Environmental
Dimensions 5.71” x 4.17” x 2.05”
(145 x 106 x 52 mm)
Weight 5.61 oz (159 g)
Certification FCC, UL/cUL, ICES-003, RSS210, CE, Wi-Fi
(IEEE 802 11a/b/g/draft n), WPA2™,
Wi-Fi Protected Setup, WMM®
Power 12V, 1A
Operating Temperature 32 to 104ºF (0 to 40ºC)
Storage Temperature -4 to 140ºF (-20 to 60ºC)
Operating Humidity 10 to 85% Noncondensing
Storage Humidity 5 to 90% Noncondensing
Specifications are subject to change without notice.
Pagina se încarcă...
Pagina se încarcă...
Pagina se încarcă...
Pagina se încarcă...
Pagina se încarcă...
Pagina se încarcă...
Pagina se încarcă...
Pagina se încarcă...
Pagina se încarcă...
Pagina se încarcă...
Pagina se încarcă...
Pagina se încarcă...
Pagina se încarcă...
Pagina se încarcă...
Pagina se încarcă...
Pagina se încarcă...
Pagina se încarcă...
Pagina se încarcă...
Pagina se încarcă...
Pagina se încarcă...
Pagina se încarcă...
Pagina se încarcă...
Pagina se încarcă...
Pagina se încarcă...
Pagina se încarcă...
Pagina se încarcă...
Pagina se încarcă...
Pagina se încarcă...
Pagina se încarcă...
Pagina se încarcă...
Pagina se încarcă...
Pagina se încarcă...
Pagina se încarcă...
Pagina se încarcă...
Pagina se încarcă...
Pagina se încarcă...
Pagina se încarcă...
Pagina se încarcă...
Pagina se încarcă...
Pagina se încarcă...
Pagina se încarcă...
Pagina se încarcă...
Pagina se încarcă...
Pagina se încarcă...
Pagina se încarcă...
Pagina se încarcă...
Pagina se încarcă...
Pagina se încarcă...
Pagina se încarcă...
Pagina se încarcă...
Pagina se încarcă...
Pagina se încarcă...
Pagina se încarcă...
Pagina se încarcă...
Pagina se încarcă...
Pagina se încarcă...
Pagina se încarcă...
Pagina se încarcă...
Pagina se încarcă...
Pagina se încarcă...
Pagina se încarcă...
Pagina se încarcă...
Pagina se încarcă...
Pagina se încarcă...
Pagina se încarcă...
Pagina se încarcă...
Pagina se încarcă...
Pagina se încarcă...
Pagina se încarcă...
Pagina se încarcă...
Pagina se încarcă...
Pagina se încarcă...
Pagina se încarcă...
Pagina se încarcă...
Pagina se încarcă...
Pagina se încarcă...
Pagina se încarcă...
Pagina se încarcă...
Pagina se încarcă...
Pagina se încarcă...
Pagina se încarcă...
Pagina se încarcă...
Pagina se încarcă...
Pagina se încarcă...
Pagina se încarcă...
Pagina se încarcă...
Pagina se încarcă...
Pagina se încarcă...
Pagina se încarcă...
Pagina se încarcă...
Pagina se încarcă...
Pagina se încarcă...
Pagina se încarcă...
Pagina se încarcă...
Pagina se încarcă...
Pagina se încarcă...
Pagina se încarcă...
Pagina se încarcă...
Pagina se încarcă...
Pagina se încarcă...
Pagina se încarcă...
Pagina se încarcă...
Pagina se încarcă...
Pagina se încarcă...
Pagina se încarcă...
Pagina se încarcă...
Pagina se încarcă...
Pagina se încarcă...
Pagina se încarcă...
Pagina se încarcă...
Pagina se încarcă...
Pagina se încarcă...
Pagina se încarcă...
Pagina se încarcă...
Pagina se încarcă...
Pagina se încarcă...
Pagina se încarcă...
Pagina se încarcă...
Pagina se încarcă...
Pagina se încarcă...
Pagina se încarcă...
Pagina se încarcă...
Pagina se încarcă...
Pagina se încarcă...
Pagina se încarcă...
Pagina se încarcă...
Pagina se încarcă...
Pagina se încarcă...
Pagina se încarcă...
Pagina se încarcă...
Pagina se încarcă...
Pagina se încarcă...
Pagina se încarcă...
Pagina se încarcă...
Pagina se încarcă...
Pagina se încarcă...
Pagina se încarcă...
Pagina se încarcă...
Pagina se încarcă...
Pagina se încarcă...
Pagina se încarcă...
Pagina se încarcă...
Pagina se încarcă...
Pagina se încarcă...
Pagina se încarcă...
Pagina se încarcă...
Pagina se încarcă...
Pagina se încarcă...
Pagina se încarcă...
Pagina se încarcă...
Pagina se încarcă...
Pagina se încarcă...
Pagina se încarcă...
Pagina se încarcă...
Pagina se încarcă...
Pagina se încarcă...
Pagina se încarcă...
Pagina se încarcă...
Pagina se încarcă...
Pagina se încarcă...
Pagina se încarcă...
Pagina se încarcă...
Pagina se încarcă...
Pagina se încarcă...
Pagina se încarcă...
Pagina se încarcă...
Pagina se încarcă...
Pagina se încarcă...
Pagina se încarcă...
Pagina se încarcă...
Pagina se încarcă...
Pagina se încarcă...
Pagina se încarcă...
Pagina se încarcă...
Pagina se încarcă...
Pagina se încarcă...
Pagina se încarcă...
Pagina se încarcă...
Pagina se încarcă...
Pagina se încarcă...
Pagina se încarcă...
Pagina se încarcă...
Pagina se încarcă...
Pagina se încarcă...
Pagina se încarcă...
Pagina se încarcă...
Pagina se încarcă...
Pagina se încarcă...
Pagina se încarcă...
Pagina se încarcă...
Pagina se încarcă...
Pagina se încarcă...
Pagina se încarcă...
Pagina se încarcă...
Pagina se încarcă...
Pagina se încarcă...
Pagina se încarcă...
Pagina se încarcă...
Pagina se încarcă...
Pagina se încarcă...
Pagina se încarcă...
Pagina se încarcă...
Pagina se încarcă...
Pagina se încarcă...
Pagina se încarcă...
Pagina se încarcă...
Pagina se încarcă...
Pagina se încarcă...
Pagina se încarcă...
Pagina se încarcă...
Pagina se încarcă...
Pagina se încarcă...
Pagina se încarcă...
Pagina se încarcă...
Pagina se încarcă...
Pagina se încarcă...
Pagina se încarcă...
Pagina se încarcă...
Pagina se încarcă...
Pagina se încarcă...
Pagina se încarcă...
Pagina se încarcă...
Pagina se încarcă...
Pagina se încarcă...
Pagina se încarcă...
Pagina se încarcă...
Pagina se încarcă...
Pagina se încarcă...
Pagina se încarcă...
Pagina se încarcă...
Pagina se încarcă...
Pagina se încarcă...
Pagina se încarcă...
Pagina se încarcă...
Pagina se încarcă...
Pagina se încarcă...
Pagina se încarcă...
Pagina se încarcă...
Pagina se încarcă...
Pagina se încarcă...
Pagina se încarcă...
Pagina se încarcă...
Pagina se încarcă...
Pagina se încarcă...
Pagina se încarcă...
Pagina se încarcă...
Pagina se încarcă...
Pagina se încarcă...
Pagina se încarcă...
Pagina se încarcă...
Pagina se încarcă...
Pagina se încarcă...
Pagina se încarcă...
Pagina se încarcă...
Pagina se încarcă...
Pagina se încarcă...
Pagina se încarcă...
Pagina se încarcă...
Pagina se încarcă...
Pagina se încarcă...
Pagina se încarcă...
Pagina se încarcă...
Pagina se încarcă...
Pagina se încarcă...
Pagina se încarcă...
Pagina se încarcă...
Pagina se încarcă...
Pagina se încarcă...
Pagina se încarcă...
Pagina se încarcă...
Pagina se încarcă...
Pagina se încarcă...
Pagina se încarcă...
Pagina se încarcă...
Pagina se încarcă...
Pagina se încarcă...
Pagina se încarcă...
Pagina se încarcă...
Pagina se încarcă...
Pagina se încarcă...
Pagina se încarcă...
Pagina se încarcă...
Pagina se încarcă...
Pagina se încarcă...
Pagina se încarcă...
Pagina se încarcă...
Pagina se încarcă...
Pagina se încarcă...
Pagina se încarcă...
Pagina se încarcă...
Pagina se încarcă...
Pagina se încarcă...
Pagina se încarcă...
Pagina se încarcă...
Pagina se încarcă...
Pagina se încarcă...
Pagina se încarcă...
Pagina se încarcă...
Pagina se încarcă...
Pagina se încarcă...
Pagina se încarcă...
Pagina se încarcă...
Pagina se încarcă...
Pagina se încarcă...
Pagina se încarcă...
Pagina se încarcă...
Pagina se încarcă...
Pagina se încarcă...
Pagina se încarcă...
Pagina se încarcă...
Pagina se încarcă...
Pagina se încarcă...
Pagina se încarcă...
Pagina se încarcă...
Pagina se încarcă...
Pagina se încarcă...
Pagina se încarcă...
Pagina se încarcă...
Pagina se încarcă...
Pagina se încarcă...
Pagina se încarcă...
Pagina se încarcă...
Pagina se încarcă...
Pagina se încarcă...
Pagina se încarcă...
Pagina se încarcă...
Pagina se încarcă...
Pagina se încarcă...
Pagina se încarcă...
Pagina se încarcă...
Pagina se încarcă...
Pagina se încarcă...
Pagina se încarcă...
Pagina se încarcă...
Pagina se încarcă...
Pagina se încarcă...
Pagina se încarcă...
Pagina se încarcă...
Pagina se încarcă...
Pagina se încarcă...
Pagina se încarcă...
Pagina se încarcă...
Pagina se încarcă...
Pagina se încarcă...
Pagina se încarcă...
Pagina se încarcă...
Pagina se încarcă...
Pagina se încarcă...
Pagina se încarcă...
Pagina se încarcă...
Pagina se încarcă...
Pagina se încarcă...
Pagina se încarcă...
Pagina se încarcă...
Pagina se încarcă...
Pagina se încarcă...
Pagina se încarcă...
Pagina se încarcă...
Pagina se încarcă...
Pagina se încarcă...
Pagina se încarcă...
Pagina se încarcă...
Pagina se încarcă...
Pagina se încarcă...
Pagina se încarcă...
Pagina se încarcă...
Pagina se încarcă...
Pagina se încarcă...
Pagina se încarcă...
Pagina se încarcă...
Pagina se încarcă...
Pagina se încarcă...
Pagina se încarcă...
Pagina se încarcă...
Pagina se încarcă...
Pagina se încarcă...
Pagina se încarcă...
Pagina se încarcă...
Pagina se încarcă...
Pagina se încarcă...
Pagina se încarcă...
Pagina se încarcă...
Pagina se încarcă...
Pagina se încarcă...
Pagina se încarcă...
Pagina se încarcă...
Pagina se încarcă...
Pagina se încarcă...
Pagina se încarcă...
Pagina se încarcă...
Pagina se încarcă...
Pagina se încarcă...
Pagina se încarcă...
Pagina se încarcă...
Pagina se încarcă...
Pagina se încarcă...
Pagina se încarcă...
Pagina se încarcă...
Pagina se încarcă...
Pagina se încarcă...
Pagina se încarcă...
Pagina se încarcă...
Pagina se încarcă...
Pagina se încarcă...
Pagina se încarcă...
Pagina se încarcă...
Pagina se încarcă...
Pagina se încarcă...
Pagina se încarcă...
Pagina se încarcă...
Pagina se încarcă...
Pagina se încarcă...
Pagina se încarcă...
Pagina se încarcă...
Pagina se încarcă...
Pagina se încarcă...
Pagina se încarcă...
Pagina se încarcă...
Pagina se încarcă...
Pagina se încarcă...
Pagina se încarcă...
Pagina se încarcă...
Pagina se încarcă...
Pagina se încarcă...
Pagina se încarcă...
Pagina se încarcă...
Pagina se încarcă...
Pagina se încarcă...
Pagina se încarcă...
Pagina se încarcă...
Pagina se încarcă...
Pagina se încarcă...
Pagina se încarcă...
Pagina se încarcă...
Pagina se încarcă...
Pagina se încarcă...
Pagina se încarcă...
Pagina se încarcă...
Pagina se încarcă...
Pagina se încarcă...
Pagina se încarcă...
Pagina se încarcă...
Pagina se încarcă...
Pagina se încarcă...
Pagina se încarcă...
Pagina se încarcă...
Pagina se încarcă...
Pagina se încarcă...
Pagina se încarcă...
Pagina se încarcă...
Pagina se încarcă...
Pagina se încarcă...
Pagina se încarcă...
Pagina se încarcă...
Pagina se încarcă...
Pagina se încarcă...
Pagina se încarcă...
Pagina se încarcă...
Pagina se încarcă...
Pagina se încarcă...
Pagina se încarcă...
Pagina se încarcă...
Pagina se încarcă...
Pagina se încarcă...
Pagina se încarcă...
Pagina se încarcă...
Pagina se încarcă...
Pagina se încarcă...
Pagina se încarcă...
Pagina se încarcă...
Pagina se încarcă...
Pagina se încarcă...
Pagina se încarcă...
Pagina se încarcă...
Pagina se încarcă...
Pagina se încarcă...
Pagina se încarcă...
Pagina se încarcă...
Pagina se încarcă...
Pagina se încarcă...
Pagina se încarcă...
Pagina se încarcă...
Pagina se încarcă...
Pagina se încarcă...
Pagina se încarcă...
Pagina se încarcă...
Pagina se încarcă...
Pagina se încarcă...
Pagina se încarcă...
Pagina se încarcă...
Pagina se încarcă...
Pagina se încarcă...
Pagina se încarcă...
Pagina se încarcă...
Pagina se încarcă...
Pagina se încarcă...
Pagina se încarcă...
Pagina se încarcă...
Pagina se încarcă...
Pagina se încarcă...
Pagina se încarcă...
Pagina se încarcă...
Pagina se încarcă...
Pagina se încarcă...
Pagina se încarcă...
Pagina se încarcă...
Pagina se încarcă...
Pagina se încarcă...
Pagina se încarcă...
Pagina se încarcă...
Pagina se încarcă...
Pagina se încarcă...
Pagina se încarcă...
Pagina se încarcă...
Pagina se încarcă...
Pagina se încarcă...
Pagina se încarcă...
Pagina se încarcă...
Pagina se încarcă...
Pagina se încarcă...
Pagina se încarcă...
Pagina se încarcă...
Pagina se încarcă...
Pagina se încarcă...
Pagina se încarcă...
Pagina se încarcă...
-
 1
1
-
 2
2
-
 3
3
-
 4
4
-
 5
5
-
 6
6
-
 7
7
-
 8
8
-
 9
9
-
 10
10
-
 11
11
-
 12
12
-
 13
13
-
 14
14
-
 15
15
-
 16
16
-
 17
17
-
 18
18
-
 19
19
-
 20
20
-
 21
21
-
 22
22
-
 23
23
-
 24
24
-
 25
25
-
 26
26
-
 27
27
-
 28
28
-
 29
29
-
 30
30
-
 31
31
-
 32
32
-
 33
33
-
 34
34
-
 35
35
-
 36
36
-
 37
37
-
 38
38
-
 39
39
-
 40
40
-
 41
41
-
 42
42
-
 43
43
-
 44
44
-
 45
45
-
 46
46
-
 47
47
-
 48
48
-
 49
49
-
 50
50
-
 51
51
-
 52
52
-
 53
53
-
 54
54
-
 55
55
-
 56
56
-
 57
57
-
 58
58
-
 59
59
-
 60
60
-
 61
61
-
 62
62
-
 63
63
-
 64
64
-
 65
65
-
 66
66
-
 67
67
-
 68
68
-
 69
69
-
 70
70
-
 71
71
-
 72
72
-
 73
73
-
 74
74
-
 75
75
-
 76
76
-
 77
77
-
 78
78
-
 79
79
-
 80
80
-
 81
81
-
 82
82
-
 83
83
-
 84
84
-
 85
85
-
 86
86
-
 87
87
-
 88
88
-
 89
89
-
 90
90
-
 91
91
-
 92
92
-
 93
93
-
 94
94
-
 95
95
-
 96
96
-
 97
97
-
 98
98
-
 99
99
-
 100
100
-
 101
101
-
 102
102
-
 103
103
-
 104
104
-
 105
105
-
 106
106
-
 107
107
-
 108
108
-
 109
109
-
 110
110
-
 111
111
-
 112
112
-
 113
113
-
 114
114
-
 115
115
-
 116
116
-
 117
117
-
 118
118
-
 119
119
-
 120
120
-
 121
121
-
 122
122
-
 123
123
-
 124
124
-
 125
125
-
 126
126
-
 127
127
-
 128
128
-
 129
129
-
 130
130
-
 131
131
-
 132
132
-
 133
133
-
 134
134
-
 135
135
-
 136
136
-
 137
137
-
 138
138
-
 139
139
-
 140
140
-
 141
141
-
 142
142
-
 143
143
-
 144
144
-
 145
145
-
 146
146
-
 147
147
-
 148
148
-
 149
149
-
 150
150
-
 151
151
-
 152
152
-
 153
153
-
 154
154
-
 155
155
-
 156
156
-
 157
157
-
 158
158
-
 159
159
-
 160
160
-
 161
161
-
 162
162
-
 163
163
-
 164
164
-
 165
165
-
 166
166
-
 167
167
-
 168
168
-
 169
169
-
 170
170
-
 171
171
-
 172
172
-
 173
173
-
 174
174
-
 175
175
-
 176
176
-
 177
177
-
 178
178
-
 179
179
-
 180
180
-
 181
181
-
 182
182
-
 183
183
-
 184
184
-
 185
185
-
 186
186
-
 187
187
-
 188
188
-
 189
189
-
 190
190
-
 191
191
-
 192
192
-
 193
193
-
 194
194
-
 195
195
-
 196
196
-
 197
197
-
 198
198
-
 199
199
-
 200
200
-
 201
201
-
 202
202
-
 203
203
-
 204
204
-
 205
205
-
 206
206
-
 207
207
-
 208
208
-
 209
209
-
 210
210
-
 211
211
-
 212
212
-
 213
213
-
 214
214
-
 215
215
-
 216
216
-
 217
217
-
 218
218
-
 219
219
-
 220
220
-
 221
221
-
 222
222
-
 223
223
-
 224
224
-
 225
225
-
 226
226
-
 227
227
-
 228
228
-
 229
229
-
 230
230
-
 231
231
-
 232
232
-
 233
233
-
 234
234
-
 235
235
-
 236
236
-
 237
237
-
 238
238
-
 239
239
-
 240
240
-
 241
241
-
 242
242
-
 243
243
-
 244
244
-
 245
245
-
 246
246
-
 247
247
-
 248
248
-
 249
249
-
 250
250
-
 251
251
-
 252
252
-
 253
253
-
 254
254
-
 255
255
-
 256
256
-
 257
257
-
 258
258
-
 259
259
-
 260
260
-
 261
261
-
 262
262
-
 263
263
-
 264
264
-
 265
265
-
 266
266
-
 267
267
-
 268
268
-
 269
269
-
 270
270
-
 271
271
-
 272
272
-
 273
273
-
 274
274
-
 275
275
-
 276
276
-
 277
277
-
 278
278
-
 279
279
-
 280
280
-
 281
281
-
 282
282
-
 283
283
-
 284
284
-
 285
285
-
 286
286
-
 287
287
-
 288
288
-
 289
289
-
 290
290
-
 291
291
-
 292
292
-
 293
293
-
 294
294
-
 295
295
-
 296
296
-
 297
297
-
 298
298
-
 299
299
-
 300
300
-
 301
301
-
 302
302
-
 303
303
-
 304
304
-
 305
305
-
 306
306
-
 307
307
-
 308
308
-
 309
309
-
 310
310
-
 311
311
-
 312
312
-
 313
313
-
 314
314
-
 315
315
-
 316
316
-
 317
317
-
 318
318
-
 319
319
-
 320
320
-
 321
321
-
 322
322
-
 323
323
-
 324
324
-
 325
325
-
 326
326
-
 327
327
-
 328
328
-
 329
329
-
 330
330
-
 331
331
-
 332
332
-
 333
333
-
 334
334
-
 335
335
-
 336
336
-
 337
337
-
 338
338
-
 339
339
-
 340
340
-
 341
341
-
 342
342
-
 343
343
-
 344
344
-
 345
345
-
 346
346
-
 347
347
-
 348
348
-
 349
349
-
 350
350
-
 351
351
-
 352
352
-
 353
353
-
 354
354
-
 355
355
-
 356
356
-
 357
357
-
 358
358
-
 359
359
-
 360
360
-
 361
361
-
 362
362
-
 363
363
-
 364
364
-
 365
365
-
 366
366
-
 367
367
-
 368
368
-
 369
369
-
 370
370
-
 371
371
-
 372
372
-
 373
373
-
 374
374
-
 375
375
-
 376
376
-
 377
377
-
 378
378
-
 379
379
-
 380
380
-
 381
381
-
 382
382
-
 383
383
-
 384
384
-
 385
385
-
 386
386
-
 387
387
-
 388
388
-
 389
389
-
 390
390
-
 391
391
-
 392
392
-
 393
393
-
 394
394
-
 395
395
-
 396
396
-
 397
397
-
 398
398
-
 399
399
-
 400
400
-
 401
401
-
 402
402
-
 403
403
-
 404
404
-
 405
405
-
 406
406
-
 407
407
-
 408
408
-
 409
409
-
 410
410
-
 411
411
-
 412
412
-
 413
413
-
 414
414
-
 415
415
-
 416
416
-
 417
417
-
 418
418
-
 419
419
-
 420
420
-
 421
421
-
 422
422
-
 423
423
-
 424
424
-
 425
425
-
 426
426
-
 427
427
-
 428
428
-
 429
429
-
 430
430
-
 431
431
-
 432
432
-
 433
433
-
 434
434
-
 435
435
-
 436
436
-
 437
437
-
 438
438
-
 439
439
-
 440
440
-
 441
441
-
 442
442
-
 443
443
-
 444
444
-
 445
445
-
 446
446
-
 447
447
-
 448
448
-
 449
449
-
 450
450
-
 451
451
-
 452
452
-
 453
453
-
 454
454
-
 455
455
-
 456
456
-
 457
457
-
 458
458
-
 459
459
-
 460
460
-
 461
461
-
 462
462
-
 463
463
-
 464
464
-
 465
465
-
 466
466
-
 467
467
-
 468
468
-
 469
469
-
 470
470
-
 471
471
-
 472
472
-
 473
473
-
 474
474
-
 475
475
-
 476
476
-
 477
477
-
 478
478
-
 479
479
-
 480
480
-
 481
481
-
 482
482
-
 483
483
-
 484
484
-
 485
485
-
 486
486
-
 487
487
-
 488
488
-
 489
489
-
 490
490
-
 491
491
-
 492
492
-
 493
493
-
 494
494
-
 495
495
-
 496
496
-
 497
497
-
 498
498
-
 499
499
-
 500
500
-
 501
501
-
 502
502
-
 503
503
-
 504
504
-
 505
505
-
 506
506
-
 507
507
-
 508
508
-
 509
509
-
 510
510
-
 511
511
-
 512
512
-
 513
513
-
 514
514
-
 515
515
-
 516
516
-
 517
517
-
 518
518
-
 519
519
-
 520
520
-
 521
521
-
 522
522
-
 523
523
-
 524
524
-
 525
525
-
 526
526
-
 527
527
-
 528
528
-
 529
529
-
 530
530
-
 531
531
-
 532
532
-
 533
533
-
 534
534
-
 535
535
-
 536
536
-
 537
537
-
 538
538
-
 539
539
-
 540
540
-
 541
541
-
 542
542
-
 543
543
-
 544
544
-
 545
545
-
 546
546


Linksys Linksys WET610N Manual de utilizare
- Categorie
- Puncte de acces WLAN
- Tip
- Manual de utilizare
- Acest manual este potrivit și pentru
în alte limbi
Lucrări înrudite
-
Linksys WRK54G Manual de utilizare
-
Linksys WUSB6300 Manualul utilizatorului
-
Linksys WRT1900ACS Manualul proprietarului
-
Linksys RE1000 Manualul proprietarului
-
Linksys X1000 Manualul proprietarului
-
-
Linksys X6200 Manualul proprietarului
-
Linksys EA4500 Manualul proprietarului
-
Linksys WVC54GCA Manual de utilizare
Alte documente
-
 Serioux SRX-WR150WH Manual de utilizare
-
Cisco WUSB100 Manual de utilizare
-
Asus WL500g-Deluxe Manualul proprietarului
-
TP-LINK Archer C6 Manualul utilizatorului
-
König CMP-WNROUT41 Ghid de instalare
-
-
Digi XBee RR Pro USB Adapter Manualul utilizatorului
-
D-Link DWA-172 Quick Installation Manual
-
Digi XBee 3 Manualul utilizatorului
-
