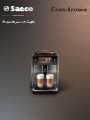
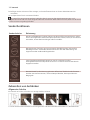
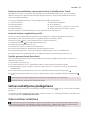
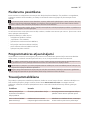
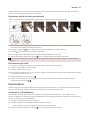
Saeco SM6685 Manual de utilizare
- Categorie
- Aparate de cafea
- Tip
- Manual de utilizare


Le respect du Café
Уважение к кофе
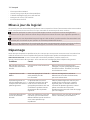
WWW.SAECO.COM/CARE
EN USER MANUAL
AZ İSTİFADƏÇİTƏLİMATI
CS UŽIVATELSKÁPŘIRUČKA
CNR UPUTSTVOZAKORISNIKE
DA BRUGERVEJLEDNING
DE BENUTZERHANDBUCH
ET KASUTUSJUHEND
ES MANUALDELUSUARIO
FR MODED’EMPLOI
HR KORISNIČKIPRIRUČNIK
IT MANUALEUTENTE
LV LIETOT JAROKASGR MATA
LT NAUDOTOJOVADOVAS
HU FELHASZNÁLÓIKÉZIKÖNYV
NL GEBRUIKSAANWIJZING
NO BRUKERHÅNDBOK
UZ FOYDALANUVCHIQO’LLANMASI
PL INSTRUKCJAOBSŁUGI
PT MANUALDOUTILIZADOR
RO MANUALDEUTILIZARE
SQ MANUALIIPËRDORIMIT
SL UPORABNIŠKIPRIROČNIK
SK NÁVODNAPOUŽITIE
SR УПУТСТВОЗАКОРИШЋЕЊЕ
FI KAYTTÖOPAS
SV ANVÄNDARHANDBOK
TK ULANYJYGOLLANMASY
EL ΕΓΧΕΙΡΊΔΙΟΧΡΉΣΗΣ
BG РЪКОВОДСТВОЗАПОТРЕБИТЕЛЯ
KY КОЛДОНУУЧУНУНЖЕТЕКЧИЛИГИ
MK КОРИСНИЧКОУПАТСТВО
RU РУКОВОДСТВОПОЛЬЗОВАТЕЛЯ
TG ДАСТУРИИСТИФОДАБАР
UK ПОСІБНИККОРИСТУВАЧА
KK ПАЙДАЛАНУШЫНҰСҚАУЛЫҒЫ
HY ՕԳՏԱԳՈՐԾՈՂԻՁԵՌՆԱՐԿ
KA ᲘᲜᲡᲢᲠᲣᲥᲪᲘᲐ
HE שומישךירדמ

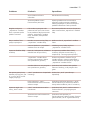
AA2A1 A3
A10
A9
A7
A8
A5
A6
A25 A26 A27
A24A23A22A21
A11
A4
A14
A17
A12
A13
A5 A16
A18
A20
A19
A15

C
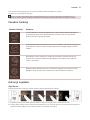
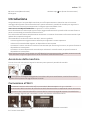
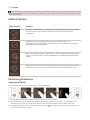
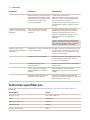
BGranAroma Deluxe: SM6685, SM6682, SM6680
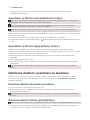
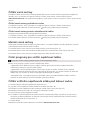
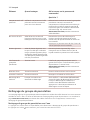
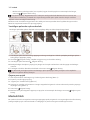
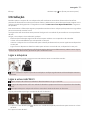
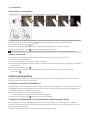
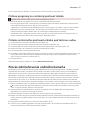
Espresso
Cappuccino
Americano
Co ee
spresso Lungo
Select your drink
Drinks
P
r
o
l
e
Sett
Sett
i
ng
s
S
S
t
t
a
tu
s
S
ho
ho
ho
p
B1
B2
B3 B4 B5 B6 B8B7
A18A16A21 A26A7 A8 A22A14A1 A10A5A20 A19 A17 A23

English 6
Azərbaycanca 25
Čeština 45
Crnogorski 65
Dansk 86
Deutsch 106
Eesti 129
Español 149
Français 170
Hrvatski 191
Italiano 212
Latviešu 234
Lietuviškai 254
Magyar 274
Nederlands 295
Norsk 316
O'zbek 336
Polski 357
Português 378
Română 399
Shqip 419
Slovenščina 440
Slovensky 460
Srpski 481
Suomi 502
Svenska 522
Türkmençe 542
Ελληνικά 562
Български 585
Кыргызча 607
Македонски 630
Русский 653
Тоҷикӣ 677
Українська 700
Қазақша 722
Հայերեն 743
ქართული ენა 767
תירבע 790

English
6English
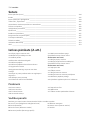
Contents
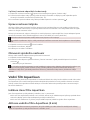
Machine overview (Fig. A)__________________________________________________________________ 6
Introduction _____________________________________________________________________________ 7
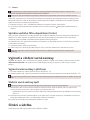
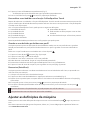
Adjusting machine settings_________________________________________________________________ 11
AquaClean water filter ____________________________________________________________________ 12
Removing and inserting the brew group _____________________________________________________ 13
Cleaning and maintenance_________________________________________________________________ 13
Descaling procedure ______________________________________________________________________ 16
Error codes_______________________________________________________________________________ 17
Ordering accessories ______________________________________________________________________ 18
Software updates _________________________________________________________________________ 18
Troubleshooting __________________________________________________________________________ 19
Technical specifications ____________________________________________________________________ 24
Declaration of Conformity__________________________________________________________________ 24
Wi-Fi ____________________________________________________________________________________ 24
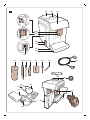
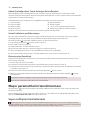
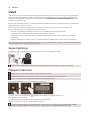
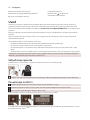
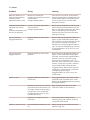
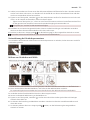
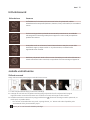
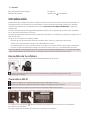
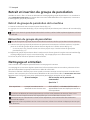
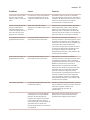
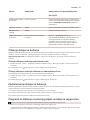
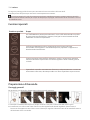
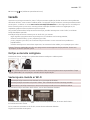
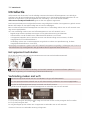
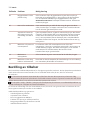
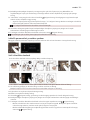
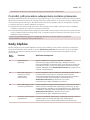
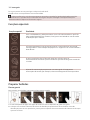
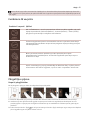
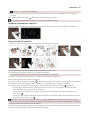
Machine overview (Fig. A)
A1 Lid of bean hopper
A2 Lid of pre-ground coffee compartment
A3 Control panel
A4 Socket for cord
A5 Drip tray
A6 Drip tray release grip
A7 HygieSteam container
A8 HygieSteam cover with milk tube holder
A9 Height-adjustable coffee and milk dispensing
spout
A10 Internal cappuccinatore
A11 Power cord with plug
A12 Grind setting knob (to learn more, visit
www.saeco.com/care)
A13 Bean hopper
A14 Brew group (to learn more, visit
www.saeco.com/care)
A15 Service door
A16 Water tank
A17 Coffee grounds container
A18 Front panel of coffee grounds container
A19 Drip tray cover
A20 'Drip tray full' indicator
Accessories
A21 Milk container
A22 Milk tube
A23 Cleaning brush
A24 Grease tube
A25 AquaClean filter
A26 Measuring spoon
A27 Water hardness test strip
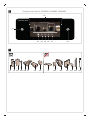
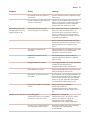
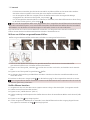
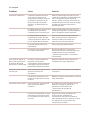
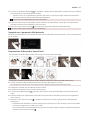
Control panel
Refer to figure B for an overview of all icons. Below you can find the descriptions.
B1 On/off icon
B2 Drinks
B3 Drinks menu
B4 Personal profiles
B5 Machine settings
B6 Status menu
B7 Shop
B8 Start/stop icon

7
English
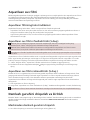
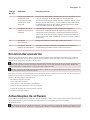
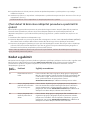
Introduction
Congratulations on your purchase of a Saeco full-automatic coffee machine! To fully benefit from the online
support that Saeco offers, you can use the control panel to register your machine via the built-in Wi-Fi
connection, or go to www.saeco.com/MyCoffeeMachine and register your product there.
Read the separate safety booklet carefully before you use the machine for the first time and save it for
future reference.
Your Saeco full-automatic coffee machine allows you to connect with your Wi-Fi network to enhance your
coffee experience.
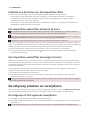
By connecting your machine to your Wi-Fi network, you will be able to:
-enjoy regular software updates to enhance your user experience
-make use of the shop functionality, if available in your country
-you can link your machine to your Amazon account for accessory replenishment, if this option is available
in your country
-connect to your Alexa home device to make use of voice control, if available in your country
Note: This machine has been tested with coffee. Although it has been carefully cleaned, there may be some
coffee residues left. We guarantee, however, that the machine is absolutely new.
Switching on the machine
Tap the 'on' icon and follow the step-by-step instructions on the control panel.
Please connect and update the machine at first installation and regularly check for manual updates.
Connecting to Wi-Fi
Connect your coffee machine to a 2.4 GHz 802.11 b/g/n home Wi-Fi network.
Connecting your coffee machine to your home Wi-Fi network, provides you with an enhanced user
experience.
Make sure that the coffee machine and the Wi-Fi router are within range of each other.
Follow the steps below to connect your coffee machine to your Wi-Fi network.
1Tap the Settings icon and swipe from left to right to find the Wi-Fi icon.
2Tap the Wi-Fi icon.
3Follow the steps on the screen to connect your machine to your Wi-Fi network.
You are now ready to start your connected experience.
The machine will perform the automatic rinsing cycle when it is switched on and off via voice control and
when the machine has been inactive for a while and switches off. Please make sure that the environment of
the machine is safe.

8English
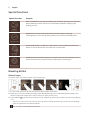
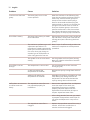
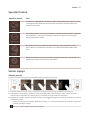
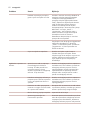
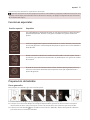
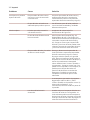
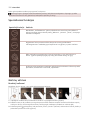
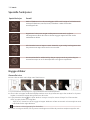
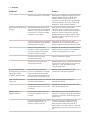
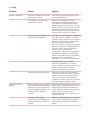
Special functions
Special function Purpose
With CoffeeMaestro you can personalize your coffee by selecting a pre-set taste
profile (Delicato, Intenso, Forte) for your beverage instead of changing the
settings yourself.
HygieSteam function automatically cleans the milk system, removing
microorganisms: use it after brewing cappuccino or other milk-based drinks.
Our durable grinder is made from 100% ceramic to be exceptionally hard and
precise. It can be adjusted to your taste with 12-step levels.
The Maintenance Dashboard gives you a helpful overview and notifies you with
status information on things like that the AquaClean is running low.
Brewing drinks
General steps
To brew a drink, you need to follow a few simple steps.
1Fill the water tank with tap water and fill the bean hopper with beans.
2Place one or two cups under the height-adjustable dispensing spout. Slide the dispensing spout up or
down to adjust the height to the size of the cup or glass you are using.
3Tap the Drinks icon to enter the 'Drinks' menu. Swipe from left to right to select your drink by tapping
on it.
-Tap the '2x' icon if you want to brew two cups. The machine automatically carries out two grinding
cycles in sequence of the selected drinks.
The '2x' icon is not available for all drinks.

9
English
4After selecting a drink you can adjust the settings to your preference by swiping the adjustable bars up
and down.
5Press the start/stop icon to start brewing the selected drink.
Do not use caramelized or flavored coffee beans.
Support on drink parameters
To get additional information about a specific drink parameter, press and hold an item for 3 seconds.
Brewing milk-based drinks
To brew milk-based drinks, you need to follow a few simple steps.
1Fill the water tank with tap water and fill the bean hopper with beans.
2Unscrew the lid of the milk container and fill the milk container with milk.
Always use milk coming directly from the fridge for optimal results.
3Connect the flexible milk tube to the cappuccinatore.
4Place the metal milk tube in the container.
5Tap the Drinks icon, scroll and select the milk-based drink icon of your choice.
6You can adjust the settings to your preference by swiping the adjustable bars up and down.
7Press the start/stop icon at any time to start brewing the selected drink.
-For specific drinks, the machine first dispenses milk and then coffee. For a number of other drinks this
is the other way around, the machine will first dispense coffee and then milk.
-To stop dispensing milk before the machine has dispensed the preset amount, press the start/stop
icon.
-To stop dispensing the complete drink (milk and coffee) before the machine is finished, press and
hold the start/stop icon.
Directly after dispensing the milk, the 'HygieSteam Shot' is performed. The machine shoots steam
through the internal milk system to rinse it quickly.The metal part of the milk tube may become hot. To
avoid the risk of burns, let it cool down first.
Tip: You can also use a regular milk carton to brew your milk-based drinks. Place the metal milk tube directly
into the milk carton.

10 English
Brewing coffee with pre-ground coffee
To brew coffee with pre-ground coffee, you need to follow a few simple steps.
1Open the lid of the pre-ground coffee compartment and pour one measuring spoon of pre-ground
coffee into it. Then close the lid.
2Tap the Drinks icon, scroll from left to right and select your drink.
3Tap the pre-ground coffee icon.
4You can adjust the settings to your preference by swiping the adjustable bars up and down.
5Press the start/stop icon to start brewing the selected drink.
If you select pre-ground coffee, you cannot adjust the coffee strength or brew more than one drink at the
same time.
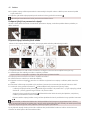
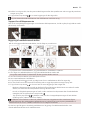
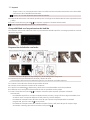
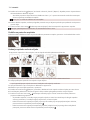
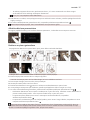
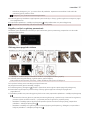
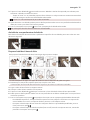
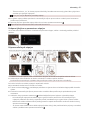
Dispensing hot water
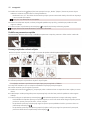
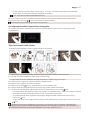
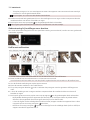
1Make sure that the internal cappuccinatore is correctly attached to the machine (Fig. 1).
2Place a cup under the spout.
3Tap 'Hot Water' (Fig. 2).
4Slide the adjustable bars up and down to adjust the hot water quantity or temperature to your
preference (Fig. 3).
5Press the start/stop icon.
6To stop dispensing hot water before the machine is finished, press the start/stop icon again.
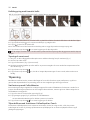
Personalization
The machine allows you to adjust the settings of a drink to your own preference and to store the adjusted
drink in a personal profile. You can choose your own icon and your own profile name.
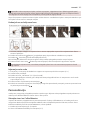
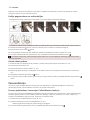
Speed up with CoffeeMaestro
Your machine offers the possibility to select taste profiles instead of adjusting all settings separately with
the CoffeeMaestro function. You can choose between Delicato, Intenso and Forte. To select a
CoffeeMaestro taste profile:
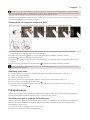
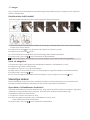
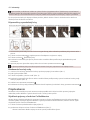
1Tap the drink icon of your choice (Fig. 4).
2Tap the CoffeeMaestro icon repeatedly (Fig. 5).
-The main settings of the drink are now adjusted accordingly.
3Press the start/stop icon to start brewing the drink.
Personalize your drink with the CoffeeEqualizer Touch function
After selecting a drink, the CoffeeEqualizer Touch function is activated automatically, allowing you to adjust
the drink settings. Long press on each of the items on the display to activate the help function and receive
further information.

11
English
With the CoffeeEqualizer Touch function you can adjust the following settings:
1Aroma strength
2Coffee quantity
3Milk quantity
4Water quantity
5Drink temperature
6Foam amount
7You can also decide to prepare 1 or 2 cups
8The order of first dispensing coffee or milk
Note: It depends on the drink you choose which settings you can adjust.
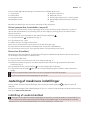
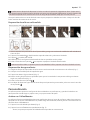
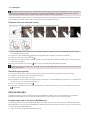
Save your favorite drinks in a profile
The machine allows you to adjust the settings of a drink to your own preference and to store the adjusted
drink in a personal profile. You can select a profile and store a recipe using the profiles.
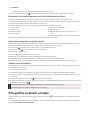
You can create a profile and add a drink using the profile icon.
1Tap the profile icon on the main menu (Fig. 6).
2Tap the Plus icon (Fig. 7).
3Type your name and select your favorite icon.
4You are ready to add a drink. Tap the drink icon of your choice.
5Personalize the drink via the CoffeeEqualizer Touch or the CoffeeMaestro function.
6Tap on the 'Safe to profile' icon to store it in your personal profile (Fig. 8).
Extra shot (ExtraShot)
Your machine offers you the possibility to add an extra shot of Ristretto to your coffee and milk drinks, for
example if you want to have a stronger coffee.
1Place a cup under the spout.
2Tap one of the one-touch drinks icons to select a drink (Fig. 4).
3Slide the adjustable bar up to set the strength to the top level and select the ExtraShot function (Fig. 9).
4Then press the start/stop icon to start brewing the drink.
5To stop dispensing the drink before the machine has finished, press the start/stop icon again.
When you have selected the ExtraShot function, you can only brew one coffee at the time.
The extra shot function is not available for all drinks.
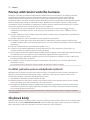
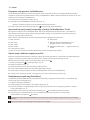
Adjusting machine settings
You can adjust most machine settings by tapping the Settings icon and follow the steps on the screen.
For online support (frequently asked questions, movies etc.), scan the QR code on the cover of this booklet
or visit www.saeco.com/care
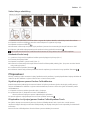
Setting the water hardness
We advise you to adjust the water hardness setting to the water hardness level in your region for optimal
performance and a longer lifetime of the machine. This also prevents you from having to descale the
machine too often. The default water hardness setting is 4: hard water.
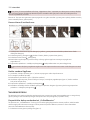
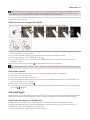
Use the water hardness test strip supplied in the box to determine the water hardness
in your region:
1Immerse the water hardness test strip in tap water or hold it under the tap for 1 second (Fig. 10).
2Wait 1 minute. The number of squares on the test strip that turn red indicate the water hardness (Fig.
11).
Set the machine to the correct water hardness:
1Tap the Settings icon and scroll from left to right to select 'Water hardness'.

12 English
2Select the water hardness level. The number of red squares selected on the display should be the same as
the number of red squares on the test strip (Fig. 12).
3When you have set the correct water hardness, tap the confirmation icon to confirm.
Adjusting the grind setting
You can change the coffee strength with the grind setting knob inside the bean container. The lower the
grind setting, the finer the coffee beans are ground and the stronger the coffee becomes. There are 12
different grind settings you can choose from.
The machine has been set up to get the best taste out of your coffee beans. Therefore we advise you not to
adjust the grind setting until you have brewed 100-150 cups (approx. 1 month of use).
You need to brew 2 to 3 drinks before you can taste the full difference.
Do not turn the grind setting knob more than one notch at a time to prevent damage to the grinder.
1Tap the Settings icon in the main menu.
2Tap on ¨Grinder¨.
3Watch the how to video.
Restoring factory settings
The machine offers you the possibility to restore the factory settings at any moment.
1Tap the Settings icon.
2Scroll from left to right to select 'Factory settings'. Confirm by tapping the confirmation icon.
-The settings are now restored.
The following factory settings are restored to default: water hardness, standby time, display brightness,
sound, front illumination, profiles, measure/units, home screen settings, Wi-Fi credentials, software update
preferences, Saeco credentials, Amazon credentials.
AquaClean water filter
Your machine is AquaClean enabled. You can place the AquaClean water filter in the water tank to preserve
the taste of your coffee. It also diminishes the need for descaling by reducing limescale build-up in your
machine. You can purchase an AquaClean water filter from your local or online retailer or from authorized
service centers.
AquaClean filter status indication
The status of the AquaClean filter is always visible in the 'Status' menu as a percentage.
-If the status of the AquaClean filter is 10% or less, the screen shows a message for 2 seconds each time
you switch on the machine. This message advises you to buy a new filter.
-If the status of the filter is 0%, the machine asks you to replace the AquaClean filter every time you
switch on the machine.
Activating the AquaClean water filter (5 min.)
The machine does not automatically detect that a filter has been placed in the water tank. Therefore you
need to activate each new AquaClean water filter that you install in the 'Status' menu.
When the machine stops showing the filter activation message, you can still activate an AquaClean water
filter, but you will need to descale the machine first.
Your machine has to be completely limescale-free before you start using the AquaClean water filter.

13
English
Before activating the AquaClean water filter, it has to be prepared by soaking it in water as described below.
If you don't do this, air might be drawn into the machine instead of water, which makes a lot of noise and
prevents the machine from being able to brew coffee.
1Tap the 'Status' icon and scroll from left to right to select 'AquaClean'.
2Tap the confirmation icon again when the activation screen appears. Follow the instructions on the
screen.
Replacing the AquaClean water filter (5 min.)
After 95 liters of water have flowed through the filter, the filter will cease to work. The AquaClean status
indicator drops to 0% to remind you to replace the filter. If you do not replace the AquaClean water filter in
time, you can still replace the filter but you first need to descale the machine.
When the AquaClean status indicator drops to 0% or when the machine reminds you to replace the
AquaClean filter:
1take out the old AquaClean water filter.
2install a new filter and activate it as described in chapter 'Activating the AquaClean water filter (5 min.)'.
Replace the AquaClean water filter at least every 3 months, even if the machine does not yet indicate that
replacement is required.
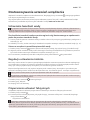
Removing and inserting the brew group
Go to the 'Status' menu on the screen and select 'Brew group clean' or visit www.saeco.com/care for
detailed video instructions on how to remove, insert and clean the brew group.
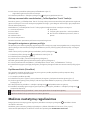
Removing the brew group from the machine
1Remove the water tank and open the service door (Fig. 13).
2Press the PUSH handle (Fig. 14) and pull at the grip of the brew group to remove it from the machine
(Fig. 15).
When you remove the brew group from the machine, make sure to empty the drip tray and the coffee
grounds container.
Reinserting the brew group
Before you slide the brew group back into the machine, make sure it is in the correct position.
1Check if the brew group is in the correct position. The arrow on the yellow cylinder on the side of the
brew group has to be aligned with the black arrow and N (Fig. 16).
-If they are not aligned, push down the lever until it is in contact with the base of the brew group (Fig.
17).
2Slide the brew group back into the machine along the guiding rails on the sides (Fig. 18) until it locks into
position with a click (Fig. 19). Do not press the PUSH button.
3Close the service door and place back the water tank.
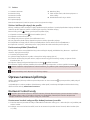
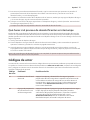
Cleaning and maintenance
Your machine will advise you when to perform cleaning and maintenance.
Regular cleaning and maintenance keeps your machine in top condition and ensures good-tasting coffee
for a long time with a steady coffee flow.

14 English
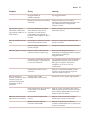
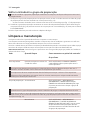
Consult the table below for a detailed description of when and how to clean all detachable parts of the
machine. You can find more detailed information and video instructions on www.saeco.com/care. See
figure C for an overview of which parts can be cleaned in the dishwasher.
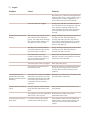
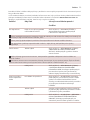
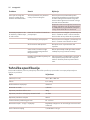
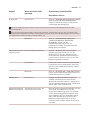
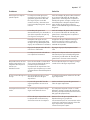
Item When to clean How to find in the control panel/
What to do
AquaClean filter When the machine asks you or
every three months. STATUS->CLEANING->AQUACLEAN. Follow the
steps to activate the AquaClean filter.
The machine does not automatically detect that a filter has been placed in the water tank. Therefore
you need to activate each new AquaClean filter that you install in the 'Status' menu.
Your machine has to be completely limescale-free before you start using the AquaClean filter.
Replace the AquaClean filter at least every 3 months, even if the machine does not yet indicate that
replacement is required.
Brew group Weekly STATUS -> PERFORMANCE ->BREW GROUP
CLEAN. Follow the steps to remove and clean
the brew group.
When you remove the brew group from the machine, make sure to empty the drip tray and the coffee
grounds container.
Before you slide the brew group back into the machine, make sure it is in the correct position.The arrow
on the yellow cylinder on the side of the brew group has to be aligned with the black arrow and N (Fig.
16).
Monthly STATUS -> PERFORMANCE ->COFFEE OIL
REMOVAL. Follow the steps of the self-cleaning
process to automatically remove coffee oil
residues from the brew group.
Milk system/internal
cappuccinatore After every day of use STATUS -> HYGIESTEAM. Follow the steps of
the self-cleaning process to clean the milk
system. Wipe the outside of the metal milk
tube with a damp cloth before placing it into
the milk tube holder.
Weekly Remove and disassemble the internal
cappuccinatore. Rinse all parts under the tap
with some washing-up liquid.
Monthly STATUS -> HYGIESTEAM -> DEEP MILK CLEAN.
Follow the steps of the self-cleaning process to
clean the milk system.
Milk container Weekly Disassemble the milk container (Fig. 20) and
push out the ball using the pin of the milk tube
(Fig. 21). Clean all parts of the milk container
under the tap or in the dishwasher.
HygieSteam
container (milk tube
holder)
Weekly or when the machine
reminds you Remove the HygieSteam container from the
machine (Fig. 22) and remove the HygieSteam
cover (Fig. 23). Clean the HygieSteam container
and cover under the tap or in the dishwasher.
Let the container and cover air-dry and place
them back into the machine.

15
English
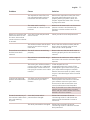
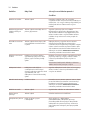
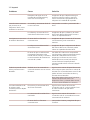
Item When to clean How to find in the control panel/
What to do
Pre-ground coffee
compartment Check the pre-ground coffee
compartment weekly to see if it is
clogged
Unplug the machine and remove the brew
group. Open the lid of the pre-ground coffee
compartment and insert the spoon handle into
it. Move the handle up and down until the
clogged ground coffee falls down (Fig. 24). Go
to www.saeco.com/care for detailed video
instructions.
Coffee grounds
container Empty the coffee grounds
container when prompted by the
machine. Clean it weekly
Remove the coffee grounds container while
the machine is switched on. Clean it under the
tap with some washing-up liquid or in the
dishwasher.
Note: The front panel of the coffee grounds
container is not dishwasher proof.
Drip tray Empty the drip tray daily or as
soon as the red 'drip tray full'
indicator pops up through the
drip tray (Fig. 25). Clean the drip
tray weekly
Remove the drip tray (Fig. 26) and clean it
under the tap with some washing-up liquid or
in the dishwasher.
Lubrication of the
brew group Every 2 months Lubricate the brew group with the by-packed
grease (see 'Lubricating the brew group'). Go
to www.saeco.com/care for detailed video
instructions.
Water tank Weekly Rinse the water tank under the tap.
Machine front Weekly Clean with a non-abrasive cloth.
Descaling of the
machine When the machine asks you to
descale STATUS -> DESCALING. Follow the steps to
descale the machine. When descaling is
needed, the machine asks you to descale it,
press the OK icon to start and follow the steps.
Cleaning the brew group
Regular cleaning of the brew group prevents coffee residues from clogging up the internal circuits. Go to
the 'Status' menu on the screen and select 'Brew group clean' or visit www.saeco.com/care for support
videos on how to remove, insert and clean the brew group.
Cleaning the brew group under the tap
1Tap the 'Status' icon and scroll to select 'Brew group clean'.
2Tap the confirmation icon to confirm and then follow the instructions on the screen.
Cleaning the brew group with the coffee oil remover tablets
Only use Philips coffee oil remover tablets.
1Tap the 'Status' icon and scroll to select 'Brew group clean'.
2Tap the confirmation icon to confirm and then follow the instructions on the screen.

16 English
Lubricating the brew group
To improve your machine's performance, we suggest that you lubricate the brew group every 2 months, to
ensure that the moving parts continue to move smoothly.
1Apply a thin layer of grease on the piston (grey part) of the brew group (Fig. 27).
2Apply a thin layer of grease around the shaft (grey part) in the bottom of the brew group (Fig. 28).
3Apply a thin layer of grease to the guiding rails on both sides (Fig. 29).
Cleaning programs for the internal cappuccinatore
The machines tells you when to clean the internal cappuccinatore.
The machine has three programs to clean the internal cappuccinatore:
-'HygieSteam Shot': during the preparation of a milk-based drink, the machine automatically shoots
steam through the internal cappuccinatore to rinse it quickly.
-'HygieSteam': the machine thoroughly cleans the internal milk system with steam. Make sure that the
HygieSteam container is correctly assembled (Fig. 30) and attached to the machine (Fig. 31). Place the
milk tube in the milk tube holder (Fig. 32) and follow the instructions on the screen.
-'Deep Milk Clean': Perform the 'Deep Milk Clean' procedure with the Philips milk circuit cleaner for a
thorough cleaning of the internal milk system.
Cleaning the internal cappuccinatore under the tap
1Open the door of the internal cappuccinatore (Fig. 33).
2Remove the internal cappuccinatore by pulling it down (Fig. 34).
3Disassemble the internal cappuccinatore by pulling the bottom part off the top part (Fig. 35).
4Disassemble all parts (Fig. 36) and clean them under the tap.
5Reassemble the internal cappuccinatore.
6To place back the internal cappuccinatore, put it in upright position and make sure the holes are aligned
with the two tubes on the machine. Then move the internal cappuccinatore upwards until it locks into
place (Fig. 1).
7Close the door.
Visit www.saeco.com/care for detailed video instructions.
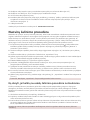
Descaling procedure
Please use Philips descaler only. Under no circumstances should you use a descaler based on sulfuric acid,
hydrochloric acid, sulfamic or acetic acid (vinegar) as this may damage the water circuit in your machine and
will not dissolve the limescale properly. Not using the Philips descaler will void your warranty. Failure to
descale the appliance will also void your warranty. You can buy Philips descaler from your local or online
retailer or from authorized service centers.
1When the machine asks you to descale it, tap the confirmation icon to start. To start descaling without
being prompted by the machine, tap the 'Status' icon and select 'Descale'.
2Remove the drip tray, the coffee grounds container and the HygieSteam container (Fig. 22), empty them
and put them back into place.
3Remove the water tank and empty it. Then remove the AquaClean filter.
4Pour the whole bottle of Philips descaler into the water tank and then fill it with water up to the CALC
CLEAN level (Fig. 37). Then place the water tank back into the machine.
5Place a large container (1.5 l) under the coffee dispensing spout.
6Make sure that the HygieSteam container is correctly assembled (Fig. 30) and attached to the machine
(Fig. 31). Place the milk tube in the milk tube holder.

17
English
7Follow the instructions on the screen to start the descaling procedure. The descaling procedure lasts
approx. 30 minutes and consists of a descaling cycle and a rinsing cycle.
8Once the descaling cycle is finished, you need to rinse the water tank and water circuit. Follow the
instructions on the screen.
9Place a new AquaClean filter in the water tank and activate it (see 'Activating the AquaClean water filter
(5 min.)').
Tip: Using the AquaClean filter reduces the need for descaling!
What to do if the descaling procedure is interrupted
You can exit the descaling procedure by pressing the on/off icon on the control panel. If the descaling
procedure is interrupted before it is completely finished, some descaling liquid may remain in the water
tank or the water circuit. In that case, do the following:
1Empty and rinse the water tank thoroughly.
2Fill the water tank with fresh water up to the CALC CLEAN level indication and switch the machine back
on. The machine will heat up and perform an automatic rinsing cycle.
3Before brewing any drinks, perform a manual rinsing cycle. To perform a manual rinsing cycle, first
dispense half a water tank of hot water and then brew 2 cups of pre-ground coffee without adding
ground coffee.
Note: If the descaling procedure was not completed, the machine will require another descaling procedure
as soon as possible.
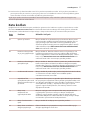
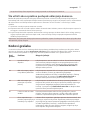
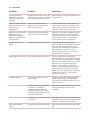
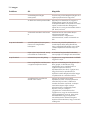
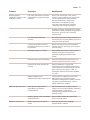
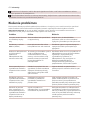
Error codes
Below you find a list of the error codes showing problems that you can solve yourself. Video instructions are
available on www.saeco.com/care. If another error code appears, please contact the Consumer Care
Center in your country. For contact details, see the warranty leaflet.
Error
code Problem Possible solution
01 The coffee funnel is
clogged. Switch off the machine and unplug it. Remove the brew group.
Then open the lid of the pre-ground coffee compartment and
insert the spoon handle. Move the handle up and down until the
clogged ground coffee falls down. Visit www.saeco.com/care for
detailed video instructions.
03 The brew group is dirty
or not well-greased. Switch off the machine. Rinse the brew group with fresh water, let
it air-dry and then lubricate it (see 'Lubricating the brew group').
Consult chapter 'Cleaning the brew group' or visit
www.saeco.com/care for detailed video instructions. Then switch
the machine on again.
04 The brew group is not
positioned correctly. Switch off the machine. Remove the brew group and reinsert it.
Make sure that the brew group is in the correct position before
you insert it. Consult chapter 'Handling the brew group' or visit
www.saeco.com/care for detailed video instructions. Then switch
the machine on again.
05 There is air in the water
circuit. Restart the machine by switching it off and on again. If this works,
dispense 2-3 cups of hot water. Descale the machine if you have
not done so for a longer period of time.

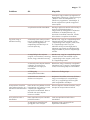
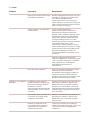
18 English
Error
code Problem Possible solution
The AquaClean filter was
not prepared properly
before installation or it is
clogged.
Remove the AquaClean filter and try to brew a coffee again. If this
works, make sure that the AquaClean filter is prepared properly
before you place it back (see 'Activating the AquaClean water
filter (5 min.)'). Put the AquaClean filter back into the water tank. If
this still does not work, the filter might be clogged and needs to
be replaced.
11 The machine needs to
adjust to room
temperature
Allow some time for the machine to adjust from
transport/outdoor temperature to room temperature. Switch off
the machine for 30 minutes and switch it on again. If this does not
work, contact the Consumer Care Center in your country. For
contact details, see the warranty leaflet.
14 The machine is
overheated. Switch off the machine and switch it back on after 30 minutes.
19 The machine is not
connected to the wall
socket properly.
Make sure that the small plug of the power cord is properly
connected to the socket on the back of the machine.
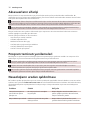
Ordering accessories
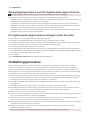
To clean and descale the machine, only use Philips maintenance products. These products can be purchased
by enabling Amazon Smart Reorders, from your local or online retailer or from authorized service centers.
To be able to use Amazon Smart Reorders, you first need to activate this service on Amazon. Then follow
the steps on the screen of your machine to connect your Amazon account to your Saeco account. After you
have completed these steps, you can use the Amazon Smart Reorder service.
In the 'Shop' menu on the control panel of the machine you can view the availability of Philips
maintenance products and accessories at local retailers.
To find a full list of spare parts online, enter the type number of your machine. You can find the type
number on the inside of the service door.
Maintenance products and type numbers:
-Descaling solution CA6700
-AquaClean filter CA6903
-Brew group grease HD5061
-Coffee oil remover tablets CA6704
-Milk circuit cleaner CA6705
-Maintenance kit CA6707
Software updates
Updating is essential to safeguard your privacy and proper functioning of your coffee machine. You can set
whether you want to update your machine manually or whether you want it to be done automatically.
When you have selected automatic updates, make sure that the machine is also plugged in at night and
Wi-Fi is enabled, so that the machine can receive the software updates overnight.
Updates are made available when there are software improvements, new features for the machine and
to prevent a possible security issue.

19
English
Mandatory firmware updates are started automatically when the coffee machine is in stand-by mode.
During a firmware update the coffee machine cannot be used.
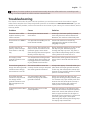
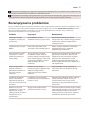
Troubleshooting
This chapter summarizes the most common problems you could encounter with the machine. Support
videos and a complete list of frequently asked questions are available on www.saeco.com/care. If you are
unable to solve the problem, contact the Consumer Care Center in your country. For contact details, see the
warranty leaflet.
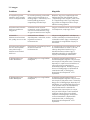
Problem Cause Solution
There are some coffee
residues inside my new
coffee machine.
This machine has been tested
with coffee. Although it has been carefully cleaned,
there may be some coffee residues left.
However, the machine is absolutely new.
The machine is in DEMO
mode. You pressed the standby icon for
more than 8 seconds. Switch the machine on and off by
unplugging the power cord and then
plugging it in again.
The drip tray fills up
quickly / there is always
some water in the drip
tray.
This is normal. The machine uses
water to rinse the internal circuit
and brew group. Some water
flows through the internal system
directly into the drip tray.
Empty the drip tray daily or as soon as the
red 'drip tray full' indicator pops up
through the drip tray cover. Tip: place a
cup under the dispensing spout to collect
rinsing water that comes out of it.
The 'empty coffee
grounds container' icon
remains on.
You emptied the coffee grounds
container while the machine was
unplugged from the wall socket,
or you placed it back too fast.
Remove the coffee grounds container,
wait at least 5 seconds and then insert it
again.
The machine prompts to
empty the coffee grounds
container even though
the container is not full.
The machine did not reset the
counter the last time you emptied
the coffee grounds container.
Always wait approx. 5 seconds when you
place back the coffee grounds container.
In this way, the coffee pucks counter will
be reset to zero and the number of coffee
pucks is counted correctly.
The coffee grounds
container is too full and
the 'empty coffee
grounds container' icon
did not appear on the
display.
You removed the drip tray
without emptying the coffee
grounds container.
When you remove the drip tray, also
empty the coffee grounds container even
if it contains only a few coffee pucks. This
ensures that the coffee pucks counter is
reset to zero and that the number of
coffee pucks is counted correctly.
I cannot remove the brew
group. The brew group is not in the
correct position. Reset the machine in the following way:
close the service door and place back the
water tank. Switch the machine off and
back on again and wait for the lights in
the drink icons to come on. Try to remove
the brew group again. See chapter
'Removing and inserting the brew group'
for step-by-step instructions.

20 English
Problem Cause Solution
I cannot insert the brew
group. The brew group is not in the
correct position. Reset the machine in the following way:
close the service door and place back the
water tank. Leave the brew group out.
Switch off the machine and unplug it.
Wait for 30 seconds and then plug the
machine back in, switch it on and wait for
the lights in the drink icons to come on.
Then put the brew group in the correct
position and reinsert it into the machine.
See chapter 'Removing and inserting the
brew group' for step- by-step instructions.
The coffee is watery. The brew group is dirty or needs
to be lubricated. Remove the brew group, rinse it under the
tap and leave it to dry. Then lubricate the
moving parts (see 'Lubricating the brew
group').
The machine is performing its self-
adjustment procedure. This
procedure is started automatically
when you use the machine for the
first time, when you change to
another type of coffee beans or
after a long period of non-use.
Brew 5 cups of coffee initially to allow the
machine to complete its self-adjustment
procedure.
The grinder is set to a too coarse
setting. Set the grinder to a finer (lower) setting.
Brew 2 to 3 drinks to be able to taste the
full difference.
The coffee is not hot
enough. The temperature is set too low. Set the temperature to the maximum
setting (Fig. 38).
A cold cup reduces the
temperature of the drink. Preheat the cups by rinsing them with hot
water.
Adding milk reduces the
temperature of the drink. Regardless of whether you add hot or cold
milk, adding milk always reduces the
temperature of the coffee. Preheat the
cups by rinsing them with hot water.
Coffee does not come out
or coffee comes out
slowly.
The AquaClean water filter was
not prepared properly for
installation.
Remove the AquaClean filter and dispense
some hot water. If this works, the
AquaClean filter was not installed
properly. Reinstall and activate the
AquaClean filter and follow all steps in
chapter 'AquaClean water filter'.
After a long period of non-use, you need
to prepare the AquaClean water filter for
use again and dispense 2-3 cups of hot
water.
The AquaClean water filter is
clogged. Replace the AquaClean water filter every 3
months. A filter that is older than 3
months can become clogged.
Pagina se încarcă...
Pagina se încarcă...
Pagina se încarcă...
Pagina se încarcă...
Pagina se încarcă...
Pagina se încarcă...
Pagina se încarcă...
Pagina se încarcă...
Pagina se încarcă...
Pagina se încarcă...
Pagina se încarcă...
Pagina se încarcă...
Pagina se încarcă...
Pagina se încarcă...
Pagina se încarcă...
Pagina se încarcă...
Pagina se încarcă...
Pagina se încarcă...
Pagina se încarcă...
Pagina se încarcă...
Pagina se încarcă...
Pagina se încarcă...
Pagina se încarcă...
Pagina se încarcă...
Pagina se încarcă...
Pagina se încarcă...
Pagina se încarcă...
Pagina se încarcă...
Pagina se încarcă...
Pagina se încarcă...
Pagina se încarcă...
Pagina se încarcă...
Pagina se încarcă...
Pagina se încarcă...
Pagina se încarcă...
Pagina se încarcă...
Pagina se încarcă...
Pagina se încarcă...
Pagina se încarcă...
Pagina se încarcă...
Pagina se încarcă...
Pagina se încarcă...
Pagina se încarcă...
Pagina se încarcă...
Pagina se încarcă...
Pagina se încarcă...
Pagina se încarcă...
Pagina se încarcă...
Pagina se încarcă...
Pagina se încarcă...
Pagina se încarcă...
Pagina se încarcă...
Pagina se încarcă...
Pagina se încarcă...
Pagina se încarcă...
Pagina se încarcă...
Pagina se încarcă...
Pagina se încarcă...
Pagina se încarcă...
Pagina se încarcă...
Pagina se încarcă...
Pagina se încarcă...
Pagina se încarcă...
Pagina se încarcă...
Pagina se încarcă...
Pagina se încarcă...
Pagina se încarcă...
Pagina se încarcă...
Pagina se încarcă...
Pagina se încarcă...
Pagina se încarcă...
Pagina se încarcă...
Pagina se încarcă...
Pagina se încarcă...
Pagina se încarcă...
Pagina se încarcă...
Pagina se încarcă...
Pagina se încarcă...
Pagina se încarcă...
Pagina se încarcă...
Pagina se încarcă...
Pagina se încarcă...
Pagina se încarcă...
Pagina se încarcă...
Pagina se încarcă...
Pagina se încarcă...
Pagina se încarcă...
Pagina se încarcă...
Pagina se încarcă...
Pagina se încarcă...
Pagina se încarcă...
Pagina se încarcă...
Pagina se încarcă...
Pagina se încarcă...
Pagina se încarcă...
Pagina se încarcă...
Pagina se încarcă...
Pagina se încarcă...
Pagina se încarcă...
Pagina se încarcă...
Pagina se încarcă...
Pagina se încarcă...
Pagina se încarcă...
Pagina se încarcă...
Pagina se încarcă...
Pagina se încarcă...
Pagina se încarcă...
Pagina se încarcă...
Pagina se încarcă...
Pagina se încarcă...
Pagina se încarcă...
Pagina se încarcă...
Pagina se încarcă...
Pagina se încarcă...
Pagina se încarcă...
Pagina se încarcă...
Pagina se încarcă...
Pagina se încarcă...
Pagina se încarcă...
Pagina se încarcă...
Pagina se încarcă...
Pagina se încarcă...
Pagina se încarcă...
Pagina se încarcă...
Pagina se încarcă...
Pagina se încarcă...
Pagina se încarcă...
Pagina se încarcă...
Pagina se încarcă...
Pagina se încarcă...
Pagina se încarcă...
Pagina se încarcă...
Pagina se încarcă...
Pagina se încarcă...
Pagina se încarcă...
Pagina se încarcă...
Pagina se încarcă...
Pagina se încarcă...
Pagina se încarcă...
Pagina se încarcă...
Pagina se încarcă...
Pagina se încarcă...
Pagina se încarcă...
Pagina se încarcă...
Pagina se încarcă...
Pagina se încarcă...
Pagina se încarcă...
Pagina se încarcă...
Pagina se încarcă...
Pagina se încarcă...
Pagina se încarcă...
Pagina se încarcă...
Pagina se încarcă...
Pagina se încarcă...
Pagina se încarcă...
Pagina se încarcă...
Pagina se încarcă...
Pagina se încarcă...
Pagina se încarcă...
Pagina se încarcă...
Pagina se încarcă...
Pagina se încarcă...
Pagina se încarcă...
Pagina se încarcă...
Pagina se încarcă...
Pagina se încarcă...
Pagina se încarcă...
Pagina se încarcă...
Pagina se încarcă...
Pagina se încarcă...
Pagina se încarcă...
Pagina se încarcă...
Pagina se încarcă...
Pagina se încarcă...
Pagina se încarcă...
Pagina se încarcă...
Pagina se încarcă...
Pagina se încarcă...
Pagina se încarcă...
Pagina se încarcă...
Pagina se încarcă...
Pagina se încarcă...
Pagina se încarcă...
Pagina se încarcă...
Pagina se încarcă...
Pagina se încarcă...
Pagina se încarcă...
Pagina se încarcă...
Pagina se încarcă...
Pagina se încarcă...
Pagina se încarcă...
Pagina se încarcă...
Pagina se încarcă...
Pagina se încarcă...
Pagina se încarcă...
Pagina se încarcă...
Pagina se încarcă...
Pagina se încarcă...
Pagina se încarcă...
Pagina se încarcă...
Pagina se încarcă...
Pagina se încarcă...
Pagina se încarcă...
Pagina se încarcă...
Pagina se încarcă...
Pagina se încarcă...
Pagina se încarcă...
Pagina se încarcă...
Pagina se încarcă...
Pagina se încarcă...
Pagina se încarcă...
Pagina se încarcă...
Pagina se încarcă...
Pagina se încarcă...
Pagina se încarcă...
Pagina se încarcă...
Pagina se încarcă...
Pagina se încarcă...
Pagina se încarcă...
Pagina se încarcă...
Pagina se încarcă...
Pagina se încarcă...
Pagina se încarcă...
Pagina se încarcă...
Pagina se încarcă...
Pagina se încarcă...
Pagina se încarcă...
Pagina se încarcă...
Pagina se încarcă...
Pagina se încarcă...
Pagina se încarcă...
Pagina se încarcă...
Pagina se încarcă...
Pagina se încarcă...
Pagina se încarcă...
Pagina se încarcă...
Pagina se încarcă...
Pagina se încarcă...
Pagina se încarcă...
Pagina se încarcă...
Pagina se încarcă...
Pagina se încarcă...
Pagina se încarcă...
Pagina se încarcă...
Pagina se încarcă...
Pagina se încarcă...
Pagina se încarcă...
Pagina se încarcă...
Pagina se încarcă...
Pagina se încarcă...
Pagina se încarcă...
Pagina se încarcă...
Pagina se încarcă...
Pagina se încarcă...
Pagina se încarcă...
Pagina se încarcă...
Pagina se încarcă...
Pagina se încarcă...
Pagina se încarcă...
Pagina se încarcă...
Pagina se încarcă...
Pagina se încarcă...
Pagina se încarcă...
Pagina se încarcă...
Pagina se încarcă...
Pagina se încarcă...
Pagina se încarcă...
Pagina se încarcă...
Pagina se încarcă...
Pagina se încarcă...
Pagina se încarcă...
Pagina se încarcă...
Pagina se încarcă...
Pagina se încarcă...
Pagina se încarcă...
Pagina se încarcă...
Pagina se încarcă...
Pagina se încarcă...
Pagina se încarcă...
Pagina se încarcă...
Pagina se încarcă...
Pagina se încarcă...
Pagina se încarcă...
Pagina se încarcă...
Pagina se încarcă...
Pagina se încarcă...
Pagina se încarcă...
Pagina se încarcă...
Pagina se încarcă...
Pagina se încarcă...
Pagina se încarcă...
Pagina se încarcă...
Pagina se încarcă...
Pagina se încarcă...
Pagina se încarcă...
Pagina se încarcă...
Pagina se încarcă...
Pagina se încarcă...
Pagina se încarcă...
Pagina se încarcă...
Pagina se încarcă...
Pagina se încarcă...
Pagina se încarcă...
Pagina se încarcă...
Pagina se încarcă...
Pagina se încarcă...
Pagina se încarcă...
Pagina se încarcă...
Pagina se încarcă...
Pagina se încarcă...
Pagina se încarcă...
Pagina se încarcă...
Pagina se încarcă...
Pagina se încarcă...
Pagina se încarcă...
Pagina se încarcă...
Pagina se încarcă...
Pagina se încarcă...
Pagina se încarcă...
Pagina se încarcă...
Pagina se încarcă...
Pagina se încarcă...
Pagina se încarcă...
Pagina se încarcă...
Pagina se încarcă...
Pagina se încarcă...
Pagina se încarcă...
Pagina se încarcă...
Pagina se încarcă...
Pagina se încarcă...
Pagina se încarcă...
Pagina se încarcă...
Pagina se încarcă...
Pagina se încarcă...
Pagina se încarcă...
Pagina se încarcă...
Pagina se încarcă...
Pagina se încarcă...
Pagina se încarcă...
Pagina se încarcă...
Pagina se încarcă...
Pagina se încarcă...
Pagina se încarcă...
Pagina se încarcă...
Pagina se încarcă...
Pagina se încarcă...
Pagina se încarcă...
Pagina se încarcă...
Pagina se încarcă...
Pagina se încarcă...
Pagina se încarcă...
Pagina se încarcă...
Pagina se încarcă...
Pagina se încarcă...
Pagina se încarcă...
Pagina se încarcă...
Pagina se încarcă...
Pagina se încarcă...
Pagina se încarcă...
Pagina se încarcă...
Pagina se încarcă...
Pagina se încarcă...
Pagina se încarcă...
Pagina se încarcă...
Pagina se încarcă...
Pagina se încarcă...
Pagina se încarcă...
Pagina se încarcă...
Pagina se încarcă...
Pagina se încarcă...
Pagina se încarcă...
Pagina se încarcă...
Pagina se încarcă...
Pagina se încarcă...
Pagina se încarcă...
Pagina se încarcă...
Pagina se încarcă...
Pagina se încarcă...
Pagina se încarcă...
Pagina se încarcă...
Pagina se încarcă...
Pagina se încarcă...
Pagina se încarcă...
Pagina se încarcă...
Pagina se încarcă...
Pagina se încarcă...
Pagina se încarcă...
Pagina se încarcă...
Pagina se încarcă...
Pagina se încarcă...
Pagina se încarcă...
Pagina se încarcă...
Pagina se încarcă...
Pagina se încarcă...
Pagina se încarcă...
Pagina se încarcă...
Pagina se încarcă...
Pagina se încarcă...
Pagina se încarcă...
Pagina se încarcă...
Pagina se încarcă...
Pagina se încarcă...
Pagina se încarcă...
Pagina se încarcă...
Pagina se încarcă...
Pagina se încarcă...
Pagina se încarcă...
Pagina se încarcă...
Pagina se încarcă...
Pagina se încarcă...
Pagina se încarcă...
Pagina se încarcă...
Pagina se încarcă...
Pagina se încarcă...
Pagina se încarcă...
Pagina se încarcă...
Pagina se încarcă...
Pagina se încarcă...
Pagina se încarcă...
Pagina se încarcă...
Pagina se încarcă...
Pagina se încarcă...
Pagina se încarcă...
Pagina se încarcă...
Pagina se încarcă...
Pagina se încarcă...
Pagina se încarcă...
Pagina se încarcă...
Pagina se încarcă...
Pagina se încarcă...
Pagina se încarcă...
Pagina se încarcă...
Pagina se încarcă...
Pagina se încarcă...
Pagina se încarcă...
Pagina se încarcă...
Pagina se încarcă...
Pagina se încarcă...
Pagina se încarcă...
Pagina se încarcă...
Pagina se încarcă...
Pagina se încarcă...
Pagina se încarcă...
Pagina se încarcă...
Pagina se încarcă...
Pagina se încarcă...
Pagina se încarcă...
Pagina se încarcă...
Pagina se încarcă...
Pagina se încarcă...
Pagina se încarcă...
Pagina se încarcă...
Pagina se încarcă...
Pagina se încarcă...
Pagina se încarcă...
Pagina se încarcă...
Pagina se încarcă...
Pagina se încarcă...
Pagina se încarcă...
Pagina se încarcă...
Pagina se încarcă...
Pagina se încarcă...
Pagina se încarcă...
Pagina se încarcă...
Pagina se încarcă...
Pagina se încarcă...
Pagina se încarcă...
Pagina se încarcă...
Pagina se încarcă...
Pagina se încarcă...
Pagina se încarcă...
Pagina se încarcă...
Pagina se încarcă...
Pagina se încarcă...
Pagina se încarcă...
Pagina se încarcă...
Pagina se încarcă...
Pagina se încarcă...
Pagina se încarcă...
Pagina se încarcă...
Pagina se încarcă...
Pagina se încarcă...
Pagina se încarcă...
Pagina se încarcă...
Pagina se încarcă...
Pagina se încarcă...
Pagina se încarcă...
Pagina se încarcă...
Pagina se încarcă...
Pagina se încarcă...
Pagina se încarcă...
Pagina se încarcă...
Pagina se încarcă...
Pagina se încarcă...
Pagina se încarcă...
Pagina se încarcă...
Pagina se încarcă...
Pagina se încarcă...
Pagina se încarcă...
Pagina se încarcă...
Pagina se încarcă...
Pagina se încarcă...
Pagina se încarcă...
Pagina se încarcă...
Pagina se încarcă...
Pagina se încarcă...
Pagina se încarcă...
Pagina se încarcă...
Pagina se încarcă...
Pagina se încarcă...
Pagina se încarcă...
Pagina se încarcă...
Pagina se încarcă...
Pagina se încarcă...
Pagina se încarcă...
Pagina se încarcă...
Pagina se încarcă...
Pagina se încarcă...
Pagina se încarcă...
Pagina se încarcă...
Pagina se încarcă...
Pagina se încarcă...
Pagina se încarcă...
Pagina se încarcă...
Pagina se încarcă...
Pagina se încarcă...
Pagina se încarcă...
Pagina se încarcă...
Pagina se încarcă...
Pagina se încarcă...
Pagina se încarcă...
Pagina se încarcă...
Pagina se încarcă...
Pagina se încarcă...
Pagina se încarcă...
Pagina se încarcă...
Pagina se încarcă...
Pagina se încarcă...
Pagina se încarcă...
Pagina se încarcă...
Pagina se încarcă...
Pagina se încarcă...
Pagina se încarcă...
Pagina se încarcă...
Pagina se încarcă...
Pagina se încarcă...
Pagina se încarcă...
Pagina se încarcă...
Pagina se încarcă...
Pagina se încarcă...
Pagina se încarcă...
Pagina se încarcă...
Pagina se încarcă...
Pagina se încarcă...
Pagina se încarcă...
Pagina se încarcă...
Pagina se încarcă...
Pagina se încarcă...
Pagina se încarcă...
Pagina se încarcă...
Pagina se încarcă...
Pagina se încarcă...
Pagina se încarcă...
Pagina se încarcă...
Pagina se încarcă...
Pagina se încarcă...
Pagina se încarcă...
Pagina se încarcă...
Pagina se încarcă...
Pagina se încarcă...
Pagina se încarcă...
Pagina se încarcă...
Pagina se încarcă...
Pagina se încarcă...
Pagina se încarcă...
Pagina se încarcă...
Pagina se încarcă...
Pagina se încarcă...
Pagina se încarcă...
Pagina se încarcă...
Pagina se încarcă...
Pagina se încarcă...
Pagina se încarcă...
Pagina se încarcă...
Pagina se încarcă...
Pagina se încarcă...
Pagina se încarcă...
Pagina se încarcă...
Pagina se încarcă...
Pagina se încarcă...
Pagina se încarcă...
Pagina se încarcă...
Pagina se încarcă...
Pagina se încarcă...
Pagina se încarcă...
Pagina se încarcă...
Pagina se încarcă...
Pagina se încarcă...
Pagina se încarcă...
Pagina se încarcă...
Pagina se încarcă...
Pagina se încarcă...
Pagina se încarcă...
Pagina se încarcă...
Pagina se încarcă...
Pagina se încarcă...
Pagina se încarcă...
Pagina se încarcă...
Pagina se încarcă...
Pagina se încarcă...
Pagina se încarcă...
Pagina se încarcă...
Pagina se încarcă...
Pagina se încarcă...
Pagina se încarcă...
Pagina se încarcă...
Pagina se încarcă...
Pagina se încarcă...
Pagina se încarcă...
Pagina se încarcă...
Pagina se încarcă...
Pagina se încarcă...
Pagina se încarcă...
Pagina se încarcă...
Pagina se încarcă...
Pagina se încarcă...
Pagina se încarcă...
Pagina se încarcă...
Pagina se încarcă...
Pagina se încarcă...
Pagina se încarcă...
Pagina se încarcă...
Pagina se încarcă...
Pagina se încarcă...
Pagina se încarcă...
Pagina se încarcă...
Pagina se încarcă...
Pagina se încarcă...
Pagina se încarcă...
Pagina se încarcă...
Pagina se încarcă...
Pagina se încarcă...
Pagina se încarcă...
Pagina se încarcă...
Pagina se încarcă...
Pagina se încarcă...
Pagina se încarcă...
Pagina se încarcă...
Pagina se încarcă...
Pagina se încarcă...
Pagina se încarcă...
Pagina se încarcă...
Pagina se încarcă...
Pagina se încarcă...
Pagina se încarcă...
Pagina se încarcă...
Pagina se încarcă...
Pagina se încarcă...
Pagina se încarcă...
Pagina se încarcă...
Pagina se încarcă...
Pagina se încarcă...
Pagina se încarcă...
Pagina se încarcă...
Pagina se încarcă...
Pagina se încarcă...
Pagina se încarcă...
Pagina se încarcă...
Pagina se încarcă...
Pagina se încarcă...
Pagina se încarcă...
Pagina se încarcă...
Pagina se încarcă...
Pagina se încarcă...
Pagina se încarcă...
Pagina se încarcă...
Pagina se încarcă...
Pagina se încarcă...
Pagina se încarcă...
Pagina se încarcă...
Pagina se încarcă...
Pagina se încarcă...
Pagina se încarcă...
Pagina se încarcă...
Pagina se încarcă...
Pagina se încarcă...
Pagina se încarcă...
Pagina se încarcă...
Pagina se încarcă...
Pagina se încarcă...
Pagina se încarcă...
Pagina se încarcă...
Pagina se încarcă...
Pagina se încarcă...
Pagina se încarcă...
Pagina se încarcă...
Pagina se încarcă...
Pagina se încarcă...
Pagina se încarcă...
Pagina se încarcă...
Pagina se încarcă...
Pagina se încarcă...
Pagina se încarcă...
Pagina se încarcă...
Pagina se încarcă...
Pagina se încarcă...
Pagina se încarcă...
Pagina se încarcă...
Pagina se încarcă...
Pagina se încarcă...
Pagina se încarcă...
Pagina se încarcă...
Pagina se încarcă...
Pagina se încarcă...
Pagina se încarcă...
Pagina se încarcă...
Pagina se încarcă...
Pagina se încarcă...
Pagina se încarcă...
Pagina se încarcă...
Pagina se încarcă...
Pagina se încarcă...
Pagina se încarcă...
Pagina se încarcă...
Pagina se încarcă...
Pagina se încarcă...
Pagina se încarcă...
Pagina se încarcă...
Pagina se încarcă...
Pagina se încarcă...
Pagina se încarcă...
Pagina se încarcă...
Pagina se încarcă...
Pagina se încarcă...
Pagina se încarcă...
Pagina se încarcă...
Pagina se încarcă...
Pagina se încarcă...
Pagina se încarcă...
Pagina se încarcă...
Pagina se încarcă...
Pagina se încarcă...
Pagina se încarcă...
Pagina se încarcă...
Pagina se încarcă...
Pagina se încarcă...
Pagina se încarcă...
Pagina se încarcă...
Pagina se încarcă...
Pagina se încarcă...
Pagina se încarcă...
Pagina se încarcă...
Pagina se încarcă...
Pagina se încarcă...
Pagina se încarcă...
Pagina se încarcă...
Pagina se încarcă...
Pagina se încarcă...
Pagina se încarcă...
Pagina se încarcă...
Pagina se încarcă...
Pagina se încarcă...
Pagina se încarcă...
Pagina se încarcă...
Pagina se încarcă...
Pagina se încarcă...
Pagina se încarcă...
Pagina se încarcă...
Pagina se încarcă...
Pagina se încarcă...
Pagina se încarcă...
Pagina se încarcă...
Pagina se încarcă...
Pagina se încarcă...
Pagina se încarcă...
Pagina se încarcă...
Pagina se încarcă...
Pagina se încarcă...
Pagina se încarcă...
Pagina se încarcă...
Pagina se încarcă...
Pagina se încarcă...
Pagina se încarcă...
Pagina se încarcă...
Pagina se încarcă...
Pagina se încarcă...
Pagina se încarcă...
Pagina se încarcă...
Pagina se încarcă...
Pagina se încarcă...
Pagina se încarcă...
Pagina se încarcă...
Pagina se încarcă...
Pagina se încarcă...
-
 1
1
-
 2
2
-
 3
3
-
 4
4
-
 5
5
-
 6
6
-
 7
7
-
 8
8
-
 9
9
-
 10
10
-
 11
11
-
 12
12
-
 13
13
-
 14
14
-
 15
15
-
 16
16
-
 17
17
-
 18
18
-
 19
19
-
 20
20
-
 21
21
-
 22
22
-
 23
23
-
 24
24
-
 25
25
-
 26
26
-
 27
27
-
 28
28
-
 29
29
-
 30
30
-
 31
31
-
 32
32
-
 33
33
-
 34
34
-
 35
35
-
 36
36
-
 37
37
-
 38
38
-
 39
39
-
 40
40
-
 41
41
-
 42
42
-
 43
43
-
 44
44
-
 45
45
-
 46
46
-
 47
47
-
 48
48
-
 49
49
-
 50
50
-
 51
51
-
 52
52
-
 53
53
-
 54
54
-
 55
55
-
 56
56
-
 57
57
-
 58
58
-
 59
59
-
 60
60
-
 61
61
-
 62
62
-
 63
63
-
 64
64
-
 65
65
-
 66
66
-
 67
67
-
 68
68
-
 69
69
-
 70
70
-
 71
71
-
 72
72
-
 73
73
-
 74
74
-
 75
75
-
 76
76
-
 77
77
-
 78
78
-
 79
79
-
 80
80
-
 81
81
-
 82
82
-
 83
83
-
 84
84
-
 85
85
-
 86
86
-
 87
87
-
 88
88
-
 89
89
-
 90
90
-
 91
91
-
 92
92
-
 93
93
-
 94
94
-
 95
95
-
 96
96
-
 97
97
-
 98
98
-
 99
99
-
 100
100
-
 101
101
-
 102
102
-
 103
103
-
 104
104
-
 105
105
-
 106
106
-
 107
107
-
 108
108
-
 109
109
-
 110
110
-
 111
111
-
 112
112
-
 113
113
-
 114
114
-
 115
115
-
 116
116
-
 117
117
-
 118
118
-
 119
119
-
 120
120
-
 121
121
-
 122
122
-
 123
123
-
 124
124
-
 125
125
-
 126
126
-
 127
127
-
 128
128
-
 129
129
-
 130
130
-
 131
131
-
 132
132
-
 133
133
-
 134
134
-
 135
135
-
 136
136
-
 137
137
-
 138
138
-
 139
139
-
 140
140
-
 141
141
-
 142
142
-
 143
143
-
 144
144
-
 145
145
-
 146
146
-
 147
147
-
 148
148
-
 149
149
-
 150
150
-
 151
151
-
 152
152
-
 153
153
-
 154
154
-
 155
155
-
 156
156
-
 157
157
-
 158
158
-
 159
159
-
 160
160
-
 161
161
-
 162
162
-
 163
163
-
 164
164
-
 165
165
-
 166
166
-
 167
167
-
 168
168
-
 169
169
-
 170
170
-
 171
171
-
 172
172
-
 173
173
-
 174
174
-
 175
175
-
 176
176
-
 177
177
-
 178
178
-
 179
179
-
 180
180
-
 181
181
-
 182
182
-
 183
183
-
 184
184
-
 185
185
-
 186
186
-
 187
187
-
 188
188
-
 189
189
-
 190
190
-
 191
191
-
 192
192
-
 193
193
-
 194
194
-
 195
195
-
 196
196
-
 197
197
-
 198
198
-
 199
199
-
 200
200
-
 201
201
-
 202
202
-
 203
203
-
 204
204
-
 205
205
-
 206
206
-
 207
207
-
 208
208
-
 209
209
-
 210
210
-
 211
211
-
 212
212
-
 213
213
-
 214
214
-
 215
215
-
 216
216
-
 217
217
-
 218
218
-
 219
219
-
 220
220
-
 221
221
-
 222
222
-
 223
223
-
 224
224
-
 225
225
-
 226
226
-
 227
227
-
 228
228
-
 229
229
-
 230
230
-
 231
231
-
 232
232
-
 233
233
-
 234
234
-
 235
235
-
 236
236
-
 237
237
-
 238
238
-
 239
239
-
 240
240
-
 241
241
-
 242
242
-
 243
243
-
 244
244
-
 245
245
-
 246
246
-
 247
247
-
 248
248
-
 249
249
-
 250
250
-
 251
251
-
 252
252
-
 253
253
-
 254
254
-
 255
255
-
 256
256
-
 257
257
-
 258
258
-
 259
259
-
 260
260
-
 261
261
-
 262
262
-
 263
263
-
 264
264
-
 265
265
-
 266
266
-
 267
267
-
 268
268
-
 269
269
-
 270
270
-
 271
271
-
 272
272
-
 273
273
-
 274
274
-
 275
275
-
 276
276
-
 277
277
-
 278
278
-
 279
279
-
 280
280
-
 281
281
-
 282
282
-
 283
283
-
 284
284
-
 285
285
-
 286
286
-
 287
287
-
 288
288
-
 289
289
-
 290
290
-
 291
291
-
 292
292
-
 293
293
-
 294
294
-
 295
295
-
 296
296
-
 297
297
-
 298
298
-
 299
299
-
 300
300
-
 301
301
-
 302
302
-
 303
303
-
 304
304
-
 305
305
-
 306
306
-
 307
307
-
 308
308
-
 309
309
-
 310
310
-
 311
311
-
 312
312
-
 313
313
-
 314
314
-
 315
315
-
 316
316
-
 317
317
-
 318
318
-
 319
319
-
 320
320
-
 321
321
-
 322
322
-
 323
323
-
 324
324
-
 325
325
-
 326
326
-
 327
327
-
 328
328
-
 329
329
-
 330
330
-
 331
331
-
 332
332
-
 333
333
-
 334
334
-
 335
335
-
 336
336
-
 337
337
-
 338
338
-
 339
339
-
 340
340
-
 341
341
-
 342
342
-
 343
343
-
 344
344
-
 345
345
-
 346
346
-
 347
347
-
 348
348
-
 349
349
-
 350
350
-
 351
351
-
 352
352
-
 353
353
-
 354
354
-
 355
355
-
 356
356
-
 357
357
-
 358
358
-
 359
359
-
 360
360
-
 361
361
-
 362
362
-
 363
363
-
 364
364
-
 365
365
-
 366
366
-
 367
367
-
 368
368
-
 369
369
-
 370
370
-
 371
371
-
 372
372
-
 373
373
-
 374
374
-
 375
375
-
 376
376
-
 377
377
-
 378
378
-
 379
379
-
 380
380
-
 381
381
-
 382
382
-
 383
383
-
 384
384
-
 385
385
-
 386
386
-
 387
387
-
 388
388
-
 389
389
-
 390
390
-
 391
391
-
 392
392
-
 393
393
-
 394
394
-
 395
395
-
 396
396
-
 397
397
-
 398
398
-
 399
399
-
 400
400
-
 401
401
-
 402
402
-
 403
403
-
 404
404
-
 405
405
-
 406
406
-
 407
407
-
 408
408
-
 409
409
-
 410
410
-
 411
411
-
 412
412
-
 413
413
-
 414
414
-
 415
415
-
 416
416
-
 417
417
-
 418
418
-
 419
419
-
 420
420
-
 421
421
-
 422
422
-
 423
423
-
 424
424
-
 425
425
-
 426
426
-
 427
427
-
 428
428
-
 429
429
-
 430
430
-
 431
431
-
 432
432
-
 433
433
-
 434
434
-
 435
435
-
 436
436
-
 437
437
-
 438
438
-
 439
439
-
 440
440
-
 441
441
-
 442
442
-
 443
443
-
 444
444
-
 445
445
-
 446
446
-
 447
447
-
 448
448
-
 449
449
-
 450
450
-
 451
451
-
 452
452
-
 453
453
-
 454
454
-
 455
455
-
 456
456
-
 457
457
-
 458
458
-
 459
459
-
 460
460
-
 461
461
-
 462
462
-
 463
463
-
 464
464
-
 465
465
-
 466
466
-
 467
467
-
 468
468
-
 469
469
-
 470
470
-
 471
471
-
 472
472
-
 473
473
-
 474
474
-
 475
475
-
 476
476
-
 477
477
-
 478
478
-
 479
479
-
 480
480
-
 481
481
-
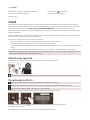 482
482
-
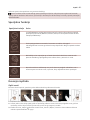 483
483
-
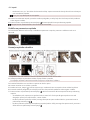 484
484
-
 485
485
-
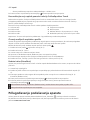 486
486
-
 487
487
-
 488
488
-
 489
489
-
 490
490
-
 491
491
-
 492
492
-
 493
493
-
 494
494
-
 495
495
-
 496
496
-
 497
497
-
 498
498
-
 499
499
-
 500
500
-
 501
501
-
 502
502
-
 503
503
-
 504
504
-
 505
505
-
 506
506
-
 507
507
-
 508
508
-
 509
509
-
 510
510
-
 511
511
-
 512
512
-
 513
513
-
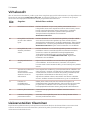 514
514
-
 515
515
-
 516
516
-
 517
517
-
 518
518
-
 519
519
-
 520
520
-
 521
521
-
 522
522
-
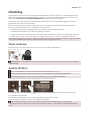 523
523
-
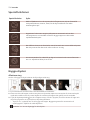 524
524
-
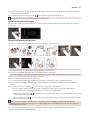 525
525
-
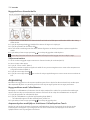 526
526
-
 527
527
-
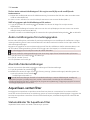 528
528
-
 529
529
-
 530
530
-
 531
531
-
 532
532
-
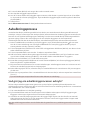 533
533
-
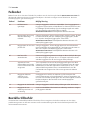 534
534
-
 535
535
-
 536
536
-
 537
537
-
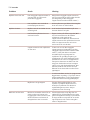 538
538
-
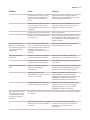 539
539
-
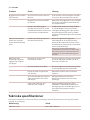 540
540
-
 541
541
-
 542
542
-
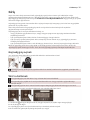 543
543
-
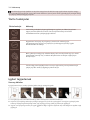 544
544
-
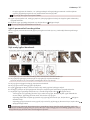 545
545
-
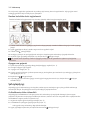 546
546
-
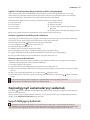 547
547
-
 548
548
-
 549
549
-
 550
550
-
 551
551
-
 552
552
-
 553
553
-
 554
554
-
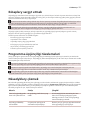 555
555
-
 556
556
-
 557
557
-
 558
558
-
 559
559
-
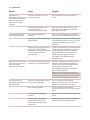 560
560
-
 561
561
-
 562
562
-
 563
563
-
 564
564
-
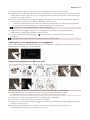 565
565
-
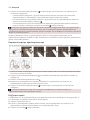 566
566
-
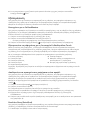 567
567
-
 568
568
-
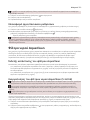 569
569
-
 570
570
-
 571
571
-
 572
572
-
 573
573
-
 574
574
-
 575
575
-
 576
576
-
 577
577
-
 578
578
-
 579
579
-
 580
580
-
 581
581
-
 582
582
-
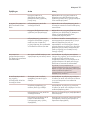 583
583
-
 584
584
-
 585
585
-
 586
586
-
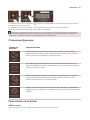 587
587
-
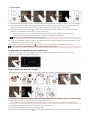 588
588
-
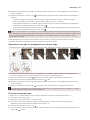 589
589
-
 590
590
-
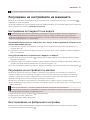 591
591
-
 592
592
-
 593
593
-
 594
594
-
 595
595
-
 596
596
-
 597
597
-
 598
598
-
 599
599
-
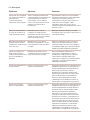 600
600
-
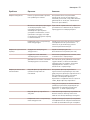 601
601
-
 602
602
-
 603
603
-
 604
604
-
 605
605
-
 606
606
-
 607
607
-
 608
608
-
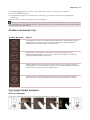 609
609
-
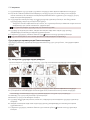 610
610
-
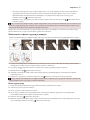 611
611
-
 612
612
-
 613
613
-
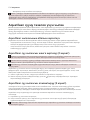 614
614
-
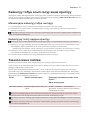 615
615
-
 616
616
-
 617
617
-
 618
618
-
 619
619
-
 620
620
-
 621
621
-
 622
622
-
 623
623
-
 624
624
-
 625
625
-
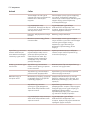 626
626
-
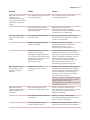 627
627
-
 628
628
-
 629
629
-
 630
630
-
 631
631
-
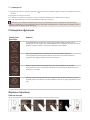 632
632
-
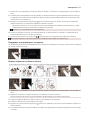 633
633
-
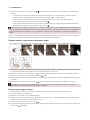 634
634
-
 635
635
-
 636
636
-
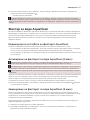 637
637
-
 638
638
-
 639
639
-
 640
640
-
 641
641
-
 642
642
-
 643
643
-
 644
644
-
 645
645
-
 646
646
-
 647
647
-
 648
648
-
 649
649
-
 650
650
-
 651
651
-
 652
652
-
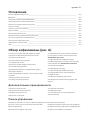 653
653
-
 654
654
-
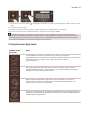 655
655
-
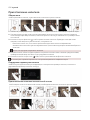 656
656
-
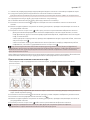 657
657
-
 658
658
-
 659
659
-
 660
660
-
 661
661
-
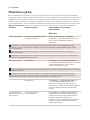 662
662
-
 663
663
-
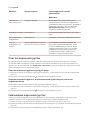 664
664
-
 665
665
-
 666
666
-
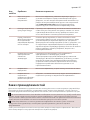 667
667
-
 668
668
-
 669
669
-
 670
670
-
 671
671
-
 672
672
-
 673
673
-
 674
674
-
 675
675
-
 676
676
-
 677
677
-
 678
678
-
 679
679
-
 680
680
-
 681
681
-
 682
682
-
 683
683
-
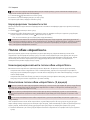 684
684
-
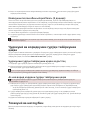 685
685
-
 686
686
-
 687
687
-
 688
688
-
 689
689
-
 690
690
-
 691
691
-
 692
692
-
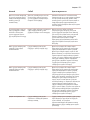 693
693
-
 694
694
-
 695
695
-
 696
696
-
 697
697
-
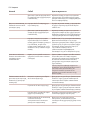 698
698
-
 699
699
-
 700
700
-
 701
701
-
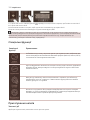 702
702
-
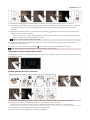 703
703
-
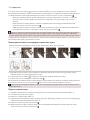 704
704
-
 705
705
-
 706
706
-
 707
707
-
 708
708
-
 709
709
-
 710
710
-
 711
711
-
 712
712
-
 713
713
-
 714
714
-
 715
715
-
 716
716
-
 717
717
-
 718
718
-
 719
719
-
 720
720
-
 721
721
-
 722
722
-
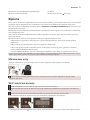 723
723
-
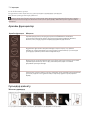 724
724
-
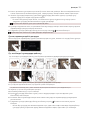 725
725
-
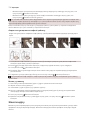 726
726
-
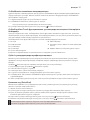 727
727
-
 728
728
-
 729
729
-
 730
730
-
 731
731
-
 732
732
-
 733
733
-
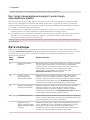 734
734
-
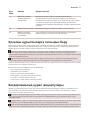 735
735
-
 736
736
-
 737
737
-
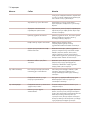 738
738
-
 739
739
-
 740
740
-
 741
741
-
 742
742
-
 743
743
-
 744
744
-
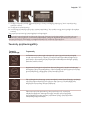 745
745
-
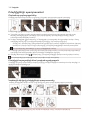 746
746
-
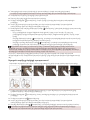 747
747
-
 748
748
-
 749
749
-
 750
750
-
 751
751
-
 752
752
-
 753
753
-
 754
754
-
 755
755
-
 756
756
-
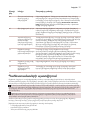 757
757
-
 758
758
-
 759
759
-
 760
760
-
 761
761
-
 762
762
-
 763
763
-
 764
764
-
 765
765
-
 766
766
-
 767
767
-
 768
768
-
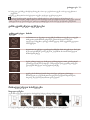 769
769
-
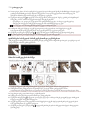 770
770
-
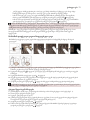 771
771
-
 772
772
-
 773
773
-
 774
774
-
 775
775
-
 776
776
-
 777
777
-
 778
778
-
 779
779
-
 780
780
-
 781
781
-
 782
782
-
 783
783
-
 784
784
-
 785
785
-
 786
786
-
 787
787
-
 788
788
-
 789
789
-
 790
790
-
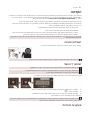 791
791
-
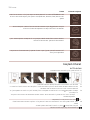 792
792
-
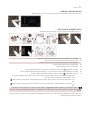 793
793
-
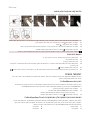 794
794
-
 795
795
-
 796
796
-
 797
797
-
 798
798
-
 799
799
-
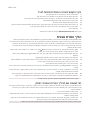 800
800
-
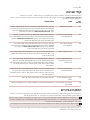 801
801
-
 802
802
-
 803
803
-
 804
804
-
 805
805
-
 806
806
-
 807
807
-
 808
808
-
 809
809
-
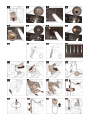 810
810
-
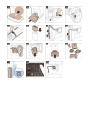 811
811
-
 812
812
-
 813
813
-
 814
814


Saeco SM6685 Manual de utilizare
- Categorie
- Aparate de cafea
- Tip
- Manual de utilizare