Allview X3 Soul Mini Manual de utilizare
- Categorie
- Telefoane mobile
- Tip
- Manual de utilizare

1
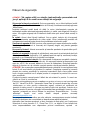
Notices for the use of phone
CAUTION! Please read carefully these instructions and follow
them, in the case of dangerous situations.
Driving safety: It is recommended not to use the phone while driving. However, if you
use it, turn on the Hands-free mode.
Turn off your phone while in an aircraft. Interference caused by mobile phones affects
aviation safety, and thus is illegal to use it on the plane. Please make sure that your
mobile phone is turned off when you are on the plane.
In hospital: When using the phone in a hospital must submit to the relevant rules
specified by the hospital. Any interference caused by medical equipment may affect the
performance of the phone.
Approved service: Only approved repair shops can repair mobile phones. If you open
the phone and try to fix it yourself you will void the warranty of the product.
Accessories and batteries: Only accessories and batteries approved by the producer
can be used.
Emergency calls: Make sure the phone is turned on and enabled if you wish to make
an emergency call, press the call key and confirm the location, explain what happened
and do not close the call.
The battery and charging the battery: It is recommended to fully charge before first use
of the device. Do not expose the battery to temperatures above 40 C. Do not dispose
the battery in fire or drop anywhere. Return defective batteries in special centers or to
the supplier center.
Warning: We take no responsibility for situations where the phone is used other than as
provided in the manual.
Our company reserves the right to make changes in the content of the manual without
making this public. These changes will be posted on the company website to the
product it amends.
The contents of this manual may be different from that in the product. In this last case
will be considered.
To avoid the problems that might occur with the service shops approved by Visual Fan
Ltd. (because Visual Fan reserves the right to stop the collaboration with any service
shop which was previously approved and mentioned in the warranty card on the date on
which the product batch was sold on the market), before taking a product to the service
shop, please check the updated list of approved service shops on Allview website at the
section: “Support & Service – Approved service”.
For more product details visit www.allviewmobile.com. Do not cover the antenna with
your hand or other objects Failure to comply resulting in connectivity issues and rapid
discharge of the battery.
All applications provided by third parties and installed in this device, may be modified
and/or stopped at any moment. Visual Fan Ltd will not be responsible in any way for
modifications of the services or content of these applications. Any request or question
regarding third party applications may be addressed to owners of these applications.

2
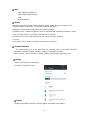
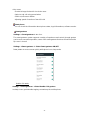
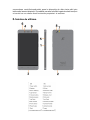
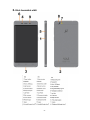
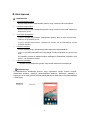
3. Before using

3
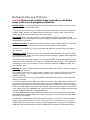
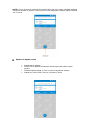
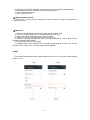
The phone is a Dual SIM mobile that allows you to use two mobile networks.
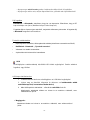
Insert Nano SIM/Micro SIM cards and SD card
1) Stick into the pin hole with eject tool, and then card tray will be out of phone.
2) Put Nano SIM/Micro SIM cards and SD card to card tray correctly.
Do not remove the cards while the device is transferring data. Doing so may cause
data to be lost or damage to the cards and device.
The Nano SIM/Micro SIM card and SD card are small parts. Please keep away from
Children to avoid swallowing the card by accident.
Please do not touch the metal surface of Nano SIM/Micro SIM and SD cards and keep
them away from electromagnetic field to avoid damaged data.
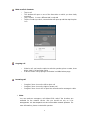
Charge the Battery
Charge the battery before using it. Connect the USB cable to the USB power adaptor, and
then plug the end of the USB cable into the USB Port.
Note:
This device equips with Micro USB, it can be positive and negative plugged in.
Please don't use other USB cable to plug in, otherwise the USB port will be damaged.
The battery of mobile phone is fixed. It cannot be removed.

4
4. Getting started
Basic Function
Turn on the phone
Press and hold the power key for a while to turn on the phone.
Turn off the phone
Long press the power key until a menu shows. Choose “Power off’’ to turn off the
phone.
Restart the phone
Option 1: Long press the power key until a menu shows. Choose “Reboot’’ to restart
the phone.
Option 2: Long press the power key till 10 seconds to auto restart the phone.
Lock the screen
Option 1: Press the power key to turn off the screen and lock it
Option 3: The screen will auto lock if you don't use the phone for a while.
To set timer for auto lock go to Setting Display Sleep and select the time you want.
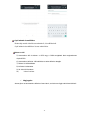
Unlock the screen
Press the power key, and then slide from down to top for unlocking.
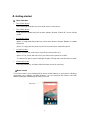
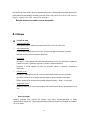
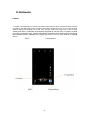
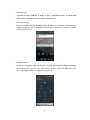
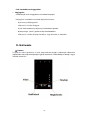
Home screen
The Home screen is your starting point to access all the features on your phone. It displays
application icons, widgets, and other features. You can customize the Home screen with
different wallpaper and display the items you want.

5
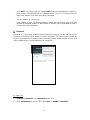
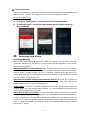
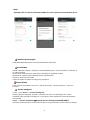
Status Bar
At the top of the screen, it displays the time, signal, battery information, and icons for
Notifications that you’ve received.
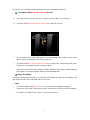
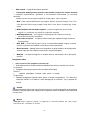
Notification Center
Swipe down from the top edge to see more detail of the new notification, such as
messaging, missed call,Wi-Fi network available etc.Tap the notification and drag to left
or right to delete it.
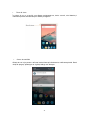
Control Center
Swipe down again from the top edge to open the control center. In the control center,
it’s a quick access to Torch, image projection etc. You can also adjust the brightness
and turn on/off Airplane mode, Wi-Fi, Data connection, Bluetooth, Location, Rotate
screen, Vibrate, Sound.

6
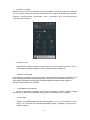
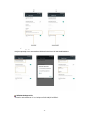
Desktop Menu
Long press screen in home to open the desktop menu. You can change the Edit
desktop. It’s a quick access to Desktop Settings, System Settings and Widgets.
Move an application
Touch & hold the icon you want to move. Drag the icon to move or cross at the edge
of the screen to move into another screen. Or you can delete the icon from main
poage by dragging it to Delete option from the top of the screen
Uninstall an application
To uninstall an app follow Settings- Apps , select the one you need to uninstall and
confirm uninstalling,
Creating a folder
Drag an icon on the top of another one to create a folder. Open the folder and then tap
the folder name to rename it.
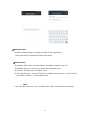
Touch screen
The way to control mobile phone is using your finger on touch icons, buttons, menu items,
the onscreen keyboard, and other items on the touch screen.
• Touch: To act on items on the screen, such as application and settings icons, to
type letters and symbols using the onscreen keyboard, or to press onscreen
buttons, you simply touch them with your finger.
• Touch & hold: Touch & hold an item on the screen by touching it and not lifting
your finger until an action occurs.
• Drag: Touch & hold an item for a moment and then, without lifting your finger,
move your finger on the screen until you reach the target position. You can drag
items on the Home screen to reposition them and you can drag to open the
Notification Center.
• Swipe or slide: To swipe or slide, quickly move your finger across the surface of
the screen, without pausing when you first touch (so you don’t drag an item
instead). For example, you slide the screen up or down to scroll a list, and in the
same way Calendar views you can swipe quickly across the screen to change the
range of time visible.
• Pinch: In some applications (Such as Maps and Gallery) you can zoom in and out
by placing finger and thumb on the screen at same time and pinching them out
together (to zoom out) or spreading them apart (to zoom in).
• Rotate the screen: On most screens, the orientation of the screen rotates with the
phone as you turn it from upright to its side and back again. You can turn this
feature on and off.

7
5. Communication
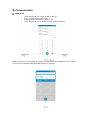
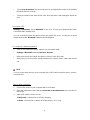
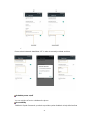
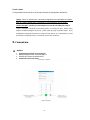
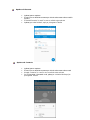
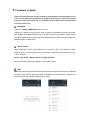
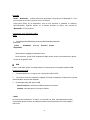
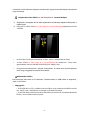
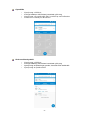
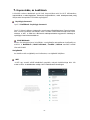
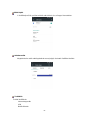
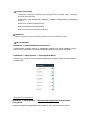
Make a call
• Touch the phone icon on the Home screen.
• Tap icon from bottom right corner
• Enter the phone number you want to dial.
• Touch the phone icon to dial the number that you entered.
NOTE! To reach the screen above, you need to tap the dial pad that appears on your screen on
any of the three available tabs Speed Dial, Recents or Contacts

8
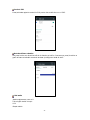
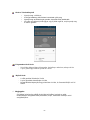
Make a call via Speed dial
• Tap to call
• The window will open on one of the three tabs on which you have lastly
searched
• Tap Speed Dial, in case a different tab is selected
• Then tap the desired Contact and dial
Make a call via Recents
• Tap to call
• The window will open on one of the three tabs on which you have lastly
searched
• Tap Recents, in case a different tab is selected
• Tap Redial

9
Make a call via Contacts
• Tap to call
• The window will open on one of the three tabs on which you have lastly
searched
• Tap Contacts, in case a different tab is selected
• Tap the Contact you wish, a new window will opne-up and then tap the phon
icon
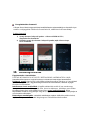
Ongoing call
• When in call, you have the option to switch to speaker, place on mute, show
dialer, hold a call and other option
• End the current call by taping to red button in middle bottom page
Incoming call
• Drag the Phone icon on the left to reject call
• Drag the Phone icon on the right to answer call
• Drag the Phone icon to UP to reject the call and send a message to caller
Note:
You can make an emergency call without SIM cards if the locations are
available for the network service. But you should not rely on it for
emergencies. It’s also depends on the local mobile network operator. For
more information, please contact with operator.

10
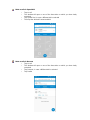
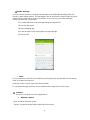
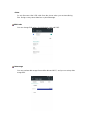
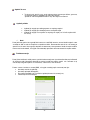
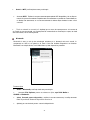
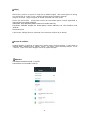
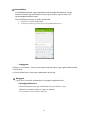
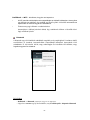
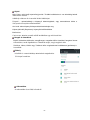
Send a message
You can use this phone to exchange text messages and multimedia messages with your
friends on their mobile phones. The messages come to and from the same contact or phone
number will be visible into a single conversation, so you can see your entire message
history with a person conveniently.
1.To create and send a new message follow the steps below:
2.Acces the app menu
3.Enter Messaging app
4.On the top right corner select option for new message
5.Enter the text
Note:
You can transform your SMS into an MMS by selecting the plus symbol and insert an image,
video or sounds into your text.
At the top of your screen, type in the phone number
To send the message, select the arrow symbol from the right panel of the screen
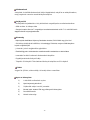
Contacts
Access the Contacts from menu applications.
Add new contact:
- Open Contacts from main menu;
- Tap the + symbol from the bottom-right side of the screen;

11
- Select the memory where you will store: account or phone entry;
- Enter contact information;
- Finally, tap the back arrow from top-left corner;
Add new contact from call log:
- From the applications menu, open the Dialer;
-Change tab from Speed dial to Recents
- Tap the icon beside phone number you want to save;
- Tap the + symbol on the top right
-Select Create new contact
- Select the memory where you will store: account or phone entry;
- Enter contact information;
- Finally, tap the back arrow from top-left corner;
In order to discard contact information, tap top-right corner (3 dots icon) and select ‘Discard
changes’ and confirm
Import/Export contacts
You can import or export contacts between memories and accounts available, as follows:
- Open Contacts;
- Press the Options button and select Import / Export;
- Choose memory from which to copy contacts;
- Choose in which memory to copy the contacts;
- Select contacts to copy;
- Press the OK button;
Synchronize contacts with an account
Note:
If you don’t have an account, you can create one which is also necessary for the Google
Play
TM
store.
You can synchronize the contacts of an account by following the next steps:
- Open the applications menu -> Settings -> Applications -> ACCOUNTS;
- Touch the already desired account; if you don’t have set, you can add a new one by
touching the button Add new account ;
- Tick the option Sync contact;

12
Customize contacts with photo
Note:
The contacts from SIM card cannot be customized with photo.
To add a photo to one contacts follow the steps:
- Open Contacts;
- Touch the desired contact name;
- On the top-right of the screen touch the contact editing symbol;
- Touch the “Change” button to add image;
- Select the input method of image: Take photo or Choose photo .
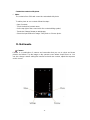
6. Multimedia
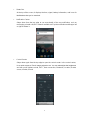
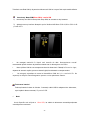
Camera
Camera is a combination of camera and camcorder that you use to shoot and share
pictures and videos. Tap the image on the camera screen where should focus on. You
can also change camera setting like transfer front and rear camera, adjust the exposure
on this screen.
N
m
al
M
o
d
e
-
T
a
k
e a
pe
r
f
ect
p
h
o
t
o.
Fa
c
e
B
e
au
t
y
M
o
d
e
(
option available only when using front camera)
-
D
I
Y
y
our
f
ace
w
i
t
h
S
m
oo
t
h
e
r
,
W
h
i
t
e
n
i
n
g,
S
limm
i
ng,
E
n
l
arge
r
.

13
Drag the slider to adjust it.
Filter Mode - Multiple filters can select from Normal, Black board, Negative, Poster,
Mono, Fresh, Water, Sepia, Sweet,
• Multi angel view mode- allows you to take pictures from different angles
• Live Photo mode – will take picture recording movement after tapping the “Take
picture” button
• Motion Track Mode - will take several pictures(long press “Take picture” button)
HDR Mode - High-Dynamic Range mode will improve the light and the shadow effect
at the same time. For Rear camera only.
Panorama Mode - Press camera button and move the phone on one direction slowly.
For Rear camera only.
PIP mode – will take picture with both cameras.
• Tap video icon to switch it for video capturing mode.
• Adjust the quality and other settings if you wish or leave them on automatic mode.
• Point the lens to frame the scene where you want to start.
• Touch the Start Video icon. Camera starts shooting the video.
• Touch Stop video icon to stop shooting. An image from your most recent video is
displayed as a thumbnail at the bottom left.
Gallery
Touch the Gallery icon in the Launcher to view albums of your pictures and videos which
you’ve taken from camera. You may share the pictures and videos with your friends by
Messaging, Email, Bluetooth and so on.
Music
You can use Music player to organize and listen to music and other audio files that you
transfer to your phone from your computer.

14
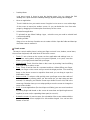
7. Connection & Settings
Your phone can connect to a variety of networks and devices, including mobile networks for
voice and data transmission, WLAN data networks, and Bluetooth devices, such as
headsets. You can also connect your phone to a computer, to transfer files from your phone
storage, and share your phone’s mobile data connection via USB or as a portable WLAN
hotspot.
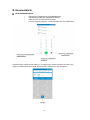
Airplane mode
Option1: Settings-->Airplane mode to turn it on
Option2: Swipe down twice from the top edge to open control center--> tap Airplane
mode. Some locations like Airplane may require you to turn off your phone’s Cellular
network, WLAN, and Bluetooth wireless connections. You can turn off all these wireless
connections at once by placing your phone on Airplane mode.
Mobile Networks
When you assemble your phone with a SIM card from your wireless service provider,
your phone is configured to use your provider’s mobile networks for voice calls and for
transmitting data. Settings More Mobile Networks Network
Operators
The name of the wireless service provider you’re currently registered with is selected in
the list.
WiFi
WiFi is a wireless networking technology that can provide internet access at distance of
up to 100 meters, depending on the WiFi router and your surroundings. You
canconfigure t
he
WLAN as follow:
Set
ti
n
g
s
--
>
WiFi
,
che
c
k
WiFi
t
o
t
urn
i
t
on.

15
• Enter WiFi. The phone scans for available WiFi networks and displays the names of
those it finds. Secured networks are indicated with a Lock icon. The phone will auto
login to the network if you have previously connected.
• Touch a network to connect to it.
If the network is open, you are prompted to confirm that you want to connect to that
network by touching connect. If the network is secured, you’re prompted to enter a
password or other credentials.
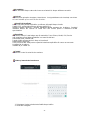
Bluetooth
Bluetooth is a short-range wireless communications technology that devices can use to
exchange information over a distance of about 10 meters. The most common Bluetooth
devices are headphones for making calls or listening to music, hands-free kits for cars, and
other portable device, including laptops and cell phones.
To send a file
• Settings--> Bluetooth, check Bluetooth to turn it on.
• Enter File Explorer to select a file, Select More--> SHARE--> Bluetooth.

16
• Touch Scan for devices, the phone will scan for and display the names of all available
Bluetooth devices in range.
• Touch the names of the other device in the list to pair them. After pairing the file will be
sent.
To receive a file
Settings--> Bluetooth, check Bluetooth to turn it on. Ensure your Bluetooth has been
connected within visibility time.
You can receive files from the devices which are paired with yours. The file you received
will be saved to the “Bluetooth” folder in the File Explorer.
To connect to a Hands-free device
• Turn on the Hands-free device, make it in a searchable state;
• Settings-->Bluetooth, Select “Search for devices”;
• After searching for the Hands-free device, Select it in the list to pair.
• After pairing, you can use the Hands-free device to listen to music, video and receive
call.
USB
You can connect the phone to your computer with a USB cable to transfer music, pictures,
and other files.
Turn on USB connection
1. Connect the phone to your computer with a USB cable.
2. Open the notification center and tap Connected as a media device to access files on
this device.
3. Other USB options can be chosen.
Charge only, connected as a USB for charging.
Camera, connected as a camera to browse photos on PC only.

17
Note:
Do not disconnect the USB cable from the phone when you are transferring
files. Doing so may cause data loss or phone damage.
SIM Cards
You can change SIM options for Mobile data calls and SMS.
Data usage
You can preview data usage from mobile data and Wi-Fi, and you can set up data
usage limit.

18
More
Find additional settings as:
Tethering&Portable Hotspot
VPN
Mobile networks
Display
Mira Vision: allows real time enhancement of picture quality. More tuning options are
available under Picture mode – User mode for advanced users.
Wallpaper: choose desired wallpaper from several locations
Brightness level – optimize brightness level for available light in adaptive brightness option
Sleep: set timer to lock screen after selected time of inactivity
Daydream: Set screen saver while the phone is docked and/or sleeping
Font size
Cast screen: Use to wirelessly stream content from your phone
Sound¬ification
This option allows you to set audio tones for incoming calls, e-mail alerts and SMS
notifications. Settings include: Vibration, Volume, Tone Audio, Reviews
Select General - Silent - Meeting - Outdoor profile by touching the right side circle.
Storage
View SD Card and Phone Memory.
Uninstall or Format SD Card.
Battery
Displays information about the charging status and usage of the battery

19
Apps
Shows the list of the installed and downloaded applications.
You can view which of them are installed on SD CARD or running.
Location
Access to my location: enable applications to use your location information.
GPS satellites: switch on/off the GPS receiver.
Google Location Service™: let applications to use the WiFi or mobile network connection
to get localization.
Security
1) Set up screen locks: you can choose none, swipe, pattern, PIN or password to unlock
the screen.
2) Encrypt phone: you can encrypt several personal information
3) Set up SIM card lock: enter 4-8 numbers PIN to set the lock of SIM.
If you enter 10 times wrong PUK code, the SIM card will be permanently locked.
4) Password visible: password visible when enter it
5) Select device administration: add or delete device manager.
6) Unknown sources: install apps from unknown sources
7) Trusted credentials: show the trusted credentials
8) Install from SD card: install the encrypted certificate from SD card.
Accounts
Add, manage and change synchronization options for the used accounts.
Languages and input
1) Selecting Language: includes all the languages available on the soft
2) Spell checker
3) Personal Dictionary: add words to custom dictionary or delete.
4) Input method : you can select Android™ keyboard or MultiLing keyboard input method.
5) Text to speech settings
6) Pointer speed

20
Backup & reset
Backup my data: backup my settings and data of other applications.
Factory data reset: clear all data stored on the phone.
Date and Time
1) Automatic date & time: use date and time provided by network or by GPS
2) Automatic time zone: check to use network-provided time zone
3) Set Date / Set time: touch to set date / time.
4) Selecting time zone Select Time Zone according to where you are. 4) Use 24 hour
time format : ON/OFF 5) Select date format.
Note:
If the Automatic time zone is ON you will NOT BE ABLE to set the time zone manual.
Pagina se încarcă ...
Pagina se încarcă ...
Pagina se încarcă ...
Pagina se încarcă ...
Pagina se încarcă ...
Pagina se încarcă ...
Pagina se încarcă ...
Pagina se încarcă ...
Pagina se încarcă ...
Pagina se încarcă ...
Pagina se încarcă ...
Pagina se încarcă ...
Pagina se încarcă ...
Pagina se încarcă ...
Pagina se încarcă ...
Pagina se încarcă ...
Pagina se încarcă ...
Pagina se încarcă ...
Pagina se încarcă ...
Pagina se încarcă ...
Pagina se încarcă ...
Pagina se încarcă ...
Pagina se încarcă ...
Pagina se încarcă ...
Pagina se încarcă ...
Pagina se încarcă ...
Pagina se încarcă ...
Pagina se încarcă ...
Pagina se încarcă ...
Pagina se încarcă ...
Pagina se încarcă ...
Pagina se încarcă ...
Pagina se încarcă ...
Pagina se încarcă ...
Pagina se încarcă ...
Pagina se încarcă ...
Pagina se încarcă ...
Pagina se încarcă ...
Pagina se încarcă ...
Pagina se încarcă ...
Pagina se încarcă ...
Pagina se încarcă ...
Pagina se încarcă ...
Pagina se încarcă ...
Pagina se încarcă ...
Pagina se încarcă ...
Pagina se încarcă ...
Pagina se încarcă ...
Pagina se încarcă ...
Pagina se încarcă ...
Pagina se încarcă ...
Pagina se încarcă ...
Pagina se încarcă ...
Pagina se încarcă ...
Pagina se încarcă ...
Pagina se încarcă ...
Pagina se încarcă ...
-
 1
1
-
 2
2
-
 3
3
-
 4
4
-
 5
5
-
 6
6
-
 7
7
-
 8
8
-
 9
9
-
 10
10
-
 11
11
-
 12
12
-
 13
13
-
 14
14
-
 15
15
-
 16
16
-
 17
17
-
 18
18
-
 19
19
-
 20
20
-
 21
21
-
 22
22
-
 23
23
-
 24
24
-
 25
25
-
 26
26
-
 27
27
-
 28
28
-
 29
29
-
 30
30
-
 31
31
-
 32
32
-
 33
33
-
 34
34
-
 35
35
-
 36
36
-
 37
37
-
 38
38
-
 39
39
-
 40
40
-
 41
41
-
 42
42
-
 43
43
-
 44
44
-
 45
45
-
 46
46
-
 47
47
-
 48
48
-
 49
49
-
 50
50
-
 51
51
-
 52
52
-
 53
53
-
 54
54
-
 55
55
-
 56
56
-
 57
57
-
 58
58
-
 59
59
-
 60
60
-
 61
61
-
 62
62
-
 63
63
-
 64
64
-
 65
65
-
 66
66
-
 67
67
-
 68
68
-
 69
69
-
 70
70
-
 71
71
-
 72
72
-
 73
73
-
 74
74
-
 75
75
-
 76
76
-
 77
77


Allview X3 Soul Mini Manual de utilizare
- Categorie
- Telefoane mobile
- Tip
- Manual de utilizare
în alte limbi
- English: Allview X3 Soul Mini User manual
Lucrări conexe
Alte documente
-
LG LGX150.AHUNSW Manual de utilizare
-
LG LGK520.ASWSBN Manual de utilizare
-
LG M160 Manual de utilizare
-
LG LGD335E.AGRCKW Manual de utilizare
-
LG K500N-black Manual de utilizare
-
LG LGK580.AEEETS Manual de utilizare
-
LG LGD331.ADEUKG Manual de utilizare
-
LG LGD320.ADEUWY Manual de utilizare
-
LG LGD620R.ATPLBK Manual de utilizare
-
LG D410 Manual de utilizare