
P8 PRO
USER MANUAL……………………………………............ 5
MANUAL DE UTILIZARE…………………….…………... 17
РЪКОВОДСТВО ЗА УПОТРЕБА………………............ 31
UŽIVATELSKÝ MANUÁL…………………………........... 44
BETRIEBSANLEITUNG................................................. 58
MANUAL DE USUARIO………………………………….. 73
HASZNÁLATI UTASÍTÁS………………………………... 86
INSTRUKCJA OBSŁUGI…………….........……….......... 96


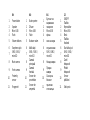
EN
RO
BG
CZ
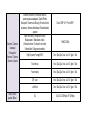
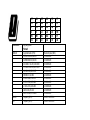
1
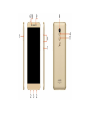
Power button
1
Buton pornire
1
Бутонът за
захранване
1
ON/OFF
Tlačítko
2
Speaker
2
Difuzor
2
говорител
2
Reproduktor
3
Micro USB
3
Micro USB
3
Micro USB
3
Micro USB
4
Flash
4
Flash
4
флаш
4
Blesk
5
Volume buttons
5
Butoane volum
5
сила на звука
5
Tlačítka
hlasitosti
6
Earphones jack
6
Mufă căști
6
слушалки жак
6
Sluchátka jack
7
SIM1 / SIM2 /
microSD
7
SIM1 / SIM2 /
microSD
7
SIM1 / SIM2 /
microSD
7
SIM1 / SIM2 /
microSD
8
Main camera
8
Cameră
principală
8
Назад камера
8
Zadní
fotoaparát
9
Front camera
9
Cameră
frontală
9
Предна
камера
9
Přední
fotoaparát
10
Proximity
sensor
10
Senzor de
proximitate
10
Сензор за
близост
10
Senzor
přiblížení
11
Fingerprint
11
Senzor de
amprentă
11
пръстови
отпечатъци
11
Otisk prstu

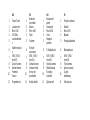
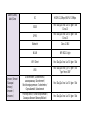
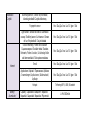
DE
ES
HU
PL
1
Power-Taste
1
Botón de
encendido
1
Bekapcsoló
gomb
1
Przycisk zasilania
2
Lautsprecher
2
Altavoz
2
Hangszóró
2
Głośnik
3
Micro USB
3
Micro USB
3
Micro USB
3
Micro USB
4
LED-Blitz
4
Flash
4
Vaku
4
Błyskać
5
Lautstärketaste
n
5
Volumen
5
Hangerő
gombok
5
Przyciski głośności
6
Kopfhörerbuchs
e
6
Enchufe
auriculares
6
Fülhallgató jack
6
Słuchawki jack
7
SIM1 / SIM2 /
microSD
7
SIM1 / SIM2 /
microSD
7
SIM1 / SIM2 /
microSD
7
SIM1 / SIM2 /
microSD
8
Zurück Kamera
8
Cámara trasera
8
Hátulsó kamera
8
Tylna kamera
9
Zweite Kamera
9
Cámara frontal
9
Elülső kamera
9
Aparat z przodu
10
Proximity-
Sensor
10
Sensor de
proximidad
10
Közelség
érzékelő
10
Czujnik
zbliżeniowy
11
Fingerabdruck
11
Huella dactilar
11
Ujjlenyomat
11
Odcisk palca

5 EN
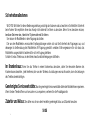
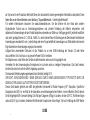
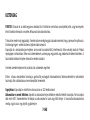
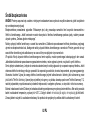
Notices for the use of phone
CAUTION! Please read carefully this instructions and follow them, in the case of dangerous situations.
Driving safety: It is recommended not to use the phone while driving. If you use it however, turn on the Handsfree mode.
Turn off your phone while in an aircraft.
Interference caused by mobile phones affects aviation safety, and thus is illegal to use it on the plane. Please make sure
that your mobile phone is turned off when you are on the plane.
In hospital: When using the phone in a hospital must submit to the relevant rules specified by the hospital. Any interference
caused by wireless devices may affect the performance of the phone.
Approved service: Only approved repair shops can repair mobile phones. If you open the phone and try to fix it yourself
you will void the warranty of the product.
Accesories and batteries: Only accesories and batteries approved by the producer can be used.
Emergency calls: Make sure the phone is turned on and enabled if you wish to make an emergency call, press the call key
and confirm the location, explain what happened and do not close the call. The battery and charging the battery: It is
recommended to fully charge before first use of the device. The battery is not removable. Do not puncture or damage the
battery in any way. Do not expose / keep / store close to heat sources / in sunlight. Risk of explosion.
Do not expose the battery/product to temperatures above 40 C. Do not dispose the battery/product in fire or drop anywhere.
Return defective batteries/products in special centers or to the supplier center.

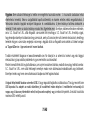
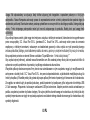
6 EN
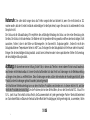
Warning: We take no responsibility for situations where the phone is used other than as provided in the manual. Our
company reserves the right to make changes in the content of the manual without making this public. These changes will
be posted on the company website to the product it amends.
The contents of this manual may be different from that in the product. In this last case will be considered.
To avoid the problems that might occur with the service shops approved by Visual Fan Ltd. (because Visual Fan reserves
the right to stop the collaboration with any service shop which was previously approved and mentioned in the waranty card
on the date on which the product batch was sold on the market), before taking a product to the service shop, please check
the updated list of approved service shps on Allview website at the section: “Support&Service – Approved service”.
For more product details visit www.allviewmobile.com. Do not cover the antenna with your hand or other objects Failure to
comply resulting in connectivity issues and rapid discharge of the battery. All applications provided by third parties and
installed in this device, may be modified and/or stopped at any moment. Visual Fan Ltd will not be responsible in any way
for modifications of the services or content of these applications. Any request or question regarding third party applications
may be addressed to owners of these applications. Due to the used enclosure material, the product shall only be connected
to a USBInterface of version 2.0 or higher. The connection to so called power USB is prohibited. The adapter shall be
installed near the equipment and shall be easily accessible. Do not use the mobile phone in the environment at too high or
too low temperature, never expose the mobile phone under strong sunshine or too wet environment.
The maximum operating ambient temperature of the equipment is 40℃
CAUTION RISK OF EXPLOSION IF BATTERY IS REPLACED BY AN INCORRECT TYPE. DISPOSE OF USED
BATTERIES ACCORDING TO THE INSTRUCTIONS

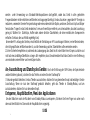
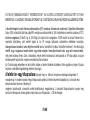
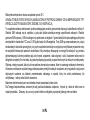
7 EN
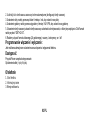
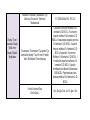
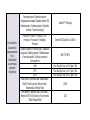
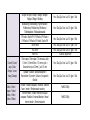
This device has been tested and meets applicable limits for Radio Frequency (RF) exposure. Specific Absorption Rate
(SAR) refers to the rate at which the body absorbs RF energy. SAR limits are 1.6 Watts per kilogram (over a volume
containing a mass of 1 gram of tissue) in countries that follow the United States FCC limit and 2.0 W/kg (averaged over 10
grams of tissue) in countries that follow the Council of the European Union limit. Tests for SAR are conducted using standard
operating positions with the device transmitting at its highest certified power level in all tested frequency bands. To reduce
exposure to RF energy, use a hands-free accessory or other similar option to keep this device away from your head and
body. Carry this device at least 5 mm away from your body to ensure exposure levels remain at or below the as-tested
levels. Choose the belt clips, holsters, or other similar body-worn accessories which do not contain metallic components to
support operation in this manner. Cases with metal parts may change the RF performance of the device, including its
compliance with RF exposure guidelines, in a manner that has not been tested or certified, and use such accessories
should be avoided.
For your safety, it is recommended that, during charging, you don’t keep the device near your body, and that you place it
on an inflammable stand. We recommend that, during nighttime, you put the phone away from you at a minimal distance
of 1 meter.
Device power on/off and standby
After inserting the SIM card, memory card and battery (optional), start the phone by holding down the Power button for 3
seconds. To power off, press and hold the same button and confirm. If you press the Power button you will set phone in
standby mode, to return shortly press the same button.

8 EN
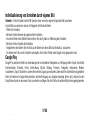
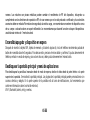
Unlocking, idle screen and applications menu
To unlock the screen when resuming from standby, slide your finger from the bottom to the top of the screen. The main
screen will be displayed Home screen pages can be customized with shortcuts and widgets. At the top of the screen is
placed the notification bar that contains information about the mobile network signal, WiFi, Bluetooth, battery level, time
and events.
Dialing
To call a number, from the main screen open the dialer, dial the number and press the call key.
To answer a call drag the icon to the right, and to reject the call drag the icon to the left.
You can call numbers directly from Call log, touch the dial symbol from the right side of the desired number.
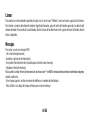
Messaging
To create and send an SMS, proceed as follows:
- Open the applications menu;
- Open the Messaging application;
- From the bottom side of the screen touch Compose new message symbol;
- Write the message;
Note: You create an MMS by touching the “+” symbol and adding media content: images, sound or movies.
- In the top text box add the number or the name of the recipient;
- Tap the arrow -> symbol from the right side of the text box to send the message.

9 EN
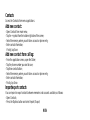
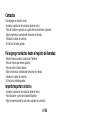
Contacts
Access the Contacts from menu applications.
Add new contact:
- Open Contacts from main menu;
- Tap the + symbol from the bottom-right side of the screen;
- Select the memory where you will store: account or phone entry;
- Enter contact information;
- Finally, tap Save.
Add new contact from call log:
- From the applications menu, open the Dialer;
- Tap the phone number you want to save;
- Tap New contact button;
- Select the memory where you will store: account or phone entry;
- Enter contact information;
- Finally, tap Save.
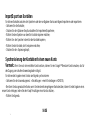
Import/export contacts
You can import or export contacts between memories and accounts available, as follows:
- Open Contacts;
- Press the Options button and select Import / Export;

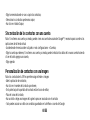
10 EN
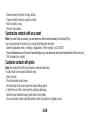
- Choose memory from which to copy contacts;
- Choose in which memory to copy the contacts;
- Select contacts to copy;
- Press the Copy button;
Synchronize contacts with an account
Note: If you don’t have an account, you can create one which is also necessary for the Google Play.
You can synchronize the contacts of an account by following the next steps:
- Open the applications menu -> Settings -> Applications -> More settings -> ACCOUNTS;
- Touch the desired account; if you don’t have allready set, you can add a new one by touching the button Add new account;
- Tick the option Sync contact;
Customize contacts with photo
Note: The contacts from SIM card cannot be customized with photo.
To add a photo to one contacts follow the steps:
- Open Contacts;
- Touch the desired contact name;
- On the top-right of the screen touch the contact editing symbol;
- In the left corner of the screen touch the symbol to add image;
- Select the input method of image: photo shoot or from gallery
- You can associate a photo only with contacts saved to your phone or Google account.

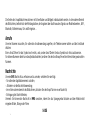
11 EN
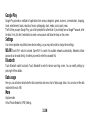
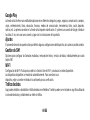
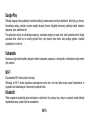
Google Play
Google Play provides a multitude of applications from various categories: games, business, communication, shopping,
travel, entertainment, books, education, finance, photography, tools, media, social, sports, news.
The first time you open Google Play, you will be prompted to authenticate. If you already have a Google™ account, enter
the data. If not, click the Create button to create a new account and follow the steps on the screen.
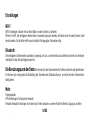
Settings
Your service provider may default some device settings, so you may not be able to change these settings.
WLAN Touch Wi-Fi switch to activate. Open Wi-Fi to search for available networks automatically. Networks without
password can be used directly, for others you need to enter the password first.
Bluetooth
Touch Bluetooth switch to activate. Touch Bluetooth to enter the device searching screen. You can modify settings by
pressing the Menu button.
Data usage
Here you can activate or deactivate the data connection and see a chart of data usage status. You can also set the data
mobile limit for each SIM.
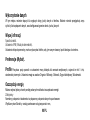
More
Airplane mode
Virtual Private Networks (VPN) Settings.

12 EN
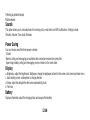
Tethering & portable hotspot
Mobile network
Sounds
This option allows you to set audio tones for incoming calls, e-mail alerts and SMS notifications. Settings include:
Vibration, Volume, Tone Audio, Reviews
Power Saving
You can choose one of the three power schemes:
-Closed
-Normal: calling and messaging are available; data connection remains the same state
-Super-long standby: calling and messaging services remains in the same state.
Display
a. Brightness: adjust the brightnessb. Wallpaper: change the wallpaper picture for idle screen, lock screen and main menu
c. Auto rotating screen: rotate phone to change direction
d. Sleep: adjust the delay before the screen automatically locks
e. Font size
Battery
Displays information about the charging status and usage of the battery.

13 EN
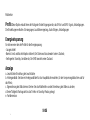
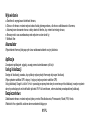
Applications
Shows the list of the installed and downloaded applications, which of them are installed on SD CARD.
Location
Access to my location: enable applications to use your location information.
GPS satellites: switch on/off the GPS receiver.
Google Location Service: let applications to use the WiFi or mobile network connection to get localization.
Security
1) Set up screen locks: you can choose slide, pattern, PIN or password to unlock the screen.
2) Set up SIM card lock: enter 4-8 numbers PIN to set the lock of SIM. If you enter 10 times wrong PUK code, the SIM card
will be permanently locked.
3) Password visible: password visible when enter it
4) Select device administration: add or delete device manager.
5) Unknown sources: install apps from unknown sources
6) Trusted credentials: show the trusted credentials
7) Install from SD card: install the encrypted certificate from SD card.
Languages and input
1) Selecting Language: includes all the languages on the phone
2) Spell checker
3) Personal Dictionary: add words to custom dictionary or delete.

14 EN
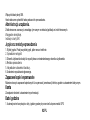
4) Input method
5) Text to speech settings
6) Pointer speed
Reset to factory settings
Backup my data: backup my settings and data of other applications.
Factory data reset: clear all data stored on the phone.
Accounts
Add, manage and change synchronization options for the used accounts.
Date and Time
1) Automatic date & time: use date and time provided by network or by GPS
2) Automatic time zone: check to use network-provided time zone
3) Set Date / Set time: touch to set date / time.
4) Selecting time zone Select Time Zone according to where you are.
4) Use 24 hour time format: ON/OFF
Schedule power on/off
You can set time of boot or off the phone.
Accessibility
1. Power button end call
2. Touch and hold delay
About phone
You can check the information about: phone status, legal informations, software version.

Măsuri de siguranță
IMPORTANT! Vă rugăm să citiți cu atenție aceste instrucțiuni și urmați-le implicit, în caz de situații periculoase Siguranță
în conducere: Este recomandat să nu folosiți telefonul mobil în timp ce conduceți. Dacă trebuie să-l folosiți, întotdeauna
folosiți sistemul de “Mâini libere” când conduceți.
Închideți telefonul mobil când sunteți în avion
Interferențele cauzate de telefoanele mobile afectează siguranță aviației și, astfel, este ilegal să-l folosiți în avion. Vă rugăm
asigurați-va că telefonul mobil este oprit atunci când sunteți în avion.
Închideți telefonul mobil în zona de operații de sablare.
În spital: Atunci când folosiți telefonul într-un spital, trebuie să va supuneți normelor relevante specificate de către spital.
Orice interferentă cauzată de echipamentele wireless poate afecta performanțele telefonului.
Service-uri aprobate: Numai service-urile aprobate pot repara telefoanele mobile. Dacă desfaceți telefonul și încercați să-l
reparați singuri veți pierde garanția produsului.Accesorii și baterii: Numai accesoriile și bateriile aprobate de producător pot
fi folosite.
Apeluri de urgentă: Asigurați-vă că telefonul este pornit și activat dacă doriți să efectuați un Apel de Urgentă la 112, apăsați
tasta de apel și confirmați locația, explicați ce s-a întâmplat și nu închideți convorbirea.
Bateria și încărcarea bateriei: Se recomandă încărcarea completă a bateriei înainte de prima utilizare a dispozitivului. Nu
expuneți bateria la temperaturi mai mari de +40ºC. Nu aruncați bateria în foc sau la întâmplare. Returnați bateriile defecte
la furnizor sau la centrele speciale pentru colectarea bateriilor defecte.
Atenție: Nu ne asumăm responsabilitatea pentru situațiile în care telefonul este folosit în alt mod decât cel prevăzut în
manual. Compania noastră își rezervă dreptul de a aduce modificări în conținutul manualului fără a face public acest lucru.
15 RO

Aceste modificări vor fi afișate pe siteul companiei la produsul la care se aduc modificări.Conținutul acestui manual poate
fi diferit de cel existent în produs. În acest caz ultimul va fi luat în considerare. Pentru a evită probleme care pot să apară
cu service-uri care nu mai sunt agreate de S.C. Visual Fan S.R.L. (deoarece S.C. Visual Fan S.R.L. își rezervă dreptul de
a încetă colaborarea cu orice service colaborator agreat, existent pe certificatul de garanție la data punerii în vânzare pe
piață a lotului de produse), înainte de a duce un produs în service vă rugăm să consultați lista actualizată a service-urilor
agreate existentă pe site-ul Allview la secțiunea “Suport&Service - Service autorizat”. Pentru mai multe detalii despre
produs accesați www.allviewmobile.com. Nu acoperiți antena cu mâna sau alte obiecte, nerespectarea acestei indicații
ducând la probleme de conectivitate și descărcarea rapidă a bateriei.
Aplicațiile care însoțesc produsul, și sunt furnizate de terțe părți, pot fi oprite sau întrerupte în orice moment. S.C. Visual
Fan S.R.L. se dezice în mod explicit de orice responsabilitate sau răspundere privind modificarea, oprirea ori suspendarea
serviciilor / conținutului puse la dispoziție de către terțe părți prin intermediul acestui dispozitiv. Întrebările sau alte solicitări
legate de acest conținut ori servicii se vor adresa direct furnizorilor proprietari ai acestora.
Datorita materialului utilizat, produsul trebuie să fie conectat numai la un USB cu versiunea 2.0 sau mai mare. Alimentarea
la oricare alt tip de USB este interzisă.
Nu utilizați telefonul mobil într-un mediu cu temperatură prea mare sau prea mică.
Nu expuneți niciodată telefonul mobil la lumină solară directă sau într-un mediu cu umiditate ridicată. Temperatura
ambientală maximă de funcționare a echipamentului este de 40 ℃
ATENȚIE RISC DE EXPLOZIE DACĂ BATERIA ESTE ÎNLOCUITĂ CU UN TIP INCORECT. ELIMINAȚI BATERIILE
UZATE ÎN CONFORMITATE CU INSTRUCȚIUNILE !
16 RO

Acest dispozitiv a fost testat și îndeplinește limitele aplicabile pentru radiofrecvență (RF). Rata specifică de absorbție (SAR)
se referă la rata la care organismul absoarbe energia RF. Limitele SAR sunt de 1,6 w/kg (peste un volum ce conține o
masă de 1 gram de țesut) în țările care urmează limita Statele Unite ale Americii FCC și 2,0 W / kg (în medie pe 10 grame
de țesut), în țările în care urmează Consiliul cu privire limită a Uniunii Europene. Testele pentru SAR sunt efectuate folosind
poziții de operare standard, cu dispozitivul transmițând la cel mai înalt nivel de putere, în toate benzile de frecvență testate.
Pentru a reduce expunerea la energie RF, utilizați un accesoriu pentru mâini libere sau altă opțiune similară pentru a
menține dispozitivul la distanță de cap și corp. Transportați acest dispozitiv de cel puțin 5 mm distanța de corp pentru a
menține nivelul de expunere la sau sub nivelurile testate.
Optați pentru accesorii ce nu conțin parți metalice pentru a nu sprijini funcționarea in acest mod. Cazurile cu piese metalice
pot modifică performanța RF a dispozitivului, inclusiv conformitatea acestuia cu liniile directoare de expunere la RF, într-un
mod care nu a fost testat sau certificate, si trebuie evitata utilizarea unor astfel de accesorii.
Pentru siguranța dvs. este recomandat ca în timpul încărcării să nu țineți dispozitivul în apropierea corpului si să îl plasați
pe un suport neinflamabil. Va recomandăm că pe timpul nopții să puneți telefonul la o distantă de minim 1 metru de dvs"
Pornire / oprire si standby dispozitiv
După introducerea cartelelor SIM, a cardului de memorie și a bateriei (opțional), porniți telefonul ținând apăsat butonul
Pornire pentru 3 secunde. Pentru oprire, apăsați lung același buton și confirmați. Dacă apăsați scurt butonul Pornire veți
introduce telefonul în modul standby, iar pentru a reveni apăsați din nou, scurt, același buton.
17 RO

Deblocare, ecran principal, meniu de aplicații
Pentru a debloca ecranul la revenirea din standby, glisați cu degetul din partea de jos către partea de sus a ecranului. Se
va afișă ecranul principal.
Paginile ecranului principal pot fi personalizate cu scurtături și widget-uri. În partea superioară a ecranului se găsește bara
de notificări care conține informații despre nivelul semnalului rețelelor mobile, WiFi, Bluetooth, nivelul bateriei, ceas și
evenimente.
Apelare
Pentru apelarea unui număr, din ecranul principal, accesați aplicația de apelare, formați numărul de telefon și apăsați tasta
de apelare. Puteți apela numere direct din Jurnalul de apeluri, atingeți butonul de apelare din partea dreaptă a numărului
dorit.Pentru a răspunde unui apel glisați simbolul central către partea dreaptă, iar pentru a respinge apelul glisați către
partea stângă.
Mesaje
Pentru a crea și trimite un mesaj SMS, procedati astfel:
- Accesați meniul de aplicații;
- Accesați aplicația Mesagerie;
- Din partea de jos a ecranului apasați butonul de mesaj nou;
- Introduceți textul mesajului;
Nota: Puteți transforma mesajul in MMS apasând simbolul „+“ și introducând continut media: imagini, sunete sau filme.
- In câmpul superior tastați numărul de telefon sau numele destinatarului;
18 RO

- Apăsați simbolul săgeată -> din partea dreaptă a câmpului de text pentru a trimite mesajul.
Contacte
Accesați aplicația Contacte din meniul de aplicații.
Adăugare contact nou:
- Accesați aplicația Contacte din meniul de aplicații;
- Atingeți simbolul de adăugare + din partea dreaptă-jos a ecranului;- Alegeți memoria sau contul unde se va stoca intrarea;
- Introduceți datele contactului;
- La final, atingeți butonul Salvare.
Adăugare contact din jurnalul de apeluri:
- Din meniul de aplicații accesați aplicația Telefon;
- Atingeți numărul de telefonul care doriți să îl salvați;
- Atingeți butonul Contact nou;
- Alegeți memoria sau contul unde se va stoca intrarea;
- Introduceți datele contactului;
- La final, atingeți butonul Salvare.
19 RO

Import/export contacte
Puteți importa sau exporta contacte între memoriile sau conturile disponibile, astfel:
- Accesați Contacte;
- Apăsați butonul Opțiuni și selectați Importați/Exportati;
- Alegeți memoria din care se vor copia contacte;
- Alegeți memoria în care copiați contactele;
- Alegeți contactele de copiat;
- Apăsați butonul Copiere;
Sincronizare contacte cu un cont
Notă: Dacă nu aveți deja un cont creat, puteți crea un cont de utilizator Google
TM
necesar accesării Google Play.
Puteți sincroniza contactele unui cont, astfel:
- Accesați meniul de aplicații -> Setări -> Mai multe setari-> CONTURI;
- Atingeți contul dorit; dacă nu aveți un cont deja introdus, puteți introduce datele unui nou cont apăsând butonul Adăugați
un cont;.
- Bifați opțiunea Agendă.
20 RO
Pagina se încarcă...
Pagina se încarcă...
Pagina se încarcă...
Pagina se încarcă...
Pagina se încarcă...
Pagina se încarcă...
Pagina se încarcă...
Pagina se încarcă...
Pagina se încarcă...
Pagina se încarcă...
Pagina se încarcă...
Pagina se încarcă...
Pagina se încarcă...
Pagina se încarcă...
Pagina se încarcă...
Pagina se încarcă...
Pagina se încarcă...
Pagina se încarcă...
Pagina se încarcă...
Pagina se încarcă...
Pagina se încarcă...
Pagina se încarcă...
Pagina se încarcă...
Pagina se încarcă...
Pagina se încarcă...
Pagina se încarcă...
Pagina se încarcă...
Pagina se încarcă...
Pagina se încarcă...
Pagina se încarcă...
Pagina se încarcă...
Pagina se încarcă...
Pagina se încarcă...
Pagina se încarcă...
Pagina se încarcă...
Pagina se încarcă...
Pagina se încarcă...
Pagina se încarcă...
Pagina se încarcă...
Pagina se încarcă...
Pagina se încarcă...
Pagina se încarcă...
Pagina se încarcă...
Pagina se încarcă...
Pagina se încarcă...
Pagina se încarcă...
Pagina se încarcă...
Pagina se încarcă...
Pagina se încarcă...
Pagina se încarcă...
Pagina se încarcă...
Pagina se încarcă...
Pagina se încarcă...
Pagina se încarcă...
Pagina se încarcă...
Pagina se încarcă...
Pagina se încarcă...
Pagina se încarcă...
Pagina se încarcă...
Pagina se încarcă...
Pagina se încarcă...
Pagina se încarcă...
Pagina se încarcă...
Pagina se încarcă...
Pagina se încarcă...
Pagina se încarcă...
Pagina se încarcă...
Pagina se încarcă...
Pagina se încarcă...
Pagina se încarcă...
Pagina se încarcă...
Pagina se încarcă...
Pagina se încarcă...
Pagina se încarcă...
Pagina se încarcă...
Pagina se încarcă...
Pagina se încarcă...
Pagina se încarcă...
Pagina se încarcă...
Pagina se încarcă...
Pagina se încarcă...
Pagina se încarcă...
Pagina se încarcă...
Pagina se încarcă...
Pagina se încarcă...
Pagina se încarcă...
-
 1
1
-
 2
2
-
 3
3
-
 4
4
-
 5
5
-
 6
6
-
 7
7
-
 8
8
-
 9
9
-
 10
10
-
 11
11
-
 12
12
-
 13
13
-
 14
14
-
 15
15
-
 16
16
-
 17
17
-
 18
18
-
 19
19
-
 20
20
-
 21
21
-
 22
22
-
 23
23
-
 24
24
-
 25
25
-
 26
26
-
 27
27
-
 28
28
-
 29
29
-
 30
30
-
 31
31
-
 32
32
-
 33
33
-
 34
34
-
 35
35
-
 36
36
-
 37
37
-
 38
38
-
 39
39
-
 40
40
-
 41
41
-
 42
42
-
 43
43
-
 44
44
-
 45
45
-
 46
46
-
 47
47
-
 48
48
-
 49
49
-
 50
50
-
 51
51
-
 52
52
-
 53
53
-
 54
54
-
 55
55
-
 56
56
-
 57
57
-
 58
58
-
 59
59
-
 60
60
-
 61
61
-
 62
62
-
 63
63
-
 64
64
-
 65
65
-
 66
66
-
 67
67
-
 68
68
-
 69
69
-
 70
70
-
 71
71
-
 72
72
-
 73
73
-
 74
74
-
 75
75
-
 76
76
-
 77
77
-
 78
78
-
 79
79
-
 80
80
-
 81
81
-
 82
82
-
 83
83
-
 84
84
-
 85
85
-
 86
86
-
 87
87
-
 88
88
-
 89
89
-
 90
90
-
 91
91
-
 92
92
-
 93
93
-
 94
94
-
 95
95
-
 96
96
-
 97
97
-
 98
98
-
 99
99
-
 100
100
-
 101
101
-
 102
102
-
 103
103
-
 104
104
-
 105
105
-
 106
106


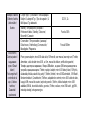
în alte limbi
- slovenčina: Allview P8 PRO Používateľská príručka
- polski: Allview P8 PRO Instrukcja obsługi
- Deutsch: Allview P8 PRO Benutzerhandbuch
- español: Allview P8 PRO Manual de usuario
Lucrări înrudite
-
Allview X4 Soul Infinity Plus - Produs resigilat Manual de utilizare
-
-
-
-
Allview X3 Soul Mini Manual de utilizare
-
Allview P9 Life Manual de utilizare
-
-