Motorola H12 - MOTOPURE H12 - Headset Manual de utilizare
- Categorie
- Căști
- Tip
- Manual de utilizare

MOTOROLA and the Stylized M Logo are registered in the US Patent &
Trademark Offi ce. All other product or service names are the property of
their respective owners. The Bluetooth trademark and logos are owned by
the Bluetooth SIG, Inc. and any use of such marks by Motorola, Inc. is under
license. © 2007 Motorola, Inc. All rights reserved.
6803578F12 - Printed in the EU.
motorola.com

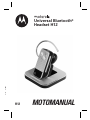
Universal Bluetooth
®
Headset H12
H12
MOTOMANUAL
&
f
y
r


1
3
2
2
1
1
Figure 2
Figure 1
6
4
7
1
2
3
5

2
Figure 4
Figure 3
Figure 5

3
Charging
Contacts
Charging
Contacts
Figure 6
Figure 7

4
Figure 8
Power
Switch
Indicator
Light

English
5
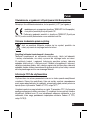
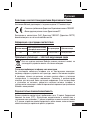
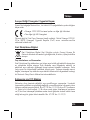
European Union Directives Conformance Statement
Hereby, Motorola Inc., declares that this H12 is in compliance
with the essential requirements and other relevant provisions of
Directive 1999/5/EC.
You can view your product’s Declaration of Conformity (DoC) to Directive
1999/5/EC (the R&TTE Directive) at www.motorola.com/rtte.
Caring for the Environment by Recycling
When you see this symbol on a Motorola product, do not dispose
the product with household waste.
Recycling Mobile Phones and Accessories
Do not dispose of mobile phones or electrical accessories, such as chargers
or headsets, with your household waste. In some countries or regions,
collection systems are set up to handle electrical and electronic waste items.
Contact your regional authorities for more details. If collection systems aren’t
available, return unwanted mobile phones or electrical accessories to any
Motorola Approved Service Centre in your region.
FCC Notice to Users
Users are not permitted to make changes or modify the device in any way.
Changes or modifi cations not expressly approved by the party responsible
for compliance could void the user’s authority to operate the equipment. See-
47-CFR-Sec.-15.21.
This device complies with part 15 of the FCC Rules. Operation is subject to the
following two conditions: (1) This device may not cause harmful interference,
and (2) this device must accept any interference received, including
interference that may cause undesired operation. See-47-CFR-Sec.-15.19(3).

English
6
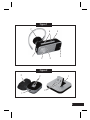
Before you begin
See fi gure 1 on page 1.
Take a moment before you get started to familiarize yourself with your new
H12 Bluetooth
®
Hands-free Headset.
1. Power switch
2. Call button
3. Indicator light
4. Microphone
5. Charging contacts
6. Volume buttons
7. Speaker
Along with your headset, a charger case and a desktop charger are provided
for both charging and storage.
See fi gure 2 on page 1.
Charging case
1. Charger port
2. Charging contacts
3. Charger cover
Desktop charger
1. Charger port
2. Charging contacts

English
7
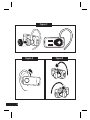
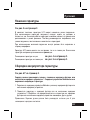
Wearing your headset
See fi gure 3 on page 2.
Your H12 headset is supplied with multiple ear buds. The ear bud is fi tted
onto the end of your headset’s earpiece speaker, and placed onto your ear
when using your headset. Your headset’s performance is greatly dependent
upon achieving a good fi t on your ear. Therefore, we recommend trying all
the supplied ear buds with your headset.
When fi tting an oval-shaped ear cushion on your headset, be sure the
cushion is pointing towards the microphone.
You can wear your H12 headset on your left of right ear. The headset comes
ready for the right ear.
Placing the headset on your ear:
see fi gure 4 on page 2.
Placing the headset on the left ear: see fi gure 5 on page 2.
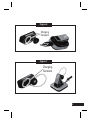
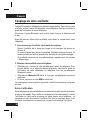
Charging your headset
See fi gure 6 & 7 on page 3.
You can only charge the headset via the charging case or the desktop
charger. You cannot plug the Motorola charger directly in the headset.
1. Plug the Motorola charger into the port on the charger case or desktop
charger
2. Place the headset into the charger case or onto desktop charger. Ensure
that that charging contacts on the headset and charging case or desktop
charger connect.
Note: Earhook must be rotated to the orientation as shown on fi gure 6 to
ensure charging contacts connect.

English
8
The indicator light turns red when the battery is charging. It may take up to
1 minute for the indicator light to turn on. When the headset’s battery is fully
charged (about 2.5 hours), the indicator light turns green.
Note: Headset is NOT functional while charging.
Note: this product uses a lithium ion, rechargeable non-repleacable
battery. Under normal use, the expected life of the rechargeable battery is
approximately 400 charges.
Storing your headset
The charging case, desktop stand, and shirt clip are designed to store your
headset. When not using your headset, use one of the accessories for
storing convenience:
• The charging case is designed for portability and protection when
headset is not in use. Case can be placed in a pocket or bag and can
easily fi t into many car cup holders.
• The desktop charger displays your headset for easy access at home or
the offi ce.
• The shirt clip secures your headset for access on-the-go. The clip can
be attached to a shirt, bag, or purse strap.

English
9
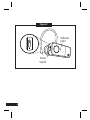
Turning headset on and off
See fi gure 8 on page 4.
To turn your headset on, slide the Power switch on (towards Power symbol
on headset). The indicator light fi rst fl ashes blue for several seconds, then:
• fl ashes blue (if paired and connected to with another device
• becomes steadily blue (if ready to be paired)
To turn your headset off, slide the Power switch off. The indicator light will
turn off.
Checking battery level
While turned on and not on a call, you can check the headset’s battery
charge level by pressing and holding both Volume buttons. The indicator
light displays charge status until you release the buttons. See “Indicator
Lights” section for details.
Note: This feature does not work when headset is in pairing mode.

English
10
Pairing your headset
Your phone’s Bluetooth feature is off by default. To use your headset, you
must turn on the Bluetooth feature in your phone. Please check your phone’s
user’s guide.
Note: The Bluetooth feature remains on until you turn the feature off.
Before you can use your headset, you must pair it with your phone.
1. Ensure headset is in pairing mode
Remove headset from charging base or desktop charger and power it on.
The indicator light fl ashes to initiate easy pairing. After a few moments,
the indicator light will be steadily lit in blue to indicate headset is in
pairing mode.
If the headset does not enter into pairing mode, see “Troubleshooting”
section.
2. Set your phone to look for your headset
• Perform a device discovery from the phone. For details about device
discovery, consult your phone’s user’s guide. The phone lists Bluetooth
devices it fi nds.
• Select Motorola H12 in the list of discovered devices and confi rm by
following the on-screen prompts.
• When prompted by the phone, enter the passkey 0000 and confi rm.
Pairing is successful when the headset indicator changes from steadily lit
to fl ashing blue.
Test and use
Your phone and headset are now paired and ready to make and receive
calls. To confi rm they are successfully paired and operating properly, place
the headset over your ear and make a call from your phone. You will hear
ringing from the headset. After you have successfully paired your phone
and headset, you do not need to repeat these steps each time you use the
headset.

English
11
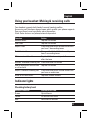
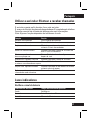
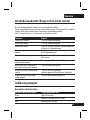
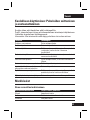
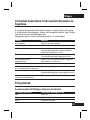
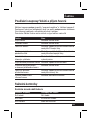
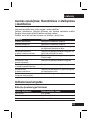
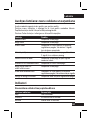
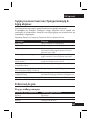
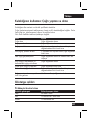
Using your headset: Making & receiving calls
Your headset supports both hands-free and headset profi les.
Accessing call functions depend upon which profi le your phone supports.
See your phone’s user’s guide for more information.
Note: Some features are phone/network dependent.
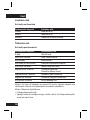
Function Action
Receive a call Tap the Call button
End a call Tap the Call button
Reject a call Press and hold either volume button until
you hear 2 descending tones
Redial last call Press and hold the Call button until you
hear 2 ascending tones
Make a voice dial call Tap the Call button and speak the name
after the tone
Answer a second incoming call Press and hold Call button
End an active call and resume Tap the Call button
a call on hold
Reject a second incoming call Press and hold either Volume button until
you hear an audio tone
Mute or un-mute a call Tap both Volume buttons
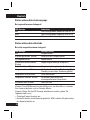
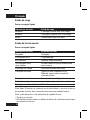
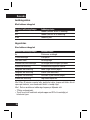
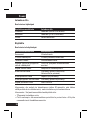
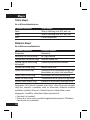
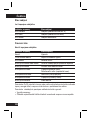
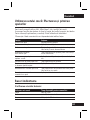
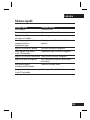
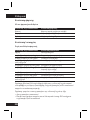
Indicator lights
Checking battery level
Headset indicator Available talk time
Green Up to 6 hours
Yellow 30 minutes to 5 hours
Red Less than 30 minutes

English
12
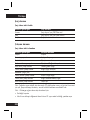
Charging status
With charger plugged in
Headset indicator Charge status
Red Charging (below 80% charge)
Yellow Charging (above 80% charge)
Green Charging complete
Operating status
With no charger plugged in
Headset indicator Headset status
Off Power off
3 blue fl ashes Powering on/off
Steady blue Pairing mode
Rapid blue/purple fl ashes Pairing/Connection successful
Quick blue fl ash Incoming/outcoming call
Slow blue fl ash Connected (on a call)
Standby (not on a call)
Slow red fl ash Idle (not connected)
Slow purple fl ash Connected (on a muted call)
Quick red fl ash Low battery
Note: After 20 minutes on a call or of inactivity, the light stops fl ashing to
conserve battery power, but the headset remains in standby mode.
Note: you can disable the indicator light as follows:
• Turn headset off
• Press and hold both volume buttons AND simultaneously turn headset
back on

English
13
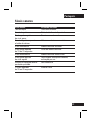
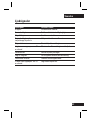
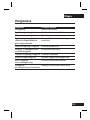
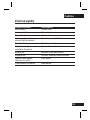
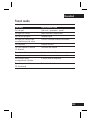
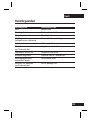
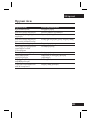
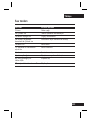
Audio tones
Audio tone Headset status
Ring tone Incoming call
Single high tone Phone network not available
High to low tone End call
Single high tone when Volume at maximum or minimum
pressing volume button
Ascending tone Mute enabled
Low tone repeated Mute reminder
very 15 seconds
Descending tone Mute disabled
Low to high tone Pairing confi rmation/voice activation
No audio indications: Out of range
deteriorating quality
2 tones repeated Low battery
every 30 seconds

English
14
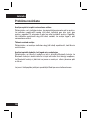
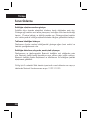
Troubleshooting
My headset will not enter pairing mode
Make sure that any devices previously paired with the headset are turned
off. If the indicator light is not steadily lit in blue, turn off both the other
device and headset, wait 10 seconds, then turn headset back on. Wait for
the indicator light to become steadily lit in blue, indicating the headset is
now in pairing mode.
My phone doesn’t fi nd my headset
Make sure the indicator light on your headset is on (lit in blue) and steady
when your phone is searching for devices.
My headset worked before but now it’s not working
Make sure your phone is on and the Bluetooth feature is turned on in
your phone. If the Bluetooth feature was turned off or was turned on only
temporarily, you may need to restart the Bluetooth feature and pair your
phone and headset again.
If you have any additional questions, please call your hotline number
(0870-9010-555) or visit us at www.hellomoto.com.

Français
15
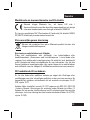
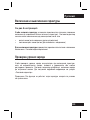
Déclaration de conformité aux directives de l’Union Européenne
Par la présente Motorola Inc., déclare que l’appareil H12 est
conforme aux exigences essentielles et aux autres dispositions
pertinentes de la directive 1999/5/EC.
Vous pouvez consulter la Déclaration de conformité de votre produit à la
Directive 1999/5/EC (la Directive R&TTE) à l’adresse www.motorola.com/rtte.
Protection de l’environnement par le recyclage
Lorsqu’un produit Motorola arbore ce symbole, ne le jetez pas dans
votre poubelle.
Recyclage des téléphones portables et accessoires
Ne jetez aucun téléphone portable ou accessoire électrique, comme un
chargeur ou un kit piéton, dans votre poubelle. Des systèmes de collecte
permettant de traiter les déchets électriques et électroniques sont
progressivement mis en place. Renseignez-vous localement pour plus
d’informations. En l’absence de système de collecte, renvoyez les téléphones
portables et accessoires électriques à l’un des Centres de Service agréé par
Motorola le plus proche.
Avis aux utilisateurs
L’utilisateur n’a le droit d’apporter ni changement ni modifi cation à l’appareil,
de quelque façon que ce soit. Le droit de l’utilisateur de faire usage de
l’appareil peut être annulé par des changements ou modifi cations non
expressément approuvés par l’entité en charge de la conformité de l’appareil
aux normes. Voir 47 CFR Sec.15.21.
Cet appareil est conforme à la clause 15 des règlements de la FCC. Son
fonctionnement est sujet aux deux conditions suivantes : (1) cet appareil ne
doit pas causer d’interférence nuisible, et (2) cet appareil doit accepter toute
interférence, y compris l’interférence pouvant causer un fonctionnement
inapproprié. Voir 47 CFR Sec.15.19 (3).

Français
16
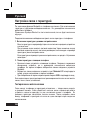
Avant de commencer
Voir fi gure 1, page 1.
Prenez le temps d’observer votre nouvelle oreillette mains-libres Bluetooth
®
H12.
1. Bouton marche/arrêt
2. Bouton d’appel
3. Voyant
4. Microphone
5. Contacts de charge
6. Boutons de volume
7. Haut-parleur
Un boîtier de charge et un support de charge de bureau sont fournis avec
votre oreillette. Ils permettent à la fois de charger et de ranger l’oreillette.
Voir fi gure 2, page 1.
Boîtier de charge
1. Port du chargeur
2. Contacts de charge
3. Couvercle du chargeur
Support de charge de bureau
1. Port du chargeur
2. Contacts de charge

Français
17
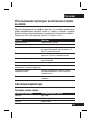
Port de votre oreillette
Voir fi gure 3, page 2.
Votre H12 possède plusieurs embouts. L’embout est fi xé sur l’extrémité du
haut-parleur de l’oreillette. Il se place directement dans l’oreille. La qualité
de son dépend pour beaucoup de la manière dont vous insérez l’embout. Il
est donc recommandé d’essayer tous les embouts.
Quand vous installez un embout de forme ovale, assurez-vous que la partie
la plus mince de l’embout soit dirigée vers le microphone.
Vous pouvez utiliser votre H12 sur l’oreille gauche ou droite. Elle est réglée à
l’origine pour l’oreille droite.
Port à l’oreille droite :
Voir fi gure 4, page 2.
Port à l’oreille gauche : Voir fi gure 5, page 2.
Charge de votre oreillette
See fi gure 6 & 7 on page 3.
Vous ne pouvez charger l’oreillette que par l’intermédiaire du boîtier ou
du support de charge de bureau. Vous ne pouvez pas brancher le chargeur
directement à l’oreillette.
1. Branchez le chargeur dans le port du boitier ou du support de bureau.
2. Installez-y l’oreillette. Vérifi ez la connexion entre les contacts de charge
de l’oreillette et ceux du boîtier ou du support de bureau.
Remarque : le contour d’oreille doit être orienté comme indiqué en Figure 6
pour une bonne connexion.
Pagina se încarcă...
Pagina se încarcă...
Pagina se încarcă...
Pagina se încarcă...
Pagina se încarcă...
Pagina se încarcă...
Pagina se încarcă...
Pagina se încarcă...
Pagina se încarcă...
Pagina se încarcă...
Pagina se încarcă...
Pagina se încarcă...
Pagina se încarcă...
Pagina se încarcă...
Pagina se încarcă...
Pagina se încarcă...
Pagina se încarcă...
Pagina se încarcă...
Pagina se încarcă...
Pagina se încarcă...
Pagina se încarcă...
Pagina se încarcă...
Pagina se încarcă...
Pagina se încarcă...
Pagina se încarcă...
Pagina se încarcă...
Pagina se încarcă...
Pagina se încarcă...
Pagina se încarcă...
Pagina se încarcă...
Pagina se încarcă...
Pagina se încarcă...
Pagina se încarcă...
Pagina se încarcă...
Pagina se încarcă...
Pagina se încarcă...
Pagina se încarcă...
Pagina se încarcă...
Pagina se încarcă...
Pagina se încarcă...
Pagina se încarcă...
Pagina se încarcă...
Pagina se încarcă...
Pagina se încarcă...
Pagina se încarcă...
Pagina se încarcă...
Pagina se încarcă...
Pagina se încarcă...
Pagina se încarcă...
Pagina se încarcă...
Pagina se încarcă...
Pagina se încarcă...
Pagina se încarcă...
Pagina se încarcă...
Pagina se încarcă...
Pagina se încarcă...
Pagina se încarcă...
Pagina se încarcă...
Pagina se încarcă...
Pagina se încarcă...
Pagina se încarcă...
Pagina se încarcă...
Pagina se încarcă...
Pagina se încarcă...
Pagina se încarcă...
Pagina se încarcă...
Pagina se încarcă...
Pagina se încarcă...
Pagina se încarcă...
Pagina se încarcă...
Pagina se încarcă...
Pagina se încarcă...
Pagina se încarcă...
Pagina se încarcă...
Pagina se încarcă...
Pagina se încarcă...
Pagina se încarcă...
Pagina se încarcă...
Pagina se încarcă...
Pagina se încarcă...
Pagina se încarcă...
Pagina se încarcă...
Pagina se încarcă...
Pagina se încarcă...
Pagina se încarcă...
Pagina se încarcă...
Pagina se încarcă...
Pagina se încarcă...
Pagina se încarcă...
Pagina se încarcă...
Pagina se încarcă...
Pagina se încarcă...
Pagina se încarcă...
Pagina se încarcă...
Pagina se încarcă...
Pagina se încarcă...
Pagina se încarcă...
Pagina se încarcă...
Pagina se încarcă...
Pagina se încarcă...
Pagina se încarcă...
Pagina se încarcă...
Pagina se încarcă...
Pagina se încarcă...
Pagina se încarcă...
Pagina se încarcă...
Pagina se încarcă...
Pagina se încarcă...
Pagina se încarcă...
Pagina se încarcă...
Pagina se încarcă...
Pagina se încarcă...
Pagina se încarcă...
Pagina se încarcă...
Pagina se încarcă...
Pagina se încarcă...
Pagina se încarcă...
Pagina se încarcă...
Pagina se încarcă...
Pagina se încarcă...
Pagina se încarcă...
Pagina se încarcă...
Pagina se încarcă...
Pagina se încarcă...
Pagina se încarcă...
Pagina se încarcă...
Pagina se încarcă...
Pagina se încarcă...
Pagina se încarcă...
Pagina se încarcă...
Pagina se încarcă...
Pagina se încarcă...
Pagina se încarcă...
Pagina se încarcă...
Pagina se încarcă...
Pagina se încarcă...
Pagina se încarcă...
Pagina se încarcă...
Pagina se încarcă...
Pagina se încarcă...
Pagina se încarcă...
Pagina se încarcă...
Pagina se încarcă...
Pagina se încarcă...
Pagina se încarcă...
Pagina se încarcă...
Pagina se încarcă...
Pagina se încarcă...
Pagina se încarcă...
Pagina se încarcă...
Pagina se încarcă...
Pagina se încarcă...
Pagina se încarcă...
Pagina se încarcă...
Pagina se încarcă...
Pagina se încarcă...
Pagina se încarcă...
Pagina se încarcă...
Pagina se încarcă...
Pagina se încarcă...
Pagina se încarcă...
Pagina se încarcă...
Pagina se încarcă...
Pagina se încarcă...
Pagina se încarcă...
Pagina se încarcă...
Pagina se încarcă...
Pagina se încarcă...
Pagina se încarcă...
Pagina se încarcă...
Pagina se încarcă...
Pagina se încarcă...
Pagina se încarcă...
Pagina se încarcă...
Pagina se încarcă...
Pagina se încarcă...
Pagina se încarcă...
Pagina se încarcă...
Pagina se încarcă...
Pagina se încarcă...
Pagina se încarcă...
Pagina se încarcă...
Pagina se încarcă...
Pagina se încarcă...
Pagina se încarcă...
Pagina se încarcă...
Pagina se încarcă...
Pagina se încarcă...
Pagina se încarcă...
Pagina se încarcă...
Pagina se încarcă...
Pagina se încarcă...
Pagina se încarcă...
Pagina se încarcă...
Pagina se încarcă...
Pagina se încarcă...
Pagina se încarcă...
Pagina se încarcă...
Pagina se încarcă...
Pagina se încarcă...
Pagina se încarcă...
Pagina se încarcă...
Pagina se încarcă...
Pagina se încarcă...
Pagina se încarcă...
Pagina se încarcă...
Pagina se încarcă...
Pagina se încarcă...
Pagina se încarcă...
Pagina se încarcă...
Pagina se încarcă...
Pagina se încarcă...
-
 1
1
-
 2
2
-
 3
3
-
 4
4
-
 5
5
-
 6
6
-
 7
7
-
 8
8
-
 9
9
-
 10
10
-
 11
11
-
 12
12
-
 13
13
-
 14
14
-
 15
15
-
 16
16
-
 17
17
-
 18
18
-
 19
19
-
 20
20
-
 21
21
-
 22
22
-
 23
23
-
 24
24
-
 25
25
-
 26
26
-
 27
27
-
 28
28
-
 29
29
-
 30
30
-
 31
31
-
 32
32
-
 33
33
-
 34
34
-
 35
35
-
 36
36
-
 37
37
-
 38
38
-
 39
39
-
 40
40
-
 41
41
-
 42
42
-
 43
43
-
 44
44
-
 45
45
-
 46
46
-
 47
47
-
 48
48
-
 49
49
-
 50
50
-
 51
51
-
 52
52
-
 53
53
-
 54
54
-
 55
55
-
 56
56
-
 57
57
-
 58
58
-
 59
59
-
 60
60
-
 61
61
-
 62
62
-
 63
63
-
 64
64
-
 65
65
-
 66
66
-
 67
67
-
 68
68
-
 69
69
-
 70
70
-
 71
71
-
 72
72
-
 73
73
-
 74
74
-
 75
75
-
 76
76
-
 77
77
-
 78
78
-
 79
79
-
 80
80
-
 81
81
-
 82
82
-
 83
83
-
 84
84
-
 85
85
-
 86
86
-
 87
87
-
 88
88
-
 89
89
-
 90
90
-
 91
91
-
 92
92
-
 93
93
-
 94
94
-
 95
95
-
 96
96
-
 97
97
-
 98
98
-
 99
99
-
 100
100
-
 101
101
-
 102
102
-
 103
103
-
 104
104
-
 105
105
-
 106
106
-
 107
107
-
 108
108
-
 109
109
-
 110
110
-
 111
111
-
 112
112
-
 113
113
-
 114
114
-
 115
115
-
 116
116
-
 117
117
-
 118
118
-
 119
119
-
 120
120
-
 121
121
-
 122
122
-
 123
123
-
 124
124
-
 125
125
-
 126
126
-
 127
127
-
 128
128
-
 129
129
-
 130
130
-
 131
131
-
 132
132
-
 133
133
-
 134
134
-
 135
135
-
 136
136
-
 137
137
-
 138
138
-
 139
139
-
 140
140
-
 141
141
-
 142
142
-
 143
143
-
 144
144
-
 145
145
-
 146
146
-
 147
147
-
 148
148
-
 149
149
-
 150
150
-
 151
151
-
 152
152
-
 153
153
-
 154
154
-
 155
155
-
 156
156
-
 157
157
-
 158
158
-
 159
159
-
 160
160
-
 161
161
-
 162
162
-
 163
163
-
 164
164
-
 165
165
-
 166
166
-
 167
167
-
 168
168
-
 169
169
-
 170
170
-
 171
171
-
 172
172
-
 173
173
-
 174
174
-
 175
175
-
 176
176
-
 177
177
-
 178
178
-
 179
179
-
 180
180
-
 181
181
-
 182
182
-
 183
183
-
 184
184
-
 185
185
-
 186
186
-
 187
187
-
 188
188
-
 189
189
-
 190
190
-
 191
191
-
 192
192
-
 193
193
-
 194
194
-
 195
195
-
 196
196
-
 197
197
-
 198
198
-
 199
199
-
 200
200
-
 201
201
-
 202
202
-
 203
203
-
 204
204
-
 205
205
-
 206
206
-
 207
207
-
 208
208
-
 209
209
-
 210
210
-
 211
211
-
 212
212
-
 213
213
-
 214
214
-
 215
215
-
 216
216
-
 217
217
-
 218
218
-
 219
219
-
 220
220
-
 221
221
-
 222
222
-
 223
223
-
 224
224
-
 225
225
-
 226
226
-
 227
227
-
 228
228
-
 229
229
-
 230
230
-
 231
231
-
 232
232


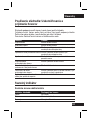
Motorola H12 - MOTOPURE H12 - Headset Manual de utilizare
- Categorie
- Căști
- Tip
- Manual de utilizare
în alte limbi
- Türkçe: Motorola H12 - MOTOPURE H12 - Headset Kullanım kılavuzu
- français: Motorola H12 - MOTOPURE H12 - Headset Manuel utilisateur
- čeština: Motorola H12 - MOTOPURE H12 - Headset Uživatelský manuál
- русский: Motorola H12 - MOTOPURE H12 - Headset Руководство пользователя
- English: Motorola H12 - MOTOPURE H12 - Headset User manual
- slovenčina: Motorola H12 - MOTOPURE H12 - Headset Používateľská príručka
- suomi: Motorola H12 - MOTOPURE H12 - Headset Ohjekirja
- polski: Motorola H12 - MOTOPURE H12 - Headset Instrukcja obsługi
- eesti: Motorola H12 - MOTOPURE H12 - Headset Kasutusjuhend
- Deutsch: Motorola H12 - MOTOPURE H12 - Headset Benutzerhandbuch
- italiano: Motorola H12 - MOTOPURE H12 - Headset Manuale utente
- español: Motorola H12 - MOTOPURE H12 - Headset Manual de usuario
- svenska: Motorola H12 - MOTOPURE H12 - Headset Användarmanual
- português: Motorola H12 - MOTOPURE H12 - Headset Manual do usuário
- Nederlands: Motorola H12 - MOTOPURE H12 - Headset Handleiding
Lucrări înrudite
-
Motorola H680 - Headset - Over-the-ear Manual de utilizare
-
-
-
-
Motorola HK200 Ghid de inițiere rapidă
-
-
Motorola P790 Manual de utilizare
-
Alte documente
-
Plantronics 610 Manual de utilizare
-
-
LG HBS-800 black Manual de utilizare
-
ACME BH420W Manual de utilizare
-
ACME BH420 Manual de utilizare
-
Sony SRS-BTD70 Instrucțiuni de utilizare
-
Siemens PHONE ADAPTER Manualul proprietarului
-
 ABC Design Cup holder Instrucțiuni de utilizare
