
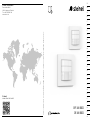
HF 180 KNX
IR 180 KNX
CN
BG
RU
LV
LT
EE
HR
SI
RO
PL
SK
CZ
HU
TR
GR
NO
FI
DK
SE
PT
ES
IT
NL
FR
GB
DE
STL-11106-20_BDAL_IR180 KNX + HF180 KNX_85x120mm.indd 1STL-11106-20_BDAL_IR180 KNX + HF180 KNX_85x120mm.indd 1 25.05.20 10:3025.05.20 10:30
STEINEL Vertrieb GmbH
Dieselstraße 80-84
33442 Herzebrock-Clarholz
Tel: +49/5245/448-188
www.steinel.de
Contact
www.steinel.de/contact
110077793 06/2020 Technische Änderungen vorbehalten. / Subject to technical modification without notice.

- 2 - - 3 -
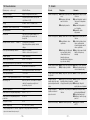
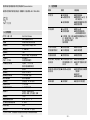
DE . . . . . . . 9
GB . . . . . . 16
FR . . . . . . 22
NL . . . . . . 28
IT . . . . . . . 34
ES . . . . . . . 40
PT . . . . . . . 46
SE . . . . . . . 52
DK . . . . . . 58
FI . . . . . . . 64
NO . . . . . . 70
GR . . . . . . 76
TR . . . . . . 82
HU . . . . . . 88
CZ . . . . . . 94
SK . . . . . 100
PL . . . . . . 106
RO . . . . . 112
SI . . . . . . 118
HR . . . . . 124
EE . . . . . . 130
LT . . . . . . 136
LV . . . . . . 142
RU . . . . . 148
BG . . . . . 154
CN . . . . . 160
Textteil beachten!
Follow written instructions!
Suivre les instructions ci-après !
Tekstpassage in acht nemen!
Seguire attentamente le istruzioni!
¡Obsérvese la información textual!
Siga as instruções escritas
Följ den skriftliga montageinstruktionen
Følg de skriftlige instruktioner!
Huomioi tekstiosa!
Se tekstdelen!
Τηρείτε γραπτές οδηγίες!
Yazılı talimatlara uyunuz!
A szöveges utasításokat tartsa meg!
Dodržujte písemné pokyny!
Dodržiavajte písomné informácie!
Postępować zgodnie zinstrukcją!
Respectai instruciunile următoare!
Upoštevajte besedilo!
Pridržavajte se uputa!
Järgige tekstiosa!
Atsižvelgti į rašytines instrukcijas!
Pievērsiet uzmanību teksta daļai!
Соблюдать текстовую инструкцию!
Прочетете инструкциите!
遵守文字说明要求!
...

- 4 - - 5 -
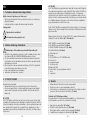
IR
HF

- 6 - - 7 -

- 8 - - 9 -
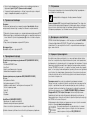
DE
1. Zu diesem Dokument
Bitte sorgfältig lesen und aufbewahren!
– Urheberrechtlich geschützt. Nachdruck, auch auszugsweise, nur mit
unserer Genehmigung.
– Änderungen, die dem technischen Fortschritt dienen, vorbehalten.
Symbolerklärung
Warnung vor Gefahren!
Verweis auf Textstellen im Dokument.
2. Allgemeine Sicherheitshinweise
!
Vor allen Arbeiten am Gerät die Spannungszufuhr unterbrechen!
• Die Installation darf nur durch Fachpersonal nach den landesüblichen
Installationsvorschriften VDE0829 (DINEN500090) durchgeführt werden.
• In einer Umgebung mit Niederspannungserzeugnissen kann eine nicht
fachgerechte Montage schwerste gesundheitliche oder materielle Schäden
verursachen.
• Dieses Gerät darf niemals an Niederspannung (230VAC) angeschlossen
werden, da es für den Anschluss an Sicherheitskleinspannung bestimmt ist.
• Nur original Ersatzteile verwenden.
• Reparaturen dürfen nur durch Fachwerkstätten durchgeführt werden.
3. IR 180/HF 180 KNX
Bestimmungsgemäßer Gebrauch
– Sensorschalter nur zur Wandmontage im Innenbereich geeignet.
– Intelligente Sensortechnik schaltet jedes Leuchtmittel bei Betreten des
Raumes automatisch ein und nach der eingestellten Zeit wieder aus.
IR180KNX
Der IR180KNX ist mit einem Pyro-Sensor ausgestattet, der die unsichtbare
Wärmestrahlung von sich bewegenden Körpern (Menschen, Tieren, etc.)
erfasst. Diese registrierte Wärmestrahlung wird elektronisch umgesetzt, und ein
angeschlossener Verbraucher (z. B. eine Leuchte) wird eingeschaltet. Durch
Hindernisse, wie z. B. Mauern oder Glasscheiben wird keine Wärmestrahlung
erkannt, es erfolgt also auch keine Schaltung.
...
!

- 10 - - 11 -
HF 180 KNX
Der HF 180 KNX ist ein aktiver Bewegungsmelder. Er reagiert temperatu-
runabhängig auf kleinste Bewegungen. Der integrierte HF-Sensor sendet
hochfrequente elektromagnetische Wellen (5,8 GHz) aus und empfängt deren
Echo. Bei der kleinsten Bewegung im Erfassungsbereich, wird die Echoverän-
derung vom Sensor wahrgenommen. Ein Microprozessor löst dann z.B. den
Schaltbefehl "Licht einschalten" aus. Eine Erfassung durch Türen, Glasscheiben
oder dünne Wände ist möglich.
Der IR 180/HF 180 KNX bietet zusätzlich die Ausgabe von Temperatur- und
Luftfeuchte-Messwerten. Diese Werte werden über den KNX Bus ausgegeben.
Alle Funktionseinstellungen können optional über die Fernbedienungen RC6,
RC7 sowie die Smart Remote vorgenommen werden. (➜ "6.Zubehör")
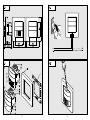
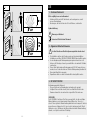
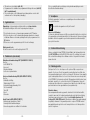
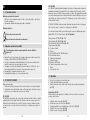
Lieferumfang IR180KNX (Abb.3.1)
Lieferumfang HF180KNX (Abb.3.2)
Produktmaße IR180/HF180KNX (Abb.3.3)
Geräteübersicht (Abb.3.4)
A Tasterwippe
B Abdeckung
C IR180KNX Linse / HF 180 KNX Abdeckung
D Demontageschlitz
E Programmiertaste
F Sensormodul
G Status LED
H Temperatur-/Luftfeuchtefühler
I Rahmen
J Blechrahmen
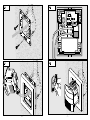
4. Montage
• Alle Bauteile auf Beschädigungen prüfen.
• Bei Schäden das Produkt nicht in Betrieb nehmen.
• Geeigneten Montageort auswählen unter Berücksichtigung der Reichweite
und Bewegungserfassung. (Abb. 5.1)
Hinweis für IR180:
Der Montageort sollte mindestens 1 m von einer Leuchte entfernt sein, da
Wärmestrahlung zur Auslösung des Systems führen kann.
• Stromversorgung abschalten. (Abb.4.1)
• Sensormodul vom Rahmen trennen. (Abb.4.2)
• Tragring mit Dosenbefestigungsschrauben anschrauben. (Abb.4.3)
• Steckverbindungen anschließen. (Abb.4.4)
• Stromversorgung einschalten. (Abb.4.6)
• Programmiertaste drücken und Programmeinstellungen vornehmen.
(Abb.4.5) (➜ "5.Inbetriebnahme")
• Sensormodul und Rahmen zusammenlegen und durch Druck mit dem
Blechrahmen (Tragring) zusammen stecken.
5. Inbetriebnahme
Hinweis:
Die Applikationsbeschreibung finden Sie unter knx.steinel.de. Alle Werksein-
stellungen sind in den Applikationsbeschreibungen zu finden.
1. Physikalische Adresse vergeben und Applikationsprogramm in der ETS
erstellen.
2. Die Physikalische Adresse und das Applikationsprogramm in den Wand-
schalter laden. Wenn Sie dazu aufgefordert werden den Programmiertaster
(E) drucken.
3. Nach erfolgreicher Programmierung erlischt die rote LED.
Integrierter Taster
Die Funktion des Tasters wird in der ETS festgelegt.
6. Zubehör (optional)
Nutzer Fernbedienung RC7 (EAN4007841592912)
Funktionen:
- Licht AN/AUS 4h
- User-Reset
- Dimmlevel verändern
- Szenen speichern/laden
Service Fernbedienung RC6 (EAN 4007841593018)
Funktionen:
- Reichweiteneinstellung
- Zeiteinstellung CH1/CH2
- Einschaltverzögerung/Raumüberwachung CH2
- Test- / Normbetrieb
- Teach-IN
- Reset
- IQ-Modus
SmartRemote (EAN4007841009151)
- Steuerung per Smartphone oder Tablet
- Ersetzt alle Fernbedienungen
- Passende App laden und per Bluetooth verbinden

- 13 -- 12 -
Die Garantiezeit für
• Sensorik / Außenleuchten / Innenleuchten beträgt: 5 Jahre und beginnt mit
dem Kaufdatum des Produktes.
Ausdrücklich ausgenommen von dieser Garantie sind alle auswechselbaren
Leuchtmittel. Darüber hinaus ist die Garantie ausgeschlossen:
• bei einem gebrauchsbedingten oder sonstigen natürlichen Verschleiß von
Produktteilen oder Mängeln am STEINEL-Produkt, die auf gebrauchsbeding-
tem oder sonstigem natürlichem Verschleiß zurückzuführen sind,
• bei nicht bestimmungs- oder unsachgemäßem Gebrauch des Produkts oder
Missachtung der Bedienungshinweise,
• wenn An- und Umbauten bzw. sonstige Modifikationen an dem Produkt
eigenmächtig vorgenommen wurden oder Mängel auf die Verwendung von
Zubehör-, Ergänzungs- oder Ersatzteilen zurückzuführen sind, die keine
STEINEL-Originalteile sind,
• wenn Wartung und Pflege der Produkte nicht entsprechend der Bedienungs-
anleitung erfolgt sind,
• wenn Anbau und Installation nicht gemäß den Installationsvorschriften von
STEINEL ausgeführt wurden,
• bei Transportschäden oder -verlusten.
Diese Herstellergarantie lässt Ihre gesetzlichen Rechte unberührt. Die hier
beschriebenen Leistungen gelten zusätzlich zu den gesetzlichen Rechten und
beschränken oder ersetzen diese nicht.
Die Garantie gilt für sämtliche STEINEL-Produkte, die in Deutschland gekauft
und verwendet werden. Es gilt deutsches Recht unter Ausschluss des
Übereinkommens der Vereinten Nationen über Verträge über den internationa-
len Warenkauf (CISG).
Geltendmachung
Wenn Sie Ihr Produkt reklamieren wollen, senden Sie es bitte vollständig und
frachtfrei mit dem Original-Kaufbeleg, der die Angabe des Kaufdatums und der
Produktbezeichnung enthalten muss, an Ihren Händler oder direkt an uns, die
STEINEL Vertrieb GmbH – Reklamationsabteilung –, Dieselstraße 80-84, 33442
Herzebrock-Clarholz. Wir empfehlen Ihnen daher, Ihren Kaufbeleg bis zum
Ablauf der Garantiezeit sorgfältig aufzubewahren. Für Transportkosten und
-risiken im Rahmen der Rücksendung übernehmen wir keine Haftung.
HERSTELLER
1
3
JAHR
DEU
GARANTIE
5
HERSTELLER
GARANTIE
HERSTELLER
GARANTIE
Detaillierte Beschreibungen in den Bedienungsanleitungen der jeweiligen
Fernbedienung.
7. Entsorgung
Elektrogeräte, Zubehör und Verpackungen sollen einer umweltgerechten
Wiederverwertung zugeführt werden.
Werfen Sie Elektrogeräte nicht in den Hausmüll!
Nur für EU-Länder:
Gemäß der geltenden Europäischen Richtlinie über Elektro- und Elektronik-
Altgeräte und ihrer Umsetzung in nationales Recht müssen nicht mehr
gebrauchsfähige Elektrogeräte getrennt gesammelt und einer umweltgerechten
Wiederverwertung zugeführt werden.
8. Konformitätserklärung
Hiermit erklärt die STEINEL Vertrieb GmbH, dass der Funkanlagentyp
HF180KNX der Richtlinie 2014/53/EU entspricht. Der vollständige Text der
EU-Konformitätserklärung ist unter der folgenden Internetadresse verfügbar:
www.steinel.de
9. Garantie
Herstellergarantie für Unternehmer, wobei Unternehmer eine natürliche oder
juristische Person oder eine rechtsfähige Personengesellschaft ist, die bei
Abschluss des Kaufes in Ausübung ihrer gewerblichen oder selbständigen
beruflichen Tätigkeit handelt.
Herstellergarantie
der STEINEL Vertrieb GmbH,
Dieselstraße 80-84, 33442 Herzebrock-Clarholz
Alle STEINEL-Produkte erfüllen höchste Qualitätsansprüche. Aus diesem Grund
leisten wir als Hersteller Ihnen als Kunde gerne eine unentgeltliche Garantie
gemäß den nachstehenden Bedingungen:
Wir leisten Garantie durch kostenlose Behebung der Mängel (nach unserer
Wahl: Reparatur oder Austausch mangelhafter Teile ggf. Austausch durch ein
Nachfolgemodell oder Erstellung einer Gutschrift), die nachweislich innerhalb
der Garantiezeit auf einem Material- oder Herstellungsfehler beruhen.

- 15 -- 14 -
10. Technische Daten
Abmessungen B × H × T 80 × 80 × 50mm
Spannung KNX Busspannung (SELV)
Sensorik Passiv Infrarot (IR) / Hochfrequenz (HF)
Reichweite IR max. 20m / HF max. 8m *
Dämmerungseinstellung 2 - 1000 Lux
Erfassungswinkel 180°
Einstellungen über ETS-Software, Fernbedienung
oder Bus
Lichtkanäle:
Licht 1 – Licht 4 Schalten/Dimmen;
Schaltbetrieb Konstantlichtregelung
Nachlaufzeit Lichtkanäle IQ-Modus, 1 - 255min,
präsenz- und helligkeitsabhängig
Lichtmessung Mischlicht
Grundhelligkeit AUS / 1 % - 100 %
Nachlaufzeit Grundhelligkeit 1 - 255 min, ganze Nacht
Ausgang HLK präsenzabhängig
Einschaltverzögerung Raumüberwachung, 10 - 255min
Nachlaufzeit HLK 1 - 255min
Ausgang Präsenznachlaufzeit 1 - 255s oder min
Weitere Ausgänge Helligkeitswert, Szenensteuerung,
Sabotage, Temperatur, Luftfeuchte,
Taster
Montagehöhe 1,2m
Wertebereich Temperatursensor 0 - 40 °C +/- 1 °C
Wertebereich Luftfeuchtigkeitssensor 0 - 100 %
IP/Schutzart IP20
Temperaturbereich 0°C bis + 40°C (indoor)
* Die Reichweite beim HF180KNX ist in extremen Winkeln stark von den örtlichen
Gegebenheiten abhängig.
11. Betriebsstörungen
Störung Ursache Abhilfe
Licht schaltet nicht ein n keine Anschluss-
spannung
n Lux-Wert zu niedrig
eingestellt
n keine Bewegungs-
erfassung
n Anschlussspannung
überprüfen
n Lux-Wert langsam
erhöhen bis Licht
einschaltet
n freie Sicht auf den
Sensor herstellen
n Erfassungsbereich
überprüfen
Licht schaltet nicht aus n Lux-Wert zu hoch
n Nachlaufzeit läuft ab
n Störende Wärme-
quellen z.B.: Heizlüfter,
oene Türen und
Fenster, Haustiere,
Glühbirne/Halogen-
strahler, sich bewe-
gende Objekte
n Lux-Wert niedriger
stellen
n Nachlaufzeit abwarten
ggf. Nachlaufzeit
kleiner stellen
n Stationäre Störquellen
durch Aufkleber aus-
blenden
Sensor schaltet trotz
Anwesenheit ab n Nachlaufzeit zu klein
n Lichtschwelle zu niedrig n Nachlaufzeit erhöhen
n Dämmerungseinstellung
ändern
Sensor schaltet zu
spät ab n Nachlaufzeit zu groß n Nachlaufzeit verkleinern
IR-Sensor schaltet bei
radialer Gehrichtung zu
spät ein
n Reichweite bei radialer
Gehrichtung kleiner als
bei tangentialer
n weitere Sensoren
montieren
n Abstand zwischen zwei
Sensoren reduzieren
Sensor schaltet trotz
Dunkelheit bei
Anwesenheit nicht ein
n Lux-Wert zu niedrig
gewählt n Sensor mit Schalter/
Taster deaktiviert ?
n Halbautomatik ?
n Helligkeitsschwelle
erhöhen
Taster hat keine Funktion n Taster deaktiviert? n Einstellung in der ETS
prüfen

- 16 - - 17 -
GB
1. About this document
Please read carefully and keep in a safe place.
– Under copyright. Reproduction either in whole or in part only with our
consent.
– Subject to change in the interest of technical progress.
Symbols
Hazard warning!
Reference to other information in the document.
2. General safety precautions
!
Disconnect the power supply before attempting
any work on the unit.
• This product must only be installed by a qualified electrician in accordance
with national wiring regulations as defined in VDE 08 29 (DIN EN 5000 90).
• Installed improperly, low-voltage products can cause extremely serious
personal injury or damage to property.
• This product must never be connected to a 230 V AC power supply as it is
intended for connection to a safety extra-low voltage power supply.
• Only use genuine replacement parts.
• Repairs may only be made by specialist workshops.
3. IR 180 / HF 180 KNX
Proper use
– Sensor switch suitable for indoor wall-mounting.
– Intelligent sensor technology automatically switches any type of lamp ON
when the room is entered and OFF again after the preset time.
IR180KNX
The IR 180 KNX is equipped with a pyro sensor which detects the invisible heat
emitted by moving objects (people, animals etc.). The heat detected in this
way is converted electronically into a signal that switches a connected load ON
(e.g. a light). Heat is not detected through obstacles, such as walls or panes of
glass. Heat radiation of this type will, therefore, not trigger the sensor.
...
!
HF 180 KNX
The HF 180 KNX is an active motion detector. It responds to the slightest
movement regardless of temperature. The integrated HF sensor emits
high-frequency electromagnetic waves (5.8 GHz) and receives their echo.
In response to the slightest movement in the detection zone, the change in
echo is perceived by the sensor. A microprocessor then issues the "switch
light ON" switching command, for example. Detection is possible through
doors, panes of glass or thin walls.
The IR 180 / HF 180 KNX also indicates the temperature and humidity levels
measured. These values are transmitted via the KNX bus.
Optionally, all function settings can be made via the RC6, RC7 remote controls
as well as the Smart Remote. (➜ "6.Accessories")
Package contents IR180KNX (Fig. 3.1)
Package contents HF180KNX (Fig. 3.2)
Product dimensions IR180 / HF180KNX (Fig. 3.3)
Product components (Fig. 3.4)
A Rocker switch
B Cover
C IR180KNX lens / HF 180 KNX cover
D Removal slot
E Programming button
F Sensor module
G Status LED
H Temperature / humidity sensor
I Surround
J Metal frame
4. Mounting
• Check all components for damage.
• Do not use the product if it is damaged.
• Select an appropriate mounting location, taking the reach and motion
detection into consideration (Fig. 5.1).
Note for IR 180:
The mounting location should be at least 1 m away from any lights because
heat radiated from these may activate the system.
• Switch OFF power supply. (Fig.4.1)
• Disconnect sensor module from surround. (Fig.4.2)
• Screw on support ring with box fixing screws. (Fig.4.3)
• Connect plug-in connectors. (Fig.4.4)
• Switch ON power supply. (Fig.4.6)

- 18 - - 19 -
• Press programming button and make program settings. (Fig.4.5)
(➜ "5.Operation")
• Fit the sensor module into the surround and press together with metal
frame (support ring).
5. Operation
Note:
You will find an application description at knx.steinel.de. All factory settings
may be found in the application descriptions.
1. Issue physical address and generate application program in the ETS.
2. Load the physical address and application program into the wall switch.
When you are prompted, press the programming button (E).
3. The red LED goes out once programming has been successfully completed.
Integrated button
The button function is defined in the ETS.
6. Accessories (optional)
User remote control RC7 (EAN4007841592912)
Functions:
- Light ON/OFF 4 h
- User reset
- Adjust dimming level
- Save / load scenarios
Service remote control RC6 (EAN 4007841593018)
Functions:
- Reach adjustment
- Time setting CH1 / CH2
- ON delay / room surveillance, CH2
- Test / normal mode
- Teach-IN
- Reset
- IQ mode
SmartRemote (EAN4007841009151)
- Control via smartphone or tablet
- Replaces all remote controls
- Download appropriate app and connect via Bluetooth
Detailed descriptions are provided in the operating instructions for the particu-
lar remote control
7. Disposal
Electrical and electronic equipment, accessories and packaging must be
recycled in an environmentally compatible manner.
Do not dispose of electrical and electronic equipment as domestic
waste.
EU countries only:
Under the current European Directive on Waste Electrical and Electronic Equip-
ment and its implementation in national law, electrical and electronic equipment
no longer suitable for use must be collected separately and recycled in an
environmentally compatible manner.
8. Declaration of Conformity
STEINEL Vertrieb GmbH hereby declares that the HF180KNX radio
equipment type conforms to Directive 2014/53/EU. The full wording of the
EU Declaration of Conformity is available for downloading from the following
Internet address: www.steinel.de
9. Manufacturer’s Warranty
As purchaser, you are entitled to your statutory rights against the vendor. If
these rights exist in your country, they are neither curtailed nor restricted by
our Warranty Declaration. We guarantee that your STEINEL Professional sensor
product will remain in perfect condition and proper working order for a period
of 5years. We guarantee that this product is free from material-, manufactur-
ing- and design flaws. In addition, we guarantee that all electronic components
and cables function in the proper manner and that all materials used and their
surfaces are without defects.
Making Claims
If you wish to make a claim, please send your product complete and carriage
paid with the original receipt of purchase, which must show the date of
purchase and product designation, either to your retailer or contact us at
STEINEL (UK) Limited, 25Manasty Road, Axis Park, Orton Southgate,
Peterborough, PE2 6UP, for a returns number. For this reason, we recom-
mend that you keep your receipt of purchase in a safe place until the warranty
period expires. STEINEL shall assume no liability for the costs or risks involved
in returning a product.
For information on making claims under the terms of the warranty, please go to
www.steinel-professional.de/garantie

- 20 - - 21 -
10. Technical specifications
Dimensions W × H × D 80 × 80 × 50mm
Voltage KNX bus voltage (SELV)
Sensor system Passive infrared (IR) /
high frequency (HF)
Reach IR max. 20 m / HF max. 8 m *
Twilight setting 2 - 1000 lux
Angle of coverage 180°
Settings via ETS software, remote control or bus
Lighting channels:
Light 1 – Light 4 Switching/dimming;
switching mode, constant lighting
control
Stay-ON time for lighting channels IQ mode, 1 - 255 min,
depending on presence and light level
Light measurement mixed light
Basic brightness OFF / 1 % - 100 %
Basic brightness stay-ON time 1-255 min, all night
HVAC output depending on presence
Switch-ON delay Room surveillance, 10 - 255 min
HVAC stay-'ON' time 1 - 255min
Presence stay ON time output 1 - 255s ormin
Further outputs Light level, scenario control, sabotage,
temperature, humidity, button
Mounting height 1.2m
Value range for temperature sensor 0 - 40 °C +/- 1 °C
Value range for humidity sensor 0 - 100 %
IP rating IP20
Temperature range 0°C to +40°C (indoor)
* At extreme angles, the reach of the HF180KNX is extensively determined
by local conditions.
11. Troubleshooting
Malfunction Cause Remedy
Light does not switch ON n No supply voltage
n Lux setting too low
n No motion being
detected
n Check supply voltage
n Slowly increase lux set-
ting until light switches
ON
n Ensure unobstructed
sensor vision
n Check detection zone
Light does not switch OFF n Lux setting too high
n Stay-ON time still
eective
n Interfering heat sources:
e.g. fan heater, open
doors and windows,
pets, light bulb / halo-
gen floodlight, moving
objects
n Reduce lux setting
n Wait until stay-ON time
elapses; reduce stay-
ON time if necessary
n Use stickers to mask
out stationary sources
of interference
Sensor switches OFF
despite persons being
present
n Stay-ON time too short
n Light-level threshold too
low
n Increase stay-ON time
n Change twilight setting
Sensor does not switch
OFF quickly enough n Stay-ON time too long n Reduce stay-ON time
IR sensor does not switch
ON quickly enough when
approached from the front
n Reach for radial walking
direction less than
for tangential walking
direction
n Install additional sensors
n Reduce distance
between two sensors
Sensor does not switch
ON when persons are
present despite it being
dark
n Lux setting too low n Sensor deactivated by
switch/button?
n Semi-automatic mode?
n Increase light-level
threshold
Button not working n Button deactivated? n Check setting in ETS
If you have a warranty claim or would like to ask any question regarding your
product, you are welcome to call us at any time on our Service Hotline 01733
366700.
MANUFACTURER'S
1
3
5
YEAR
GB
WARRANTY
MANUFACTURER'S
YEAR
WARRANTY
MANUFACTURER'S
YEAR
WARRANTY

- 22 - - 23 -
FR
1. À propos de ce document
Veuillez le lire attentivement et le conserver en lieu sûr !
– Il est protégé par la loi sur les droits d'auteur. Une réimpression même partielle
n'est autorisée qu'après notre accord préalable.
– Sous réserve de modifications techniques.
Explication des symboles
Attention danger !
Renvoi à des passages dans le document.
2. Consignes de sécurité générales
!
Avant toute intervention sur l'appareil, couper l'alimentation électrique !
• L'installation doit être eectuée par un professionnel conformément aux directives
locales d'installation (VDE 08 29, NF-C 15100) (DIN EN 5000 90).
• Dans un environnement présentant des appareils basse tension, un montage
incorrect est susceptible de causer de graves dommages matériels ou de mettre
en danger la santé des personnes.
• Il est interdit de raccorder cet appareil à la basse tension (230 V CA) car il est
prévu pour une très basse tension sécurisé.
• Utiliser uniquement des pièces de rechange d'origine.
• Les réparations ne doivent être eectuées que par des ateliers spécialisés.
3. IR 180/HF 180 KNX
Utilisation conforme aux prescriptions
– Le détecteur type interrupteur n'est destiné qu'à un montage mural à l'intérieur.
– La technologie de détection intelligente allume automatiquement chaque source
lumineuse dès qu'une personne entre dans la pièce et l'éteint après écoulement
de la durée réglée.
IR180KNX
L'IR180KNX est muni d'un capteur pyroélectrique qui détecte le rayonnement de
chaleur invisible émis par les corps en mouvement (personnes, animaux, etc.). Ce
rayonnement de chaleur capté est ensuite traité par un système électronique qui met
en marche l'appareil raccordé (p. ex. un luminaire). Les obstacles comme les murs
ou les vitres empêchent la détection du rayonnement de chaleur et donc toute com-
mutation.
...
!
HF 180 KNX
Le HF180KNX est un détecteur de mouvement actif. Il réagit indépendamment
de la température au moindre mouvement. Le capteur HF intégré émet des ondes
électromagnétiques à hyperfréquence (5,8 GHz) et reçoit leur écho. Au moindre
mouvement dans la zone de détection, le système détecte la modification de l'écho.
Un microprocesseur déclenche alors presque instantanément la commande « Allu-
mage de la lumière ». L'appareil peut détecter les mouvements à travers les portes,
les vitres et les fines cloisons.
L'IR 180/HF 180 KNX permet également d'acher la température et l'humidité de
l'air. Ces valeurs sont transmises par le bus KNX.
Tous les réglages du fonctionnement peuvent être eectués par le biais des télécom-
mandes RC6, RC7 et de la télécommande Smart Remote. (➜ «6. Accessoires»)
Contenu de la livraison du modèle IR180 KNX (fig.3.1)
Contenu de la livraison du modèle HF180KNX (fig.3.2)
Dimensions des modèles IR180/HF180KNX (fig.3.3)
Vue d'ensemble de l'appareil (fig. 3.4)
A Interrupteur à bascule
B Diuseur
C Lentille IR180KNX / Diuseur HF 180 KNX
D Fente de démontage
E Bouton de programmation
F Module de détection
G LED d'état
H Sonde de température/d'humidité de l'air
I Cadre
J Cadre en tôle
4. Montage
• Contrôler l'absence de dommages sur toutes les pièces.
• Ne pas mettre le produit en service en cas de dommage.
• Choisir l'emplacement de montage approprié en tenant compte de la portée et
de la détection des mouvements. (fig.5.1)
Remarque concernant l'IR180
Il faut monter l'appareil à 1 m au moins de tout luminaire dont la chaleur pourrait
entraîner un déclenchement intempestif du détecteur.
• Couper l'alimentation électrique. (Fig.4.1)
• Débrancher le module de détection du cadre. (Fig.4.2)
• Visser l'anneau support au moyen des vis de fixation de la boîte. (Fig.4.3)
• Brancher les raccords enfichables. (Fig.4.4)
• Mettre l'appareil sous tension. (Fig.4.6)

- 24 - - 25 -
• Appuyer sur le bouton de programmation et procéder aux réglages du pro-
gramme. (Fig.4.5) (➜ « 5.Mise en service »)
• Assembler le module de détection et le cadre et emboîter par simple pression sur
le cadre en tôle (anneau support).
5. Mise en service
Remarque:
Vous trouverez la description de l'application à l'adresse knx.steinel.de. Vous trou-
verez tous les réglages eectués en usine dans les descriptions des applications.
1. Établir l'adresse physique et le programme d'application avec l'ETS.
2. Transmettre l'adresse physique et le programme d'application à l'interrupteur
mural. Appuyer sur demande le bouton de programmation (E).
3. Une fois la programmation terminée avec succès, la LED rouge s'éteint.
Bouton intégré
La fonction du bouton est définie dans l'ETS.
6. Accessoires (en option)
Télécommande utilisateur RC7 (EAN4007841592912)
Fonctions :
- Lumière ALLUMÉE/ÉTEINTE 4h
- Réinitialisation de l'utilisateur
- Modifier le niveau d'intensité lumineuse
- Mémoriser/Charger les scénarios d'éclairage
Télécommande de service RC6 (EAN 4007841593018)
Fonctions :
- Réglage de la portée
- Temporisation des CH1/CH2
- Délai à l'allumage/Surveillance de la pièce CH2
- Mode test/Mode normal
- Teach-In (apprentissage)
- Réinitialisation (« reset »)
- Mode IQ
SmartRemote (EAN4007841009151)
- Commande par smartphone ou tablette
- Remplace toutes les télécommandes
- Charger l'appli nécessaire et se connecter par Bluetooth
Vous trouverez des descriptions détaillées dans les modes d'emploi de la télécom-
mande correspondante.
7. Élimination
Les appareils électriques, les accessoires et les emballages doivent être soumis à un
recyclage respectueux de l’environnement.
Ne jetez pas les appareils électriques avec les ordures ménagères!
Uniquement pour les pays de l’UE: Conformément à la directive européenne en
vigueur relative aux appareils électriques et électroniques usagés et à son application
dans le droit national, les appareils électriques qui ne fonctionnent plus doivent être
collectés séparément des ordures ménagères et doivent faire l’objet d’un recyclage
écologique.
8. Déclaration de conformité
STEINEL Vertrieb GmbH déclare par la présente que le type d’appareils radio
HF180KNX est conforme à la directive 2014/53/UE. Vous trouverez le texte intégral
de la déclaration de conformité UE à l’adresse Internet suivante: www.steinel.de
9. Garantie du fabricant
En tant qu’acheteur, vous disposez des droits prescrits par la loi à l’encontre
du vendeur. Notre déclaration de garantie ne raccourcit ni ne limite ces droits
dans la mesure où ils existent dans votre pays. Nous vous accordons une
garantie de 5ans sur le parfait état et le bon fonctionnement de votre produit à
détection STEINEL Professional. Nous garantissons que ce produit ne présente
pas de défauts matériels, de fabrication ni de construction. Nous garantissons
le bon état de fonctionnement de tous les composants électroniques et des
câbles ainsi que l’absence de vices pour tous les matériaux utilisés et leurs
surfaces.
Réclamation : Si vous avez une réclamation à faire au sujet de votre produit,
veuillez contacter votre revendeur en lui fournissant la preuve d’achat originale
qui doit comporter la date de l’achat et la désignation du produit.
Veuillez consulter notre site Internet www.steinel-professional.de/garantie
pour de plus amples informations sur la manière de faire valoir un droit à une
prestation de garantie.
Si vous avez besoin d’avoir recours au service de garantie ou si vous avez une
question au sujet de votre produit, vous pouvez nous appeler à tout moment
au n° d’assistance téléphonique pour la clientèle 03 20 30 34 00.
1
3
5
FR
DE GARANTIE
AN
FABRICANT DE GARANTIE
ANS
FABRICANT
DE GARANTIE
ANS
FABRICANT

- 26 - - 27 -
10. Caractéristiques techniques
Dimensions l × H × P 80 × 80 × 50mm
Tension Tension bus KNX (SELV)
Technologie de détection Infrarouge passif (IR) / Hyperfréquence (HF)
Portée IR max. 20m / HF max. 8m *
Réglage de la luminosité de
déclenchement De 2 à 1000 lx
Angle de détection 180°
Réglages Par logiciel ETS, télécommande ou bus
Canaux d'éclairage :
lumière 1 – lumière 4 Commuter/Varier l'intensité ; mode de com-
mutation maintien d'un éclairage constant
Temporisation des canaux d'éclairage Mode IQ, de 1 à 255 min, en fonction de la
présence et de la luminosité
Mesurage de la luminosité Lumière mixte
Balisage ARRÊT / de 1 % à 100 %
Temporisation du balisage De 1 à 255 min, toute la nuit
Sortie CVC
(chauage, ventilation et climatisation) En fonction de la présence
Temporisation de démarrage Surveillance de la pièce, de 10 à 255 min
Temporisation CVC (chauage,
ventilation, climatisation) De 1 à 255 min
Sortie temporisation en cas de présence De 1 à 255 s ou min
Autres sorties Valeur de luminosité, commande de
scénarios, sabotage, température, humidité
de l'air, bouton
Hauteur d'installation 1,2m
Plage des valeurs mesurées par
la sonde de température de 0 à 40 °C +/- 1 °C
Plage des valeurs mesurées par
le capteur d'humidité de l'air de 0 à 100 %
IP/Indice de protection IP20
Intervalle de température De 0°C à + 40°C (à l'intérieur)
* La portée du modèle HF180KNX dépend fortement des spécificités locales à des angles
extrêmes.
11. Dysfonctionnements
Problème Cause Solution
La lumière ne
s'allume pas n Pas de tension
d'alimentation
n Valeur en lux sélectionnée
trop faible
n Pas de détection de
mouvement
n Vérifier la tension
d'alimentation
n Augmenter la valeur en lux
lentement jusqu'à ce que
la lumière s'allume
n Assurer une vue libre sur
le détecteur
n Vérifier la zone de détec-
tion
La lumière ne
s'éteint pas n Valeur en lux trop élevée
n La temporisation touche
à sa fin
n Sources de chaleur
gênantes comme par ex.
les radiateurs souants,
les portes et les fenêtres
ouvertes, les animaux do-
mestiques, une ampoule/
un projecteur halogène,
des objets en mouvement
n Réduire la valeur en lux
n Attendre l'écoulement de
la temporisation, la réduire
le cas échéant
n Masquer les sources
de brouillage avec des
autocollants
Le détecteur
s'éteint malgré une
présence
n Temporisation trop courte
n Seuil de luminosité trop
faible
n Augmenter la
temporisation
n Modifier le réglage de la
luminosité de déclenche-
ment
Le détecteur s'éteint
trop tard n Temporisation trop longue n Réduire la temporisation
Le détecteur IR
s'allume trop tard
en cas de sens de
passage radial
n La portée pour le sens de
passage radial est infé-
rieure à celle pour le sens
de passage tangentiel
n Monter des détecteurs
supplémentaires
n Réduire l'écart entre deux
détecteurs
Le détecteur ne
s'allume pas
malgré obscurité et
présence
n Valeur en lux sélectionnée
trop faible n Détecteur désactivé avec
interrupteur / bouton ?
n Mode semi-automatique ?
n Augmenter le seuil de
luminosité
Le bouton n'a pas
de fonction n Bouton désactivé ? n Contrôler le réglage dans
l'ETS

- 28 - - 29 -
NL
1. Over dit document
Zorgvuldig doorlezen en bewaren a.u.b.!
– Rechten uit het auteursrecht voorbehouden. Vermenigvuldiging, ook van
delen van deze handleiding, is alleen met onze toestemming geoorloofd.
– Wijzigingen in het kader van de technische vooruitgang voorbehouden.
Toelichting van de symbolen
Waarschuwing voor gevaar!
Verwijzing naar tekstpassages in het document.
2. Algemene veiligheidsvoorschriften
!
Voor alle werkzaamheden aan het apparaat dient de spanningstoe-
voer te worden onderbroken!
• De installatie moet volgens de geldende installatievoorschriften VDE0829
(DIN EN 500090) door een vakman worden uitgevoerd.
• In een omgeving met laagspanningsproducten kan een verkeerde montage
zwaar letsel en grote materiële schade veroorzaken.
• Dit apparaat mag nooit op laagspanning (230VAC) worden aangesloten,
aangezien het voor aansluiting op een veilige lage spanning is bedoeld.
• Gebruik uitsluitend originele reserveonderdelen.
• Reparaties mogen uitsluitend door een vakbedrijf worden uitgevoerd.
3. IR 180/HF 180 KNX
Gebruik volgens de voorschriften
– Sensorschakelaar alleen geschikt voor wandmontage binnenshuis.
– De intelligente sensortechniek schakelt iedere lamp bij het betreden van de
ruimte automatisch in en na afloop van de ingestelde tijd weer uit.
IR180KNX
De IR180KNX is voorzien van een pyrosensor, die de onzichtbare warmte-
straling van bewegende elementen (mensen, dieren enz.) registreert. Deze zo
geregistreerde warmtestraling wordt elektronisch omgezet en een aangesloten
apparaat (bijv. een lamp) wordt ingeschakeld. Door hindernissen, zoals muren
of ruiten, wordt geen warmtestraling herkend, dus vindt ook geen schakeling
plaats.
...
!
HF 180 KNX
De HF 180 KNX is een actieve bewegingsmelder. Hij reageert temperatuuronaf-
hankelijk op de kleinste bewegingen. De geïntegreerde HF-sensor zendt hoog-
frequente elektromagnetische golven (5,8 GHz) uit en vangt de echo daarvan
op. Bij de kleinste beweging in het registratiebereik wordt de veranderde echo
door de sensor geregistreerd. Een microprocessor activeert vervolgens bijv.
het schakelbevel 'licht inschakelen'. Ook door deuren, ruiten of dunne wanden
heen worden bewegingen geregistreerd.
De IR 180/HF 180 KNX meet tevens temperatuur- en luchtvochtigheidswaar-
den. Deze waarden worden via de KNX-bus verstuurd.
Alle functie-instellingen kunnen optioneel met de afstandsbedieningen RC6,
RC7 en de Smart Remote worden uitgevoerd. (➜ '6.Toebehoren')
Bij de levering van de IR180KNX inbegrepen (afb.3.1)
Bij de levering van de HF180KNX inbegrepen (afb.3.2)
Productafmetingen IR180/HF180KNX (afb.3.3)
Overzicht apparaat (afb. 3.4)
A Schakelaar
B Afdekking
C IR 180 KNX lens / HF 180 KNX afdekking
D Demontagegleuf
E Programmeertoets
F Sensormodule
G Status-led-lampje
H Temperatuur-/luchtvochtigheidsensor
I Afdekraam
J Stalen plaatje
4. Montage
• Alle onderdelen controleren op beschadigingen.
• Neem het product bij beschadigingen niet in gebruik.
• Kies een passende montageplaats; houd hierbij rekening met de reikwijdte
en de bewegingsregistratie. (afb.5.1)
Opmerking voor IR180:
De montageplaats moet minstens 1 m van een lamp verwijderd zijn, omdat de
warmtestraling het systeem kan activeren.
Stroomtoevoer uitschakelen (afb. 4.1).
• Sensormodule scheiden van het afdekraam (afb. 4.2).
• Draagring met doosbevestigingsschroeven vastschroeven (afb. 4.3).
• Steekverbindingen aansluiten (afb. 4.4).

- 30 - - 31 -
• Stroomtoevoer inschakelen (afb. 4.6).
• Programmeertoets indrukken en programma-instellingen uitvoeren (afb.4.5)
(➜ '5.Ingebruikname').
• De sensormodule en het afdekraam tegen elkaar plaatsen en met druk
verbinden met het stalen plaatje (draagring).
5. Ingebruikname
Opmerking: de toepassingsbeschrijving vindt u onder knx.steinel.de
Alle fabrieksinstellingen vindt u in de toepassingsbeschrijvingen.
1. Fysisch adres invoeren en toepassingsprogramma in de ETS maken.
2. Het fysische adres en het toepassingsprogramma uploaden in de wand-
schakelaar. Wanneer u hiernaar gevraagd wordt op de programmeertoets
(E) drukken.
3. Na een succesvolle programmering dooft het rode led-lampje.
Geïntegreerde toets
De functie van de toets wordt vastgelegd in de ETS.
6. Toebehoren (naar keuze)
Gebruikersafstandsbediening RC7 (EAN4007841592912)
Functies:
- Licht AAN/UIT 4 h
- User-reset
- Dimstand wijzigen
- Lichtscènes opslaan/laden
Service-afstandsbediening RC6 (EAN 4007841593018)
Functies:
- Reikwijdte-instelling
- Tijdinstelling CH1/CH2
- Inschakelvertraging/bewaking CH2
- Test-/normbedrijf
- Teach IN
- Reset
- IQ-modus
Smart Remote (EAN 4007841 009151)
- Bediening via smartphone of tablet
- Vervangt alle afstandsbedieningen
- Passende app laden en via Bluetooth verbinden
Zie voor gedetailleerde beschrijvingen in de gebruiksaanwijzingen van de
betreende afstandsbediening.
7. Verwijderen
Elektrische apparaten, toebehoren en verpakkingen dienen milieuvriendelijk
gerecycled te worden.
Doe elektrische apparaten niet bij het huisvuil!
Alleen voor EU-landen:
Conform de geldende Europese richtlijn voor gebruikte elektrische en elektroni-
sche apparatuur en hun implementatie in het nationaal recht, dienen niet langer
bruikbare elektrische apparaten gescheiden ingezameld en milieuvriendelijk
gerecycled te worden.
8. Conformiteitsverklaring
Hiermee verklaart de firma STEINEL Vertrieb GmbH, dat de draadloze instal-
latie HF180KNX aan richtlijn 2014/53/EU voldoet. De volledige tekst van de
EU-conformiteitsverklaring is beschikbaar onder het volgende internetadres:
www.steinel.de
9. Fabrieksgarantie
Als koper heeft u t.o.v. de verkoper recht op de wettelijk voorgeschreven
garantie. Voor zover dit recht op garantie in uw land bestaat, wordt die door
onze garantieverklaring noch verkort, noch beperkt. Wij verlenen 5jaar garantie
op de onberispelijke staat en het correcte functioneren van uw sensorproduct
uit het STEINEL Professional assortiment. Wij garanderen dat dit product geen
materiaal-, productie- of constructiefouten heeft. Wij garanderen de goede
werking van alle elektronische componenten en kabels, alsook dat alle toege-
paste materialen en hun oppervlakken vrij van gebreken zijn.
Garantie claimen
Als u aanspraak wilt maken op garantie, dan kunt u het betreende artikel,
compleet samen met het originele aankoopbewijs en de klachtomschrijving,
terugsturen naar uw leverancier of direct naar Van Spijk Agenturen, De
Scheper 402, 5688 HP Oirschot. Wij adviseren u daarom uw aankoopbewijs
zorgvuldig te bewaren tot de garantieperiode is verlopen. STEINEL kan niet
aansprakelijk worden gesteld voor de transportkosten en het transportrisico
van het terugsturen.

- 32 - - 33 -
10. Technische gegevens
Afmetingen b × h × d 80 × 80 × 50 mm
Spanning KNX busspanning (SELV)
Sensor Passief-infrarood (IR) / hoogfrequentie (HF)
Reikwijdte IR max. 20 m / HF max. 8 m *
Schemerinstelling 2 - 1000 lux
Registratiehoek 180°
Instellingen Via ETS-software, afstandsbediening of bus
Lichtkanalen:
licht 1 – licht 4 Schakelen/dimmen;
schakelmodus regeling constant licht
Nalooptijd lichtkanalen IQ-modus, 1 - 255 min.,
afhankelijk van aanwezigheid en lichtsterkte
Lichtmeting Gemengd licht
Basislichtsterkte UIT / 1 % - 100 %
Nalooptijd basislichtsterkte 1 - 255 min., hele nacht
Uitgang HLK Afhankelijk van aanwezigheid
Inschakelvertraging Bewaking, 10 - 255 min.
Nalooptijd HLK 1 - 255min.
Uitgang nalooptijd aanwezigheid 1 - 255 sec. ofmin.
Overige uitgangen Lichtsterktewaarde, scènesturing, sabotage,
temperatuur, luchtvochtigheid, toets
Montagehoogte 1,2m
Bereik waarden temperatuursensor 0 - 40 °C +/- 1 °C
Bereik waarden luchtvochtigheid-
sensor 0 - 100 %
IP/bescherming IP20
Temperatuurbereik 0°C tot + 40°C (indoor)
* De reikwijdte bij de HF180KNX is in extreme hoeken erg afhankelijk van de plaatse-
lijke omstandigheden.
11. Storingen
Storing Oorzaak Oplossing
Licht gaat niet aan n Geen aansluitspanning
n Lux-waarde te laag
ingesteld
n Geen bewegingsregis-
tratie
n Aansluitspanning
controleren
n Lux-waarde langzaam
verhogen tot het licht
inschakelt
n Voor vrij zicht op de
sensor zorgen
n Registratiebereik
controleren
Licht gaat niet uit n Lux-waarde te hoog
n Nalooptijd loopt af
n Storende warmtebron-
nen bijv.: ventilatoren,
open deuren en ra-
men, huisdieren, gloei-
lamp/halogeenspot,
bewegende objecten
n Lux-waarde lager
instellen
n Nalooptijd afwachten of
nalooptijd lager zetten
n Permanente storings-
bronnen met stickers
afschermen
Sensor schakelt uit
ondanks aanwezigheid n Nalooptijd te kort
n Inschakelniveau te laag n Nalooptijd verhogen
n Schemerinstelling
veranderen
Sensor schakelt te laat uit n Nalooptijd te lang n Nalooptijd verkorten
IR-sensor schakelt bij
radiale looprichting te
laat in
n Reikwijdte bij radiale
looprichting kleiner dan
bij tangentiale
n Meer sensoren monte-
ren
n Afstand tussen twee
sensoren verkleinen
De sensor schakelt
ondanks duisternis
niet in bij aanwezigheid
n Lux-waarde te laag
ingesteld n Sensor met schakelaar/
toets gedeactiveerd?
n Halfautomatisch?
n Inschakelniveau
verhogen
Schakelaar heeft geen
functie n Schakelaar
gedeactiveerd? n Instelling in de ETS
controleren
(Op onze website www.vanspijk.nl vindt u meer informatie over het claimen
van garantierechten)
Als u een garantie-aanvraag heeft of technische vragen betreende uw pro-
duct, kunt u contact opnemen met onze helpdesk +31 499 551490.
1
3
5
NL
FABRIEKS
JAAR
GARANTIE FABRIEKS
JAAR
GARANTIE
FABRIEKS
JAAR
GARANTIE

- 34 - - 35 -
IT
1. Riguardo a questo documento
Si prega di leggerlo attentamente e di conservarlo!
– Tutelato dai diritti d'autore. La ristampa, anche solo di estratti, è consentita solo
previa nostra approvazione.
– Con riserva di modifiche legate al progresso della tecnica.
Spiegazione dei simboli
Avvertimento contro pericoli
Rimando a passaggi nel documento.
2. Avvertenze generali relative alla sicurezza
!
Prima di eettuare qualsiasi lavoro sull'apparecchio, togliete sempre la
corrente!
• L'installazione deve essere eettuata esclusivamente da personale specializzato
e in base alle prescrizioni d'installazione VDE 08 29 (DIN EN 5000 90) vigenti nel
relativo paese.
• In un ambiente in cui sono presenti dispositivi a bassa tensione, un montaggio
eseguito non a regola d'arte potrebbe provocare gravissimi danni a persone o
cose.
• Questo apparecchio non deve mai essere allacciato alla bassa tensione
(230 V CA), in quanto esso è destinato all'allacciamento alla piccola tensione di
sicurezza.
• Utilizzare esclusivamente pezzi di ricambio originali.
• Le riparazioni devono essere eettuate esclusivamente da ocine specializzate.
3. IR 180/HF 180 KNX
Utilizzo adeguato allo scopo
– Interruttore a sensore adatto solo per il montaggio a muro in ambienti interni.
– L'intelligente tecnica a sensore accende qualsiasi lampadina ogni volta che
qualcuno entra nel locale e la spegne allo scadere del tempo impostato.
IR180KNX
Il modello IR180KNX è dotato di un pirosensore che rileva le radiazioni termiche
invisibili provenienti da corpi in movimento (persone, animali, ecc.). Le radiazioni ter-
miche registrate vengono commutate in impulsi elettronici che attivano un utilizzatore
connesso (viene p. es. accesa una lampada). La presenza di ostacoli quali per es.
...
!
muri o vetri impedisce il riconoscimento dell'irraggiamento termico, l'accensione
pertanto non avviene.
HF 180 KNX
Il modello HF 180 KNX è un segnalatore attivo di movimento. Esso reagisce ai
minimi movimenti indipendentemente dalla temperatura. Il sensore ad alta frequenza
integrato irradia onde elettromagnetiche ad alta frequenza (5,8 GHz) e riceve le onde
riflesse. Quando si verifica il minimo movimento nel campo di rilevamento, il sensore
reagisce alle modifiche delle onde riflesse. Un microprocessore fa poi scattare per
es. l'istruzione di commutazione "Accendi la luce“. E' possibile rilevare i movimenti
anche attraverso porte, lastre di vetro e pareti sottili.
L'IR 180/HF 180 KNX ore anche il rilevamento dei valori di temperatura e umidità
dell'aria. Questi valori vengono emessi attraverso il bus KNX.
Tutte le regolazioni delle funzioni possono venire eseguite come optional anche
tramite i telecomandi RC6 e RC7 nonché Smart Remote. (➜ "6.Accessori")
Volume di fornitura IR 180 KNX (Fig.3.1)
Volume di fornitura HF 180 KNX (Fig.3.2)
Dimensioni dell'apparecchio IR 180/HF 180 KNX (Fig. 3.3)
Panoramica degli apparecchi (Fig. 3.4)
A Interruttore a bilanciere
B Copertura
C IR180KNX lente / HF 180 KNX copertura
D Fessura di smontaggio
E Tasto di programmazione
A Modulo sensore
F LED di stato
H Sonda della temparetura/sonda dell'umidità dell'aria
I Telaio
J Telaio in lamiera
4. Montaggio
• Controllare tutti i componenti per verificare se presentano danneggiamenti.
• In caso di danni non mettere in funzione il prodotto.
• Scegliere un luogo di montaggio adeguato tenendo conto del raggio d'azione e
del rilevamento del movimento. (Fig. 5.1)
Avvertenza per l'IR 180:
il luogo d'installazione deve trovarsi ad almeno 1 m di distanza da una fonte lumino-
sa, in quanto l'irraggiamento termico può provocare l'intervento del sistema.
• Staccare l'alimentazione di corrente. (Fig.4.1)
• Separare il modulo sensore dal telaio. (Fig.4.2)

- 36 - - 37 -
• Avvitare l'anello portante con viti per il fissaggio di barattoli. (Fig.4.3)
• Allacciare i collegamenti a innesto. (Fig.4.4)
• Attivare l'alimentazione di corrente. (Fig.4.6)
• Premere il tasto di programmazione ed eettuare le impostazioni del programma.
(Fig.4.5) (➜ "5.Messa in funzione")
• Unire modulo sensore e telaio ed esercitando una leggera pressione unirli a loro
volta al telaio di lamiera (anello portante).
5. Messa in funzione
Avvertenza: l'applicazione è descritta al sito knx.steinel.de
Tutte le impostazioni di fabbrica si trovano nelle descrizioni dell'applicazione.
1. Assegnate l'indirizzo fisico e create il programma applicativo nell'ETS.
2. Caricate l'indirizzo fisico e il programma applicativo nell'interruttore a muro. Quan-
do compare la relativa richiesta, premete il tasto di programmazione (E).
3. A programmazione ultimata il LED rosso si spegne.
Tasto integrato
La funzione del tasto viene stabilita nel software ETS.
6. Accessori (optional)
Telecomando utente RC7 (EAN4007841592912)
Funzioni:
- Luce ON/OFF 4h
- Reset utente
- Cambiate il livello di dimmerazione
- Memorizzate/caricate le scene
Telecomando di servizio RC6 (EAN 4007841593018)
Funzioni:
- Regolazione del raggio d'azione
- Ritardo dello spegnimento CH1/CH2
- Ritardo dell'accensione / controllo dell'ambiente CH2
- Modalità test/normale
- Teach-IN
- Reset
- Modalità IQ
SmartRemote (EAN4007841009151)
- Comando tramite smartphone o tablet
- Sostituisce tutti i telecomandi
- Caricare la app adeguata e collegare tramite Bluetooth
Descrizioni dettagliate sono contenute nelle istruzioni per l'uso del relativo teleco-
mando.
7. Smaltimento
Apparecchi elettrici, accessori e materiali d’imballaggio devono essere consegnati
agli appositi centri di raccolta e smaltimento.
Non gettare gli apparecchi elettrici nei rifiuti domestici!
Solo per paesi UE:
Conformemente alla Direttiva Europea vigente in materia di rifiuti di apparecchi elet-
trici ed elettronici e alla sua attuazione nel diritto nazionale, gli apparecchi elettrici ed
elettronici non più idonei all’uso devono essere separati dagli altri rifiuti e consegnati a
un centro di riciclaggio riconosciuto.
8. Dichiarazione di conformità
La STEINEL Vertrieb GmbH dichiara che il tipo di impianto radio HF180KNX
risponde alla Direttiva 2014/53/UE. Il testo integrale della dichiarazione di conformità
UE è disponibile al seguente indirizzo Internet: www.steinel.it
9. Garanzia del produttore
Quale acquirente Lei può rivendicare nei confronti del venditore i diritti previsti
dalla legge. Nella misura in cui tali diritti esistono nel Suo paese, la nostra
dichiarazione di garanzia né li riduce né li limita. Noi Le concediamo 5anni di
garanzia dell’impeccabile costituzione e del regolare funzionamento del Suo
prodotto a sensori STEINEL Professional. Noi garantiamo che questo prodotto
è privo di difetti di produzione e costruzione. Garantiamo la funzionalità di tutti i
componenti elettronici e di tutti i cavi nonché l’assenza di vizi di tutti i materiali
impiegati e delle loro superfici.
Rivendicazione
Se ha intenzione di esporre reclamo in merito al prodotto da Lei acquistato, La
si prega di trasmettere tale reclamo completo e arancato assieme allo scon-
trino d’acquisto o alla fattura indicante la data dell’acquisto e la denominazione
del prodotto al Suo rivenditore o direttamente a noi: STEINEL Italia S.r.l.,
Largo Donegani 2, I-20121 Milano. Le consigliamo pertanto di conservare
scrupolosamente lo scontrino d’acquisto o la fattura fino alla scadenza del
periodo di garanzia. La STEINEL declina ogni responsabilità per costi e rischi
legati al trasporto nell’ambito della restituzione del prodotto.
(Per informazioni in merito alla rivendicazione di un diritto di garanzia si prega di
consultare il nostro sito web www.steinel.it)

- 39 -- 38 -
10. Dati tecnici
Dimensioni largh. × alt. × prof. 80 × 80 × 50mm
Tensione KNX tensione bus (SELV)
Sensori A infrarossi passivi (IR) /
ad alta freqenza (HF)
Raggio d'azione IR max. 20m / HF max. 8m *
Regolazione crepuscolare 2 - 1000 Lux
Angolo di rilevamento 180°
Impostazioni mediante software ETS,
telecomando o bus
Canali illuminazione:
luce 1 – luce 4 Accendere-spegnere/dimmerizzare;
regolazione luce costante tramite
interruttore
Tempo di accensione canali illumina-
zione IQ-Modus, 1 - 255min., in funzione
della presenza e della luminosità
Misurazione luce Luce mista
Luminosità di base OFF / 1 % - 100 %
Tempo di accensione luminosità di base 1 - 255 min., tutta la notte
Uscita HVAC in funzione della presenza
Ritardo di accensione Monitoraggio ambiente, 10 - 255min.
Tempo di accensione HVAC 1 - 255min.
Uscita tempo di accensione presenza 1 - 255s omin.
Ulteriori uscite Valore di luminosità, controllo dello
scenario, sabotaggio, temperatura,
umidità dell'aria, tasto
Altezza di montaggio 1,2m
Intervallo di valori sensore termico 0 - 40 °C +/- 1 °C
Intervallo di valori sensore dell'umidità
dell'aria 0 -100 %
IP/grado di protezione IP20
Intervallo di temperatura 0°C - + 40°C (indoor)
* Il raggio d'azione nell'HF180KNX in angoli estremi dipende fortemente dalle
circostanze locali.
11. Disturbi di funzionamento
Guasto Causa Rimedio
La luce non si accende n Mancanza di tensione di
allacciamento
n Valore Lux impostato
troppo basso
n Non viene rilevato
nessun movimento
n Controllare la tensione di
allacciamento
n Aumentare lentamente il
valore Lux finché la luce
non si accende
n Fare in modo da liberare
la visuale sul sensore
n Verificare il campo di
rilevamento
La luce non si spegne n Valore Lux troppo
elevato
n Il tempo di accensione
sta scadendo
n Fonti di calore che
interferiscono, per es.
termoventilatore, porte
o finestre aperte, animali
domestici, lampadina/
faro alogeno, oggetti in
movimento
n Abbassare il valore Lux
n Aspettare la scadenza
del tempo di accensione
o all'occorrenza ridurlo
n Escludere fonti d'in-
terferenza stazionarie
mediante adesivi
Il sensore provoca lo
spegnimento delle luci
nonostante la presen-
za di persone
n Il tempo di accensione è
troppo breve
n La soglia luminosa è
troppo bassa
n Aumentare il tempo di
accensione
n Modificare la regolazione
crepuscolare
Il sensore spegne le
luci troppo tardi n Il tempo di accensione è
eccessivamente lungo n Ridurre il tempo di
accensione
In caso di senso
di marcia radiale il
sensore IR interviene
troppo tardi
n Raggio d'azione in caso
di senso di marcia radiale
inferiore che in caso di
senso di marcia tangen-
ziale
n Montare ulteriori sensori
n Ridurre la distanza tra
due sensori
Il sensore non accende
le luci in presenza di
persone nonostante
sia buio
n Valore Lux impostato
troppo basso n È stato disattivato il
sensore con l'interruttore/
il tasto?
n Funzionamento semiauto-
matico?
n Aumentare la soglia di
luminosità
Il tasto non funziona n Tasto disattivato? n Controllare l'impostazio-
ne nel software ETS
Se dovesse esporre un caso di garanzia o una domanda sul Suo prodotto, ci
può contattare al numero +39/02/96457231 dal lunedì al venerdì dalle 9:00
alle 18:00.
DI GARANZIA
3
5
ANNO
IT
DEL PRODUTTORE
DI GARANZIA
ANNI
DEL PRODUTTORE
DI GARANZIA
ANNI
DEL PRODUTTORE
Pagina se încarcă...
Pagina se încarcă...
Pagina se încarcă...
Pagina se încarcă...
Pagina se încarcă...
Pagina se încarcă...
Pagina se încarcă...
Pagina se încarcă...
Pagina se încarcă...
Pagina se încarcă...
Pagina se încarcă...
Pagina se încarcă...
Pagina se încarcă...
Pagina se încarcă...
Pagina se încarcă...
Pagina se încarcă...
Pagina se încarcă...
Pagina se încarcă...
Pagina se încarcă...
Pagina se încarcă...
Pagina se încarcă...
Pagina se încarcă...
Pagina se încarcă...
Pagina se încarcă...
Pagina se încarcă...
Pagina se încarcă...
Pagina se încarcă...
Pagina se încarcă...
Pagina se încarcă...
Pagina se încarcă...
Pagina se încarcă...
Pagina se încarcă...
Pagina se încarcă...
Pagina se încarcă...
Pagina se încarcă...
Pagina se încarcă...
Pagina se încarcă...
Pagina se încarcă...
Pagina se încarcă...
Pagina se încarcă...
Pagina se încarcă...
Pagina se încarcă...
Pagina se încarcă...
Pagina se încarcă...
Pagina se încarcă...
Pagina se încarcă...
Pagina se încarcă...
Pagina se încarcă...
Pagina se încarcă...
Pagina se încarcă...
Pagina se încarcă...
Pagina se încarcă...
Pagina se încarcă...
Pagina se încarcă...
Pagina se încarcă...
Pagina se încarcă...
Pagina se încarcă...
Pagina se încarcă...
Pagina se încarcă...
Pagina se încarcă...
Pagina se încarcă...
Pagina se încarcă...
Pagina se încarcă...
-
 1
1
-
 2
2
-
 3
3
-
 4
4
-
 5
5
-
 6
6
-
 7
7
-
 8
8
-
 9
9
-
 10
10
-
 11
11
-
 12
12
-
 13
13
-
 14
14
-
 15
15
-
 16
16
-
 17
17
-
 18
18
-
 19
19
-
 20
20
-
 21
21
-
 22
22
-
 23
23
-
 24
24
-
 25
25
-
 26
26
-
 27
27
-
 28
28
-
 29
29
-
 30
30
-
 31
31
-
 32
32
-
 33
33
-
 34
34
-
 35
35
-
 36
36
-
 37
37
-
 38
38
-
 39
39
-
 40
40
-
 41
41
-
 42
42
-
 43
43
-
 44
44
-
 45
45
-
 46
46
-
 47
47
-
 48
48
-
 49
49
-
 50
50
-
 51
51
-
 52
52
-
 53
53
-
 54
54
-
 55
55
-
 56
56
-
 57
57
-
 58
58
-
 59
59
-
 60
60
-
 61
61
-
 62
62
-
 63
63
-
 64
64
-
 65
65
-
 66
66
-
 67
67
-
 68
68
-
 69
69
-
 70
70
-
 71
71
-
 72
72
-
 73
73
-
 74
74
-
 75
75
-
 76
76
-
 77
77
-
 78
78
-
 79
79
-
 80
80
-
 81
81
-
 82
82
-
 83
83


în alte limbi
- slovenčina: STEINEL IR 180 KNX Používateľská príručka
Lucrări înrudite
-
STEINEL Light Sensor Dual KNX Manual de utilizare
-
-
-
-
-
-
-
-
-