Milwaukee M18 FNCS18GS Manual de utilizare
- Categorie
- Unelte electrice
- Tip
- Manual de utilizare

M18 FNCS18GS
Original instructions
Originalbetriebsanleitung
Notice originale
Istruzioni originali
Manual original
Oorspronkelijke
gebruiksaanwijzing
Original brugsanvisning
Original bruksanvisning
Bruksanvisning i original
Alkuperäiset ohjeet
Orijinal iletme talimatı
Pvodním návodem k používání
Pôvodný návod na použitie
Instrukcj oryginaln
Eredeti használati utasítás
Izvirna navodila
Originalne pogonske upute
Instrukcijm oriinlvalod
Originali instrukcija
Algupärane kasutusjuhend
Instruciuni de folosire originale

2 3
ENGLISH 1 2 3
Picture section
with operating description and functional description
Text section with Technical Data, important Safety and Working Hints
and description of Symbols
DEUTSCH 1 2 3
Bildteil
mit Anwendungs- und Funktionsbeschreibungen
Textteil mit Technischen Daten, wichtigen Sicherheits- und Arbeitshinweisen
und Erklärung der Symbole.
FRANÇAIS 1 2 3
Partie imagée
avec description des applications et des fonctions
Partie textuelle avec les données techniques, les consignes importantes de sécurité et de travail ainsi que
l’explication des pictogrammes.
ITALIANO 1 2 3
Sezione illustrata
con descrizione dell'applicazione e delle funzioni
Sezione testo con dati tecnici, importanti informazioni sulla sicurezza e sull‘utilizzo,
spiegazione dei simboli.
ESPAÑOL 1 2 3
Sección de ilustraciones
con descripción de aplicación y descripción funcional
Sección de texto con datos técnicos, indicaciones importantes de seguridad y trabajo y explicación de los símbolos.
PORTUGUES
1 2 3
Parte com imagens
explicativas contendo descrição operacional e funcional
Parte com texto explicativo contendo Especifi cações técnicas, Avisos de segurança e de operação e a Descrição
dos símbolos.
NEDERLANDS
1 2 3
Beeldgedeelte
met toepassings- en functiebeschrijvingen
Tekstgedeelte met technische gegevens, belangrijke veiligheids- en arbeidsinstructies en verklaring van de
symbolen.
DANSK 1 2 3
Billeddel
med anvendelses- og funktionsbeskrivelser
Tekstdel med tekniske data, vigtige sikkerheds- og arbejdsanvisninger
og symbolforklaring.
NORSK 1 2 3
Bildedel
med bruks- og funksjonsbeskrivelse
Tekstdel med tekniske data, viktige sikkerhets- og arbeidsinstruksjoner
og forklaring av symbolene.
SVENSKA 1 2 3
Bilddel
med användnings- och funktionsbeskrivning
Textdel med tekniska informationer, viktiga säkerhets- och användningsinstruktioner
samt symbolförklaringar.
SUOMI 1 2 3
Kuvasivut
käyttö- ja toimintakuvaukset
Tekstisivut: tekniset tiedot, tärkeät turvallisuus- ja työskentelyohjeet
sekä merkkien selitykset.
1 2 3
,
.
TÜRKÇE 1 2 3
Resim bölümü
Uygulama ve fonksiyon açıklamaları ile birlikte
Teknik bilgileri, önemli güvenlik ve çalıma açıklamalarını ve de sembollerin açıklamalarını
içeren metin bölümü.
ESKY 1 2 3
Obrazová ást
s popisem aplikací a funkcí
Textová ást s technickými daty, dležitými bezpenostními a pracovními pokyny
a s vysvtlivkami symbol
SLOVENSKY
1 2 3
Obrazová ass popisom aplikácií a funkcií
Textová as s technickými dátami, dôležitými bezpenostnými a pracovnými pokynmi
a s vysvetlivkami symbolov
POLSKI 1 2 3
Cz rysunkowa z opisami zastosowania i dziaania
Cz opisowa z danymi technicznymi, wanymi wskazówkami dotyczcymi bezpieczestwa i pracy oraz
objanieniami symboli.
MAGYAR 1 2 3
Képes részalkalmazási- és mködési leírásokkal
Szöveges rész mszaki adatokkal, fontos biztonsági- és munkavégzési útmutatásokkal, valamint a szimbólumok
magyarázata.
SLOVENSKO
1 2 3
Del slikez opisom uporabe in funkcij
Del besedila s tehninimi podatki, pomembnimi varnostnimi opozorili in delovnimi navodili
in pojasnili simbolov.
HRVATSKI 1 2 3
Dio sa slikamasa opisima primjene i funkcija
Dio štiva sa tehnikim podacima, važnim sigurnosnim i radnim uputama
i objašnjenjem simbola.
LATVISKI 1 2 3
Attla daa ar lietošanas un funkciju aprakstiem
Teksta daa ar tehniskajiem parametriem, svargiem drošbas un darbbas nordjumiem,
simbolu atšifrjumiem.
LIETUVIŠKAI
1 2 3
Paveiksllio dalissu vartojimo instrukcija ir funkcij aprašymais
Teksto dalis su techniniais duomenimis, svarbiomis saugumo ir darbo instrukcijomis
bei simboli paaiškinimais.
EESTI 1 2 3
Pildiosa kasutusjuhendi ja funktsioonide kirjeldusega
Tekstiosa tehniliste näitajate, oluliste ohutus- ja tööjuhenditega
ning sümbolite kirjeldustega.
1 2 3
, ,
, .
1 2 3
,
.
ROMÂNIA 1 2 3
Secvena de imagine cu descrierea utilizrii i a funcionrii
Poriune de text cu date tehnice, indicaii importante privind sigurana i modul de lucru
i descrierea simbolurilor.
1 2 3
,
.
1 2 3
,
.
1 2 3
4
4
4
4
4
4
4
4
4
4
4
4
4
4
4
4
4
4
4
4
4
4
4
4
4
4
4
4
26
30
34
38
42
46
50
54
58
62
66
70
74
78
82
86
90
94
98
102
106
110
114
118
122
126
130
139

4 5
STOP
24
14
16
18
8
10
6
20
15
12

6 7
1
1
2
2
click
78-100 %
55-77 %
33-54 %
10-32 %
< 10 %
Remove the battery pack
before starting any work on
the machine.
Vor allen Arbeiten an der
Maschine den Wechselakku
herausnehmen
Avant tous travaux sur la
machine retirer l’accu interchangeable.
Prima di iniziare togliere la batteria dalla
macchina.
Retire la batería antes de comenzar cualquier
trabajo en la máquina.
Antes de efectuar qualquer intervenção na
máquina retirar o bloco acumulador.
Voor alle werkzaamheden aan de machine
de akku verwijderen.
Ved arbejde inden i maskinen, bør batteriet
tages ud.
Ta ut vekselbatteriet før du arbeider på
maskinen
Drag ur batteripaket innan arbete utföres på
maskinen.
Tarkista pistotulppa ja verkkojohto
mahdollisilta vauriolta. Viat saa korjata vain
alan erikoismies.
Ðñéí áðü êÜèå åñãáóßá óôç ìç÷áíÞ
áöáéñåßôå ôçí áíôáëëáêôéêÞ ìðáôáñßá.
Aletin kendinde bir çalıma yapmadan önce
kartu aküyü çıkarın.
Ped zahájením veškerých prací na vrtacím
šroubováku vyjmout výmnný akumulátor.
Pred každou prácou na stroji výmenný
akumulátor vytiahnu.
Przed przystpieniem do jakichkolwiek prac
na elektronarzdziu naley wyj wkadk
akumulatorow.
Karbantartás, javítás, tisztítás, stb. eltt az
akkumulátort ki kell venni a készülékbl.
Pred deli na stroju izvlecite izmenljivi
akumulator.
Prije svih radova na stroju izvaditi bateriju za
zamjenu.
Pirms mašnai veikt jebkda veida apkopes
darbus, ir jizem r akumultors.
Prieš atlikdami bet kokius darbus renginyje,
išimkite keiiam akumuliatori.
Enne kõiki töid masina kallal võtke vahetatav
aku välja.
Bûíüòå àêêóìóëÿòîð èç ìàøèíû ïåðåä
ïðîâåäåíèåì ñ íåé êàêèõ-ëèáî
ìàíèïóëÿöèé.
.
Scoatei acumulatorul înainte de a începe
orice intervenie pe main.
.
-
.
.

8 9
1
2
3
click
1
2

10 11
Single Sequential Actuation
Einzelbetätigung
Actionnement individuel
Azionamento singolo
Accionamiento individual secuencial
Acionamento individual
Enkele bediening
Enkel aktivering
Enkelt skudd
Enkelspik
Yksittäistoimennus
Tek tetikleme
Jednotlivý nástel
Jednotlivý nástrel
Tryb pojedynczy
Egyedi mködtetés
Posamina aktivacija
Pojedinano aktiviranje
Autonom darbinšana
Vienkartinis jungimas
Üksikkäivitus
Acionare succesiv simpl
Contact (Bump) Actuation
Kontaktbetätigung
Actionnement à contact
Azionamento a contatto
Accionamiento por contacto
Acionamento de contato
Contactbediening
Kontaktaktivering
Kontakt skudd
Kontakspikning
Kosketustoimennus
Temas tetikleme
Kontaktní nástel
Kontaktný nástrel
Tryb kontaktowy
Érintéses mködtetés
Kontaktna aktivacija
Kontaktno aktiviranje
Darbinšana ar kontaktu
Kontaktinis jungimas
Kontaktkäivitus
Acionare prin contact
()
Switching on-o
Press and hold the power button for 2 seconds.
Ein-/Ausschalten
Die Power Taste ca. 2 Sekunden gedrückt halten.
Marche/Arrêt
Maintenir enfoncée la touche Power 2 secondes.
Accensione/spegnimento
Tenere premuto il tasto Power 2 sec.
Activar y desactivar
Pulse y mantenga pulsado el botón 2 seg de
encendido/accionamiento.
Ligar-Desligar
Mantenha a tecla Power pressionada 2 segundos.
In-/uitschakelen
Houd de Power-toets 2 sec. ingedrukt.
Tænd-sluk
Hold power-tasten 2 sec. nede.
Inn- utkobling
Hold Power-tasten 2 sec. trykt.
Starta-stänga av
Håll Power-knappen 2 sek intryckt.
Käynnistys - sammutus
Pidä „Power“-näppäin 2 sek. painettuna.
/
Power 2
.
Açma-Kapatma
Power tuunu basılı tutun (2 saniye)
Zapnutí-vypnutí
Držte stisknuté tlaítko Power 2 sekundy.
Zapnutie-vypnutie
Držte zatlaené tlaidlo Power 2 sekundy.
Wczanie / wyczanie
Naley trzyma wcinity przycisk zasilania (2
sekund).
Be-kikapcsolás
Tartsa nyomva a Power gombot 2 másodperc.
Vklopiti-izklopiti
Držite pritisnjeno tipko Power 2 sek.
Ukljuiti-Iskljuiti
Tipku Power 2 sec. držati pritisnutom.
Leslgšana un izslgšana
Turiet nospiestu Power-pogu 2 sek.
jungimas / išjungimas
Laikykite nuspaust galios mygtuk (2 sec).
Sisse-/väljalülitamine
Hoidke all käivitusnuppu (2 sek).
/
(2 ).
-
2 .
Pornit-Oprit
Apsai continuu butonul 2 sec. de alimentare/
funcionare.
-
.
/
(2
).
-
. 2 /
2 sec

12 13
Low Battery LED
If the red light will on, the battery is low. The tool will not be able to
fi re nails. To continue work, charge the battery.
LED Akkuladung gering
Wenn die rote LED leuchtet ist ist die Akkuladung zu gering. Der
Nagler kann keine Nägel mehr einschlagen. Um weiter zu arbeiten
den Akku laden.
LED Charge de batterie faible
Lorsque la LED rouge est allumée, la charge de la batterie est trop
faible.
La cloueuse ne peut plus enfoncer de clous. Pour continuer de
travailler, charger la batterie.
LED batteria scarica
Se la luce rossa si accende, la batteria è scarica. Il dispositivo non
sarà in grado di sparare chiodi. Per continuare il lavoro, caricare la
batteria.
Carga de batería de LED baja
Si se ilumina el LED rojo es porque la carga de batería es
demasiado baja. Por lo tanto, la clavadora no podrá clavar más
clavos. Recargue la batería si desea seguir trabajando.
LED carga da bateria fraca
Quando o LED vermelho se acender, a carga da bateria estará
muito fraca. A ferramenta não pode mais cravar pregos. Carregue a
bateria para continuar o trabalho.
Led 'Acculading gering'
Als de rode led brandt, is de acculading te gering. Het spijkerpistool
kan geen spijkers meer inslaan. Om door te kunnen werken, moet u
eerst de accu opladen.
Lavt batteri LED
Hvis indikatoren lyser rødt, er batteriet for lavt. Maskinen vil ikke
længere være i stand til at skyde søm i. Batteriet skal oplades, hvis
arbejdet skal fortsættes.
Lavt nivå på LED oppladbart batteri
Når den røde LED-en lyser er batterinivået for lavt Spikrepistolen
kan ikke slå inn spikre lenger. Lad opp batteriet for å arbeide videre.
Lysdiod för låg batterinivå
När den röda lysdioden lyser är batterinivån låg. Spikpistolen kan
inte längre slå i spikar. Ladda batteriet för att fortsätta arbetet.
LED Akun lataus vähäinen
Kun punainen LED palaa, niin akun lataus on liian alhainen.
Naulain ei voi enää lyödä nauloja sisään. Jatkaaksesi työtä lataa
akku.
,
. .
, .
LED Akü arjı yetersiz
Kırmızı LED yandıında akü arjı yetersizdir. Çivi çakma makinesi
artık çivi çakamıyor. Çalımaya devam etmek için aküyü arj
ettiriniz.
LED nízkého nabití akumulátoru
Když svítí ervená LED, je nabití akumulátoru píliš nízké.
Hebíkovaka už nemže zatloukat hebíky. Abyste mohli dále
pracovat, nabijte akumulátor.
LED nízkeho nabitia akumulátora
Ke svieti ervená LED, je nabitie akumulátora príliš nízke.
Klincovaka už nemôže zatka klince. Aby ste mohli alej pracova,
nabite akumulátor.
LED Niski poziom naadowania akumulatora
Jeli wieci si czerwona dioda LED, oznacza to, e poziom
naadowania akumulatora jest zbyt niski. Gwodziarka nie jest ju w
stanie wbija gwodzi. Aby kontynuowa prac, naley naadowa
bateri.
LED alacsony akkumulátor töltés
Ha világít a piros LED, alacsony az akkumulátor töltése. A
szögbelöv nem tud több szöget belni. Ahhoz, hogy tovább tudjon
dolgozni, töltse fel az akkumulátort!
LED luka za nizko napolnjenost akumulatorske baterije
er sveti rdea LED luka, je akumulatorska baterija premalo
napolnjena. Žebljalnik ne more ve zabijati žebljev. e želite
nadaljevati delo, napolnite akumulatorsko baterijo.
LED punjenje akumulatora nisko
Kada svjetli crveni LED, punjenje akumulatora je prenisko. Ureaj
za zabijanje avala više ne može zabijati avle. Da bi se moglo
dalje raditi, napuniti akumulator.
Nepietiekama uzldes lmea LED
Ja spd sarkan LED, tad akumulatora uzldes lmenis ir
nepietiekams. Ar naglotju vairs nevar iedzt naglas. Uzldjiet
akumulatoru, lai turpintu darbu.
Šviesadiodis maža akumuliatoriaus krova
Kai švieia raudonas šviesadiodis, per maža akumuliatoriaus
krova. Vini kaltuvas daugiau nebekala vini. Kad galtumte tsti
darb, kraukite akumuliatori.
Madala aku laetusastme LED
Kui põleb punane LED, on aku laetusaste madal. Naeluti ei suuda
rohkem naelu sisse lüüa. Edasi töötamiseks laadige akut.
,
.
.
.
LED
LED , a
.
. ,
.
LED acumulator descrcat
Dac se aprinde LED-ul rou, atunci acumulatorul nu este sufi cient
de încrcat. Maina de btut cuie nu mai poate s bat cuie.
Pentru a lucra în continuare trebuie s încrcai acumulatorul.
LED-
LED-, .
. ,
.
:
,
. .
.
LED
. LED
. .

14 15
1
2
9 sec

16 17
Switch to single sequential actiation:
Press MODE Button - LED will light.
Auf Einzelbetätigung umschalten:
MODE Taste drücken - Die LED leuchtet.
Sélectionner sur Actionnement individuel:
Appuyez sur le bouton MODE - le DEL s‘allume.
Commutare su Azionamento singolo:
Premere il pulsante MODE – Il LED si accende
con luce.
Cambie a accionamiento individual secuencial:
Presione el botón MODE - LED luz.
Comutar ao acionamento individual:
Pressione o botão MODE - O LED acende-se.
Omschakelen naar enkele bediening:
Druk op de MODE-knop – de led brandt.
Skift til enkel aktivering:
Tryk på MODE knappen – LED-lampen lyser.
Koble om til enkel skudd:
Trykk på MODE-knappen – LED-lampen lyser
hele.
Ställ om till enkelspik:
Tryck på MODE-knappen – lysdioden lyser.
Vaihda kytkennäksi yksittäistoimennus:
Paina MODE-painiketta - LED palaa jatkuvasti.
:
MODE –
.
Tek tetiklemeye ayarlama:
MODE Dümesine Basın - LED yanmakta.
Pepnte na jednotlivý nástel:
Stisknte tlaítko MODE – LED dioda svítí.
Prepnite na jednotlivý nástrel:
Stlate tlaidlo MODE – LED dióda svieti.
Przeczenie na tryb pojedynczy:
Nacinij przycisk MODE – dioda LED wieci si.
Kapcsoljon át egyedi mködtetésre:
Nyomja meg a MODE gombot – a LED
folyamatosan.
Preklop na posamino aktivacijo:
Pritisnite tipko MODE – LED sveti.
Preklopiti na pojedinano aktiviranje:
Pritisnite tipku MODE – LED svjetli.
Prsldziet autonoms darbinšanas režm:
Nospiediet pogu MODE – LED lampia spd.
Perjungti vienkartinio jungimo režim:
Paspauskite MODE mygtuk – šviesos diodas
dega.
Üksikkäivitusele ümberlülitamine:
Vajutage nuppu MODE – LED põleb.
:
MODE -
.
:
MODE – LED .
Comutai la acionarea succesiv simpl:
Apsai butonul MODE - ledul lumineaz .
:
MODE –
:
MODE -
.
:
- MODE
Push the tool against the work surface, compressing the workpiece contact.
Die Maschine gegen das Werkstück drücken. Dabei wird der Arbeitskontakt
betätigt.
Appuyer l‘outil sur la pièce à usiner. De cette façon le palpeur sera actionné.
Premere l‘utensile contro il pezzo da lavorare. In questo modo si aziona il
contatto di lavoro
Presione la herramienta contra la superfi cie de trabajo, accionando el contacto
de la pieza de trabajo.
Pressione a ferramenta contra a peça. Assim, o contato de trabalho é ativado.
Druk het gereedschap op het werkstuk. Daarbij wordt het arbeidscontact
bediend.
Tryk værktøjet imod emnet. Herved aktiveres arbejdskontakten.
Trykk verktøyet mot arbeidsemnet. Arbeidskontakten blir derved aktivert.
Tryck verktyget mot arbetsstycket. Det gör att arbetskontakten aktiveras.
Paina työkalu työkappaleeseen kiinni. Tällöin työkontakti toimentuu
,
.
Aleti i parçasına bastırın. Bu sırada çalıma kontaı tetiklenir.
Náadí zatlate proti opracovávané souásti. Pitom se aktivuje pracovní kontakt.
Náradie zatlate proti obrobku. Pri tom sa aktivuje pracovný kontakt.
Wsun narzdzie w kierunku obrabianego przedmiotu. Tym samym kontakt
roboczy zostanie wcinity.
Nyomja a szerszámot a munkadarabhoz. Ennek során a munkadarab-érintkez
mködtetésre kerül.
Pritisnite orodje ob surovec. Pri tem se sproži delovni stik.
Pritisnite alat prema izratku. Kod toga se aktivira radni kontakt.
Piespiediet darbarku pret apstrdjamo detau. Td veid tiek iedarbints
darba kontakts.
Prispauskite prietais prie ruošinio. Taip pasiekiamas darbinis kontaktas.
Suruge tööriist detaili vastu. Seejuures käivitatakse püstoli ots.
. .
,
.
Apsai unealta pe suprafaa de lucru, comprimând piesa de contact.
.
. .
.
Pull the trigger to drive the fastener.
Den Auslöser betätigen, um den Nagel einzuschlagen.
Activer l‘actionneur pour enfoncer le clou.
Attivare l‘azionatore per inserire il chiodo.
Tire del disparador para insertar el clavo.
Ative o disparador para cravar o prego.
Druk op de trigger om de spijker in te slaan.
Aktivér udløseren for at slå sømmet i.
Trekk i avtrekkeren for å skyte inn spiker.
Tryck in utlösaren för att slå i spiken.
Paina liipaisinta lyödäksesi naulan.
, .
Çiviyi çakmak için tetie basın.
Stisknte spouš, aby se mohl nastelit hebík.
Stlate spúš, aby sa mohol nastreli klinec.
Aby wbi gwód, naley wcisn przycisk wyzwalacza.
Nyomja meg a kioldót a szög belövéséhez.
Sprožite sprožilec, da zabijete žeblje.
Aktivirati okida za zabijanje avla.
Iedarbiniet sldzi naglas iedzšanai.
junkite jungikl, kad iššautumte vinis.
Vajutage päästikule, et nael sisse lüüa.
, .
, .
Apsai trgaciul pentru împucarea cuiului.
.
.
2
3
1
clack
Single Sequential Actuation
Einzelbetätigung
Actionnement individuel
Azionamento singolo
Accionamiento individual secuencial
Acionamento individual
Enkele bediening
Enkel aktivering
Enkelt skudd
Enkelspik
Yksittäistoimennus
Tek tetikleme
Jednotlivý nástel
Jednotlivý nástrel
Tryb pojedynczy
Egyedi mködtetés
Posamina aktivacija
Pojedinano aktiviranje
Autonom darbinšana
Vienkartinis jungimas
Üksikkäivitus
Acionare succesiv simpl

18 19
Switch to Contact Actuation:
Press MODE Button - LED will light.
Auf Kontaktbetätigung umschalten:
Press MODE Button - die LED leuchtet.
Sélectionner l‘actionnement à contact:
Appuyez sur le bouton MODE - le DEL s‘allume.
Commutare su Azionamento a contatto:
Premere il pulsante MODE – Il LED si accende con luce.
Cambie a accionamiento por contacto:
Presione el botón MODE - LED luz.
Comute para o acionamento de contato:
Pressione o botão MODE - O LED acende-se.
Omschakelen naar contactbediening:
Druk op de MODE-knop – de led brandt.
Skift til kontaktaktivering:
Tryk på MODE knappen – LED-lampen lyser.
Koble om til kontakt skudd:
Trykk på MODE-knappen – LED-lampen lyser hele.
Ställ om till kontaktspikning:
Tryck på MODE-knappen – lysdioden lyser.
Vaihda kytkennäksi kosketustoimennus:
Paina MODE-painiketta - LED palaa jatkuvasti.
:
MODE –
.
Temas tetiklemeye ayarlama:
MODE Dümesine Basın - LED yanmakta.
Pepnte na kontaktní nástel:
Stisknte tlaítko MODE – LED dioda svítí.
Prepnite na kontaktný nástrel:
Stlate tlaidlo MODE – LED dióda svieti.
Przeczenie na tryb kontaktowy:
Nacinij przycisk MODE – dioda LED wieci si.
Kapcsoljon át érintéses mködtetésre:
Nyomja meg a MODE gombot – a LED folyamatosan.
Preklop na kontaktno aktivacijo:
Pritisnite tipko MODE – LED sveti.
Preklapanje na kontaktno aktiviranje:
Pritisnite tipku MODE – LED svjetli.
Prsldziet darbinšanas režm ar kontaktu:
Nospiediet pogu MODE – LED lampia spd.
Perjungti kontaktinio jungimo režim:
Paspauskite MODE mygtuk – šviesos diodas dega.
Kontaktkäivitusele ümberlülitamine:
Vajutage nuppu MODE – LED põleb.
:
MODE - .
:
MODE – LED .
Comutai la acionarea prin contact:
Apsai butonul MODE - ledul lumineaz .
:
MODE –
:
MODE - .
:
- MODE
Pull and hold the trigger
Den Auslöser gedrückt halten.
Maintenir enfoncé l‘actionneur.
Tenere premuto l‘azionatore.
Tire del disparador y manténgalo
presionado
Mantenha o disparador pressionado.
Houd de trigger ingedrukt.
Hold udløseren nede.
Hold avtrekkeren trykket.
Håll utlösaren intryckt.
Pidä liipaisinta painettuna.
.
Tetii basılı tutun.
Spouš podržte zatlaenou.
Spúš podržte zatlaenú.
Trzyma przycisk wyzwalacza wcinity.
Tartsa nyomva a kioldót.
Sprožilec držite pritisnjen.
Okida držati pritisnutim.
Turiet sldzi nospiestu.
Laikykite jungikl nuspaust.
Hoidke päästikut all.
.
Apsai continuu trgaciul.
.
.
Push the tool against the work surface,
compressing the workpiece contact to drive
the fastener.
Die Maschine gegen das Werkstück
drücken. Dabei wird der Arbeitskontakt
betätigt und der Nagel eingeschlagen.
Appuyer l‘outil sur la pièce à usiner. De
cette manière, le palpeur s‘activera et le
clou sera enfoncé.
Premere l‘utensile contro il pezzo da
lavorare. In questo modo si aziona il
contatto di lavoro e viene inserito il chiodo.
Presione la herramienta contra la superfi cie
de trabajo, accionando el contacto de la
pieza de trabajo para insertar el clavo.
Pressione a ferramenta contra a peça.
Nisso, o contato de trabalho é ativado e o
prego é cravado.
Druk het gereedschap op het werkstuk.
Daarbij wordt het arbeidscontact bediend
en de spijker ingeslagen.
Tryk værktøjet imod emnet. Herved
aktiveres arbejdskontakten og sømmet
slås i
Trykk verktøyet mot arbeidsemnet.
Arbeidskontakten blir derved aktivert og
spikeren skutt inn.
Tryck verktyget mot arbetsstycket. Det gör
att arbetskontakten aktiveras och spiken
slås i.
Paina työkalu työkappaleeseen kiinni.
Tällöin työkontakti toimentuu ja naula
lyödään.
,
Aleti i parçasına bastırın. Bu sırada
çalıma kontaı tetiklenir ve çivi çakılır.
Náadí zatlate proti opracovávané
souásti. Pitom se aktivuje pracovní
kontakt a nastelí se hebík
Náradie zatlate proti obrobku. Pri tom
sa aktivuje pracovný kontakt a nastrelí sa
klinec.
Wsun narzdzie w kierunku obrabianego
przedmiotu. Tym samym nastpi
uruchomienie kontaktu roboczego i wbicie
gwodzia.
Nyomja a szerszámot a munkadarabhoz.
Ennek során a munkadarab-érintkez
mködésbe lép, és megtörténik a
szögbelövés.
Orodje pritisnite ob surovec. Pri tem se
sproži delovni stik in žebelj se zabija.
Alat pritisnite prema izratku. Kod toga e
biti aktiviran radni kontakt i avao se zabija.
Piespiediet darbarku pret apstrdjamo
detau. Td veid darba kontakts tiek
iedarbints un iedzta nagla.
Prispauskite prietais prie ruošinio. Taip
pasiekiamas darbinis kontaktas ir iššaukite
vin.
Suruge tööriist detaili vastu. Seejuures
käivitatakse püstoli ots ja nael lüüakse
sisse.
.
,
.
,
.
Apsai unealta pe suprafaa de lucru,
comprimând piesa de contact pentru
împucarea cuiului.
.
.
.
.
2
3
1
Contact (Bump) Actuation
Kontaktbetätigung
Actionnement à contact
Azionamento a contatto
Accionamiento por contacto
Acionamento de contato
Contactbediening
Kontaktaktivering
Kontakt skudd
Kontakspikning
Kosketustoimennus
Temas tetikleme
Kontaktní nástel
Kontaktný nástrel
Tryb kontaktowy
Érintéses mködtetés
Kontakta aktivacija
Kontaktno aktiviranje
Darbinšana ar kontaktu
Kontaktinis jungimas
Kontaktkäivitus
Acionare prin contact
()

20 21
1
3
5
2
6
4
Retract a dropped striker.
Zurücksetzen eines verklemmten
Schlagkörpers.
Retrait d‘un élément de frappe coincé.
Ripristino del percussore inceppato.
Retirada de un impactador atascado.
Retração dum corpo de impacto
emperrado.
Het terugzetten van een vastgelopen
slagpen.
Udtrækning af et fastklemt slagemne.
Tilbaketrekking av en fastklemt
slaglegeme.
Återställning av en fastklämd slagkropp.
Kiinnijuuttuneen iskurin vapauttaminen.
,
.
Sıkımı olan bir darba parçasının geri
çekilmesi.
Vysunutí zaseknutého nastelovacího
tlesa.
Vysunutie zaseknutého nastreovacieho
telesa.
Wyjmij zakleszczon zszywk.
A megszorult beüttest visszaállítása.
Namestitev zataknjenega udarnega
nastavka v izhodišni položaj.
Vraanje jednog zaglavljenog udarnog
tijela na poetak.
Ielta skavotja belža atiestatšana.
Užstrigusio smgiuotuvo atstatymas.
Akuga klammerdaja vabastamine
kinnikiilumise korral.
.
.
Retragerea percutorului înepenit.
.
,
, .
.

22 23
9
11
10
8
7

24 25
1
2

2726
M18 FNCS18GS
.........4770 95 02
...000001-999999
.................0 °
............1,24 mm
......9,5/38,1 mm
.............108
.................3 /sec.
...............18 V
2,8 kg ... 4,0 kg
... -18°C ... +50 °C
.. M18B...M18HB...
M12-18 C...M1418 C6
............80,8 dB (A)
............91,8 dB (A)
............2,21 m/s2
..............1,5 m/s2
ENGLISH
TECHNICAL DATA CORDLESS STAPLER
Production code........................................................................................
Collation angle ..........................................................................................
Fastener type: brad
Diameter ................................................................................................
Length min./max. ...................................................................................
Magazine capacity (number of nails) ........................................................
Cycle rate .................................................................................................
Battery voltage..........................................................................................
Weight according EPTA-Procedure 01/2014 (2.0 Ah ... 12.0 Ah) .............
Recommended ambient operating temperature .......................................
Recommended battery types....................................................................
Recommended charger ............................................................................
Noise/vibration information
Measured values determined according to EN 60 745.
Typically, the A-weighted noise levels of the tool are:
Sound pressure level (Uncertainty K=3dB(A)) .........................................
Sound power level (Uncertainty K=3dB(A)) ..............................................
Wear ear protectors!
Total vibration values (vector sum in the three axes) determined
according to EN 60 745.
Vibration emission value ah ...................................................................
Uncertainty K= .......................................................................................
WARNING Read all safety warnings, instructions,
illustrations and specifi cations provided with this power tool.
Failure to follow all instructions listed below may result in electric
shock, fi re and/or serious injury.
Save all warnings and instructions for future reference.
CORDLESS STAPLER SAFETY WARNINGS
Always assume that the tool contains fasteners. Careless
handling of the stapler can result in unexpected fi ring of fasteners
and personal injury.
Do not point the tool towards yourself or anyone nearby.
Unexpected triggering will discharge the fastener causing an injury.
Do not actuate the tool unless the tool is placed fi rmly against
the workpiece. If the tool is not in contact with the workpiece, the
fastener may be defl ected away from your target.
Disconnect the tool from the power source when the fastener
jams in the tool. While removing a jammed fastener, the stapler
may be accidentally activated if it is plugged in.
Use caution while removing a jammed fastener. The
mechanism may be under compression and the fastener may be
forcefully discharged while attempting to free a jammed condition.
Do not use this stapler for fastening electrical cables. It is not
designed for electric cable installation and may damage the
insulation of electric cables thereby causing electric shock or fi re
hazards.
Wear ear protectors. Exposure to noise can cause hearing loss.
Hold power tool by insulated gripping surfaces, when
performing an operation where the nail may contact hidden
wiring. Nails contacting a “live” wire may make exposed metal
parts of the power tool “live” and could give the operator an electric
shock.
Always wear eye protection with side shields. Everyday
glasses have only impact resistant lenses. They are not safety
glasses. Following this rule will reduce the risk of serious personal
injury.
Eye protection provides protection against flying particles
both from the FRONT and SIDE should ALWAYS be worn by
the operator and others in the work area when loading,
operating or servicing this tool. Eye protection is required to
guard against flying fasteners and debris, which could cause
severe eye injury.
Always remove the battery before adjusting the depth of drive
wheel.
Do not pull back on the adjustment wheel, the wheel is designed to
be rotated.
Do not press the trigger while adjusting the depth of drive wheel.
Always select full sequential fi ring mode before adjusting the depth
of drive.
Do not point the tool towards yourself or anyone nearby when
adjusting the depth of drive.
ADDITIONAL SAFETY INSTRUCTIONS
Always be aware that misuse and improper handling of this tool
can cause injury to yourself and others.
The tool is designed for single-hand use. Do not hold the tool by
the front of the magazine. Do not put hands, head, or other parts of
your body near the bottom of the magazine where the nail exits the
tool, as serious personal injury could be caused.
Always ensure that the workpiece contact is fully positioned above
the workpiece. Positioning the workpiece contact only partially
above the workpiece could cause the nail to miss the workpiece
completely and result in serious personal injury.
Do not drive nails near edge of material. The workpiece may split
causing the nail to ricochet, injuring you or a coworker. Be aware
that the nail may follow the grain of the wood, causing it to protrude
unexpectedly from the side of the work material or defl ect, possibly
causing injury.
WARNING
The vibration and noise emission level given in this information sheet has been measured in accordance with a standardized test given in
EN 60745 and may be used to compare one tool with another. It may be used for a preliminary assessment of exposure.
The declared vibration and noise emission level represents the main applications of the tool. However if the tool is used for di erent
applications, with di erent accessories or poorly maintained, the vibration and noise emission may di er. This may signifi cantly increase the
exposure level over the total working period.
An estimation of the level of exposure to vibration and noise should also take into account the times when the tool is switched o or when it
is running but not actually doing the job. This may signifi cantly reduce the exposure level over the total working period.
Identify additional safety measures to protect the operator from the e ects of vibration and noise such as: maintain the tool and the
accessories, keep the hands warm, organization of work patterns.
ENGLISH
Keep hands and body parts clear of immediate work area. Hold
workpiece with clamps when necessary to keep hands and body
out of potential harm. Be sure the workpiece is properly secured
before pressing the fastener against the material. The workpiece
contact may cause the work material to shift unexpectedly. Keep
face and body parts away from back of the tool cap when working
in restricted areas. Sudden recoil can result in impact to the body,
especially when nailing into hard or dense material.
During normal use the tool will recoil immediately after driving a
fastener. This is a normal function of the tool. Do not attempt to
prevent the recoil by holding the stapler against the work.
Restriction to the recoil can result in a second fastener being
driven from the stapler. Grip the handle fi rmly, let the tool do the
work and do not place second hand on top of tool or near exhaust
at any time. Failure to heed this warning can result in serious
personal injury.
Do not drive fasteners on top of other fasteners or with the tool at
an overly steep angle as this may cause defl ection of fasteners
which could cause injury.
Always check the work area for hidden wiring, gas lines, water
lines, etc., before using the product on such work area.
After using the product in the contact actuation mode, switch it
back to the full sequential mode.
The driving depth of the nail may be adjusted beyond air pressure.
It is advisable to test the depth on a scrap workpiece to determine
the required depth for the application.
Only fasteners matching the description in the Technical Data can
be used with this tool. Using incorrect fasteners may lead to
jamming or other malfunctions.
Do not select contact actuation mode when working on sca olds,
ladders or platforms where you may need to move your body
position. You may unintentionally fi re a nail by inadvertent
activation of the workpiece contact while moving about if the
contact actuation mode is selected. When moving positions, select
full sequential activation or deactivate the product completely by
removing the battery pack. This will reduce the potential for injury
to yourself and others.
Do not dispose of used battery packs in the household refuse or by
burning them. Milwaukee Distributors o er to retrieve old batteries
to protect our environment.
Do not store the battery pack together with metal objects (short
circuit risk).
No metal parts must be allowed to enter the battery section of the
charger (short circuit risk).
Use only 18 V chargers for charging 18 V battery packs. Do not
use battery packs from other systems.
Never break open battery packs and chargers and store only in dry
rooms. Keep dry at all times.
Battery acid may leak from damaged batteries under extreme load
or extreme temperatures. In case of contact with battery acid wash
it o immediately with soap and water. In case of eye contact rinse
thoroughly for at least 10 minutes and immediately seek medical
attention.
Warning! To reduce the risk of fi re, personal injury, and product
damage due to a short circuit, never immerse your tool, battery
pack or charger in fl uid or allow a fl uid to fl ow inside them.
Corrosive or conductive fl uids, such as seawater, certain industrial
chemicals, and bleach or bleach containing products, etc., can
cause a short circuit.
SPECIFIED CONDITIONS OF USE
The stapler is intended for driving staples into wood or similar soft
materials from a magazine containing a strip of suitable nails. The
staple strip which can be safely loaded into the magazine for the
product are described in the product specifi cation table in this
manual. Do not use any other type of staple or fi xing with the
Stapler. The Stapler should not be used for fi xing electric cables.
Do not use this product in any other way as stated for normal use.
EC-DECLARATION OF CONFORMITY
We declare as the manufacturer under our sole responsibility that
the product described under “Technical Data” fulfi lls all the relevant
regulations and the directives 2011/65/EU (RoHS), 2014/30/EU,
2006/42/EC, and the following harmonized standards have been
used:
EN 60745-1:2009+A11:2010
EN 60745-2-16:2010
EN 55014-1:2017+A11:2020
EN 55014-2:2015
EN IEC 63000:2018
Winnenden, 2020-11-18
Alexander Krug
Managing Director
Authorized to compile the technical fi le.
Techtronic Industries GmbH
Max-Eyth-Straße 10
71364 Winnenden
Germany
GB-DECLARATION OF CONFORMITY
We declare as the manufacturer under our sole responsibility that
the product described under “Technical Data” fulfi lls all the relevant
provisions of the following Regulations S.I. 2008/1597 (as
amended), S.I. 2016/1091 (as amended), S.I. 2012/3032 (as
amended) and that the following designated standards have been
used:
BS EN 60745-1:2009+A11:2010
BS EN 60745-2-16:2010
BS EN 55014-1:2017+A11:2020
BS EN 55014-2:2015
BS EN IEC 63000:2018
Winnenden, 2020-11-18
Alexander Krug
Managing Director
Authorized to compile the technical fi le.
Techtronic Industries GmbH
Max-Eyth-Straße 10
71364 Winnenden
Germany
BATTERIES
Battery packs which have not been used for some time should be
recharged before use.
Temperatures in excess removeof 50°C (122°F) reduce the
performance of the battery pack. Avoid extended exposure to heat
or sunshine (risk of overheating).
The contacts of chargers and battery packs must be kept clean.
For an optimum life-time, after use, the battery packs have to be
fully charged.
To obtain the longest possible battery life remove the battery pack
from the charger once it is fully charged.
"For battery pack storage longer than 30 days:
Store the battery pack where the temperature is below 27°C and
away from moisture
Store the battery packs in a 30% - 50% charged condition
Every six months of storage, charge the pack as normal.
TRANSPORTING LITHIUM BATTERIES
Lithium-ion batteries are subject to the Dangerous Goods
Legislation requirements.

28 29
Transportation of those batteries has to be done in accordance
with local, national and international provisions and regulations.
• The user can transport the batteries by road without further
requirements.
• Commercial transport of Lithium-Ion batteries by third parties is
subject to Dangerous Goods regulations. Transport preparation
and transport are exclusively to be carried out by appropriately
trained persons and the process has to be accompanied by
corresponding experts.
When transporting batteries:
• Ensure that battery contact terminals are protected and insulated
to prevent short circuit.
• Ensure that battery pack is secured against movement within
packaging.
• Do not transport batteries that are cracked or leak.
Check with forwarding company for further advice
OPERATION
There are two ways for working with this stapler (see also picture
section):
Single Sequential Actuation:
Drive the fastener by pulling the trigger.
Contact (Bump) Actuation:
Hold the trigger and drive the fastener by pushing the stapler
against the workpiece.
Reload Indicator
To indicate that the magazine is almost empty of staples (about 4-5
left), the workpiece contact will not compress, preventing operation
under usual pressure. Install more staples to continue working.
Setting the Depth of Drive (see picture section)
Know what is behind your workpiece. A staple could travel through
the workpiece and out the other side, striking a bystander and
causing serious injury. Lower the depth of drive to prevent the
staple from being pushed all the way through the workpiece.
CLEARING A JAMMED FASTENER
Most jams are caused by a fastener or part of a fastener wedging
between the driver blade and the nail guide. Fastener strips with
an incorrect collation angle or the wrong fastener gauge may
cause continuous jamming.
To clear the jam:
1. Remove battery pack.
2. WARNING! Always point the tool away from yourself and
others when installing or removing fasteners. Failure to do so
could result in injury.
3. Remove fastener strip from magazine.
4. Remove the fastener using needle-nose pliers. If necessary,
remove magazine from tool.
5. Follow the steps under "Required Daily Testing" before
restarting the work.
REQUIRED DAILY TESTING
WARNING: To reduce the risk of injury to yourself and
others, test the tool before beginning work each day or if the
tool is dropped, received a sharp blow, been run over, etc.
Complete the following checklist IN ORDER. If the tool does
not work as it should, contact a MILWAUKEE service facility
immediately.
Always point tool away from yourself and others.
6. Remove battery pack.
WARNING! Always point the tool away from yourself and
others when installing fasteners. Failure to do so could result in
injury.
7. Check all screws, bolts, nuts, and pins on the tool. Any loose
fasteners must be tightened.
8. Pull back the fastener pusher on the magazine (to override the
Reload Indicator) and press the workpiece contact against a
workpiece. It must move smoothly.
9. With the workpiece contact pressed against the workpiece, pull
the trigger. It must move smoothly.
10. Insert battery pack.
11. Select the Single Sequential Actuation Operation. Without
pulling the trigger, pull back the fastener pusher on the
magazine (to override the Reload Indicator) and press the
workpiece contact against a workpiece. The tool must not
operate. Holding the workpiece contact away from the
workpiece, pull back the fastener pusher on the magazine (to
override the Reload Indicator). Pull and hold the trigger for 5
seconds. The tool must not operate. Continue to pull and hold
the trigger and push the workpiece contact against a
workpiece. The tool must not operate. Without pulling the
trigger, pull back the fastener pusher on the magazine (to
override the Reload Indicator) and press the workpiece contact
against a workpiece. Pull the trigger. The tool must operate.
Release the trigger. The driver must move up.
12. Select the Contact Actuation Operation. Holding the workpiece
contact away from the workpiece, pull back the fastener
pusher on the magazine (to override the Reload Indicator) and
pull the trigger. The tool must not operate. Continue to pull and
hold the trigger and push the workpiece contact against a
workpiece. The tool must operate.
13. If all previous tests work properly, set the tool for your work.
Select the operation and load fastener strips.
14. Set the depth of drive according to the "Setting the Depth of
Drive" section and see picture section.
15. If all tests operate properly, the tool is ready for use. Repeat
these tests before use each day or if the tool is dropped,
received a sharp blow, been run over, jammed, etc.
MAINTENANCE
The ventilation slots of the machine must be kept clear at all times.
Use only Milwaukee accessories and Milwaukee spare parts.
Should components need to be replaced which have not been
described, please contact one of our Milwaukee service agents
(see our list of guarantee/service addresses).
If needed, an exploded view of the tool can be ordered. Please
state the machine type printed as well as the six-digit No. on the
label and order the drawing at your local service agents or directly
at: Techtronic Industries GmbH, Max-Eyth-Straße 10,
71364 Winnenden, Germany.
SYMBOLS
CAUTION! WARNING! DANGER!
Remove the battery pack before starting any work
on the machine.
Please read the instructions carefully before
starting the machine.
Always wear goggles when using the machine.
Wear gloves!
Wear ear protectors!
ENGLISH ENGLISH
Keep hands away!
Warning of gas cylinders
Do not dispose electric tools, batteries/
rechargeable batteries together with household
waste material.
Electric tools and batteries that have reached the
end of their life must be collected separately and
returned to an environmentally compatible
recycling facility.
Check with your local authority or retailer for
recycling advice and collection point.
n0No-load speed
VVolts
Direct current
European Conformity Mark
British Confomity Mark
Ukraine Conformity Mark
EurAsian Conformity Mark

3130
M18 FNCS18GS
.........4770 95 02
...000001-999999
.................0 °
............1,24 mm
......9,5/38,1 mm
.............108
.................3 /sec.
...............18 V
2,8 kg ... 4,0 kg
... -18°C ... +50 °C
.. M18B...M18HB...
M12-18 C...M1418 C6
............80,8 dB (A)
............91,8 dB (A)
............2,21 m/s2
..............1,5 m/s2
WEITERE SICHERHEITS- UND ARBEITSHINWEISE
Seien Sie sich immer bewusst, dass Missbrauch und falsche
Handhabung dieses Werkzeugs zu Verletzungen von Ihnen und
anderen Personen führen kann.
Das Werkzeug ist zur Benutzung mit einer Hand entworfen
worden. Das Produkt darf nur an dem Handgri gehalten werden.
Halten Sie die andere Hand fern von dem Arbeitsbereich und dem
Produkt. Platzieren Sie Ihren Kopf oder andere Körperteile nicht in
der Nähe des Produktes, während Sie Nägel einschlagen, um
schwere Verletzungen zu vermeiden.
Stellen Sie immer sicher, dass die Mündung vollständig über dem
Werkstück ist. Wenn die Mündung nur teilweise über dem
Werkstück platziert ist, kann die Klammer das Werkstück
vollständig verfehlen und zu schweren Verletzungen führen.
Schießen Sie keine Nägel an der Materialkante ein. Das
Werkstück kann sich spalten und der Befestigungsmittel abprallen,
und Sie oder einen anderen Arbeiter verletzen. Seien Sie sich
bewusst,
dass der Befestigungsmittel der Holzmaserung folgen kann und
dadurch unversehens aus der Seite des Arbeitsmaterials
heraustreten oder umgelenkt werden, und Verletzungen
verursachen kann.
Halten Sie Ihre Hände und Körperteile fern vom unmittelbaren
Arbeitsbereich. Halten Sie das Werkstück, wenn nötig mit
Klemmen fest, um Hände und Körper aus dem Gefahrenbereich zu
halten. Stellen Sie sicher, dass das Werkstück gesichert ist, bevor
Sie die Klammern gegen das Material drücken. Kontakt mit dem
Werkstück kann zu unerwarteter Bewegung des Arbeitsmaterials
führen. Halten Sie Gesicht und Körperteile von der Rückseite des
Werkzeugs fern, wenn Sie in enger Umgebung arbeiten.
Plötzlicher Rückschlag kann zu einem Schlag auf den Körper
führen, besonders beim Arbeiten in hartem oder dichtem Material.
Bei normaler Benutzung schlägt das Werkzeug sofort nach dem
Einschießen einer Klammer zurück. Versuchen Sie nicht, den
Rückschlag zu verhindern, indem Sie den Tacker gegen das
Werkstück halten. Einschränkung des Rückschlags kann dazu
führen, dass eine zweite Klammer eingeschossen wird. Halten Sie
den Gri fest, lassen Sie das Werkzeug die Arbeit machen und
platzieren Sie Ihre zweite Hand niemals auf dem Werkzeug oder in
der Nähe der Mündung. Die Nichtbeachtung dieser Warnung kann
zu schweren Verletzungen führen.
Schießen Sie keine Klammern über anderen, bereits gesetzten
Klammer oder in einem übermäßig steilen Winkel, weil dadurch
Klammern abgelenkt werden und Verletzungen verursachen
können.
Überprüfen Sie immer den Arbeitsbereich auf versteckte
Verkabelung, Gasleitungen, Wasserleitungen usw., bevor Sie das
Produkt in dem Arbeitsbereich benutzen.
Schalten Sie das Produkt zurück auf Einzelauslösung, nachdem
Sie es mit Kontaktauslösung benutzt haben.
Die Einschlagtiefe des Nagels kann über die benötigte Tiefe hinaus
eingestellt werden. Es ist ratsam die Einschlagtiefe an einem
Abfallstück zu testen, um die Tiefe für die Aufgabe zu überprüfen
und, wenn notwendig, einzustellen.
Nur Klammern die der Beschreibung in der Produktspezifi kation
entsprechen können mit diesem Werkzeug benutzt werden.
Benutzung der falschen Klammern kann zu Verklemmen oder
anderen Fehlfunktionen führen.
Wählen Sie nicht den Kontakt-Auslösemodus, wenn Sie auf
Gerüsten, Leitern oder Plattformen arbeiten, wo Sie Ihre
Körperhaltung vielleicht verändern müssen. Sie könnten
unbeabsichtigt durch versehentliches Auslösen des Kontakt-
Auslösers einen Nagel abfeuern, während Sie sich bewegen und
der Kontakt-Auslösemodus gewählt ist. Wenn Sie die Position
ändern, wählen Sie den Einzelauslösemodus mit Sicherungsfolge
oder deaktivieren das Produkt vollständig, indem Sie den Akku
entnehmen. Das verringert die Gefahr von Verletzungen für Sie
und andere.
Verbrauchte Wechselakkus nicht ins Feuer oder in den Hausmüll
werfen. Milwaukee bietet eine umweltgerechte Alt-Wechselakku-
Entsorgung an; bitte fragen Sie Ihren Fachhändler.
Wechselakkus nicht zusammen mit Metallgegenständen
aufbewahren (Kurzschlussgefahr).
In den Wechselakku-Einschubschacht der Ladegeräte dürfen keine
Metallteile gelangen (Kurzschlussgefahr).
Wechselakkus des Systems18 V nur mit Ladegeräten des Systems
18 V laden. Keine Akkus aus anderen Systemen laden.
Wechselakkus und Ladegeräte nicht ö nen und nur in trockenen
Räumen lagern. Vor Nässe schützen.
Unter extremer Belastung oder extremer Temperatur kann aus
beschädigten Wechselakkus Batteriefl üssigkeit auslaufen. Bei
Berührung mit Batteriefl üssigkeit sofort mit Wasser und Seife
abwaschen. Bei Augenkontakt sofort mindestens 10 Minuten
gründlich spülen und unverzüglich einen Arzt aufsuchen.
Warnung! Um die durch einen Kurzschluss verursachte Gefahr
eines Brandes, von Verletzungen oder Produktbeschädigungen zu
vermeiden, tauchen Sie das Werkzeug, den Wechselakku oder
das Ladegerät nicht in Flüssigkeiten ein und sorgen Sie dafür,
dass keine Flüssigkeiten in die Geräte und Akkus eindringen.
Korrodierende oder leitfähige Flüssigkeiten, wie Salzwasser,
bestimmte Chemikalien und Bleichmittel oder Produkte, die
Bleichmittel enthalten, können einen Kurzschluss verursachen.
BESTIMMUNGSGEMÄSSE VERWENDUNG
Der Tacker ist vorgesehen, um Klammern aus einem Magazin mit
einem Streifen geeigneter Klammern in Holz oder ähnlich weiches
Material einzuschlagen. Klammern, die sicher in das Magazin
geladen werden können, sind in der Tabelle der technischen Daten
in dieser Bedienungsanleitung beschrieben, Verwenden Sie keine
anderen Arten von Klammern mit dem Tacker. Der Tacker sollte
nicht zur Befestigung von elektrischen Kabeln benutzt werden.
Dieses Gerät darf nur wie angegeben bestimmungsgemäß
verwendet werden.
EG-KONFORMITÄTSERKLÄRUNG
Wir erklären als Hersteller in alleiniger Verantwortung, dass das
unter „Technische Daten“ beschriebene Produkt mit allen
relevanten Vorschriften der Richtlinien 2011/65/EU (RoHS),
2014/30/EU, 2006/42/EG und den folgenden harmonisierten
normativen Dokumenten übereinstimmt:
EN 60745-1:2009+A11:2010
EN 60745-2-16:2010
EN 55014-1:2017+A11:2020
EN 55014-2:2015
EN IEC 63000:2018
Winnenden, 2020-11-18
Alexander Krug
Managing Director
Bevollmächtigt die technischen Unterlagen zusammenzustellen.
Techtronic Industries GmbH
Max-Eyth-Straße 10
71364 Winnenden
Germany
DEUTSCH
TECHNISCHE DATEN AKKU TACKER
Produktionsnummer .................................................................................
Magazin Winkel ........................................................................................
Nageltyp: Nagelstift
Durchmesser .........................................................................................
Länge min./max. ....................................................................................
Magazingröße (Anzahl der Nägel)............................................................
Taktrate .....................................................................................................
Spannung Wechselakku ...........................................................................
Gewicht nach EPTA-Prozedur 01/2014 (2,0 Ah ... 12,0 Ah) .....................
Empfohlene Umgebungstemperatur beim Arbeiten..................................
Empfohlene Akkutypen .............................................................................
Empfohlene Ladegeräte ...........................................................................
Geräusch/Vibrationsinformation
Messwerte ermittelt entsprechend EN 60 745.
Der A-bewertete Geräuschpegel des Gerätes beträgt typischerweise:
Schalldruckpegel (Unsicherheit K=3dB(A)) ..............................................
Schallleistungspegel (Unsicherheit K=3dB(A)) .........................................
Gehörschutz tragen!
Schwingungsgesamtwerte (Vektorsumme dreier Richtungen) ermittelt
entsprechend EN 60745.
Schwingungsemissionswert ah ..............................................................
Unsicherheit K= .....................................................................................
Elektroleitungen geeignet, kann die Isolierung von Kabeln
beschädigen und so elektrischen Schlag und Feuergefahren
verursachen.
Tragen Sie Gehörschutz. Die Einwirkung von Lärm kann
Gehörverlust bewirken.
Halten Sie das Gerät an den isolierten Gri fl ächen, vor allem
bei Arbeiten, bei denen verdeckte Leitungen getro en werden
könnten. Nägel, die auf stromführende Leitungen tre en,
übertragen den Strom auf die Metallteile des Werkzeugs, was zu
einem Stromschlag für den Bediener führen kann.
Tragen Sie immer eine Schutzbrille mit seitlicher
Abschirmung. Normale Brillen haben nur stoßfeste Gläser. Sie
gelten nicht als Schutzbrillen. Die Beachtung dieser Regeln
verringert das Verletzungsrisiko.
Die Schutzbrille schützt sowohl von VORNE als auch von der
SEITE vor umherfl iegenden Partikeln. Tragen Sie beim
Bestücken, Bedienen und bei der Instandhaltung des
Werkzeugs IMMER eine Schutzbrille. Die Schutzbrille wird zum
Schutz vor Schmutz und Nägeln benötigt, die schwere
Augenverletzungen verursachen können.
Entfernen Sie immer den Akku, bevor Sie das Stellrad zur
Tiefenanschlageinstellung einstellen.
Ziehen Sie das Einstellrad nicht nach hinten. Das Rad ist für
Drehungen vorgesehen.
Drücken Sie nicht den Abzug während Sie das Stellrad zur
Tiefenanschlageinstellung einstellen.
Wählen Sie immer die Einzelauslösung, bevor sie den
Tiefenanschlag einstellen.
Richten sie das Werkzeug nicht auf sich selbst oder andere, wenn
Sie den Tiefenanschlag einstellen.
DEUTSCH
WARNUNG!
Die angegebenen Schwingungsgesamtwerte und Geräuschemissionswerte wurden nach einem genormten Messverfahren gemäß EN
60745 gemessen und können für den Vergleich von Elektrowerkzeugen miteinander verwendet werden. Es kann für eine vorläufi ge
Einschätzung der Belastung verwendet werden.
Der angegebene Schwingungs- und Geräuschemissionspegel repräsentiert die hauptsächlichen Anwendungen des Elektrowerkzeugs.
Wenn allerdings das Elektrowerkzeug für andere Anwendungen, mit abweichenden Einsatzwerkzeugen oder ungenügender Wartung
eingesetzt wird, können sich die Schwingungs- und Geräuschemissionen unterscheiden. Dies kann deren Wirkung über den gesamten
Arbeitszeitraum deutlich erhöhen.
Bei der Abschätzung der Belastung durch Schwingungen und Lärm sollten auch die Zeiten berücksichtigt werden, in denen das
Elektrowerkzeug ausgeschaltet ist oder zwar läuft, aber keine tatsächliche Arbeit verrichtet wird. Dies kann deren Wirkung über den
gesamten Arbeitszeitraum deutlich reduzieren.
Legen Sie zusätzliche Sicherheitsmaßnahmen zum Schutz des Bedieners vor den Auswirkungen von Schwingungen- und / oder Lärm fest,
wie z. B.: Wartung des Werkzeugs und des Zubehörs, Warmhalten der Hände, Organisation der Arbeitsabläufe.
WARNUNG! Lesen Sie alle Sicherheitshinweise,
Anweisungen, Darstellungen und Spezifi kationen für dieses
Elektrowerkzeug. Versäumnisse bei der Einhaltung der
nachstehenden Anweisungen können elektrischen Schlag, Brand
und/oder schwere Verletzungen verursachen.
Bewahren Sie alle Sicherheitshinweise und Anweisungen für
die Zukunft auf.
SICHERHEITSHINWEISE FÜR AKKU TACKER
Gehen Sie immer davon aus, dass das Elektrowerkzeug
Klammern enthält. Die sorglose Handhabung des Eintreibgeräts
kann zu unerwartetem Ausschießen von Klammern führen und Sie
verletzen.
Zielen Sie mit dem Elektrowerkzeug nicht auf sich selbst oder
andere Personen in der Nähe. Durch unerwartetes Auslösen wird
eine Klammer ausgestoßen, was zu Verletzungen führen kann.
Betätigen Sie das Elektrowerkzeug nicht, bevor es fest auf
das Werkstück gesetzt ist. Wenn das Elektrowerkzeug keinen
Kontakt mit dem Werkstück hat, kann die Klammer von der
Befestigungsstelle abprallen.
Trennen Sie das Elektrowerkzeug vom Netz oder vom Akku,
wenn die Klammer im Elektrowerkzeug klemmt. Wenn das
Eintreibgerät angeschlossen ist, kann es beim Entfernen einer fest
sitzenden Klammer versehentlich betätigt werden.
Seien Sie vorsichtig beim Entfernen einer festsitzenden
Klammer. Das System kann gespannt sein und die Klammer
kräftig ausgestoßen werden, während Sie versuchen die
Klemmung zu beseitigen.
Verwenden Sie dieses Eintreibgerät nicht zur Befestigung von
Elektroleitungen. Es ist nicht für die Installation von

32 33
AKKUS
Längere Zeit nicht benutzte Wechselakkus vor Gebrauch
nachladen.
Eine Temperatur über 50°C vermindert die Leistung des
Wechselakkus. Längere Erwärmung durch Sonne oder Heizung
vermeiden.
Die Anschlusskontakte an Ladegerät und Wechselakku sauber
halten.
Für eine optimale Lebensdauer müssen nach dem Gebrauch die
Akkus voll geladen werden.
Für eine möglichst lange Lebensdauer sollten die Akkus nach dem
Aufl aden aus dem Ladegerät entfernt werden.
Bei Lagerung des Akkus länger als 30 Tage:
Akku bei ca. 27°C und trocken lagern.
Akku bei ca. 30%-50% des Ladezustandes lagern.
Akku alle 6 Monate erneut aufl aden.
TRANSPORT VON LITHIUM-IONEN-AKKUS
Lithium-Ionen-Akkus fallen unter die gesetzlichen Bestimmungen
zum Gefahrguttransport.
Der Transport dieser Akkus muss unter Einhaltung der lokalen,
nationalen und internationalen Vorschriften und Bestimmungen
erfolgen.
• Verbraucher dürfen diese Akkus ohne Weiteres auf der Straße
transportieren.
• Der kommerzielle Transport von Lithium-Ionen-Akkus durch
Speditionsunternehmen unterliegt den Bestimmungen des
Gefahrguttransports. Die Versandvorbereitungen und der
Transport dürfen ausschließlich von entsprechend geschulten
Personen durchgeführt werden. Der gesamte Prozess muss
fachmännisch begleitet werden.
Folgende Punkte sind beim Transport von Akkus zu beachten:
• Stellen Sie sicher, dass die Kontakte geschützt und isoliert sind,
um Kurzschlüsse zu vermeiden.
• Achten Sie darauf, dass der Akkupack innerhalb der Verpackung
nicht verrutschen kann.
• Beschädigte oder auslaufende Akkus dürfen nicht transportiert
werden.
Wenden Sie sich für weitere Hinweise an Ihr
Speditionsunternehmen.
HANDHABUNG
Dieser Tacker verfügt über zwei Betriebsarten (siehe dazu auch
die Abbildungen):
Einzelbetätigung:
Die Klammer wird durch Betätigen des Auslösers eingeschlagen.
Kontaktbetätigung:
Den Auslöser gedrückt halten, damit die Klammer bei Kontakt mit
dem Werkstück automatisch eingeschlagen wird.
Nachfüllanzeige
Wenn das Magazin fast leer ist (nur noch 4–5 Klammern
enthalten), wird der Arbeitskontakt unter normalem Druck nicht
ausgelöst und es wird keine Klammer eingetrieben. Füllen Sie das
Magazin auf, um weiterzuarbeiten.
Einschlagtiefe einstellen (siehe Abbildungen)
Prüfen Sie, was sich hinter dem Werkstück befi ndet. Die Klammer
kann beim Einschlagen durch das Werkstück hindurch gehen und
dabei andere Personen ernsthaft verletzen. Verringern Sie bei
Bedarf die Einschlagtiefe, um zu verhindern, dass die Klammer
das Werkstück durchschlägt.
VERKLEMMTEN NAGEL ENTFERNEN
Die meisten Verklemmungen werden durch einen Nagel oder
Nagelteil verursacht, der zwischen dem Mitnehmerblatt und der
Nagelführung eingeklemmt ist. Nagelstreifen mit einem falschen
Kollationswinkel oder einer falschen Größe können zu
dauerhaftem Verklemmen führen.
Verklemmung beseitigen:
1. Akku entfernen.
2. ACHTUNG! Halten Sie den Nagler immer von sich und
anderen Personen weg, wenn Sie Nägel einsetzen oder
entfernen. Nichtbeachtung kann zu Verletzungen führen.
3. Nagelstreifen aus dem Magazin entfernen.
4. Entfernen Sie den Nagel mit einer Spitzzange. Entnehmen Sie
gegebenenfalls das Magazin aus dem Nagler.
5. Befolgen Sie die Schritte unter dem Abschnitt „tägliche Prüfung
erforderlich“, bevor Sie die Arbeit neu starten.
TÄGLICHE PRÜFUNG ERFORDERLICH
WARNUNG: Um das Verletzungsrisiko für sich selbst und
andere zu minimieren, führen Sie täglich vor Aufnahme der
Arbeit folgende Prüfung durch – vor allem, wenn das
Werkzeug herunter gefallen ist, einen starken Stoß erlitten hat
oder darauf getreten wurde. Führen Sie die nachfolgenden
Prüfungen in der angegebenen REIHENFOLGE durch. Wenn
das Werkzeug nicht ordnungsgemäß funktioniert, dann setzen
Sie sich sofort mit dem MILWAUKEE-Kundendienst in
Verbindung.
Richten Sie das Werkzeug immer von sich selbst und anderen
Personen weg.
1. Entfernen Sie den Akku.
WARNUNG! Richten Sie das Werkzeug beim Einsetzen der
Nägel immer von sich selbst und anderen Personen weg.
Andernfalls besteht Verletzungsgefahr.
2. Prüfen Sie sämtliche Schrauben, Bolzen, Muttern und Stifte
des Werkzeugs. Lose Befestigungselemente sind zu
befestigen.
3. Ziehen Sie den Nagelvorschub im Magazin zurück (um die
Nachfüllanzeige zu deaktivieren) und drücken Sie den
Arbeitskontakt gegen ein Werkstück. Die Betätigung muss
leichtgängig erfolgen.
4. Wenn der Arbeitskontakt am Werkstück anliegt, betätigen Sie
den Auslöser. Die Betätigung muss leichtgängig erfolgen.
5. Setzen Sie den Akku ein.
6. Wählen Sie die Betriebsart "Einzelbetätigung". Ziehen Sie den
Nagelvorschub im Magazin zurück (um die Nachfüllanzeige zu
deaktivieren) ohne den Auslöser zu betätigen, und drücken Sie
den Arbeitskontakt gegen ein Werkstück. Das Werkzeug darf
nicht starten. Den Arbeitskontakt vom Werkstück wegziehen
und den Nagelvorschub im Magazin zurückziehen (um die
Nachfüllanzeige zu deaktivieren). Den Auslöser 5 Sekunden
lang gedrückt halten. Das Werkzeug darf nicht starten. Den
Auslöser weiterhin gedrückt halten und den Arbeitskontakt
gegen das Werkstück drücken. Das Werkzeug darf nicht
starten. Ohne den Auslöser zu betätigen, den Nagelvorschub
im Magazin zurückziehen (um die Nachfüllanzeige zu
deaktivieren) und den Arbeitskontakt gegen ein Werkstück
drücken. Den Auslöser betätigen. Das Werkzeug muss starten.
Den Auslöser loslassen. Der Einschlagbolzen muss sich nach
oben bewegen.
7. Wählen Sie die Betriebsart "Kontaktbetätigung". Ohne Kontakt
mit einem Werkstück den Nagelvorschub im Magazin
zurückziehen (um die Nachfüllanzeige zu deaktivieren) und
den Auslöser betätigen. Das Werkzeug darf nicht starten. Den
Auslöser weiterhin gedrückt halten und den Arbeitskontakt
gegen ein Werkstück drücken. Das Werkzeug muss starten.
8. Nach der erfolgreichen Durchführung all dieser Prüfungen ist
das Werkzeug einsatzbereit. Wählen Sie die gewünschte
Betriebsart und setzen Sie die Nagelstreifen ein.
9. Stellen Sie die Einschlagtiefe gemäß Abschnitt "Einschlagtiefe
einstellen" ein und beachten Sie die Abbildungen.
10. Nach Beendigung aller Prüfungen ist das Gerät betriebsbereit.
Führen Sie diese Prüfungen täglich vor Gebrauch des
Werkzeugs durch bzw. immer dann, wenn das Gerät
heruntergefallen ist, einen schweren Stoß erlitten hat, darauf
getreten wurde, die Nägel sich verklemmt haben etc.
WARTUNG
Stets die Lüftungsschlitze der Maschine sauber halten.
Nur Milwaukee Zubehör und Milwaukee Ersatzteile verwenden.
Bauteile, deren Austausch nicht beschrieben wurde, bei einer
Milwaukee Kundendienststelle auswechseln lassen (Broschüre
Garantie/Kundendienstadressen beachten).
Bei Bedarf kann eine Explosionszeichnung des Gerätes unter
Angabe der Maschinen Type und der sechsstelligen Nummer auf
dem Leistungsschild bei Ihrer Kundendienststelle oder direkt bei
Techtronic Industries GmbH, Max-Eyth-Straße 10,
71364 Winnenden, Germany angefordert werden.
SYMBOLE
ACHTUNG! WARNUNG! GEFAHR!
Vor allen Arbeiten an der Maschine den
Wechselakku herausnehmen
Bitte lesen Sie die Gebrauchsanweisung vor
Inbetriebnahme sorgfältig durch.
Beim Arbeiten mit der Maschine stets Schutzbrille
tragen.
Schutzhandschuhe tragen!
Gehörschutz tragen!
Hände fernhalten!
Warnung vor Gasfl aschen
DEUTSCHDEUTSCH
Elektrogeräte, Batterien/Akkus dürfen nicht
zusammen mit dem Hausmüll entsorgt werden.
Elektrische Geräte und Akkus sind getrennt zu
sammeln und zur umweltgerechten Entsorgung bei
einem Verwertungsbetrieb abzugeben.
Erkundigen Sie sich bei den örtlichen Behörden
oder bei Ihrem Fachhändler nach Recyclinghöfen
und Sammelstellen.
n0Leerlaufdrehzahl
VSpannung
Gleichstrom
Europäisches Konformitätszeichen
Britisches Konformitätszeichen
Ukrainisches Konformitätszeichen
Euroasiatisches Konformitätszeichen

3534
M18 FNCS18GS
.........4770 95 02
...000001-999999
.................0 °
............1,24 mm
......9,5/38,1 mm
.............108
.................3 /sec.
...............18 V
2,8 kg ... 4,0 kg
... -18°C ... +50 °C
.. M18B...M18HB...
M12-18 C...M1418 C6
............80,8 dB (A)
............91,8 dB (A)
............2,21 m/s2
..............1,5 m/s2
AVIS COMPLÉMENTAIRES DE SÉCURITÉ ET DE TRAVAIL
Soyez toujours conscient qu'une mauvaise utilisation ainsi qu'une
mauvaise manipulation de cet outil peuvent causer des blessures
à vous et aux autres
Cet outil est conçu pour être utilisé d'une seule main. Le produit ne
doit être tenu que par ses poignées d'utilisation. Gardez l'autre
main bien à l'écart de la zone de travail et du produit. Ne mettez
pas votre tête ou une autre partie du corps près du produit en
cours de clouage afi n d'éviter toute blessure grave.
Assurez-vous toujours que le contact avec la pièce à fi xer se
trouve bien au dessus du matériau support. Le fait de positionner
la pièce à fi xer en contact partiel au dessus du matériau support
peut faire que le clou rate complètement la pièce, entraînant de
graves blessures
Ne clouez pas près du bord du matériau. La pièce à fi xer est
susceptible de se fendre, entraînant un ricochet du clou, ce qui
risque de blesser soit vous soit un collègue. Soyez conscient du
fait que le clou est susceptible de suivre les fi bres du bois, ce qui
peut
entraîner son dépassement inattendu par la tranche de la pièce à
fi xer, cause possible de blessures
Maintenez la pièce avec des serre-joints lorsque cela est
nécessaire afi n de protéger vos mains et votre corps de tout
danger potentiel. Assurez-vous du bon maintien de la pièce à fi xer
avant de presser la cloueuse contre le support. L'enfoncement du
clou est susceptible de faire dévier le support de façon inattendue.
Gardez votre visage et votre corps éloignés de l'arrière de l'outil
lorsque vous travaillez dans des endroits exigus. Un brusque recul
peut entraîner un choc avec votre corps, en particulier lors du
clouage de matériaux durs ou denses.
En cours d‘utilisation normale, l‘outil subit un recul immédiatement
après l‘enfoncement d‘une agrafe. Ne tentez pas d‘éviter le recul
en gardant l‘agrafeuse contre la pièce. La résistance au recul peut
entraîner la libération d‘une deuxième agrafe. Saisissez fermement
la poignée, laissez l‘outil travailler et ne placez à aucun moment
votre deuxième main sur le dessus de l‘outil ou à proximité de la
zone de sortie. Le non-respect de cet avertissement pourrait
entraîner de graves blessures.
N'agrafez pas par dessus d'autres agrafes ou en donnant trop
d'angle à l'outil, ce qui risquerait de provoquer la déviation des
agrafes et de possibles blessures.
Vérifi ez toujours l'éventuelle présence de câbles cachés, tuyaux de
gaz ou d'eau, etc. avant d'utiliser le produit.
Après avoir utilisé le produit en mode par contact, remettez-le en
position de fonctionnement séquentiel.
La profondeur de clouage peut être réglée au-delà de la
profondeur requise. Il est recommandé de procéder à un test de la
profondeur nécessaire sur une chute de matériau et d'ajuster, au
besoin, le réglage de profondeur.
N'utilisez avec cet outil que des agrafes correspondant au tableau
des caractéristiques du produit. L'utilisation d'agrafes inadaptées
peut entraîner un blocage ou autres dysfonctionnements
Ne sélectionnez pas le mode de déclenchement par contact
lorsque vous travaillez sur un échafaudage, une échelle ou autre
plateforme nécessitant un changement de position de votre corps.
Si le mode de déclenchement par contact était activé, vous
pourriez accidentellement déclencher l'éjection d'un clou par mise
en contact par inadvertance avec la pièce à clouer tout en vous
déplaçant. Lorsque vous changez de position, sélectionnez le
mode séquentiel total ou désactivez complètement le produit en en
retirant le pack batterie. Vous réduirez ainsi le risque d'infl iger des
blessures à vous-même ou aux autres.
Ne pas jeter les accus interchangeables usés au feu ou avec les
déchets ménagers. Milwaukee o re un système d’évacuation
écologique des accus usés.
Ne pas conserver les accus interchangeables avec des objets
métalliques (risque de court-circuit)
Aucune pièce métallique ne doit pénétrer dans le logement d’accu
du chargeur (risque de court-circuit)
Ne charger les accus interchangeables du système18 V qu’avec le
chargeur d’accus du système18 V. Ne pas charger des accus
d’autres systèmes.
Ne pas ouvrir les accus interchangeables et les chargeurs et ne
les stocker que dans des locaux secs. Les protéger contre
l’humidité.
En cas de conditions ou températures extrêmes, du liquide
caustique peut s’échapper d’un accu interchangeable endommagé.
En cas de contact avec le liquide caustique de la batterie, laver
immédiatement avec de l’eau et du savon. En cas de contact avec
les yeux, rincer soigneusement avec de l’eau et consulter
immédiatement un médecin.
Avertissement! Pour réduire le risque d‘incendie, de blessures
corporelles et de dommages causés par un court-circuit, ne jamais
immerger l‘outil, le bloc-piles ou le chargeur dans un liquide ou
laisser couler un fl uide à l‘intérieur de celui-ci. Les fl uides corrosifs
ou conducteurs, tels que l‘eau de mer, certains produits chim-iques
industriels, les produits de blanchiment ou de blanchi-ment, etc.,
Peuvent provoquer un court-circuit.
UTILISATION CONFORME AUX PRESCRIPTIONS
L‘agrafeuse est destinée à enfoncer des agrafes dans le bois ou
autres matériaux tendres similaires à partir d‘un magasin
contenant une bande d‘agrafes appropriées. Les agrafes pouvant
être chargées en toute sécurité dans le magasin du produit sont
décrites dans le tableau des caractéristiques de ce manuel.
N‘utilisez aucun autre type d‘agrafes ou de fi xation avec
l‘agrafeuse. L‘agrafeuse ne doit pas être utilisée pour la fi xation de
câbles électriques.
Comme déjà indiqué, cette machine n’est conçue que pour être
utilisée conformément aux prescriptions.
DÉCLARATION CE DE CONFORMITÉ
Nous déclarons, en tant que fabricant et sous notre seule
responsabilité, que le produit décrit dans « Données techniques »
est conforme à toutes les dispositions pertinentes des directives
2011/65/UE (RoHS), 2014/30/UE, 2006/42/CE et des documents
normatifs harmonisés suivants :
EN 60745-1:2009+A11:2010
EN 60745-2-16:2010
EN 55014-1:2017+A11:2020
EN 55014-2:2015
EN IEC 63000:2018
Winnenden, 2020-11-18
Alexander Krug
Managing Director
Autorisé à compiler la documentation technique.
Techtronic Industries GmbH
Max-Eyth-Straße 10
71364 Winnenden
Germany
ACCUS
Recharger les accus avant utilisation après une longue période de
non utilisation.
Une température supérieure à 50°C amoindrit la capacité des
accus. Eviter les expositions prolongées au soleil ou au chau age.
Tenir propres les contacts des accus et des chargeurs.
Pour une durée de vie optimale, les accus doivent être chargés à
fond après l'utilisation.
Pour une plus longue durée de vie, enlever les batteries du
chargeur de batterie quand celles-ci seront chargées.
En cas d'entreposage de la batterie pour plus de 30 jours:
Entreposer la batterie à 27°C environ dans un endroit sec.
Entreposer la batterie avec une charge d'environ 30% - 50%.
Recharger la batterie tous les 6 mois.
FRANÇAIS
CARACTÉRISTIQUES TECHNIQUES AGRAFEUSE SUR BATTERIE
Numéro de série .......................................................................................
Magasin angle ..........................................................................................
Type d'agrafes : Tête homme
Diamètre ................................................................................................
Longueur ...............................................................................................
Capacité du magasin (nombre d’agrafes) ................................................
Taux de cycle ............................................................................................
Tension accu interchangeable ..................................................................
Poids suivant EPTA-Procedure 01/2014 (2,0 Ah ... 12,0 Ah) ..................
Température conseillée lors du travail ......................................................
Batteries conseillées.................................................................................
Chargeurs de batteries conseillés ............................................................
Informations sur le bruit et les vibrations
Valeurs de mesure obtenues conformément à la EN 60 745.
Les mesures réelles (des niveaux acoustiques de l’appareil sont :
Niveau de pression acoustique (Incertitude K=3dB(A)) ...........................
Niveau d'intensité acoustique (Incertitude K=3dB(A)) ..............................
Toujours porter une protection acoustique!
Valeurs totales des vibrations (somme vectorielle de trois sens) établies
conformément à EN 60745.
Valeur d’émission vibratoire ah ..............................................................
Incertitude K= ........................................................................................
AVERTISSEMENT! Lire tous les avertissements de
sécurité, les instructions opérationnelles, les illustrations et
les spécifi cations fournies avec cet outil électrique. La non
observance des instructions mentionnées ci-dessous peut causer
des chocs électriques, des incendies ou de graves blessures.
Conserver tous les avertissements et toutes les instructions
pour pouvoir s‘y reporter ultérieurement.
INSTRUCTIONS DE SÉCURITÉ AGRAFEUSE SUR
BATTERIE
Considérez toujours que l‘outil contient des agrafes. Une
manipulation inattentive de l‘agrafeuse peut entraîner son
déclenchement intempestif, cause de possibles blessures.
Ne faites pas pointer l‘outil vers vous-même ou quiconque à
proximité. Une pression involontaire sur la gâchette déclenchera
l‘éjection d‘une agrafe, cause de blessures.
Ne déclenchez pas l‘outil s‘il n‘est pas pressé fermement
contre la pièce à fi xer. Si l‘outil n‘est pas en contact avec la pièce
à fi xer, l‘agrafe risque d‘être déviée de sa cible.
Débranchez l‘outil de sa source de courant en cas de blocage
d‘agrafes dans l‘outil. Lors du retrait d‘une agrafe coincée,
l‘agrafeuse est susceptible d‘être déclenchée de façon accidentelle
au cas où elle serait branchée.
Soyez prudent lors du retrait d‘une agrafe coincée. Le
mécanisme est susceptible d‘être sous pression et l‘agrafe peut se
voir éjectée avec force lors d‘une tentative de déblocage.
N'utilisez pas cette agrafeuse pour fi xer des câbles
électriques. L'outil n'est pas prévu pour la fi xation des câbles
électriques car leur isolation est susceptible d'être endommagée,
entraînant un risque de décharge électrique ou d'incendie.
Portez une protection acoustique. L‘infl uence du bruit peut
provoquer la surdité.
Tenir l‘outil sur les surfaces de prise isolées, surtout en
e ectuant des travaux lors desquels on pourrait toucher des
conducteurs cachés. Lorsqu‘un clou encontre des conducteurs
sous tension, la tension sera transmise aux parties métalliques de
l‘outil avec risque de fulguration pour l‘utilisateur.
Porter toujours des lunettes de protection avec protections
latérales. Des lunettes normales ont uniquement des verres
incassables. Elles ne sont pas considérées des lunettes de
protection. Le respect des présentes prescriptions réduit le risque
d‘accident.
Les lunettes de protection protègent contre des particules
errantes tant DE FRONT que LATERALEMENT. Lors de la
préparation de l‘outil, de son utilisation et de son entretien
porter TOUJOURS des lunettes de protection. Les lunettes de
protection sont nécessaires pour la protection contre la saleté et
les clous pouvant causer des lésions graves aux yeux.
Retirez toujours la batterie avant de manipuler la roue de réglage
de profondeur.
Ne tirez pas sur la roue de réglage de profondeur, elle est conçue
pour être tournée.
N‘enfoncez pas la gâchette de déclenchement en cours de réglage
de la profondeur.
Sélectionnez toujours le mode séquentiel total avant de régler la
profondeur.
Ne faites pas pointer l‘outil vers vous-même ou quiconque à
proximité lors du réglage de profondeur.
AVERTISSEMENT!
Le niveau de vibration et d‘émissions sonores indiqué dans cette fi che de données a été mesuré en respect d‘une méthode standard de test
selon la norme EN 60745 et peut être utilisé pour comparer les outils entre eux. Il peut être utilisé pour évaluation préliminaire de
l‘exposition.
Le niveau de vibration et d‘émissions sonores déclaré correspond à l‘application principale de l‘outil. Cependant, si l‘outil est utilisé pour des
applications di érentes, avec di érents accessoires ou est mal entretenu, les vibrations et les émissions sonores peuvent di érer. Cela peut
augmenter considérablement le niveau d‘exposition au cours de la période de travail totale.
Une estimation du niveau d‘exposition aux vibrations et au bruit devrait également tenir compte des temps d‘arrêt de l‘outil ou des périodes
où il est en marche mais n‘e ectue pas réellement le travail. Cela peut réduire considérablement le niveau d‘exposition au cours de la
période de travail totale.
Identifi er des mesures de sécurité supplémentaires pour protéger l‘opérateur des e ets des vibrations et/ou du bruit tels que : l‘entretien de
l‘outil et des accessoires, le maintien au chaud des mains, l‘organisation des processus de travail.
FRANÇAIS

36 37
FRANÇAISFRANÇAIS
TRANSPORT DE BATTERIES LITHIUM-ION
Les batteries lithium-ion sons soumises aux dispositions
législatives concernant le transport de produits dangereux.
Le transport de ces batteries devra s'e ectuer dans le respect des
dispositions et des normes locales, nationales et internationales.
• Les utilisateurs peuvent transporter ces batteries sans
restrictions.
• Le transport commercial de batteries lithium-ion est réglé par les
dispositions concernant le transport de produits dangereux. La
préparation au transport et le transport devront être e ectués
uniquement par du personnel formé de façon adéquate. Tout le
procédé devra être géré d‘une manière professionnelle.
Durant le transport de batteries il faut respecter les consignes
suivantes :
• S‘assurer que les contacts soient protégés et isolés en vue
d‘éviter des courts-circuits.
• S‘assurer que le groupe de batteries ne puisse pas se déplacer
à l‘intérieur de son emballage.
• Des batteries endommagées ou des batteries perdant du liquide
ne devront pas être transportées.
Pour tout renseignement complémentaire veuillez vous adresser à
votre transporteur professionnel.
MANIEMENT
La présente agrafeuse est pourvue de deux modes de
fonctionnement (voir aussi les fi gures) :
Actionnement individuel :
L'agrafe est enfoncée en activant l'actionneur.
Actionnement à contact :
Garder enfoncé l'actionneur et au moment du contact avec la pièce
à usiner, l'agrafe sera enfoncée automatiquement.
Indicateur de charge
Lorsque le réservoir est presque vide (il ne contient que 4–5
agrafes) à pression normale, le palpeur ne sera pas actionné et
aucune agrafe ne sera enfoncée. Charger le réservoir pour
continuer à travailler.
Régler la profondeur d'enfoncement (voir fi gures)
Contrôler ce qu'il y a derrière la pièce a usiner. Lors de
l'enfoncement, l'agrafe peut traverser la pièce à usiner et blesser
sérieusement d'autres personnes. Si nécessaire, réduire la
profondeur d'enfoncement en vue d'éviter que l'agrafe ne traverse
la pièce à usiner.
RETIRER DES CLOUS COINCÉS
La plupart des blocages sont dus à un clou ou une partie d’un clou
qui s’est coincé(e) entre le doigt d’entraînement et le guide-clou.
Une bande de clous de taille incorrecte ou avec une inclinaison
incorrecte du magasin peut entraîner un blocage permanent.
Résoudre un problème de blocage :
1. Retirer la batterie.
2. ATTENTION ! Ne pointez jamais la cloueuse vers vous ou
toute autre personne lorsque vous insérez ou retirez des clous.
Tout non-respect de cette consigne peut entraîner des
blessures.
3. Retirez la bande de clous du magasin.
4. Retirez le clou à l’aide d’une pince à bec long. Si nécessaire,
retirez le magasin de la cloueuse.
5. Suivez les étapes décrites dans la section « Vérifi cation
quotidienne nécessaire » avant de recommencer à travailler.
IL FAUT CONTROLER TOUS LES JOURS
AVERTISSEMENT : En vue de réduire le risque de
blessures pour soi-même et pour les autres, e ectuer
journellement les contrôles suivants avant de commencer à
travailler, surtout si l'outil est tombé, s'il a subi un fort impact
ou s'il a été piétiné. E ectuer les contrôles suivants dans la
SEQUENCE indiquée. Si l'outil ne fonctionne pas
correctement, s'adresser immédiatement au service clients de
MILWAUKEE.
Ne jamais pointer l'outil vers l'opérateur et des autres
personnes.
1. Enlever la batterie.
AVERTISSEMENT! Lors de l'enfoncement des clous, ne
jamais pointer l'outil en direction de l'opérateur et des autres
personnes. Dans le cas contraire, il y aurait un danger de
blessures.
2. Vérifi ez toutes les vis, boulons, écrous et chevilles de l'outil.
Serrer d'éventuels éléments de fi xation déserrés.
3. Tirer arrière l'avancement clous à l'intérieur du réservoir (pour
désactiver l'indicateur de charge) et appuyer le palpeur sur la
pièce à usiner. L'activation doit être sans à-coups.
4. Activer l'actionneur quand le palpeur appuie sur la pièce à
usiner. L'activation doit être sans à-coups.
5. Insérer la batterie.
6. Sélectionner le mode "Actionnement individuel". Tirer arrière
l'avancement clous à l'intérieur du réservoir (pour désactiver
l'indicateur de charge) sans activer l'actionneur et appuyer le
palpeur sur la pièce à usiner. L'outil ne doit pas se mettre en
marche. Éloigner le palpeur de la pièce à usiner et tirer arrière
l'avancement clous à l'intérieur du réservoir (pour désactiver
l'indicateur de charge) Maintenir l'actionneur enfoncé pendant
5 secondes. L'outil ne doit pas se mettre en marche. Continuer
à maintenir enfoncé l'actionneur et appuyer le palpeur sur la
pièce à usiner. L'outil ne doit pas se mettre en marche. Sans
activer l'actionneur, tirer arrière l'avancement clous à l'intérieur
du réservoir (pour désactiver l'indicateur de charge) et appuyer
le palpeur sur une pièce à usiner. Activer l'actionneur. L'outil
doit se mettre en marche. Désenclencher l'actionneur. La tige
d'enfoncement doit se déplacer vers le haut.
7. Sélectionner le mode "Actionnement à contact". Sans appuyer
sur une pièce à usiner, tirer arrière l'avancement clous à
l'intérieur du réservoir (pour désactiver l'indicateur de charge)
et activer l'actionneur. L'outil ne doit pas se mettre en marche.
Continuer à maintenir enfoncé l'actionneur et appuyer le
palpeur sur une pièce à usiner. L'outil doit se mettre en
marche.
8. Après avoir achevé avec succès tous les contrôles mentionnés
ci-dessus, l'outil sera prêt à être utilisé. Sélectionner le mode
de fonctionnement voulu et insérer les bandes de clous.
9. Régler la profondeur d'enfoncement suivant le paragraphe
"Régler la profondeur d'enfoncement" et en observant les
fi gures.
10. Après avoir achevé tous les contrôles, l'outil sera prêt à être
utilisé. E ectuer ces contrôles tous les jours avant d'utiliser
l'outil et chaque fois que l'outil est tombé, a subi un fort
impact, a été piétiné, les clous sont restés coincés à son
intérieur, etc..
ENTRETIEN
Tenir toujours propres les orifi ces de ventilation de la machine.
Utiliser uniquement les accessoires Milwaukee et les pièces
détachées Milwaukee. Faire remplacer les composants dont le
remplacement n'a pas été décrit, par un des centres de service
après-vente Milwaukee (observer la brochure avec les adresses
de garantie et de service après-vente).
En cas de besoin il est possible de demander un dessin éclaté du
dispositif en indiquant le modèle de la machine et le numéro de six
chi res imprimé sur la plaquette de puissance et en s'adressant au
centre d'assistance technique ou directement à Techtronic
Industries GmbH, Max-Eyth-Straße 10, 71364 Winnenden,
Germany.
SYMBOLES
ATTENTION! AVERTISSEMENT! DANGER!
Avant tous travaux sur la machine retirer l’accu
interchangeable.
Veuillez lire avec soin le mode d'emploi avant la
mise en service
Toujours porter des lunettes protectrices en
travaillant avec la machine.
Porter des gants de protection!
Toujours porter une protection acoustique!
Garder les mains à distance !
Avertissement relatif aux bouteilles de gaz
Les dispositifs électriques, les batteries et les
batteries rechargables ne sont pas à éliminer dans
les déchets ménagers.
Les dispositifs électriques et les batteries sont à
collecter séparément et à remettre à un centre de
recyclage en vue de leur élimination dans le
respect de l‘environnement.
S‘adresser aux autorités locales ou au détaillant
spécialisé en vue de connaître l‘emplacement des
centres de recyclage et des points de collecte.
n0Vitesse de rotation à vide
VVoltage
Courant continu
Marque de conformité européenne
Marque de conformité britannique
Marque de conformité ukrainienne
Marque de conformité d’Eurasie

3938
M18 FNCS18GS
.........4770 95 02
...000001-999999
.................0 °
............1,24 mm
......9,5/38,1 mm
.............108
.................3 /sec.
...............18 V
2,8 kg ... 4,0 kg
... -18°C ... +50 °C
.. M18B...M18HB...
M12-18 C...M1418 C6
............80,8 dB (A)
............91,8 dB (A)
............2,21 m/s2
..............1,5 m/s2
accanto al prodotto durante le operazioni di lavoro per evitare gravi
lesioni alla persona.
Assicurarsi sempre che il punto di contatto avvenga al di sopra del
materiale da inchiodare assieme. Posizionare il punto di contatto
parzialmente al di sopra del materiale da inchiodare assieme
potrebbe far perdere al chiodo la presa del materiale e causare
gravi lesioni personali.
Non spingere i chiodi sull'orlo del materiale. Il pezzo sul quale si
sta lavorando potrà causare un rimbalzo del chiodo ferendo
l'operatore o un suo collaboratore. Ricordare sempre che il chiodo
può seguire le venature del legno e protrudere in maniera
insaspettata dal lato del materiale di lavoro piegandosi e causando
gravi lesioni.
Tenere fermo il pezzo sul quale si sta lavorando con morsetti se
necessario per tenere le mani e il corpo lontani da eventuali rischi.
Assicurarsi che il materiale da fi ssare assieme sia correttamente
assicurato prima di premere il pezzo sul quale si sta lavorando
contro il materiale. L'inserimento del chiodo potrà far spostare
inaspettatamente il materiale. Tenere viso e parti del corpo lontani
dal coperchio dell'utensile quando si lavora in zone limitate.
L'eventuale rimbalzo improvviso potrà causare un impatto con il
corpo soprattutto quando si inseriscono chiodi in materiali duri o
densi.
Durante il normale utilizzo l‘utensile potrà scattare indietro dopo
aver sparato una gra a. Non tentare di prevenire eventuali rimbalzi
reggendo la gra atrice contro il pezzo sul quale si sta lavorando.
Eventuali restrizioni al rimbalzo potranno far scattare una seconda
gra a dalla gra atrice. Reggere il manico in modo saldo, lasciare
che l‘utensile svolga il suo lavoro e non posizionare l‘altra mano
sulla parte superiore dell‘utensile o accanto allo scarico. La
mancata osservanza di questo avvertimento potrà causare gravi
lesioni alla persona.
Non inserire chiodi sopra altri chiodi né inserirli reggendo l'utensile
ad angolo dal momento che tale operazione farà piegare i chiodi
causando lesioni all'operatore.
Controllare sempre l'area di lavoro individuando cavi nacosti, tubi
del gas o dell'acqua ecc, prima di utilizzare il prodotto in queste
aree.
Dopo aver utilizzato il prodotto nella modalità contatto, riportare
l'interruttore sulla modalità sequenziale.
La profondità di inserimento del chiodo potrà essere regolata a
seconda della profondità richiesta. Si consiglia di controllare la
profondità di inserimento chiodo su materiale di scarto per
determinare e regolare, se necessario, la profondità
dell'applicazione.
Utilizzare con questo utensile solo chiodi che corrispondano alla
descrizione nelle specifi che del prodotto. Utilizzare chiodi non
regolari potrà causare blocchi o malfunzionamenti.
Non selezionare la modalità di attivazione al contatto quando si
lavora su impalcature, scale o piattaforme o quando si deve
spostare la posizione del corpo. Si potrebbe non intenzionalmente
sparare un chiodo entrando in contatto con il pezzo sul quale si sta
lavorando mentre ci si sposta o muove nel caso in cui la modalità d
attivazione al contatto sia stata selezionata. Quando si cambia
posizione selezionare l’attivazione sequenziale completa o
disattivare il prodotto completamente rimuovendo la batteria. Ciò
ridurrà la possibilità di lesioni per sé stessi e per gli altri.
Non gettare le batterie esaurite sul fuoco o nella spazzatura di
casa. La Milwaukee o re infatti un servizio di recupero batterie
usate.
Nel vano d’innesto per la batteria del caricatore non devono
entrare parti metalliche.(pericolo di cortocircuito).
Non conservare le batterie con oggetti metallici (pericolo di
cortocircuito).
Le batterie del System18 V sono ricaricabili esclusivamente con i
caricatori del System18 V. Le batterie di altri sistemi non possono
essere ricaricate.
Non aprire nè la batteria nè il caricatore e conservarli solo in luogo
asciutto. Proteggerli dalla umidità.
Nel caso di batterie danneggiate da un carico eccessivo o da
temperature alte, l'acido di queste potrebbe fuoriuscire. In caso di
contatto con l'acido delle batterie lavarsi immediatamente con
acqua e sapone. In caso di contatto con gli occhi risciacquare
immediatamente con acqua per almeno 10 minuti e contattare
subito un medico.
Attenzione! Per ridurre il rischio d'incendio, di lesioni o di danni al
prodotto causati da corto circuito, non immergere mai l'utensile, la
batteria ricaricabile o il carica batterie in un liquido e non lasciare
mai penetrare alcun liquido all'interno dei dispositivi e delle
batterie. I fl uidi corrosivi o conduttori come acqua salata, alcuni
agenti chimici, agenti candeggianti o prodotti contenenti agenti
candeggianti potrebbero provocare un corto circuito.
UTILIZZO CONFORME
Questa gra atrice è progettata per sparare gra e nel legno e in
materiali morbidi simili grazie ad un caricatore contenente una
serie di gra e adatte a tale scopo. Le gra e idonee ad essere
inserite con sicurezza nel caricatore del prodotto sono descritte
nella tabella delle specifi che del prodotto nel presente manuale.
Non utilizzare alcun altro tipo di gra e con la gra atrice. La
gra atrice non deve essere utilizzata per fi ssare cavi elettrici.
Utilizzare il prodotto solo per l’uso per cui è previsto.
DICHIARAZIONE CE DI CONFORMITÀ
In qualità di produttore dichiariamo sotto la nostra esclusiva
responsabilità che il prodotto descritto nei „Dati tecnici“ è conforme
a tutte le disposizioni pertinenti delle direttive 2011/65/UE (RoHS),
2014/30/UE, 2006/42/CE e dei seguenti documenti normativi
armonizzati:
EN 60745-1:2009+A11:2010
EN 60745-2-16:2010
EN 55014-1:2017+A11:2020
EN 55014-2:2015
EN IEC 63000:2018
Winnenden, 2020-11-18
Alexander Krug
Managing Director
Autorizzato alla preparazione della documentazione tecnica
Techtronic Industries GmbH
Max-Eyth-Straße 10
71364 Winnenden
Germany
BATTERIE
Batterie non utilizzate per molto tempo devone essere ricaricate
prima dell’uso.
A temperature superiori ai 50°C , la potenza della batteria si riduce.
Evitare di esporre l’accumulatore a surriscaldamento prolungato,
dovuto ad esempio ai raggi del sole o ad un impianto di
riscaldamento.
Per una ottimale vita utile è necessario ricaricare completamente
le batterie dopo l'uso.
Per una più lunga durata, rimuovere le batterie dal caricabatterie
quando saranno cariche.
In caso di immagazzinaggio della batteria per più di 30 giorni:
Immagazzinare la batteria a circa 27°C in ambiente asciutto.
Immagazzinare la batteria con carica di circa il 30% - 50%.
Ricaricare la batteria ogni 6 mesi.
TRASPORTO DI BATTERIE AGLI IONI DI LITIO
Le batterie agli ioni di litio sono soggette alle disposizioni di legge
sul trasporto di merce pericolosa.
Il trasporto di queste batterie deve avvenire rispettando le
disposizioni e norme locali, nazionali ed internazionali.
• Gli utilizzatori possono trasportare queste batterie su strada
senza alcuna restrizione.
ITALIANO
DATI TECNICI GRAFFATRICE A BATTERIA
Numero di serie ........................................................................................
Pistola angolo ...........................................................................................
Tipo di chiodi: Chiodo con testa a scomparsa
Diametro ................................................................................................
Lunghezza .............................................................................................
Capacità pistola (numero di chiodi) ..........................................................
Velocità del ciclo .......................................................................................
Tensione batteria ......................................................................................
Peso secondo la procedura EPTA 01/2014 (2,0 Ah ... 12,0 Ah) ...............
Temperatura consigliata durante il lavoro .................................................
Batterie consigliate ...................................................................................
Caricatori consigliati .................................................................................
Informazioni sulla rumorosità/sulle vibrazioni
Valori misurati conformemente alla norma EN 60 745.
La misurazione A del livello di pressione acustica dell’utensile è di solito
di:
Livello di rumorosità (Incertezza della misura K=3dB(A)) ........................
Potenza della rumorosità (Incertezza della misura K=3dB(A)) .................
Utilizzare le protezioni per l'udito!
Valori totali delle oscillazioni (somma di vettori in tre direzioni) misurati
conformemente alla norma EN 60745.
Valore di emissione dell’oscillazione ah .................................................
Incertezza della misura K= ....................................................................
AVVERTENZA! Leggere tutte le avvertenze di sicurezza,
istruzioni operative, illustrazioni e specifi che fornite con
questo elettroutensile. Il mancato rispetto delle istruzioni di
seguito riportate può causare scosse elettriche, incendi e/o lesioni
gravi.
Conservare tutte le avvertenze di pericolo e le istruzioni
operative per ogni esigenza futura.
NORME DI SICUREZZA GRAFFATRICE A BATTERIA
Ricordare sempre che il dispositivo contiene gra e. Utilizzare
la gra atrice senza cura potrà provocare un lancio casuale di
gra e e lesioni personali.
Non puntare verso sé stessi o verso eventuali terzi. Premere
inaspettatamente il grilletto farà scaricare die chiodi causando
lesioni.
Non attivare l‘utensile a meno che non sia posizionato
saldamente contro il pezzo sul quale si sta lavorando. Se
l‘utensile non entra in contatto con il pezzo sul quale si sta
lavorando, i chiodi potranno spostarsi dall‘obiettivo.
Scollegare l‘utensile dall‘alimentazione quando le gra e si
bloccano all‘interno dello stesso. Quando si rimuove una gra a
bloccata, la gra atrice potrà accidentalmente attivarsi se è
collegata all‘alimentazione.
Fare attenzione quando si rimuovere un chiodo incastrato. Il
meccanismo potrà essere sotto pressione e i chiodi potranno
essere scaricati con forza mentre si tenta di liberare parti bloccate.
Non utilizzare questa gra atrice per assicurare cavi elettrici.
Non è progettata per installare cavi elettrici dal momento che potrà
danneggiare l‘isolamento dei cavi elettrici causando scosse
elettriche o rischi di incendio
Indossare protezioni acustiche adeguate. L‘esposizione
prolungata al rumore senza protezione può causare danni all‘udito.
Tenere l‘utensile sulle superfi ci di presa isolate, soprattutto
quando si eseguono lavori durante i quali si potrebbero
colpire conduttori nascosti. Quando un chiodo incontra
conduttori sotto tensione, la tensione verrà trasmessa alle parti
metalliche dell‘utensile con rischio di folgorazione per l‘utente.
Indossare sempre occhiali di protezione con protezioni
laterali. Occhiali normali hanno soltanto lenti infrangibili. Non
vengono considerati occhiali di protezione. Il rispetto delle presenti
prescrizioni riduce il rischio di infortunio.
Gli occhiali di protezioni proteggono da particelle vaganti sia
FRONTALMENTE che LATERALMENTE. Durante
l‘attrezzaggio, l‘uso e la manutenzione dell‘utensile indossare
SEMPRE occhiali di protezione. Gli occhiali di protezioni sono
necessari per la protezione da sporcizia e chiodi che potrebbero
causare lesioni gravi agli occhi.
Rimuovere sempre la batteria prima di regolare la profondità della
ruota di trazione.
Non tirare indietro la ruota di regolazione, è progettata per essere
ruotata.
Non premere il grilletto mentre si regola la profondità della ruota di
trazione.
Selezionare la modalità sequenziale prima di regolare la profondità
di trazione.
Non puntare l‘utensile verso sè stessi o verso eventuali osservatori
quando si regola la profondità della trazione.
ULTERIORI AVVISI DI SICUREZZA E DI LAVORO
Ricordare sempre che un utilizzo errato dell'utensile potrà causare
lesioni a se stessi e agli altri.
Utensile progettato per utilizzo con una sola mano. Tenere il
prodotto reggendolo dal manico. Tenere l’altra mano lontana
dall’area di lavoro. Non posizionare la testa o altre parti del corpo
ATTENZIONE
Il/i valore/i di emissione acustica riportato/i in questa scheda informativa sono stati misurati conformemente a un metodo di prova standard
sulla base della norma EN 60745 e possono essere utilizzati per confrontare gli utensili tra loro. Può/possono essere utilizzato/i anche per
una valutazione preliminare dell’esposizione.
Il livello di vibrazione ed emissione acustica dichiarato rappresenta le applicazioni principali dell’utensile. Tuttavia, se l’utensile è utilizzato
per applicazioni diverse, con accessori di erenti o una manutenzione non adeguata, la vibrazione e l’emissione acustica potrebbero variare.
Ciò può aumentare signifi cativamente il livello di esposizione durante l’intera durata del lavoro.
Una stima del livello di esposizione alle vibrazioni e al rumore dovrebbe tenere conto anche dei periodi in cui l’utensile è spento o è in
funzione ma non sta lavorando. Ciò può ridurre signifi cativamente il livello di esposizione durante l’intera durata del lavoro.
Identifi care le misure di sicurezza supplementari per proteggere l’operatore dagli e etti delle vibrazioni e/o del rumore, ad esempio
eseguendo la manutenzione dell’utensile e degli accessori, mantenendo le mani calde e organizzando gli schemi di lavoro.
ITALIANO
Pagina se încarcă...
Pagina se încarcă...
Pagina se încarcă...
Pagina se încarcă...
Pagina se încarcă...
Pagina se încarcă...
Pagina se încarcă...
Pagina se încarcă...
Pagina se încarcă...
Pagina se încarcă...
Pagina se încarcă...
Pagina se încarcă...
Pagina se încarcă...
Pagina se încarcă...
Pagina se încarcă...
Pagina se încarcă...
Pagina se încarcă...
Pagina se încarcă...
Pagina se încarcă...
Pagina se încarcă...
Pagina se încarcă...
Pagina se încarcă...
Pagina se încarcă...
Pagina se încarcă...
Pagina se încarcă...
Pagina se încarcă...
Pagina se încarcă...
Pagina se încarcă...
Pagina se încarcă...
Pagina se încarcă...
Pagina se încarcă...
Pagina se încarcă...
Pagina se încarcă...
Pagina se încarcă...
Pagina se încarcă...
Pagina se încarcă...
Pagina se încarcă...
Pagina se încarcă...
Pagina se încarcă...
Pagina se încarcă...
Pagina se încarcă...
Pagina se încarcă...
Pagina se încarcă...
Pagina se încarcă...
Pagina se încarcă...
Pagina se încarcă...
Pagina se încarcă...
Pagina se încarcă...
Pagina se încarcă...
Pagina se încarcă...
Pagina se încarcă...
-
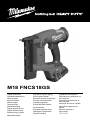 1
1
-
 2
2
-
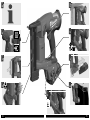 3
3
-
 4
4
-
 5
5
-
 6
6
-
 7
7
-
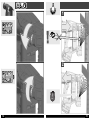 8
8
-
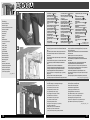 9
9
-
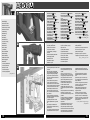 10
10
-
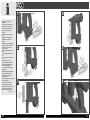 11
11
-
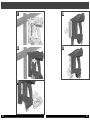 12
12
-
 13
13
-
 14
14
-
 15
15
-
 16
16
-
 17
17
-
 18
18
-
 19
19
-
 20
20
-
 21
21
-
 22
22
-
 23
23
-
 24
24
-
 25
25
-
 26
26
-
 27
27
-
 28
28
-
 29
29
-
 30
30
-
 31
31
-
 32
32
-
 33
33
-
 34
34
-
 35
35
-
 36
36
-
 37
37
-
 38
38
-
 39
39
-
 40
40
-
 41
41
-
 42
42
-
 43
43
-
 44
44
-
 45
45
-
 46
46
-
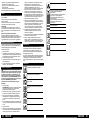 47
47
-
 48
48
-
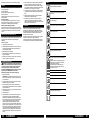 49
49
-
 50
50
-
 51
51
-
 52
52
-
 53
53
-
 54
54
-
 55
55
-
 56
56
-
 57
57
-
 58
58
-
 59
59
-
 60
60
-
 61
61
-
 62
62
-
 63
63
-
 64
64
-
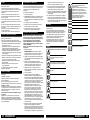 65
65
-
 66
66
-
 67
67
-
 68
68
-
 69
69
-
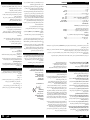 70
70
-
 71
71


Milwaukee M18 FNCS18GS Manual de utilizare
- Categorie
- Unelte electrice
- Tip
- Manual de utilizare
în alte limbi
- slovenčina: Milwaukee M18 FNCS18GS Používateľská príručka
Alte documente
-
Ryobi R18GN18X Manual de utilizare
-
 JBM 60037 Manualul utilizatorului
-
Axor 10101000 Manual de utilizare
-
DeWalt DPN1664PP Manual de utilizare
-
Chamberlain LiftMaster Evolution LM80EV Manualul proprietarului
-
Bosch GSK 64 Original Instructions Manual
-
EHEIM Dimmer Day & Night classicLED Manualul proprietarului
