
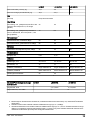
LC 247i, LC 347iVX, LC 353iVX
EN Operator's manual 8-24
BG Ръководство за експлоатация 25-44
CS Návod k použití 45-62
DA Brugsanvisning 63-79
DE Bedienungsanweisung 80-98
EL Οδηγίες χρήσης 99-117
ES Manual de usuario 118-136
ET Kasutusjuhend 137-153
FI Käyttöohje 154-170
FR Manuel d'utilisation 171-189
HR Priručnik za korištenje 190-206
HU Használati utasítás 207-224
IT Manuale dell'operatore 225-242
JA 取扱説明書 243-259
LT Operatoriaus vadovas 260-277
LV Lietošanas pamācība 278-295
NL Gebruiksaanwijzing 296-313
NO Bruksanvisning 314-330
PL Instrukcja obsługi 331-349
PT Manual do utilizador 350-367
RO Instrucţiuni de utilizare 368-385
RU Руководство по эксплуатации 386-405
SK Návod na obsluhu 406-423
SL Navodila za uporabo 424-440
SR Priručnik za rukovaoca 441-458
SV Bruksanvisning 459-475
TR Kullanım kılavuzu 476-492
UK Посібник користувача 493-512
ZH 操作手册 513-526

2
3
1
1
1016 28 17
11
14
26 20
21
22
23
24
15
2
3
4
5
18
12
12
9
7
8
LC 347iVX
LC 353iVX LC 247i
13
19
6
25 27
1
2 3 4 5 6 7
8 9 10 11 12 13

14 15
16 17
18 19
20 21

22 23
24 25
26 27
28 29

30 31
32
B
A
33
34 35
36 37

38
B
A
39
40 41
42 43
44 45

46 47
48 49
50 51

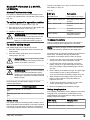
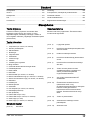
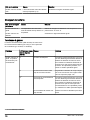
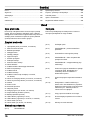
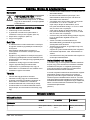
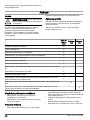
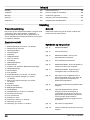
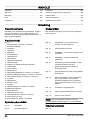
Contents
Introduction..................................................................... 8
Safety..............................................................................9
Assembly...................................................................... 14
Operation...................................................................... 14
Maintenance................................................................. 17
Troubleshooting............................................................ 19
Transportation, storage and disposal........................... 20
Technical data.............................................................. 21
Declaration of Conformity............................................. 24
Registered trademarks................................................. 24
Introduction
Product description
The product is a pedestrian-controlled rotary lawn
mower. The grass is collected in a grass catcher.
Remove the grass catcher to get rear discharge of the
grass. Attach a mulch kit (accessory) to cut the grass
into fertilizer.
Intended use
Use the product to cut grass. Do not use the product for
other tasks.
Product overview
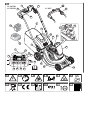
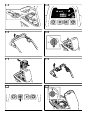
(Fig. 1)
1. Control panel (LC 347iVX, LC 353iVX)
2. Motor brake handle
3. Start inhibitor
4. Grass catcher
5. Rear cover
6. Safety key
7. Handle knob
8. Battery cover
9. Cutting height control
10. ON/OFF button
11. Indicator for
Bluetooth®
wireless technology
12. Lift handles
13. SavE indicator
14. Battery indicator
15. Speed level indicator (LC 347iVX, LC 353iVX)
16. Decrease speed button (LC 347iVX, LC 353iVX)
17. Increase speed button (LC 347iVX, LC 353iVX)
18. Symbols
19. Cutting cover
20. Operator's manual
21. Rating plate
22. Drive bail (LC 347iVX, LC 353iVX)
23. Battery charger (Accessory)
24. Battery (Accessory)
25. Error LED (LC 247i)
26. Error LED (LC 347iVX, LC 353iVX)
27. SavE button (LC 247i)
28. SavE button (LC 347iVX, LC 353iVX)
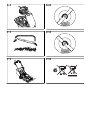
Symbols on the product
(Fig. 2) WARNING
(Fig. 3) Read the instructions.
(Fig. 4) WARNING - Beware of thrown objects.
(Fig. 5) Keep bystanders away.
(Fig. 6) WARNING – Keep hands and feet away
from the blades.
(Fig. 7) WARNING – Disconnect battery before
maintenance.
(Fig. 8) The product or package of the product is
not domestic waste. Recycle it at a
recycling station for electrical and
electronic equipment.
(Fig. 9) The product agrees with applicable EC
directives.
(Fig. 10) Noise emission to the environment label
as per EU and UK directives and
regulations. The guaranteed sound power
level of the product is specified in
Technical data on page 21
and on the
label.
(Fig. 11) The product is drip protected.
(Fig. 12) Release the motor brake handle to stop.
(Fig. 13) Scannable code
Note: Other symbols/decals on the product refer to
certification requirements for some markets.
81696 - 002 - 03.12.2021

Label on the product
(Fig. 14)
DANGER – Keep hands and feet away.
Product liability
As referred to in the product liability laws, we are not
liable for damages that our product causes if:
• the product is incorrectly repaired.
• the product is repaired with parts that are not from
the manufacturer or not approved by the
manufacturer.
• the product has an accessory that is not from the
manufacturer or not approved by the manufacturer.
• the product is not repaired at an approved service
center or by an approved authority.
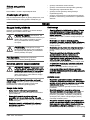
Safety
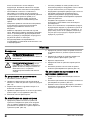
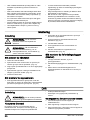
Safety definitions
Warnings, cautions and notes are used to point out
specially important parts of the manual.
WARNING: Used if there is a risk of
injury or death for the operator or bystanders
if the instructions in the manual are not
obeyed.
CAUTION: Used if there is a risk of
damage to the product, other materials or
the adjacent area if the instructions in the
manual are not obeyed.
Note: Used to give more information that is necessary
in a given situation.
General product safety warnings
WARNING: Read all safety warnings,
instructions, illustrations and specifications
provided with this product. Failure to follow
all instructions listed below may result in
electric shock, fire and/or serious injury.
Save all warnings and instructions for future reference.
The term "product" in the warnings refers to your mains-
operated (corded) product or battery-operated (cordless)
product.
Work area safety
•Keep work area clean and well lit. Cluttered or dark
areas invite accidents.
•Do not operate the product in explosive
atmospheres, such as in the presence of flammable
liquids, gases or dust. The product create sparks
which may ignite the dust or fumes.
•Keep children and bystanders away while operating
the product. Distractions can cause you to lose
control.
Electrical safety
•Product plugs must match the outlet. Never modify
the plug in any way. Do not use any adapter plugs
with earthed (grounded) products. Unmodified plugs
and matching outlets will reduce risk of electric
shock.
•Avoid body contact with earthed or grounded
surfaces, such as pipes, radiators, ranges and
refrigerators. There is an increased risk of electric
shock if your body is earthed or grounded.
•Do not expose products to rain or wet conditions.
Water entering a product will increase the risk of
electric shock.
•Do not abuse the cord. Never use the cord for
carrying, pulling or unplugging the product. Keep
cord away from heat, oil, sharp edges or moving
parts. Damaged or entangled cords increase the risk
of electric shock.
•When operating a product outdoors, use an
extension cord suitable for outdoor use. Use of a
cord suitable for outdoor use reduces the risk of
electric shock.
•If operating a product in a damp location is
unavoidable, use a residual current device (RCD)
protected supply. Use of an RCD reduces the risk of
electric shock.
Personal safety
•Stay alert, watch what you are doing and use
common sense when operating a product. Do not
use a product while you are tired or under the
influence of drugs, alcohol or medication. A moment
of inattention while operating products may result in
serious personal injury.
•Use personal protective equipment. Always wear
eye protection. Protective equipment such as dust
mask, non-skid safety shoes, hard hat or hearing
protection used for appropriate conditions will reduce
personal injuries.
•Prevent unintentional starting. Ensure the switch is in
the off-position before connecting to power source
and/or battery pack, picking up or carrying the
product. Carrying products with your finger on the
switch or energising products that have the switch on
invites accidents.
•Remove any adjusting key or wrench before turning
the product on. A wrench or a key left attached to a
rotating part of the product may result in personal
injury.
1696 - 002 - 03.12.2021 9

•Do not overreach. Keep proper footing and balance
at all times. This enables better control of the
product in unexpected situations.
•Dress properly. Do not wear loose clothing or
jewellery. Keep your hair and clothing away from
moving parts. Loose clothes, jewellery or long hair
can be caught in moving parts.
•If devices are provided for the connection of dust
extraction and collection facilities, ensure these are
connected and properly used. Use of dust collection
can reduce dust-related hazards.
•Do not let familiarity gained from frequent use of
products allow you to become complacent and
ignore product safety principles. A careless action
can cause severe injury within a fraction of a second.
Product use and care
•Do not force the product. Use the correct product for
your application. The correct product will do the job
better and safer at the rate for which it was
designed.
•Do not use the product if the switch does not turn it
on and off. Any product that cannot be controlled
with the switch is dangerous and must be repaired.
•Disconnect the plug from the power source and/or
remove the battery pack, if detachable, from the
product before making any adjustments, changing
accessories, or storing products. Such preventive
safety measures reduce the risk of starting the
product accidentally.
•Store idle products out of the reach of children and
do not allow persons unfamiliar with the product or
these instructions to operate the product. Products
are dangerous in the hands of untrained users.
•Maintain products and accessories. Check for
misalignment or binding of moving parts, breakage
of parts and any other condition that may affect the
product's operation. If damaged, have the product
repaired before use. Many accidents are caused by
poorly maintained products.
•Keep cutting tools sharp and clean. Properly
maintained cutting tools with sharp cutting edges are
less likely to bind and are easier to control.
•Use the product, accessories and tool bits etc. in
accordance with these instructions, taking into
account the working conditions and the work to be
performed. Use of the product for operations
different from those intended could result in a
hazardous situation.
•Keep handles and grasping surfaces dry, clean and
free from oil and grease. Slippery handles and
grasping surfaces do not allow for safe handling and
control of the product in unexpected situations.
Service
•Have your product serviced by a qualified repair
person using only identical replacement parts. This
will ensure that the safety of the product is
maintained.
•Never service damaged battery packs. Service of
battery packs should only be performed by the
manufacturer or authorized service providers.
Battery tool use and care
•Recharge only with the charger specified by the
manufacturer. A charger that is suitable for one type
of battery pack may create a risk of fire when used
with another battery pack.
•Use products only with specifically designated
battery packs. Use of any other battery packs may
create a risk of injury and fire.
•When battery pack is not in use, keep it away from
other metal objects, like paper clips, coins, keys,
nails, screws or other small metal objects, that can
make a connection from one terminal to another.
Shorting the battery terminals together may cause
burns or a fire.
•Under abusive conditions, liquid may be ejected from
the battery; avoid contact. If contact accidentally
occurs, flush with water. If liquid contacts eyes,
additionally seek medical help. Liquid ejected from
the battery may cause irritations or burns.
•Do not use a battery pack or tool that is damaged or
modified. Damaged or modified batteries may exhibit
unpredictable behavior resulting in fire, explosion or
risk of injury.
•Do not expose a battery pack or tool to fire or
excessive temperature. Exposure to fire or
temperature above 130 °C / 265 °F may cause
explosion.
•Follow all charging instructions and do not charge
the battery pack or tool outside the temperature
range specified in the instructions. Charging
improperly or at temperatures outside the specified
range may damage the battery and increase the risk
of fire.
Lawnmower safety warnings
•Do not use the lawnmower in bad weather
conditions, especially when there is a risk of
lightning. This decreases the risk of being struck by
lightning.
•Thoroughly inspect the area for wildlife where the
lawnmower is to be used. Wildlife may be injured by
the lawnmower during operation.
•Thoroughly inspect the area where the lawnmower is
to be used and remove all stones, sticks, wires,
bones, and other foreign objects. Thrown objects
can cause personal injury.
•Before using the lawnmower, always visually inspect
to see that the blade and the blade assembly are not
worn or damaged. Worn or damaged parts increase
the risk of injury.
•Before use, check the supply cord and any extension
cord for signs of damage or aging. Do not use the
lawnmower if the cord is damaged or worn. If the
cord is damaged or worn during use, switch off the
lawnmower and do not touch the cord before
disconnecting it from the supply. A damaged supply
10 1696 - 002 - 03.12.2021

cord or extension cord may result in electric shock,
fire and/or serious injury.
•Check the grass catcher frequently for wear or
deterioration. A worn or damaged grass catcher may
increase the risk of personal injury.
•Keep guards in place. Guards must be in working
order and be properly mounted. A guard that is
loose, damaged, or is not functioning correctly may
result in personal injury.
•Keep all cooling air inlets clear of debris. Blocked air
inlets and debris may result in overheating or risk of
fire.
•While operating the lawnmower, always wear non-
slip and protective footwear. Do not operate the
lawnmower when barefoot or wearing open sandals.
This reduces the chance of injury to the feet from
contact with the moving blade.
•While operating the lawnmower, always wear long
trousers. Exposed skin increases the likelihood of
injury from thrown objects.
•Do not operate the lawnmower in wet grass. Walk,
never run. This reduces the risk of slipping and
falling which may result in personal injury.
•Do not operate the lawnmower on excessively steep
slopes. This reduces the risk of loss of control,
slipping and falling which may result in personal
injury.
•When working on slopes, always be sure of your
footing, always work across the face of slopes, never
up or down and exercise extreme caution when
changing direction. This reduces the risk of loss of
control, slipping and falling which may result in
personal injury.
•Use extreme caution when reversing or pulling the
lawnmower towards you. Always be aware of your
surroundings. This reduces the risk of tripping during
operation.
•Keep the supply cord away from the cutting blades.
A damaged supply cord may result in electric shock,
fire and/or serious injury.
•Switch off and remove plug from mains if the cord is
entangled or damaged. Entangled or damaged cords
can increase the risk of electric shock.
•Do not touch blades and other hazardous moving
parts while they are still in motion. This reduces the
risk of injury from moving parts.
•When clearing jammed material or cleaning the
lawnmower, make sure all power switches are off
and the power cord is disconnected. Unexpected
operation of the lawnmower may result in serious
personal injury.
Residual current device
• Use a residual current device with a tripping current
of maximum 30 mA.
General safety instructions
WARNING: Read the warning
instructions that follow before you use the
product.
• This product is dangerous if used incorrectly or if you
are not careful. Injury or death can occur if you do
not obey the safety instructions.
• This product produces an electromagnetic field
during operation. This field may under some
circumstances interfere with active or passive
medical implants. To reduce the risk of serious or
fatal injury we recommend persons with medical
implants to consult their physician and the medical
implant manufacturer before operating this product.
• Always be careful and use your common sense. If
you are not sure how to operate the product in a
special situation, stop and speak to your Husqvarna
dealer before you continue.
• Keep in mind that the operator will be held
responsible for accidents that involve other persons
or their property.
• Keep the product clean. Make sure that you can
clearly read signs and decals.
• Never allow children or people unfamiliar with these
instructions to use the appliance. Local regulations
may restrict the age of the operator.
• Always monitor a person, with decreased physical
capacity or mental capacity, that uses the product. A
responsible adult must be there at all times.
• Do not use the product if you are tired, ill, or under
the influence of alcohol, drugs or medicine. This has
a negative effect on your vision, alertness,
coordination and judgment.
• Do not use the product if it is defective.
• Do not change this product or use it if it is possible
that it has been changed by others.
Work safety
WARNING: Read the warning
instructions that follow before you use the
product.
• Use this product to cut grass lawns only. It is not
permitted to use it for other tasks.
• Use personal protective equipment. Refer to
Personal protective equipment on page 12
.
• Make sure that you know how to stop the motor
quickly in an emergency.
• Do not operate the product in rain or wet conditions.
The risk of electrical shock increases if water enters
the product.
• Do not operate the product unless the blade and all
covers are attached correctly. An incorrectly
attached blade can come loose and cause personal
injury.
1696 - 002 - 03.12.2021 11

• Make sure that the blade does not hit objects such
as stones and roots. This can do damage to the
blade and bend the motor shaft. A bent axle causes
heavy vibration and a very high risk that the blade
becomes loose.
• If the blade hits an object or if vibrations occur, stop
the product immediately. Stop the motor, turn the
safety key to 0 and remove the battery. Wait until
moving parts stop. Examine the product for
damages. Tighten loose parts. Repair damages and
replace damaged parts. Let an approved service
agent do the repair.
• Never attach the motor brake handle permanently to
the handle when the motor is started.
• Put the product on a stable, flat surface and start it.
Make sure that the blade does not hit the ground or
other objects.
• Always stay behind the product when you operate it.
• Let all the wheels stay on the ground and keep 2
hands on the handle when you operate the product.
Keep your hands and feet away from the rotating
blades.
• Do not tilt the product when you start the motor or
during operation of the product.
• Be careful when you pull the product rearward.
• Never lift up the product when the motor is started. If
you must lift the product, first stop the motor, turn the
safety key to 0 and remove the battery.
• Do not walk rearward when you operate the product.
• Stop the motor when it is necessary to tilt the
product for transportation or before you move across
areas without grass, for example paths made of
gravel, stone and asphalt.
• Do not run with the product when the motor is
started. Always walk when you operate the product.
• Stop the motor before you change the cutting height.
Never make adjustments with the motor started.
• Never let the product stay out of view with the motor
started. Stop the motor and make sure that the
cutting equipment does not rotate.
• The vibrations in the product during operation can be
different from the declared vibration value in
Technical data on page 21
. The difference is
caused by variations in how the product is used. If
you operate the product frequently or for long
periods of time, take breaks regularly to prevent
injury from vibrations.
Safety instructions for operation
Personal protective equipment
WARNING: Read the warning
instructions that follow before you use the
product.
• Personal protective equipment cannot fully prevent
injury but it decreases the degree of injury if an
accident does occur. Let your dealer help you select
the right equipment.
• Use heavy-duty slip-resistant boots or shoes. Do not
use open shoes or go with bare feet.
• Use heavy, long pants.
• Use protective gloves when necessary, for example
when you attach, examine or clean the cutting
equipment.
• We recommend to use hearing protection.
Safety devices on the product
WARNING: Read the warning
instructions that follow before you use the
product.
• Do not use a product with defective safety devices.
• Do not remove or do modifications to safety devices.
• Do a check of the safety devices regularly. If the
safety devices are defective, speak to your
Husqvarna service agent.
To do a check of the cutting cover
The cutting cover decreases vibrations in the product
and decreases the risk of injury from the blade.
• Examine the cutting cover to make sure that there
are no damages such as cracks.
To do a check of the safety key
The safety key is below the battery lid. The safety key
connects the battery that supplies the motor with power.
• Start and stop the motor to do a check of the safety
key.
• If the safety key operates correctly, the motor can
only start when the safety key is in position 1. (Fig.
15)
To do a check of the motor brake handle
The motor brake handle stops the motor. When the
motor brake handle is released, the motor stops.
• Start the product. Refer to
Operation on page 14
.
• Release the motor brake handle. (Fig. 16)
• Make sure that the product stops. If the motor does
not stop in 3 seconds, let an approved Husqvarna
service agent adjust the motor brake.
To do a check of the start inhibitor
Do a check of the start inhibitor to make sure that it
prevents operation of the motor.
1. Push the motor brake handle in the direction of the
handlebar. The start inhibitor stops the movement.
2. Push the start inhibitor out. (Fig. 17)
3. Release the start inhibitor and make sure that it goes
back to its initial position.
12 1696 - 002 - 03.12.2021

Battery safety
WARNING: Read the warning
instructions that follow before you use the
product.
• Use Husqvarna rechargeable batteries as a power
supply for related Husqvarna products only. To
prevent injury, do not use the battery as a power
supply for other devices.
• Do not use non-rechargeable batteries.
• Risk of electrical shock. Do not connect the battery
terminals to keys, coins, screws or other metal. This
can cause a short circuit of the battery.
• Do not put objects into the air slots of the battery.
• Keep the battery away from sunlight, heat or open
flame. The battery can explode and cause burns
and/or chemical burns.
• Keep the battery away from rain and wet conditions.
• Keep the battery away from microwaves and high
pressure.
• Do not try to disassemble or break the battery.
• If the battery leaks, do not let the liquid touch your
body or eyes. If you have touched the liquid, clean
the area with a large quantity of water and get
medical aid.
• Use the battery in the product only when the ambient
temperature is between 5 °C - 40 °C.
• Use the battery charger only when the ambient
temperature is between 5 °C - 40 °C.
• The battery will not charge if the battery temperature
is more than 50 ° C.
• Do not clean the battery or the battery charger with
water. Refer to
To clean the battery and the battery
charger on page 18
.
• Do not use a defective or damaged battery.
• Keep batteries in storage away from metal objects
such as nails, coins, jewellery.
Battery charger safety
WARNING: Read the warning
instructions that follow before you use the
product.
• Use the QC battery chargers to charge Husqvarna
replacement batteries only.
• Risk of electrical shock or short circuit. Do not put
objects into the air slots of the charger. Do not try to
disassemble the battery charger. Do not connect the
charger terminals to metal objects. Use an approved
mains socket.
• This product produces an electromagnetic field
during operation. This field may under some
circumstances interfere with active or passive
medical implants. To reduce the risk of serious or
fatal injury, we recommend persons with medical
implants to consult their physician and the medical
implant manufacturer before operating this product.
• Regularly make sure that the power cord of the
battery charger is not damaged and that there are no
cracks in it.
• Do not lift the battery charger by the power cord. To
disconnect the battery charger from a mains socket,
pull out the plug. Do not pull the power cord.
• Keep the power cord and extension cables away
from water, oil and sharp edges. Make sure that the
cable is not pinched in doors, fences or equivalent. It
can cause the charger to become energized.
• Do not clean the battery charger with water.
• The battery charger can be used by children aged
from 8 years and above and persons with reduced
physical, sensory, or mental capabilities or lack of
experience and knowledge if they have been given
supervision or instruction concerning use of the
battery charger in a safe way and understand the
hazards involved. Children shall not play with the
battery charger. Cleaning and user maintenance
shall not be made by children without supervision.
• Do not charge non-rechargeable batteries in the
battery charger.
• Do not use the battery charger near flammable
materials or materials that can cause corrosion. Do
not cover the battery charger. Pull out the plug to the
battery charger if there is smoke or fire.
• Do not use a defective or damaged battery charger.
• Only charge the battery indoors in a room with good
airflow and away from sunlight. Do not charge the
battery in wet conditions.
Safety instructions for maintenance
WARNING: Read the warning
instructions that follow before you use the
product.
• To prevent accidental start during maintenance, turn
the safety key to 0 and remove the battery. Wait at
minimum 5 seconds before you start the
maintenance.
• Only do the maintenance work written in this
operator's manual. More extensive work and
professional repairs must be done by an approved
service agent. Speak to your nearest service agent
for more information.
• Do the maintenance work correctly to increase the
lifetime of the product and decrease the risk of
accidents.
• Replace damaged, worn or broken parts. Always use
original spare parts from the manufacturer. Other
spare parts can cause damage to the product and
increase the risk of accidents.
• To prevent injury, do not remove or do modifications
to safety devices.
1696 - 002 - 03.12.2021 13

• Put on heavy duty gloves when you use the cutting
equipment. The blade is very sharp and cuts can
easily occur.
• Keep the cutting edges sharp and clean for the best
and safest performance.
• Let your service agent regularly examine the product
and make necessary adjustments and repairs.
• Obey the instructions for how to change accessories.
Only use accessories from the manufacturer.
• When not in operation, keep the product, battery and
battery charger apart in a dry, indoor and locked
area. Make sure that children and persons that are
not approved cannot get access to the product,
battery or battery charger.
Assembly
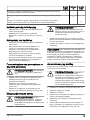
Introduction
WARNING: Before you assemble the
product, read the safety chapter.
WARNING: To prevent accidental start
during assembly, turn the safety key to 0,
remove the battery and wait at minimum 5
seconds.
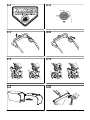
To adjust the handle
1. Loosen the lower knobs.
2. Move the knobs to the lower end of the grooves on
the left and the right side of the product. (Fig. 18)
3. Set the handle height in one of the 2 available
positions.
4. Move the knobs up in the direction of the handle until
they stop and you hear a click. (Fig. 19)
5. Tighten the knobs fully.
To assemble the grass catcher
1. Attach the grass catcher frame to the grass bag with
the rigid part of the bag on the bottom. Keep the
handle of the frame on top of the grass bag. (Fig. 20)
2. Attach the bottom section of the grass catcher frame
in the groove on the bottom of the grass catcher.
3. Attach the grass bag to the grass catcher frame with
the clips. (Fig. 21)
4. Lift the rear cover.
5. Attach the grass catcher to the top edge of the
chassis.
6. Put the lower part of the grass catcher into the grass
discharge channel. (Fig. 22)
To assemble the mulch plug
(accessory)
1. Lift up the rear cover and remove the grass catcher.
2. Put the mulch plug into the discharge channel. (Fig.
23)
3. Replace the blade with the mulch blade that is
supplied in the mulch kit. Refer to
To replace the
blade on page 18
.
Operation
Introduction
WARNING: Before you operate the
product, you must read and understand the
safety chapter.
Husqvarna Connect
Husqvarna Connect is a free app for your mobile device.
The Husqvarna Connect app gives extended functions
for your Husqvarna product:
• Extended product information.
• Information about, and help with, product parts and
servicing.
To start to use Husqvarna Connect
1. Download the Husqvarna Connect app on your
mobile device.
2. Register in the Husqvarna Connect app.
3. Follow the instruction steps in the Husqvarna
Connect app to connect and register the product.
Note: Husqvarna Connect app is not available for
download in all markets. Speak to your servicing
dealer for more information.
14 1696 - 002 - 03.12.2021

Bluetooth® information (LC 347iVX,
LC 353iVX)
Bluetooth® wireless technology
The symbol for
Bluetooth®
wireless technology comes
on when your mobile device is connected to the product.
(Fig. 24)
To set the product in operation position
1. Fold the handle to upright position. (Fig. 25)
2. Move the knobs up in the direction of the handle until
they stop and you hear a click. (Fig. 19)
3. Tighten the knobs fully.
WARNING: Do not operate the product
unless the handle is fully folded up and set
in one of the applicable height positions.
Refer to
To adjust the handle on page 14
.
To set the cutting height
The cutting height can be adjusted in 6 levels.
1. Move the cutting height lever down to decrease the
cutting height.
2. Move the cutting height lever up to increase the
cutting height. (Fig. 26)
CAUTION: Do not set the cutting height
too low. The blades can hit the ground if the
surface of the lawn is not level.
Battery
WARNING: Before you use the battery,
you must read and understand the safety
chapter. You must also read and understand
the operator's manual for the battery and the
battery charger.
Keep the battery and the battery charger in correct
ambient temperatures.
Ambient temperature
Operation of the bat-
tery
5 °C - 40 °C
Charging of the bat-
tery
5 °C - 40 °C
Battery status
The display shows the remaining battery capacity and if
there are problems with the battery. The battery capacity
is shown for 5 seconds after the product is switched off
or the battery indicator button is pressed. The warning
symbol on the battery is on when an error has occurred.
See
Battery on page 19
.
(Fig. 27)
LED lights Battery status
All LEDs are lit Fully charged (75-100%)
LED 1, LED 2, LED 3 are
lit
The battery is 50%-75%
charged
LED 1, LED 2 are lit The battery is 25%-50%
charged
LED 1 is lit The battery is 0%-25%
charged.
LED 1 flashes The battery is empty.
Charge the battery.
To charge the battery
Charge the battery before the first use. The battery is
only 30% charged when supplied to the customer.
Note: The battery charger must be connected to the
voltage and frequency specified on the rating plate.
The battery does not charge if the battery temperature is
above 50°C. The battery charger decreases the
temperature of the battery before it starts to charge.
1. Connect one end of the power cord for the battery
charger into the socket of the battery charger.
2. Connect the other end of the power cord for the
battery charger in an grounded mains socket. The
LED on the battery charger flashes green one time.
(Fig. 28)
3. Put the battery in the battery charger. The green light
on the charger comes on when the battery is
correctly connected to the battery charger. (Fig. 29)
4. When all LEDs on the battery have come on the
battery is fully charged. Charge the battery for
maximum 24 hours.
5. To disconnect the battery charger from the mains
socket, pull the plug, not the power cord.
6. Remove the battery from the battery charger.
Battery charging status
A Husqvarna Li-ion battery can be charged or used at all
charging levels. The battery is not damaged. A fully
charged battery will not decrease its charge when the
battery is left in the charger.
LED display Charging status
LED 1 flashes 0%-25%
LED 1 is lit, LED 2 flashes 25%-50%
1696 - 002 - 03.12.2021 15

LED display Charging status
LED 1, LED 2 are lit, LED
3 flashes
50%-75%
LED 1, LED 2, LED 3 are
lit, LED 4 flashes
75%-100%
LED 1, LED 2, LED 3,
LED 4 are lit
Fully charged
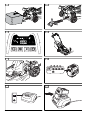
To start the product (LC 247i)
1. Open the battery lid.
2. Put a charged battery in 1 of the battery holders. For
longer operation time, put a second charged battery
in the other battery holder.
3. Turn the safety key to 1. (Fig. 30)
4. Stay behind the product.
5. Loosen the start inhibitor. (Fig. 17)
6. Push the motor brake handle in the direction of the
handlebar. (Fig. 31)
To start the product (LC 347iVX,
LC 353iVX)
1. Open the battery lid.
2. Put a charged battery in 1 of the battery holders. For
longer operation time, put a second charged battery
in the other battery holder.
3. Turn the safety key to 1. (Fig. 32)
4. Stay behind the product.
5. Push the ON/OFF button (A) on the control panel.
The display comes on. The battery indicator (B)
shows the battery charge of the 2 batteries. The
number of the battery that operates is shown
adjacent to the battery indicator. For models
LC 347iVX, LC 353iVX, the display also shows the
set speed. (Fig. 33)
6. Loosen the start inhibitor. (Fig. 34)
7. Push the motor brake handle in the direction of the
handlebar. (Fig. 35)
To use the drive on the wheels
LC 347iVX, LC 353iVX
• Pull the drive bail in the direction of the handlebar to
start the drive. (Fig. 36)
• Push + and - on the control panel to set the drive
speed in 4 steps. (Fig. 37)
• Release the drive bail to disengage the drive, for
example when you go near an obstacle.
To use the SavE™ function (LC 247i)
The product has a battery saving function (SavE™) that
gives longer operation time.
• Push the SavE™ button to position 1 to start the
function. (Fig. 38)
• Push the SavE™ button to position 0 to stop the
function.
Note: The SavE™ function stops automatically if the
ground conditions make it necessary to have a higher
output. The SavE™ function starts automatically again
when the ground conditions let it.
To use the SavE™ function
(LC 347iVX, LC 353iVX)
The product has a battery saving function (SavE™) that
gives longer operation time.
1. Push the SavE™ button (A) to start the function. The
SavE™ symbol (B) on the display comes on.
2. Push the SavE™ button again to stop the function.
The SavE™ symbol (B) on the display goes out. (Fig.
39)
Note: The SavE™ function stops automatically if the
ground conditions make it necessary to have a higher
output. The SavE™ function starts automatically again
when the ground conditions let it.
High load function
When the product cuts long or wet grass, the motor
automatically increases rpm. The motor goes back to
standard mode when high load is not necessary.
Automatic restart
During operation, the blade and motor can temporarily
stop because of obstacles such as grass blockage
below the cutting cover. If this occurs and you keep the
motor brake handle pushed down, the product tries to
restart automatically. If the product does not restart in 5
seconds, it can be necessary to clean below the cutting
cover. Refer to
To clean the product on page 18
.
WARNING: Before a check of the
cutting cover, release the motor brake
handle, turn the safety key to 0, remove the
battery and wait at minimum 5 seconds.
There is a risk of injury if the obstacle is
removed and the product accidentally starts.
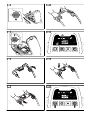
To stop the product (LC 247i)
WARNING: Turn the safety key to 0
before you let the product out of view.
1. Release the motor brake handle to stop the motor.
(Fig. 40)
2. Open the battery lid and turn the safety key to 0.
(Fig. 41)
16 1696 - 002 - 03.12.2021

3. To remove the battery, push the 2 release buttons
and pull out the battery. (Fig. 42)
4. Charge the battery if it is weak. For more
information, refer to
To charge the battery on page
15
.
To stop the product (LC 347iVX,
LC 353iVX)
WARNING: Turn the safety key to 0
before you let the product out of view.
1. Release the motor brake handle to stop the motor.
(Fig. 43)
2. Push the ON/OFF button on the control panel. All
LED lights and symbols on the display go out. (Fig.
44)
3. Open the battery lid and turn the safety key to 0.
(Fig. 45)
4. To remove the battery, push the 2 release buttons
and pull out the battery. (Fig. 46)
5. Charge the battery if it is weak. For more
information, refer to
To charge the battery on page
15
.
Note: The product is automatically de-energized if you
do not operate it for some minutes. To start the product
again, refer to
To start the product (LC 347iVX,
LC 353iVX) on page 16
.
To get a good result
• Always use a sharp blade. A blunt blade gives an
irregular result and the cut surface of the grass
becomes yellow. A sharp blade also uses less
energy than a blunt blade.
• Do not cut more than ⅓ of the length of the grass.
Cut first with the cutting height set high. Examine the
result and lower the cutting height to an applicable
level. If the grass is very long, drive slowly and cut 2
times if necessary.
• Cut in different directions each time to prevent
stripes in the lawn.
• Keep the cutting cover clean. Buildup from grass and
dirt on the inner side of the cutting cover can
decrease the cutting result. Refer to
To clean the
product on page 18
.
To cut grass without a grass catcher or
mulch plug attached
• Lift up the rear cover and remove the grass catcher.
• If a mulch plug and a mulch blade are attached,
remove them.
• Close the rear cover before you operate the product.
When you operate the product, the cut grass discharges
below the rear cover.
Maintenance
Introduction
WARNING: Before you do
maintenance, you must read and
understand the safety chapter.
For all servicing and repair work on the product, special
training is necessary. We guarantee the availability of
professional repairs and servicing. If your dealer is not a
service agent, speak to them for information about the
nearest service agent.
For more detailed information, refer to
www.husqvarna.com.
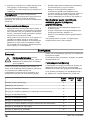
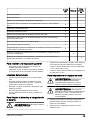
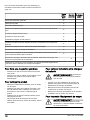
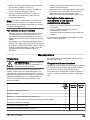
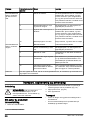
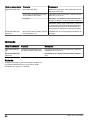
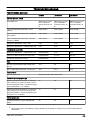
Maintenance schedule
The maintenance intervals are calculated from daily use
of the product. The intervals change if the product is not
used daily.
For maintenance identified with * see instructions in
Safety on page 9
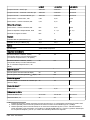
.
Each use Monthly Each
season
Do a general inspection X
Clean the product X
Do a check of the start inhibitor * X
Make sure that the safety devices on the product are not defective * X
Examine the cutting equipment X
Examine the cutting cover * X
1696 - 002 - 03.12.2021 17

Each use Monthly Each
season
Do a check of the motor brake handle * X
Make sure that the ON/OFF button operates correctly and is not defective X
Examine the battery for damage X
Do a check of the battery charge X
Make sure that the release buttons on the battery operates correctly and that the
battery locks into the product X
Examine the battery charger for damage and make sure that it operates correct-
ly. X
Examine the connections between the battery and the product. Also examine the
connection between the battery and the battery charger. X
To do a general inspection
• Make sure that the nuts and screws on the product
are tightened.
• Make sure that the cables on the product are not in a
position where they can get damaged.
To clean the product
• Clean plastic parts with a clean and dry cloth.
• Do not use water to clean the product. Water can
enter the battery or the motor and cause short circuit
or damage to the product.
• Do not use a high pressure washer to clean the
product.
• Do not flush water directly on the motor.
• Use a brush to remove leaves, grass and dirt.
To clean the battery and the battery
charger
WARNING: Do not clean the battery or
the battery charger with water.
• Make sure that the battery and the battery charger
are clean and dry before you put the battery into the
battery charger.
• Clean the battery terminals with compressed air or
use a soft and dry cloth.
• Clean the surfaces of the battery and the battery
charger with a soft and dry cloth.
To examine the cutting equipment
WARNING: To prevent accidental start,
turn the safety key to 0, remove the battery
and wait a minimum 5 seconds.
WARNING: Use protective gloves
when you do maintenance on the cutting
equipment. The blade is very sharp and cuts
can easily occur.
1. Examine the cutting equipment for damage or
cracks. Always replace a damaged cutting
equipment.
2. Look at the blade to see if it is damaged or blunt.
Note: It is necessary to balance the blade after it is
sharpened. Let a service center sharpen, replace and
balance the blade. If you hit an obstacle that causes the
product to stop, replace the damaged blade. Let the
service center estimate if the blade can be sharpened or
must be replaced.
To replace the blade
Refer to
Technical data on page 21
for the correct type
of blade.
WARNING: Lock the blade with a block
of wood to prevent injury to fingers when
you replace the blade. The blade can be
moved when the motor is off and fingers can
become trapped between the blade and
stationary parts.
1. Lock the blade with a block of wood. (Fig. 47)
2. Remove the blade bolt.
3. Remove the blade.
4. Examine the blade support and blade bolt to see if
there are damages.
5. Examine the motor shaft to make sure that it is not
bent.
6. When you attach the new blade, point the angled
ends of the blade in the direction of the cutting cover.
(Fig. 48)
18 1696 - 002 - 03.12.2021

7. Make sure that the blade is aligned with the center of
the motor shaft.
8. Lock the blade with a block of wood. Attach the
spring washer and tighten the bolt and washer with a
torque of 23–28 Nm. (Fig. 49)
9. Pull the blade around by hand and make sure that it
turns freely.
WARNING: Use heavy duty gloves.
The blade is very sharp and cuts can
easily occur.
10. Start the product to do a test of the blade. If the
blade is not correctly attached, there is vibration in
the product or the cutting result is unsatisfactory.
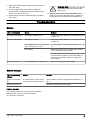
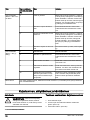
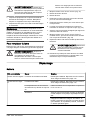
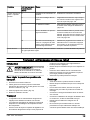
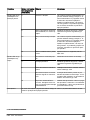
Troubleshooting
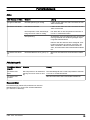
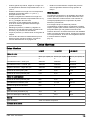
Battery
LED on the battery Cause Solution
The green LED flashes. The battery voltage is low. Charge the battery. Refer to
To charge the battery
on page 15
.
The error LED flashes. The battery is weak. Charge the battery. Refer to
To charge the battery
on page 15
.
The temperature in the work environ-
ment is too high or too low.
Use the battery in temperatures between 5 °C - 40
°C.
Overvoltage. Make sure that the mains voltage is the same as
on the rating plate on the product.
Remove the battery from the battery charger. Wait
5 seconds and try again to charge the battery. If
the problem continues, speak to an approved
service agent.
The error LED is on. The cell difference too much (1V). Speak to an approved service agent.
Battery charger
LED on the battery
charger
Cause Solution
The error LED flash-
es.
The temperature in the work en-
vironment is too high or too low.
Use the battery charger in temperatures between 5 °C -
40 °C.
The error LED is on. Speak to an approved service agent.
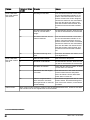
Lawn mower
The warning indicator (error LED) is found below the
battery lid ((LC 247i)) or on the control panel
((LC 347iVX, LC 353iVX)).
1696 - 002 - 03.12.2021 19

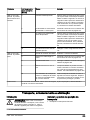
Problem Error LED (number
of flashes)
Cause Solution
Error LED flashes.
The product does
not operate cor-
rectly.
3 The blade is blocked. Turn the safety key to 0 to prevent acci-
dental start. Remove the battery and
wait a minimum of 5 seconds. Remove
possible obstacles and make sure that
the blade can rotate freely. If the prob-
lem continues, speak to an approved
service agent.
5 The motor speed drops too
much, and the motor stops.
Increase the cutting height. Refer to
To
set the cutting height on page 15
.
61The wheels or transmission is
blocked.
Turn the safety key to 0 to prevent acci-
dental start. Remove the battery and
wait a minimum of 5 seconds. Remove
the possible obstacles and make sure
that the wheels can rotate freely. If the
problem continues, speak to an ap-
proved service agent.
10 The motor control is too hot. Stop the motor and wait until it has be-
come cool.
Error LED flashes.
The product stops.
0 Battery connector failure. Examine the battery connector.
3 There is overload in the mo-
tor.
Increase the cutting height. Refer to
To
set the cutting height on page 15
.
8 The battery is weak. Charge the battery. Refer to
To charge
the battery on page 15
.
9 Battery error or no signal from
battery.
Put the battery in the product correctly
and examine the battery connector. If the
error LED on the battery flashes. Refer
to
Battery on page 19
.
12 Incorrect start procedure. The
motor brake handle has been
engaged before the motor
starts.
Release the motor brake handle and
wait approximately 5 seconds. Push the
motor brake handle down again to start
the product.
Other errors. If other errors occur, turn the safety key to 0, remove the battery and speak to an approved
service agent.
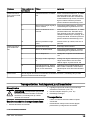
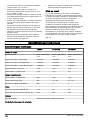
Transportation, storage and disposal
Introduction
WARNING: To prevent unintentional
start during transport turn the safety key
to ”0”, remove the battery and wait at least 5
seconds.
To set the product in transport position
1. Loosen the lower knobs.
2. Move the knobs to the lower end of the grooves on
the left and the right side of the product. (Fig. 18)
3. Fold the handle forward. (Fig. 50)
4. Remove the grass catcher.
1LC 347iVX, LC353iVX
20 1696 - 002 - 03.12.2021
Pagina se încarcă...
Pagina se încarcă...
Pagina se încarcă...
Pagina se încarcă...
Pagina se încarcă...
Pagina se încarcă...
Pagina se încarcă...
Pagina se încarcă...
Pagina se încarcă...
Pagina se încarcă...
Pagina se încarcă...
Pagina se încarcă...
Pagina se încarcă...
Pagina se încarcă...
Pagina se încarcă...
Pagina se încarcă...
Pagina se încarcă...
Pagina se încarcă...
Pagina se încarcă...
Pagina se încarcă...
Pagina se încarcă...
Pagina se încarcă...
Pagina se încarcă...
Pagina se încarcă...
Pagina se încarcă...
Pagina se încarcă...
Pagina se încarcă...
Pagina se încarcă...
Pagina se încarcă...
Pagina se încarcă...
Pagina se încarcă...
Pagina se încarcă...
Pagina se încarcă...
Pagina se încarcă...
Pagina se încarcă...
Pagina se încarcă...
Pagina se încarcă...
Pagina se încarcă...
Pagina se încarcă...
Pagina se încarcă...
Pagina se încarcă...
Pagina se încarcă...
Pagina se încarcă...
Pagina se încarcă...
Pagina se încarcă...
Pagina se încarcă...
Pagina se încarcă...
Pagina se încarcă...
Pagina se încarcă...
Pagina se încarcă...
Pagina se încarcă...
Pagina se încarcă...
Pagina se încarcă...
Pagina se încarcă...
Pagina se încarcă...
Pagina se încarcă...
Pagina se încarcă...
Pagina se încarcă...
Pagina se încarcă...
Pagina se încarcă...
Pagina se încarcă...
Pagina se încarcă...
Pagina se încarcă...
Pagina se încarcă...
Pagina se încarcă...
Pagina se încarcă...
Pagina se încarcă...
Pagina se încarcă...
Pagina se încarcă...
Pagina se încarcă...
Pagina se încarcă...
Pagina se încarcă...
Pagina se încarcă...
Pagina se încarcă...
Pagina se încarcă...
Pagina se încarcă...
Pagina se încarcă...
Pagina se încarcă...
Pagina se încarcă...
Pagina se încarcă...
Pagina se încarcă...
Pagina se încarcă...
Pagina se încarcă...
Pagina se încarcă...
Pagina se încarcă...
Pagina se încarcă...
Pagina se încarcă...
Pagina se încarcă...
Pagina se încarcă...
Pagina se încarcă...
Pagina se încarcă...
Pagina se încarcă...
Pagina se încarcă...
Pagina se încarcă...
Pagina se încarcă...
Pagina se încarcă...
Pagina se încarcă...
Pagina se încarcă...
Pagina se încarcă...
Pagina se încarcă...
Pagina se încarcă...
Pagina se încarcă...
Pagina se încarcă...
Pagina se încarcă...
Pagina se încarcă...
Pagina se încarcă...
Pagina se încarcă...
Pagina se încarcă...
Pagina se încarcă...
Pagina se încarcă...
Pagina se încarcă...
Pagina se încarcă...
Pagina se încarcă...
Pagina se încarcă...
Pagina se încarcă...
Pagina se încarcă...
Pagina se încarcă...
Pagina se încarcă...
Pagina se încarcă...
Pagina se încarcă...
Pagina se încarcă...
Pagina se încarcă...
Pagina se încarcă...
Pagina se încarcă...
Pagina se încarcă...
Pagina se încarcă...
Pagina se încarcă...
Pagina se încarcă...
Pagina se încarcă...
Pagina se încarcă...
Pagina se încarcă...
Pagina se încarcă...
Pagina se încarcă...
Pagina se încarcă...
Pagina se încarcă...
Pagina se încarcă...
Pagina se încarcă...
Pagina se încarcă...
Pagina se încarcă...
Pagina se încarcă...
Pagina se încarcă...
Pagina se încarcă...
Pagina se încarcă...
Pagina se încarcă...
Pagina se încarcă...
Pagina se încarcă...
Pagina se încarcă...
Pagina se încarcă...
Pagina se încarcă...
Pagina se încarcă...
Pagina se încarcă...
Pagina se încarcă...
Pagina se încarcă...
Pagina se încarcă...
Pagina se încarcă...
Pagina se încarcă...
Pagina se încarcă...
Pagina se încarcă...
Pagina se încarcă...
Pagina se încarcă...
Pagina se încarcă...
Pagina se încarcă...
Pagina se încarcă...
Pagina se încarcă...
Pagina se încarcă...
Pagina se încarcă...
Pagina se încarcă...
Pagina se încarcă...
Pagina se încarcă...
Pagina se încarcă...
Pagina se încarcă...
Pagina se încarcă...
Pagina se încarcă...
Pagina se încarcă...
Pagina se încarcă...
Pagina se încarcă...
Pagina se încarcă...
Pagina se încarcă...
Pagina se încarcă...
Pagina se încarcă...
Pagina se încarcă...
Pagina se încarcă...
Pagina se încarcă...
Pagina se încarcă...
Pagina se încarcă...
Pagina se încarcă...
Pagina se încarcă...
Pagina se încarcă...
Pagina se încarcă...
Pagina se încarcă...
Pagina se încarcă...
Pagina se încarcă...
Pagina se încarcă...
Pagina se încarcă...
Pagina se încarcă...
Pagina se încarcă...
Pagina se încarcă...
Pagina se încarcă...
Pagina se încarcă...
Pagina se încarcă...
Pagina se încarcă...
Pagina se încarcă...
Pagina se încarcă...
Pagina se încarcă...
Pagina se încarcă...
Pagina se încarcă...
Pagina se încarcă...
Pagina se încarcă...
Pagina se încarcă...
Pagina se încarcă...
Pagina se încarcă...
Pagina se încarcă...
Pagina se încarcă...
Pagina se încarcă...
Pagina se încarcă...
Pagina se încarcă...
Pagina se încarcă...
Pagina se încarcă...
Pagina se încarcă...
Pagina se încarcă...
Pagina se încarcă...
Pagina se încarcă...
Pagina se încarcă...
Pagina se încarcă...
Pagina se încarcă...
Pagina se încarcă...
Pagina se încarcă...
Pagina se încarcă...
Pagina se încarcă...
Pagina se încarcă...
Pagina se încarcă...
Pagina se încarcă...
Pagina se încarcă...
Pagina se încarcă...
Pagina se încarcă...
Pagina se încarcă...
Pagina se încarcă...
Pagina se încarcă...
Pagina se încarcă...
Pagina se încarcă...
Pagina se încarcă...
Pagina se încarcă...
Pagina se încarcă...
Pagina se încarcă...
Pagina se încarcă...
Pagina se încarcă...
Pagina se încarcă...
Pagina se încarcă...
Pagina se încarcă...
Pagina se încarcă...
Pagina se încarcă...
Pagina se încarcă...
Pagina se încarcă...
Pagina se încarcă...
Pagina se încarcă...
Pagina se încarcă...
Pagina se încarcă...
Pagina se încarcă...
Pagina se încarcă...
Pagina se încarcă...
Pagina se încarcă...
Pagina se încarcă...
Pagina se încarcă...
Pagina se încarcă...
Pagina se încarcă...
Pagina se încarcă...
Pagina se încarcă...
Pagina se încarcă...
Pagina se încarcă...
Pagina se încarcă...
Pagina se încarcă...
Pagina se încarcă...
Pagina se încarcă...
Pagina se încarcă...
Pagina se încarcă...
Pagina se încarcă...
Pagina se încarcă...
Pagina se încarcă...
Pagina se încarcă...
Pagina se încarcă...
Pagina se încarcă...
Pagina se încarcă...
Pagina se încarcă...
Pagina se încarcă...
Pagina se încarcă...
Pagina se încarcă...
Pagina se încarcă...
Pagina se încarcă...
Pagina se încarcă...
Pagina se încarcă...
Pagina se încarcă...
Pagina se încarcă...
Pagina se încarcă...
Pagina se încarcă...
Pagina se încarcă...
Pagina se încarcă...
Pagina se încarcă...
Pagina se încarcă...
Pagina se încarcă...
Pagina se încarcă...
Pagina se încarcă...
Pagina se încarcă...
Pagina se încarcă...
Pagina se încarcă...
Pagina se încarcă...
Pagina se încarcă...
Pagina se încarcă...
Pagina se încarcă...
Pagina se încarcă...
Pagina se încarcă...
Pagina se încarcă...
Pagina se încarcă...
Pagina se încarcă...
Pagina se încarcă...
Pagina se încarcă...
Pagina se încarcă...
Pagina se încarcă...
Pagina se încarcă...
Pagina se încarcă...
Pagina se încarcă...
Pagina se încarcă...
Pagina se încarcă...
Pagina se încarcă...
Pagina se încarcă...
Pagina se încarcă...
Pagina se încarcă...
Pagina se încarcă...
Pagina se încarcă...
Pagina se încarcă...
Pagina se încarcă...
Pagina se încarcă...
Pagina se încarcă...
Pagina se încarcă...
Pagina se încarcă...
Pagina se încarcă...
Pagina se încarcă...
Pagina se încarcă...
Pagina se încarcă...
Pagina se încarcă...
Pagina se încarcă...
Pagina se încarcă...
Pagina se încarcă...
Pagina se încarcă...
Pagina se încarcă...
Pagina se încarcă...
Pagina se încarcă...
Pagina se încarcă...
Pagina se încarcă...
Pagina se încarcă...
Pagina se încarcă...
Pagina se încarcă...
Pagina se încarcă...
Pagina se încarcă...
Pagina se încarcă...
Pagina se încarcă...
Pagina se încarcă...
Pagina se încarcă...
Pagina se încarcă...
Pagina se încarcă...
Pagina se încarcă...
Pagina se încarcă...
Pagina se încarcă...
Pagina se încarcă...
Pagina se încarcă...
Pagina se încarcă...
Pagina se încarcă...
Pagina se încarcă...
Pagina se încarcă...
Pagina se încarcă...
Pagina se încarcă...
Pagina se încarcă...
Pagina se încarcă...
Pagina se încarcă...
Pagina se încarcă...
Pagina se încarcă...
Pagina se încarcă...
Pagina se încarcă...
Pagina se încarcă...
Pagina se încarcă...
Pagina se încarcă...
Pagina se încarcă...
Pagina se încarcă...
Pagina se încarcă...
Pagina se încarcă...
Pagina se încarcă...
Pagina se încarcă...
Pagina se încarcă...
Pagina se încarcă...
Pagina se încarcă...
Pagina se încarcă...
Pagina se încarcă...
Pagina se încarcă...
Pagina se încarcă...
Pagina se încarcă...
Pagina se încarcă...
Pagina se încarcă...
Pagina se încarcă...
Pagina se încarcă...
Pagina se încarcă...
Pagina se încarcă...
Pagina se încarcă...
Pagina se încarcă...
Pagina se încarcă...
Pagina se încarcă...
Pagina se încarcă...
Pagina se încarcă...
Pagina se încarcă...
Pagina se încarcă...
Pagina se încarcă...
Pagina se încarcă...
Pagina se încarcă...
Pagina se încarcă...
Pagina se încarcă...
Pagina se încarcă...
Pagina se încarcă...
Pagina se încarcă...
Pagina se încarcă...
Pagina se încarcă...
Pagina se încarcă...
Pagina se încarcă...
Pagina se încarcă...
Pagina se încarcă...
Pagina se încarcă...
Pagina se încarcă...
Pagina se încarcă...
Pagina se încarcă...
Pagina se încarcă...
Pagina se încarcă...
Pagina se încarcă...
Pagina se încarcă...
Pagina se încarcă...
Pagina se încarcă...
Pagina se încarcă...
Pagina se încarcă...
Pagina se încarcă...
Pagina se încarcă...
Pagina se încarcă...
Pagina se încarcă...
Pagina se încarcă...
Pagina se încarcă...
Pagina se încarcă...
Pagina se încarcă...
Pagina se încarcă...
Pagina se încarcă...
Pagina se încarcă...
Pagina se încarcă...
Pagina se încarcă...
Pagina se încarcă...
Pagina se încarcă...
Pagina se încarcă...
Pagina se încarcă...
Pagina se încarcă...
Pagina se încarcă...
Pagina se încarcă...
Pagina se încarcă...
Pagina se încarcă...
Pagina se încarcă...
Pagina se încarcă...
Pagina se încarcă...
Pagina se încarcă...
Pagina se încarcă...
Pagina se încarcă...
Pagina se încarcă...
Pagina se încarcă...
Pagina se încarcă...
Pagina se încarcă...
Pagina se încarcă...
Pagina se încarcă...
Pagina se încarcă...
Pagina se încarcă...
Pagina se încarcă...
Pagina se încarcă...
Pagina se încarcă...
Pagina se încarcă...
Pagina se încarcă...
Pagina se încarcă...
Pagina se încarcă...
Pagina se încarcă...
Pagina se încarcă...
Pagina se încarcă...
Pagina se încarcă...
Pagina se încarcă...
Pagina se încarcă...
Pagina se încarcă...
Pagina se încarcă...
Pagina se încarcă...
Pagina se încarcă...
Pagina se încarcă...
Pagina se încarcă...
Pagina se încarcă...
Pagina se încarcă...
Pagina se încarcă...
Pagina se încarcă...
Pagina se încarcă...
Pagina se încarcă...
Pagina se încarcă...
Pagina se încarcă...
Pagina se încarcă...
Pagina se încarcă...
Pagina se încarcă...
Pagina se încarcă...
Pagina se încarcă...
Pagina se încarcă...
Pagina se încarcă...
Pagina se încarcă...
Pagina se încarcă...
Pagina se încarcă...
Pagina se încarcă...
-
 1
1
-
 2
2
-
 3
3
-
 4
4
-
 5
5
-
 6
6
-
 7
7
-
 8
8
-
 9
9
-
 10
10
-
 11
11
-
 12
12
-
 13
13
-
 14
14
-
 15
15
-
 16
16
-
 17
17
-
 18
18
-
 19
19
-
 20
20
-
 21
21
-
 22
22
-
 23
23
-
 24
24
-
 25
25
-
 26
26
-
 27
27
-
 28
28
-
 29
29
-
 30
30
-
 31
31
-
 32
32
-
 33
33
-
 34
34
-
 35
35
-
 36
36
-
 37
37
-
 38
38
-
 39
39
-
 40
40
-
 41
41
-
 42
42
-
 43
43
-
 44
44
-
 45
45
-
 46
46
-
 47
47
-
 48
48
-
 49
49
-
 50
50
-
 51
51
-
 52
52
-
 53
53
-
 54
54
-
 55
55
-
 56
56
-
 57
57
-
 58
58
-
 59
59
-
 60
60
-
 61
61
-
 62
62
-
 63
63
-
 64
64
-
 65
65
-
 66
66
-
 67
67
-
 68
68
-
 69
69
-
 70
70
-
 71
71
-
 72
72
-
 73
73
-
 74
74
-
 75
75
-
 76
76
-
 77
77
-
 78
78
-
 79
79
-
 80
80
-
 81
81
-
 82
82
-
 83
83
-
 84
84
-
 85
85
-
 86
86
-
 87
87
-
 88
88
-
 89
89
-
 90
90
-
 91
91
-
 92
92
-
 93
93
-
 94
94
-
 95
95
-
 96
96
-
 97
97
-
 98
98
-
 99
99
-
 100
100
-
 101
101
-
 102
102
-
 103
103
-
 104
104
-
 105
105
-
 106
106
-
 107
107
-
 108
108
-
 109
109
-
 110
110
-
 111
111
-
 112
112
-
 113
113
-
 114
114
-
 115
115
-
 116
116
-
 117
117
-
 118
118
-
 119
119
-
 120
120
-
 121
121
-
 122
122
-
 123
123
-
 124
124
-
 125
125
-
 126
126
-
 127
127
-
 128
128
-
 129
129
-
 130
130
-
 131
131
-
 132
132
-
 133
133
-
 134
134
-
 135
135
-
 136
136
-
 137
137
-
 138
138
-
 139
139
-
 140
140
-
 141
141
-
 142
142
-
 143
143
-
 144
144
-
 145
145
-
 146
146
-
 147
147
-
 148
148
-
 149
149
-
 150
150
-
 151
151
-
 152
152
-
 153
153
-
 154
154
-
 155
155
-
 156
156
-
 157
157
-
 158
158
-
 159
159
-
 160
160
-
 161
161
-
 162
162
-
 163
163
-
 164
164
-
 165
165
-
 166
166
-
 167
167
-
 168
168
-
 169
169
-
 170
170
-
 171
171
-
 172
172
-
 173
173
-
 174
174
-
 175
175
-
 176
176
-
 177
177
-
 178
178
-
 179
179
-
 180
180
-
 181
181
-
 182
182
-
 183
183
-
 184
184
-
 185
185
-
 186
186
-
 187
187
-
 188
188
-
 189
189
-
 190
190
-
 191
191
-
 192
192
-
 193
193
-
 194
194
-
 195
195
-
 196
196
-
 197
197
-
 198
198
-
 199
199
-
 200
200
-
 201
201
-
 202
202
-
 203
203
-
 204
204
-
 205
205
-
 206
206
-
 207
207
-
 208
208
-
 209
209
-
 210
210
-
 211
211
-
 212
212
-
 213
213
-
 214
214
-
 215
215
-
 216
216
-
 217
217
-
 218
218
-
 219
219
-
 220
220
-
 221
221
-
 222
222
-
 223
223
-
 224
224
-
 225
225
-
 226
226
-
 227
227
-
 228
228
-
 229
229
-
 230
230
-
 231
231
-
 232
232
-
 233
233
-
 234
234
-
 235
235
-
 236
236
-
 237
237
-
 238
238
-
 239
239
-
 240
240
-
 241
241
-
 242
242
-
 243
243
-
 244
244
-
 245
245
-
 246
246
-
 247
247
-
 248
248
-
 249
249
-
 250
250
-
 251
251
-
 252
252
-
 253
253
-
 254
254
-
 255
255
-
 256
256
-
 257
257
-
 258
258
-
 259
259
-
 260
260
-
 261
261
-
 262
262
-
 263
263
-
 264
264
-
 265
265
-
 266
266
-
 267
267
-
 268
268
-
 269
269
-
 270
270
-
 271
271
-
 272
272
-
 273
273
-
 274
274
-
 275
275
-
 276
276
-
 277
277
-
 278
278
-
 279
279
-
 280
280
-
 281
281
-
 282
282
-
 283
283
-
 284
284
-
 285
285
-
 286
286
-
 287
287
-
 288
288
-
 289
289
-
 290
290
-
 291
291
-
 292
292
-
 293
293
-
 294
294
-
 295
295
-
 296
296
-
 297
297
-
 298
298
-
 299
299
-
 300
300
-
 301
301
-
 302
302
-
 303
303
-
 304
304
-
 305
305
-
 306
306
-
 307
307
-
 308
308
-
 309
309
-
 310
310
-
 311
311
-
 312
312
-
 313
313
-
 314
314
-
 315
315
-
 316
316
-
 317
317
-
 318
318
-
 319
319
-
 320
320
-
 321
321
-
 322
322
-
 323
323
-
 324
324
-
 325
325
-
 326
326
-
 327
327
-
 328
328
-
 329
329
-
 330
330
-
 331
331
-
 332
332
-
 333
333
-
 334
334
-
 335
335
-
 336
336
-
 337
337
-
 338
338
-
 339
339
-
 340
340
-
 341
341
-
 342
342
-
 343
343
-
 344
344
-
 345
345
-
 346
346
-
 347
347
-
 348
348
-
 349
349
-
 350
350
-
 351
351
-
 352
352
-
 353
353
-
 354
354
-
 355
355
-
 356
356
-
 357
357
-
 358
358
-
 359
359
-
 360
360
-
 361
361
-
 362
362
-
 363
363
-
 364
364
-
 365
365
-
 366
366
-
 367
367
-
 368
368
-
 369
369
-
 370
370
-
 371
371
-
 372
372
-
 373
373
-
 374
374
-
 375
375
-
 376
376
-
 377
377
-
 378
378
-
 379
379
-
 380
380
-
 381
381
-
 382
382
-
 383
383
-
 384
384
-
 385
385
-
 386
386
-
 387
387
-
 388
388
-
 389
389
-
 390
390
-
 391
391
-
 392
392
-
 393
393
-
 394
394
-
 395
395
-
 396
396
-
 397
397
-
 398
398
-
 399
399
-
 400
400
-
 401
401
-
 402
402
-
 403
403
-
 404
404
-
 405
405
-
 406
406
-
 407
407
-
 408
408
-
 409
409
-
 410
410
-
 411
411
-
 412
412
-
 413
413
-
 414
414
-
 415
415
-
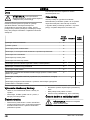 416
416
-
 417
417
-
 418
418
-
 419
419
-
 420
420
-
 421
421
-
 422
422
-
 423
423
-
 424
424
-
 425
425
-
 426
426
-
 427
427
-
 428
428
-
 429
429
-
 430
430
-
 431
431
-
 432
432
-
 433
433
-
 434
434
-
 435
435
-
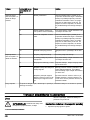 436
436
-
 437
437
-
 438
438
-
 439
439
-
 440
440
-
 441
441
-
 442
442
-
 443
443
-
 444
444
-
 445
445
-
 446
446
-
 447
447
-
 448
448
-
 449
449
-
 450
450
-
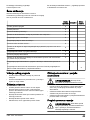 451
451
-
 452
452
-
 453
453
-
 454
454
-
 455
455
-
 456
456
-
 457
457
-
 458
458
-
 459
459
-
 460
460
-
 461
461
-
 462
462
-
 463
463
-
 464
464
-
 465
465
-
 466
466
-
 467
467
-
 468
468
-
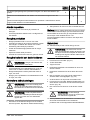 469
469
-
 470
470
-
 471
471
-
 472
472
-
 473
473
-
 474
474
-
 475
475
-
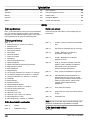 476
476
-
 477
477
-
 478
478
-
 479
479
-
 480
480
-
 481
481
-
 482
482
-
 483
483
-
 484
484
-
 485
485
-
 486
486
-
 487
487
-
 488
488
-
 489
489
-
 490
490
-
 491
491
-
 492
492
-
 493
493
-
 494
494
-
 495
495
-
 496
496
-
 497
497
-
 498
498
-
 499
499
-
 500
500
-
 501
501
-
 502
502
-
 503
503
-
 504
504
-
 505
505
-
 506
506
-
 507
507
-
 508
508
-
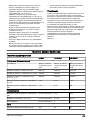 509
509
-
 510
510
-
 511
511
-
 512
512
-
 513
513
-
 514
514
-
 515
515
-
 516
516
-
 517
517
-
 518
518
-
 519
519
-
 520
520
-
 521
521
-
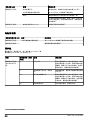 522
522
-
 523
523
-
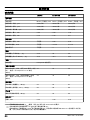 524
524
-
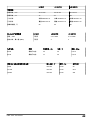 525
525
-
 526
526
-
 527
527
-
 528
528


în alte limbi
- slovenčina: Husqvarna LC 247i Používateľská príručka
- eesti: Husqvarna LC 247i Kasutusjuhend
Lucrări înrudite
Alte documente
-
Gardena 5038 Manual de utilizare
-
-
-
Gardena 5041 Manual de utilizare
-
-
-
-
Atco 18SLi Instrucțiuni de utilizare
-
Stiga Collector 132e Kit Manual de utilizare