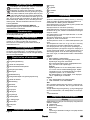
Kärcher 1 vacuum cleaner Compact Battery Manual de utilizare
- Tip
- Manual de utilizare

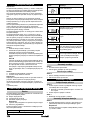
WD 1 Compact Battery
WD 1 Compact Battery Set
9.765-285.0 (02/20)
001
Register
your product
www.kaercher.com/welcome
Deutsch 5
English 13
Français 21
Italiano 29
Nederlands 37
Español 45
Português 53
Dansk 61
Norsk 69
Svenska 76
Suomi 84
Ελληνικά 91
Türkçe 100
Русский 107
Magyar 118
Čeština 126
Slovenščina 134
Polski 141
Româneşte 150
Slovenčina 158
Hrvatski 166
Srpski 173
Български 182
Eesti 191
Latviešu 198
Lietuviškai 206
Українська 214
Қазақша 223
ﺔﻴﺑﺮﻌﻟﺍ 233

11
14
13
15
16
17
18
12
7
2
1
10
6
9
8
3
45
A

1
4
3
2
B
1.
2.
C
5 h
100%
D
1.
2.
E
1.
1.
2.
F
1.
2.
2.
G
H I J
K L M

1.
2.
N O P
1.
2.
Q
3.
R
4.
S
5.
6.
T
1.
2.
3.
3.
U

Deutsch 5
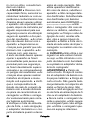
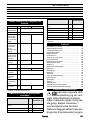
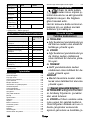
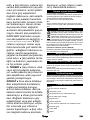
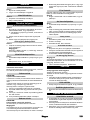
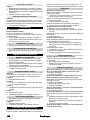
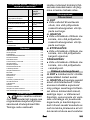
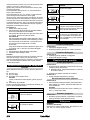
Inhalt
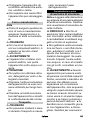
Allgemeine Hinweise
Lesen Sie vor der ers-
ten Benutzung des Ge-
räts diese
Originalbetriebsanleitung und
die beiliegenden Sicherheitshin-
weise. Handeln Sie danach.
Bewahren Sie beide Hefte für
späteren Gebrauch oder für
Nachbesitzer auf.
Sicherheitshinweise
Gefahrenstufen
GEFAHR
● Hinweis auf eine unmittelbar
drohende Gefahr, die zu
schweren Körperverletzungen
oder zum Tod führt.
몇WARNUNG
● Hinweis auf eine möglicher-
weise gefährliche Situation,
die zu schweren Körperverlet-
zungen oder zum Tod führen
kann.
몇VORSICHT
● Hinweis auf eine möglicher-
weise gefährliche Situation,
die zu leichten Verletzungen
führen kann.
ACHTUNG
● Hinweis auf eine möglicher-
weise gefährliche Situation,
die zu Sachschäden führen
kann.
Allgemeine
Sicherheitshinweise
GEFAHR ● Erstickungsge-
fahr. Halten Sie Verpackungsfo-
lien von Kindern fern.
몇WARNUNG ● Verwenden Sie
das Gerät nur bestimmungsge-
mäß. Berücksichtigen Sie die
örtlichen Gegebenheiten und
achten Sie beim Arbeiten mit
dem Gerät auf Dritte, insbeson-
dere Kinder. ● Personen mit
verringerten physischen, senso-
rischen oder geistigen Fähigkei-
ten oder Mangel an Erfahrung
und Wissen dürfen das Gerät
nur benutzen, wenn sie korrekt
beaufsichtigt werden oder wenn
sie durch eine für ihre Sicherheit
zuständige Person bezüglich
der sicheren Anwendung des
Geräts unterwiesen wurden und
wenn sie die daraus resultieren-
den Gefahren verstanden ha-
ben. ● Nur Personen, die in der
Handhabung des Geräts unter-
Allgemeine Hinweise ............................................ 5
Sicherheitshinweise.............................................. 5
Steckerladegerät .................................................. 7
Bestimmungsgemäße Verwendung ..................... 8
Umweltschutz ....................................................... 8
Kundendienst ....................................................... 8
Zubehör und Ersatzteile ....................................... 9
Lieferumfang ........................................................ 9
Gerätebeschreibung............................................. 9
Bedienelemente ................................................... 9
Ladevorgang ........................................................ 9
Bedienung Akkupack............................................ 9
Montage ............................................................... 10
Inbetriebnahme .................................................... 10
Bedienung ............................................................ 10
Transport .............................................................. 11
Pflege und Wartung..............................................11
Hilfe bei Störungen............................................... 11
Lagerung .............................................................. 12
Garantie................................................................ 12
Technische Daten................................................. 12
Technische Daten Akkupack ................................ 12
Technische Daten Standard-Ladegerät................ 13

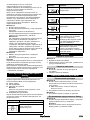
6 Deutsch
wiesen sind oder Ihre Fähigkei-
ten zur Bedienung
nachgewiesen haben und aus-
drücklich mit der Benutzung be-
auftragt sind, dürfen das Gerät
benutzen. ● Kinder dürfen das
Gerät nicht betreiben. ● Kinder
ab mindestens 8 Jahren dürfen
das Gerät betreiben, wenn sie
durch eine für ihre Sicherheit zu-
ständige Person in der Anwen-
dung unterwiesen wurden oder
wenn sie korrekt beaufsichtigt
werden und wenn sie die daraus
resultierenden Gefahren ver-
standen haben. ● Beaufsichti-
gen Sie Kinder, um
sicherzustellen, dass sie nicht
mit dem Gerät spielen. ● Kinder
dürfen Reinigung und Anwen-
derwartung nur unter Aufsicht
durchführen.
몇VORSICHT ● Sicherheitsein-
richtungen dienen Ihrem
Schutz. Verändern oder umge-
hen Sie niemals Sicherheitsein-
richtungen.
Betrieb
GEFAHR
●Der Betrieb in explosionsge-
fährdeten Bereichen ist unter-
sagt.
●Explosionsgefahr
Saugen Sie keine brennbaren
Gase, Flüssigkeiten oder
Stäube auf.
Saugen Sie keine reaktiven
Metallstäube (z. B. Alumini-
um, Magnesium oder Zink)
auf.
Saugen Sie keine unverdünn-
ten Laugen oder Säuren auf.
Saugen Sie keine brennen-
den oder glimmenden Gegen-
stände auf.
Diese Stoffe können zusätzlich
die am Gerät verwendeten Ma-
terialien angreifen.
몇WARNUNG
●Verletzungsgefahr. Saugen
Sie mit Düse und Saugrohr
nicht in Kopfnähe.
몇VORSICHT
●Lassen Sie das Gerät niemals
unbeaufsichtigt, solange es in
Betrieb ist.
●Unfälle oder Beschädigungen
durch Umfallen des Geräts.
Sie müssen vor allen Tätigkei-
ten mit oder am Gerät die
Standsicherheit herstellen.
ACHTUNG
●Schützen Sie das Gerät vor
extremer Witterung, Feuchtig-
keit und Hitze.
●Saugen Sie niemals ohne Fil-
ter, das Gerät kann beschädigt
werden.
Pflege und Wartung
Hinweis
●Schalten Sie das Gerät vor al-
len Pflege- und Wartungsar-
beiten aus und entfernen Sie
den Akkupack.
몇VORSICHT

Deutsch 7
● Lassen Sie Reparaturarbeiten
und Arbeiten an elektrischen
Bauteilen nur vom autorisier-
ten Kundendienst durchfüh-
ren.
몇WARNUNG
● Das Gerät enthält elektrische
Bauteile, reinigen Sie das Ge-
rät nicht unter fließendem
Wasser.
ACHTUNG
● Verwenden Sie zum Reinigen
keine Scheuermittel, Glas-
oder Allzweckreiniger.
● Nehmen Sie den Akkupack
aus dem Gerät, bevor sie es
längere Zeit nicht verwenden.
● Nehmen Sie einen verbrauch-
ten Akkupack aus dem Gerät
und entsorgen Sie ihn vor-
schriftsmäßig.
Transport
몇VORSICHT
● Um Unfälle oder Verletzungen
zu vermeiden, müssen Sie
beim Transport das Gewicht
des Geräts beachten.
Steckerladegerät
Sicherheitshinweise
Hinweis ● Lesen Sie unbedingt
die dem Akkupack beiliegenden
Sicherheitshinweise. Beachten
Sie die Sicherheitshinweise bei
der Verwendung.
GEFAHR ● Explosionsge-
fahr. Keine nicht-wiederauflad-
baren Batterien aufladen.
● Verwenden Sie das Ladegerät
nicht in explosionsgefährdeter
Umgebung. ● Werfen Sie Akku-
packs nicht ins Feuer oder in
den Hausmüll. ● Vermeiden Sie
den Kontakt mit aus defekten
Akkus austretender Flüssigkeit.
Spülen Sie die Flüssigkeit bei
Kontakt sofort mit Wasser ab
und konsultieren Sie bei Kontakt
mit den Augen zusätzlich einen
Arzt.
몇WARNUNG ● Personen mit
verringerten physischen, senso-
rischen oder geistigen Fähigkei-
ten oder Mangel an Erfahrung
und Wissen dürfen das Gerät
nur benutzen, wenn sie korrekt
beaufsichtigt werden oder wenn
sie durch eine für ihre Sicherheit
zuständige Person bezüglich
der sicheren Anwendung des
Geräts unterwiesen wurden und
wenn sie die daraus resultieren-
den Gefahren verstanden ha-
ben. ● Kinder dürfen mit dem
Gerät nicht spielen. ● Beauf-
sichtigen Sie Kinder, um sicher-
zustellen, dass sie nicht mit dem
Gerät spielen. ● Kinder ab min-
destens 8 Jahren dürfen das
Gerät betreiben, wenn sie durch
eine für ihre Sicherheit zuständi-
ge Person in der Anwendung
unterwiesen wurden oder wenn
sie korrekt beaufsichtigt werden
und wenn sie die daraus resul-
tierenden Gefahren verstanden
haben. ● Kinder dürfen Reini-
gung und Anwenderwartung nur

8 Deutsch
unter Aufsicht durchführen.
● Prüfen Sie die Übereinstim-
mung der Netzspannung mit der
auf dem Typenschild des Lade-
geräts angegebenen Spannung.
● Verwenden Sie das Ladegerät
nur zum Laden zugelassener
Akkupacks. ● Prüfen Sie Ste-
ckernetzteil, Verbindungskabel,
Akkuadapter und Akkupack vor
jedem Betrieb auf Schäden.
Verwenden Sie keine beschä-
digten Geräte. Ersetzen Sie bei
Beschädigung das Gerät. ● La-
den Sie keine beschädigten Ak-
kupacks. Ersetzen Sie
beschädigte Akkupacks durch
von KÄRCHER zugelassene
Akkupacks. Gilt nicht für Geräte mit fest eingebautem
Akku ● Öffnen Sie nicht das Lade-
gerät. Ersetzen Sie bei Beschä-
digungen oder Defekt das
Ladegerät. ● Schützen Sie das
Verbindungskabel vor Hitze,
scharfen Kanten, Öl und sich
bewegenden Geräteteilen.
● Ziehen Sie den Stecker aus
der Netzsteckdose, bevor Sie
das Ladegerät reinigen oder ei-
ne Anwenderwartung durchfüh-
ren.
몇VORSICHT ● Verwenden Sie
das Ladegerät nicht in nassem
oder verschmutztem Zustand.
● Schieben Sie Akkupacks nicht
in nassem oder verschmutztem
Zustand auf den Akkuadapter
des Ladegeräts.
ACHTUNG ● Kurzschlussge-
fahr. Schützen Sie die Kontakte
des Akkuadapters vor Metalltei-
len. ● Kurzschlussgefahr. Be-
wahren Sie Akkupacks nicht
zusammen mit Metallgegen-
ständen auf. ● Beschädigungs-
gefahr. Wickeln Sie das
Verbindungskabel nicht um das
Steckernetzteil oder den Akkua-
dapter. ● Decken Sie das Lade-
gerät während des Betriebs
nicht ab. ● Tragen Sie das Lade-
gerät nicht am Verbindungska-
bel. ● Verwenden Sie das
Ladegerät nur in Innenräumen.
Bestimmungsgemäße Verwendung
Benutzen Sie das Gerät ausschließlich für den Privat-
haushalt.
Das Gerät ist entsprechend der in dieser Betriebsanlei-
tung gegebenen Beschreibungen und den Sicherheits-
hinweisen zur Verwendung als Mehrzwecksauger
bestimmt.
Asche und Ruß dürfen mit diesem Gerät nicht gesaugt
werden.
Hinweis
Der Hersteller haftet nicht für eventuelle Schäden, die
durch nicht bestimmungsgemäßen Gebrauch oder fal-
sche Bedienung verursacht werden.
Umweltschutz
Die Verpackungsmaterialien sind recyclebar. Bit-
te Verpackungen umweltgerecht entsorgen.
Elektrische und elektronische Geräte enthalten
wertvolle recyclebare Materialien und oft Be-
standteile wie Batterien, Akkus oder Öl, die bei
falschem Umgang oder falscher Entsorgung eine
potentielle Gefahr für die menschliche Gesundheit und
die Umwelt darstellen können. Für den ordnungsgemä-
ßen Betrieb des Geräts sind diese Bestandteile jedoch
notwendig. Mit diesem Symbol gekennzeichnete Gerä-
te dürfen nicht mit dem Hausmüll entsorgt werden.
Hinweise zu Inhaltsstoffen (REACH)
Aktuelle Informationen zu Inhaltsstoffen finden Sie un-
ter: www.kaercher.de/REACH
Kundendienst
Bei Fragen oder Störungen hilft Ihnen unsere
KÄRCHER-Niederlassung gerne weiter.

Deutsch 9
Zubehör und Ersatzteile
Nur Original-Zubehör und Original-Ersatzteile verwen-
den, sie bieten die Gewähr für einen sicheren und stö-
rungsfreien Betrieb des Geräts.
Informationen über Zubehör und Ersatzteile finden Sie
unter www.kaercher.com.
Lieferumfang
Der Lieferumfang des Geräts ist auf der Verpackung ab-
gebildet. Prüfen Sie beim Auspacken den Inhalt auf
Vollständigkeit. Bei fehlendem Zubehör oder bei Trans-
portschäden benachrichtigen Sie bitte Ihren Händler.
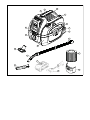
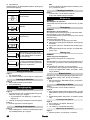
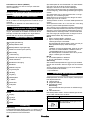
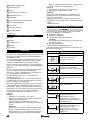
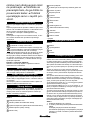
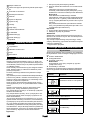
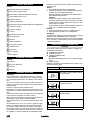
Gerätebeschreibung
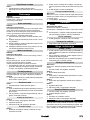
Abbildung A
1Saugschlauchanschluss
2Aufnahme Akkupack
3Entriegelungstaste Akkupack
4Geräteschalter (Ein / Aus)
5Tragegriff
6Blasanschluss
7Befestigungsband für Saugschlauchaufbewahrung
8Zubehöraufnahme
9Behälterverschluss
10 Behälter
11 Polsterdüse
12 Fugendüse
13 Handgriff
14 Saugschlauch
15 *Akkupack
16 *Ladegerät
17 Patronenfilter
18 Filterbeutel
* optional
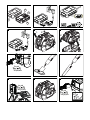
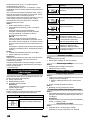
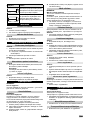
Bedienelemente
Abbildung B
1Display
2Typenschild
3Kontakte
4Aufnahme
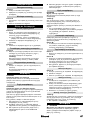
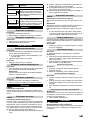
Ladevorgang
Hinweis
Laden Sie die Akkupacks Battery Power (+) 18/25 und
18/50 nur mit den Akkupack-Ladegeräten für die
KÄRCHER 18 V Battery Power Plattform.
Neue Akkupacks sind nur vorgeladen und müssen vor
der ersten Benutzung vollständig geladen werden.
Das Display ist beim ersten Ladevorgang aktiviert.
Entladen Sie den Akkupack bei der ersten Verwendung
bis zum Abschalten, damit die Ladezustandsanzeige
korrekt funktioniert.
Neue Akkupacks erreichen die volle Kapazität nach ca.
5 Lade- und Entladezyklen.
Längere Zeit nicht verwendete Akkupacks vor der Be-
nutzung nachladen.
Bei Temperaturen unter 0 °C sinkt die Leistungsfähig-
keit des Akkupacks.
Bei Temperaturen unter -20 °C und über 60 °C kann
lange Lagerung die Kapazität des Akkupacks verrin-
gern.
Zeigt das Display während des Ladens nichts an, ist die
Akkukapazität erschöpft oder sehr niedrig. Das Display
zeigt die Restladezeit an, sobald der Akkupack ausrei-
chend geladen ist. Erfolgt auch nach längerer Zeit keine
Anzeige, ist der Akkupack defekt. Ersetzen Sie den Ak-
kupack.
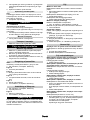
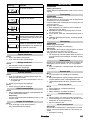
Abbildung C
1. Den Netzstecker in die Steckdose stecken.
2. Den Akkupack in die Aufnahme des Ladegeräts
schieben.
Der Ladevorgang beginnt automatisch.
Die Restladezeit wird während des Ladevorgangs
im Display des Akkupacks in Minuten angezeigt.
Abbildung D
Die Ladezeit für einen leeren Akkupack 18/25 be-
trägt mit einem Standard-Ladegerät ca. 5 Stunden.
Die Ladezeit mit einem **Schnell-Ladegerät bis zu
einer Aufladung von 80 % beträgt 45 Minuten.
Bei vollständig geladenem Akkupack zeigt das Dis-
play 100 % an. Der Ladevorgang ist beendet.
Abbildung E
3. Den Akkupack aus dem Ladegerät nehmen.
4. Den Netzstecker aus der Steckdose ziehen.
Hinweis
Der aufgeladene Akkupack kann bis zur Verwendung
auf dem Ladegerät bleiben. Eine Gefahr der Überla-
dung besteht nicht.
Vermeiden Sie unnötigen Energieverbrauch und ste-
cken Sie das Ladegerät aus, wenn der Akkupack voll-
ständig geladen ist.
** Sonderzubehör
Bedienung Akkupack
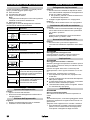
Display
Der Akkupack ist mit einem Display ausgestattet. Im
Display kann Folgendes abgelesen werden:
Ladezustand
Fortschritt der Aufladung
Restlaufzeit
Hinweis
Die Laufzeitanpassung wird durch Leistungsum-
schaltung erzeugt!
Fehlermeldungen
Die Anzeige dreht sich je nach verwendetem Gerät
beim Einsetzen des Akkupacks.
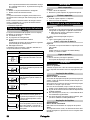
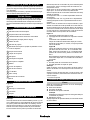
Anzeige Bedeutung
Akkupack lagern
Der Ladezustand des Akkupacks bei
Nichtverwendung.
Akkupack verwenden

10 Deutsch
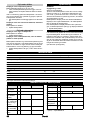
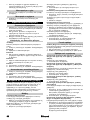
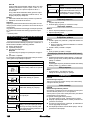
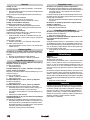
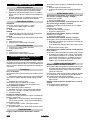
Montage
Gerät öffnen
Abbildung F
1. Behälterverschlüsse öffnen.
2. Gerätekopf am Tragegriff abnehmen.
Gerät schließen
Abbildung G
1. Gerätekopf auf Behälter setzen.
2. Behälterverschlüsse schließen.
Inbetriebnahme
Zubehör anschließen
Abbildung H
1. Saugschlauch in Saugschlauchanschluss am Gerät
eindrücken, bis er einrastet.
a Zum Entnehmen Raste drücken und Saug-
schlauch herausziehen.
2. Absaugdüse mit Handgriff verbinden.
Abbildung J
3. Fugendüse mit Handgriff verbinden.
Akkupack einsetzen
Abbildung K
1. Akkupack von oben in Aufnahme Akkupack ein-
schieben, bis der Akkupack einrastet.
Hinweis
Verwenden Sie ausschließlich die Akkupacks Bat-
tery Power (+) 18/25 oder 18/50.
Gerät einschalten
Abbildung L
1. Taste I drücken, um das Gerät einzuschalten.
Saug- bzw. Blasfunktion werden eingeschaltet.
Bedienung
ACHTUNG
Beschädigung des Geräts
Arbeiten Sie immer mit eingesetztem Patronenfilter, so-
wohl beim Nass- als auch beim Trockensaugen.
Trockensaugen
ACHTUNG
Beschädigung des Patronenfilters
Beim Wechsel von Nass- zu Trockensaugen kann sich
ein nasser Patronenfilter zusetzen und unbrauchbar
werden.
Lassen Sie den Patronenfilter vor dem Trockensaugen
gut trocken oder ersetzen Sie ihn durch einen trocke-
nen.
Wechseln Sie bei Bedarf den Patronenfilter.
1. Zum Saugen von Feinstaub den Filterbeutel einset-
zen.
Der Füllgrad des Filterbeutels ist abhängig vom auf-
gesaugten Schmutz.
Bei Feinstaub, Sand usw. muss der Filterbeutel häu-
figer erneuert werden.
Zugesetzte Filterbeutel können platzen, erneuern
Sie den Filterbeutel rechtzeitig.
Nasssaugen
ACHTUNG
Schäden durch Feuchtigkeit
Verwenden Sie keinen Filterbeutel beim Nasssaugen.
Hinweis
Ist der Behälter voll, schließt ein Schwimmer die Sau-
göffnung und das Gerät läuft mit erhöhter Drehzahl.
Schalten Sie das Gerät sofort aus und leeren Sie den
Behälter.
1. Zum Aufsaugen von Feuchtigkeit bzw. Nässe die
Polster- oder Fugendüse auf den Handgriff stecken,
siehe Kapitel Zubehör anschließen.
Blasfunktion
Reinigen von schwer erreichbaren Stellen oder wo das
Saugen nicht möglich ist, z. B. Laub aus dem Kiesbeet.
Abbildung M
1. Saugschlauch in Blasanschluss einstecken, bis der
Saugschlauch einrastet.
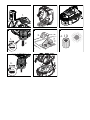
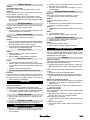
Betrieb beenden
Abbildung L
1. Taste 0 drücken, um das Gerät auszuschalten.
Abbildung N
2. Entriegelungstaste Akkupack nach vorn schieben
und Akkupack nach oben aus der Aufnahme Akku-
pack herausziehen.
3. Akkupack bei Bedarf aufladen, siehe Kapitel Lade-
vorgang.
Behälter leeren
Abbildung O
1. Gerät öffnen, siehe Kapitel Montage.
2. Behälter leeren.
3. Gerät schließen, siehe Kapitel Montage.
Gerät aufbewahren
Abbildung P
1. Polster- und Fugendüse am Gerät verstauen.
2. Saugschlauch um das Gerät wickeln und mit Befes-
tigungsbändern für Saugschlauchaufbewahrung fi-
xieren.
3. Gerät in trockenen Räumen aufbewahren.
Die Restlaufzeit des Akkupacks bei
Verwendung.
Akkupack laden
Die Restladezeit des Akkupacks
beim Laden.
Der Akkupack ist vollständig gela-
den.
Fehleranzeige
Die Akkupacktemperatur liegt au-
ßerhalb des zulässigen Temperatur-
bereichs oder der Akkupack ist
wegen Kurzschluss gesperrt.
Der Akkupack ist defekt und zur Si-
cherheit gesperrt. Den Akkupack
nicht verwenden und vorschriftsmä-
ßig entsorgen.
Anzeige Bedeutung

Deutsch 11
Akkupack aufbewahren
Hinweis
Unabhängig vom Betrieb zieht das LC-Display etwas
Akkukapazität, egal ob Akkupack im Gerät oder außer-
halb.
1. Siehe Kapitel Lagerung.
Transport
몇VORSICHT
Nichtbeachtung des Gewichts
Verletzungs- und Beschädigungsgefahr
Beachten Sie bei Transport und Lagerung das Gewicht
des Geräts.
1. Beim Transport in Fahrzeugen das Gerät nach den
gültigen Richtlinien gegen Rutschen und Kippen si-
chern.
Transport von Hand
1. Gerät am Tragegriff hochheben und tragen.
Transport in Fahrzeugen
1. Gerät gegen Verrutschen und Kippen sichern.
Pflege und Wartung
Gerät und Zubehör
1. Gerät und Zubehörteile aus Kunststoff mit einem
handelsüblichen Kunststoffreiniger pflegen.
2. Behälter und Zubehör bei Bedarf mit Wasser aus-
spülen und vor der Weiterverwendung trocknen.
3. Ladekontakte regelmäßig auf Verschmutzung prü-
fen und gegebenenfalls reinigen.
Patronenfilter reinigen
Hinweis
Empfehlung: Patronenfilter 1x pro Jahr erneuern.
1. Gerät öffnen, siehe Kapitel Montage.
Abbildung Q
2. Patronenfilter ausbauen.
Abbildung R
3. Patronenfilter bei Bedarf unter fließendem Wasser
reinigen, nicht abreiben oder abbürsten.
Abbildung S
4. Patronenfilter vor dem Einbau vollständig trocknen
lassen.
Abbildung T
5. Patronenfilter einbauen.
6. Gerät schließen, siehe Kapitel Montage.
Filterbeutel wechseln
1. Gerät öffnen, siehe Kapitel Montage.
2. Filterbeutel entnehmen.
Abbildung U
3. Neuen Filterbeutel einsetzen.
4. Gerät schließen, siehe Kapitel Montage.
Hilfe bei Störungen
Störungen haben oft einfache Ursachen, die Sie mit Hil-
fe der folgenden Übersicht selbst beheben können. Im
Zweifelsfall oder bei hier nicht genannten Störungen
wenden Sie sich bitte an den autorisierten Kunden-
dienst.
Störungen
Gerät läuft nicht
Akkupack sitzt nicht richtig in der Aufnahme Akkupack.
1. Akkupack in Aufnahme Akkupack einschieben, bis
er einrastet.
Ladezustand des Akkupack (siehe Display) zu
schwach.
1. Akkupack aufladen.
Akkupack oder Ladegerät defekt.
1. Akkupack bzw. Ladegerät erneuern.
Gerät schaltet selbstständig ab
Gerät / Akkupack überhitzt.
1. Warten, bis Gerät / Akkupack abgekühlt sind.
Behälter ist voll Wasser und dadurch der Schwimmer
aktiviert.
1. Behälter leeren.
Die Saugkraft lässt nach
Polster- bzw. Fugendüse, Handgriff oder Saugschlauch
sind verstopft.
1. Polster- bzw. Fugendüse, Handgriff und Saug-
schlauch prüfen und ggf. reinigen.
Der Patronenfilter ist verschmutzt.
1. Den Patronenfilter reinigen, siehe Patronenfilter rei-
nigen.
Der Filterbeutel ist voll.
1. Den Filterbeutel erneuern, siehe Filterbeutel wech-
seln.
Allgemeiner Fehler
Display zeigt durchbrochenes Batteriesymbol
Der Akkupack ist defekt und zur Sicherheit gesperrt.
1. Den Akkupack nicht verwenden.
2. Den Akkupack vorschriftsmäßig entsorgen.
Fehler beim Laden
Akkupack lädt nicht, Kontrollleuchte am Ladegerät
ist aus, Display ist aus
Das Ladegerät ist defekt.
1. Das Ladegerät ersetzen.
Akkupack lädt nicht, Kontrollleuchte am Ladegerät
blinkt, Display ist an.
Ggf. ist die Akkupacktemperatur nicht im Normalbe-
reich.
Das Ladegerät ist defekt.
1. Displayanzeige beachten.
2. Das Ladegerät ersetzen.
Akkupack lädt nicht, Display ist an
Das Ladegerät ist defekt.
1. Das Ladegerät ersetzen.
Akkupack lädt nicht, Display ist aus
Akkupack ist komplett entladen oder defekt.
1. Warten, ob das Display nach einiger Zeit die Restla-
dezeit anzeigt.
Bleibt das Display aus, ist der Akkupack defekt.
2. Den Akkupack ersetzen.
Akkupack lädt nicht, Display zeigt Temperatursym-
bol
Die Akkupacktemperatur ist zu niedrig / hoch.
1. Akkupack in eine Umgebung mit gemäßigten Tem-
peraturbedingungen bringen und warten, bis die Ak-
kupacktemperatur im Normalbereich liegt, siehe
Kapitel Technische Daten Akkupack.
Der Ladevorgang beginnt automatisch.
Fehler im Betrieb
Display zeigt Temperatursymbol
Die Akkupacktemperatur ist zu niedrig / hoch.
1. Warten, bis die Akkupacktemperatur im Normalbe-
reich liegt, siehe Kapitel Technische Daten Akku-
pack.

12 Deutsch
Bei einem Kurzschluss wird der Akkupack für 30 Sekun-
den gesperrt. Tritt der Kurzschluss häufiger auf, wird
der Akkupack dauerhaft gesperrt.
1. Den Akkupack zum Entsperren an das Ladegerät
anschließen.
Display zeigt Restlaufzeit 0, Gerät schaltet sich aus
Der Akkupack ist entladen.
1. Den Akkupack laden.
Fehler bei der Lagerung
Display zeigt keine Restkapazität
Der Akkupack ist entladen.
1. Den Akkupack laden.
Display zeigt Restkapazität 70%, obwohl der Akku-
pack voll geladen
ist
Der Akkupack befindet sich im automatischen Lager-
modus. Der Lagermodus aktiviert sich, wenn der Akku-
pack mehr als 21 Tage nicht verwendet wurde. Diese
Funktion schützt die Akkuzellen vor schneller Alterung
und erhöht die Lebensdauer.
1. Den Akkupack vor der nächsten Verwendung voll-
ständig laden.
Lagerung
ACHTUNG
Feuchtigkeit und Hitze
Beschädigungsgefahr
Lagern Sie Akkupacks nur in Innenräumen mit niedriger
Luftfeuchtigkeit und unter 27°C. Wird der Akkupack bei
über 70% gelagert und mehr als 21 Tage nicht verwen-
det, aktiviert sich automatisch ein Lagermodus, der den
Akkupack auf 70% teilentlädt.
Das Display des Akkupacks zeigt den aktuellen Lade-
zustand. Das Display zeigt auch den Ladezustand,
wenn der Akkupack nicht an ein Ladegerät angeschlos-
sen ist.
Erlischt das Display des Akkupacks während der Lage-
rung, ist die Akkukapazität erschöpft und das Display
wird abgeschaltet.
1. Den Akkupack laden.
Garantie
In jedem Land gelten die von unserer zuständigen Ver-
triebsgesellschaft herausgegebenen Garantiebedin-
gungen. Etwaige Störungen an Ihrem Gerät beseitigen
wir innerhalb der Garantiefrist kostenlos, sofern ein Ma-
terial- oder Herstellungsfehler die Ursache sein sollte.
Im Garantiefall wenden Sie sich bitte mit Kaufbeleg an
Ihren Händler oder die nächste autorisierte Kunden-
dienststelle.
(Adresse siehe Rückseite)
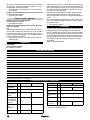
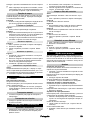
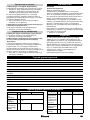
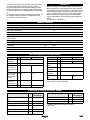
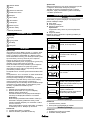
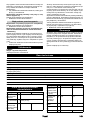
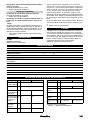
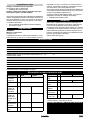
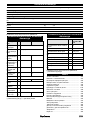
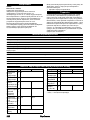
Technische Daten
Technische Änderungen vorbehalten.
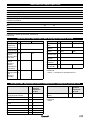
Technische Daten Akkupack
Technische Änderungen vorbehalten.
* optional, ** Sonderzubehör
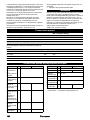
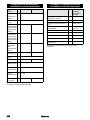
WD 1 Compact Battery
Elektrischer Anschluss
Akkuspannung V 18
Nennleistung W 230
Leistungsdaten Gerät
Betriebszeit bei voller Akkuladung im Normalbetrieb min 10
Maße und Gewichte
Gewicht kg 3,5
Länge mm 386
Breite mm 279
Höhe mm 312
Battery Power *18/25 **18/50
Nennspan-
nung Akku V18
Akkutyp – Li-Ion
Nennkapazität
(nach IEC/EN
61690)
Ah 2,4 4,8
Nennkapazität
(nach Angabe
des Zellenher-
stellers)
Ah 2,5 5,0
Nennenergie
(nach
UN 3480)
W
h43,2 86,4
Ladestrom
max. A4 8
Schutzart – IPX5
Gewicht kg 0,615 0,918
Betriebstempe-
ratur °C -20...40
Aufladetempe-
ratur °C 0...40
Lagertempera-
tur °C -20...60
Abmessungen
(L x B x H) m
m133 x 88 x 50 133 x 88 x 72
Battery Power *18/25 **18/50

English 13
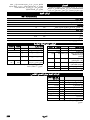
Technische Daten Standard-
Ladegerät
Technische Änderungen vorbehalten.
* optional
Contents
General notes
Read these original op-
erating instructions and
the enclosed safety instructions
before using the device for the
first time. Proceed accordingly.
Keep both books for future refer-
ence or for future owners.
Safety instructions
Hazard levels
DANGER
●Indication of an imminent
threat of danger that will lead
to severe injuries or even
death.
몇WARNING
●Indication of a potentially dan-
gerous situation that may lead
to severe injuries or even
death.
몇CAUTION
●Indication of a potentially dan-
gerous situation that may lead
to minor injuries.
ATTENTION
●Indication of a potentially dan-
gerous situation that may lead
to damage to property.
General safety instructions
DANGER ● Risk of asphyxia-
tion. Keep packaging film out of
the reach of children.
몇WARNING ● Only use the de-
vice for its proper use. Take into
account the local conditions and
beware of third parties, in par-
ticular children, when working
with the device. ● Persons with
reduced physical, sensory or
mental capabilities and persons
lacking experience and knowl-
edge may only use the appli-
ance if they are properly
supervised, have been instruct-
ed on use of the appliance safe-
ly by a person responsible for
*Standard-La-
degerät BC 18
V
Nennspannung Akkupack V 18
Ladestrom max. A 0,5
Akkupacktyp – Li-Ion
Akkupackplattform – Battery Power
(+)
Netzspannung V 100...240
Frequenz Hz 50-60
Stromaufnahme A max. 0,3
Schutzklasse – II
Gewicht (ohne Akkupack) g 160
General notes....................................................... 13
Safety instructions ................................................ 13
Plug-in charger ..................................................... 15
Intended use......................................................... 16
Environmental protection...................................... 16
Customer Service department.............................. 16
Accessories and spare parts ................................ 16
Scope of delivery.................................................. 16
Device description ................................................ 16
Control elements .................................................. 17
Charging process ................................................. 17
Battery pack operation ......................................... 17
Installation ............................................................ 17
Initial startup ......................................................... 18
Operation.............................................................. 18
Transport .............................................................. 18
Care and service .................................................. 18
Troubleshooting guide.......................................... 19
Storage................................................................. 19
Warranty............................................................... 20
Technical data ...................................................... 20
Battery pack technical data .................................. 20
Standard charger technical data .......................... 20

14 English
their safety, and understand the
resultant hazards involved.
● Only people who have been
instructed on how to use the de-
vice, or have proven their ability
to operate it, and have been ex-
plicitly instructed to use it, may
use the device. ● Children must
not operate the device. ● Chil-
dren from the minimum age of 8
may use the appliance if they
are properly supervised or have
been instructed in its use by a
person responsible for their
safety, and if they have under-
stood the resultant hazards in-
volved. ● Children must be
supervised to prevent them from
playing with the appliance.
● Children may only perform
cleaning work and user mainte-
nance under supervision.
몇CAUTION ● Safety devices
are provided for your own pro-
tection. Never modify or bypass
safety devices.
Operation
DANGER
● Operation in explosive atmos-
pheres is prohibited.
● Risk of explosion
Never use the device to vacu-
um up combustible gases, liq-
uids or dusts.
Never use the device to vacu-
um up reactive metal dusts
(e.g. aluminium, magnesium,
zinc).
Never use the device to vacu-
um up undiluted brine or ac-
ids.
Never use the device to vacu-
um up any burning or smoul-
dering objects/matter.
These substances can corrode
the materials in use on the de-
vice.
몇WARNING
● Risk of injury. Do not use the
nozzle and suction pipe at
head height.
몇CAUTION
● Never leave the device unsu-
pervised while it is in opera-
tion.
● Accidents or damage due to
the device falling over. Before
all actions with or on the de-
vice, you must make sure that
it is stable.
ATTENTION
● Protect the device from ex-
treme weather conditions,
moisture and heat.
● Never use the device without a
filter, this can lead to device
damage.
Care and service
Note
● Switch off the device and re-
move the battery pack before
performing any care and ser-
vice work.
몇CAUTION
● Have repair work and work on
electrical components carried

English 15
out by the authorised customer
service only.
몇WARNING
●The appliance contains electri-
cal components - do not clean
the appliance under running
water.
ATTENTION
●Do not use scouring agents,
glass or multi-purpose cleaner
for cleaning.
●Remove the battery pack from
the device before a longer pe-
riod of inactivity.
●Remove a used battery pack
from the device and dispose if
it properly.
Transport
몇CAUTION
●In order to prevent accidents
or injuries, you must observe
the weight of the device when
transporting it.
Plug-in charger
Safety instructions
Note ● Be sure to read the safe-
ty instructions enclosed with the
battery pack. Adhere to the safe-
ty instructions during use.
DANGER ● Danger of explo-
sion. Do not charge any non-re-
chargeable battery. ● Do not
charge the battery pack in an ex-
plosion-hazard environment.
●Do not throw battery packs in-
to a fire or into the household
rubbish. ● Avoid contact with flu-
id leaking from defective batter-
ies. Immediately rinse off the
fluid using water if contact is
made, and also consult a doctor
in the event of contact with the
eyes.
몇WARNING ● Persons with re-
duced physical, sensory or men-
tal capabilities and persons
lacking experience and knowl-
edge may only use the appli-
ance if they are properly
supervised, have been instruct-
ed on use of the appliance safe-
ly by a person responsible for
their safety, and understand the
resultant hazards involved.
●Children must not play with the
appliance. ● Children must be
supervised to prevent them from
playing with the appliance.
●Children from the minimum
age of 8 may use the appliance
if they are properly supervised
or have been instructed in its
use by a person responsible for
their safety, and if they have un-
derstood the resultant hazards
involved. ● Children may only
perform cleaning work and user
maintenance under supervision.
●Check that the mains voltage
corresponds with the voltage
stated on the type plate of the
charger. ● Only use the charger
for charging approved battery
packs. ● Inspect the plug-in
power supply, connection cable,
battery adapter and battery pack
for damage every time before

16 English
use. Do not use any damaged
devices. Replace any damaged
devices. ● Do not charge any
damaged battery packs. Re-
place damaged battery packs
with battery packs approved by
KÄRCHER. Does not apply to appliances with a fixed
battery ● Do not open the charger.
In case of damage or defect, re-
place the charger. ● Protect the
connection cable against heat,
sharp edges, oil and moving unit
parts. ● Pull the plug out of the
mains socket before cleaning
the charger or performing clean-
ing work.
몇CAUTION ● Do not use the
battery pack when dirty or wet.
●Do not put the battery pack in-
to the battery adapter of the
charging device if it is dirty or
wet.
ATTENTION ● Short circuit haz-
ard. Protect the contacts of the
battery adapter against contact
with metal parts. ● Short circuit
hazard. Do not store the battery
packs together with metal ob-
jects. ● Risk of damage. Do not
wind the connection cable
around the plug-in power supply
or the battery adapter. ● Never
cover the charger during use.
●Do not carry the charger by the
connection cable. ● Use the
charger in interior spaces only.
Intended use
Only use the device in private households.
In accordance with the descriptions and the safety infor-
mation in these operating instructions the device is in-
tended for use as a multipurpose vacuuming device.
Ash and soot must not be vacuumed with this device.
Note
The manufacturer accepts no liability for possible dam-
age caused by improper use or incorrect operation.
Environmental protection
The packing materials can be recycled. Please
dispose of packaging in accordance with the en-
vironmental regulations.
Electrical and electronic appliances contain valu-
able, recyclable materials and often components
such as batteries, rechargeable batteries or oil,
which - if handled or disposed of incorrectly - can
pose a potential threat to human health and the environ-
ment. However, these components are required for the
correct operation of the appliance. Appliances marked
by this symbol are not allowed to be disposed of togeth-
er with the household rubbish.
Notes on the content materials (REACH)
Current information on content materials can be found
at: www.kaercher.com/REACH
Customer Service department
Our local KÄRCHER branch will be happy to help you if
you have any questions or problems with the device.
Accessories and spare parts
Only use original accessories and original spare parts.
They ensure that the appliance will run fault-free and
safely.
Information on accessories and spare parts can be
found at www.kaercher.com.
Scope of delivery
The scope of delivery for the appliance is shown on the
packaging. Check the contents for completeness when
unpacking. If any accessories are missing or in the
event of any shipping damage, please notify your deal-
er.
Device description
Illustration A
1Suction hose connection
2Battery pack mounting
3Battery pack unlocking button
4Power switch (On/Off)
5Carrying handle
6Blower connection
7Fastening strap for suction hose storage
8Accessory mounting
9Container closure
10 Container
11 Upholstery nozzle
12 Crevice nozzle
13 Handle

English 17
14 Suction hose
15 *Rechargeable battery pack
16 *Charger
17 Cartridge filter
18 Filter bag
* optional
Control elements
Illustration B
1Display
2Type plate
3Terminals
4Mounting
Charging process
Note
Charge the battery packs Battery Power (+) 18/25 and
18/50 with battery pack chargers for the KÄRCHER
18 V Battery Power Platform only.
New battery packs are only pre-charged and must be
fully charged before first use.
The display is activated during the first charging pro-
cess.
On first use, discharge the battery pack until the device
switches off so that the charge indicator functions cor-
rectly.
New battery packs reach their full capacity after approx.
5 charging and discharging cycles.
Charge battery packs that have not been used for a long
time before use.
At temperatures below 0 °C, the capacity of the battery
pack decreases.
At temperatures below -20° C and above 60 °C long-
term storage can reduce the capacity of the battery
pack.
If the display does not show anything during charging,
the battery capacity is fully depleted or very low. Display
shows remaining charging time once the battery pack is
sufficiently charged. If the display does not show any-
thing even after a longer period of time, the battery pack
is defective. Replace the battery pack.
Illustration C
1. Plug the mains plug into the socket.
2. Push the battery pack into the mounting on the
charger.
The charging process begins automatically.
The remaining charging time in minutes is shown on
the battery pack display during the charging pro-
cess.
Illustration D
Using a standard charger, the charging time for an
empty battery pack 18/25 is approximately 5 hours.
Using a **fast charger the charging time to reach an
80% charge is approximately 45 minutes.
The display shows 100% when the battery pack is
fully charged. The charging process has finished.
Illustration E
3. Remove the battery pack from the charger.
4. Pull the mains plug out of the socket.
Note
The charged battery pack can remain in the charger un-
til it is used. There is no danger of overcharging.
Avoid unnecessary energy consumption and unplug the
charger when the battery pack is fully charged.
** optional accessories
Battery pack operation
Display
The battery pack is equipped with a display. The follow-
ing information can be read on the display:
Charging state
Charging progress
Remaining charging time
Note
The runtime adjustment is generated via capacity
switching!
Error messages
The display rotates when the battery pack is inserted,
according to the device used.
Installation
Opening the device
Illustration F
1. Open the container closures.
2. Carry the device head by the carrying handle.
Closing the device
Illustration G
1. Fit the device head onto the container.
2. Close the container closures.
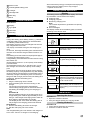
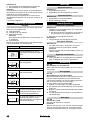
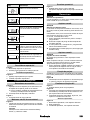
Display Meaning
Battery pack in storage
Charging state of the battery pack
while not in use.
Battery pack in use
Remaining battery life of the battery
pack while in use.
Charging the battery pack
Remaining charging time of the bat-
tery pack during charging.
The battery pack is fully charged.
Fault display
The battery pack temperature lies
outside the permissible temperature
range or the battery pack is disabled
due to a short circuit.
Battery pack is defective and disa-
bled for safety. Do not continue us-
ing the battery pack and dispose of it
properly.

18 English
Initial startup
Connecting accessories
Illustration H
1. Press the suction hose into the suction hose con-
nection on the device until it latches into place.
a To remove, press the latch and pull the suction
hose out.
2. Connect the vacuum nozzle to the handle.
Illustration J
3. Connect the crevice nozzle to the handle.
Inserting the battery pack
Illustration K
1. Push the battery pack into the battery pack mount-
ing from above until the battery pack latches into
place.
Note
Use the battery packs Battery Power (+) 18/25 or
18/50 only.
Switch on the device
Illustration L
1. Press the I button to switch the device on.
The suction and blowing functions are switched on.
Operation
ATTENTION
Damage to the device
Always ensure that the cartridge filter is inserted, for
both wet vacuuming and dry vacuuming.
Dry vacuuming
ATTENTION
Damage to the cartridge filter
When changing from wet to dry vacuuming, a wet car-
tridge filter can become damaged and unusable.
Allow the cartridge filter to dry completely before dry
vacuuming or replace it with a dry cartridge.
Replace the cartridge filter as necessary.
1. Insert the filter bag when vacuuming fine dust.
The fill degree of the filter bag depends on the
amount of dirt vacuumed.
The filter bag must be changed more frequently
when vacuuming fine dust, sand, etc.
A damaged filter bag can rupture, so be sure to
change the filter bag in time.
Wet vacuum cleaning
ATTENTION
Damage due to moisture
Do not use a filter bag for wet vacuum cleaning.
Note
When the container is full, a float switch closes the suc-
tion opening and the device runs at a higher speed.
Switch off the device immediately and empty the con-
tainer.
1. To attach the upholstery nozzle or crevice nozzle to
the handle in order to vacuum up moisture or liquids,
see Chapter Connecting accessories.
Blowing function
Cleaning of locations that are difficult to access or
where vacuuming is not possible, e.g. leaf litter from a
gravel bed.
Illustration M
1. Push the suction hose into the blower connection
until the suction hose latches into place.
Finishing operation
Illustration L
1. Press the 0 button to switch the device off.
Illustration N
2. Push the battery pack unlocking button forwards
and pull the battery pack upwards out of the battery
pack mounting.
3. Charge the battery pack if necessary, see chapter
Charging process.
Emptying the container
Illustration O
1. Open the device, see Chapter Installation.
2. Empty the container.
3. Close the device, see Chapter Installation.
Storing the device
Illustration P
1. Store the upholstery nozzle and crevice nozzle on
the device.
2. For storage the suction hose, wind the suction hose
around the device and fasten using the fastening
straps.
3. Store the device in a dry room.
Storing the battery pack
Note
Regardless of the vacuuming operations, the LC display
uses a small amount of the battery capacity, regardless
of whether the battery pack is inside or outside the de-
vice.
1. See chapter Storage.
Transport
몇CAUTION
Failure to observe the weight
Risk of injury and damage
Be aware of the weight of the device during transport
and storage.
1. When transporting in vehicles, secure the device
against slipping and tipping over according to the
applicable guidelines.
Manual transport
1. Lift and carry the device by the carrying handle.
Transport in vehicles
1. Secure the device against slipping and tipping over.
Care and service
Device and accessories
1. Clean the device and accessory parts made of plas-
tic with a commonly available plastic cleaner.
2. Rinse the container and accessories with water as
necessary and dry them thoroughly before further
use.
3. Regularly check the battery terminals for soiling and
clean them as necessary.
Cleaning the cartridge filter
Note
Recommendation: Replace the cartridge filter 1x per
year.
1. Open the device, see Chapter Installation.
Illustration Q
2. Remove the cartridge filter.
Illustration R
3. If necessary, clean the cartridge filter under running
water but do not rub or scrub it.

English 19
Illustration S
4. Allow the cartridge filter to dry completely before in-
stallation.
Illustration T
5. Install the cartridge filter.
6. Close the device, see Chapter Installation.
Replacing the filter bag
1. Open the device, see Chapter Installation.
2. Remove the filter bag.
Illustration U
3. Insert a new filter bag.
4. Close the device, see Chapter Installation.
Troubleshooting guide
Malfunctions often have simple causes that you can
remedy yourself using the following overview. When in
doubt, or in the case of malfunctions not mentioned
here, please contact your authorised Customer Service.
Malfunctions
Device not running
Battery pack not correctly seated in the battery pack
mounting.
1. Push the battery pack into the battery pack mount-
ing until it latches into place.
Charging state of the battery pack (see display) too low.
1. Charge the battery pack.
Defective battery pack or charger.
1. Replace the battery pack or charger.
Device switches off automatically
Device/battery pack overheated.
1. Wait until the device/battery pack has cooled down.
Container is full of water, which has activated the float
switch.
1. Empty the container.
The suction power decreases
Upholstery nozzle, crevice nozzle, handle or suction
hose are clogged.
1. Check the upholstery nozzle, crevice nozzle, handle
and suction hose and clean if necessary.
The cartridge filter is dirty.
1. Clean the cartridge filter, see Cleaning the cartridge
filter.
The filter bag is full.
1. Replace the filter bag, see Replacing the filter bag.
General fault
Display shows broken battery symbol
Battery pack is defective and disabled for safety.
1. Do not use the battery pack.
2. Dispose of the battery pack in the correct manner.
Faults during charging
Battery pack not charging, indicator lamp off, dis-
play off
Defective charger.
1. Replace the charger.
Battery pack not charging, indicator lamp on the
charger is blinking, display is on.
The battery pack temperature may not be within the nor-
mal range.
Defective charger.
1. Observe the information per the display.
2. Replace the charger.
Battery pack not charging, display is on
Defective charger.
1. Replace the charger.
Battery pack not charging, display is off
Battery pack is completely discharged or defective.
1. Wait and see if the display shows the remaining
charging time after a while.
If the display remains off then the battery pack is de-
fective.
2. Replace the battery pack.
Battery pack not charging, display shows the tem-
perature symbol
The battery pack temperature is too low/high.
1. Put the battery pack in a moderate temperature en-
vironment and wait until the battery pack tempera-
ture returns to the normal range, see Chapter
Battery pack technical data.
The charging process begins automatically.
Faults during operation
Display shows the temperature symbol
The battery pack temperature is too low/high.
1. Wait until the battery pack temperature returns to
the normal range, see Chapter Battery pack techni-
cal data.
In case of a short circuit, the battery pack is disabled for
30 seconds. If the short-circuit occurs more frequently,
the battery pack is permanently disabled.
1. Connect the battery pack to the charger to unlock it.
Display shows remaining run time 0, device switch-
es off
The battery pack is discharged.
1. Charge the battery pack.
Storage faults
Display shows no remaining capacity
The battery pack is discharged.
1. Charge the battery pack.
Display shows a remaining capacity of 70%, but the
battery pack is fully
charged
The battery pack is in automatic storage mode. The
storage mode is activated if the battery pack has not
been used for more than 21 days. This function protects
the battery cells against rapid ageing and increases
their service life.
1. Fully recharge the battery pack before next use.
Storage
ATTENTION
Moisture and heat
Risk of damage
Store the battery packs indoors only, at low humidity and
at temperatures below 27°C. If the battery pack is stored
at over 70% power and has not been used for more than
21 days, storage mode is automatically activated, which
partially discharges the battery pack to 70% power.
The battery pack display shows the current charging
state. The display also shows the current charging state
when the battery pack is not connected to a charger.
If the battery pack display goes out during storage, the
battery capacity is fully depleted and the display has
been switched off.
1. Charge the battery pack.

20 English
Warranty
The warranty conditions issued by our relevant sales
company apply in all countries. We shall remedy possi-
ble malfunctions on your appliance within the warranty
period free of cost, provided that a material or manufac-
turing defect is the cause. In a warranty case, please
contact your dealer (with the purchase receipt) or the
next authorised customer service site.
(See overleaf for the address)
Technical data
Subject to technical modifications.
Battery pack technical data
Subject to technical changes without notice.
* optional, ** optional accessories
Standard charger technical data
Subject to technical changes without notice.
* optional
WD 1 Compact Battery
Electrical connection
Battery voltage V 18
Nominal power W 230
Device performance data
Operating time when battery is fully charged in normal
operation min 10
Dimensions and weights
Weight kg 3,5
Length mm 386
Width mm 279
Height mm 312
Battery Power *18/25 **18/50
Nominal volt-
age of battery V18
Battery type – Li-Ion
Rated capacity
(according to
IEC/EN 61690)
Ah 2.4 4.8
Rated capacity
(per cell manu-
facturer specifi-
cations)
Ah 2.5 5.0
Rating (in ac-
cordance with
UN 3480)
W
h43.2 86.4
Charging pow-
er max. A4 8
Protection
class –IPX5
Weight kg 0.615 0.918
Operating tem-
perature °C -20...40
Charging tem-
perature °C 0...40
Storage tem-
perature °C -20...60
Dimensions
(L x W x H) m
m133 x 88 x 50 133 x 88 x 72
*Standard
charger BC 18
V
Battery pack nominal voltage V 18
Charging power max. A 0.5
Battery pack type – Li-Ion
Battery pack platform – Battery Power
(+)
Mains voltage V 100...240
Frequency Hz 50-60
Current consumption A max. 0.3
Protection class – II
Weight (without battery pack) g 160
Pagina se încarcă...
Pagina se încarcă...
Pagina se încarcă...
Pagina se încarcă...
Pagina se încarcă...
Pagina se încarcă...
Pagina se încarcă...
Pagina se încarcă...
Pagina se încarcă...
Pagina se încarcă...
Pagina se încarcă...
Pagina se încarcă...
Pagina se încarcă...
Pagina se încarcă...
Pagina se încarcă...
Pagina se încarcă...
Pagina se încarcă...
Pagina se încarcă...
Pagina se încarcă...
Pagina se încarcă...
Pagina se încarcă...
Pagina se încarcă...
Pagina se încarcă...
Pagina se încarcă...
Pagina se încarcă...
Pagina se încarcă...
Pagina se încarcă...
Pagina se încarcă...
Pagina se încarcă...
Pagina se încarcă...
Pagina se încarcă...
Pagina se încarcă...
Pagina se încarcă...
Pagina se încarcă...
Pagina se încarcă...
Pagina se încarcă...
Pagina se încarcă...
Pagina se încarcă...
Pagina se încarcă...
Pagina se încarcă...
Pagina se încarcă...
Pagina se încarcă...
Pagina se încarcă...
Pagina se încarcă...
Pagina se încarcă...
Pagina se încarcă...
Pagina se încarcă...
Pagina se încarcă...
Pagina se încarcă...
Pagina se încarcă...
Pagina se încarcă...
Pagina se încarcă...
Pagina se încarcă...
Pagina se încarcă...
Pagina se încarcă...
Pagina se încarcă...
Pagina se încarcă...
Pagina se încarcă...
Pagina se încarcă...
Pagina se încarcă...
Pagina se încarcă...
Pagina se încarcă...
Pagina se încarcă...
Pagina se încarcă...
Pagina se încarcă...
Pagina se încarcă...
Pagina se încarcă...
Pagina se încarcă...
Pagina se încarcă...
Pagina se încarcă...
Pagina se încarcă...
Pagina se încarcă...
Pagina se încarcă...
Pagina se încarcă...
Pagina se încarcă...
Pagina se încarcă...
Pagina se încarcă...
Pagina se încarcă...
Pagina se încarcă...
Pagina se încarcă...
Pagina se încarcă...
Pagina se încarcă...
Pagina se încarcă...
Pagina se încarcă...
Pagina se încarcă...
Pagina se încarcă...
Pagina se încarcă...
Pagina se încarcă...
Pagina se încarcă...
Pagina se încarcă...
Pagina se încarcă...
Pagina se încarcă...
Pagina se încarcă...
Pagina se încarcă...
Pagina se încarcă...
Pagina se încarcă...
Pagina se încarcă...
Pagina se încarcă...
Pagina se încarcă...
Pagina se încarcă...
Pagina se încarcă...
Pagina se încarcă...
Pagina se încarcă...
Pagina se încarcă...
Pagina se încarcă...
Pagina se încarcă...
Pagina se încarcă...
Pagina se încarcă...
Pagina se încarcă...
Pagina se încarcă...
Pagina se încarcă...
Pagina se încarcă...
Pagina se încarcă...
Pagina se încarcă...
Pagina se încarcă...
Pagina se încarcă...
Pagina se încarcă...
Pagina se încarcă...
Pagina se încarcă...
Pagina se încarcă...
Pagina se încarcă...
Pagina se încarcă...
Pagina se încarcă...
Pagina se încarcă...
Pagina se încarcă...
Pagina se încarcă...
Pagina se încarcă...
Pagina se încarcă...
Pagina se încarcă...
Pagina se încarcă...
Pagina se încarcă...
Pagina se încarcă...
Pagina se încarcă...
Pagina se încarcă...
Pagina se încarcă...
Pagina se încarcă...
Pagina se încarcă...
Pagina se încarcă...
Pagina se încarcă...
Pagina se încarcă...
Pagina se încarcă...
Pagina se încarcă...
Pagina se încarcă...
Pagina se încarcă...
Pagina se încarcă...
Pagina se încarcă...
Pagina se încarcă...
Pagina se încarcă...
Pagina se încarcă...
Pagina se încarcă...
Pagina se încarcă...
Pagina se încarcă...
Pagina se încarcă...
Pagina se încarcă...
Pagina se încarcă...
Pagina se încarcă...
Pagina se încarcă...
Pagina se încarcă...
Pagina se încarcă...
Pagina se încarcă...
Pagina se încarcă...
Pagina se încarcă...
Pagina se încarcă...
Pagina se încarcă...
Pagina se încarcă...
Pagina se încarcă...
Pagina se încarcă...
Pagina se încarcă...
Pagina se încarcă...
Pagina se încarcă...
Pagina se încarcă...
Pagina se încarcă...
Pagina se încarcă...
Pagina se încarcă...
Pagina se încarcă...
Pagina se încarcă...
Pagina se încarcă...
Pagina se încarcă...
Pagina se încarcă...
Pagina se încarcă...
Pagina se încarcă...
Pagina se încarcă...
Pagina se încarcă...
Pagina se încarcă...
Pagina se încarcă...
Pagina se încarcă...
Pagina se încarcă...
Pagina se încarcă...
Pagina se încarcă...
Pagina se încarcă...
Pagina se încarcă...
Pagina se încarcă...
Pagina se încarcă...
Pagina se încarcă...
Pagina se încarcă...
Pagina se încarcă...
Pagina se încarcă...
Pagina se încarcă...
Pagina se încarcă...
Pagina se încarcă...
Pagina se încarcă...
Pagina se încarcă...
Pagina se încarcă...
Pagina se încarcă...
Pagina se încarcă...
Pagina se încarcă...
Pagina se încarcă...
Pagina se încarcă...
Pagina se încarcă...
Pagina se încarcă...
Pagina se încarcă...
Pagina se încarcă...
Pagina se încarcă...
Pagina se încarcă...
Pagina se încarcă...
Pagina se încarcă...
Pagina se încarcă...
Pagina se încarcă...
Pagina se încarcă...
Pagina se încarcă...
-
 1
1
-
 2
2
-
 3
3
-
 4
4
-
 5
5
-
 6
6
-
 7
7
-
 8
8
-
 9
9
-
 10
10
-
 11
11
-
 12
12
-
 13
13
-
 14
14
-
 15
15
-
 16
16
-
 17
17
-
 18
18
-
 19
19
-
 20
20
-
 21
21
-
 22
22
-
 23
23
-
 24
24
-
 25
25
-
 26
26
-
 27
27
-
 28
28
-
 29
29
-
 30
30
-
 31
31
-
 32
32
-
 33
33
-
 34
34
-
 35
35
-
 36
36
-
 37
37
-
 38
38
-
 39
39
-
 40
40
-
 41
41
-
 42
42
-
 43
43
-
 44
44
-
 45
45
-
 46
46
-
 47
47
-
 48
48
-
 49
49
-
 50
50
-
 51
51
-
 52
52
-
 53
53
-
 54
54
-
 55
55
-
 56
56
-
 57
57
-
 58
58
-
 59
59
-
 60
60
-
 61
61
-
 62
62
-
 63
63
-
 64
64
-
 65
65
-
 66
66
-
 67
67
-
 68
68
-
 69
69
-
 70
70
-
 71
71
-
 72
72
-
 73
73
-
 74
74
-
 75
75
-
 76
76
-
 77
77
-
 78
78
-
 79
79
-
 80
80
-
 81
81
-
 82
82
-
 83
83
-
 84
84
-
 85
85
-
 86
86
-
 87
87
-
 88
88
-
 89
89
-
 90
90
-
 91
91
-
 92
92
-
 93
93
-
 94
94
-
 95
95
-
 96
96
-
 97
97
-
 98
98
-
 99
99
-
 100
100
-
 101
101
-
 102
102
-
 103
103
-
 104
104
-
 105
105
-
 106
106
-
 107
107
-
 108
108
-
 109
109
-
 110
110
-
 111
111
-
 112
112
-
 113
113
-
 114
114
-
 115
115
-
 116
116
-
 117
117
-
 118
118
-
 119
119
-
 120
120
-
 121
121
-
 122
122
-
 123
123
-
 124
124
-
 125
125
-
 126
126
-
 127
127
-
 128
128
-
 129
129
-
 130
130
-
 131
131
-
 132
132
-
 133
133
-
 134
134
-
 135
135
-
 136
136
-
 137
137
-
 138
138
-
 139
139
-
 140
140
-
 141
141
-
 142
142
-
 143
143
-
 144
144
-
 145
145
-
 146
146
-
 147
147
-
 148
148
-
 149
149
-
 150
150
-
 151
151
-
 152
152
-
 153
153
-
 154
154
-
 155
155
-
 156
156
-
 157
157
-
 158
158
-
 159
159
-
 160
160
-
 161
161
-
 162
162
-
 163
163
-
 164
164
-
 165
165
-
 166
166
-
 167
167
-
 168
168
-
 169
169
-
 170
170
-
 171
171
-
 172
172
-
 173
173
-
 174
174
-
 175
175
-
 176
176
-
 177
177
-
 178
178
-
 179
179
-
 180
180
-
 181
181
-
 182
182
-
 183
183
-
 184
184
-
 185
185
-
 186
186
-
 187
187
-
 188
188
-
 189
189
-
 190
190
-
 191
191
-
 192
192
-
 193
193
-
 194
194
-
 195
195
-
 196
196
-
 197
197
-
 198
198
-
 199
199
-
 200
200
-
 201
201
-
 202
202
-
 203
203
-
 204
204
-
 205
205
-
 206
206
-
 207
207
-
 208
208
-
 209
209
-
 210
210
-
 211
211
-
 212
212
-
 213
213
-
 214
214
-
 215
215
-
 216
216
-
 217
217
-
 218
218
-
 219
219
-
 220
220
-
 221
221
-
 222
222
-
 223
223
-
 224
224
-
 225
225
-
 226
226
-
 227
227
-
 228
228
-
 229
229
-
 230
230
-
 231
231
-
 232
232
-
 233
233
-
 234
234
-
 235
235
-
 236
236
-
 237
237
-
 238
238
-
 239
239
-
 240
240


Kärcher 1 vacuum cleaner Compact Battery Manual de utilizare
- Tip
- Manual de utilizare
Lucrări înrudite
-
Kärcher KV 4 Manual de utilizare
-
Kärcher 2-18 Battery Set Standard Vacuum Cleaner Manual de utilizare
-
-
-
-
-
-
-
-