

1
2
3

4
5
6
7

8
9
10

PR 2-HS A12
en Originaloperatinginstructions....................................... 1
bg Оригинално Ръководство за експлоатация . . . . . . . . . . . . . . . . . . . . . . . . . . . . 12
ro Manualdeutilizareoriginal ........................................ 24
tr Orijinalkullanımkılavuzu ......................................... 35
ar ﺩﻟﻴﻞﺍﻻﺳﺘﻌﻤﺎﻝﺍﻷﺻﻠﻲ .......................................... 47
lv Oriģinālālietošanasinstrukcija ..................................... 59
lt Originalinaudojimoinstrukcija...................................... 70
et Algupäranekasutusjuhend ........................................ 81
sr Originalnouputstvozaupotrebu .................................... 92
uk Оригінальна інструкція з експлуатації . . . . . . . . . . . . . . . . . . . . . . . . . . . . . . . . 103
el Πρωτότυπεςοδηγίεςχρήσης....................................... 116
kk Түпнұсқа пайдалану бойынша нұсқаулық . . . . . . . . . . . . . . . . . . . . . . . . . . . . . 128
ja オリジナル取扱説明書 ............................................ 140
ko 오리지널사용설명서............................................. 150
zh 原始操作說明.................................................. 161
cn 原版操作说明.................................................. 171


*2131238* 2131238 English 1
Original operating instructions
1 Information about the operating instructions
1.1 Explanation of symbols
1.1.1 Warnings
Warnings alert persons to hazards that occur when handling or using the product. The following signal words
are used:
DANGER
DANGER !
▶Draws attention to imminent danger that will lead to serious personal injury or fatality.
WARNING
WARNING !
▶Draws attention to a potential threat of danger that can lead to serious injury or fatality.
CAUTION
CAUTION !
▶Draws attention to a potentially dangerous situation that could lead to personal injury or damage to the
equipment or other property.
1.1.2 Symbols in the operating instructions
The following symbols are used in these operating instructions:
Comply with the operating instructions
Instructions for use and other useful information
Dealing with recyclable materials
Do not dispose of electric equipment and batteries as household waste
Hilti Liion battery
Hilti charger
1.1.3 Symbols in illustrations
The following symbols are used in illustrations:
These numbers refer to the illustrations at the beginning of these operating instructions.
The numbering reflects the sequence of operations shown in the illustrations and may deviate
from the steps described in the text.
Item reference numbers are used in the overview illustration and refer to the numbers used in
the key in the product overview section.
These characters are intended to specifically draw your attention to certain points when handling
the product.
1.2 Product-dependent symbols
1.2.1 Symbols on the product
The following symbols can be used on the product:
The product supports wireless data transmission compatible with iOS and Android platforms.

2 English 2131238 *2131238*
Hilti Li-ion battery type series used. Observe the information given in the section headed
Intended use.
Li-ion battery
Never use the battery as a striking tool.
Do not drop the battery. Never use a battery that has suffered an impact or is damaged in any
other way.
1.3 On the product
Laser information
Laser Class 2 based on the IEC60825-1 / EN60825-1:2007 standard in com-
pliance with CFR 21 § 1040 (Laser Notice 50).
Do not stare into beam.
1.4 Product information
products are designed for professional users and only trained, authorized personnel are
permitted to operate, service and maintain the products. This personnel must be specifically informed about
the possible hazards. The product and its ancillary equipment can present hazards if used incorrectly by
untrained personnel or if used not in accordance with the intended use.
The type designation and serial number are printed on the rating plate.
▶Write down the serial number in the table below. You will be required to state the product details when
contacting Hilti Service or your local Hilti organization to inquire about the product.
Product information
Rotating laser PR 2-HS A12
Generation 02
Serial no.
1.5 Declaration of conformity
We declare, on our sole responsibility, that the product described here complies with the applicable directives
and standards. A copy of the declaration of conformity can be found at the end of this documentation.
We declare, on our sole responsibility, that the product described here complies with the applicable directives
and standards. A copy of the declaration of conformity can be found at the end of this documentation.
The technical documentation is filed here:
Hilti Entwicklungsgesellschaft mbH | Tool Certification | Hiltistrasse 6 | D-86916 Kaufering, Germany
2 Safety
2.1 Safety instructions
2.1.1 Basic information concerning safety
Read all safety instructions and other instructions. Failure to observe the safety instructions and other
instructions may result in electric shock, fire and/or serious injury.
Retain all safety precautions and instructions for future reference. The term “electric tool” used in the
safety instructions refers to your mains-operated (corded) electric tool or battery-operated (cordless) electric
tool.
2.1.2 General safety instructions
▶Stay alert, watch what you are doing and use common sense when operating an electric tool. Do
not use an electric tool while you are tired or under the influence of drugs, alcohol or medication.
A moment of inattention while operating the electric tool may result in serious personal injury.
▶Do not render safety devices ineffective and do not remove information and warning notices.
▶Keep laser tools out of reach of children.

*2131238* 2131238 English 3
▶Laser radiation in excess of Class 2 may be emitted if the tool is opened without following the correct
procedures. Have the tool repaired only by Hilti Service.
▶Laser beams should be projected well above or well below eye height.
▶Take the influences of the surrounding area into account. Do not use the tool where there is a risk
of fire or explosion.
▶Statement in accordance with FCC §15.21: Changes or modifications not expressly approved by Hilti
may restrict the user’s authorization to operate the equipment.
▶You must check the accuracy of the tool after it has been dropped or subjected to other mechanical
stresses.
▶When the tool is brought into a warm environment from very cold conditions, or vice-versa, allow
it to become acclimatized before use.
▶Make sure that the tool is mounted securely when adapters or accessories are used.
▶Keep the laser exit aperture clean to avoid measurement errors.
▶Although the tool is designed for the tough conditions of jobsite use, as with other optical and
electronic instruments (e.g. binoculars, spectacles, cameras) it should be treated with care.
▶Although the tool is protected to prevent entry of dampness, it should be wiped dry each time
before being put away in its transport container.
▶Check the tool before using it for important measuring work.
▶Check the accuracy of the measurements several times during use of the tool.
▶Ensure that the workplace is well lit.
▶Do not expose the laser to rain or wet conditions.
▶Avoid touching the contacts.
▶Maintain the tool carefully. Check for misalignment or binding of moving parts, breakage of parts
and any other condition that may affect the tool’s operation. Have damaged parts repaired before
using the tool. Many accidents are caused by poorly maintained tools.
2.1.3 Proper preparation of the working area
▶Secure the area in which you will be taking measurements. Make sure that the laser beam is not
directed toward other persons or toward yourself while setting up the PR 2-HS A12.
▶Avoid unfavorable body positions when working from ladders. Make sure you work from a safe
stance and stay in balance at all times.
▶Readings taken in the vicinity of reflective objects or surfaces, through panes of glass or similar materials
may produce incorrect results.
▶Ensure that the tool is set up on a stable, level surface (not subject to vibration).
▶Use the tool only within its specified limits.
▶Use the tool and its accessories etc. in accordance with these instructions and in the manner
intended for the particular type of tool. Take the working conditions and the task to be performed
into account. Use of tools for applications different from those intended could result in a hazardous
situation.
▶Use of the telescopic staff in the vicinity of overhead high voltage cables is not permissible.
2.1.4 Electromagnetic compatibility
Although the tool complies with the strict requirements of the applicable directives, Hilti cannot exclude the
following possibilities:
• The tool may be negatively affected by powerful electromagnetic radiation, possibly leading to incorrect
operation.
In these cases, or if you are otherwise unsure, confirmatory measurements should be made by other
means.
• The tool may cause interference to other devices (e.g. aircraft navigation equipment).
Only for Korea:
This device is suitable for the electromagnetic radiation encountered in residential environments (Class B). It
is intended mainly for use in residential environments but may also be used in other environments.
2.1.5 Laser classification for Class 2 laser products
The tool complies with laser Class 2 as per IEC60825-1:2007 / EN60825-1:2007. This tool may be used
without need for further protective measures.

4 English 2131238 *2131238*
CAUTION
Risk of injury! Do not direct the laser beam toward persons.
▶Never look directly into the source of the laser beam. In the event of direct eye contact, close your eyes
and move your head out of the path of the laser beam.
2.1.6 Careful use of battery-powered tools
▶Do not expose batteries to high temperatures, the direct heat of the sun, and keep them away
from fire. There is a risk of explosion.
▶Do not disassemble, squash or incinerate batteries and do not subject them to temperatures over
80°C (176°F). This presents a risk of fire, explosion or injury through contact with caustic substances.
▶Do not subject the battery to hard mechanical impacts and do not throw the battery.
▶Batteries must be kept out of reach of children.
▶Avoid ingress of moisture. Ingress of moisture may cause a short circuit, resulting in burning injuries or
fire.
▶Under abusive conditions, liquid may leak from the battery. Avoid contact with the liquid. If contact
accidentally occurs, flush with water. If the liquid contacts the eyes, also seek medical attention.
Liquid leaking from the battery may cause irritation or burns.
▶Use only batteries of the type approved for use with the applicable tool. Use of other batteries or
use of the batteries for purposes for which they are not intended presents a risk of fire and explosion.
▶Store the battery in a cool and dry place. Never store the battery where it is exposed to direct sunlight or
sources of heat, e.g. on heaters / radiators or behind glass.
▶When not in use, keep the battery and the charger away from paper clips, coins, keys, nails,
screws or other small metal objects that could cause a short circuit at the battery terminals or the
charging contacts. Short-circuiting the contacts on a battery or charger may cause burning injuries or
start a fire.
▶Do not charge or continue to use damaged batteries (e.g. batteries with cracks, broken parts, bent
or pushed-in and/or pulled-out contacts).
▶Recharge only with the charger specified by the manufacturer. A charger that is suitable for a certain
type of battery may present a risk of fire when used with other types of battery.
▶Observe the special guidelines applicable to the transport, storage and use of Li-ion batteries.
▶The battery must be insulated or removed from the tool before the tool is shipped or sent by mail.
Leaking batteries may damage the tool.
▶If the battery gets noticeably hot when not in use, this may indicate that the battery or the tool / battery
system is faulty. In this case, place the tool in a non-flammable location, well away from flammable
materials, where it can be kept under observation and allowed to cool down.
3 Description
3.1 Overview of the product
3.1.1 PR 2-HS A12 rotating laser 1
@Laser beam (plane of rotation)
;Rotary head
=Grip
%Battery release button
&Liion battery
(Battery charge status display
)Control panel
+Base plate with 5/8" thread
3.1.2 PR 2-HS A12 control panel 2
@On/off button
;LED: Auto-leveling
=Button and LED: Shock warning deactiva-
tion
%Button and LED: Manual inclined plane
mode
&Battery charge state LEDs
3.1.3 PRA 20 laser receiver control panel 3
@On/off button
;Volume button
=Units key
%Receiving area
&Marking notch
(Display

*2131238* 2131238 English 5
3.1.4 PRA 20 laser receiver display 4
@Indicator showing distance from laser plane
;Volume indicator
=Rotating laser low battery indicator
%Battery status
&Indicator showing position of receiver
relative to height of laser plane
(Display
)Marking notch
+Receiving area
3.1.5 Intended use
The product described is a rotating laser with a visible rotating laser beam. It can be operated by one person.
The tool is designed to be used for determining, transferring and checking references in the horizontal and
inclined planes. Examples of uses are transferring datums and heights.
▶Use only the Hilti B12/2.6 and respectively the B 1230 Li ion battery for this product.
▶Use only the Hilti C 4⁄1250 charger for this product.
3.1.6 Features
The rotating laser can be used horizontally and for inclined planes.
The tool is equipped with the following operating status indicators: auto-leveling LED, inclination angle LED
and shock warning LED.
Auto-leveling
Auto-leveling is carried out by two built-in servo motors after switching on. LEDs indicate the current
operating status. Auto-leveling is active within the ±5° range relative to the horizontal plane and can be
deactivated by pressing the button. The tool can be set up directly on the ground or floor, on a tripod, or
with the aid of suitable mounting brackets.
Inclination angle
Alternatively, in inclined plane mode, the slope adapter can be adjusted manually to achieve slopes of up to
60%. Auto-leveling is not active.
Automatic cut-out
The tool switches off automatically if it is unable to level itself, because the laser:
• is inclined at more than 5° relative to the horizontal plane.
• is blocked mechanically.
• has been knocked off level by an impact or vibration.
When the tool has switched itself off, rotation stops and all LEDs blink.
Shock warning
If the laser is knocked off level during operation, the built-in shock warning function switches the tool to
warning mode. The shock warning function becomes active only two minutes after completion of auto-
leveling. If a button on the control panel is pressed within this two-minute period it will again take a further
two minutes until shock warning function becomes active. If the laser is in warning mode:
• all LEDs blink.
• the laser stops rotating.
• the laser beam switches off.
The shock warning function can be switched off by pressing the button if the ground or floor is not free
from vibration or when you are working in inclined plane mode.
Laser receiver
Hilti laser receivers can be used to detect and indicate the laser beam at great distances.
3.1.7 LED indicators
The rotating laser is equipped with an LED display.
Status Meaning
All LEDs blink The tool has been bumped, knocked off level or is
subject to some other error.
The auto-leveling LED blinks green The tool is in the leveling phase.
The auto-leveling LED lights green constantly The tool has leveled itself / is operating normally.
The shock warning LED lights orange constantly Shock warning mode is deactivated.
The inclination LED lights orange constantly Inclined plane mode is active.

6 English 2131238 *2131238*
3.1.8 Li-ion battery charge state display
The Li-ion battery features a state of charge display.
Status Meaning
4 LEDs light. Charge status: 75 % to 100 %
3 LEDs light. Charge status: 50 % to 75 %
2 LEDs light. Charge status: 25 % to 50 %
1 LED lights. Charge status: 10 % to 25 %
1 LED blinks. Charge status: < 10 %
When the tool is in operation, the battery charge status is indicated in the display on the tool.
When not in operation, battery charge state can be indicated by lightly pressing the release button.
During charging, charge state is indicated by the LEDs on the battery (please refer to the operating
instructions for the charger).
3.1.9 Items supplied
PR 2-HS A12 rotating laser, PRA 20 (02) laser receiver, 2 batteries (AA cells), PRA 83 laser receiver holder,
2 manufacturer’s certificates, operating instructions.
Other system products approved for use with this product can be found at your local Hilti Store or at:
www.hilti.group
4 Technical data
4.1 Technical data, rotating laser
PR 2-HS
Rated voltage 10.8 V
Rated current 100 mA
Maximum relative humidity 80 %
Maximum site elevation above datum 2,000 m
Receiving range (diameter) PRA 20 (02) 2 m … 600 m
Accuracy at 10 m (under standard ambient conditions in
accordance with MILSTD810G) ±0.5 mm
Laser class Visible, Laser Class 2,
620-690 nm/Po<4.85 mW ≥ 300 ⁄min;
EN 60825-1:2007; IEC 60825-1:2007
Speed of rotation 300 /min
Self-leveling range ±5°
Operating temperature −20 ℃ … 50 ℃
Storage temperature −25 ℃ … 60 ℃
Weight (including B12/2.6 and respectively B 1230 bat-
tery) 2.44 kg
Drop test height (under standard ambient conditions in
accordance with MILSTD810G) 1.5 m
Tripod thread 5/8 in
Protection class in accordance with IEC 60529 (except
battery and battery compartment) IP66
4.2 Technical data, laser receiver
Rated voltage 3 V
Rated current 150 mA
Maximum site elevation above datum 2,000 m
Maximum relative humidity 80 %

*2131238* 2131238 English 7
Indicator range, distance from zero ±52 mm
Laser plane display range ±0.5 mm
Length of the detection area ≤ 120 mm
Center indication from top edge of casing 75 mm
Time without detection before automatic power off 15 min
Drop test height in the PRA 83 laser receiver holder
(under standard ambient conditions in accordance with
MILSTD810G)
2 m
Operating temperature −20 ℃ … 50 ℃
Storage temperature −25 ℃ … 60 ℃
Weight (including batteries) 0.25 kg
Protection class in accordance with IEC 60529 IP66
5 Operating the rotating laser
5.1 Handling the laser and battery correctly 5
The type B12 battery has no protection class. Do not expose the battery to rain or wet conditions.
In accordance with the Hilti instructions, the battery may be used only with the associated product
and must be inserted in the battery compartment for this purpose.
1. Fig. 1: Working in horizontal mode.
2. Fig. 2: In inclined plane mode, the laser should be lifted at the control panel side.
3. Fig. 3: Laying down or transporting in an inclined position.
▶Hold the laser so that the battery compartment does NOT face upwards, so that no moisture can
enter.
5.2 Inserting / removing the battery 6
CAUTION
Electrical hazard. Dirty contacts may cause a short circuit.
▶Check that the contacts on the battery and on the tool are free from foreign objects before inserting the
battery.
CAUTION
Risk of injury. If the battery is not fitted correctly it may drop out and fall.
▶Check that the battery is securely seated in the tool so that it cannot drop out and fall, thereby presenting
a hazard to other persons.
1. Push the battery in until it engages securely.
▶The laser is ready to switch on.
2. Press the release button and hold it in this position.
3. Pull the battery out.
5.3 Switching the laser on and working in the horizontal plane 7
Check the accuracy of the laser tool before using it for important tasks, especially if it has been
dropped or subjected to unusual influences or impacts etc.
1. Mount the laser on a suitable holder or bracket.
2. Press the ' button.
▶The auto-leveling LED blinks green.

8 English 2131238 *2131238*
▶The laser switches on, the beam begins to rotate and the “auto leveling” LED lights as soon as the
tool has leveled itself.
A wall bracket or tripod may be used as mounting devices. The angle of inclination of the surface
on which it stands should not exceed ± 5°.
5.4 Using the slope adapter to set the slope
1. Mount a suitable slope adapter on a tripod.
2. Mount the laser tool on the slope adapter.
The control panel of the laser tool should face away from the direction of inclination.
3. Position the tripod either at the upper edge or lower edge of the inclined plane.
4. Make sure that the slope adapter is in the zero position (0°).
5. Position yourself behind the laser tool, facing the control panel.
6. With the aid of the target notch on the head of the laser tool, adjust the tool with the slope adapter until
it is parallel to the inclined plane.
7. Press the button on the laser tool.
▶The inclined plane mode LED then lights on the control panel of the laser tool.
▶The laser tool then begins automatic self-leveling. The laser switches on and begins to rotate as soon
as this is complete.
8. Set the slope adapter to the desired angle of inclination.
To return to standard operating mode, switch the laser tool off and then switch it back on again.
5.5 Deactivating the shock warning function
1. Switch the laser on. → page 7
2. Press the button.
▶The shock warning deactivation LED lights constantly, indicating that the function has been
deactivated.
To return to standard operating mode, switch the laser tool off and then switch it back on again.
5.6 Checking the main and transverse horizontal axes 8
1. Set up the tripod approx. 20 m (66 ft) from a wall and adjust the tripod head horizontally with a spirit level.
2. Mount the tool on the tripod and use the visual sighting method (front and rear sights) to aim the tool at
the wall.
3. Fig. a: Use the receiver to catch the laser beam and mark a point (point 1) on the wall.
4. Pivot the tool clockwise through 90° about its own axis. In doing so, ensure that the height of the tool
does not change.
5. Fig. b: Use the laser receiver to catch the laser beam and mark a second point (point 2) on the wall.
6. Fig. c and d: Repeat the two previous steps twice and use the laser receiver to catch the beam and mark
points 3 and 4 on the wall.
If the procedure has been carried out accurately, the vertical distance between the two marked
points 1 and 3 (main axis) or points 2 and 4 (transverse axis) should each be < 2 mm (at 20 m) (0.12" at
66 ft). If the deviation is greater than this, the tool should be returned to Hilti Service for calibration.
6 Operating the laser receiver
6.1 Inserting the batteries in the laser receiver 9
▶Insert the batteries in the laser receiver.
Use only batteries that have been manufactured in accordance with international standards.

*2131238* 2131238 English 9
6.2 Using the laser receiver to detect the laser beam
1. Press the button on the laser receiver.
2. Hold the laser receiver with the receiving window directly in the plane of the laser beam.
3. Hold the laser receiver still while alignment is taking place and take care to ensure that the line of sight
between the laser receiver and the tool is not obstructed.
▶Detection of the laser beam is indicated by visual and audible signals.
▶The laser receiver indicates the distance to the laser beam.
6.3 Setting the units to be used
1. When switching the laser receiver on, press and hold the button for two seconds.
▶The menu is then shown in the display.
2. Use the button to toggle between metric or imperial measuring units.
3. Switch the laser receiver off by pressing the button.
▶The settings will be saved.
6.4 Changing the units used by the laser receiver
1. Switch the laser on. → page 7
2. Press the button repeatedly.
▶The desired accuracy (mm/cm/off) is shown alternately in the digital display.
6.5 Adjusting the volume level on the laser receiver
1. Switch the laser on. → page 7
2. Press the button repeatedly.
▶The desired volume level (low/normal/high/off) is shown alternately in the digital display.
The laser receiver is set to “Normal” volume when switched on.
6.6 Adjusting the signal tone on the laser receiver
1. When switching the laser receiver on, press and hold the button for two seconds.
▶The menu is then shown in the display.
2. Use the button to assign the rapid signal tone to the upper or lower detection area.
3. Switch the laser receiver off by pressing the button.
▶The settings will be saved.
6.7 PRA 83 laser receiver with holder 10
1. Fit the laser receiver into the rubber sleeve of the PRA 83 at an angle from above.
2. Then press the laser receiver all the way into the rubber sleeve until the sleeve surrounds the laser
receiver completely.
3. Fit the rubber sleeve onto the magnetic grip piece.
4. Press the button.
5. Unscrew the clamping knob on the grip piece slightly.
6. Mount the PRA 83 laser receiver on a telescopic staff or leveling staff and secure it by tightening the
clamping knob.
▶The laser receiver is ready for taking measurements.
7 Care and maintenance
7.1 Care and maintenance
WARNING
Risk of injury with battery inserted !
▶Always remove the battery before carrying out care and maintenance tasks!

10 English 2131238 *2131238*
Care and maintenance of the tool
• Carefully remove any dirt that may be adhering to the tool.
• Use only a slightly damp cloth to clean the casing. Do not use cleaning agents containing silicone as
these may attack the plastic parts.
Care of the lithiumion batteries
• Keep the battery free from oil and grease.
• Use only a slightly damp cloth to clean the casing. Do not use cleaning agents containing silicone as
these may attack the plastic parts.
• Avoid ingress of moisture.
Maintenance
• Check all visible parts and controls for signs of damage at regular intervals and make sure that they all
function correctly.
• Do not operate the battery-powered tool if signs of damage are found or if parts malfunction. Have the
tool repaired by Hilti Service immediately.
• After cleaning and maintenance, fit all guards or protective devices and check that they function correctly.
To help ensure safe and reliable operation, use only genuine Hilti spare parts and consumables. Spare
parts, consumables and accessories approved by Hilti for use with the product can be found at your
local Hilti Center or online at: www.hilti.com
Cleaning the laser exit window
▶Blow any dust off the laser exit window.
▶Do not touch the laser exit window with your fingers.
Abrasive cleaning materials may scratch the glass and impair the accuracy of the laser tool. Do not
use any liquids other than pure alcohol or water as these may damage the plastic components.
Observe the temperature limits when drying the equipment.
7.2 Hilti Measuring Systems Service
Hilti Measuring Systems Service checks the product and, if deviations from the specified accuracy are found,
recalibrates it and checks it again to ensure conformity with specifications. The service certificate provides
written confirmation of conformity with specifications at the time of the test. The following is recommended:
• A suitable test interval should be chosen in accordance with the degree of use.
• Have the product checked by Hilti Measuring Systems Service after exceptionally heavy use or subjection
to unusual conditions or stress, before important work or at least once a year.
Having the product checked by Hilti Measuring Systems Service does not relieve the user of his/her
obligation to check the product before and during use.
7.3 Checking accuracy
In order to ensure compliance with the technical specifications, the tool should be checked regularly (at least
before each major / relevant measuring task).
After falling from considerable height, the tool should be checked for correct, accurate operation. When the
following conditions are fulfilled it can be assumed that the tool is operating faultlessly:
• The height of the fall did not exceed the height given in the technical data.
• The tool operated faultlessly before the impact.
• The tool suffered no obvious mechanical damage from the impact (e.g. breakage of the pentaprism).
• The tool projects a rotating laser beam when in operation.
8 Transport and storage
8.1 Transport and storage
Transport
CAUTION
Accidental starting during transport !
▶Always transport your products with the batteries removed!

*2131238* 2131238 English 11
▶Remove the battery.
▶Transport the tool and battery individually packaged.
▶Never transport batteries in bulk form (loose, unprotected).
▶Check tools and batteries for damage before use after long periods of transport.
Storage
WARNING
Accidental damage caused by defective or leaking batteries !
▶Always store your products with the batteries removed!
▶Store the tool and battery in a place that is as cool and dry as possible.
▶Never store batteries in direct sunlight, on heating units or behind a window pane.
▶Store the tool and batteries in a place where they cannot be accessed by children or unauthorized
persons.
▶Check the tool and batteries for damage before use after long periods of storage.
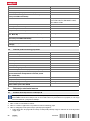
9 Troubleshooting
If the trouble you are experiencing is not listed in this table or you are unable to remedy the problem by
yourself, please contact Hilti Service.
Trouble or fault Possible cause Action to be taken
The tool doesn’t work. The battery is not fully inserted. ▶Push the battery in until it
engages with an audible click.
Battery is discharged. ▶Change the battery and charge
the empty battery.
The battery runs down more
quickly than usual. Very low ambient temperature. ▶Warm up the battery slowly to
room temperature.
The battery doesn’t engage
with an audible click. The retaining lugs on the battery
are dirty.
▶Clean the retaining lugs and refit
the battery.
The tool or battery gets very
hot. Electrical fault. ▶Switch the tool off immediately,
remove the battery, keep it
under observation, allow it to
cool down and contact Hilti
Service.
10 Disposal
WARNING
Risk of injury due to incorrect disposal! Health hazards due to escaping gases or liquids.
▶DO NOT send batteries through the mail!
▶Cover the terminals with a non-conductive material (such as electrical tape) to prevent short circuiting.
▶Dispose of your battery out of the reach of children.
▶Dispose of the battery at your Hilti Store, or consult your local governmental garbage disposal or public
health and safety resources for disposal instructions.
Most of the materials from which Hilti tools and appliances are manufactured can be recycled. The
materials must be correctly separated before they can be recycled. In many countries, your old tools,
machines or appliances can be returned to Hilti for recycling. Ask Hilti Service or your Hilti representative
for further information.
In accordance with the European Directive on waste electrical and electronic equipment and its implemen-
tation in conformance with national law, electric tools or appliances and batteries that have reached the end
of their life must be collected separately and returned to an environmentally compatible recycling facility.
▶Do not dispose of electronic measuring tools together with household waste.
To avoid pollution of the environment, tools or appliances and batteries must be disposed of in accordance
with the currently applicable national regulations.

12 Български 2131238 *2131238*
11 Manufacturer’s warranty
▶Please contact your local Hilti representative if you have questions about the warranty conditions.
Оригинално Ръководство за експлоатация
1 Данни за Ръководството за експлоатация
1.1 Условни обозначения
1.1.1 Предупредителни указания
Предупредителните указания предупреждават за опасност в зоната около продукта. Използват се
следните сигнални думи:
ОПАСНОСТ
ОПАСНОСТ !
▶Отнася се за непосредствена опасност от заплаха, която води до тежки телесни наранявания или
смърт.
ПРЕДУПРЕЖДЕНИЕ
ПРЕДУПРЕЖДЕНИЕ !
▶Отнася се за възможна опасност от заплаха, която може да доведе до тежки телесни наранявания
или смърт.
ПРЕДПАЗЛИВОСТ
ВНИМАНИЕ !
▶Отнася се за възможна опасна ситуация, която може да доведе до телесни наранявания или
материални щети.
1.1.2 Символи в Ръководството за експлоатация
В настоящото Ръководство за експлоатация се използват следните символи:
Да се съблюдава Ръководството за експлоатация
Препоръки при употреба и друга полезна информация
Боравене с рециклируеми материали
Не изхвърляйте електроуреди и акумулатори в битовите отпадъци
Hilti Литиево-йонен акумулатор
Hilti Зарядно устройство
1.1.3 Символи във фигурите
Във фигурите се използват следните символи:
Тези числа препращат към съответната фигура в началото на настоящото Ръководство за
експлоатация.
Номерацията възпроизвежда последователното изпълнение на работните стъпки в изобра-
жението и може да се различава от работните стъпки в текста.
Позиционните номера се използват във фигурата Преглед и препращат към номерата на
легендата в Раздел Преглед на продукта.
Този знак трябва да привлече Вашето специално внимание при работа с продукта.

*2131238* 2131238 Български 13
1.2 Символи в зависимост от продукта
1.2.1 Символи върху продукта
Върху продукта може да се използват следните символи:
Продуктът поддържа безжичен пренос на данни, който е съвместим с iOS- и Android плат-
форми.
Използвани типове Hilti литиево-йонни акумулатори. Съблюдавайте указанията в Раздел
Употреба по предназначение.
Литиево-йонен акумулатор
Никога не използвайте акумулатора като ударен механизъм.
Не оставяйте акумулатора да падне. Не използвайте акумулатор, който е бил ударен или е
повреден по друг начин.
1.3 Върху продукта
Информация за лазера
Лазерен клас 2, базиран върху стандарт IEC60825-1/EN60825-1:2007 и
съответстващ на CFR 21 § 1040 (Laser Notice 50).
Да не се гледа директно в лъча.
1.4 Информация за продукта
Продуктите са предназначени за професионални потребители и могат да бъдат обслужвани,
поддържани в изправност и ремонтирани само от оторизиран компетентен персонал. Този персонал
трябва да бъде специално инструктиран за възможните опасности. Продуктът и неговите приспособ-
ления могат да бъдат опасни, ако бъдат експлоатирани неправомерно от неквалифициран персонал
или ако бъдат използвани не по предназначение.
Обозначението на типа и серийният номер са отбелязани върху типовата табелка.
▶Пренесете серийния номер в представената по-долу таблица. Вие се нуждаете от данните за
продукта, когато се обръщате с въпроси към нашето представителство или сервизен отдел.
Данни за продукта
Ротационен лазер PR 2-HS A12
Поколение 02
Сериен №
1.5 Декларация за съответствие
Ние декларираме на собствена отговорност, че описаният тук продукт отговаря на действащите
директиви и стандарти. Копие на Декларацията за съответствие ще намерите в края на настоящата
документация.
Ние декларираме на собствена отговорност, че описаният тук продукт отговаря на действащите
директиви и стандарти. Копие на Декларацията за съответствие ще намерите в края на настоящата
документация.
Тук се съхранява Техническата документация:
Hilti Entwicklungsgesellschaft mbH | Zulassung Geräte | Hiltistraße 6 | 86916 Kaufering, DE

14 Български 2131238 *2131238*
2 Безопасност
2.1 Указания за безопасност
2.1.1 Основни препоръки за безопасност
Запознайте се с всички указания за безопасност и инструкции. Неспазването на приведените по-
долу указания за безопасност и инструкции може да причини електрически удар, пожар и/или тежки
наранявания.
Съхранявайте всички указания за безопасност и инструкции за бъдещи справки. Използваното
в указанията за безопасност понятие "електроинструмент" се отнася до захранвани от електрическата
мрежа електроинструменти (с мрежов кабел) и до захранвани от акумулатор електроинструменти (без
мрежов кабел).
2.1.2 Общи мерки за безопасност
▶Бъдете концентрирани, следете внимателно действията си и постъпвайте разумно при работа
с електроинструменти. Не използвайте електроинструмент, когато сте уморени или се
намирате под въздействие на наркотици, алкохол или медикаменти. Само един момент на
невнимание при използването на електроинструмента може да доведе до сериозни наранявания.
▶Никога не деактивирайте устройствата за безопасност и не отстранявайте указателни и
предупредителни табели.
▶Дръжте лазерните уреди далеч от достъпа на деца.
▶При неумело завинтване на уреда може да възникне лазерно лъчение, което надвишава клас 2.
Оставяйте уреда за ремонт само в сервизните центрове на Hilti.
▶Лазерните лъчи трябва да преминават далече над или под нивото на очите.
▶Съобразявайте се с влиянието на околната среда. Не използвайте уреда на места, където
има опасност от пожар или експлозия.
▶Указание съгласно FCC§15.21: Промени или модификации, които не са били изрично разрешени от
Hilti, могат да доведат до ограничения на правото на потребителя да работи с уреда.
▶След падане или други механични въздействия трябва да проверите точността на уреда.
▶Когато уредът се внесе от много студена среда в по-топла обстановка или обратно, преди
употреба трябва да оставите уреда да се аклиматизира.
▶При използването на адаптери и принадлежности се уверете, че уредът е закрепен здраво.
▶За избягване на грешки при измервания трябва да поддържате чисто изходното прозорче на
лазера.
▶Въпреки че уредът е проектиран за работа в тежки условия в строителството, трябва да
боравите с него внимателно, както с други оптични и електрически уреди (бинокъл, очила,
фотоапарат).
▶Въпреки че уредът е защитен срещу проникване на влага, трябва да изсушите уреда с
избърсване, преди да го наместите в транспортния контейнер.
▶Проверявайте уреда преди важни измервания.
▶При употреба многократно проверявайте точността.
▶Осигурете добро осветление на работната зона.
▶Съхранявайте лазера далече от дъжд и влага.
▶Избягвайте допира с контактите.
▶Отнасяйте се грижливо към уреда. Проверявайте дали подвижните части на уреда функцио-
нират изправно и не заклинват, дали има счупени или повредени детайли, които нарушават
функциите на уреда. Преди експлоатация на уреда оставяйте повредените части за ре-
монт.Много злополуки се дължат на лошо поддържани уреди.
2.1.3 Целесъобразна организация на работните места
▶Обезопасете измерваното място. Уверете се, че при монтирането на уреда PR 2-HS A12 Вие
не насочвате лъча срещу самите себе си или срещу други лица.
▶При работа върху стълба избягвайте неудобните положения на тялото. Заемете стабилна
стойка и пазете равновесие по всяко време.
▶Измервания, правени в близост до отразяващи обекти, респ. повърхности, през стъкла на прозорци
или други подобни материали, могат да изопачат резултата от измерванията.
▶Внимавайте уредът да бъде монтиран върху равна стабилна основа (без вибрации!).
▶Използвайте уреда само в рамките на предварително дефинираните граници.
▶Използвайте уреди, принадлежности, сменяеми инструменти и т.н. съобразно настоящите
инструкции и така, както е предписано за този специален тип уреди. При това съблюдавайте
Pagina se încarcă...
Pagina se încarcă...
Pagina se încarcă...
Pagina se încarcă...
Pagina se încarcă...
Pagina se încarcă...
Pagina se încarcă...
Pagina se încarcă...
Pagina se încarcă...
Pagina se încarcă...
Pagina se încarcă...
Pagina se încarcă...
Pagina se încarcă...
Pagina se încarcă...
Pagina se încarcă...
Pagina se încarcă...
Pagina se încarcă...
Pagina se încarcă...
Pagina se încarcă...
Pagina se încarcă...
Pagina se încarcă...
Pagina se încarcă...
Pagina se încarcă...
Pagina se încarcă...
Pagina se încarcă...
Pagina se încarcă...
Pagina se încarcă...
Pagina se încarcă...
Pagina se încarcă...
Pagina se încarcă...
Pagina se încarcă...
Pagina se încarcă...
Pagina se încarcă...
Pagina se încarcă...
Pagina se încarcă...
Pagina se încarcă...
Pagina se încarcă...
Pagina se încarcă...
Pagina se încarcă...
Pagina se încarcă...
Pagina se încarcă...
Pagina se încarcă...
Pagina se încarcă...
Pagina se încarcă...
Pagina se încarcă...
Pagina se încarcă...
Pagina se încarcă...
Pagina se încarcă...
Pagina se încarcă...
Pagina se încarcă...
Pagina se încarcă...
Pagina se încarcă...
Pagina se încarcă...
Pagina se încarcă...
Pagina se încarcă...
Pagina se încarcă...
Pagina se încarcă...
Pagina se încarcă...
Pagina se încarcă...
Pagina se încarcă...
Pagina se încarcă...
Pagina se încarcă...
Pagina se încarcă...
Pagina se încarcă...
Pagina se încarcă...
Pagina se încarcă...
Pagina se încarcă...
Pagina se încarcă...
Pagina se încarcă...
Pagina se încarcă...
Pagina se încarcă...
Pagina se încarcă...
Pagina se încarcă...
Pagina se încarcă...
Pagina se încarcă...
Pagina se încarcă...
Pagina se încarcă...
Pagina se încarcă...
Pagina se încarcă...
Pagina se încarcă...
Pagina se încarcă...
Pagina se încarcă...
Pagina se încarcă...
Pagina se încarcă...
Pagina se încarcă...
Pagina se încarcă...
Pagina se încarcă...
Pagina se încarcă...
Pagina se încarcă...
Pagina se încarcă...
Pagina se încarcă...
Pagina se încarcă...
Pagina se încarcă...
Pagina se încarcă...
Pagina se încarcă...
Pagina se încarcă...
Pagina se încarcă...
Pagina se încarcă...
Pagina se încarcă...
Pagina se încarcă...
Pagina se încarcă...
Pagina se încarcă...
Pagina se încarcă...
Pagina se încarcă...
Pagina se încarcă...
Pagina se încarcă...
Pagina se încarcă...
Pagina se încarcă...
Pagina se încarcă...
Pagina se încarcă...
Pagina se încarcă...
Pagina se încarcă...
Pagina se încarcă...
Pagina se încarcă...
Pagina se încarcă...
Pagina se încarcă...
Pagina se încarcă...
Pagina se încarcă...
Pagina se încarcă...
Pagina se încarcă...
Pagina se încarcă...
Pagina se încarcă...
Pagina se încarcă...
Pagina se încarcă...
Pagina se încarcă...
Pagina se încarcă...
Pagina se încarcă...
Pagina se încarcă...
Pagina se încarcă...
Pagina se încarcă...
Pagina se încarcă...
Pagina se încarcă...
Pagina se încarcă...
Pagina se încarcă...
Pagina se încarcă...
Pagina se încarcă...
Pagina se încarcă...
Pagina se încarcă...
Pagina se încarcă...
Pagina se încarcă...
Pagina se încarcă...
Pagina se încarcă...
Pagina se încarcă...
Pagina se încarcă...
Pagina se încarcă...
Pagina se încarcă...
Pagina se încarcă...
Pagina se încarcă...
Pagina se încarcă...
Pagina se încarcă...
Pagina se încarcă...
Pagina se încarcă...
Pagina se încarcă...
Pagina se încarcă...
Pagina se încarcă...
Pagina se încarcă...
Pagina se încarcă...
Pagina se încarcă...
Pagina se încarcă...
Pagina se încarcă...
Pagina se încarcă...
Pagina se încarcă...
Pagina se încarcă...
Pagina se încarcă...
Pagina se încarcă...
Pagina se încarcă...
Pagina se încarcă...
Pagina se încarcă...
Pagina se încarcă...
Pagina se încarcă...
Pagina se încarcă...
Pagina se încarcă...
-
 1
1
-
 2
2
-
 3
3
-
 4
4
-
 5
5
-
 6
6
-
 7
7
-
 8
8
-
 9
9
-
 10
10
-
 11
11
-
 12
12
-
 13
13
-
 14
14
-
 15
15
-
 16
16
-
 17
17
-
 18
18
-
 19
19
-
 20
20
-
 21
21
-
 22
22
-
 23
23
-
 24
24
-
 25
25
-
 26
26
-
 27
27
-
 28
28
-
 29
29
-
 30
30
-
 31
31
-
 32
32
-
 33
33
-
 34
34
-
 35
35
-
 36
36
-
 37
37
-
 38
38
-
 39
39
-
 40
40
-
 41
41
-
 42
42
-
 43
43
-
 44
44
-
 45
45
-
 46
46
-
 47
47
-
 48
48
-
 49
49
-
 50
50
-
 51
51
-
 52
52
-
 53
53
-
 54
54
-
 55
55
-
 56
56
-
 57
57
-
 58
58
-
 59
59
-
 60
60
-
 61
61
-
 62
62
-
 63
63
-
 64
64
-
 65
65
-
 66
66
-
 67
67
-
 68
68
-
 69
69
-
 70
70
-
 71
71
-
 72
72
-
 73
73
-
 74
74
-
 75
75
-
 76
76
-
 77
77
-
 78
78
-
 79
79
-
 80
80
-
 81
81
-
 82
82
-
 83
83
-
 84
84
-
 85
85
-
 86
86
-
 87
87
-
 88
88
-
 89
89
-
 90
90
-
 91
91
-
 92
92
-
 93
93
-
 94
94
-
 95
95
-
 96
96
-
 97
97
-
 98
98
-
 99
99
-
 100
100
-
 101
101
-
 102
102
-
 103
103
-
 104
104
-
 105
105
-
 106
106
-
 107
107
-
 108
108
-
 109
109
-
 110
110
-
 111
111
-
 112
112
-
 113
113
-
 114
114
-
 115
115
-
 116
116
-
 117
117
-
 118
118
-
 119
119
-
 120
120
-
 121
121
-
 122
122
-
 123
123
-
 124
124
-
 125
125
-
 126
126
-
 127
127
-
 128
128
-
 129
129
-
 130
130
-
 131
131
-
 132
132
-
 133
133
-
 134
134
-
 135
135
-
 136
136
-
 137
137
-
 138
138
-
 139
139
-
 140
140
-
 141
141
-
 142
142
-
 143
143
-
 144
144
-
 145
145
-
 146
146
-
 147
147
-
 148
148
-
 149
149
-
 150
150
-
 151
151
-
 152
152
-
 153
153
-
 154
154
-
 155
155
-
 156
156
-
 157
157
-
 158
158
-
 159
159
-
 160
160
-
 161
161
-
 162
162
-
 163
163
-
 164
164
-
 165
165
-
 166
166
-
 167
167
-
 168
168
-
 169
169
-
 170
170
-
 171
171
-
 172
172
-
 173
173
-
 174
174
-
 175
175
-
 176
176
-
 177
177
-
 178
178
-
 179
179
-
 180
180
-
 181
181
-
 182
182
-
 183
183
-
 184
184
-
 185
185
-
 186
186
-
 187
187
-
 188
188
-
 189
189
-
 190
190
-
 191
191
-
 192
192


în alte limbi
Lucrări înrudite
-
Hilti PR 2-HS-A12 Instrucțiuni de utilizare
-
Hilti PR 30-HVSG A12 Instrucțiuni de utilizare
-
Hilti PR 3-HVSG A12 Instrucțiuni de utilizare
-
Hilti PR 35 Instrucțiuni de utilizare
-
Hilti PRI 36 Instrucțiuni de utilizare
-
-
-
Hilti PRI 2 Instrucțiuni de utilizare
-
-