Tefal HT310B - Poivre Sel Manualul proprietarului
- Categorie
- Mixere
- Tip
- Manualul proprietarului
Acest manual este potrivit și pentru

G G
G
G
F
C EB D
A1
A2
L
K
A
J
H
I
F
fig.1 fig.2
fig.3
fig.5
fig.4
1
2
EN
HR
PT
NL
HU
PL
IT
BG
RO
ES
DE
CS
SK
FR
RU
UK
EL

G
1
2
1 2 3
4 5
GG
G
F
C EB D
A1
A2
L
K
A
J
H
I
F

G
1
2
1 2 3
4 5
GG
G
F
C EB D
A1
A2
L
K
A
J
H
I
F

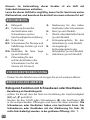
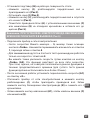
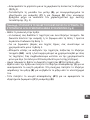
N.B.: A booklet containing safety guidelines is provided with this
appliance.
Before using your appliance for the rst time, please read the booklet
carefully and keep it in a safe place.
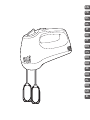
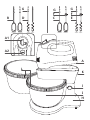
A. Motor unit
A1. Ejection button to remove
dough hooks or whisks &
speed control
A2. Turbo button
B/C. Multi-blade whisks for light
preparations (depending on
model)
D/E. Dough hooks for heavy
dough (depending on model)
F. Gear ring for the right whisk
or dough hook (for bowl
version only)
G. Marker for left whisk or dough
hook
H. Base (depending on model)
I. Plastic or Stainless steel bowl
(depending on model)
J. Hinged arm release button
(depending on model)
K. Mixer lock/unlock button
(depending on model)
L. Toothed rim (depending on
model)
• Remove the accessories from their packaging and clean using warm
water.
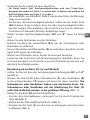
Mixer function with whisks or dough hooks
• Manual use:
• Check that the speed control (A1) is set to “0”.
• Insert the rod of each whisk (B) or dough hooks (D) into the
corresponding holes and lock into place. The whisks and dough hooks
have a specic shape, the mixer or whisk with the marker for left whisk
or dough hook (G) should be positioned to the left, in the biggest hole
(Fig.1).
• Plug in the appliance:
– Your appliance has five speed levels and a turbo button. Always begin
DESCRIPTION
BEFORE FIRST USE
USING THE APPLIANCE
4

mixing or kneading at setting 1 initially, then move to setting 2, 3, 4 or 5.
–To knead thick, heavy doughs we recommend using setting 5 only.
–You can also increase the speed by pressing the turbo button (A2): this
function can be used at all speeds. We recommend that it is only used
briey (a maximum of 30 seconds for thick, heavy doughs).
• After nishing, set the speed control (A1) to “0”.
• Unplug the appliance.
• Then press the ejection button (A1) to remove the whisks or mixers.
• To avoid overheating of the motor unit (A), do not use the unit for more
than 4 minutes.
• Rest 20 minutes before next operation.
• Always leave the appliance to cool down to room temperature before
next usage, otherwise, it may overload and cause damage to the
appliance.
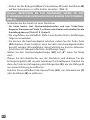
• Using with the base (H): (According to model)
• Check that the speed control (A1) is set to “0”.
• Insert the rod of each whisk (C) or dough hook (E) into the corresponding
holes and lock into place. The whisks and dough hooks have a specific
shape, the mixer or whisk with the marker for left whisk or dough hook (G)
should be positioned to the left, in the biggest hole (Fig.1).
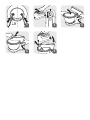
• Place the base (H) on a at, stable, heat and water resistant work surface
away from water splashes and sources of heat.
–To raise the arm, unlock by pressing on the button (J) (Fig.3).
–Position the bowl (I) (Fig.3).
–Press on button (J) to unlock the arm and lower it (Fig.4).
–Place the motor unit (A), tted with whisks (C) or dough hooks (E), on
the hinged arm until you hear it click into place (Fig.5).
• Plug in the appliance:
–Your appliance has ve speed levels and a turbo button. Always begin
mixing or kneading at setting 1 initially, then move to setting 2, 3, 4
or 5.
–To knead thick consistent doughs we recommend using setting 5 only.
–You can also increase the speed by pressing the turbo button (A2): this
Note: INSERT THE MIXER BY POSITIONING THE WHISKS OR DOUGH
HOOKS IN THE NOTCHES (Fig.5)
5
EN

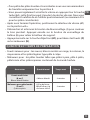
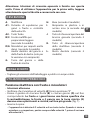
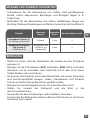
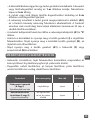
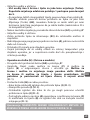
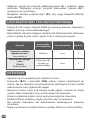
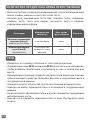
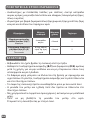
QUANTITIES AND PREPARATION TIMES
CLEANING
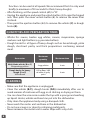
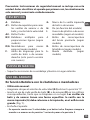
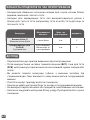
• Whisks for: sauces, beaten egg whites, creams, mayonnaise, sponge
mixtures and light batters (e.g. pancake batters).
• Dough hooks for: all types of heavy dough such as bread dough, pizza
dough, shortcrust pastry and thick preparations containing minced
meat.
Accessories
Maximum
quantity
Maximum time Speed
Multi-blade whisks (B or C)
Whipped egg whites
4 egg whites 4 min 5
Dough hooks for heavy
dough (D or E)
White Bread
0.5 kg our, 300
ml water, 8 g dry
yeast
4 min 5
• Make sure that the appliance is unplugged.
• Clean the whisks (B/C), dough hooks (D/E) immediately after use to
avoid remains of mixtures with egg or oil sticking or drying on them.
• You can clean the accessories under the tap with a sponge and washing
up liquid. Hooks, whisks and bowl can put into the dishwasher.
• Only clean the appliance body using a damped cloth.
• Never wash the motor unit and base in the dishwasher.
• Do not use scourers or objects containing metal parts.
• Never immerse the motor unit in water. Wipe with a dry cloth.
function can be used at all speeds. We recommend that it is only used
briey (a maximum of 30 seconds for thick, heavy doughs).
• After nishing, set the speed control (A1) to “0”.
• Unplug the appliance and press the unlock button (J) to raise the hinged
arm. Then press the mixer unlock button (K) to remove the mixer from
its stand.
• Then press the ejection button (A1) to remove the whisks (C) or dough
hooks (E).
6

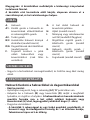
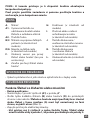
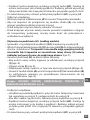
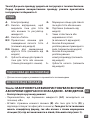
Attention : un livret de consignes de sécurité est fourni avec cet
appareil. Avant d’utiliser votre appareil pour la première fois, lisez
attentivement ce livret et conservez-le soigneusement.
A. Batteur
A1. Touche d’éjection des fouets
ou malaxeurs et de réglage
de la vitesse
A2. Touche Turbo
B/C. Fouets multi-brins pour
préparations légères (selon
modèle)
D/E. Malaxeurs pour pâtes lourdes
(selon modèle)
F. Couronne de fouet ou
malaxeur droit (modèle avec
bol uniquement)
G. Détrompeur de fouet ou
malaxeur gauche
H. Socle (selon modèle)
I. Bol en inox ou plastique
(selon modèle)
J. Bouton de verrouillage
/ déverrouillage du bras
pivotant (selon modèle)
K. Bouton de verrouillage /
déverrouillage du batteur
(selon modèle)
L. Roue dentée (selon modèle)
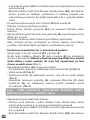
• Sortez les accessoires de leur emballage et nettoyez-les à l’eau chaude.
En fonction Batteur avec les fouets ou les malaxeurs
• Utilisation à la main :
• Vériez que le sélecteur de vitesse (A1) est en position « 0 »
• Insérez la tige de chaque fouet (B) ou malaxeur (D) dans les trous
correspondants et verrouillez-les. Les fouets et malaxeurs ont une forme
spécique. Le fouet ou malaxeur avec détrompeur (G) doit être placé à
gauche dans le trou le plus grand (Fig.1).
• Branchez l’appareil :
– Votre appareil est doté de 5 vitesses et d’une touche turbo. Commencez
toujours à mélanger ou pétrir en position 1 avant de passer en position 5.
–Pour pétrir des pâtes lourdes et consistantes nous vous recommandons
de travailler uniquement sur la position 5.
DESCRIPTION
MISE EN SERVICE
UTILISATION DE L’APPAREIL
7
FR

–Vous pouvez également accroître la vitesse en appuyant sur la touche
turbo (A2) ; cette fonction peut s’ajouter à toutes les vitesses. Nous vous
conseillons toutefois de ne l’utiliser que brièvement (au maximum 30 s
pour les pâtes consistantes).
• Après avoir terminé l’opération, positionnez le sélecteur de vitesse (A1)
sur la position « 0 ».
• Débranchez.
• Appuyez ensuite sur la touche d’éjection (A1) pour libérer les fouets ou
les malaxeurs.
• Pour éviter la surchaue du bloc moteur (A), ne faites pas fonctionner
l’appareil plus de 4 minutes.
• Laissez-le reposer 20 minutes avant l’utilisation suivante.
• Laissez toujours l’appareil refroidir jusqu’à la température ambiante
avant l’utilisation suivante, sinon cela peut le mettre en surcharge et
l’endommager.
• Utilisation sur le socle (H) : (Selon modèle)
• Vériez que le sélecteur de vitesse (A1) est en position « 0 ».
• Insérez la tige de chaque fouet (C) ou malaxeur (E) dans les trous
correspondants et verrouillez-les. Les fouets et malaxeurs ont une forme
spécique. Le fouet ou malaxeur avec détrompeur (G) doit être placé
à gauche dans le trou le plus grand (Fig.1).
• Placez le socle (H) sur le plan de travail :
–Pour soulever le bras, déverrouillez en appuyant sur le bouton (J)
(Fig.3).
–Positionnez le bol (I) (Fig.3).
–Déverrouillez le bras pour le rabattre en appuyant sur le bouton (J)
(Fig.4).
– Insérez le bloc moteur (A) avec les fouets (C) ou les malaxeurs (E)
assemblés sur le bras articulé jusqu’à l’entendre s’encastrer (Fig.5).
• Branchez l’appareil :
– Votre appareil est doté de 5 vitesses et d’une touche turbo. Commencez
toujours à mélanger ou pétrir en position 1 avant de passer en position 5.
Attention : INSEREZ LE BATTEUR EN POSITIONNANT LES FOUETS
OU MALAXEURS DANS LES ENCOCHES (Fig.5)
8

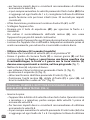
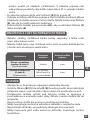
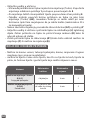
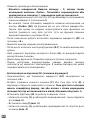
QUANTITÉS ET TEMPS DE PRÉPARATION
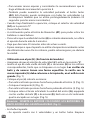
• Fouets mixeurs pour: les sauces, blancs montés en neige, les crèmes, la
mayonnaise et les pâtes légères type pâte à crêpe.
• Malaxeurs pour: les pâtes lourdes telles que pâtes à pain, pâte à pizza,
pâte brisée et les pâtes épaisses contenant de la viande hachée.
Accessoires Quantité maxi Temps maxi Vitesse
Fouets multi-brins
(B ou C)
Blancs d’oeufs battus
4 blancs d’oeufs 4 minutes 5
Malaxeurs pour pâte lourde
(D ou E)
Quatre-quarts
0,5 kg de farine,
300 ml d’eau, 8 g
de levure sèche
4 minutes 5
–Pour pétrir des pâtes lourdes et consistantes nous vous recommandons
de travailler uniquement sur la position 5.
–Vous pouvez également accroître la vitesse en appuyant sur la touche
turbo (A2) ; cette fonction peut s’ajouter à toutes les vitesses. Nous vous
conseillons toutefois de ne l’utiliser que brièvement (au maximum 30 s
pour les pâtes consistantes).
• Après avoir terminé l’opération, positionnez le sélecteur de vitesse (A1)
sur la position « 0 ».
• Débranchez et actionnez le bouton de déverrouillage (J) pour soulever
le bras pivotant. Appuyez ensuite sur le bouton de verrouillage du
batteur (K) pour retirer le batteur du support.
• Appuyez ensuite sur la touche d’éjection (A1) pour libérer les fouets (C)
ou les malaxeurs (E).
9
FR

NETTOYAGE
• S’assurer que l’appareil est bien débranché.
• Nettoyez les fouets (B/C) et les malaxeurs (D/E) immédiatement après
utilisation pour éviter que des restes de préparation à l’œuf ou à l’huile
ne collent ou ne sèchent dessus.
• Vous pouvez nettoyer les accessoires à l’eau du robinet avec une éponge
et du liquide vaisselle. Les malaxeurs, les fouets et le bol peuvent être
lavés au lave-vaisselle.
• Nettoyez le corps de l’appareil exclusivement avec un chion humide.
• Ne lavez jamais le bloc moteur et le socle dans un lave-vaisselle.
• N’utilisez pas de tampons à récurer ni d’objets contenant des pièces
métalliques.
• N’immergez jamais le bloc moteur dans l’eau. Essuyez-le avec un chion
sec.
10

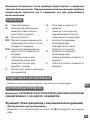
Let op: Een boekje met veiligheidsvoorschriften is inbegrepen bij dit
apparaat. Voordat u het apparaat voor de eerste keer gebruikt, lees
dit boekje zorgvuldig en nauwkeurig door.
A. Mixer
A1. Vrijgaveknop om de
kneedhaken of kloppers af te
halen en snelheidsregelaar
A2. Turbostand
B/C. Gardes voor lichte bereidingen
(afhankelijk van het model)
D/E. Gardes voor zware bereidingen
(afhankelijk van het model)
F. Schakelring voor de rechter
klopper of kneedhaak (alleen
voor de kom-versie)
G. Markering voor linker klopper
of kneedhaak
H. Standaard (afhankelijk van
het model)
I. Kunststof of roestvrijstalen
kom (afhankelijk van model)
J. Knop voor het bewegen
van de draaiende standaard
(afhankelijk van het model)
K. Uitwerpknop voor mixer
(afhankelijk van het model)
L. Gekartelde rand (afhankelijk
van het model)
• Haal de onderdelen uit hun verpakkingen en maak ze schoon met warm
water.
Het gebruik van de mixer met de gardes
• Handgebruik:
• Controleer of de snelheidsregelaar (A1) in positie “0” staat.
• Breng de stang van elke klopper (B) of kneedhaak (D) in het
overeenkomstig gat en zet het op zijn plaats vast. De kloppers en
kneedhaken hebben een specieke vorm. Breng de kneedhaak of
klopper met de linker markering (G) in de linkerkant (het grootste
gat) aan (fig. 1).
• Het apparaat aanzetten:
– Het apparaat is uitgerust met 5 snelheidsstanden en een turbostand. Begin
het roeren of mixen altijd in positie 1 voordat u naar positie 5 overgaat.
BESCHRIJVING
VOOR HET EERSTE GEBRUIK
GEBRUIK VAN HET APPARAAT
11
NL

– Om zware bereidingen te mixen, raden wij u aan om alleen met positie
5 te werken.
–U kunt ook de snelheid versnellen door op de turbostand (A2) te
drukken: deze functie werkt bij alle standen. Wij raden u echter aan
om deze stand slechts kort te gebruiken (maximaal 30 seconden voor
zware bereidingen).
• Als u klaar bent met gebruik, zet u de snelheidsregelaar (A1) weer in de
“0” positie.
• Trek de stekker uit het stopcontact.
• Druk vervolgens op de uitwerpknop (A1) om de gardes eruit te halen.
• Om oververhitting van de motoreenheid (A) te vermijden, gebruik het
apparaat niet langer dan 4 minuten.
• Wacht 20 minuten voordat u het apparaat opnieuw gebruikt.
• Laat het apparaat tot kamertemperatuur afkoelen voordat u het
opnieuw gebruikt, anders kan het apparaat overbelast en beschadigd
raken.
• Gebruik met de standaard (H): (afhankelijk van het model)
• Controleer of de snelheidsregelaar (A1) in positie “0” staat.
• Breng de stang van elke klopper (C) of kneedhaak (E) in het
overeenkomstig gat en zet het op zijn plaats vast. De kloppers en
kneedhaken hebben een specieke vorm. Breng de kneedhaak of
klopper met de linker markering (G) in de linkerkant (het grootste
gat) aan (fig. 1).
• Plaats de standaard (H) op het aanrecht:
–Druk op de (J) knop om de standaard omhoog te zetten (fig. 3).
–Plaats de kom (I) (fig. 3).
–Druk op de (J) knop om de standaard weer te laten zakken (fig. 4).
–Installeer de motoreenheid (A), met de kloppers (C) of kneedhaken (E),
op de scharnierarm totdat het op zijn plaats klikt (fig.5).
• Het apparaat aanzetten:
–Het apparaat is uitgerust met 5 snelheidsstanden en een turbostand.
Begin het roeren of mixen altijd in positie 1 voordat u naar positie 5
overgaat.
Let op: PLAATS DE GARDES VAN DE MIXER IN DE HIERVOOR
BEDOELDE UITSPARINGEN (g. 5)
12

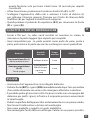
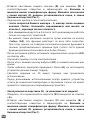
HOEVEELHEDEN EN BEREIDINGSTIJD VAN
VEELVOORKOMENDE BEREIDINGEN
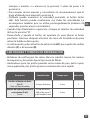
• Meerarmige gardes voor: de sauzen, opgeklopte eiwitten, room,
mayonaise en lichte soorten pasta beslag.
• Kneders voor: het zware deeg zoals brooddeeg, pizzadeeg, gebroken
deeg en het dikke deeg met gehakt.
Onderdelen + naam
bereiding
Max hoeveelheid Max tijd Snelheid
Kloppers (B of C)
Opgeklopt eiwit
4 eiwitten 4 min 5
Kneedhaken voor zwaar
beslag (D of E)
Viervierdengebak
0,5 kg bloem,
300 ml water, 8 g
droge gist
4 min 5
–Om zware bereidingen te mixen, raden wij u aan om alleen met positie
5 te werken.
–U kunt ook de snelheid versnellen door op de turbostand (A2) te
drukken: deze functie werkt bij alle standen. Wij raden u echter aan
om deze stand slechts kort te gebruiken (maximaal 30 seconden voor
zware bereidingen).
• Als u klaar bent met gebruik, zet u de snelheidsregelaar (A1) weer in de
“0” positie.
• Trek de stekker uit het stopcontact en druk op de (J) knop om de
draaiende arm omhoog te zetten. Druk vervolgens op de uitwerpknop
van de mixer (K) om zo de mixer uit de steun te halen.
• Druk vervolgens op de vrijgaveknop (A1) om de kloppers (C) of
kneedhaken (E) te verwijderen.
13
NL

SCHOONMAKEN
• Controleer of de stekker uit het stopcontact is.
• Maak de kloppers (B/C) en kneedhaken (D/E) onmiddellijk na gebruik
schoon om het vastkleven van eiermengselresten of olie te vermijden.
• Reinig het toebehoren onder de kraan met een spons en afwasmiddel.
De kneedhaken, kloppers en kom kunnen in de vaatwasser worden
gewassen.
• Veeg de buitenkant van het apparaat schoon met een vochtige doek.
• Was de motoreenheid en het voetstuk nooit in de vaatwasser.
• Gebruik geen schuursponsje of voorwerp met een metalen onderdeel.
• Dompel het apparaat nooit in water. Veeg schoon met een droge doek.
14

ES
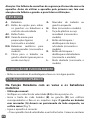
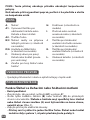
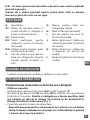
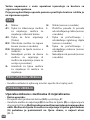
Precaución: Instrucciones de seguridad manual se incluye con esta
unidad. Antes de utilizar el aparato por primera vez, lea atentamente
este manual y consérvelo cuidadosamente.
A. Batidora
A1. Botón de expulsión para sacar
las varillas de amasar o de
batir, y control de la velocidad
A2. Botón Turbo
B/C. Batidores múltiples para
preparaciones ligeras (según
modelo)
D/E. Mezcladores para masas
espesas (según modelo)
F. Anillo de engranaje para la
varilla de batir o de amasar
derecha (solo para la versión
con cuenco)
G. Marca de la varilla izquierda
de batir o de amasar
H. Pie (en función del modelo)
I. Cuenco de plástico o de acero
inoxidable (según el modelo)
J. Botón de cierre/apertura
del brazo pivotante (según
modelo)
K. Botón de cierre/apertura de
la batidora (según modelo)
L. Rueda dentada (según
modelo)
• Saque los accesorios de su embalaje y lávelos con agua caliente.
En función Batidora con los batidores o mezcladores
• Utilización manual:
• Asegúrese de que el selector de velocidad (A1) esté en la posición “0”.
• Inserte el eje de cada varilla de batir (B) o de amasar (D) en los oricios
correspondientes, hasta que se bloqueen en su lugar. Las varillas de
batir y de amasar tienen una forma especíca: la varilla con la
marca izquierda (G) debe colocarse a la izquierda, en el oricio más
grande (Fig. 1).
• Enchufe el aparato:
– Su aparato cuenta con 5 velocidades y un botón turbo. Empiece siempre a
mezclar o a amasar en la posición 1 antes de pasar a la posición 5.
DESCRIPCIÓN
PUESTA EN MARCHA
USO DEL APARATO
15

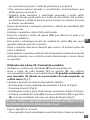
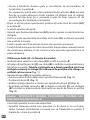
–Para amasar masas espesas y consistentes le recomendamos que lo
haga utilizando únicamente la posición 5.
–También puede aumentar la velocidad pulsando el botón turbo
(A2). Esta función puede combinarse con todas las velocidades. Le
aconsejamos también que no utilice prolongadamente (máximo 30
segundos para las masas consistentes).
• Cuando haya nalizado la operación, coloque el selector de velocidad
(A1) en la posición “0”.
• Desenchufe el cable.
• A continuación pulse el botón de liberación (A1) para poder retirar los
batidores o mezcladores.
• Para evitar que la unidad del motor (A) se caliente demasiado, no utilice
el aparato durante más de 4 minutos.
• Deje que descanse 20 minutos antes de volver a usarlo.
• Espere siempre a que el aparato se enfríe a temperatura ambiente antes
de utilizarlo de nuevo. De lo contrario, podría sobrecargarse y se dañaría
la unidad.
• Utilización con el pie (H): (En función del modelo)
• Asegúrese de que el selector de velocidad (A1) esté en la posición “0”.
• Inserte el eje de cada varilla de batir (C) o de amasar (E) en los oricios
correspondientes, hasta que se bloqueen en su lugar. Las varillas de
batir y de amasar tienen una forma especíca: la varilla con la
marca izquierda (G) debe colocarse a la izquierda, en el oricio más
grande (Fig. 1)
• Coloque el pie (H) sobre la encimera:
–Para retirar el brazo presione hacia fuera pulsando el botón (J) (Fig. 3).
–Coloque el recipiente (I) (Fig. 3).
–Para retirar el brazo presione hacia fuera pulsando el botón (J) (Fig. 4).
–Coloque sobre el brazo articulado la unidad del motor (A), equipada
con las varillas de batir (C) o de amasar (E), hasta oír un clic indicando
que ha encajado en su lugar (Fig. 5).
• Enchufe el aparato:
–Su aparato cuenta con 5 velocidades y un botón turbo. Empiece
Atención: INSERTE EL BATIDOR COLOCANDO LOS BATIDORES O
MEZCLADORES EN LAS ENTALLADURAS (Fig. 5)
16

ES
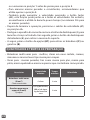
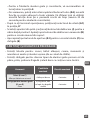
CANTIDADES Y TIEMPOS DE PREPARACIÓN
• Batidores de varillas para: las salsas, blancos subidos nievan, las cremas,
la mayonesa y las pastas ligera tipo masa de lloas.
• Amasadores para: las pastas pesadas como masas de pan, pasta a piza,
masa quebrada y las pastas gruesas conteniendo carne tajada.
Accesorios Cantidad máx. Tiempo máx. Velocidad
Varillas múltiples de batir
(B o C)
Claras de huevo batidas
4 claras de huevo 4 min 5
Varillas de amasar para masa
consistente (D o E)
Pastel
0,5 kg de harina,
300 ml de agua, 8
g de levadura seca
4 min 5
siempre a mezclar o a amasar en la posición 1 antes de pasar a la
posición 5.
–Para amasar masas espesas y consistentes le recomendamos que lo
haga utilizando únicamente la posición 5.
–También puede aumentar la velocidad pulsando el botón turbo
(A2). Esta función puede combinarse con todas las velocidades. Le
aconsejamos también que no utilice prolongadamente (máximo 30
segundos para las masas consistentes).
• Cuando haya nalizado la operación, coloque el selector de velocidad
(A1) en la posición “0”.
• Desenchufe y apriete el botón de apertura (J) para liberar el brazo
pivotante. Presione después el botón de cierre de la batidora (K) para
retirar la batidora del soporte.
• A continuación, pulse el botón de extracción (A1) para quitar las varillas
de batir (C) o de amasar (E).
17

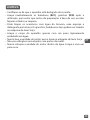
LIMPIEZA
• Asegúrese de que el aparato esté desconectado.
• Limpie las varillas de batir (B/C) o de amasar (D/E) inmediatamente
después de usarlas, para evitar que los restos de mezclas con huevo o
aceite queden adheridos o se sequen.
• Puede limpiar los accesorios bajo el chorro de agua del grifo, con una
esponja y detergente líquido de fregar. Las varillas de amasar, las de
batir y el cuenco se pueden lavar en el lavavajillas.
• Para limpiar el cuerpo del aparato, utilice únicamente un paño húmedo.
• No lave nunca en el lavavajillas la unidad del motor y la base.
• No utilice estropajos ni objetos que contengan piezas metálicas.
• No sumerja nunca en agua la unidad del motor. Límpiela con un paño
seco.
18

IT
A. Sbattitore
A1. Pulsante di espulsione per
ganci o fruste e controllo
della velocità
A2. Tasto Turbo
B/C. Fruste multilo per
preparazioni leggere
(secondo il modello)
D/E. Miscelatori per impasti molto
densi (secondo il modello)
F. Anello dentato del gancio o
della frusta di destra (solo per
la versione con recipiente)
G. Tacca del gancio o della
frustra di sinistra
H. Base (secondo il modello)
I. Recipiente in plastica o in
acciaio inox (a seconda del
modello)
J. Tasto di chiusura/apertura del
braccio girevole (secondo il
modello)
K. Tasto di chiusura/apertura
dello sbattitore (secondo il
modello)
L. Ruota dentata (secondo il
modello)
• Togliere gli accessori dall’imballaggio e pulirli con acqua calda.
Funzione sbattitore con fruste o miscelatori
• Istruzioni alla mano
• Vericare che il variatore di velocità (A1) sia in posizione “0”
• Fissare il gambo di ciascuna frusta (B) o ciascun gancio (D) nel foro
corrispondente. Le fruste e i ganci hanno una forma specica che
li contraddistingue; la frusta o il gancio con la tacca sinistra (G)
devono essere posizionati a sinistra, nel foro più grande (fig. 1).
• Inserire la spina:
– l’apparecchio è dotato di 5 velocità e di un tasto turbo. Quando si inizia a
miscelare o a impastare, partire sempre dalla velocità 1 prima di arrivare
alla velocità 5;
DESCRIZIONE
MESSA IN MOTO
UTILIZZO DELL’APPARECCHIO
Attenzione: Istruzioni di sicurezza opuscolo è fornito con questa
unità. Prima di utilizzare l’apparecchio per la prima volta, leggere
attentamente questo libretto e conservarlo con cura.
19

–per lavorare impasti densi e consistenti raccomandiamo di utilizzare
unicamente la velocità 5;
–si può sempre aumentare la velocità premendo il tasto turbo (A2) che
si aggiunge ad ogni livello da 1 a 5; consigliamo tuttavia di utilizzare
questa funzione solo per brevi istanti (max. 30 secondi per impasti
consistenti).
• A ne lavorazione, posizionare il variatore di velocità (A1) su “0”.
• Scollegare l’apparecchio.
• Premere poi il tasto di espulsione (A1) per sganciare le fruste o i
miscelatori.
• Per evitare il surriscaldamento dell’unità motore (A), non usare
l’apparecchio per più di 4 minuti continuativi.
• Lasciare spento l’apparecchio per 20 minuti prima di usarlo nuovamente.
• Lasciare che l’apparecchio si rareddi a temperatura ambiente prima di
usarlo nuovamente, per evitare che si surriscaldi e subisca danni.
• Utilizzo sulla base (H) (secondo il modello)
• Vericare che il variatore di velocità (A1) sia in posizione “0” .
• Fissare il gambo di ciascuna frusta (C) o ciascun gancio (E) nel foro
corrispondente. Le fruste e i ganci hanno una forma specica che
li contraddistingue; la frusta o il gancio con la tacca sinistra (G)
devono essere posizionati a sinistra, nel foro più grande (fig. 1).
• Mettere la base (H) sul piano di lavoro:
–per sollevare il braccio sbloccare premendo il tasto (J) (fig. 3);
–posizionare il recipiente (I) (fig. 3);
– sbloccare il braccio sbattitore premendo il tasto (J) (fig. 4);
–Posizionare l’unità motore (A), dotata di fruste (C) o ganci (E), sul
braccio mobile no a udire un “clic” (fig. 5).
• Inserire la spina:
–l’apparecchio è dotato di 5 velocità e di un tasto turbo. Quando si inizia
a miscelare o a impastare, partire sempre dalla velocità 1 prima di
arrivare alla velocità 5.
–Per lavorare impasti densi e consistenti raccomandiamo di utilizzare
unicamente la velocità 5.
–Si può sempre aumentare la velocità premendo il tasto turbo (A2) che
si aggiunge ad ogni livello da 1 a 5. Consigliamo tuttavia di utilizzare
Attenzione: INSERIRE IL BATTITORE POSIZIONANDO LE FRUSTE O I
MISCELATORI NELLE TACCHE (FIG. 5)
20
Pagina se încarcă...
Pagina se încarcă...
Pagina se încarcă...
Pagina se încarcă...
Pagina se încarcă...
Pagina se încarcă...
Pagina se încarcă...
Pagina se încarcă...
Pagina se încarcă...
Pagina se încarcă...
Pagina se încarcă...
Pagina se încarcă...
Pagina se încarcă...
Pagina se încarcă...
Pagina se încarcă...
Pagina se încarcă...
Pagina se încarcă...
Pagina se încarcă...
Pagina se încarcă...
Pagina se încarcă...
Pagina se încarcă...
Pagina se încarcă...
Pagina se încarcă...
Pagina se încarcă...
Pagina se încarcă...
Pagina se încarcă...
Pagina se încarcă...
Pagina se încarcă...
Pagina se încarcă...
Pagina se încarcă...
Pagina se încarcă...
Pagina se încarcă...
Pagina se încarcă...
Pagina se încarcă...
Pagina se încarcă...
Pagina se încarcă...
Pagina se încarcă...
Pagina se încarcă...
Pagina se încarcă...
Pagina se încarcă...
Pagina se încarcă...
Pagina se încarcă...
Pagina se încarcă...
Pagina se încarcă...
Pagina se încarcă...
Pagina se încarcă...
Pagina se încarcă...
-
 1
1
-
 2
2
-
 3
3
-
 4
4
-
 5
5
-
 6
6
-
 7
7
-
 8
8
-
 9
9
-
 10
10
-
 11
11
-
 12
12
-
 13
13
-
 14
14
-
 15
15
-
 16
16
-
 17
17
-
 18
18
-
 19
19
-
 20
20
-
 21
21
-
 22
22
-
 23
23
-
 24
24
-
 25
25
-
 26
26
-
 27
27
-
 28
28
-
 29
29
-
 30
30
-
 31
31
-
 32
32
-
 33
33
-
 34
34
-
 35
35
-
 36
36
-
 37
37
-
 38
38
-
 39
39
-
 40
40
-
 41
41
-
 42
42
-
 43
43
-
 44
44
-
 45
45
-
 46
46
-
 47
47
-
 48
48
-
 49
49
-
 50
50
-
 51
51
-
 52
52
-
 53
53
-
 54
54
-
 55
55
-
 56
56
-
 57
57
-
 58
58
-
 59
59
-
 60
60
-
 61
61
-
 62
62
-
 63
63
-
 64
64
-
 65
65
-
 66
66
-
 67
67


Tefal HT310B - Poivre Sel Manualul proprietarului
- Categorie
- Mixere
- Tip
- Manualul proprietarului
- Acest manual este potrivit și pentru
în alte limbi
- slovenčina: Tefal HT310B - Poivre Sel Návod na obsluhu
- italiano: Tefal HT310B - Poivre Sel Manuale del proprietario
Lucrări înrudite
-
Tefal HT312138 Manualul proprietarului
-
-
-
-
-
-
-
-
-
Alte documente
-
BLACK+DECKER BXMXA500E Manual de utilizare
-
 Russell Hobbs 24680-56 Manual de utilizare
-
 Russell Hobbs 18965-56 Manual de utilizare
-
 Russell Hobbs 24670-56 Manual de utilizare
-
Zelmer ZHM2550 Manual de utilizare
-
Clatronic HM 2737 Manualul proprietarului
-
Electrolux ESM1250 Manual de utilizare
-
Moulinex HM450B10 Manualul proprietarului
-
Braun MQ500 Soup Manualul proprietarului
-


