
CORDLESS ENGRAVING TOOL 4V PAGG 4 A1
АКУМУЛАТОРЕН
ГРАВИРАЩ УРЕД 4 V
Превод на оригиналното ръководство
за експлоатация
APARAT DE GRAVURĂ
CU ACUMULATOR 4 V
Traducerea instrucţiunilor de utilizare original
AKU UREĐAJ
ZA GRAVIRANJE 4 V
Prijevod originalnih uputa za uporabu
AKU UREĐAJ
ZA GRAVIRANJE 4 V
Prevod originalnog uputstva za upotrebu
CORDLESS ENGRAVING
TOOL 4V
Translation of the original instructions
ΕΠΑΝΑΦΟΡΤΙΖΟΜΕΝΗ
ΣΥΣΚΕΥΗ ΧΑΡΑΞΗΣ 4 V
Μετάφραση των αυθεντικών οδηγιών
λειτουργίας
AKKU-GRAVIERGERÄT 4 V
Originalbetriebsanleitung
IAN 359506_2101

GB / CY Translation of the original instructions Page 1
HR Prijevod originalnih uputa za uporabu Stranica 23
RS Prevod originalnog uputstva za upotrebu Strana 45
RO Traducerea instrucţiunilor de utilizare original Pagina 69
BG Превод на оригиналното ръководство
за експлоатация Cтраница 91
GR / CY Μετάφραση των αυθεντικών οδηγιών
λειτουργίας Σελίδα 119
DE / AT / CH Originalbetriebsanleitung Seite 143
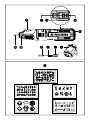
Before reading, unfold the page containing the illustrations and familiarise
yourself with all functions of the device.
Prije nego što pročitate tekst, otvorite stranicu sa slikama i upoznajte se na
osnovu toga sa svim funkcijama uređaja.
Pre čitanja rasklopite obe strane sa slikama te se upoznajte sa svim funkcijama
uređaja.
Înainte de a citi instrucţiunile, priviţi imaginile şi familiarizaţi-vă cu toate
funcţiile aparatului.
Преди да прочетете отворете страницата с фигурите и след това се
запознайте с всички функции на уреда.
Πριν ξεκινήσετε την ανάγνωση, ανοίξτε τη σελίδα με τις εικόνες και
εξοικειωθείτε με όλες τις λειτουργίες της συσκευής.
Klappen Sie vor dem Lesen die Seite mit den Abbildungen aus und machen
Sie sich anschließend mit allen Funktionen des Gerätes vertraut.


PAGG 4 A1 GB│CY │ 1 ■
Contents
Introduction ...................................2
Intended use ..........................................2
Notes on trademarks ...................................2
Features .............................................3
Package contents ......................................3
Technical specifications .................................4
General power tool safety warnings ..............6
1. Work area safety ....................................6
2. Electrical safety .....................................6
3. Personal safety ......................................7
4. Power tool use and care ..............................8
5. Battery tool use and care ..............................9
6. Service ...........................................10
Safety guidelines for battery chargers .....................11
Before use ...................................12
Charging the appliance battery ..........................12
Battery level display ..................................13
Operation ...................................13
Switching on and off ..................................13
Setting the penetration depth of the engraving ..............13
Changing the engraving tip .............................14
Working procedures ...................................14
Maintenance and cleaning ......................15
Disposal .....................................15
Kompernass Handels GmbH warranty ...........17
Service ......................................20
Importer ....................................20
Translation of the original Conformity Declaration ..21

PAGG 4 A1
■ 2 │ GB│CY
CORDLESS ENGRAVING TOOL 4V
PAGG 4 A1
Introduction
Congratulations on the purchase of your new appliance.
You have chosen a high-quality product. The operating
instructions are part of this product. They contain important
information about safety, usage and disposal. Before using the
product, please familiarise yourself with all of the operating and
safety instructions. Use the product only as described and for the
range of applications specified. Please also pass these operating
instructions on to any future owner.
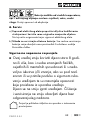
Intended use
This appliance is intended for engraving or decorating materials
such as metal, plastic, glass, ceramics, leather and stone. Any other
usage or modification of the appliance is deemed to be improper
and carries a significant risk of accidents. The manufacturer accepts
no responsibility for damage(s) attributable to misuse. This appliance
is not intended for commercial use.
Notes on trademarks
USB® is a registered trademark of USB Implementers Forum, Inc.
All other names and products may be trademarks or registered
trademarks of their respective owner.

PAGG 4 A1 GB│CY │ 3 ■
Features
1 ON/OFF switch
2 Battery capacity/charge level indicator
3 3x indicator LEDs (2 stroke rate levels per LED)
4 +/– speed control buttons (stroke rate)
5 Micro-USB-C socket
6 Mains adapter*
7 USB plug of the charger cable
8 Charging cable
9 Micro-USB-C plug of the charging cable
0 Engraving tip lock
q Engraving tip
w Engraving templates
Package contents
1 cordless engraving tool 4V PAGG 4 A1
1 charging cable
5 engraving templates
1 set of operating instructions

PAGG 4 A1
■ 4 │ GB│CY
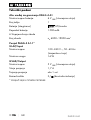
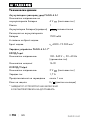
Technical specifications
Cordless engraving tool PAGG 4 A1
Nominal battery voltage 4 V (DC)
Cells 1
Battery (integrated) LITHIUM ion
Battery capacity 1500 mAh
6 stroke rate levels
Stroke rate n0 6000–19000 rpm
Charger PAGG 4 A1-1*
INPUT
Rated voltage 100–240 V ∼,
50–60 Hz (AC)
Rated power 16 W
OUTPUT
Rated voltage 5 V (DC)
Charging current 1.7 A
Charging time approx. 1 hr
Protection class II / (double insulation)
* CHARGER NOT INCLUDED

PAGG 4 A1 GB│CY │ 5 ■
Noise emission value
Noise measurement value determined in accordance with
EN62841. The A-rated noise level of the power tool is typically
as follows:
Sound pressure level LpA = 82.6 dB (A)
Uncertainty KpA = 3 dB
Sound power level LWA = 93.6 dB (A)
Uncertainty KWA= 3 dB
Wear ear muffs!
Total vibration value ah = 2.8 m/s2
Uncertainty K = 1.5 m/s2
NOTE
► The vibration emission values and the noise emission values
given in these instructions have been measured in accordance
with a standardised test procedure and can be used for
comparison of the power tool with another tool.
► The specified total vibration values and the noise emission
values can also be used to make a provisional load estimate.
WARNING!
► Depending on the manner in which the power tool is being
used, and in particular the kind of workpiece that is being
worked, the vibration and noise emission values can deviate
from the values given in these instructions during actual use of
the power tool.
► Try to keep the load as low as possible. Measures to reduce
the vibration load are, e.g. wearing gloves and limiting the
working time. Wherein all states of operation must be included
(e.g. times when the power tool is switched off and times where
the power tool is switched on but running without load).

PAGG 4 A1
■ 6 │ GB│CY
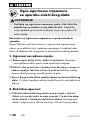
General power tool safety
warnings
WARNING!
►Read all safety warnings, instructions, illustrations and speci-
fications provided with this power tool. Failure to follow all
instructions listed below may result in electric shock, fire and/or
serious injury.
Save all warnings and instructions for future reference.
The term „power tool“ in the warnings refers to your mains-operated
(corded) power tool or battery-operated (cordless) power tool.
1. Work area safety
a) Keep work area clean and well lit. Cluttered or dark areas
invite accidents.
b) Do not operate power tools in explosive atmospheres, such as
in the presence of flammable liquids, gases or dust. Power
tools create sparks which may ignite the dust or fumes.
c) Keep children and bystanders away while operating a power
tool. Distractions can cause you to lose control.
2. Electrical safety
a) Power tool plugs must match the outlet. Never modify the plug
in any way. Do not use any adapter plugs with earthed
(grounded) power tools. Unmodified plugs and matching outlets
will reduce risk of electric shock.
b) Avoid body contact with earthed or grounded surfaces, such
as pipes, radiators, ranges and refrigerators. There is an
increased risk of electric shock if your body is earthed or grounded.
c) Do not expose power tools to rain or wet conditions. Water
entering a power tool will increase the risk of electric shock.

PAGG 4 A1 GB│CY │ 7 ■
d) Do not abuse the cord. Never use the cord for carrying,
pulling or unplugging the power tool. Keep cord away from
heat, oil, sharp edges or moving parts. Damaged or entangled
cords increase the risk of electric shock.
e) When operating a power tool outdoors, use an extension cord
suitable for outdoor use. Use of a cord suitable for outdoor use
reduces the risk of electric shock.
f) If operating a power tool in a damp location is unavoidable,
use a residual current device (RCD) protected supply. Use of
an RCD reduces the risk of electric shock.
3. Personal safety
a) Stay alert, watch what you are doing and use common sense
when operating a power tool. Do not use a power tool while
you are tired or under the influence of drugs, alcohol or medi-
cation. A moment of inattention while operating power tools may
result in serious personal injury.
b) Use personal protective equipment. Always wear eye protec-
tion.
Protective equipment such as a dust mask, non-skid safety
shoes, hard hat or hearing protection used for appropriate condi-
tions will reduce personal injuries.
c) Prevent unintentional starting. Ensure the switch is in the off-po-
sition before connecting to power source and/or battery pack,
picking up or carrying the tool. Carrying power tools with your
finger on the switch or energising power tools that have the
switch on invites accidents.
d) Remove any adjusting key or wrench before turning the power
tool on. A wrench or a key left attached to a rotating part of the
power tool may result in personal injury.
e) Do not overreach. Keep proper footing and balance at all
times. This enables better control of the power tool in unexpected
situations.

PAGG 4 A1
■ 8 │ GB│CY
f) Dress properly. Do not wear loose clothing or jewellery. Keep
your hair and clothing away from moving parts. Loose clothes,
jewellery or long hair can be caught in moving parts.
g) If devices are provided for the connection of dust extraction
and collection facilities, ensure these are connected and prop-
erly used. Use of dust collection can reduce dust-related hazards.
h) Do not let familiarity gained from frequent use of tools allow
you to become complacent and ignore tool safety principles.
A careless action can cause severe injury within a fraction of a
second.
4. Power tool use and care
a) Do not force the power tool. Use the correct power tool for
your application. The correct power tool will do the job better
and safer at the rate for which it was designed.
b) Do not use the power tool if the switch does not turn it on and
off. Any power tool that cannot be controlled with the switch is
dangerous and must be repaired.
c) Disconnect the plug from the power source and/or remove the
battery pack, if detachable, from the power tool before
making any adjustments, changing accessories, or storing
power tools. Such preventive safety measures reduce the risk of
starting the power tool accidentally.
d) Store idle power tools out of the reach of children and do not
allow persons unfamiliar with the power tool or these instruc-
tions to operate the power tool. Power tools are dangerous in
the hands of untrained users.
e) Maintain power tools and accessories. Check for misalignment
or binding of moving parts, breakage of parts and any other
condition that may affect the power tool’s operation. If
damaged, have the power tool repaired before use. Many
accidents are caused by poorly maintained power tools.

PAGG 4 A1 GB│CY │ 9 ■
f) Keep cutting tools sharp and clean. Properly maintained cutting
tools with sharp cutting edges are less likely to bind and are
easier to control.
g) Use the power tool, accessories and tool bits etc. in accord-
ance with these instructions, taking into account the working
conditions and the work to be performed. Use of the power
tool for operations different from those intended could result in a
hazardous situation.
h) Keep handles and grasping surfaces dry, clean and free from
oil and grease. Slippery handles and grasping surfaces do not
allow for safe handling and control of the tool in unexpected
situations.
5. Battery tool use and care
a) Recharge only with the charger specified by the manufacturer.
A charger that is suitable for one type of battery pack may create
a risk of fire when used with another battery pack.
b) Use power tools only with specifically designated battery
packs. Use of any other battery packs may create a risk of injury
and fire.
c) When battery pack is not in use, keep it away from other
metal objects, like paper clips, coins, keys, nails, screws or
other small metal objects, that can make a connection from
one terminal to another. Shorting the battery terminals together
may cause burns or a fire.
d) Under abusive conditions, liquid may be ejected from the
battery; avoid contact. If contact accidentally occurs, flush
with water. If liquid contacts eyes, additionally seek medical
help. Liquid ejected from the battery may cause irritation or
burns.

PAGG 4 A1
■ 10 │ GB│CY
e) Do not use a battery pack or tool that is damaged or modi-
fied. Damaged or modified batteries may exhibit unpredictable
behaviour resulting in fire, explosion or risk of injury.
f) Do not expose a battery pack or tool to fire or excessive
temperature. Exposure to fire or temperature above 130 °C
(265°F) may cause explosion.
g) F
ollow all charging instructions and do not charge the battery
pack or tool outside the temperature range specified in the instruc-
tions. Charging improperly or at temperatures outside the specified
range may damage the battery and increase the risk of fire.
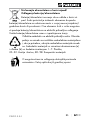
CAUTION! RISK OF EXPLOSION!
Never charge non-rechargeable batteries.
Protect the rechargeable battery from
heat; for example, from continuous exposure to sunlight, fire,
water and moisture. There is a risk of explosion.
6. Service
a) Have your power tool serviced by a qualified repair person
using only identical replacement parts. This will ensure that the
safety of the power tool is maintained.
b) Never service damaged battery packs. Service of battery packs
should only be performed by the manufacturer or authorized
service providers.

PAGG 4 A1 GB│CY │ 11 ■
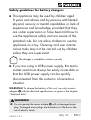
Safety guidelines for battery chargers
■ This appliance may be used by children aged
8years and above and by persons with limited
physical, sensory or mental capabilities or lack of
experience and knowledge, provided that they
are under supervision or have been told how to
use the appliance safely and are aware of the
potential risks. Do not allow children to use the
appliance as a toy. Cleaning and user mainte-
nance tasks may not be carried out by children
unless they are supervised.
The charger is suitable for indoor use only.
■ If you are using a USB power supply, the mains
socket used must always be easily accessible so
that the USB power supply can be quickly
disconnected from the socket in a hazardous
situation.
WARNING! To charge the battery of this unit, use only a mains
adapter 6 with the identical specifications as given in the chapter
“Technical data”.
WARNING!
■ Do not operate the mains adapte 6 with a damaged mains
plug. Damaged mains plugs are hazardous to life due to the
risk of electric shock.

PAGG 4 A1
■ 12 │ GB│CY
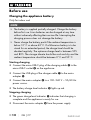
Before use
Charging the appliance battery
Only for indoor use!
NOTE
► The battery is supplied partially charged. Charge the battery
before first use. Li-ion batteries can be charged at any time
without adversely affecting their service life. Interrupting the
charging process does not damage the battery.
► Never charge the battery pack if the ambient temperature is
below 10°C or above 40°C. If a lithium-ion battery is to be
stored for an extended period, the charge level should be
checked regularly. The optimum charge level is between 50%
and 80%. The storage climate should be cool and dry and the
ambient temperature should be between 0°C and 50°C.
Starting charging
♦ Connect the micro-USB-C plug of the charging cable 9 to the
micro-USB-C socket 5 on the appliance.
♦ Connect the USB plug of the charger cable 7 to the mains
adapter 6.
♦ Connect the mains adapter 6 to a 100–240 V ∼ 50/60 Hz
power source.
♦ The battery charge level indicator2 lights up red.
Stopping charging
♦ The green charge level indicator2 indicates that charging is
complete and the appliance is ready for use.
♦ Disconnect the mains adapter 6 from the power supply.

PAGG 4 A1 GB│CY │ 13 ■
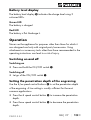
Battery level display
The battery level display2 indicates the charge level using 2
coloured LEDs.
Green LED
The battery is charged.
Red LED
The battery is flat. Recharge it.
Operation
Never use the appliance for purposes other than those for which it
was designed and only with original parts/accessories. Using
attachments or accessory tools other than those recommended in the
operating instructions can lead to a risk of injury.
Switching on and off
Switching on
♦ Press and hold the ON/OFF switch 1.
Switching off
♦ Let go of the ON/OFF switch 1.
Setting the penetration depth of the engraving
Use the +/– speed control buttons 4 to set the penetration depth
of the engraving. A low setting is usually sufficient for the most
common applications.
♦ Press the + speed control button 4 to increase the penetration
depth.
♦ Press the – speed control button 4 to decrease the penetration
depth.

PAGG 4 A1
■ 14 │ GB│CY
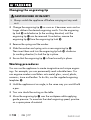
Changing the engraving tip
CAUTION! RISK OF INJURY!
► Always switch the appliance off before carrying out any work
on it.
♦ Change the engraving tipq as soon as it becomes worn and no
longer delivers the desired engraving results. Turn the engraving
tip lock0 anticlockwise (in the working direction) until the
engraving tipq can be removed. From below, remove the
engraving tipq from the engraving tip lock0.
♦ Remove the spring and the washer.
♦ Slide the washer and spring onto a new engraving tipq.
Then insert them and turn the engraving tip lock 0 clockwise
(inworking direction) to lock the tip in place.
♦ Ensure that the engraving tipq is fixed correctly in place.
Working procedures
You can use the appliance to create imaginative and unique engrav-
ings. For example, you can permanently mark valuable items. You
can engrave numbers and letters onto metal, glass, wood, plastic,
ceramics, stone and leather. To do this, use the supplied engraving
templates w.
♦ Hold the appliance at an angle, in the same way you would hold
a pen.
♦ Your arm should be resting on the table.
♦ Move the engraving tipq over the workpiece while applying
gentle pressure. To ascertain the ideal engraving speed, practice
on a spare piece of material.

PAGG 4 A1 GB│CY │ 15 ■
NOTE
► The supplied engraving tipq is made of tungsten steel. It is
therefore not suitable for engraving electronic media such as
CDs, DVDs, etc. These materials and their readability could be
damaged.
Maintenance and cleaning
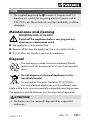
WARNING! RISK OF INJURY!
Switch off the appliance before carrying out any
cleaning or maintenance work.
■ The appliance is maintenance-free.
■ Remove all dirt from the appliance. Use a dry cloth to do this.
■ Do not allow any liquids to get into the appliance.
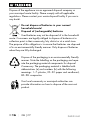
Disposal
The packaging is made from environmentally friendly
material and can be disposed of at your local recycling
plant.
Do not dispose of electrical appliances in the
household waste!
As required by European Guideline 2012/19/EU,
worn-out electrical appliances must be collected sepa-
rately and fed into an environmentally compatible recycling process.
The appliance and the batteries must be disposed of separately.
ATTENTION!
► The battery must be removed/disposed of by a specialist
technician.

PAGG 4 A1
■ 16 │ GB│CY
Dispose of the appliance via an approved disposal company or
your municipal waste facility. Please comply with all applicable
regulations. Please contact your waste disposal facility if you are in
any doubt.
Do not dispose of batteries in your normal
household waste!
Disposal of (rechargeable) batteries
Used batteries may not be disposed of in the household
waste. Consumers are legally obliged to dispose of batteries at a
collection point in their community/city district or at a retail store.
The purpose of this obligation is to ensure that batteries are disposed
of in an environmentally friendly manner. Only dispose of batteries
when they are fully discharged.
Dispose of the packaging in an environmentally friendly
manner. Note the labelling on the packaging and sepa-
rate the packaging material components for disposal
ifnecessary. The packaging material is labelled with
abbreviations (a) and numbers (b) with the following
meanings: 1–7: plastics, 20–22: paper and cardboard,
80–98: composites.
Your local community or municipal authorities can
provide information on how to dispose of the worn-out
product.

PAGG 4 A1 GB│CY │ 17 ■
Kompernass Handels GmbH warranty
Dear Customer,
This appliance has a 3-year warranty valid from the date of purchase.
If this product has any faults, you, the buyer, have certain statutory
rights. Your statutory rights are not restricted in any way by the
warranty described below.
Warranty conditions
The warranty period starts on the date of purchase. Please keep your
receipt in a safe place. This will be required as proof of purchase.
If any material or manufacturing fault occurs within three years of the
date of purchase of the product, we will either repair or replace the
product for you or refund the purchase price (at our discretion). This
warranty service requires that you present the defective appliance
and the proof of purchase (receipt) within the three-year warranty
period, along with a brief written description of the fault and of
when it occurred.
If the defect is covered by the warranty, your product will either be
repaired or replaced by us. The repair or replacement of a product
does not signify the beginning of a new warranty period.
Warranty period and statutory claims for defects
The warranty period is not prolonged by repairs effected under the
warranty. This also applies to replaced and repaired components.
Any damage and defects present at the time of purchase must be
reported immediately after unpacking. Repairs carried out after
expiry of the warranty period shall be subject to a fee.
Pagina se încarcă...
Pagina se încarcă...
Pagina se încarcă...
Pagina se încarcă...
Pagina se încarcă...
Pagina se încarcă...
Pagina se încarcă...
Pagina se încarcă...
Pagina se încarcă...
Pagina se încarcă...
Pagina se încarcă...
Pagina se încarcă...
Pagina se încarcă...
Pagina se încarcă...
Pagina se încarcă...
Pagina se încarcă...
Pagina se încarcă...
Pagina se încarcă...
Pagina se încarcă...
Pagina se încarcă...
Pagina se încarcă...
Pagina se încarcă...
Pagina se încarcă...
Pagina se încarcă...
Pagina se încarcă...
Pagina se încarcă...
Pagina se încarcă...
Pagina se încarcă...
Pagina se încarcă...
Pagina se încarcă...
Pagina se încarcă...
Pagina se încarcă...
Pagina se încarcă...
Pagina se încarcă...
Pagina se încarcă...
Pagina se încarcă...
Pagina se încarcă...
Pagina se încarcă...
Pagina se încarcă...
Pagina se încarcă...
Pagina se încarcă...
Pagina se încarcă...
Pagina se încarcă...
Pagina se încarcă...
Pagina se încarcă...
Pagina se încarcă...
Pagina se încarcă...
Pagina se încarcă...
Pagina se încarcă...
Pagina se încarcă...
Pagina se încarcă...
Pagina se încarcă...
Pagina se încarcă...
Pagina se încarcă...
Pagina se încarcă...
Pagina se încarcă...
Pagina se încarcă...
Pagina se încarcă...
Pagina se încarcă...
Pagina se încarcă...
Pagina se încarcă...
Pagina se încarcă...
Pagina se încarcă...
Pagina se încarcă...
Pagina se încarcă...
Pagina se încarcă...
Pagina se încarcă...
Pagina se încarcă...
Pagina se încarcă...
Pagina se încarcă...
Pagina se încarcă...
Pagina se încarcă...
Pagina se încarcă...
Pagina se încarcă...
Pagina se încarcă...
Pagina se încarcă...
Pagina se încarcă...
Pagina se încarcă...
Pagina se încarcă...
Pagina se încarcă...
Pagina se încarcă...
Pagina se încarcă...
Pagina se încarcă...
Pagina se încarcă...
Pagina se încarcă...
Pagina se încarcă...
Pagina se încarcă...
Pagina se încarcă...
Pagina se încarcă...
Pagina se încarcă...
Pagina se încarcă...
Pagina se încarcă...
Pagina se încarcă...
Pagina se încarcă...
Pagina se încarcă...
Pagina se încarcă...
Pagina se încarcă...
Pagina se încarcă...
Pagina se încarcă...
Pagina se încarcă...
Pagina se încarcă...
Pagina se încarcă...
Pagina se încarcă...
Pagina se încarcă...
Pagina se încarcă...
Pagina se încarcă...
Pagina se încarcă...
Pagina se încarcă...
Pagina se încarcă...
Pagina se încarcă...
Pagina se încarcă...
Pagina se încarcă...
Pagina se încarcă...
Pagina se încarcă...
Pagina se încarcă...
Pagina se încarcă...
Pagina se încarcă...
Pagina se încarcă...
Pagina se încarcă...
Pagina se încarcă...
Pagina se încarcă...
Pagina se încarcă...
Pagina se încarcă...
Pagina se încarcă...
Pagina se încarcă...
Pagina se încarcă...
Pagina se încarcă...
Pagina se încarcă...
Pagina se încarcă...
Pagina se încarcă...
Pagina se încarcă...
Pagina se încarcă...
Pagina se încarcă...
Pagina se încarcă...
Pagina se încarcă...
Pagina se încarcă...
Pagina se încarcă...
Pagina se încarcă...
Pagina se încarcă...
Pagina se încarcă...
Pagina se încarcă...
Pagina se încarcă...
Pagina se încarcă...
Pagina se încarcă...
Pagina se încarcă...
Pagina se încarcă...
Pagina se încarcă...
Pagina se încarcă...
Pagina se încarcă...
Pagina se încarcă...
-
 1
1
-
 2
2
-
 3
3
-
 4
4
-
 5
5
-
 6
6
-
 7
7
-
 8
8
-
 9
9
-
 10
10
-
 11
11
-
 12
12
-
 13
13
-
 14
14
-
 15
15
-
 16
16
-
 17
17
-
 18
18
-
 19
19
-
 20
20
-
 21
21
-
 22
22
-
 23
23
-
 24
24
-
 25
25
-
 26
26
-
 27
27
-
 28
28
-
 29
29
-
 30
30
-
 31
31
-
 32
32
-
 33
33
-
 34
34
-
 35
35
-
 36
36
-
 37
37
-
 38
38
-
 39
39
-
 40
40
-
 41
41
-
 42
42
-
 43
43
-
 44
44
-
 45
45
-
 46
46
-
 47
47
-
 48
48
-
 49
49
-
 50
50
-
 51
51
-
 52
52
-
 53
53
-
 54
54
-
 55
55
-
 56
56
-
 57
57
-
 58
58
-
 59
59
-
 60
60
-
 61
61
-
 62
62
-
 63
63
-
 64
64
-
 65
65
-
 66
66
-
 67
67
-
 68
68
-
 69
69
-
 70
70
-
 71
71
-
 72
72
-
 73
73
-
 74
74
-
 75
75
-
 76
76
-
 77
77
-
 78
78
-
 79
79
-
 80
80
-
 81
81
-
 82
82
-
 83
83
-
 84
84
-
 85
85
-
 86
86
-
 87
87
-
 88
88
-
 89
89
-
 90
90
-
 91
91
-
 92
92
-
 93
93
-
 94
94
-
 95
95
-
 96
96
-
 97
97
-
 98
98
-
 99
99
-
 100
100
-
 101
101
-
 102
102
-
 103
103
-
 104
104
-
 105
105
-
 106
106
-
 107
107
-
 108
108
-
 109
109
-
 110
110
-
 111
111
-
 112
112
-
 113
113
-
 114
114
-
 115
115
-
 116
116
-
 117
117
-
 118
118
-
 119
119
-
 120
120
-
 121
121
-
 122
122
-
 123
123
-
 124
124
-
 125
125
-
 126
126
-
 127
127
-
 128
128
-
 129
129
-
 130
130
-
 131
131
-
 132
132
-
 133
133
-
 134
134
-
 135
135
-
 136
136
-
 137
137
-
 138
138
-
 139
139
-
 140
140
-
 141
141
-
 142
142
-
 143
143
-
 144
144
-
 145
145
-
 146
146
-
 147
147
-
 148
148
-
 149
149
-
 150
150
-
 151
151
-
 152
152
-
 153
153
-
 154
154
-
 155
155
-
 156
156
-
 157
157
-
 158
158
-
 159
159
-
 160
160
-
 161
161
-
 162
162
-
 163
163
-
 164
164
-
 165
165
-
 166
166
-
 167
167
-
 168
168
-
 169
169
-
 170
170


Lucrări înrudite
-
Parkside PFBS 9.6 A1 Operation and Safety Notes
-
Parkside PFBS 10.8 A1 Operation And Safety Manual
-
Parkside PGG 15 A1 Operation and Safety Notes
-
-
Parkside PMGS 12 C3 Operation and Safety Notes
-
Parkside PFBS 160 B2 Manual de utilizare
-
-
-
-