Olympus M.ZUIKO DIGITAL ED 17mm F1.2 PRO Manual de utilizare
- Categorie
- Lentilele camerei
- Tip
- Manual de utilizare
Acest manual este potrivit și pentru

© 2017
ED 17mm f1.2 PRO
WD290801
Printed in Vietnam
Model No.:IM007
date of issue 2017.9
61 -
PL
INSTRUKCJA
64 -
PT
INSTRUÇÕES
67 -
RO
INSTRUCŢIUNI
70 -
RU
ИНСТРУКЦИЯ
73 -
SK
NÁVOD NA POUŽITIE
76 -
SL
NAVODILA
79 -
SR
UPUTSTVO ZA UPOTREBU
82 -
SV
BRUKSANVISNING
85 -
TR
TALİMATLAR
88 -
UK
ІНСТРУКЦІЯ
93 -
AR
94 -
KR
사용설명서
97 -
CHT
ℬ䛕屗㞻㢥
100
-
TH
คําแนะนําการใชงาน
103
-
VI
CÁC HƯỚNG DẪN
04 -
JP
07 -
EN
INSTRUCTIONS
11 -
ES
INSTRUCCIONES
15 -
FR
MODE D’EMPLOI
19 -
BG
ИНСТРУКЦИИ
22 -
CS
NÁVOD K POUŽITÍ
25 -
DA
BETJENINGSVEJLEDNING
28 -
DE
BEDIENUNGSANLEITUNG
31 -
EL
ΟΔΗΓΙΕΣ
34 -
ET
JUHISED
37 -
FI
KÄYTTÖOHJEET
40 -
HR
UPUTE
43 -
HU
HASZNÁLATI ÚTMUTATÓ
46 -
IT
ISTRUZIONI
49 -
LT
INSTRUKCIJA
52 -
LV
NORĀDĪJUMI
55 -
NL
AANWIJZINGEN
58 -
NO
INSTRUKSJONER

4 JP 109
1 4
2 5
3 6
1 2
1
2
34
JP
The following importer description applies to products imported
into the EU directly by OLYMPUS EUROPA SE & Co. KG only.
OLYMPUS EUROPA SE & Co. KG
Wendenstrasse 14-18, 20097 Hamburg, Germany
Manufactured by OLYMPUS CORPORATION
2951 Ishikawa-machi, Hachioji-shi, Tokyo 192-8507, Japan
1 2 4
3

JP 5
)

6 JP
http://www.olympus.co.jp/en/support/imsg/
digicamera/download/notice/notice.cfm

EN 7
INSTRUCTIONS
Thank you for purchasing this Olympus product.
To ensure your safety, please read this
instruction manual before use, and keep it
handy for future reference.
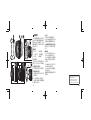
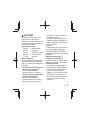
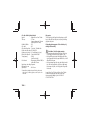
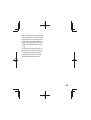
Name of parts
1 Lens hood
2 Focus ring
3 L-Fn button
4 Mount index
5 Depth-of-field indicator
6 Distance indicator
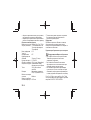
Focus ring
Slide to change the focus method (Fig. 1 and
2) (manual focus clutch mechanism).
• Position in which distance indicator
cannot be seen (Fig. 1)
The lens will operate in the focus mode set by
the camera.
• Position in which distance indicator can be
seen (Fig. 2)
The lens will operate in the MF mode,
regardless of the focus mode set by the
camera.
Focus by rotating the lens focus ring.
Depth of field varies with the aperture selected
with the camera, and is shown by the depth-
of-field indicator on the lens.
L-Fn button
The AF stops functioning while the button is
pressed.
You may be able to assign other functions
depending on your camera. For details, see the
instruction manual that came with your camera.
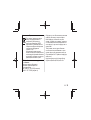
Attaching the hood (Fig. 3)/
Storing the hood (Fig. 4)
To remove the hood, rotate it while pressing the
release.
Notes on Shooting
• If autofocus (AF) is unavailable, check the
sliding position of the focus ring.
• Edges of pictures may be cut off if more than
one filter is used or if a thick filter is used.
• When using a flash, flash light may be blocked
by the lens body, lens hood, etc.
• The focus distance may change when you
slide the focus ring.
• The distance and depth-of-field indicators are
intended as guides only.
EN

8 EN
Main Specifications
Mount : Micro Four Thirds mount
Focal distance : 17 mm
(equivalent to 34 mm on a
35 mm camera)
Max. aperture : f1.2
Image angle : 65°
Lens configuration : 11 groups, 15 lenses
Iris control : f1.2 to f16
Shooting range : 0.2 m (7.9 in.) to )
(infinite)
Focus adjustment : AF/MF switching
Weight : 390 g (13.8 oz.)
(excluding hood and cap)
Dimensions : Max. dia. Ø 68.2 (2.7 in.) ×
length 87 mm (3.4 in.)
Lens hood mount : Bayonet
Filter mount thread
diameter : Ø 62 mm
*
Specifications are subject to change without any
notice or obligation on the part of the manufacturer.
Maintenance
Blow dust off the lens with a commercially
available blower. For the lens, wipe gently with a
lens cleaning paper.
Precautions: Be Sure to Read the Following
Warnings: Safety Precautions
• Do not view the sun through the lens. It may
cause blindness or vision impairment.
• Do not leave the lens without the cap. If solar
light is converged through the lens, a fire may
result.
• Do not point the camera lens at the sun.
Sunlight will converge in the lens and focus
inside the camera, possibly causing a
malfunction or fire.
Micro Four Thirds and the Micro Four Thirds
logo are trademarks or registered trademarks of
OLYMPUS CORPORATION.

EN 9
For customers in Europe
This symbol [crossed-out wheeled
bin WEEE Annex IV] indicates
separate collection of waste
electrical and electronic equipment
in the EU countries.
Please do not throw the equipment
into the domestic refuse.
Please use the return and collection
systems available in your country
for the disposal of this product.
European Technical Customer Support
Please visit our homepage
http://www.olympus-europa.com
or call: Tel. 00800 - 67 10 83 00 (Toll-free)
+49 40 - 237 73 899 (Charged)
•
For customers in North America, Central
America, South America and the Caribbean
FCC Notice
This device complies with part 15 of the
FCC rules. Operation is subject to the
following two conditions:
(1) This device may not cause harmful
interference, and (2) this device must accept
any interference received, including
interference that may cause undesired
operation.
Any unauthorized changes or modifications
to this equipment would void the user’s
authority to operate.
CAN ICES-3(B)/NMB-3(B)
Technical Support (U.S.A. / Canada)
24/7 online automated help :
http://www.olympusamerica.com/support
Phone customer support :
Tel.1-800-260-1625 (Toll-free)
Our phone customer support is available
from 9 am to 9 pm (Monday to Friday) ET
E-Mail : [email protected]

10 EN
The software in this lens may include third party
software. Any third party software is subject
to the terms and conditions, imposed by the
owners or licensors of that software, under
which software is provided to you.
Those terms and other third party software
notices, if any, may be found in the software
notice PDF file stored at
http://www.olympus.co.jp/en/support/imsg/
digicamera/download/notice/notice.cfm

ES 11
INSTRUCCIONES
Muchas gracias por comprar este producto
Olympus. Antes de usarlo, lea este manual de
instrucciones para proteger su seguridad, y
guárdelo en un lugar práctico para usarlo como
referencia futura.
Nombre de las piezas
1 Parasol del
objetivo
2 Anillo de enfoque
3 Botón L-Fn
4 Índice de montura
5 Indicador de
profundidad de campo
6 Indicador de distancia
Anillo de enfoque
Deslícelo para cambiar el método de enfoque
(Fig. 1 y 2) (mecanismo de embrague del
enfoque manual).
• Posición en la que el indicador de
distancia no se puede ver (Fig. 1)
El objetivo operará en el modo de enfoque
establecido por la cámara.
• Posición en la que el indicador de
distancia se puede ver (Fig. 2)
El objetivo operará en el modo MF, con
independencia del modo de enfoque
establecido por la cámara.
Enfoque la imagen girando el anillo de
enfoque del objetivo.
La profundidad del campo varía según la
apertura seleccionada con la cámara y se
muestra por el indicador de profundidad de
campo en el objetivo.
Botón L-Fn
El AF deja de funcionar mientras se mantiene
pulsado el botón.
Es posible que pueda asignar otras funciones
dependiendo de la cámara. Para obtener más
detalles, consulte el manual de instrucciones
suministrado con la cámara.
Instalación del parasol (Fig. 3)/
Almacenamiento del parasol (Fig. 4)
Para quitar el parasol, gírelo mientras pulsa el
botón de liberación.
Notas sobre la toma fotográfica
• Si el enfoque automático (AF) no está
disponible, compruebe la posición deslizante
del anillo de enfoque.
• Los bordes de las imágenes pueden cortarse
si se usa más de un filtro o un filtro grueso.
ES

12 ES
• Si se utiliza un flash, la luz del mismo puede
verse bloqueada por el cuerpo del objetivo,
por el parasol, etc.
• La distancia focal puede cambiar al deslizar el
anillo de enfoque.
• Los indicadores de distancia y de profundidad de
campo se incluyen solamente como referencia.
Especificaciones principales
Montura :
Montura Micro Four Thirds
Distancia focal :
17 mm
(equivalente a 34 mm en
una cámara de 35 mm)
Apertura máx. : f1,2
Ángulo de imagen : 65°
Configuración de
objetivo : 11
grupos, 15 objetivos
Control de diafragma
: de f1,2 a f16
Distancia de toma : de 0,2 m a ) (infinito)
Ajuste de enfoque : Cambio AF/MF
Peso : 390 g (excluyendo el
parasol y la tapa)
Medidas :
Diámetro máximo Ø 68,2 ×
longitud
87 mm
Montura del parasol
del objetivo
: Bayoneta
Diámetro de rosca
de montura de filtro
: Ø 62 mm
*
Las especificaciones están sujetas a cambios sin
previo aviso ni obligación por parte del fabricante.
Mantenimiento
Quite el polvo del objetivo con un soplador
mecánico disponible comercialmente. Para
las lentes, limpie suavemente con un papel de
limpieza de lentes.
Precauciones: Asegúrese de leer lo siguiente
Advertencias: Precauciones de seguridad
• No observe el sol a través del objetivo. Puede
causar ceguera o daños en la vista.
• No deje el objetivo sin la tapa. Si la luz solar
se concentra a través del objetivo, puede
producir un incendio.
• Evite que el objetivo montado en la cámara apunte
hacia el sol, ya que los rayos solares incidirán
directamente en la cámara, lo que puede causar
su mal funcionamiento o producir un incendio.
Micro Four Thirds y el logotipo de Micro Four
Thirds son marcas comerciales o marcas
registradas de OLYMPUS CORPORATION.

ES 13
Para los clientes de Europa
Este símbolo [un contenedor de
basura tachado con una X en el
Anexo IV de RAEE] indica que la
recogida de basura de equipos
eléctricos y electrónicos deberá
tratarse por separado en los países
de la Unión Europea.
No tire este equipo a la basura
doméstica.
Para el desecho de este tipo de
equipos utilice los sistemas de
devolución al vendedor y de
recogida que se encuentren
disponibles en su país.
Asistencia técnica al cliente en Europa
Visite nuestra página web
http://www.olympus-europa.com
o Ilame al: Tel.
00800 - 67 10 83 00 (Llamada gratuita)
+49 40 - 237 73 899 (Llamada con coste)
•
Para los clientes de Norteamérica,
Centroamérica, Sudamérica y el Caribe
Aviso FCC
Este dispositivo cumple con el apartado 15
de los reglamentos FCC. La operación está
sujeta a las siguientes dos condiciones:
(1) Este dispositivo no puede producir
interferencias que ocasionen daños, y
(2) este dispositivo puede aceptar cualquier
interferencia, incluida una interferencia que
pueda ocasionar una operación no
deseada. Cualquier cambio o modificación
no autorizada que se realice a este equipo
anulará el derecho del usuario a operarlo.
CAN ICES-3(B)/NMB-3(B)
Asistencia técnica (EE.UU. / Canadá)
24/7 Ayuda automatizada en línea:
http://www.olympusamerica.com/support
Soporte telefónico al cliente:
Tel. 1-800-260-1625 (Llamada gratuita)
Nuestro teléfono de atención al cliente está
disponible de 9 am a 9 pm (de lunes a viernes)
Hora del Este
Correo electrónico: [email protected]

14 ES
Es posible que el software de este objetivo
incluya software de terceros. Cualquier
software de terceros está sujeto a los términos
y condiciones impuestos por los dueños o
portadores de la licencia del software, bajo los
cuales se le suministra dicho software.
Esos términos y otros avisos de software
provenientes de terceros, si hay alguno, los
puede encontrar en el archivo PDF de avisos
de software en
http://www.olympus.co.jp/en/support/imsg/
digicamera/download/notice/notice.cfm

FR 15
MODE D’EMPLOI
Nous vous remercions pour l’achat de ce produit
Olympus. Avant toute utilisation, nous vous
recommandons de lire ce mode d’emploi pour
votre sécurité et de conserver ces instructions à
portée de main pour un usage ultérieur.
Nomenclature
1 Pare-soleil
2 Bague de mise
au point
3 Bouton L-Fn
4 Repère de montage
5 Indicateur de
profondeur de champ
6 Indicateur de distance
Bague de mise au point
Actionnez la bague pour modifier la méthode
de mise au point (Fig. 1 et 2) (mécanisme
d’enclenchement de la mise au point manuelle).
• Position dans laquelle l’indicateur de
distance ne peut pas être vu (Fig. 1)
L’objectif fonctionnera dans le mode de mise
au point défini par l’appareil photo.
• Position dans laquelle l’indicateur de
distance peut être vu (Fig. 2)
L’objectif fonctionnera en mode MF, quel
que soit le mode de mise au point défini par
l’appareil photo.
Effectuez la mise au point en tournant la
bague de mise au point de l’objectif.
La profondeur de champ varie en fonction de
l’ouverture sélectionnée avec l’appareil photo.
Elle est indiquée par l’indicateur de
profondeur de champ sur l’objectif.
Bouton L-Fn
L’AF cesse de fonctionner lorsque le bouton est
enfoncé.
Vous pouvez attribuer d’autres fonctions en
fonction du modèle de votre appareil photo.
Pour obtenir des informations détaillées,
consultez le mode d’emploi de votre appareil
photo.
Fixation du pare-soleil (Fig. 3)/
Rangement du pare-soleil (Fig. 4)
Pour retirer le pare-soleil, tournez-le tout en
appuyant sur le bouton de déverrouillage.
Remarques sur la prise de vue
• Si l’autofocus (AF) n’est pas disponible,
vérifiez la position d’actionnement de la bague
de mise au point.
• Les bords des images risquent d’être coupés
si plusieurs filtres sont utilisés ensemble ou si
vous utilisez un filtre épais.
FR

16 FR
• Lors de l’utilisation du flash, la lumière du flash
peut être stoppée par l’objectif, le pare-soleil, etc.
• La distance de mise au point peut changer lorsque
vous actionnez la bague de mise au point.
• Les indicateurs de profondeur de champ et la
distance sont donnés uniquement à titre indicatif.
Caractéristiques principales
Monture : monture Micro Four Thirds
Longueur focale : 17 mm (équivalent à 34 mm
sur un appareil photo 35 mm)
Ouverture maximale
: f1.2
Angle de vue : 65 °
Configuration de
l’objectif
: 11 groupes, 15 lentilles
Commande de
diaphragme : f1.2 à f16
Plage de prise de vue
: 0,2 m à ) (infini)
Réglage de la
mise au point : Commutation AF/MF
Poids : 390 g (pare-soleil et bouchon
exclus)
Dimensions : Dia. max. Ø 68,2 ×
longueur 87 mm
Montage du
pare-soleil : Baïonnette
Diamètre de filetage
du montage du filtre
: Ø 62 mm
* Caractéristiques modifiables sans préavis ni
obligations de la part du fabricant.
Entretien
Soufflez la poussière hors de l’objectif à l’aide
d’une soufflette disponible dans le commerce.
Pour l’objectif, essuyez délicatement avec du
papier nettoyant pour objectif.
Précautions : lire attentivement
Avertissements : précautions de sécurité
• Ne pas regarder le soleil à travers l’objectif. Cela
pourrait causer des troubles ou la perte de la vue.
• Ne pas laisser l’objectif sans le bouchon. La
concentration des rayons du soleil à travers
l’objectif peut causer un incendie.
• Ne pas pointer l’objectif monté sur l’appareil vers
le soleil. Une telle action concentrerait les rayons
du soleil dans l’appareil, ce qui engendrerait un
mauvais fonctionnement ou un incendie.
Micro Four Thirds et le logo Micro Four Thirds
sont des marques commerciales ou déposées
de OLYMPUS CORPORATION.

FR 17
Pour les utilisateurs en Europe
Le symbole [poubelle sur roue barrée
d’une croix WEEE annexe IV] indique
une collecte séparée des déchets
d’équipements électriques et
électroniques dans les pays de l’UE.
Veuillez ne pas jeter l’équipement
dans les ordures domestiques.
À utiliser pour la mise au rebut de
ces types d’équipements
conformément aux systèmes de
traitement et de collecte disponibles
dans votre pays.
Support technique européen
Visitez notre site à l’adresse
http://www.olympus-europa.com
ou appelez le :
00800 - 67 10 83 00 (appel gratuit)
+49 40 - 237 73 899 (appel payant)
•
Pour les utilisateurs en Amérique du
Nord, Amérique centrale, Amérique du
Sud et aux Caraïbes
Notice FCC
Cet appareil est conforme aux normes de la
Section 15 des directives FCC. Son utilisation
est soumise aux deux conditions suivantes :
(1) Cet appareil ne doit pas causer
d’interférences radioélectriques, et (2) doit
pouvoir résister à toutes les interférences, y
compris celles susceptibles d’entraver son
bon fonctionnement.
Toute modification non autorisée peut
annuler la permission accordée à l’utilisateur
de se servir de ce matériel.
CAN ICES-3(B)/NMB-3(B)
Support technique (
États-Unis / Canada
)
Aide en ligne 24/24h, 7/7 jours :
http://www.olympusamerica.com/support
Ligne téléphonique de support :
Tél. 1-800-260-1625 (appel gratuit)
Notre centre d’appels clients est ouvert de 9 h
à 21 h (du lundi au vendredi) Heure de l’Est
E-mail : [email protected]

18 FR
Le logiciel compris dans cet objectif peut inclure
un logiciel tiers. Tout logiciel tiers est soumis
aux conditions d’utilisation, imposées par les
propriétaires ou concédants de licence de ce
logiciel, en vertu desquelles le logiciel vous est
fourni.
Ces conditions et autres avis de logiciels tiers,
le cas échéant, se trouvent dans le fichier PDF
d’avis de logiciels stocké sur
http://www.olympus.co.jp/en/support/imsg/
digicamera/download/notice/notice.cfm

BG 19
ИНСТРУКЦИИ
Благодарим ви за закупуването на този
продукт Olympus. За да подсигурите
безопасността си, преди употреба прочетете
настоящата инструкция за експлоатация и я
запазете за бъдещи справки.
Наименования на частите
1 Сенник на
обектива
2 Гривна за
фокусиране
3 L-Fn бутон
4 Монтажен маркер
5 Индикатор на
дълбочината на рязкост
6 Скала за фокусното
разстояние
Гривна за фокусиране
Промяна
та на метода на фокусиране става
чрез плъзгане на гривната за фокусиране
(фиг. 1 и 2) (механизъм за превключване на
ръчен фокус).
• Позиция, в която скалата за фокусното
разстояние не се вижда (фиг. 1)
Обективът работи в режима на
фокусиране, зададен от фотоапарата.
• Позиция, в която скалата за фокусното
ра
зстояние се вижда (фиг. 2)
Обективът работи в режим MF за
ръчен фокус независимо от режима на
фокусиране, зададен от фотоапарата.
Фокусирайте, като завъртите гривната за
фокусиране на обектива.
Дълбочината на рязкост варира спрямо
диафрагмата, избрана с фотоапарата, и се
показва от индикатора на дълбочината на
рязкост на обектива.
L-Fn бутон
AF спира да работи, докато бутонът е натиснат.
Можете да използвате и други функции в
зависимост от фотоапарата. За подробна
информация вижте ръководството за работа на
фотоапарата.
Прикрепяне на сенника (фиг. 3)/
Съхраняване на сенника (фиг. 4)
За да махнете сенника, го завъртете, докато
държите натиснат бутона за освобождаване.
Забележки при снимане
• Ако не може да се използва режим AF за
автоматичен фокус, проверете позицията
на плъзгане на гривната за фокусиране.
• Краищата на снимките може да се
повредят, ако се изпо
лзват повече от един
филтър или филтър с плътен пръстен.
• При използване на светкавица светлината
може да бъде засенчена от обектива,
сенника и пр.
BG

20 BG
• Фокусното разстояние може да се промени,
като завъртите гривната за фокусиране.
• Индикаторите за разстояние и дълбочина на
рязкостта са предвидени само като ориентир.
Основни технически данни
Байонетен пръстен
:
Байонет Micro Four Thirds
Фокусно разстояние :
17 mm (еквивалентно на
34 mm при фотоапарат с
35 mm филм)
Макс. диафрагма : f1.2
Ъгъл на
изображението : 65°
Конфигурация на
обектива
: 11 групи, 15 лещи
Контрол на ириса : f1.2 до f16
Обхват на снимане : 0,2 m до ) (безкрайност)
Настройка на фокуса
:
Превключване между
автоматичен и ръчен режим
Тегло : 390 g (без сенник и
капачка)
Размери : Максимален диаметър
Ø 68,2 × дължина 87 mm
Байонет за монтиране
на сенник
: Байонет
Диаметър на резбата за
поставяне на филтъра
: Ø 62 mm
* Техническите данни подлежат на промяна
без предизвестие или задължение от
страна на производителя.
Поддръжка
Премахнете праха от обектива с помощта
на предлагана на пазара гумена круша.
Избършете обектива внимателно с хартия за
почистване на обективи.
Предпазни мерки: Задължително прочетете следното
Предупреждения: Мерки за безопасност
• Не гледайте към слънцето през обектива.
Това може да причини слепота или
увреждане на зрението.
• Не оставяйте обектива без капачката.
Фокусирането на слънчева светлина през
обектива може да причини пожар.
• Не насочвайте обектива на фотоапарата
към слънцето. Снопът слънчеви лъчи през
обектива ще се фокусира във фотоапарата
и може да причини неизправност или пожар.
Micro Four Thirds и логото на Micro Four Thirds
са търговски марки или регистрирани търговски
марки на OLYMPUS CORPORATION.

BG 21
За клиенти в Европа
Европейска техническа поддръжка
за клиенти
Посетете нашата уебстраница
http://www.olympus-europa.com
или позвънете на
тел. 00800 - 67 10 83 00 (безплатно)
+49 40 - 237 73 899
(таксува се)
•
Този символ [зачеркната кофа за
боклук според Директивата за
отпадъчното електрическо и
електронно оборудване WEEE,
приложение IV] указва разделното
събиране на отпадъчно електрическо
и електронно оборудване в
страните от ЕС.
Не изхвърляйте уреда заедно с
битовите отпадъци.За изхвърлянето
на този продукт използвайте системата
за връщане и събиране на отпадъци,
действаща във вашата страна.
Софтуерът в този обектив може да включва
софтуер, собственост на трета страна.
Всеки софтуер, собственост на трета
страна, е предмет на условията, наложени
от собствениците или лицензодателите на
този софтуер, и при които софтуерът ви се
предоставя.
Тези условия, както и други забележки
по отношение на притежавания от трети
страни софтуер, ак
о има такива, могат да
бъдат намерени в PDF файла за софтуера,
наличен на
http://www.olympus.co.jp/en/support/imsg/
digicamera/download/notice/notice.cfm

22 CS
NÁVOD K POUŽITÍ
Děkujeme vám za pořízení tohoto výrobku
Olympus. Pro vaši bezpečnost si, prosím, před
jeho použitím pozorně přečtěte tento návod
a poté jej uložte pro budoucí nahlédnutí.
Názvy částí
1 Sluneční clona
2 Zaostřovací
kroužek
3 Tlačítko L-Fn
4
Značka pro nasazování
objektivu
5
Indikace hloubky ostrosti
6 Indikátor vzdálenosti
Zaostřovací kroužek
Posunutím změníte způsob ostření (obr. 1 a 2)
(přepínací mechanismus ručního ostření).
• Poloha, ve které se indikátor vzdálenosti
nezobrazuje (obr. 1)
Objektiv bude fungovat v režimu ostření
nastaveném fotoaparátem.
• Poloha, ve které se indikátor vzdálenosti
zobrazuje (obr. 2)
Objektiv bude fungovat v režimu MF
bez ohledu na režim ostření nastavený
fotoaparátem.
Zaostřete otáčením zaostřovacího kroužku.
Hloubka ostrosti se mění v závislosti na
nastavení clony na fotoaparátu a je ukázána
pomocí indikace hloubky ostrosti na objektivu.
Tlačítko L-Fn
V době stisknutí tohoto tlačítka nefunguje AF.
Podle fotoaparátu můžete přiřadit další funkce.
Další informace naleznete v návodu k použití
dodaném s fotoaparátem.
Nasazení sluneční clony (obr. 3)/
Uskladnění sluneční clony (obr. 4)
Abyste odstranili kryt, otáčejte jím a zároveň
přidržujte stisknuté tlačítko uvolnění.
Poznámky ke snímání
• Pokud není automatické zaostřování k
dispozici, zkontrolujte posouvací polohu
zaostřovacího kroužku.
• Při použití silného filtru nebo kombinace více
filtrů mohou být oř
íznuty okraje (rohy) snímků.
• Při použití blesku může být jeho světlo
zastíněno objektivem, sluneční clonou atd.
• Zaostřovací vzdálenost se může při
posouvání zaostřovacího kroužku měnit.
•
Indikace vzdálenosti a hloubky ostrosti mají
sloužit pouze jako vodítka.
CS
Pagina se încarcă ...
Pagina se încarcă ...
Pagina se încarcă ...
Pagina se încarcă ...
Pagina se încarcă ...
Pagina se încarcă ...
Pagina se încarcă ...
Pagina se încarcă ...
Pagina se încarcă ...
Pagina se încarcă ...
Pagina se încarcă ...
Pagina se încarcă ...
Pagina se încarcă ...
Pagina se încarcă ...
Pagina se încarcă ...
Pagina se încarcă ...
Pagina se încarcă ...
Pagina se încarcă ...
Pagina se încarcă ...
Pagina se încarcă ...
Pagina se încarcă ...
Pagina se încarcă ...
Pagina se încarcă ...
Pagina se încarcă ...
Pagina se încarcă ...
Pagina se încarcă ...
Pagina se încarcă ...
Pagina se încarcă ...
Pagina se încarcă ...
Pagina se încarcă ...
Pagina se încarcă ...
Pagina se încarcă ...
Pagina se încarcă ...
Pagina se încarcă ...
Pagina se încarcă ...
Pagina se încarcă ...
Pagina se încarcă ...
Pagina se încarcă ...
Pagina se încarcă ...
Pagina se încarcă ...
Pagina se încarcă ...
Pagina se încarcă ...
Pagina se încarcă ...
Pagina se încarcă ...
Pagina se încarcă ...
Pagina se încarcă ...
Pagina se încarcă ...
Pagina se încarcă ...
Pagina se încarcă ...
Pagina se încarcă ...
Pagina se încarcă ...
Pagina se încarcă ...
Pagina se încarcă ...
Pagina se încarcă ...
Pagina se încarcă ...
Pagina se încarcă ...
Pagina se încarcă ...
Pagina se încarcă ...
Pagina se încarcă ...
Pagina se încarcă ...
Pagina se încarcă ...
Pagina se încarcă ...
Pagina se încarcă ...
Pagina se încarcă ...
Pagina se încarcă ...
Pagina se încarcă ...
Pagina se încarcă ...
Pagina se încarcă ...
Pagina se încarcă ...
Pagina se încarcă ...
Pagina se încarcă ...
Pagina se încarcă ...
Pagina se încarcă ...
Pagina se încarcă ...
Pagina se încarcă ...
Pagina se încarcă ...
Pagina se încarcă ...
Pagina se încarcă ...
Pagina se încarcă ...
Pagina se încarcă ...
Pagina se încarcă ...
Pagina se încarcă ...
Pagina se încarcă ...
Pagina se încarcă ...
Pagina se încarcă ...
Pagina se încarcă ...
-
 1
1
-
 2
2
-
 3
3
-
 4
4
-
 5
5
-
 6
6
-
 7
7
-
 8
8
-
 9
9
-
 10
10
-
 11
11
-
 12
12
-
 13
13
-
 14
14
-
 15
15
-
 16
16
-
 17
17
-
 18
18
-
 19
19
-
 20
20
-
 21
21
-
 22
22
-
 23
23
-
 24
24
-
 25
25
-
 26
26
-
 27
27
-
 28
28
-
 29
29
-
 30
30
-
 31
31
-
 32
32
-
 33
33
-
 34
34
-
 35
35
-
 36
36
-
 37
37
-
 38
38
-
 39
39
-
 40
40
-
 41
41
-
 42
42
-
 43
43
-
 44
44
-
 45
45
-
 46
46
-
 47
47
-
 48
48
-
 49
49
-
 50
50
-
 51
51
-
 52
52
-
 53
53
-
 54
54
-
 55
55
-
 56
56
-
 57
57
-
 58
58
-
 59
59
-
 60
60
-
 61
61
-
 62
62
-
 63
63
-
 64
64
-
 65
65
-
 66
66
-
 67
67
-
 68
68
-
 69
69
-
 70
70
-
 71
71
-
 72
72
-
 73
73
-
 74
74
-
 75
75
-
 76
76
-
 77
77
-
 78
78
-
 79
79
-
 80
80
-
 81
81
-
 82
82
-
 83
83
-
 84
84
-
 85
85
-
 86
86
-
 87
87
-
 88
88
-
 89
89
-
 90
90
-
 91
91
-
 92
92
-
 93
93
-
 94
94
-
 95
95
-
 96
96
-
 97
97
-
 98
98
-
 99
99
-
 100
100
-
 101
101
-
 102
102
-
 103
103
-
 104
104
-
 105
105
-
 106
106


Olympus M.ZUIKO DIGITAL ED 17mm F1.2 PRO Manual de utilizare
- Categorie
- Lentilele camerei
- Tip
- Manual de utilizare
- Acest manual este potrivit și pentru
în alte limbi
Lucrări conexe
-
Olympus M.ZUIKO DIGITAL ED 45mm F1.2 PRO Manual de utilizare
-
-
-
-
-
-
-
-
-