Fellowes Jupiter 2 A3 Manual de utilizare
- Categorie
- Laminatoare
- Tip
- Manual de utilizare

Office Laminator

CONTENTS
LOCATION OF CONTROLS 3
ENGLISH 4-6
FRANCAIS 7-9
ESPAÑOL 10-12
DEUTSCH 13-15
ITALIANO 16-18
NEDERLANDS 19-21
SVENSKA 22-24
DANSK 25-27
SUOMI 28-30
NORSK 31-33
POLSKI 34-36
РУССКИЙ 37-39
EΛΛΗΝΙΚΑ 40-42
TÜRKÇE 43-45
ČESKY 46-48
SLOVENSKY 49-51
MAGYAR 52-54
PORTUGUÊS 55-57
БЪЛГАРСКИ 58-60
ROMÂNĂ 61-63
HRVATSKI 64-66
SLOVENČINA 67-69
SRPSKI 70-72
73-75
76-78
Please read these instructions before use.
Lire ces instructions avant utilisation.
Lea estas instrucciones antes de usar la
máquina.
Diese Anleitungen vor Gebrauch genau
durchlesen.
Primo dell’uso, si raccomanda di leggere
questo manuale di istruzioni.
Lees deze instructies zorgvuldig door voor-
dat u de machine in gebruik neemt.
Läs dessa anvisningar innan du använder
apparaten.
Læs venligst denne vejledning før anven-
delse.
Lue nämä ohjeet ennen käyttöä.
Vennligst les nøye igjennom denne bruksan-
visningen før bruk.
Przed użyciem proszę zapoznać się z niniejszą
instrukcją.
Перед эксплуатацией устройства
ознакомьтесь с содержанием данной
инструкции.
Διαβάστε τις παρακάτω οδηγίες πριν από τη
χρήση.
Kullanmadan önce lutfen bu talimatlari
okuyen.
Pred použitím si pročtěte tyto pokyny.
Pred poużitím si prečítajte tieto pokyny.
Kérjük, hogy használat elött olvassa el az
utasításokat.
Leia estas instruções antes da utilização.
Моля, прочетете инструкциите преди
употреба.
Vă rugăm să citiţi instrucţiunile înainte de
utilizare.
Pažljivo pročitajte ove upute prije korištenja.
Pred uporabo izdelka preberite ta navodila
za uporabo.
Pročitajte ova uputstva pre upotrebe.
FR
GB
DE
IT
ES
NL
SE
DK
FI
N0
PL
RU
GR
TR
CZ
HU
PT
BG
RO
HR
SI
SR
AR
ȲƾƵƯƄŴǽȚǚƃŻȝȚȢƾŵȤȁȚǟƴŸȬǾŶǽȚǟűǍƁ
ǀƸŮǍƯŽȚ
ĵĤijĜĭ
HB
ĴĠĩĤĴğĤīįħğħěĵĠěijĠğěĠijIJħěī
ĞĤĵĭĜĨĦīĠĤĭħĠijĩĴĥĤħĴğħĪĤě
SK

3
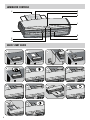
LAMINATOR CONTROLS
QUICK START GUIDE
F
A
J
B
1
20”
2
3
4
5
7
14
C
D
E
G
H
I
13
6
8
10 11 129

IMPORTANT SAFETY INSTRUCTIONS - KEEP FOR FUTURE USE
4
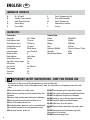
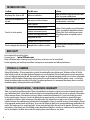
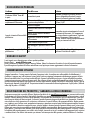
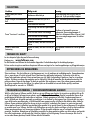
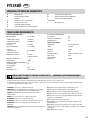
CAPABILITIES
Performance
Entry width A3 / 318mm
Pouch thickness (min.) 75 micron
Pouch thickness (max.) 250 micron
Estimated heat-up time 55 seconds
Cool down time 30-60 minutes
Lamination speed up to 75cm/min
Number of rollers 6
Ready indication Light & beep
Reverse/Auto reverse Yes/Yes
Clear Path / Anti-jam engine Yes
LED interface Yes
Auto Shut-off Yes (30 mins)
Photo-capable Yes
Carrier-free Yes
Exit tray Yes
Technical Data
Voltage 220-240V AC
Frequency 50-60Hz
Wattage 1200 Watts
Amps 5.2 Amps
Dimensions (HxWxD) 121mm x 546mm x 172mm
Net weight 6.5Kg
Max document thickness 0.8mm
- The machine is for indoor use only. Plug the machine into an easily accessible outlet.
- To prevent electrical shock - do not use the appliance close to water, do not spill water on to the appliance, power cord or wall
socket.
DO ensure the machine is on a stable surface.
DO test laminate scrap sheets and set the machine before final
laminations.
DO remove staples and other metal articles prior to laminating.
DO keep the machine away from heat and water sources.
DO turn off the machine after each use.
DO unplug the machine when not in use for an extended period.
DO use pouches designed for use at the appropriate settings.
DO keep away from pets, while in use.
DO NOT leave the power cord in contact with hot surfaces.
DO NOT leave power cord hanging from cupboards or shelves.
DO NOT use appliance if the power cord is damaged.
DO NOT attempt to open or otherwise repair the machine.
DO NOT exceed the machines quoted performance.
DO NOT allow minors to use this machine.
DO NOT laminate sharp or metal objects (eg: staples, paper
clips).
DO NOT laminate heat-sensitive documents (eg: tickets,
ultrasounds etc) on hot settings.
DO NOT laminate an empty pouch.
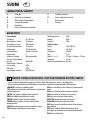
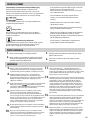
LAMINATOR CONTROLS
A On / off switch
B Standby / Power on button
C Ready Button (hot/cold)
D Reverse button
E Carry handles
F Pouch / document entry slot
G Entry shelf (illuminated)
H Pouch / document exit
I Illuminated user interface
J Exit tray
ENGLISH
GB

5
FEATURES & TIPS
Advanced Pouch Tracking System
This feature will detect and alert the user if there is a mis-feed or the
document has not gone completely through the machine in normal
operating time, and automatically reverse the document until the jam
is cleared.
AutoSense
Unique system detects pouch thickness and self-adjusts to optimal
lamination setting.
’Reverse’ function
To eject the laminating pouch during use, press and hold down the
reverse button until the pouch has ejected from the machine.
‘Auto Shut-Off’ function
If the machine is not active for 30 minutes, the ‘Sleep Mode’ function
will place the machine into standby mode. To operate the machine,
press the ‘Power On’ button on the control panel.
t For best results, use Fellowes ® brand thermal pouches:
Enhance 80, Impress 100, Capture 125, Protect 175, Preserve
250 and Cold Pouches
t This machine does not need a carrier to laminate. It is a carrier-
free mechanism.
t Always put the item to be laminated into the appropriate sized
pouch.
t Always test laminate with a similar size and thickness before
final process.
t Prepare pouch and item for lamination. Place item within pouch
centered and touching the leading sealed edge. Ensure the
pouch is not too large for the item.
t If required, trim excess material from around the item after
lamination and cooling.
BEFORE LAMINATING
Ensure the machine is on a stable surface.
Check there is enough clear space (min 50 cm) behind the
machine to allow items to pass through freely.
Plug the machine into an easily accessible main outlet.
Equip the Exit Tray for best laminating results.
STEPS TO LAMINATE
Switch the power on (located at the rear right side of the machine).
The control panel buttons will flash once as part of a check light
system to ensure proper function.
The Standby button will turn on with a soft blue glow. The machine
is automatically warming up to hot lamination. Note: the laminator
features AutoSense which automatically recognizes the pouch
thickness you insert into the laminator.
When the machine is ready, the green “Ready”
LED and
entry tray LED’s will come on and the machine will beep to indicate
that it is ready for lamination.
To toggle between Cold and Hot lamination, press and hold the
“Ready” button for 2 seconds. The Ready icon will blink 3 times in
“Blue” when initially switched to the Cold mode to indicate that the
mode has been switched then the Ready light will turn off until the
machine is ready for cold lamination. Note: to use the cold setting
after hot lamination you may have to wait for the laminator to cool
down for 30 – 60 minutes.
When the machine is ready for Cold Lamination the “Ready” LED will
illuminate “Blue” and the machine will beep.
To switch back to hot pouch laminating after cold laminating, press
and hold the “Ready” LED. Wait until the ready light turns green to
indicate it’s ready for hot lamination before inserting pouch.
Place the pouch, sealed edge first, into the pouch / document entry.
Keep the pouch straight and centered within the document entry, not
on an angle. Use the entry markings as a guide.
This unit is equipped with an Advanced Pouch Tracking System that
will detect and alert the user if there is a mis-feed. If a jam is detected
the machine will automatically reverse the document to help clear the
jam. The reverse button will come on while auto-reverse is engaged.
After this, if the jam is not completely cleared the Reverse button will
blink/flash. Press and hold the reverse button while pulling on the
pouch to completely remove the laminate from the machine.Once the
jam is cleared the unit will return to normal operation.
Upon exit, the laminated pouch may be hot and soft. For the best
quality and to prevent jamming remove the pouch immediately. Place
the pouch on to a flat surface to cool. Take care when handling a
hot pouch. Always remove laminated document before starting next
laminate. For best performance/results, use the Exit Tray.
Turning off the Machine – If the top power button is pushed, the
machine will go into cool-down mode. The heaters will turn off, but
the rollers will still run until the unit reaches the desired temperature
to turn off completely. This functionality reduces long term wear and
tear to the unit.
1.
2.
3.
5.
6.
7.
8.
9.
11.
12.
10.
4.
13.
14.

6
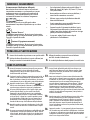
TROUBLESHOOTING
STORAGE & CLEANING
PRODUCT REGISTRATION / WORLDWIDE WARRANTY
Problem Possible cause Solution
No glowing ‘blue’ Power on LED Machine not switched on
Switch on machine at right rear side and at wall
socket. Press power standby button
Pouch does not completely seal
the item
Item may be too thick to laminate
Maximum document thickness equals .03". Pass
through laminator a second time
Pouch is lost in the machine
Pouch is jammed
Machine will automatically reverse the document.
If jam is not completely cleared Reverse button
will blink/flash. Press and hold reverse button
while pulling on pouch to completely remove
pouch.
Pouch was inserted open end first
Pouch was not centered on entry
Pouch was not straight upon entry
Empty pouch was used
Damaged rollers or adhesive on rollers
Pouch is damaged after lamination Damaged rollers or adhesive on rollers
Pass cleaning sheets through the machine to test
and clean rollers
Turning off the Machine – If the top power button is pushed, the machine will go into cool-down mode. The heaters will turn off, but the
rollers will still run until the unit reaches the desired temperature to turn off completely. This functionality reduces long term wear and tear
to the unit. Unplug the machine at the wall. The outside of the machine can be cleaned with a damp cloth. Do not use solvents or flammable
materials to polish the machine. Cleaning sheets can be purchased for use with the machine. When the machine is warm – run the sheets
through the machine to clean any residue off the rollers. For optimum performance, it is recommended that cleaning sheets are used with
the machine regularly. (Cleaning sheet order code #5320603).
Thank you for purchasing a Fellowes product. Please visit www.fellowes.com/register to register your product and benefit from product
news, feedback and offers. Product details can be found listed on the rating plate positioned on the rear side or underside of the machine.
Fellowes warrants all parts of the laminator to be free of defects in material and workmanship for 2 years from the date of purchase
by the original consumer. If any part is found to be defective during warranty period, your sole and exclusive remedy will be repair
or replacement, at Fellowes’ option and expense, of the defective part. This warranty does not apply in cases of abuse, mishandling or
unauthorised repair. Any implied warranty, including that of merchantability or fitness for particular purpose, is hereby limited in duration
to the appropriate warranty period set forth above. In no event shall Fellowes be liable for any consequential damages attributable to this
product. This warranty gives you specific legal rights. You may have other legal rights that vary from this warranty. The duration, terms
and conditions of this warranty are valid worldwide, except where different limitations, restrictions or conditions may be required by local
law. For more details or to obtain services under this warranty, please contact Fellowes or your dealer.
NEED HELP?
Let our experts help you with a solution.
Customer Service...
www.fellowes.com
Always call Fellowes before contacting your place of purchase, see the rear cover for contact details.
Consider registering your machine at www.fellowes.com/register to receive updates and additional information.

COMMANDES DE LA PLASTIFIEUSE
CONSIGNES DE SÉCURITÉ IMPORTANTES - À CONSERVER
7
A Interrupteur Marche/Arrêt
B Bouton de veille/mise sous tension
C
Bouton Prêt (chaud/froid)
D Bouton marche arrière
E Poignées de transport
F Fente d'introduction de pochette/document
G Support d'introduction (lumineux)
H Sortie de pochette/document
I Interface utilisateur lumineuse
J Plateau de réception
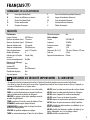
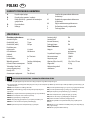
CAPACITÉS
Performance
Largeur d'entrée A3/318mm
Épaisseur de pochette (min.) 75 microns
Épaisseur de pochette (max.) 250 microns
Temps de chauffe estimé 55 secondes
Temps de refroidissement 30 à 60 minutes
Vitesse de plastification jusqu'à 75cm/min
Nombre de rouleaux 6
Indicateur prêt à l'emploi Voyant & bip
Inverser/
Inverser automatiquement Oui/Oui
Mécanisme de déblocage/
anti-bourrage Oui
Interface DEL Oui
Arrêt automatique Oui (30 minutes)
Plastification de photos Oui
Sans transporteur Oui
Plateau de réception Oui
Fiche technique
Tension 220-240V CA
Fréquence 50-60Hz
Puissance en watts 1200 W
Ampères 5,2 A
Dimensions (H x l x P) 121mm x 546mm x 172mm
Poids net 6,5 kg
Épaisseur de document max. 0,8 mm
- Cet appareil est destiné uniquement à être utilisé à l'intérieur. Brancher la machine à une prise secteur facile d'accès.
- Pour éviter les risques de court-circuit, ne pas utiliser l'appareil à proximité de l'eau et ne pas renverser d'eau sur l'appareil, sur
le cordon d'alimentation ou sur la prise secteur.
VEILLER à ce que la machine repose sur une surface stable.
FAIRE un essai de plastification avec du papier brouillon et
régler la machine avant de plastifier les documents.
ENLEVER les agrafes et autres objets métalliques avant de
procéder à la plastification.
TENIR la machine à l'écart des sources de chaleur et d'eau.
ÉTEINDRE la machine après chaque utilisation.
DÉBRANCHER la machine si elle ne doit pas être utilisée
pendant une longue période.
UTILISER des pochettes adaptées aux réglages.
TENIR les animaux domestiques à l'écart lors de l'utilisation.
NE PAS laisser le cordon en contact avec des surfaces chaudes.
NE PAS laisser le cordon pendre de placards ou d'étagères.
NE PAS utiliser l'appareil si le cordon est endommagé.
NE PAS tenter d'ouvrir ou de réparer la machine.
NE PAS dépasser les performances spécifiées pour la machine.
NE PAS laisser des personnes mineures utiliser la machine.
NE PAS plastifier des objets tranchants ou métalliques (p. ex.:
agrafes et trombones).
NE PAS plastifier des documents sensibles à la chaleur (p. ex.:
tickets, échographies, etc.) sur les réglages à chaud.
NE PAS plastifier une pochette vide.
FRANÇAIS
FR

8
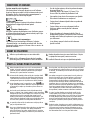
AVANT DE PLASTIFIER
Veillez à ce que la machine repose sur une surface stable.
Vérifiez qu’il y a suffisamment d’espace derrière la machine
(50cm min.) pour que les documents en sortent sans difficulté.
Branchez la machine à une prise secteur facile d’accès. Si la prise
est équipée d’un interrupteur, le mettre sous tension.
Installez le Plateau de sortie pour une plastification optimale.
ÉTAPES À SUIVRE POUR PLASTIFIER
1.
2.
3.
4.
FONCTIONS ET CONSEILS
Système avancé de suivi de pochette
Cette fonction détecte les bourrages de papier et avertit l’utilisateur
lorsqu’un tel bourrage se produit ou lorsqu’un document tarde à sortir
de la machine. De plus, cette fonction inverse automatiquement le
document tant qu’il existe un bourrage de papier.
AutoSense
Système unique qui détecte l’épaisseur de la pochette et sélectionne
automatiquement le réglage de plastification optimal.
Fonction «Marche arrière»
Pour éjecter la pochette de plastification en cours d’utilisation, appuyer
sur le bouton de marche arrière et le maintenir enfoncé jusqu’à ce que
la pochette soit éjectée de la machine.
Fonction « Arrêt automatique »
Si la machine n’a pas fonctionné depuis 30 minutes, la fonction
«Économie d’énergie» met la machine en mode de veille. Pour faire
fonctionner la machine, appuyer sur le bouton «Mise sous tension» du
panneau de commande.
t Pour des résultats optimaux, utilisez des pochettes thermiques
de marque Fellowes ®:
Enhance 80, Impress 100, Capture 125, Protect 175 et
Preserve 250 et les pochettes de plastification à froid
t Cette machine n’a pas besoin d’un transporteur pour plastifier.
Elle est dotée d’un mécanisme sans transporteur.
t Toujours placer le document à plastifier dans une pochette de
la taille appropriée.
t Toujours effectuer un test avec un document de taille et
d’épaisseur similaires avant de plastifier le document
proprement dit.
t Préparer la pochette et le document à plastifier. Placer le
document dans la pochette, il doit être bien centré et toucher le
bord déjà soudé. Vérifier que la pochette n’est pas trop grande
pour le document.
t Le cas échéant, recouper les bords une fois le document
plastifié et refroidi.
Allumez la machine (le bouton se trouve sur le côté arrière droit de la
machine). Les boutons du panneau de configuration, qui font partie du
système de voyants de vérification, clignotent une fois pour indiquer à
l’utilisateur que le système fonctionne correctement.
Le bouton de veille (Standby) s’allume en bleu pâle. La machine chauffe
automatiquement pour procéder à une plastification à chaud. Remarque
: la plastifieuse offre une fonction de capteur automatique qui reconnaît
automatiquement l’épaisseur de la pochette insérée dans la plastifieuse.
Lorsque la machine est prête, le voyant LED vert « Prêt »
et les
voyants LED du plateau d’entrée s’allument et un bip émis par la machine
se fait entendre pour indiquer que la machine est prête à effectuer une
plastification.
Pour basculer entre la plastification à froid et la plastification à chaud,
appuyez sur le bouton « Prêt » (Ready) pendant 2 secondes. Pour indiquer
le changement de mode, l’icône Prêt clignote 3 fois en bleu lors du passage
initial en mode Froid, puis le voyant Ready (Prêt) s’éteint lorsque la
machine est prête à effectuer une plastification à froid. Remarque : pour
utiliser la fonction de plastification à froid après une plastification à chaud,
vous devez laisser la plastifieuse refroidir pendant 30 à 60 minutes.
Le voyant LED s’allume en bleu et la machine émet un bip lorsqu’elle est
prête pour la plastification à froid.
Pour revenir à la plastification de pochette à chaud après une plastification
à froid, appuyez sur le voyant LED « Prêt » (Ready) et maintenez-le
enfoncé. Avant d’insérer une pochette, patientez tant que le voyant Prêt
ne devient pas vert pour indiquer que la machine est prête à effectuer une
plastification à chaud.
Placez la pochette, côté scellé en premier, dans la voie d’entrée de pochette /
document. Maintenez la pochette bien droite et au centre de la voie d’entrée
du document ; ne la maintenez pas de biais. Utilisez les marquages d’entrée
comme guides.
Cette machine est équipée d’un Système avancé de suivi de pochette qui
détecte les bourrages de papier et avertit l’utilisateur si un bourrage se
produit. Lorsqu’un bourrage de papier est détecté, la machine inverse
automatiquement le document pendant pour faciliter l’élimination du
bourrage. Le bouton d’inversion s’allume au déclenchement de l’inversion
automatique. Après quoi, si le bourrage de papier n’est pas complètement
éliminé, le bouton Inverser (Reverse) clignote/flashe. Appuyez sur le bouton
d’inversion et maintenez-le enfoncé tout en tirant sur la pochette pour
retirer complètement de la machine le document à plastifier.Une fois le
bourrage éliminé, la machine recommence à fonctionner normalement.
À sa sortie, la pochette plastifiée peut être chaude et molle. Pour des
résultats optimaux et pour prévenir tout bourrage, retirez la pochette
immédiatement. Placez la pochette sur une surface plane pour lui permettre
de refroidir, Manipulez toute pochette chaude avec précaution. Retirez
toujours le document plastifié avant de lancer la plastification suivante.
Pour obtenir des performances/résultats optimaux, utilisez le plateau de
sortie (Exit).
Éteindre la machine : la machine passe en mode de refroidissement si vous
appuyez sur le bouton d’alimentation supérieur.Les éléments de chauffage
se désactivent, mais les rouleaux continuent de fonctionner tant que la
température n’atteint pas la valeur souhaitée pour la désactivation totale.
Cette fonctionnalité réduit l’usure à long terme de la machine.
5.
6.
7.
8.
9.
11.
12.
10.
13.
14.

9
DÉPANNAGE
RANGEMENT ET NETTOYAGE
Problème Cause éventuelle Solution
Le voyant DEL bleu de mise sous
tension n'est pas allumé
La machine n'est pas sous tension
Allumez la machine sur le côté arrière droit et à
la prise murale. Appuyez sur le bouton de veille
de l’alimentation
La pochette ne scelle pas
complètement le document
Le document est peut-être trop épais pour la
plastification
L'épaisseur de document maximale est 0,8mm
La pochette n'est pas ressortie de
la machine
La pochette est bloquée
La machine inverse automatiquement le
document. Si le bourrage de papier n’est pas
complètement éliminé, le bouton Inverser
(Reverse) clignote/flashe. Appuyez sur le
bouton d’inversion et maintenez-le enfoncé
tout en tirant sur la pochette pour la retirer
complètement.
La pochette a été introduite dans la machine,
le côté ouvert en premier
La pochette n'a pas été placée au centre de
la fente d'introduction
La pochette n'était pas droite au moment de
son introduction dans la machine
Une pochette vide a été utilisée
Les rouleaux sont endommagés ou ont un
résidu de colle
La pochette sort endommagée de
la machine
Les rouleaux sont endommagés ou ont un
résidu de colle
Faites passer des feuilles de nettoyage dans la
machine pour tester et nettoyer les rouleaux
Éteindre la machine : la machine passe en mode de refroidissement si vous appuyez sur le bouton d’alimentation supérieur. Les
éléments de chauffage se désactivent, mais les rouleaux continuent de fonctionner tant que la température n’atteint pas la valeur
souhaitée pour la désactivation totale. Cette fonctionnalité réduit l’usure à long terme de la machine. Éteindre la machine en la
débranchant de la prise secteur. Laisser la machine refroidir. L'extérieur de la machine peut être nettoyé à l'aide d'un chiffon humide.
Ne pas utiliser de solvants ni de produits inflammables pour nettoyer la machine. Des feuilles de nettoyage peuvent être achetées
et utilisées dans la machine. Alors que la machine est chaude, passer les feuilles dans la machine pour éliminer les résidus déposés
sur les rouleaux. Pour une performance optimale, il est conseillé de passer régulièrement des feuilles de nettoyage dans la machine.
(Référence de commande des feuilles nettoyantes #5320603).
BESOIN D'AIDE ?
Nos experts sont là pour vous aider.
Service clientèle ... www.fellowes.com
Toujours appeler Fellowes avant de contacter le lieu d'achat de la machine; voir coordonnées à la dernière page de couverture.
Ne pas oublier d'enregistrer votre machine sur www.fellowes.com/register pour recevoir des mises à jour et des informations
complémentaires.
ENREGISTREMENT DU PRODUIT / GARANTIE MONDIALE
Merci d’avoir acheté un produit Fellowes. Veuillez visiter www.fellowes.com/register pour enregistrer votre produit et recevoir les
dernières nouvelles, commentaires et offres concernant les produits. Les détails concernant le produit figurent sur la plaque signalétique
à l'arrière ou sur le dessous de la machine. Fellowes garantit que les pièces de la plastifieuse ne présenteront aucun défaut de matière
ou de fabrication pendant 2 ans à compter de la date d'achat par le premier utilisateur. En cas de défaut pendant la période de
garantie, votre recours unique et exclusif sera la réparation ou l'échange, au choix et aux frais de Fellowes, de la pièce défectueuse.
Cette garantie ne s'applique pas en cas d'utilisation abusive, de mauvaise manipulation ou de réparation non autorisée. Toute garantie
implicite, y compris la garantie de qualité marchande ou d'aptitude à une utilisation particulière, est ainsi limitée dans le temps à la
période de garantie appropriée indiquée ci-dessus. Fellowes ne sera en aucun cas responsable des dommages indirects attribuables à
ce produit. Cette garantie vous donne des droits légaux spécifiques, mais il est possible que vous ayez d'autres droits légaux différents
de ceux conférés par cette garantie. La durée et les conditions de cette garantie sont valides dans le monde entier, sauf lorsque des
limitations, restrictions ou conditions différentes peuvent être exigées par la loi locale. Pour obtenir un complément d'information ou
des services aux termes de la présente garantie, veuillez contacter Fellowes ou votre revendeur.

CONTROLES DE LA PLASTIFICADORA
INSTRUCCIONES IMPORTANTES DE SEGURIDAD - CONSÉRVELAS PARA UN USO FUTURO
10
A Interruptor de encendido/apagado
B Botón de espera/encendido
C Botón de preparado (caliente/frío)
D Botón de retroceso
E Asas para transportar
F Ranura de entrada de bolsa/documento
G Bandeja de entrada (iluminada)
H Salida de bolsa/documento
I Interfaz de usuario iluminada
J Bandeja de salida
CARACTERÍSTICAS
Rendimiento
Anchura de entrada A3/318mm
Grosor de la bolsa (mínimo) 75 micras
Grosor de la bolsa (máximo) 250 micras
Tiempo estimado de
calentamiento 55 segundos
Tiempo de enfriamiento 30-60 minutos
Velocidad de plastificado hasta 75cm/min
Número de rodillos 6
Indicación de listo Luz & señal sonora
Retroceso/Retroceso automático Sí/Sí
Motor "Clear Path"/Antiatasco Sí
Interfaz de luces LED Sí
Apagado automático Sí (30 min.)
Capacidad para fotografías Sí
Sin transporte Sí
Bandeja de salida Sí
Especificaciones técnicas
Tensión 220-240V CA
Frecuencia 50-60Hz
Potencia 1200 vatios
Amperios 5,2 amperios
Dimensiones
(altura x anchura x profundidad) 121mm x 546mm x 172mm
Peso neto 6,5Kg
Grosor máximo del documento 0,8mm
- La máquina debe usarse únicamente en interiores. Conecte la máquina a un tomacorriente de fácil acceso.
- Para evitar una descarga eléctrica, no utilice la máquina cerca del agua, no derrame agua sobre la máquina, el cable o el enchufe.
ASEGÚRESE de que la máquina se encuentra sobre una
superficie estable.
PRUEBE plastificar trozos de hoja y ajuste la máquina antes de
los plastificados definitivos.
RETIRE las grapas y los otros objetos de metal antes de
plastificar.
MANTENGA la máquina alejada de fuentes de calor y de
agua.
APAGUE la máquina después de cada uso.
DESCONECTE la máquina de la toma cuando no vaya a ser
utilizada durante un largo período de tiempo.
UTILICE bolsas diseñadas para el uso con la configuración
apropiada.
MANTÉNGALA alejada de los animales cuando se esté
utilizando.
NO deje el cable de corriente en contacto con superficies
calientes.
NO deje el cable de corriente colgando de armarios o
estanterías.
NO utilice la máquina si el cable de corriente está dañado.
NO intente abrir o reparar la máquina.
NO sobrepase el rendimiento estimado de la máquina.
NO permita que los menores utilicen este aparato.
NO plastifique objetos afilados o de metal (p. ej: grapas, clips
de papel).
NO plastifique documentos sensibles al calor (p. ej.: tiquets,
ultrasonidos, etc.) en ajustes calientes.
NO plastifique bolsas vacías.
ESPAÑOL
ES

11
ANTES DE PLASTIFICAR
Asegúrese de que la máquina está sobre una superficie estable.
Compruebe que haya suficiente espacio libre (mín. 50 cm) detrás
de la máquina para que los objetos pasen libremente.
Enchufe la máquina a una toma de red de fácil acceso. Conecte el
suministro de red.
Coloque en la Bandeja de salida todo lo necesario para obtener los
mejores resultados de plastificación.
CÓMO PLASTIFICAR
1.
2.
3.
4.
CARACTERÍSTICAS & CONSEJOS
Sistema de seguimiento de bolsa avanzado
Esta característica detectará y alertará al usuario si hay un atasco o si
el documento no se ha introducido completamente en la máquina en
el tiempo de funcionamiento normal. Automáticamente se anulará el
documento hasta que no resuelva el atasco.
AutoSense
Exclusivo sistema que detecta el grosor de la bolsa y se ajusta
automáticamente a una configuración de plastificado óptima.
Función “Retroceso”
Para expulsar la bolsa de plastificado durante el uso, oprima y
sostenga el botón de retroceso hasta que la bolsa haya salido
completamente de la máquina.
Función de ‘Apagado automático’
Si la máquina deja de funcionar durante 30 minutos, la función ‘Modo
de suspensión’ pondrá a la máquina en modo de espera. Para activar
la máquina, pulse el botón de ‘Encendido’ en el panel de control.
t Para obtener un mejor resultado, utilice las bolsas térmicas de
la marca Fellowes ®:
Enhance 80, Impress 100, Capture 125, Protect 175,
Preserve250 y bolsas en frío
t Esta máquina no necesita transportador para plastificar. Es un
mecanismo sin transportador.
t Coloque siempre el objeto que desea plastificar en una bolsa de
tamaño adecuado.
t Pruebe siempre la plastificación con un tamaño y grosor
similares antes del proceso final.
t Prepare una bolsa y un objeto para plastificar. Coloque
el objeto dentro de una bolsa centrada y tocando la guía
delantera. Compruebe que la bolsa no es demasiado grande
para el objeto.
t Si es necesario, recorte cualquier exceso de material alrededor
del objeto después de la plastificación y el enfriamiento.
Encienda la alimentación (el interruptor se encuentra en la parte
posterior derecha de la máquina). Los botones del panel de control
parpadearán una vez como parte de una comprobación del sistema de
luces para garantizar el correcto funcionamiento.
El botón de En espera se activará con un suave brillo azul. La
máquina se calienta automáticamente para realizar el plastificado
en caliente. Nota: la plastificadora contiene AutoSense, que reconoce
automáticamente el espesor de la bolsa que inserte en la plastificadora.
Cuando la máquina esté preparada, se encenderán el LED verde de
“Preparado” y el LED de la bandeja de entrada. La máquina
emitirá un pitido para indicar que está lista para plastificar.
Para alternar entre la plastificación en Frío y Caliente, presione el
botón de “Preparado” y manténgalo presionado durante 2 segundos.
El icono de Preparado parpadeará tres veces en azul cuando se alterne
inicialmente a la modalidad de en Frío para indicar que la modalidad
se ha cambiado y, a continuación, se apagará la luz de preparación
hasta que la máquina esté lista para la plastificación en frío. Nota:
para utilizar la configuración de plastificado en frío después de un
plastificado en caliente tendrá que esperar a que la plastificadora se
enfríe durante unos 30 – 60 minutos.
Cuando la máquina esté lista para la plastificación en frío, se iluminará
el LED de “Preparado” en azul y la máquina pitará.
Para volver a cambiar a la plastificación de bolsa en caliente tras la
plastificación en frío, presione el LED de “Preparado” y manténgalo
presionado. Espere hasta que la luz de preparado cambie a color verde
para indicar que está preparada para la plastificación en caliente antes
de insertar la bolsa.
Coloque la bolsa, el borde sellado primero, en la entrada de la bolsa/
documento. Mantenga la bolsa recta y centrada en la entrada de
documento, no en un ángulo. Utilice las marcas de entrada como guía.
Esta unidad está equipada con un Sistema de seguimiento de bolsa
avanzado que detectará y alertará al usuario si hay algún atasco. Si se
detecta un atasco, la máquina anulará el documento automáticamente
de para ayudar a resolver el atasco. El botón de retroceso se encenderá
mientras está activado el retroceso automático. Tras lo anterior, si
no se ha resuelto completamente el atasco, el botón de retroceso
parpadeará. Presione el botón de retroceso y manténgalo presionado
mientras tira de la bolsa para extraer completamente el laminado
de la máquina.Una vez resuelto el atasco, la unidad volverá a su
funcionamiento normal.
Cuando saque la bolsa laminada, ésta podría estar caliente y blanda.
Para obtener la mejor calidad y evitar atascos, extraiga la bolsa
inmediatamente. Coloque la bolsa en una superficie plana para que se
enfríe. Tenga cuidado al manejar una bolsa caliente. Extraiga siempre
el documento laminado antes de iniciar el siguiente laminado. Para
obtener el mejor rendimiento/resultado, utilice la Bandeja de salida.
Apagar la máquina: si se pulsa el botón de alimentación superior, la
máquina pasará a la modalidad de enfriamiento. Los calentadores
se apagarán, pero los rodillos continuarán funcionando hasta que la
unidad alcance la temperatura deseada para apagarse completamente.
Esta funcionalidad reduce el desgaste de la unidad a largo plazo.
5.
6.
7.
8.
9.
11.
12.
10.
13.
14.

12
LOCALIZACIÓN Y RESOLUCIÓN DE PROBLEMAS
ALMACENAMIENTO & LIMPIEZA
Problema Posible causa Solución
No brilla la luz LED ‘azul’ de
encendido
La máquina no está encendida
Encienda la máquina en la parte posterior
derecha y en la toma de pared. Pulse el
botón de En espera de encendido.
La bolsa no sella el artículo por
completo
Es posible que el artículo sea demasiado
grueso para ser plastificado
El grosor máximo del documento equivale a
0,8mm/0,04 pulg
La bolsa se ha perdido en la
máquina
La bolsa está atascada
La máquina anulará automáticamente
el documento. Si no se ha resuelto
completamente el atasco, el botón
de retroceso parpadeará. Presione y
mantenga presionado el botón de retroceso
mientras tira de la bolsa para extraerla
completamente.
Se introdujo primero el extremo abierto
de la bolsa
La bolsa no estaba centrada al entrar
La bolsa no estaba derecha al entrar
Se utilizó una bolsa vacía
Los rodillos están dañados o tienen
adhesivo
Después del plastificado, la
bolsa queda dañada
Los rodillos están dañados o tienen
adhesivo
Pase toallitas limpiadoras por la máquina
para comprobar el correcto funcionamiento
y la limpieza de los rodillos
Apagar la máquina: si se pulsa el botón de alimentación superior, la máquina pasará a la modalidad de enfriamiento. Los calentadores
se apagarán, pero los rodillos continuarán funcionando hasta que la unidad alcance la temperatura deseada para apagarse
completamente. Esta funcionalidad reduce el desgaste de la unidad a largo plazo. Desenchufe la máquina. Deje que la máquina se
enfríe. El exterior de la máquina puede limpiarse con un trapo húmedo. No utilice disolventes o materiales inflamables para pulir la
máquina. Se pueden adquirir toallitas limpiadoras para utilizar en la máquina. Cuando la máquina esté caliente, pase las toallitas por la
máquina para limpiar los residuos de los rodillos. Para un rendimiento óptimo, se recomienda el uso regular de toallitas limpiadoras en
la máquina. (Código de pedido de toallitas limpiadoras # 5320603).
¿NECESITA AYUDA?
Deje que nuestros expertos lo ayuden con una solución.
Servicio de atención al cliente...
www.fellowes.com
Llame siempre a Fellowes antes de comunicarse con el lugar de la compra, busque en la tapa posterior los datos de contacto.
Considere registrar su máquina en www.fellowes.com/register para recibir actualizaciones e información adicional.
REGISTRO DEL PRODUCTO/GARANTÍA MUNDIAL
Gracias por comprar un producto Fellowes. Visite www.fellowes.com/register para registrar su producto y beneficiarse con noticias,
información y ofertas del producto. Se pueden encontrar los detalles acerca del producto en la placa situada en la parte trasera o
inferior de la máquina. Fellowes garantiza durante 2 años desde la fecha de compra del consumidor original que todas las partes
de la plastificadora carecen de defectos materiales y de fabricación. Si se encontrara alguna parte defectuosa durante el período de
garantía, se reparará o sustituirá la parte defectuosa a cuenta de Fellowes. Esta garantía queda anulada en caso de uso abusivo,
manipulación indebida o reparación no autorizada. Toda garantía implícita, incluida la de comercialización o idoneidad para un uso
particular, está limitada en su duración al período de garantía pertinente establecido anteriormente. En ningún caso será Fellowes
responsable de los daños emergentes que puedan atribuirse a este producto. La presente garantía le otorga derechos legales específicos.
Pueden ampararle otros derechos legales que no se contemplan en esta garantía. La duración, los términos y las condiciones de esta
garantía son válidos en todo el mundo, excepto en aquellos lugares en los que la legislación local imponga limitaciones, restricciones
o condiciones diferentes. Para más detalles o para obtener servicios conforme a esta garantía, comuníquese con Fellowes o con su
distribuidor.

BEDIENELEMENTE
WICHTIGE SICHERHEITSVORSCHRIFTEN – BITTE AUFBEWAHREN
13
A Ein/Aus-Schalter
B Standby-/Netztaste
C Taste „Bereit“ (Heiß/Kalt)
D Rücklauf-Taste
E Tragegriffe
F Eingabeschlitz für Laminierfolie/Dokument
G Einlegestütze (beleuchtet)
H Ausgabeschlitz für Laminierfolie/Dokument
I Beleuchtetes Bedienfeld
J Auffangschale
LEISTUNGSMERKMALE
Leistung
Eingabebreite A3 / 318 mm
Folienstärke (min.) 75 Micron
Folienstärke (max.) 250 Micron
Geschätzte Aufwärmzeit 55 Sekunden
Abkühlzeit 30 - 60 Minuten
Laminiergeschwindigkeit bis zu 75 cm/Min.
Anzahl Walzen 6
Anzeige der
Betriebsbereitschaft Anzeigeleuchte & Signalton
Rückgabe/Autom. Rückgabe Ja/Ja
Anti-Stau-Funktion Ja
LED-Bedieneroberfläche Ja
Automatisch ausschalten Ja (nach 30 Min.)
Für Fotos geeignet Ja
Ohne Schutzkarton (Carrier) Ja
Auffangschale Ja
Technische Daten
Spannung 220-240 V AC
Frequenz 50-60 Hz
Leistung 1200 Watt
Stromstärke 5,2 A
Abmessungen (HxBxT) 121 mm x 546 mm x 172 mm
Nettogewicht 6,5 kg
Max. Dokumentendicke 0,8 mm
- Das Gerät ist nur zum Gebrauch in Innenräumen vorgesehen. Schließen Sie das Gerät an einer einfach zu erreichenden Netzdosean.
- Zur Verhütung eines Stromschlags das Gerät nicht in der Nähe von Wasser betreiben und sicherstellen, dass kein Wasser auf Gerät,
Netzkabel oder Steckdose gelangt.
IMMER sicherstellen, dass das Gerät auf einer sicheren und stabilen
Fläche steht.
IMMER zunächst einige Probeblätter laminieren und das Gerät
entsprechend einstellen, bevor die endgültigen Dokumente laminiert
werden.
IMMER vor dem Laminieren zunächst Heftklammern und andere
Metallartikel entfernen.
IMMER das Gerät vor Wärme und Feuchtigkeit schützen.
IMMER das Gerät nach Gebrauch ausschalten.
IMMER den Gerätestecker aus der Netzsteckdose ziehen, wenn das
Gerät für längere Zeit nicht benutzt wird.
IMMER geeignete Laminierfolien verwenden und entsprechende
Einstellungen vornehmen.
IMMER Tiere während des Gebrauchs vom Gerät fernhalten.
KEINESFALLS das Stromkabel mit heißen Oberflächen in Berührung
kommen lassen.
KEINESFALLS das Stromkabel von Schränken oder Regalen
herunterhängen lassen.
KEINESFALLS das Gerät benutzen, wenn das Stromkabel beschädigt ist.
KEINESFALLS versuchen, das Gerät zu öffnen oder selbst zu
reparieren.
KEINESFALLS die angegebene Leistung des Geräts überschreiten.
KEINESFALLS Minderjährigen erlauben, das Gerät zu verwenden.
KEINESFALLS scharfe oder spitze Objekte bzw. Metallgegenstände
(z.B. Heft- oder Büroklammern) laminieren.
KEINESFALLS wärmeempfindliche Dokumente (z. B. Tickets,
Ultraschallbilder usw.) bei heißen Einstellungen laminieren.
KEINESFALLS leere Folien laminieren.
DEUTSCH
DE

14
VOR DEM LAMINIEREN
Vergewissern Sie sich, dass das Gerät auf einer sicheren und
stabilen Fläche steht.
Achten Sie darauf, dass ausreichend freier Platz (mind. 50 cm) auf
der Geräterückseite vorhanden ist, damit die Objekte ungehindert
durchlaufen können.
Schließen Sie das Gerät an eine einfach zu erreichende
Wandsteckdose an. Schalten Sie die Stromzufuhr ein (bei
abschaltbaren Steckdosen).
Beste Laminierergebnisse erzielen Sie, wenn Sie das Ausgabefach
verwenden.
LAMINIEREN
1.
2.
3.
4.
FUNKTIONSMERKMALE & TIPPS
Erweitertes Folienverfolgungssystem
Diese Funktion erkennt, wenn es zu einem Fehleinzug kommt oder
das Dokument das Gerät nicht in der normalen Betriebszeit durchläuft,
und informiert den Benutzer entsprechend. Das Dokument wird
automatisch zurückgegeben, damit der Stau beseitigt werden kann.
AutoSense
Erkennt die Folienstärke und nimmt automatisch die optimalen
Laminiereinstellungen vor
Rücklauffunktion
Um eine Laminiertasche während des Vorgangs auszuwerfen, halten
Sie die Taste ‘Reverse’ gedrückt, bis die Tasche aus der Maschine
transportiert wird.
Funktion „Automatisch ausschalten“
Wird das Gerät 30 Minuten nicht genutzt, schaltet die “Schlafmodus”-
Funktion das Gerät automatisch auf Standby. Zum Aktivieren des
Geräts drücken Sie die Netz-Taste auf dem Bedienfeld.
t Beste Ergebnisse erzielen Sie, wenn Sie Laminierfolien der
Marke Fellowes ® verwenden:
Enhance 80, Impress 100, Capture 125, Protect 175,
Preserve250
und Kalttaschen
t Zum Laminieren mit diesem Gerät sind keine Schutzkartons
(Carrier) erforderlich. Es handelt sich um einen Mechanismus
ohne Schutzkartons.
t Legen Sie das zu laminierende Objekt immer in eine
Laminierfolie der passenden Größe ein.
t Laminieren Sie stets ein Probeexemplar ähnlicher Größe und
Dicke, bevor Sie das endgültige Dokument laminieren.
t Bereiten Sie die Laminierfolie und das zu laminierende Objekt
vor. Legen Sie das Objekt mittig in die Laminierfolie, sodass es
die vordere versiegelte Kante berührt. Achten Sie darauf, dass
die Laminierfolie nicht zu groß für das Objekt ist.
t Gegebenenfalls schneiden Sie überschüssiges Material nach
dem Laminieren und Abkühlen ab.
Schalten Sie das Gerät ein (der Netzschalter befindet sich hinten rechts
am Gerät). Die Tasten der Bedienfläche leuchten kurz auf. Dies ist
Teil einer Anzeigesystemprüfung, die den ordnungsgemäßen Betrieb
sicherstellt.
Die Standby-Taste schaltet sich ein und leuchtet hellblau. Das Gerät
wird automatisch für die Heißlamination erhitzt. Hinweis: Das
Laminiergerät verfügt über eine AutoSensor-Funktion, die automatisch
die Stärke der Folie erkennt, die Sie in das Gerät einlegen.
Wenn das Gerät bereit ist, leuchten die grüne LED-Taste „Bereit“
und die
LED-Taste des Zufuhrfachs. Zusätzlich gibt das
Gerät einenSignalton aus, um anzuzeigen, dass es bereit für den
Laminiervorgang ist.
Um zwischen kaltem und heißem Laminieren zu wechseln, halten Sie
die Taste „Bereit“ 2 Sekunden lang gedrückt. Das Symbol „Bereit“
blinkt 3 Mal blau, wenn erstmals in den Modus „Kalt“ gewechselt
wird, um anzuzeigen, dass der Modus geändert wurde. Anschließend
schaltet sich die Anzeige „Bereit“ aus, bis das Gerät bereit für die
Kaltlamination ist. Hinweis: Wenn Sie nach der Heißlamination eine
Kaltlamination durchführen möchten, müssen Sie unter Umständen
30 - 60 Minuten warten, bis das Gerät abgekühlt ist.
Wenn das Gerät bereit für die Kaltlamination ist, leuchtet die LED-
Anzeige „Bereit“ blau, und das Gerät gibt einen Signalton aus.
Um nach einer Kaltlamination zu einer Heißlamination zu wechseln,
halten Sie die LED-Taste „Bereit“ gedrückt. Warten Sie, bis die
Anzeige „Bereit“ grün leuchtet, um die Bereitschaft des Geräts für die
Heißlamination anzuzeigen, bevor Sie eine Folie einlegen.
Legen Sie die Folie mit der versiegelten Seite zuerst in den Folien-/
Dokumentschacht ein. Führen Sie die Folie gerade und mittig (nicht
schräg) in den Eingabeschacht ein. Orientieren Sie sich an den
Eingabemarkierungen.
Dieses Gerät verfügt über ein erweitertes Folienverfolgungssystem, das
Fehleinzüge erkennt und den Benutzer entsprechend informiert. Bei
Erkennung eines Staus gibt das Gerät das Dokument automatisch lang
zurück, damit der Stau beseitigt werden kann. Wenn die automatische
Rückgabefunktion aktiv ist, leuchtet die Rückgabetaste. Wenn der Stau
daraufhin nicht vollständig beseitigt wurde, blinkt die Rückgabetaste.
Halten Sie die Rückgabetaste gedrückt, während Sie an der Folie
ziehen, um sie aus dem Gerät zu entfernen.Nachdem der Stau
beseitigt wurde, wechselt das Gerät wieder in den Normalbetrieb.
Nach dem Entfernen ist die herausgenommene Folie möglicherweise
warm und weich. Um eine optimale Qualität zu erzielen und
Staubildung zu vermeiden, nehmen Sie die Folie umgehend heraus.
Legen Sie die Folie zum Abkühlen auf einer ebenen Fläche ab. Seien
Sie beim Umgang mit erhitzten Folien vorsichtig. Entfernen Sie
stets das vorherige laminierte Dokument, bevor Sie das nächste zu
laminierende Dokument einlegen. Beste Ergebnisse erzielen Sie, wenn
Sie das Ausgabefach verwenden.
Ausschalten des Geräts – Wenn Sie den oberen Netzschalter betätigen,
wechselt das Gerät in den Abkühlmodus. Die Heizelemente werden
deaktiviert, während die Walzen weiterhin laufen, bis das Gerät
die erforderliche Temperatur erreicht hat, um sich vollständig
auszuschalten. Diese Funktion verringert Abnutzung und Verschleiß.
5.
6.
7.
8.
9.
11.
12.
10.
13.
14.

15
FEHLERSUCHE UND -BEHEBUNG
AUFBEWAHRUNG & REINIGUNG
Problem Mögliche Ursache Lösung
Netz-LED leuchtet nicht blau Gerät nicht eingeschaltet
Schalten Sie das Gerät am Netzschalter hinten rechts
ein, nachdem Sie es an eine Steckdose angeschlossen
haben. Drücken Sie die Standby-Taste.
Objekt nicht vollständig in der Folie
eingeschlossen
Das zu laminierende Objekt ist unter
Umständen zu dick.
Max. Dokumentenstärke 0,8 mm
Folie ist im Gerät verschwunden
Folie steckt fest
Das Gerät gibt das Dokument automatisch wieder
aus. Wenn ein Stau nicht vollständig beseitigt
wurde, blinkt die Rückgabetaste. Halten Sie die
Rückgabetaste gedrückt, während Sie an der
Folie ziehen, um sie vollständig aus dem Gerät zu
entfernen.
Folie wurde mit der offenen Seite zuerst
eingeführt
Folie war beim Eingeben nicht korrekt
zentriert
Folie war beim Eingeben nicht gerade
ausgerichtet
Es wurde eine leere Folie laminiert
Walzen beschädigt oder verklebt
Folie nach dem Laminieren
beschädigt
Walzen beschädigt oder verklebt
Reinigungsblätter durch das Gerät laufen lassen, um
Walzen zu testen und zu reinigen
Ausschalten des Geräts – Wenn Sie den oberen Netzschalter betätigen, wechselt das Gerät in den Abkühlmodus. Die Heizelemente
werden deaktiviert, während die Walzen weiterhin laufen, bis das Gerät die erforderliche Temperatur erreicht hat, um sich vollständig
auszuschalten. Diese Funktion verringert Abnutzung und Verschleiß. Ziehen Sie den Netzstecker des Geräts. Lassen Sie das Gerät
abkühlen. Die Außenseite des Geräts kann mit einem feuchten Tuch abgewischt werden. Verwenden Sie keine Lösungsmittel oder leicht
entzündliche Materialien zum Abwischen des Geräts. Zur Reinigung des Geräts können separat erhältliche Reinigungsblätter verwendet
werden. Die Blätter durch das warme Gerät laufen lassen, um Rückstände von den Walzen zu entfernen. Um eine optimale Funktion zu
gewährleisten, empfehlen wir, regelmäßig Reinigungsblätter zu verwenden. (Bestellnummer 5320603)
BRAUCHEN SIE HILFE?
Unsere Experten helfen Ihnen gern.
Kundendienst...
www.fellowes.com
Rufen Sie stets zuerst Fellowes an, bevor Sie sich an Ihre Verkaufsstelle wenden. Die Kontaktangaben finden Sie auf der hinteren
Umschlagseite.
Wir empfehlen Ihnen, Ihr Gerät bei www.fellowes.com/register zu registrieren, damit Sie aktuelle Miteilungen und zusätzliche
Informationen erhalten.
PRODUKTREGISTRIERUNG/WELTWEITE GARANTIE
Vielen Dank, dass Sie sich für ein Produkt von Fellowes entschieden haben. Bitte registrieren Sie Ihr Produkt auf der Website
www.fellowes.com/register, damit wir Sie über Produktneuheiten, Feedback und Angebote informieren können. Die Produktdaten
finden Sie auf dem Typenschild an der Rück- bzw. Unterseite des Geräts. Fellowes gewährt auf alle Teile des Geräts eine Garantie
gegen Herstellungs- und Materialfehler für 2 Jahre ab dem Kaufdatum durch den Erstkäufer. Wird ein Teil des Gerätes während
der Gewährleistungsfrist als defekt befunden, wird dieses nach Fellowes' Ermessen und auf dessen Kosten entweder repariert oder
ausgetauscht. Andere Gewährleistungsansprüche bestehen nicht. Die Garantieansprüche entfallen, falls das Produkt bestimmungsfremd
gebraucht, falsch gehandhabt oder unbefugt repariert wird. Jede Art gesetzlicher Gewährleistung, einschließlich der Gewährleistung
der Durchschnittsqualität oder der Eignung für einen bestimmten Zweck, ist hierdurch auf die oben angegebene Garantiefrist
beschränkt. In keinem Fall haftet Fellowes für Folgeschäden, die auf dieses Produkt zurückzuführen sind. Diese Garantie bietet Ihnen
bestimmte Rechtsansprüche, gegebenenfalls haben Sie auch andere Rechtsansprüche, die von dieser Garantie abweichen. Die Dauer,
Bestimmungen und Konditionen dieser Garantie gelten weltweit, außer dort, wo durch die regionale Gesetzgebung eventuell andere
Haftungsbeschränkungen, Einschränkungen oder Bedingungen vorgeschrieben sind. Für weitere Angaben oder für Leistungsansprüche
im Rahmen dieser Garantie wenden Sie sich bitte an Fellowes oder Ihre zuständige Vertretung.

COMANDI DELLA PLASTIFICATRICE
IMPORTANTI ISTRUZIONI DI SICUREZZA - CONSERVARE PER FUTURO RIFERIMENTO
16
A Tasto di accensione/spegnimento
B Pulsante di stand-by/"Power On"
C Pulsante "Ready" (a caldo/a freddo)
D Pulsante "Reverse"
E Maniglie per il trasporto
F Fessura per inserimento pouch/documento
G Guida di immissione (illuminata)
H Uscita pouch/documento
I Interfaccia utente illuminata
J Vaschetta di uscita
CARATTERISTICHE TECNICHE
Prestazioni
Larghezza imboccatura A3 / 318 mm
Spessore pouch (min) 75 micron
Spessore pouch (max) 250 micron
Tempo di riscaldamento
stimato 55 secondi
Tempo di raffreddamento 30-60 minuti
Velocità di plastificazione fino a 75 cm/min.
Numero di rulli 6
Indicatore di pronto macchina Spia e segnale acustico
Inversione/
Inversione automatica Sì/Sì
Dispositivo anti-inceppamento/
ClearPath Sì
Interfaccia LED Sì
Spegnimento automatico Sì (30 min.)
Adatta per foto Sì
Senza carrier Sì
Vaschetta di uscita Sì
Specifiche tecniche
Tensione 220-240 V CA
Frequenza 50-60 Hz
Potenza 1200 Watt
Amp 5,2 Amp
Dimensioni (AxLxP) 121 mm x 546 mm x 172 mm
Peso netto 6,5 Kg
Spessore massimo dei
documenti 0,8 mm
- La macchina è idonea a un uso esclusivamente in interni. Collegare la macchina a una presa di corrente facilmente accessibile.
- Per scongiurare il rischio di una scossa elettrica, non utilizzare la macchina vicino all'acqua, non versare acqua sulla macchina, sul
cavo o sulla presa di alimentazione.
VERIFICARE che la macchina sia posizionata su una superficie
stabile.
ESEGUIRE alcune prove e regolare la macchina prima di
procedere alla plastificazione dei documenti.
RIMUOVERE punti e altri oggetti metallici prima di
plastificare.
TENERE la macchina lontana da fonti di calore e acqua.
SPEGNERE la macchina dopo ogni utilizzo.
SCOLLEGARE la macchina in caso di periodi di inutilizzo
prolungati.
UTILIZZARE pouch apposite e con le impostazioni corrette.
TENERE lontano dagli animali durante l'utilizzo.
NON lasciare il cavo di alimentazione a contatto con superfici
calde.
NON lasciar pendere il cavo di alimentazione da scaffali o
ripiani.
NON utilizzare la macchina se il cavo di alimentazione è
danneggiato.
NON aprire né tentare di riparare la macchina.
NON superare i limiti di prestazione indicati.
NON consentire a minori di utilizzare la macchina.
NON plastificare oggetti taglienti o metallici (ad es.: punti
metallici, graffette).
NON plastificare documenti sensibili al calore (ad es.: biglietti,
ecografie, ecc.) con impostazioni a caldo.
NON plastificare una pouch vuota.
ITALIANO
IT

17
PRIMA DELLA PLASTIFICAZIONE
Accertarsi che la macchina sia posizionata su una superficie stabile.
Verificare che dietro alla macchina vi sia spazio sufficiente (min
50 cm) per consentire la fuoriuscita dei documenti.
Collegare la macchina a una presa di corrente facilmente
accessibile. Accendere l’alimentazione.
Per risultati di plastificazione ottimali preparare il vassoio di uscita.
COME PLASTIFICARE
1.
2.
3.
4.
FUNZIONI E SUGGERIMENTI
Sistema avanzato di localizzazione della pouch
Questa funzione rileva e informa l’utente se una pouch non è
stata introdotta correttamente o se un documento non è passato
completamente attraverso la macchina nel normale tempo di
funzionamento, e viene automaticamente invertito il senso di
scorrimento del documento fino a eliminare l’inceppamento.
AutoSense
Sistema unico che rileva lo spessore delle pouch e adatta
automaticamente le impostazioni di plastificazione per un risultato
ottimale.
Funzione "Reverse"
Se la macchina rimane inattiva per 30 minuti, questa funzione attiva
la modalità di stand-by. Per utilizzare la macchina, premere il pulsante
"Power On" sul pannello di controllo.
Funzione di ‘Spegnimento automatico’
Se la macchina rimane inattiva per 30 minuti, questa funzione attiva
la modalità di stand-by. Per utilizzare la macchina, premere il pulsante
"Power On" sul pannello di controllo.
t Per risultati ottimali, utilizzare pouch termiche Fellowes ®:
Enhance 80, Impress 100, Capture 125, Protect 175, Preserve
250 e pouch a freddo
t Questa macchina non utilizza un carrier per plastificare; si
tratta infatti di un meccanismo senza carrier.
t Utilizzare sempre pouch per la plastificazione adatte alle
dimensioni del documento.
t Eseguire sempre alcune prove con modelli di dimensioni e
spessore simili ai documenti da plastificare.
t Preparare la pouch e il documento da plastificare. Inserire
il documento al centro della pouch e a contatto con il bordo
sigillato di quest’ultima. Accertarsi che la pouch non sia troppo
grande per il documento da plastificare.
t Se necessario, tagliare il bordo in eccesso dopo la
plastificazione e il raffreddamento.
Azionare l’interruttore di accensione (situato sulla parte posteriore
destra della macchina). I pulsanti del pannello di controllo
lampeggeranno una volta per verificare e garantire il corretto
funzionamento delle spie luminose.
Il pulsante di stand-by si illuminerà emettendo una tenue luce blu. La
macchina si riscalda automaticamente per la plastificazione a caldo.
Nota: la plastificatrice è dotata del sistema AutoSense, che riconosce
automaticamente lo spessore della pouch inserita nella plastificatrice.
Quando la macchina è pronta, il LED verde "Ready" e il
LED del vassoio di caricamento si illuminano e la macchina emette un
segnale acustico per indicare che è pronta per la plastificazione.
Per passare dalla plastificazione a caldo a quella a freddo, tenere
premuto il pulsante "Ready" per due secondi. L’icona "Ready"
lampeggerà 3 volte nel colore blu quando si passa inizialmente
alla modalità a freddo per indicare l’avvenuto cambio di modalità,
poi la spia "Ready" si spegne fino a quando la macchina è pronta
per la plastificazione a freddo. Nota: per usare l’impostazione di
plastificazione a freddo subito dopo quella a caldo, è necessario
attendere 30-60 minuti per il raffreddamento della plastificatrice.
Quando la macchina è pronta per la plastificazione a freddo, il LED
"Ready" si illumina nel colore blu e la macchina emette un segnale
acustico.
Per passare nuovamente alla plastificazione a caldo delle pouch dopo
la plastificazione a freddo, tenere premuto il LED "Ready". Prima di
inserire la pouch, attendere fino a quando la spia di pronto diventa
verde ad indicare che la macchina è pronta per la plastificazione a
caldo.
Inserire il bordo sigillato della pouch nella fessura di ingresso per
pouch/documenti. Mantenere la pouch allineata e centrata rispetto
all’ingresso per documenti, non inclinata. Usare i simboli riportati
sull’ingresso come guida.
Questa unità è dotata di un Sistema avanzato di localizzazione della
pouch che rileva e informa l’utente se una pouch non è stata introdotta
correttamente. Se viene rilevato un inceppamento la macchina inverte
automaticamente il senso di scorrimento del documento per per
cercare di eliminare l’inceppamento. Il pulsante "Reverse" si illumina
mentre si attiva l’inversione automatica. Se con questa operazione
l’inceppamento non è stato eliminato completamente, il pulsante
"Reverse" lampeggerà. Tenere premuto il pulsante "Reverse" tirando
contemporaneamente la pouch per rimuovere del tutto la plastica dalla
macchina.Una volta eliminato l’inceppamento, l’unità riprenderà a
funzionare normalmente.
Quando viene espulsa, la pouch plastificata può essere calda e soffice.
Per una qualità ottimale e per evitare inceppamenti rimuovere
immediatamente la pouch. Posizionare la pouch su una superficie
piatta a raffreddare. Prestare attenzione quando si maneggia una
pouch calda. Rimuovere sempre il documento plastificato prima di
avviare la plastificazione successiva. Per prestazioni/risultati ottimali,
usare il vassoio di uscita.
Spegnere la macchina – Se viene premuto il pulsante di accensione in
alto, la macchina entra nella modalità di raffreddamento. I riscaldatori
si spengono ma i rulli continuano a girare finché l’unità non raggiunge
la temperatura desiderata per spegnersi del tutto. Questa funzionalità
riduce l’usura a lungo termine dell’unità.
5.
6.
7.
8.
9.
11.
12.
10.
13.
14.

18
RISOLUZIONE DEI PROBLEMI
CONSERVAZIONE E PULIZIA
Problema Possibile causa Solution
L'indicatore LED blu "Power On"
è spento
La macchina è spenta
Accendere la macchina sulla parte posteriore
destra e collegandola alla presa di corrente.
Premere il pulsante di accensione/stand-by
La pouch non sigilla
completamente il documento
Il documento potrebbe essere troppo spesso
per poter essere plastificato
Lo spessore massimo della pouch corrisponde a
0,8 mm / 0,04"
La pouch è rimasta all'interno della
plastificatrice
La pouch è inceppata
La macchina inverte automaticamente il senso di
scorrimento del documento. Se l’inceppamento
non è stato eliminato completamente, il pulsante
"Reverse" lampeggerà. Tenere premuto il
pulsante "Reverse" tirando contemporaneamente
la pouch per rimuoverla del tutto.
La pouch è stata inserita con il lato aperto
in avanti
a pouch non era centrata al momento
dell'inserimento
La pouch non era diritta al momento
dell'inserimento
È stata utilizzata una pouch vuota
Rulli danneggiati o presenza di adesivo sui
rulli
La pouch si è danneggiata dopo la
plastificazione
Rulli danneggiati o presenza di adesivo sui
rulli
Inserire i fogli di pulizia nel dispositivo per
verificare lo stato dei rulli e pulirli
Spegnere la macchina – Se viene premuto il pulsante di accensione in alto, la macchina entra nella modalità di raffreddamento. I
riscaldatori si spengono ma i rulli continuano a girare finché l’unità non raggiunge la temperatura desiderata per spegnersi del tutto.
Questa funzionalità riduce l’usura a lungo termine dell’unità. Staccare la spina dalla presa a muro. Lasciar raffreddare la macchina.
La parte esterna può essere pulita con un panno umido. Non utilizzare solventi o materiali infiammabili per pulire la plastificatrice. È
possibile acquistare degli appositi fogli di pulizia da usare con questa macchina. Quando il dispositivo è ancora caldo, inserire i fogli nel
dispositivo per eliminare i residui dai rulli. Per prestazioni ottimali si raccomanda di utilizzare regolarmente i fogli di pulizia. (Codice di
ordine fogli di pulizia n. 5320603).
BISOGNO DI AIUTO?
I nostri esperti sono a disposizione per risolvere qualsiasi problema.
Servizio Clienti...
www.fellowes.com
Prima di contattare il rivenditore, rivolgersi sempre a Fellowes. Vedere le informazioni di contatto sul retro del presente documento.
È possibile registrare il prodotto all'indirizzo www.fellowes.com/register per ricevere aggiornamenti e ulteriori informazioni.
REGISTRAZIONE DEL PRODOTTO / GARANZIA A LIVELLO MONDIALE
Grazie per aver acquistato un prodotto Fellowes. Registrare il prodotto sul sito www.fellowes.com/register per conoscere tutte le novità,
le informazioni e le offerte sui prodotti. I dati relativi al prodotto sono riportati nella targhetta posizionata sul lato posteriore o sotto la
macchina. Fellowes garantisce l'assenza di difetti materiali e di lavorazione della plastificatrice e dei suoi componenti per 2 anni dalla
data di acquisto da parte del cliente originale. Se durante il periodo di garanzia vengono rilevati difetti in un componente, il rimedio
unico ed esclusivo sarà la riparazione o la sostituzione, a discrezione e a spese di Fellowes, del componente difettoso. Questa garanzia
non si applica in caso di utilizzo errato, manipolazione impropria o riparazione non autorizzata. Qualsiasi garanzia implicita, compresa
quella di vendibilità o idoneità a un particolare scopo, viene qui limitata in durata al periodo di garanzia indicato sopra. In nessun caso
Fellowes può essere ritenuta responsabile per danni indiretti attribuibili a questo prodotto. Questa garanzia conferisce all'utente diritti
legali specifici. L'utente può essere detentore di altri diritti legali diversi da quelli indicati dalla presente garanzia. La durata, i termini e
le condizioni della presente garanzia sono validi in tutto il mondo, tranne nei casi in cui le normative locali impongano limiti, restrizioni
o condizioni diverse. Per ulteriori informazioni o per ottenere l'assistenza prevista dalla garanzia, contattare Fellowes o il rivenditore.

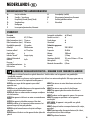
BEDIENINGSKNOPPEN LAMINEERMACHINE
BELANGRIJKE VEILIGHEIDSINSTRUCTIES - BEWAREN VOOR TOEKOMSTIG GEBRUIK
19
A Aan/uit-schakelaar
B Standby- / stroomknop
C Knop Ready (Gereed) (heet)/(koud)
D Terugdraaiknop
E Handgrepen
F Invoeropening lamineerhoes/document
G Invoerplankje (verlicht)
H Uitvoeropening lamineerhoes/document
I Verlichte gebruikersinterface
J Uitvoerlade
OVERZICHT
Prestatie
Invoerbreedte A3 / 318 mm
Dikte lamineerhoes (min.) 75 micron
Dikte lamineerhoes (max.) 250 micron
Gemiddelde opwarmtijd 55 seconden
Afkoeltijd 30-60 minuten
Lamineersnelheid tot 75 cm/min.
Aantal rollen 6
Indicatie "Gereed" Lampje & piep
Achteruit/Automatisch
achteruit Ja/Ja
Doorvoer /
anti-blokkeermechanisme Ja
LED interface Ja
Automatisch uitschakelen Ja (30 min.)
Geschikt voor foto's Ja
Zonder drager Ja
Uitvoerlade Ja
Technische gegevens
Spanning 220-240V AC
Frequentie 50-60Hz
Wattage 1200 watt
Amperes 5,2 Amp.
Afmetingen (HxBxD) 121 mm x 546 mm x 172 mm
Netto gewicht 6,5 kg
Maximale documentdikte 0,8 mm
- Het apparaat is uitsluitend bestemd voor gebruik binnenshuis. Steek de stekker van het apparaat in een gemakkelijke
toegankelijk stopcontact.
- Om elektrische schok te voorkomen, mag het apparaat niet in de buurt van water worden gebruikt. Ook mag er geen water op
het apparaat, het snoer of het stopcontact worden gemorst.
ALTIJD ervoor zorgen dat het apparaat op een stabiel
oppervlak staat.
ALTIJD eerst een proefblad lamineren en het apparaat instellen
voordat u originele documenten lamineert.
ALTIJD alle nietjes en andere metalen voorwerpen verwijderen
vóór het lamineren.
ALTIJD het apparaat uit de buurt van water en warmtebronnen
houden.
ALTIJD het apparaat uitschakelen wanneer u klaar bent.
ALTIJD de stekker uit het stopcontact trekken wanneer u het
apparaat langere tijd niet gaat gebruiken.
ALTIJD de juiste lamineerhoezen en de juiste instellingen
gebruiken.
ALTIJD dieren uit de buurt van het apparaat houden tijdens het
gebruik.
NOOIT het netsnoer in contact laten komen met een heet
oppervlak.
NOOIT het netsnoer aan een kast of plank hangen.
NOOIT het apparaat gebruiken wanneer het netsnoer is
beschadigd.
NOOIT proberen om het apparaat te openen of te repareren.
NOOIT de opgegeven specificaties van het apparaat
overschrijden.
NIET DOEN - dit apparaat is niet geschikt voor gebruik
doorkinderen.
NOOIT scherpe of metalen voorwerpen lamineren (bv. nietjes,
papierclips).
NOOIT warmtegevoelige documenten lamineren (bv. tickets,
echografieën enz) met hete instellingen.
NOOIT lege hoezen lamineren.
NEDERLANDS
NL

20
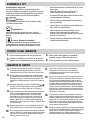
VOORDAT U GAAT LAMINEREN
Zorg ervoor dat het apparaat op een stabiel oppervlak staat.
Controleer of er voldoende vrije ruimte (min. 50 cm) achter het
apparaat is voor een ongehinderde doorvoer van de documenten.
Steek de stekker van het apparaat in een gemakkelijk
toegankelijk stopcontact. Schakel de stroomtoevoer in.
Voeg de uitvoerlade toe voor de beste lamineerresultaten.
LAMINEREN IN STAPPEN
1.
2.
3.
4.
KENMERKEN & TIPS
Geavanceerd hoes-volgsysteem
Deze functie detecteert of de invoer niet goed verloopt en of het
document niet volledig door het apparaat is gevoerd binnen de normale
werkingstijd. De gebruiker wordt hierop geattendeerd en het document
wordt automatisch achteruit gevoerd tot het niet meer blokkeert.
AutoSense
Uniek systeem dat de hoesdikte meet en zelf de optimale instelling
voor lamineren hieraan aanpast.
Terugdraaifunctie
Om de lamineerhoes tijdens gebruik uit te werpen, houdt u de
achteruit-knop ingedrukt totdat de lamineerhoes uit het apparaat is
geworpen.
De functie ‘Automatisch uitschakelen’
Als het apparaat gedurende 30 minuten niet wordt gebruikt, zal
de slaapstandfuntie het apparaat in stand-by zetten. Druk op het
bedieningspaneel op de stroomknop om het apparaat in te zetten.
t Gebruik thermische hoezen van het merk Fellowes ® voor het
beste resultaat:
Enhance 80, Impress 100, Capture 125, Protect 175,
Preserve250 en hoezen voor koude laminering
t Deze machine heeft geen drager nodig om te lamineren. Het is
een lamineerapparaat zonder drager.
t Plaats het te lamineren document altijd in een lamineerhoes
met de juiste afmeting.
t Lamineer altijd eerst een testdocument van dezelfde grootte en
dikte voordat u het origineel lamineert.
t Maak de lamineerhoes en het document klaar voor het
lamineren. Plaats het document in het midden van de
lamineerhoes tegen de gesealde rand aan. De hoes mag niet te
groot zijn voor het document.
t Knip na het lamineren en afkoelen indien nodig overtollig
materiaal rondom het document af.
Zet de stroom aan (rechtsachter op het apparaat). De knoppen
van het bedieningspaneel knipperen één keer als deel van een
controlelampjesysteem, om er zeker van te zijn dat alles goed werkt.
De knop Standby gaat aan en brandt met een zachte blauwe gloed.
Het apparaat wordt automatisch opgewarmd voor hete laminering.
Opmerking: de laminator is voorzien van AutoSense. Hiermee wordt
automatisch de hoesdikte bepaald zodra u deze hoes in de laminator
plaatst.
Wanneer het apparaat klaar is, gaan de groene LED
"
Ready
"
en de LED’s van de invoerlade branden en laat het apparaat een
pieptoon horen om aan te geven dat het klaar is voor laminering.
U kunt overschakelen tussen hete en koude laminering door de knop
"Ready" 2 seconden ingedrukt te houden. Het pictogram "Ready"
zal 3 keer in blauw knipperen wanneer u naar de koude modus
overschakelt om aan te geven dat deze modus is geactiveerd. Het
lampje "Ready" gaat dan uit tot het apparaat klaar is voor koude
laminering. Opmerking: als u de koude-instelling wilt gebruiken na
hitte-laminering, moet u wachten tot de laminator is afgekoeld. Dit kan
30 - 60 minuten duren.
Wanneer het apparaat klaar is voor koude laminering, gaat de "LED
"Ready"" blauw branden en produceert het apparaat een pieptoon.
Als u na koude laminering weer op hete laminering wilt overschakelen,
houdt u de "LED "Ready"" ingedrukt. Wacht tot het lampje Ready groen
gaat branden om aan te geven dat het apparaat klaar is voor hete
laminering voordat u een hoes invoert.
Plaats de hoes met de dichte rand naar voren in de hoes-/
documentinvoer. Houd de hoes recht en in het midden van
de documentinvoeropening, niet onder een hoek. Gebruik de
invoermarkeringen als richtlijn.
Dit apparaat is met een geavanceerd hoes-volgsysteem uitgerust dat
verkeerde invoer detecteert en de gebruiker hiervoor waarschuwt.
Als een doorvoerstoring wordt gedetecteerd, draait het apparaat
automatisch de doorvoerrichting van het document om om de storing
te verhelpen. Wanneer de doorvoerrichting is omgedraaid, gaat de
knop Achteruit automatisch branden. Als de storing niet volledig is
verholpen, gaat de knop Achteruit knipperen. Houd de knop Achteruit
ingedrukt terwijl u aan het hoesje trekt om het laminaat volledig uit
het apparaat te verwijderen.Zodra de storing is verholpen, gaat het
apparaat weer normaal werken.
Als het gelamineerde hoesje het apparaat uitkomt, kan dit heet en
zacht zijn. Verwijder het hoesje onmiddellijk. Dit resulteert in de beste
kwaliteit en voorkomt doorvoerstoringen. Plaats het hoesje op een
plat oppervlak om af te koelen. Weest voorzichtig wanneer u een heet
hoesje hanteert. Verwijder altijd eerst het gelamineerde document
voordat u met de volgende laminering begint. Gebruik de uitvoerlade
voor een optimale prestatie/resultaten.
Het apparaat uitzetten - Als de bovenste aan/uit-knop wordt ingedrukt,
komt het apparaat in de afkoelingsmodus. De hitte-elementen worden
uitgezet, maar de rollers blijven nog doorlopen tot het apparaat
de gewenste temperatuur voor volledig uitzetten bereikt. Deze
functionaliteit reduceert slijtage van het apparaat op langere termijn.
5.
6.
7.
8.
9.
11.
12.
10.
13.
14.
Pagina se încarcă...
Pagina se încarcă...
Pagina se încarcă...
Pagina se încarcă...
Pagina se încarcă...
Pagina se încarcă...
Pagina se încarcă...
Pagina se încarcă...
Pagina se încarcă...
Pagina se încarcă...
Pagina se încarcă...
Pagina se încarcă...
Pagina se încarcă...
Pagina se încarcă...
Pagina se încarcă...
Pagina se încarcă...
Pagina se încarcă...
Pagina se încarcă...
Pagina se încarcă...
Pagina se încarcă...
Pagina se încarcă...
Pagina se încarcă...
Pagina se încarcă...
Pagina se încarcă...
Pagina se încarcă...
Pagina se încarcă...
Pagina se încarcă...
Pagina se încarcă...
Pagina se încarcă...
Pagina se încarcă...
Pagina se încarcă...
Pagina se încarcă...
Pagina se încarcă...
Pagina se încarcă...
Pagina se încarcă...
Pagina se încarcă...
Pagina se încarcă...
Pagina se încarcă...
Pagina se încarcă...
Pagina se încarcă...
Pagina se încarcă...
Pagina se încarcă...
Pagina se încarcă...
Pagina se încarcă...
Pagina se încarcă...
Pagina se încarcă...
Pagina se încarcă...
Pagina se încarcă...
Pagina se încarcă...
Pagina se încarcă...
Pagina se încarcă...
Pagina se încarcă...
Pagina se încarcă...
Pagina se încarcă...
Pagina se încarcă...
Pagina se încarcă...
Pagina se încarcă...
Pagina se încarcă...
Pagina se încarcă...
Pagina se încarcă...
Pagina se încarcă...
-
 1
1
-
 2
2
-
 3
3
-
 4
4
-
 5
5
-
 6
6
-
 7
7
-
 8
8
-
 9
9
-
 10
10
-
 11
11
-
 12
12
-
 13
13
-
 14
14
-
 15
15
-
 16
16
-
 17
17
-
 18
18
-
 19
19
-
 20
20
-
 21
21
-
 22
22
-
 23
23
-
 24
24
-
 25
25
-
 26
26
-
 27
27
-
 28
28
-
 29
29
-
 30
30
-
 31
31
-
 32
32
-
 33
33
-
 34
34
-
 35
35
-
 36
36
-
 37
37
-
 38
38
-
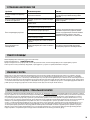 39
39
-
 40
40
-
 41
41
-
 42
42
-
 43
43
-
 44
44
-
 45
45
-
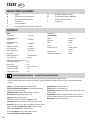 46
46
-
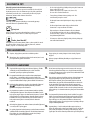 47
47
-
 48
48
-
 49
49
-
 50
50
-
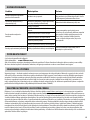 51
51
-
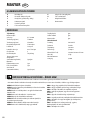 52
52
-
 53
53
-
 54
54
-
 55
55
-
 56
56
-
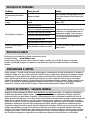 57
57
-
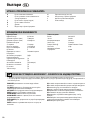 58
58
-
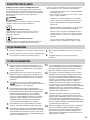 59
59
-
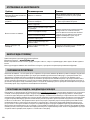 60
60
-
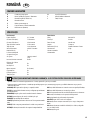 61
61
-
 62
62
-
 63
63
-
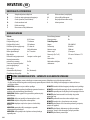 64
64
-
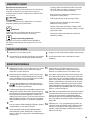 65
65
-
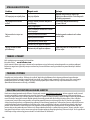 66
66
-
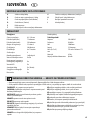 67
67
-
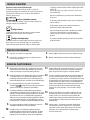 68
68
-
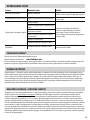 69
69
-
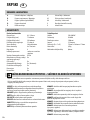 70
70
-
 71
71
-
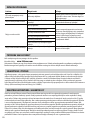 72
72
-
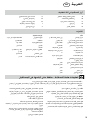 73
73
-
 74
74
-
 75
75
-
 76
76
-
 77
77
-
 78
78
-
 79
79
-
 80
80
-
 81
81


Fellowes Jupiter 2 A3 Manual de utilizare
- Categorie
- Laminatoare
- Tip
- Manual de utilizare
în alte limbi
- français: Fellowes Jupiter 2 A3 Manuel utilisateur
- slovenčina: Fellowes Jupiter 2 A3 Používateľská príručka
Lucrări înrudite
-
Fellowes Neptune 3 A3 Manual de utilizare
-
Fellowes Calibre A3 Manual de utilizare
-
Fellowes Calibre A4 Manual de utilizare
-
Fellowes Venus A3 Manual de utilizare
-
-
Fellowes Cosmic 2 A3 Manual de utilizare
-
-
-
-