
Philips Sonicare
3 Series


1


6
Introduction
Congratulations on your purchase and welcome to Philips! To fully
benet from the support that Philips offers, register your product at
www.philips.com/welcome.
Important
Read this user manual carefully before you use the
appliance and save it for future reference.
Danger
- Keep the charger away from water. Do not place
or store it over or near water contained in a
bathtub, washbasin, sink etc. Do not immerse the
charger in water or any other liquid. After cleaning,
make sure the charger is completely dry before
you connect it to the mains.
Warning
- The mains cord cannot be replaced. If the mains
cord is damaged, discard the charger.
- Always have the charger replaced with one of the
original type in order to avoid a hazard.
- Do not use the charger outdoors or near heated
surfaces.
- If the appliance is damaged in any way
(brush head, toothbrush handle or charger),
stop using it. This appliance contains no
serviceable parts. If the appliance is damaged,
contact the Consumer Care Centre in your
country (see chapter ‘Guarantee and support’).
ENGLISH

- This appliance can be used by children aged
from 8 years and above and by persons with
reduced physical, sensory or mental capabilities
or lack of experience and knowledge if they
have been given supervision or instruction
concerning use of the appliance in a safe way
and if they understand the hazards involved.
Children shall not play with the appliance.
Cleaning and user maintenance shall not be made by
children unless they are older than 8 and supervised.
Caution
- Do not clean the brush head, the handle or the
charger in the dishwasher.
- If you have had oral or gum surgery in the
previous 2 months, consult your dentist before
you use the toothbrush.
- Consult your dentist if excessive bleeding occurs
after using this toothbrush or if bleeding continues
to occur after 1 week of use. Also consult your
dentist if you experience discomfort or pain when
you use the Sonicare.
- The Sonicare toothbrush complies with the safety
standards for electromagnetic devices. If you have
a pacemaker or other implanted device, contact
your physician or the device manufacturer of the
implanted device prior to use.
- If you have medical concerns, consult your doctor
before you use the Sonicare.
ENGLISH 7

- This appliance has only been designed for cleaning
teeth, gums and tongue. Do not use it for any
other purpose. Stop using the appliance and
contact your doctor if you experience any
discomfort or pain.
- The Sonicare toothbrush is a personal care device
and is not intended for use on multiple patients in
a dental practice or institution.
- Stop using a brush head with crushed or bent
bristles. Replace the brush head every 3 months
or sooner if signs of wear appear. Do not use
other brush heads than the ones recommended
by the manufacturer.
- If your toothpaste contains peroxide, baking soda
or bicarbonate (common in whitening toothpastes),
thoroughly clean the brush head with soap and
water after each use. This prevents possible
cracking of the plastic.
Electromagnetic elds (EMF)
This Philips appliance complies with all applicable standards and
regulations regarding exposure to electromagnetic elds.
ENGLISH8

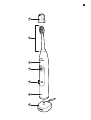
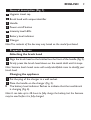
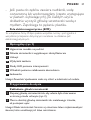
General description (Fig. 1)
1 Hygienic travel cap
2 Brushheadwithuniqueidentier
3 Handle
4 Power on/off button
5 Intensity level LEDs
6 Battery level indicator
7 Charger
Note: The contents of the box may vary based on the model purchased.
Preparing for use
Attaching the brush head
1 Align the brush head so the bristles face the front of the handle (Fig. 2).
2 Firmly press the brush head down on the metal shaft until it stops.
Note: Sonicare brush heads come with easily identiable icons to identify your
brush head.
Charging the appliance
1 Put the plug of the charger in a wall socket.
2 Place the handle on the charger (Fig. 3).
, Thebatterylevelindicatorashestoindicatethatthetoothbrush
is charging (Fig. 4).
Note: It can take up to 48 hours to fully charge the battery, but the Sonicare
may be used before it is fully charged.
ENGLISH 9

Using the appliance
Brushing instructions
1 Wet the bristles and apply a small amount of toothpaste.
2 Place the toothbrush bristles against the teeth at a slight angle
towards the gumline (Fig. 5).
3 Press the power on/off button to switch on the Sonicare.
4 Apply light pressure to maximise Sonicare’s effectiveness and let
the Sonicare toothbrush do the brushing for you. Do not scrub.
5 Gently move the brush head slowly across the teeth in a small back
and forth motion so the longer bristles reach between the teeth.
Continue this motion throughout the brushing cycle.
Note: To make sure you brush evenly throughout the mouth, divide the mouth
into 4 sections using the Quadpacer feature (see chapter ‘Features’).
6 Brush each section for 30 seconds for a total brushing time of
2 minutes. Start with section 1 (outside top teeth) and then brush
section 2 (inside top teeth). Continue with section 3 (outside
bottomteeth)andnallybrushsection4(insidebottomteeth)
(Fig. 6).
Note: After you have completed the brushing cycle, you can spend additional
time brushing the chewing surfaces of your teeth and areas where staining
occurs. You may also brush your tongue, with the toothbrush switched on or
off, as you prefer.
The Sonicare is safe to use on:
- Braces (brush heads may wear out more quickly when used on braces)
- Dental restorations (llings, crowns, veneers, implants)
Note: When the Sonicare is used in clinical studies, the handle has to be fully
charged, set to the high intensity level and the Easy-start feature must be
deactivated.
ENGLISH10

Intensity levels
- Low: 1 LED indicator light (Fig. 7)
- Medium: 2 LED indicator lights (Fig. 8)
- High: 3 LED indicator lights (Fig. 9)
Note: To adjust the intensity level, press the power on/off button to let
your Sonicare cycle through the intensity levels in the following order:
High, Medium, Low, High etc. Each touch of the button allows you to select
the next available intensity level.
Battery status (when handle is not on charger)
- A yellow battery level indicator indicates a low charge.
- A green battery level indicator indicates a high charge.
- The battery level indicator turns off when the battery is in between
a low and a high charge.
Note: When you hear 3 beeps and the yellow LED of the battery level
indicator ashes, this means the battery charge is below 10% and the
toothbrush should be recharged.
Note: When you hear 2 sets of 5 beeps, this means the Sonicare will not
operate and needs to be recharged.
Note: To keep the battery fully charged at all times, you may keep the
Sonicare on the charger when not in use.
Features
Quadpacer
- The Quadpacer is an interval timer that has a short beep and pause
to remind you to brush the 4 sections of your mouth. The Quadpacer
feature works at all 3 intensity levels (Fig. 10).
ENGLISH 11

Smartimer
The Smartimer indicates that your brushing cycle is complete when it
automatically switches off the toothbrush at the end of the brushing cycle.
Dentists recommend brushing at least 2 minutes twice a day.
Note: After brushing for 1.5 seconds, pressing the power on/off button causes
the toothbrush to pause. After a pause of 30 seconds, the Smartimer resets.
Easy-start
The Easy-start feature gently increases power over the rst 14 brushings
to let you get used to brushing with the Sonicare.
The Easy-Start feature only works at the High intensity level.
This Sonicare model comes with the Easy-start feature deactivated.
To activate or deactivate the Easy-start feature:
1 Attach your brush head to the handle.
2 Place the handle in the plugged-in charger.
3 Activate or deactivate Easy-start:
, To activate Easy-start: Press and hold the power on/off button for
2seconds.Youhear2beepsandthebatterylevelindicatorashes
green to indicate that the Easy-start feature has been activated.
, To deactivate Easy-start: Press and hold the power on/off button
for 2 seconds. You hear 1 beep and the battery level indicator
ashesyellowtoindicatethattheEasy-startfeaturehasbeen
deactivated.
Note: Each of the rst 14 brushings must be at least 1 minute in length to
properly move through the Easy-start ramp-up cycle.
Note: Using the Easy-start feature beyond the initial ramp-up period is not
recommended and reduces Sonicare’s effectiveness in removing plaque.
ENGLISH12

Cleaning
Do not clean the brush head, handle or charger in the dishwasher.
Toothbrush handle
1 Remove the brush head and rinse the metal shaft area with warm
water (Fig. 11).
Do not push on the rubber seal on the metal shaft with sharp objects,
as this may cause damage.
2 Use a damp cloth to wipe the entire surface of the handle.
Brush head
1 Rinse the brush head and bristles after each use (Fig. 12).
2 Remove the brush head from the handle and rinse the brush head
connection at least once a week with warm water.
Charger
1 Unplug the charger.
2 Use a damp cloth to wipe the surface of the charger.
Storage
If you are not going to use the appliance for an extended period of time,
remove the mains plug from the wall socket. Then clean the appliance and
store it in a cool and dry place away from direct sunlight.
Replacement
Brush head
Replace Sonicare brush heads every 3 months to achieve optimal results.
Only use genuine Philips Sonicare replacement brush heads that are
suitable for this model.
ENGLISH 13

Ordering accessories
To buy accessories or spare parts, visit www.shop.philips.com/
service or go to your Philips dealer. You can also contact the Philips
Consumer Care Centre in your country (see the worldwide guarantee
leaet for contact details).
Recycling
- This symbol on a product means that the product is covered by
European Directive 2012/19/EU (Fig. 13).
- This symbol means that the product contains a built-in rechargeable
battery covered by European Directive 2006/66/EC which cannot be
disposed of with normal household waste. Follow the instructions in
section ‘Removing the rechargeable battery’ to remove the
battery (Fig. 14).
- Inform yourself about the local separate collection system for
electrical and electronic products and rechargeable batteries.
Follow local rules and never dispose of the product and rechargeable
batteries with normal household waste. Correct disposal of old
products and rechargeable batteries helps prevent negative
consequences for the environment and human health.
Removing the rechargeable battery
Please note that this process is not reversible.
To remove the rechargeable battery, you need a small standard
screwdriver and tape. Observe basic safety precautions when you follow
the procedure below.
1 To deplete the rechargeable battery of any charge, remove the
handle from the charger, turn on the Sonicare and let it operate
until it stops. Repeat this step until you can no longer turn on the
Sonicare.
2 Insert a small standard screwdriver into the bottom of the handle
and turn it counter-clockwise to remove the screw. Pull the end
cap off of the handle (Fig. 15).
ENGLISH14

3 Insert the screwdriver between the handle and the internal frame.
Tilt the screwdriver to loosen the handle (Fig. 16).
4 Remove the internal frame from the handle. (Fig. 17)
5
Remove the rubbers that are on top and below the battery (Fig. 18).
6 Insert the screwdriver between the battery and the frame.
Tilt the screwdriver to pop the battery out of the frame (Fig. 19).
7 Place some tape over the ends of the battery to avoid any
short-circuiting due to residual energy in the battery (Fig. 20).
The rechargeable battery can now be recycled or disposed of and the
rest of the product discarded appropriately.
Guarantee and support
If you need information or support, please visit www.philips.com/
support or read the separate worldwide guarantee leaet.
Guarantee restrictions
The terms of the international guarantee do not cover the following:
- Brush heads.
- Damage caused by use of unauthorised replacement parts.
- Damage caused by misuse, abuse, neglect, alterations or
unauthorised repair.
- Normal wear and tear, including chips, scratches, abrasions,
discolouration or fading.
ENGLISH 15

16
Кіріспе
Өнімді сатып алуыңызбен құттықтаймыз және Philips компаниясына
қош келдіңіз! Philips компаниясы ұсынатын қолдауды толығымен
пайдалану үшін өніміңізді www.philips.com/welcome
веб-бетінде тіркеңіз.
Маңызды
Құралды қолданбас бұрын, осы пайдаланушы
нұсқаулығын мұқият оқып шығып, болашақта
анықтамалық құрал ретінде пайдалану үшін
сақтап қойыңыз.
Қауіпті жағдайлар
- Зарядтағышты судан алыс ұстаңыз. Оны суға
толы ваннаның, раковинаның, т.с.с. үстіне не
жанына қоюға, не болмаса сақтауға болмайды.
Зарядтағышты суға немесе басқа сұйықтыққа
батырмаңыз. Тазалағаннан кейін ток көзіне
жалғар алдында зарядтағыштың толық
құрғағанын тексеріңіз.
Абайлаңыз!
- Ток сымын ауыстыруға болмайды. Егер ток
сымы зақымдалса, зарядтағышты тастаңыз.
- Қауіпті болдырмау үшін әрқашан зарядтағышты
бастапқы түріне жататынымен ауыстырыңыз.
- Зарядтағышты далада немесе қызған беттердің
жанында пайдаланбаңыз.
ҚАЗАҚША

17ҚАЗАҚША
- Құрылғы қандай да бір жолмен зақымдалса
(щетка басы, тіс щеткасының сабы немесе
зарядтағыш), оны пайдалануды тоқтатыңыз.
Бұл құрылғы құрамында пайдаланушы жөндей
алатын бөлшектер жоқ. Егер құрылғы
зақымдалса, еліңіздегі тұтынушыларды қолдау
орталығына хабарласыңыз («Кепілдік пен
қызмет көрсету» тарауын қараңыз).
- Бұл құрылғыны 8 және одан жоғары жастағы
балалар және физикалық, сезу немесе ойлау
қабілеттері шектеулі, не болмаса тәжірибесі
және білімі жоқ адамдар қадағалаумен немесе
құрылғыны қауіпсіз пайдалануға қатысты
нұсқаулар алған және байланысты қауіптерді
түсінген жағдайда пайдалана алады. Балалар
құрылғымен ойнамауы керек. 8 жасқа толмаған
балалар тазалауды және күтуді қадағалаусыз
орындамауы керек.
Абайлаңыз
- Щетка басын, сапты немесе зарядтағышты
ыдыс жуғышта тазаламаңыз.
- Тіс щеткасын қолданар алдында, егер сіз
2 ай шамасында жақ сүйекке, бетіңізге немесе
тіс етіне операция жасаған болсаңыз,
дәрігеріңізбен кеңесіңіз.

- Осы тіс щеткасын пайдаланғаннан кейін көп қан
ақса немесе 1 апта пайдаланылса да, тістің
қанауы тоқтамаса, тіс дәрігерінен кеңес алыңыз.
Сондай-ақ, Sonicare щеткасын пайдаланғанда
қолайсыздықты немесе ауырсынуды сезінсеңіз,
тіс дәрігерінен кеңес алыңыз.
- Sonicare тіс щеткасы электромагниттік
құрылғыларға арналған қауіпсіздік
стандарттарына сәйкес келеді. Егер сізде
кардиостимулятор немесе басқа импланттық
құрылғылар болса, пайдаланар алдында
дәрігеріңізге немесе имплант құрылғысын
өндірушіге хабарласыңыз.
- Егер сізде медициналық проблемалар болса,
Sonicare құрылғысын пайдаланар алдында
дәрігеріңізбен кеңесіңіз.
- Бұл құрылғы тек тістер, қызыл иектер мен
тілді тазалауға арналған. Қандай да бір басқа
мақсатта қолдануға болмайды. Қолайсыздық
немесе ауырсыну сезінсеңіз, құрылғыны
қолдануды тоқтатып, дәрігерге хабарласыңыз.
- Sonicare тіс щеткасы — жеке күтім
құрылғысы және стоматологиялық жұмыста
немесе мекемеде көптеген емделушілерге
қолдануға арналмаған.
ҚАЗАҚША18

- Қылшықтары бүлінген немесе майысқан щетка
басын пайдалануды тоқтатыңыз. Щетка басын
3 ай сайын немесе тозу белгілері пайда болса
тезірек ауыстырыңыз. Өндіруші ұсынғаннан
басқа щетка бастарын пайдаланбаңыз.
- Егер тіс пастаңызда пероксид, ас немесе екі
көмір қышқылды содасы (ағартатын тіс
пасталарында көбіне кездеседі) болса,
щетка басын әрбір пайдаланған соң сабындап,
сумен мұқият тазалаңыз. Бұл пластиктің
шытынауынан қорғайды.
Электромагниттік өрістер (ЭМӨ)
Осы Philips құрылғысы электромагниттік өрістерге қатысты барлық
қолданыстағы стандарттар мен ережелерге сәйкес келеді.
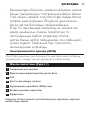
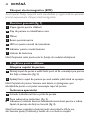
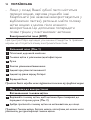
Жалпы сипаттама (Cурет 1)
1 Гигиеналықжолқақпағы
2 Бірегейидентификаторыбарщеткабасы
3 Сап
4 Қуаттықосу/өшірутүймесі
5 ҚарқындылықдеңгейініңЖШД-тары
6 Батареядеңгейінкөрсеткіш
7 Зарядтағыш
Ескертпе. Сатып алынған үлгіге байланысты қораптағы нәрселер
өзгеше болуы мүмкін.
ҚАЗАҚША 19

Пайдалануға дайындау
Щетка басын жалғау
1 Щеткабасынқылшықтарсаптыңалдынақараптұратындай
туралаңыз(Cурет2).
2 Тоқтағаншащеткабасынметаллбіліккеқаттыбасыңыз.
Ескертпе. Sonicare щетка бастарында щетка басын анықтауға
арналған оңай анықталатын белгішелер болады.
Аккумулятор батареясын зарядтау
1 Зарядтағыштыңштепселінқабырғарозеткасынажалғаңыз.
2 Тұтқанызарядтағышқақойыңыз(Cурет3).
, Батареядеңгейініңиндикаторыжыпылықтап,щетказарядталып
жатқанынкөрсетеді(Cурет4).
Ескертпе. Батареяны толық зарядтауға 48 сағатқа дейін кетуі
мүмкін, бірақ Sonicare щеткасын толығымен зарядталмай тұрып
пайдалануға болады.
Құрылғыны пайдалану
Щеткамен тазалау туралы нұсқаулар
1 Қылшықтардысулап,тіспастасыныңазғанамөлшерінжағыңыз.
2 Щеткақылшықтарынқызылиеккеазғантайбұрышпен
келетіндейетіптіскежақындатыңыз(Cурет5).
3 Sonicareқұрылғысынқосуүшінқосу/өшірутүймесінбасыңыз.
4 SonicareтиімділігінбарыншаарттыружәнеSonicareщеткасының
өзбетіншетазалауынамүмкіндікберуүшінжайлапбасып,
қолданыңыз.Қаттықырмаңыз.
5 Қылшықтарытістердіңарасындатолығырақкіруіүшінщетканы
тістеәрі-беріақырынқозғалтыңыз.Тазалауциклындаосындай
қозғалыстыжалғастырыңыз.
Ескертпе. Ауыз қуысын толық тазалау үшін ауызды Quadpacer
мүмкіндігімен 4 бөлікке бөліңіз («Мүмкіндіктер» тарауын қараңыз).
20
ҚАЗАҚША
Pagina se încarcă...
Pagina se încarcă...
Pagina se încarcă...
Pagina se încarcă...
Pagina se încarcă...
Pagina se încarcă...
Pagina se încarcă...
Pagina se încarcă...
Pagina se încarcă...
Pagina se încarcă...
Pagina se încarcă...
Pagina se încarcă...
Pagina se încarcă...
Pagina se încarcă...
Pagina se încarcă...
Pagina se încarcă...
Pagina se încarcă...
Pagina se încarcă...
Pagina se încarcă...
Pagina se încarcă...
Pagina se încarcă...
Pagina se încarcă...
Pagina se încarcă...
Pagina se încarcă...
Pagina se încarcă...
Pagina se încarcă...
Pagina se încarcă...
Pagina se încarcă...
Pagina se încarcă...
Pagina se încarcă...
Pagina se încarcă...
Pagina se încarcă...
Pagina se încarcă...
Pagina se încarcă...
Pagina se încarcă...
Pagina se încarcă...
Pagina se încarcă...
Pagina se încarcă...
Pagina se încarcă...
Pagina se încarcă...
Pagina se încarcă...
Pagina se încarcă...
Pagina se încarcă...
Pagina se încarcă...
Pagina se încarcă...
Pagina se încarcă...
Pagina se încarcă...
Pagina se încarcă...
Pagina se încarcă...
Pagina se încarcă...
Pagina se încarcă...
Pagina se încarcă...
Pagina se încarcă...
Pagina se încarcă...
Pagina se încarcă...
Pagina se încarcă...
Pagina se încarcă...
Pagina se încarcă...
Pagina se încarcă...
Pagina se încarcă...
Pagina se încarcă...
Pagina se încarcă...
Pagina se încarcă...
Pagina se încarcă...
Pagina se încarcă...
Pagina se încarcă...
Pagina se încarcă...
Pagina se încarcă...
Pagina se încarcă...
Pagina se încarcă...
Pagina se încarcă...
Pagina se încarcă...
Pagina se încarcă...
Pagina se încarcă...
Pagina se încarcă...
Pagina se încarcă...
Pagina se încarcă...
Pagina se încarcă...
Pagina se încarcă...
Pagina se încarcă...
Pagina se încarcă...
Pagina se încarcă...
Pagina se încarcă...
Pagina se încarcă...
Pagina se încarcă...
Pagina se încarcă...
Pagina se încarcă...
Pagina se încarcă...
-
 1
1
-
 2
2
-
 3
3
-
 4
4
-
 5
5
-
 6
6
-
 7
7
-
 8
8
-
 9
9
-
 10
10
-
 11
11
-
 12
12
-
 13
13
-
 14
14
-
 15
15
-
 16
16
-
 17
17
-
 18
18
-
 19
19
-
 20
20
-
 21
21
-
 22
22
-
 23
23
-
 24
24
-
 25
25
-
 26
26
-
 27
27
-
 28
28
-
 29
29
-
 30
30
-
 31
31
-
 32
32
-
 33
33
-
 34
34
-
 35
35
-
 36
36
-
 37
37
-
 38
38
-
 39
39
-
 40
40
-
 41
41
-
 42
42
-
 43
43
-
 44
44
-
 45
45
-
 46
46
-
 47
47
-
 48
48
-
 49
49
-
 50
50
-
 51
51
-
 52
52
-
 53
53
-
 54
54
-
 55
55
-
 56
56
-
 57
57
-
 58
58
-
 59
59
-
 60
60
-
 61
61
-
 62
62
-
 63
63
-
 64
64
-
 65
65
-
 66
66
-
 67
67
-
 68
68
-
 69
69
-
 70
70
-
 71
71
-
 72
72
-
 73
73
-
 74
74
-
 75
75
-
 76
76
-
 77
77
-
 78
78
-
 79
79
-
 80
80
-
 81
81
-
 82
82
-
 83
83
-
 84
84
-
 85
85
-
 86
86
-
 87
87
-
 88
88
-
 89
89
-
 90
90
-
 91
91
-
 92
92
-
 93
93
-
 94
94
-
 95
95
-
 96
96
-
 97
97
-
 98
98
-
 99
99
-
 100
100
-
 101
101
-
 102
102
-
 103
103
-
 104
104
-
 105
105
-
 106
106
-
 107
107
-
 108
108


Saeco HX6631/01 Manual de utilizare
- Categorie
- Periuțe de dinți electrice
- Tip
- Manual de utilizare
în alte limbi
- slovenčina: Saeco HX6631/01 Používateľská príručka
- polski: Saeco HX6631/01 Instrukcja obsługi
Lucrări înrudite
Alte documente
-
Sonicare HX9112/02 Manual de utilizare
-
Sonicare HX3412/07 Manual de utilizare
-
Sonicare HX3292/44 Manual de utilizare
-
-
Sonicare HX6921/06 Manual de utilizare
-
Sonicare HX1610/05 Manual de utilizare
-
-
Philips AUDIOPHILE HD 650 Manual de utilizare