LE32A430T1

Samsung LE32A430T1 Manual de utilizare

  • Bună! Sunt un chatbot AI antrenat să vă ajut cu Samsung LE32A430T1 Manual de utilizare. Am citit deja documentul și sunt gata să vă ofer răspunsuri clare și simple.
Country
Customer Care Centre
Web Site
AUSTRIA 0800-SAMSUNG (726-7864) www.samsung.com/at
BELGIUM 0032 (0)2 201 24 18 www.samsung.com/be
CZECH REPUBLIC
844 000 844 www.samsung.com/cz
Distributor pro Českou republiku:
Samsung Zrt., česka organizační složka Vyskočilova 4, 14000 Praha 4
DENMARK 70 70 19 70 www.samsung.com/dk
EIRE 0818 717 100 www.samsung.com/ie
FINLAND 030-6227 515 www.samsung.com/
FRANCE
3260 SAMSUNG (€ 0,15/Min)
08 25 08 65 65 (€ 0,15/Min)
www.samsung.com
GERMANY 01805 - SAMSUNG (726-7864) (€ 0,14/Min) www.samsung.com
HUNGARY 06-80-SAMSUNG (726-7864) www.samsung.com
ITALIA 800-SAMSUNG (726-7864) www.samsung.com
LUXEMBURG 0035 (0)2 261 03 710 www.samsung.com/be
NETHERLANDS 0900-SAMSUNG (726-7864) (€ 0,10/Min) www.samsung.com/nl
NORWAY 815-56 480 www.samsung.com/no
POLAND
0 801 801 881
022-607-93-33
www.samsung.com/pl
PORTUGAL 80820-SAMSUNG (726-7864) www.samsung.com/pt
SLOVAKIA 0800-SAMSUNG (726-7864) www.samsung.com/sk
SPAIN 902 10 11 30 www.samsung.com
SWEDEN 0771-400 200 www.samsung.com/se
SWITZERLAND 0800-SAMSUNG (726-7864) www.samsung.com/ch
U.K 0845 SAMSUNG (7267864) www.samsung.com
TURKEY 444 77 11 www.samsung.com
ESTONIA 800-7267 www.samsung.ee
LATVIA 800-7267 www.samsung.com/lv
LITHUANIA 8-800-77777 www.samsung.lt
KAZAHSTAN 8-10-800-500-55-500 www.samsung.kz
KYRGYZSTAN 00-800-500-55-500 -
RUSSIA 8-800-555-55-55 www.samsung.ru
TADJIKISTAN 8-10-800-500-55-500 -
UKRAINE 8-800-502-0000 www.samsung.com
UZBEKISTAN 8-10-800-500-55-500 www.samsung.uz
LCD TV
user manual
imagine the possibilities
Thank you for purchasing this Samsung product.
To receive more complete service, please register
your product at
www.samsung.com/global/register
Model Serial No.
BN68-01465B-00
Contact SAMSUNG WORLDWIDE
If you have any questions or comments relating to Samsung products,
please contact the SAMSUNG customer care centre.
BN68-01465B-Cover-0306_1.indd 1 2008-03-11 ¿ÀÈÄ 3:28:33
English - 3
Viewing the Control Panel
1 SOURCE
Toggles between all the available input
sources (TV, Ext.1, Ext.2, AV, S-Video,
Component, PC, HDMI1, HDMI2, HDMI3).
In the on-screen menu, use this button as
you use the ENTER
button on the remote
control.
2 MENU
Press to see an on-screen menu of your TV’s
features.
3
Press to decrease or increase the volume.
In the on-screen menu, use the
buttons as you use the
and
buttons on
the remote control.
4
Press to change channels. In the on-screen
menu, use the buttons as you use
the
and
buttons on the remote control.
(Without the Remote Control, you can turn on
the TV by using the Channel buttons.)
5 Speakers
6 (Power)
Press to turn the TV on and off.
Remote Control Sensor
Aim the remote control towards this spot on
the TV.
Power Indicator
Blinks and turns off when the power is on and
lights up in stand-by mode.
The product colour and shape may vary depending on the model.
Side Panel buttons
1
2
3
4
55 6
BN68-01465A-Eng-0310.indd 3 2008-03-17 �� 4:43:27
English - 13
This operation allows you to change the programme numbers
of the stored channels.
This operation may be necessary after using the auto store.
1. Press the MENU button to display the menu.
Press the ▲ or ▼ button to select "Channel", then press the
ENTER
button.
2. Press the
or
button to select "Sort", then press the
ENTER
button.
3. Select the channel number that you wish to change by
pressing the
or
button repeatedly.
Press the ENTER
button.
The selected channel number and name are moved to
right side.
4. Press the
or
button to move to the position in which you
would like to change and then press the ENTER
button.
5. Repeat steps
3 to 4 for another channel to be sorted.
6. Press the EXIT
button to exit.
Sorting the Stored Channels
Assigning Channels Names
Channel names will be assigned automatically when channel
information is broadcast. These names can be changed,
allowing you to assign new names.
1. Press the MENU button to display the menu.
Press the
or
button to select "Channel", then press the
ENTER
button.
2. Press the
or
button to select "Name", then press the
ENTER
button.
3. If necessary, select the channel to be assigned to a new
name by pressing the
or
button. Press the ENTER
button.
The selection bar is displayed around the name box.
4.
The following characters are available: Letters of the alphabet (A~Z) / Numbers
(0~9) / Special characters (+, -, *, /, space)
5. Repeat steps
3 to 4 for each channel to be assigned to a new name.
6. Press the EXIT
button to exit.
To...
Select a letter, number or symbol
Move on the next letter
Move back the previous letter
Confirm the name
Then...
Press the ▲ or ▼ button
Press the ► button
Press the ◄ button
Press the ENTER
button
Channel
Country : Belgium
Auto Store
Manual Store
Channel Manager
Sort
Name
Fine Tune
TV
Move Enter Return
Sort
Prog. Ch. Name
0 C-- -----
1 C23 -----
2 S06 -----
3 S07 -----
4 S09 -----
5 S12 -----
6 S13 -----
7 S14 -----
8 S17 -----
9 C21 -----
TV
Move Enter Return
Channel
Country : Belgium
Auto Store
Manual Store
Channel Manager
Sort
Name
Fine Tune
Move Enter Return
TV
Name
Move Enter Return
Prog. Ch. Name
0 C-- -----
1 C23 -----
2 S06 -----
3 S07 -----
4 S09 -----
5 S12 -----
6 S13 -----
7 S14 -----
8 S17 -----
9 C21 -----
TV
BN68-01465A-Eng-0310.indd 13 2008-03-17 �� 4:43:31
English - 14
Use fine tuning to manually adjust a particular channel for
optimal reception.
1. Use the number buttons to directly select the channel that
you want to fine tune.
2. Press the
MENU button to display the menu.
Press the
or
button to select "Channel", then press the
ENTER
button.
3. Press the
or
button to select "Fine Tune", then press
the ENTER
button.
4. Press the
or
button to adjust the fine tuning.
Press the ENTER
button.
5. Press the EXIT
button to exit.
Fine tuned channels that have been saved are marked
with an asterisk "
*
" on the right-hand side of the channel
number in the channel banner. And the channel number
turns red.
To reset the ne-tuning, select "Reset" by pressing the
or
button and then press the ENTER
button.
Fine Tuning Channel Reception
Channel
Country : Belgium
Auto Store
Manual Store
Channel Manager
Sort
Name
Fine Tune
TV
Move Enter Return
Fine Tune
P 1
0
Reset
Adjust Save Return
BN68-01465A-Eng-0310.indd 14 2008-03-17 �� 4:43:32
English - 15
You can select the type of picture which best corresponds to
your viewing requirements.
1. Press the MENU button to display the menu.
Press the ENTER
button, to select "Picture".
2. Press the ENTER
button again, to select "Mode".
3. Press the
or
button to select the desired picture effect.
Press the ENTER
button.
4. Press the EXIT
button to exit.
Dynamic: Selects the picture for high-definition in a bright
room.
Standard: Selects the picture for optimum display in a
normal environment.
Movie: Selects the picture for comfortable display in a
dark room.
The Picture mode must be adjusted separately for each
input source.
You can also press the P.MODE button on the remote control
to select one of the picture settings.
Changing the Picture Standard
Picture
Mode : Standard
Backlight
7
Contrast 95
Brightness 45
Sharpness 50
Colour 50
Tint G 50 R 50
Detailed Settings
Picture Options
Reset : OK
TV
Move Enter Return
Picture
Mode : Standard
Backlight 7
Contrast 95
Brightness 45
Sharpness 50
Colour 50
Tint G 50 R 50
Detailed Settings
Picture Options
Reset : OK
TV
Move Enter Return
Dynamic
Standard
Movie
Easy Setting
1. Press the TOOLS button on the remote control.
2. Press the ▲ or ▼ button to select "Picture Mode".
3. Press the ◄ or ► button to select the required option.
4. Press the EXIT
or TOOLS button to exit.
Anynet+ (HDMI-CEC)
Picture Mode Standard
Sound Mode : Custom
Sleep Timer : Off
SRS TS XT : Off
Energy Saving : Off
Dual l-ll : Mono
Tools
Move Adjust Exit
TOOLS
BN68-01465A-Eng-0310.indd 15 2008-03-17 �� 4:43:32
English - 20
You can display a sub picture within the main picture of set programme or video input. In this
way, you can watch the picture of set programme or video input from any connected equipment
while watching the main picture.
1. Press the MENU button to display the menu.
Press the ▲ or ▼ button to select "Setup", then press the
ENTER button.
2. Press the ▲ or ▼ button to select "PIP", then press the
ENTER button.
3. Select the required option by pressing the ▲ or ▼ button, then
press the ENTER button.
4. When you are satised with your setting, press the
ENTER button.
5. Press the EXIT
button to exit.
You may notice that the picture in the PIP window becomes
slightly unnatural when you use the main screen to view a
game or karaoke.
Easy Setting
1. Press the TOOLS button on the remote control.
2. Press the ▲ or ▼ button to select “PIP”, then press the
ENTER
button.
3. Press the ▲ or ▼ button to select a particular item.
4. Press the ◄ or ► button to select the required option.
5.
Press the EXIT or TOOLS button to exit.
PIP: On/Off
You can activate or deactivate the PIP function.
Main picture Sub picture
Component TV, Ext.1, Ext.2, AV
HDMI 1, 2, 3 TV, Ext.1, Ext.2, AV
PC TV, Ext.1, Ext.2, AV
Source
You can select a source of the sub-picture.
Size: / /
You can select a size of the sub-picture.
If main picture is in "HDMI" mode, "Size" is available.
Position: / / /
You can select a position of the sub-picture.
In Double ( , ) mode, "Position" cannot be selected.
Programme
You can select a channel of the sub-picture only when the "Source" is set to "TV".
Viewing the Picture In Picture (PIP)
TV
Setup
Plug & Play
Language : English
Time
Melody : Off
Entertainment : Off
Energy Saving : Off
PIP
Move Enter Return
TV
PIP
PIP : On
Source : TV
Size :
Position :
Programme : P1
Move Enter Return
Anynet+ (HDMI-CEC)
Picture Mode : Standard
Sound Mode : Custom
Sleep Timer : Off
SRS TS XT : Off
Energy Saving : Off
PIP
Tools
Move Enter Exit
PIP On
Source : TV
Size :
Position :
Programme : P1
PIP
Move Adjust Return
BN68-01465A-Eng-0310.indd 20 2008-03-17 �� 4:43:35
English - 24
When you start using your set for the first time, you must
select the language which will be used for displaying menus
and indications.
1. Press the MENU button to display the on-screen menu.
Press the ▲ or ▼ button to select "Setup", then press the
ENTER
button.
2. Press the ▲ or ▼ button to select "Language", then press
the ENTER
button.
3. Select a particular language by pressing the ▲ or ▼ button
repeatedly.
Press the ENTER
button.
4. Press the EXIT
button to exit.
Choosing Your Language
TV
Setup
Plug & Play
Language : English
Time
Melody : Off
Entertainment : Off
Energy Saving : Off
PIP
Move Enter Return
1. Press the MENU button to display the menu.
Press the ▲ or ▼ button to select "Setup", then press the
ENTER
button.
2. Press the ▲ or ▼ button to select "Time", then press the
ENTER
button.
3. Press the ▲ or ▼ button to select "Timer 1", "Timer 2",
"Timer 3", then press the ENTER
button.
Three different On/Off Timer Settings can be made.
You must set the clock first.
4. Press the ◄ or ► button to select the required item below.
Press the ▲ or ▼ button to adjust to the setting satisfied.
On Time: Select hour, minute, and "On"/"Off". (To activate
timer with the setting satisfied, set to "On".)
Off Time: Select hour, minute, and "On"/"Off". (To activate
timer with the setting satisfied, set to "On".)
Repeat: Select "Once", "Everyday", "Mon~Fri", "Mon~Sat",
or "Sat~Sun".
Volume: Select the desired turn on volume level.
You can set the hour and minute directly by pressing the number buttons on the remote control.
Auto Power Off
When you set the timer On, the TV will eventually turn off, if no controls are operated for 3 hours
after the TV was turned on by timer. This function is only available in timer On mode and prevents
overheating, which may occur if a TV is on for too long time.
Switching the Television On and Off Automatically
TV
Setup
Plug & Play
Language : English
Time
Melody : Off
Entertainment : Off
Energy Saving : Off
PIP
Move Enter Return
TV
Timer 1
On Time
Repeat
Once
Volume
10
00 00 Off
:
Off Time
00
00 Off
:
Move Adjust Return
6
5
BN68-01465A-Eng-0310.indd 24 2008-03-17 �� 4:43:39
English - 27
Name the device connected to the input jacks to make your
input source selection easier.
1. Press the MENU button to display the menu.
Press the ▲ or ▼ button to select "Input", then press the
ENTER
button.
2. Press the
▲ or button to select "Edit Name", then press
the ENTER
button.
3. Press the
▲ or button to select the device that you wish to
edit.
Press the ENTER
button.
4. Press the or ▼ button to select the required device.
Press the ENTER
button.
5. Press the EXIT
button to exit.
Editing the Input Source Names
TV
Input
Source List : TV
Edit Name
Anynet+(HDMI-CEC)
Move Enter Return
TV
Edit Name
Ext.1 : ----
Ext.2 : ----
AV : ----
S-Video : ----
Component : ----
PC : ----
HDMI1 : ----
HDMI2 : ----
HDMI3 : ----
Move Enter Return
----
VCR
DVD
Cable STB
Satellite STB
PVR STB
AV Receiver
Game
q
BN68-01465A-Eng-0310.indd 27 2008-03-17 �� 4:43:41
English - 28
The Windows display-settings for a typical computer are shown below. The
actual screens on your PC may be different depending upon your particular
version of Windows and your particular video card. Even if your actual
screens look different, the same, basic set-up information will apply in almost
all cases. (If not, contact your computer manufacturer or Samsung Dealer.)
1. First, click on "Control Panel" on the Windows start menu.
2. When the control panel window appears, click on "Appearance and Themes"
and a display dialog-box will appear.
3. When the control panel window appears, click on "Display" and a display
dialog-box will appear.
4. Navigate to the "Settings" tab on the display dialog-box.
The correct size setting (resolution): Optimum- 1360 X 768
If a vertical-frequency option exists on your display settings dialog box, the correct value is
"60" or "60 Hz". Otherwise, just click "OK" and exit the dialog box.
Setting up Your PC Software (Based on Windows XP)
When using an HDMI/DVI cable connection, you must use the HDMI IN 2 jack.
The interlace mode is not supported.
The set might operate abnormally if a non-standard video format is selected.
Separate and Composite modes are supported. SOG is not supported.
Display Modes
Both screen position and size will vary depending on the type of PC monitor and its resolution.
The resolutions in the table are recommended.
Mode
Resolution
Horizontal
Frequency (kHz)
Vertical
Frequency (Hz)
Pixel Clock
Frequency (MHz)
Sync Polarity
(H/V)
VESA
640×480
800×600
1024×768
1360 x 768
31.469
37.879
48.363
47.712
59.940
60.317
60.004
60.015
25.175
40.000
65.000
85.500
-/-
+/+
-/-
+/+
D-Sub Input
HDMI/DVI Input
Mode
Resolution
Horizontal
Frequency (kHz)
Vertical
Frequency (Hz)
Pixel Clock
Frequency (MHz)
Sync Polarity
(H/V)
IBM
640x350
720×400
31.469
31.469
70.086
70.087
25.175
28.322
+/-
-/+
VESA
640×480
640×480
640×480
800×600
800×600
800×600
1024×768
1024×768
1024×768
1360 x 768
31.469
37.861
37.500
37.879
48.077
46.875
48.363
56.476
60.023
47.712
59.940
72.809
75.000
60.317
72.188
75.000
60.004
70.069
75.029
60.015
25.175
31.500
31.500
40.000
50.000
49.500
65.000
75.000
78.750
85.500
-/-
-/-
-/-
+/+
+/+
+/+
-/-
-/-
+/+
+/+
BN68-01465A-Eng-0310.indd 28 2008-03-17 �� 4:43:42
English - 29
Setting up the TV with your PC
Preset: Press the SOURCE button to select PC mode.
1. Press the MENU button to display the menu.
Press the ENTER
button, to select "Picture".
2. Select the required option by pressing the ▲ or ▼ button,
then press the ENTER
button.
3. When you are satisfied with your setting, press the
ENTER
button.
4.
Press the EXIT button to exit.
Auto Adjustment
Auto adjustment allows the PC screen of set to self-adjust to
the incoming PC video signal. The values of fine, coarse and
position are adjusted automatically.
Easy Setting
1. Press the TOOLS button on the remote control.
2. Press the ▲ or ▼ button to select “Auto Adjustment”, then
press the ENTER button.
Screen Adjustment:
Coarse/Fine
The purpose of picture quality adjustment is to remove or
reduce picture noise. If the noise is not removed by Fine-
tuning alone, then adjust the frequency as best as possible
(coarse) and Fine-tune again. After the noise has been
reduced, re-adjust the picture so that it is aligned on the
center of screen.
Press the ▲ or ▼ button to select "Coarse" or "Fine", then
press the ENTER
button.
Press the ◄ or ► button to adjust the screen quality.
Press the ENTER
button.
Position
Adjust the PC’s screen positioning if it does not fit the TV
screen.
Press the ▲ or ▼ button to adjusting the Vertical-Position.
Press the ◄ or ► button to adjust the Horizontal-Position.
Press the ENTER
button.
Image Reset
You can replace all image settings with the factory default
values.
Screen Adjustment
Coarse 50
Fine 34
Position
Image Reset
TV
Move Enter Return
Position
TV
Move Enter Return
Picture
Mode : Standard
Backlight 7
Contrast 95
Brightness
45
Sharpness 50
Auto Adjustment
Screen Adjustment
Detailed Settings
Picture Options
Reset : OK
TV
Move Enter Return
Screen Adjustment
Coarse 50
Fine 34
Position
Image Reset
TV
Move Enter Return
Auto Adjustment in progress
Please wait.
Anynet+ (HDMI-CEC)
Picture Mode : Standard
Sound Mode : Custom
Sleep Timer : Off
SRS TS XT : Off
Energy Saving : Off
PIP
Auto Adjustment
Move Enter Exit
Tools
BN68-01465A-Eng-0310.indd 29 2008-03-17 �� 4:43:43
English - 30
Connecting Anynet
+
Devices
The Anynet+ system supports AV devices supporting Anynet+ only.
Check if there is an Anynet+ mark on the AV device to be connected to the TV.
To directly connect to TV
Connect the [HDMI 1], [HDMI
2] or [HDMI 3] jack on the TV
and the HDMI OUT jack of the
corresponding Anynet+ device
using the HDMI cable.
To connect to Home Theater
1. Connect the [HDMI 1],
[HDMI 2] or [HDMI 3]
jack on the TV and the
HDMI OUT jack of the
corresponding Anynet+
device using the HDMI
cable.
2. Connect the HDMI IN jack
of the home theatre and
the HDMI OUT jack of the
corresponding Anynet+
device using the HDMI
cable.
Connect only one receiver.
You can connect an Anynet+ device using the HDMI cable. Some HDMI cables may not support
Anynet+ functions.
Anynet+ works when the AV device supporting Anynet+ is in the Standby or On status.
Anynet+ supports up to 8 AV devices in total.
What is Anynet
+
?
Anynet+ is an AV network system that enables an easy-to-use AV interface for users by controlling
all connected AV devices through the Anynet+ menu when Samsung Electronics AV devices are
connected.
Anynet+ Device 1 Anynet+ Device 2 Anynet+ Device 3
TV
HDMI Cable
HDMI Cable
HDMI Cable
TV
Anynet+ Device 1 Anynet+ Device 2
Anynet+ Device 3
HDMI Cable
HDMI Cable
HDMI Cable
HDMI Cable
Home Theatre
BN68-01465A-Eng-0310.indd 30 2008-03-17 �� 4:43:43
English - 37
The teletext pages are organized according to six categories:
Part Contents
A Selected page number.
B Broadcasting station identity.
C Current page number or search status.
D Date and time.
E Text.
F Status information.
FASTEXT information.
Teletext information is often divided between several pages displayed in sequence, which can be
accessed by:
♦ Entering the page number
♦ Selecting a title in a list
♦ Selecting a coloured heading (FASTEXT system)
Press the TV button to exit from the teletext display.
TOOLS
BN68-01465A-Eng-0310.indd 37 2008-03-17 �� 4:43:46
English - 39
Moving to the remembered position
1.
Complete Step 1 of “Entering the menu”.
2.
Pressing a Colour (Red, Green, Yellow) button moves the auto
wall mount to the saved position.
You can move the wall mount to one of the 3 pre-set
positions by pressing the Red (Position 1),
Green (Position 2) or Yellow (Position 3) buttons.
If you adjust the Position after moving to a pre-set position,
the position display will disappear.
For installation, refer to the Installation Manual provided with the wall mount.
For product installation and the installation and moving of the wall mount, make sure to consult a
specialized installation company.
This installation manual is to be used when attaching the wall mount to a wall. When attaching to
other building materials, please contact your nearest dealer.
The auto wall mount will not work when Anynet+ is operating.
37 and 40 inch models are not compatible with the old electrically powered wall mount model
(WMN5090A*).
Wall-Mount Adjusment
Adjust Save Center
INFO
Position1
Position 1 2 3
Using the Anti-Theft Kensington Lock (depending on the model)
The Kensington Lock is a device used to physically fix the system when using it in a public place.
The appearance and locking method may differ from the illustration depending on the manufacturer.
Refer to the manual provided with the Kensington Lock for proper use. The locking device has to be
purchased separately.
1. Insert the locking device into the Kensington
slot on the LCD TV (Figure 1), and turn it in the
locking direction (Figure 2).
2. Connect the Kensington Lock cable.
3. Fix the Kensington Lock to a desk or a heavy
stationary object.
The location of the Kensington
Lock
may be
different depending on its model.
Cable
Figure 1
Figure 2
<Optional>
BN68-01465A-Eng-0310.indd 39 2008-03-17 �� 4:43:46
English - 41
Technical and Environmental Specications
Model Name
LE32A430 / LE32A431 LE37A430 / LE37A431
Screen Size (Diagonal)
32 inch 37 inch
PC Resolution
1360 X 768 @ 60 Hz 1360 X 768 @ 60 Hz
Sound
Output
10W x 2 10W x 2
Dimensions (WxDxH)
Body
With stand
796 X 79 X 531 mm
796 X 252 X 580 mm
916 X 87 X 572 mm
916 X 300 X 652 mm
Weight
With stand
13 kg 18 kg
Environmental Considerations
Operating Temperature
Operating Humidity
Storage Temperature
Storage Humidity
10 °C to 40 °C (50 °F to 104 °F)
10 % to 80 %, non-condensing
-20 °C to 45 °C (-4 °F to 113 °F)
5 % to 95 %, non-condensing
10 °C to 40 °C (50 °F to 104 °F)
10 % to 80 %, non-condensing
-20 °C to 45 °C (-4 °F to 113 °F)
5 % to 95 %, non-condensing
Stand Swivel
(Left / Right)
-20˚ ~ 20˚ -20˚ ~ 20˚
Model Name
LE40A430 / LE40A431
Screen Size (Diagonal)
40 inch
PC Resolution
1360 X 768 @ 60 Hz
Sound
Output
10W x 2
Dimensions (WxDxH)
Body
With stand
971 X 87 X 628 mm
971 X 300 X 687 mm
Weight
With stand
21 kg
Environmental Considerations
Operating Temperature
Operating Humidity
Storage Temperature
Storage Humidity
10 °C to 40 °C (50 °F to 104 °F)
10 % to 80 %, non-condensing
-20 °C to 45 °C (-4 °F to 113 °F)
5 % to 95 %, non-condensing
Stand Swivel
(Left / Right)
-20˚ ~ 20˚
Design and specifications are subject to change without prior notice.
This device is a Class B digital apparatus.
For the power supply and Power Consumption, refer to the label attached to the product.
BN68-01465A-Eng-0310.indd 41 2008-03-17 �� 4:43:46
Ελληνικά - 
Ρύθμιση του λογισμικού του υπολογιστή σας (με βάση τα Windows XP)
Παρακάτω φαίνονται οι ρυθμίσεις της οθόνης των Windows για έναν τυπικό
υπολογιστή. Οι οθόνες που θα εμφανιστούν στον υπολογιστή σας πιθανόν
να διαφέρουν , ανάλογα με τη συγκεκριμένη έκδοση των Windows και τη
συγκεκριμένη κάρτα βίντεο που διαθέτετε. Ακόμη κι αν οι πραγματικές οθόνες
φαίνονται διαφορετικές, στις περισσότερες περιπτώσεις θα ισχύουν οι ίδιες
βασικές πληροφορίες ρύθμισης. (Εάν όχι, επικοινωνήστε με τον κατασκευαστή του
υπολογιστή ή με τον αντιπρόσωπο της Samsung.)
. Πρώτα, κάντε κλικ στο “Πίνακας ελέγχου” στο μενού έναρξης των Windows.
. Όταν εμφανιστεί το παράθυρο του πίνακα ελέγχου, κάντε κλικ στο “Εμφάνιση και
Θέματα” και θα εμφανιστεί ένα παράθυρο διαλόγου.
. Όταν εμφανιστεί το παράθυρο του πίνακα ελέγχου, κάντε κλικ στο “Οθόνη” και θα εμφανιστεί ένα παράθυρο
διαλόγου.
. Περιηγηθείτε στην καρτέλα “Ρυθμίσεις” στο παράθυρο διαλόγου οθόνης. Η σωστή ρύθμιση μεγέθους
(ανάλυση): Βέλτιστη - 1360 X 768 Εάν υπάρχει επιλογή κατακόρυφης συχνότητας στο παράθυρο διαλόγου
οθόνης, η σωστή τιμή είναι “60” ή “60 Hz”. Διαφορετικά, απλά κάντε κλικ στο “OK” για έξοδο από το παράθυρο
διαλόγου.
Τρόποι λειτουργίας οθόνης
Τόσο η θέση όσο και το μέγεθος της οθόνης θα ποικίλλουν, ανάλογα με τον τύπο και την ανάλυση της
οθόνης του υπολογιστή. Συνιστώνται οι αναλύσεις που αναγράφονται στον πίνακα.
D-Sub Είσοδος
Τρόπος
λειτουργίας
Ανάλυση
Οριζόντια
Συχνότητα (kHz)
Οριζόντια
Συχνότητα (Hz)
Οριζόντια
Συχνότητα (MHz)
Πολικότητα
συγχρονισμού
(H/V)
IBM
640×350
720×400
31,469
31,469
70,086
70,087
25,175
28,322
+/-
-/+
VESA
640×480
640×480
640×480
800×600
800×600
800×600
1024×768
1024×768
1024×768
1360 × 768
31,469
37,861
37,500
37,879
48,077
46,875
48,363
56,476
60,023
47,712
59,940
72,809
75,000
60,317
72,188
75,000
60,004
70,069
75,029
60,015
25,175
31,500
31,500
40,000
50,000
49,500
65,000
75,000
78,750
85,500
-/-
-/-
-/-
+/+
+/+
+/+
-/-
-/-
+/+
+/+
HDMI/DV IΕίσοδος
Τρόπος
λειτουργίας
Ανάλυση
Οριζόντια
Συχνότητα (kHz)
Οριζόντια
Συχνότητα (Hz)
Οριζόντια
Συχνότητα (MHz)
Πολικότητα
συγχρονισμού
(H/V)
VESA
640×480
800×600
1024×768
1360 × 768
31,469
37,879
48,363
47,712
59,940
60,317
60,004
60,015
25,175
40,000
65,000
85,500
-/-
+/+
-/-
+/+
Εάν χρησιμοποιείτε σύνδεση με χρήση καλωδίου HDMI/DVI, θα πρέπει να χρησιμοποιήσετε την υποδοχή
HDMI IN2.
Ο τρόπος λειτουργίας διεμπλοκής δεν υποστηρίζεται.
Η συσκευή ενδέχεται να μη λειτουργεί κανονικά, εάν επιλεγεί κάποια μη τυπική μορφή βίντεο.
Υποστηρίζονται οι λειτουργίες Separate και Composite. Το SOG δεν υποστηρίζεται.
BN68-01465B-Gre-0310_1.indd 28 2008-03-17 �� 5:35:16
Ελληνικά - 
Τεχνικές και Περιβαλλοντικές προδιαγραφές
Όνομα μοντέλου
LEA0 / LEA LEA0 / LEA
Διαστάσεις οθόνης
(Διαγώνιος)
32”
37”
Ανάλυση υπολογιστή
1360 X 768 @ 60 Hz 1360 X 768 @ 60 Hz
Ήχος
Έξοδος 10W x 2 10W x 2
Διαστάσεις (Π x Β x Υ)
Σώμα
Με βάση
796 X 79 X 531 mm
796 X 252 X 580 mm
916 X 87 X 572 mm
916 X 300 X 652 mm
Βάρος
με βάση
13 kg 18 kg
Περιβαλλοντικές συνθήκες
Θερμοκρασία λειτουργίας
Υγρασία λειτουργίας
Θερμοκρασία φύλαξης
Υγρασία φύλαξης
10 °C έως 40 °C (50 °F έως 104 °F)
10 % έως 80 %, χωρίς συμπύκνωση υδρατμών
-20 °C έως 45 °C (-4 °F έως 113 °F)
5 % έως 95 %, χωρίς συμπύκνωση υδρατμών
10 °C έως 40 °C (50 °F έως 104 °F)
10 % έως 80 %, χωρίς συμπύκνωση υδρατμών
-20 °C έως 45 °C (-4 °F έως 113 °F)
5 % έως 95 %, χωρίς συμπύκνωση υδρατμών
Περιστροφή βάσης
(Αριστερά / Δεξιά)
-20˚ ~ 20˚
-20˚ ~ 20˚
Όνομα μοντέλου
LE0A0 / LE0A
Διαστάσεις οθόνης
(Διαγώνιος)
40”
Ανάλυση υπολογιστή
1360 X 768 @ 60 Hz
Ήχος
Έξοδος 10W x 2
Διαστάσεις (Π x Β x Υ)
Σώμα
Με βάση
971 X 87 X 628 mm
971 X 300 X 687 mm
Βάρος
με βάση
21 kg
Περιβαλλοντικές συνθήκες
Θερμοκρασία λειτουργίας
Υγρασία λειτουργίας
Θερμοκρασία φύλαξης
Υγρασία φύλαξης
10 °C έως 40 °C (50 °F έως 104 °F)
10 % έως 80 %, χωρίς συμπύκνωση υδρατμών
-20 °C έως 45 °C (-4 °F έως 113 °F)
5 % έως 95 %, χωρίς συμπύκνωση υδρατμών
Περιστροφή βάσης
(Αριστερά / Δεξιά)
-20˚ ~ 20˚
Το σχέδιο και οι προδιαγραφές μπορεί να τροποποιηθούν χωρίς προηγούμενη ειδοποίηση.
Η συσκευή αυτή είναι ψηφιακός εξοπλισμός Κατηγορίας B.
Για την τροφοδοσία και την κατανάλωση ρεύματος, ανατρέξτε στην ετικέτα που είναι επικολλημένη στο
προϊόν.
BN68-01465B-Gre-0310_1.indd 41 2008-03-17 �� 5:35:20




 Натиснете бутона 
, за да се покаже менюто.
Натиснете бутона или , за да изберете “Kанал” и
натиснете бутона

.
 Натиснете бутона
или , за да изберете “Мениджър
канали” и натиснете бутона

.

С използване на Списък на каналите можете да добавяте
канали.
 Изберете Списък на каналите с натискане на бутона

.
 Придвижете се към полето (
) с натискане на бутоните
,, или изберете канала, който искате да добавите и
натиснете бутона

, за да добавите канала.
Ако натиснете бутона

отново, символът
( ) близо до канала изчезва и каналът не се добавя.
е активно, когато “Защита за деца” е избрана на
“Вкл”.

Тази функция ви позволява де предотвратите гледане
на определени неподходящи програми без разрешение,
например от деца, като потиснете видеото и аудиото.
 Натиснете бутона
или , за да изберете “Защита за
деца” и натиснете бутона

.
 Изберете “Вкл” с натискане на бутона
или , след това
натиснете бутона

.
 Натиснете бутона
или , за да изберете “Списък на
каналите” и натиснете бутона

.
 Придвижете се към полето
с натискане на бутоните
,, или изберете канала, който искате да заключите и
натиснете бутона

, за да добавите канала.
Ако натиснете бутона

отново, символът ( )
близо до канала изчезва и каналът не се заключва.
При активиране на “Защита за деца” се показва син
екран.
 Натиснете бутона  за излизане.
Изберете “Вкл” или “Изкл” в “Защита за деца” за да можете
лесно да активирате и дезактивирате каналите, избрани
на .
Можете да изберете тези опции просто като натиснете
бутона  на дистанционното управление.
TOOLS






 













 
  



  
  









 





BN68-01465B-Bul-0317.indd 12 2008-03-17 �� 5:44:46




 Използвайте цифровите бутони, за да изберете директно
канала, който искате да настроите фино.
 Натиснете бутона 
, за да се покаже менюто.
Натиснете бутона или , за да изберете “Kанал”, после
натиснете бутона

.
 Натиснете бутона
или , за да изберете “Фина настр.” и
натиснете бутона

.
 Натиснете бутоните
или , за да извършите фината
настройка.
Натиснете бутона

.
 Натиснете бутона 
за излизане.
Фино настроените канали, които са запаметени, се
маркират със звездичка “*” от дясната страна на номера
на канала в лентата на канала. И номерът на канал
става червен.
За да върнете фината настройка на 0, изберете “Нулиране”, като натиснете бутона или ,
а след това натиснете бутона

.

 
  



  
  














BN68-01465B-Bul-0317.indd 14 2008-03-17 �� 5:44:47


Можете директно да изберете нивото на черното на екрана, за да регулирате дълбочината.

Можете да регулирате контраста на екрана, така че да осигурите оптималния.

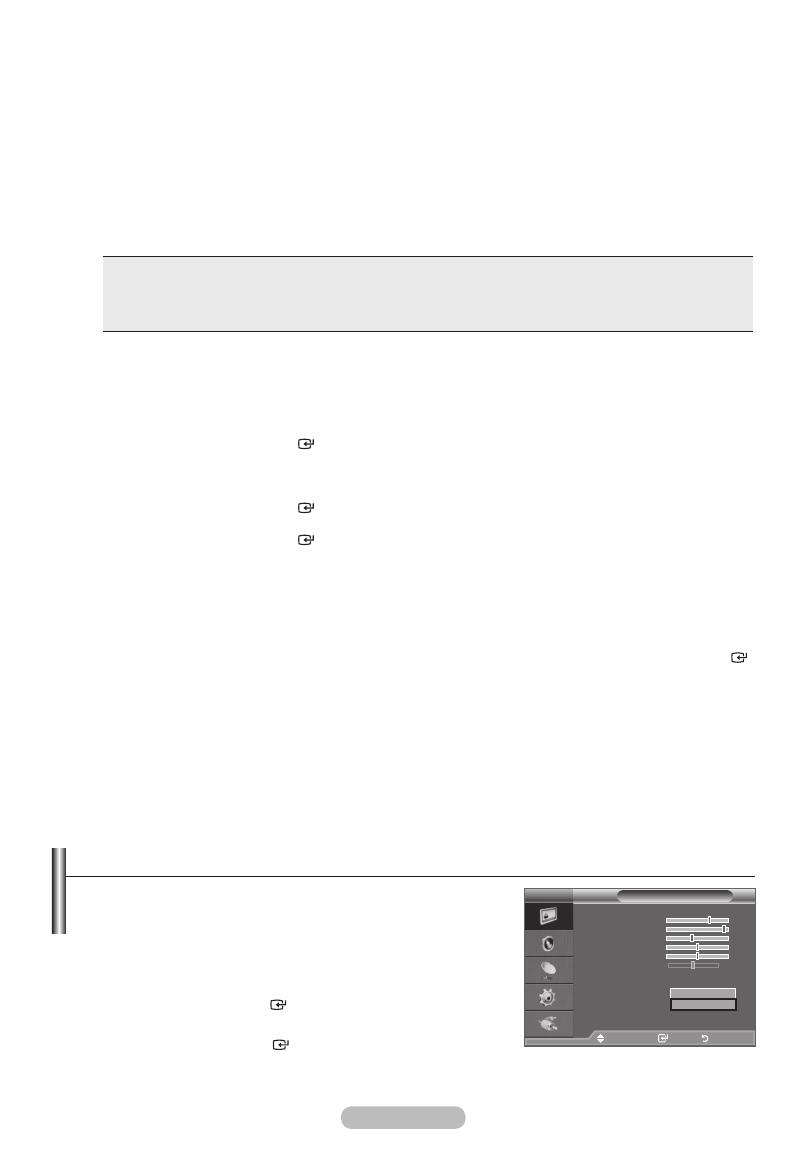
Можете да регулирате интензитета на основните цветове (Червено, Зелен, Cиньо).
Натиснете бутона или , докато достигнете до оптималната настройка.

Цветово пространство е цветова матрица, съставена от червен, зелен и син цвят.
Изберете своето предпочитано цветово пространство, за да се потопите в света на естествените
цветове.
Авто цветово пространство автоматично настройва към естествен цветови
тон въз основа на програмните източници.
Естествено цветово пространство предлага дълбок и богат цветови тон.
Регулира цветовата гама по ваш вкус.


Регулира цветовата гама по ваш вкус.
“Цвят” е достъпно, когато “Цветова област” е зададено на “По избор”.
Натиснете бутона или , за да изберете “Червено”, “Зелен”, “Cиньо”, “Жълто”, “Циан” или
“Магента”.
Натиснете бутона

.
 В “Цвят” можете да задавате RGB стойностите за избрания цвят.
Натиснете бутона или , за да изберете “Червено”, “Зелен” или “Cиньо”, за да го
промените.
Натиснете бутона

.
Натиснете бутона или , за да намалите или увеличите стойността на даден елемент.
Натиснете бутона

.
 Връща настройките на цветово пространство до фабричните.


Можете да регулирате цветовата температура за по-естествени цветове на картината.
: Промяна на
стойността на настройка ще обнови настроения екран.
Изберете необходимата опция с натискане на бутона или и след това натиснете бутона  .
Натиснете бутона или , докато достигнете до оптималната настройка.
: Зададените преди това настройки на Баланс бяло ще се върнат към фабричните.

Можете да акцентирате върху розовия телесен тон в картината.
Натиснете бутона или , докато достигнете до оптималната настройка.
Промяна на стойността на настройка ще обнови настроения екран.

Можете да подчертавате границите на обектите в картината.



 За да изберете желания ефект на картината, следвайте
инструкции от 1 до 3 в “Смяна на стандарта на картината”
1 до 3 на стр. 15.
 Натиснете бутона
или , за да изберете “Нулиране” и
натиснете бутона

.
 Натиснете бутона
или , за да изберете “OK” или “Отказ”.
Натиснете бутона

.
 Натиснете бутона 
за излизане.
“Нулиране” се настройва за всеки режим на картината.

  

 


 
 
   


 








BN68-01465B-Bul-0317.indd 17 2008-03-17 �� 5:44:48





 Натиснете бутона 
, за да се покаже менюто.
Натиснете бутона ▲ или ▼, за да изберете “Настройка”,
после натиснете бутона  .
 Натиснете бутона ▲ или ▼, за да изберете “КВК” и
натиснете бутона  .
 Изберете необходимата опция с натискане на бутона
▲ или▼ и след това натиснете бутона  .
 Когато сте доволни от настройката, натиснете бутона
 .
 Натиснете бутона 
за излизане.
Може да забележите, че картината в прозореца на КВК
става леко неестествена, когато използвате главния екран,
за да гледате игра или караоке.


Натиснете бутона  на дистанционното управление.
 Натиснете бутона ▲ или ▼, за да изберете “КВК ”, след
което натиснете бутона  .
 Натиснете бутона
▲ или ▼ за да изберете даден елемент.
 Натиснете бутона
◄ или ►, за да изберете необходимата
опция.

Натиснете бутона  или , за да излезете.

Можете да активирате или деактивирате функцията КВК.
Главна картина Подкартина
Компонент ТВ, Ext.1, Ext.2, AV
HDMI 1, 2, 3 ТВ, Ext.1, Ext.2, AV
PC ТВ, Ext.1, Ext.2, AV

Можете да избирате източника на подкартината.
 / /
Можете да избирате размера на подкартината.
Ако главната картина е в режим “HDMI”, “Размер” е налично.
   
Можете да избирате позицията на подкартината.
В режим Double ( , ) не може да се избира “Позиция”.

Можете да изберете канал за подкартината само когато “Източник” е зададено на “TB”.




 

 
 
 
КВК







 
 
 
 
 






 
 
 
 
 


  
 
 
 
 
 

  
BN68-01465B-Bul-0317.indd 20 2008-03-17 �� 5:44:50
1/424