
HealthyWhite+


1


6
Introduction
Congratulations on your purchase and welcome to Philips!
To fully benet from the support that Philips offers, register your
product at www.philips.com/welcome.
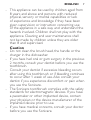
Important
Read this user manual carefully before you use the
appliance and save it for future reference.
Danger
- Keep the charger away from water. Do not place
or store it over or near water contained in a
bathtub, washbasin, sink etc. Do not immerse the
charger in water or any other liquid. After cleaning,
make sure the charger is completely dry before
you connect it to the mains.
Warning
- The mains cord cannot be replaced. If the mains
cord is damaged, discard the charger.
- Always have the charger replaced with one of the
original type in order to avoid a hazard.
- Do not use the charger outdoors or near heated
surfaces.
- If the appliance is damaged in any way (brush head,
toothbrush handle or charger), stop using it.
This appliance contains no serviceable parts.
If the appliance is damaged, contact the
Consumer Care Centre in your country
(see chapter ‘Guarantee and support’).
ENGLISH

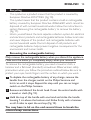
- This appliance can be used by children aged from
8 years and above and persons with reduced
physical, sensory or mental capabilities or lack
of experience and knowledge if they have been
given supervision or instruction concerning use
of the appliance in a safe way and understand the
hazards involved. Children shall not play with the
appliance. Cleaning and user maintenance shall
not be made by children unless they are older
than 8 and supervised.
Caution
- Do not clean the brush head, the handle or the
charger in the dishwasher.
- I
f you have had oral or gum surgery in the previous
2 months, consult your dentist before you use the
toothbrush.
- Consult your dentist if excessive bleeding occurs
after using this toothbrush or if bleeding continues
to occur after 1 week of use. Also consult your
dentist if you experience discomfort or pain when
you use the Sonicare.
- The Sonicare toothbrush complies with the safety
standards for electromagnetic devices. If you have
a pacemaker or other implanted device, contact
your physician or the device manufacturer of the
implanted device prior to use.
- If you have medical concerns, consult your doctor
before you use the Sonicare.
ENGLISH 7

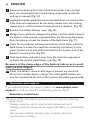
- This appliance has only been designed for cleaning
teeth, gums and tongue. Do not use it for any
other purpose. Stop using the appliance and
contact your doctor if you experience any
discomfort or pain.
- The Sonicare toothbrush is a personal care device
and is not intended for use on multiple patients in
a dental practice or institution.
- Stop using a brush head with crushed or bent
bristles. Replace the brush head every 3 months
or sooner if signs of wear appear. Do not use
other brush heads than the ones recommended
by the manufacturer.
- If your toothpaste contains peroxide, baking soda
or bicarbonate (common in whitening
toothpastes), thoroughly clean the brush head
with soap and water after each use. This prevents
possible cracking of the plastic.
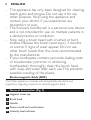
Electromagnetic elds (EMF)
This Philips appliance complies with all applicable standards and
regulations regarding exposure to electromagnetic elds.
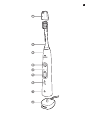
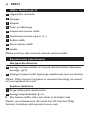
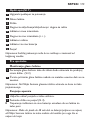
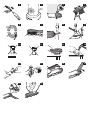
General description (Fig. 1)
1 Hygienic travel cap
2 Brush head
3 Handle
4 Power on/off and mode button
5 Intensity level indicator
ENGLISH8

6 Intensity level button (+ and -)
7 Mode indicator
8 Battery level indicator
9 Charger
Note: The content of the box may vary based on the model purchased.
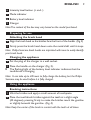
Preparing for use
Attaching the brush head
1
Align the brush head so the bristles face the front of the handle. (Fig. 2)
2
Firmly press the brush head down onto the metal shaft until it stops.
Note: Philips Sonicare brush heads are imprinted with icons to easily identify
your brush head.
Charging the appliance
1 Put the plug of the charger in a wall socket.
2 Place the handle on the charger (Fig. 3).
, The ashing light of the battery level indicator indicates that the
toothbrush is charging.
Note: It can take up to 48 hours to fully charge the battery, but the Philips
Sonicare may be used before it is fully charged.
Using the appliance
Brushing instructions
1 Wet the bristles and apply a small amount of toothpaste.
2 Place the toothbrush bristles against the teeth at a slight angle
(45 degrees), pressing rmly to make the bristles reach the gumline
or slightly beneath the gumline. (Fig. 4)
Note: Keep the center of the brush in contact with the teeth at all times.
ENGLISH 9

3 Press the power on/off and mode button to switch on the Philips
Sonicare.
4 Apply light pressure to maximise Philips Sonicare’s effectiveness
and let the Philips Sonicare toothbrush do the brushing for you.
Do not scrub.
5 Gently move the brush head slowly across the teeth in a small back
and forth motion so the longer bristles reach between your teeth.
Continue this motion throughout the brushing cycle.
6 To clean the inside surfaces of the front teeth, tilt the brush handle
semi-upright and make several vertical overlapping brushing strokes
on each tooth (Fig. 5).
Note: To make sure you brush evenly throughout the mouth, divide your
mouth into 4 sections using the Quadpacer feature (see chapter ‘Features’).
7 Brush each section for 30 seconds for a total brushing time of 2
minutes. Start with section 1 (outside top teeth) and then brush
section 2 (inside top teeth). Continue with section 3 (outside
bottom teeth) and nally brush section 4 (inside bottom teeth)
(Fig. 6).
8 After you have completed the brushing cycle, you can spend
additional time brushing the chewing surfaces of your teeth and
areas where staining occurs. You can also brush your tongue, with
the toothbrush switched on or off, as you prefer (Fig. 7).
The Philips Sonicare is safe to use on:
- Braces (brush heads wear out sooner when used on braces).
- Dental restorations (llings, crowns, veneers)
Note: Ensure that braces or dental restorations are properly adhered and not
compromised. If not, braces or dental restorations may be damaged when
they come into contact with the brush head.
Note: When the Philips Sonicare is used in clinical studies, the default
2-minute Clean mode with high intensity must be selected. The handle
should be fully charged and the Easy-start feature deactivated.
ENGLISH10

Brushing modes
Clean mode
The ultimate in plaque removal (default mode).
White mode
To brighten and polish your front teeth.
1 Press the power on/off and mode button to switch on the Philips
Sonicare.
2 Press the power on/off and mode button again before 2.5 seconds
to switch to White mode.
3 Press the power on/off and mode button after 2.5 seconds to
pause the Philips Sonicare.
Intensity levels
- Low: 1 LED indicator light
- Medium: 2 LED indicator lights
- High: 3 LED indicator lights
Note: To adjust the intensity level to the next higher or lower level, press the +
intensity level button to increase intensity or the - intensity level button to
decrease intensity at any time during the brushing cycle.
Battery status (when handle is not on charger)
- A ashing yellow battery level indicator indicates a low charge.
- A ashing green battery level indicator indicates a moderate charge.
- A solid green battery level indicator indicates a full charge.
Note: If you hear 5 beeps and the battery level indicator ashes yellow, this
means that you have to recharge the battery. When the battery is completely
empty, the Philips Sonicare switches off. Place the Philips Sonicare on the charger
to charge it
(Fig. 3).
Note: To keep the battery fully charged at all times, you may keep the Philips
Sonicare on the charger when not in use.
ENGLISH 11

Features
Smartimer
The Smartimer indicates that your brushing cycle is complete when it
automatically switches off the toothbrush at the end of the brushing cycle.
Dental professionals recommend brushing no less than 2 minutes twice
a day.
Easy-start
-
The Easy-start feature gently increases power over the rst 14 brushings
t
o help you get used to brushing with the Philips Sonicare.
- This Philips Sonicare comes with the Easy-start feature deactivated.
Activating or deactivating the Easy-start feature:
Place the handle in the plugged-in charger.
- To activate Easy-start:
Press and hold the power on/off and mode button for 2 seconds.
You hear 2 beeps and the battery level indicator lights up green to
indicate that the Easy-start feature has been activated.
- To deactivate Easy-start:
Press and hold the power on/off and mode button for 2 seconds.
You hear 1 beep and the battery level indicator lights up yellow to
indicate that the Easy-start feature has been deactivated.
Note: Each of the rst 14 brushings must last at least 1 minute to move
through the Easy-start ramp-up cycle properly.
Note: Use of the Easy-start feature beyond the initial ramp-up period is
not recommended and reduces the effectiveness of the Philips Sonicare
toothbrush in removing plaque.
Quadpacer
- The Quadpacer is an interval timer that has a short beep and pause
to remind you to brush the 4 sections of your mouth evenly and
thoroughly. Depending on the brushing mode you have selected,
the Quadpacer beeps at different intervals during the brushing cycle
(Fig. 6).
ENGLISH12

Activating or deactivating the Quadpacer feature:
Place the handle in the plugged-in charger.
- To activate Quadpacer: Press and hold the intensity level button
down (-) for 2 seconds. You hear 2 beeps and the battery level
indicator lights up green to indicate that the Quadpacer feature
has been activated.
- To deactivate Quadpacer: Press and hold the intensity level button
down (-) for 2 seconds. You hear 1 beep and the battery level
indicator lights up yellow to indicate that the Quadpacer feature
has been deactivated.
Charger conrmation
When the charger conrmation feature is activated, the handle beeps and
vibrates briey when it is placed on the charger base. This Philips Sonicare
model comes with the charger conrmation feature deactivated.
Activating or deactivating the charger conrmation feature:
Place the handle on the charger.
- To activate charger conrmation: Press and hold the intensity level
button up (+) for 2 seconds. You hear 2 beeps and the battery level
indicator lights up green twice to indicate that the charger
conrmation feature has been activated.
- To deactivate charger conrmation: Press and hold the intensity level
button up (+) for 2 seconds. You hear 1 beep and the battery level
indicator lights up yellow once to indicate that the charger
conrmation feature has been deactivated.
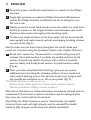
Cleaning
The Philips Sonicare should be cleaned regularly to remove toothpaste
and other residue. Failure to clean the Philips Sonicare may result in an
unhygienic product and damage to it may occur.
Do not clean brush heads, the handle or the charger in the dishwasher.
ENGLISH 13

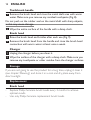
Toothbrush handle
1 Remove the brush head and rinse the metal shaft area with warm
water. Make sure you remove any residual toothpaste (Fig. 8).
Do not push on the rubber seal on the metal shaft with sharp objects,
as this may cause damage.
2 Wipe the entire surface of the handle with a damp cloth.
Brush head
1 Rinse the brush head and bristles after each use (Fig. 9).
2 Remove the brush head from the handle and rinse the brush head
connection with warm water at least once a week.
Charger
1 Unplug the charger before you clean it.
2 Wipe the surface of the charger with a damp cloth. Make sure you
remove any toothpaste or other residue from the charger surfaces.
Storage
If you are not going to use the product for a long time, unplug it, clean it
(see chapter ‘Cleaning’) and store it in a cool and dry place away from
direct sunlight.
Replacement
Brush head
- Replace Philips Sonicare brush heads every 3 months to achieve
optimal results.
- Use only Philips Sonicare replacement brush heads.
ENGLISH14

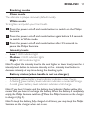
Recycling
- This symbol on a product means that the product is covered by
European Directive 2012/19/EU (Fig. 10).
- This symbol means that the product contains a built-in rechargeable
battery covered by European Directive 2006/66/EC which cannot be
disposed of with normal household waste. Follow the instructions in
section ‘Removing the rechargeable battery’ to remove the battery
(Fig. 11).
- Inform yourself about the local separate collection system for electrica
l
and electronic products and rechargeable batteries. Follow local rules
and never dispose of the product and rechargeable batteries with
normal household waste. Correct disposal of old products and
rechargeable batteries helps prevent negative consequences for the
environment and human health.
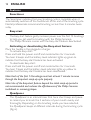
Removing the rechargeable battery
Only remove the rechargeable battery when you discard the appliance.
Make sure the battery is completely empty when you remove it.
To remove the rechargeable battery, you need a towel or cloth, a
hammer and a at-head (standard) screwdriver. Observe basic safety
precautions when you follow the procedure outlined below. Be sure to
protect your eyes, hands, ngers, and the surface on which you work.
1 To deplete the rechargeable battery of any charge, remove the
handle from the charger, switch on the Philips Sonicare and
let it run until it stops. Repeat this step until you can no longer
switch on the Philips Sonicare.
2 Remove and discard the brush head. Cover the entire handle with
a towel or cloth (Fig. 12).
3 Hold the top of the handle with one hand and strike the handle
housing 1 cm above the bottom end. Strike rmly with a hammer
on all 4 sides to eject the end cap (Fig. 13).
You may have to hit on the end several times to break the
internal snap connections.
ENGLISH 15

4 Remove the end cap from the toothbrush handle. If the end cap
does not release easily from the housing, repeat step 3 until the
end cap is released (Fig. 14).
5
Holding the handle upside down, press the shaft down on a hard surface.
If the internal components do not easily release from the housing,
repeat step 3 until the internal components are released. (Fig. 15)
6 Remove the rubber battery cover (Fig. 16).
7 Wedge the screwdriver between the battery and the black frame at
the bottom of the internal components. Then pry the screwdriver away
from the battery to break the bottom of the black frame (Fig. 17).
8 Insert the screwdriver between the bottom of the battery and the
black frame to break the metal tab connecting the battery to the
green printed circuit board. This will release the bottom end of the
battery from the frame (Fig. 18).
9 Grab the battery and pull it away from the internal components
to break the second metal battery tab (Fig. 19).
Be aware of the sharp edges of the battery tabs so as to avoid
injury to your ngers.
10 Cover the battery contacts with tape to prevent any electrical
short from residual battery charge. The rechargeable battery can
n
ow be recycled and the rest of the product discarded appropriately.
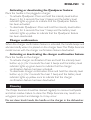
Guarantee and support
If you need information or support, please visit www.philips.com/
support or read the separate worldwide guarantee leaet.
Guarantee restrictions
The terms of the international guarantee do not cover the following:
- Brush heads.
- Damage caused by use of unauthorised replacement parts.
- Damage caused by misuse, abuse, neglect, alterations or unauthorised
repair.
- Normal wear and tear, including chips, scratches, abrasions,
discolouration or fading.
ENGLISH16

17
Въведение
Поздравления за вашата покупка и добре дошли във Philips!
За да се възползвате изцяло от предлаганата от Philips поддръжка,
регистрирайте продукта си на адрес www.philips.bg/welcome.
Важно
Преди да използвате уреда, прочетете
внимателно това ръководство за потребителя и
го запазете за справка в бъдеще.
Опасност
- Пазете зарядното устройство от вода.
Не го поставяйте и не го съхранявайте
над или близо до вода във вана, мивка и т.н.
Не потапяйте зарядното във вода или каквато
и да е друга течност. След почистване се уверете,
че зарядното устройство е напълно сухо,
преди да го включите в електрическата мрежа.
Предупреждение
- Захранващият кабел не може да бъде заменян.
При повреда в кабела зарядното устройство
трябва да се изхвърли.
- За да избегнете злополуките, винаги заменяйте
повреденото зарядно устройство само с
оригинално такова.
- Не използвайте зарядното устройство на
открито или близо до горещи повърхности.
БЪЛГАРСКИ

- Не използвайте уреда, ако някоя негова част е
повредена (главата, дръжката на четката или
зарядното устройство). Този уред няма части,
които могат да се подменят от потребителя.
При повреда в уреда се свържете с Центъра
за обслужване на потребители във вашата
страна (вижте раздел „Гаранция и поддръжка”).
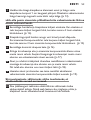
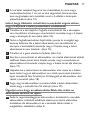
- Този уред може да се използва от деца с
възраст 8 години и повече и от хора с
намалени физически, сензорни или умствени
възприятия или без опит и познания, ако са
инструктирани за безопасна употреба на уреда
или са под наблюдение с цел гарантиране на
безопасна употреба и ако са им разяснени
евентуалните опасности. Не позволявайте на
деца да си играят с уреда. Не позволявайте на
деца да извършват почистване или поддръжка
на уреда, освен ако децата не са на възраст
8 години или повече и са под надзор.
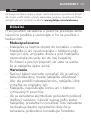
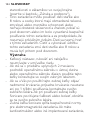
Внимание
- Не мийте главата на четката, дръжката или
зарядното устройство в съдомиялна машина.
- Ако сте претърпели операция по устната
кухина или венците през последните 2 месеца,
посъветвайте се със зъболекар, преди да
използвате четката за зъби.
- Консултирайте се с вашия зъболекар, ако след
използването на тази четка за зъби се появи
БЪЛГАРСКИ18

прекомерно кървене или ако кървенето
продължи да възниква след 1 седмица на
използване. Също така се консултирайте със
своя зъболекар, ако изпитвате неудобство или
болка, когато използвате четката Sonicare.
-
Четката Sonicare съответства на стандартите за
безопасност на електромагнитните устройства.
Ако имате пейсмейкър или друго имплантирано
устройство, преди употреба се консултирайте
с вашия лекар или с производителя на
имплантираното устройство.
- Ако имате медицински съображения, преди да
използвате Sonicare, се консултирайте с лекар.
- Този уред е предназначен за почистване на
зъбите, венците и езика. Не го използвайте за
каквито и да е други цели. Ако изпитвате какъвто
и да било дискомфорт или болка, спрете да
използвате уреда и се консултирайте с лекар.
- Четката Sonicare е уред за лична хигиена и не
е предназначена за използване върху множество
пациенти в дентална практика или клиника.
- Прекратете използването на главата на четката,
ако косъмчетата са смачкани или огънати.
Подменяйте главата на четката на всеки
3 месеца или по-често, ако се появят признаци
за износване. Не използвайте други глави на
четки, освен препоръчваните от производителя.
БЪЛГАРСКИ 19

- Ако вашата паста за зъби съдържа пероксид,
сода за хляб или бикарбонат (често срещани
в избелващите пасти за зъби), след всяка
употреба измивайте старателно главата на
четката със сапун и вода. Това ще предотврати
евентуално напукване на пластмасата.
Електромагнитни излъчвания (EMF)
Този уред на Philips е в съответствие с нормативната уредба и
всички действащи стандарти, свързани с излагането на
електромагнитни излъчвания.
Общо описание (фиг. 1)
1 Хигиенично капаче за пътуване
2 Глава на четката
3 Дръжка
4 Вкл./изкл. на захранването и бутон за режим
5 Индикатор за ниво на интензивност
6 Бутон за ниво на интензивност (+ и -)
7 Индикатор за режим
8 Индикатор за заряда на батерията
9 Зарядно устройство
Забележка: Съдържанието на кутията може да се различава в
зависимост от закупения модел.
БЪЛГАРСКИ20
Pagina se încarcă ...
Pagina se încarcă ...
Pagina se încarcă ...
Pagina se încarcă ...
Pagina se încarcă ...
Pagina se încarcă ...
Pagina se încarcă ...
Pagina se încarcă ...
Pagina se încarcă ...
Pagina se încarcă ...
Pagina se încarcă ...
Pagina se încarcă ...
Pagina se încarcă ...
Pagina se încarcă ...
Pagina se încarcă ...
Pagina se încarcă ...
Pagina se încarcă ...
Pagina se încarcă ...
Pagina se încarcă ...
Pagina se încarcă ...
Pagina se încarcă ...
Pagina se încarcă ...
Pagina se încarcă ...
Pagina se încarcă ...
Pagina se încarcă ...
Pagina se încarcă ...
Pagina se încarcă ...
Pagina se încarcă ...
Pagina se încarcă ...
Pagina se încarcă ...
Pagina se încarcă ...
Pagina se încarcă ...
Pagina se încarcă ...
Pagina se încarcă ...
Pagina se încarcă ...
Pagina se încarcă ...
Pagina se încarcă ...
Pagina se încarcă ...
Pagina se încarcă ...
Pagina se încarcă ...
Pagina se încarcă ...
Pagina se încarcă ...
Pagina se încarcă ...
Pagina se încarcă ...
Pagina se încarcă ...
Pagina se încarcă ...
Pagina se încarcă ...
Pagina se încarcă ...
Pagina se încarcă ...
Pagina se încarcă ...
Pagina se încarcă ...
Pagina se încarcă ...
Pagina se încarcă ...
Pagina se încarcă ...
Pagina se încarcă ...
Pagina se încarcă ...
Pagina se încarcă ...
Pagina se încarcă ...
Pagina se încarcă ...
Pagina se încarcă ...
Pagina se încarcă ...
Pagina se încarcă ...
Pagina se încarcă ...
Pagina se încarcă ...
Pagina se încarcă ...
Pagina se încarcă ...
Pagina se încarcă ...
Pagina se încarcă ...
Pagina se încarcă ...
Pagina se încarcă ...
Pagina se încarcă ...
Pagina se încarcă ...
Pagina se încarcă ...
Pagina se încarcă ...
Pagina se încarcă ...
Pagina se încarcă ...
Pagina se încarcă ...
Pagina se încarcă ...
Pagina se încarcă ...
Pagina se încarcă ...
Pagina se încarcă ...
Pagina se încarcă ...
Pagina se încarcă ...
Pagina se încarcă ...
Pagina se încarcă ...
Pagina se încarcă ...
Pagina se încarcă ...
Pagina se încarcă ...
Pagina se încarcă ...
Pagina se încarcă ...
Pagina se încarcă ...
Pagina se încarcă ...
Pagina se încarcă ...
Pagina se încarcă ...
Pagina se încarcă ...
Pagina se încarcă ...
Pagina se încarcă ...
Pagina se încarcă ...
Pagina se încarcă ...
Pagina se încarcă ...
Pagina se încarcă ...
Pagina se încarcă ...
Pagina se încarcă ...
Pagina se încarcă ...
Pagina se încarcă ...
Pagina se încarcă ...
Pagina se încarcă ...
Pagina se încarcă ...
Pagina se încarcă ...
Pagina se încarcă ...
Pagina se încarcă ...
Pagina se încarcă ...
Pagina se încarcă ...
Pagina se încarcă ...
Pagina se încarcă ...
Pagina se încarcă ...
Pagina se încarcă ...
Pagina se încarcă ...
Pagina se încarcă ...
Pagina se încarcă ...
Pagina se încarcă ...
Pagina se încarcă ...
Pagina se încarcă ...
Pagina se încarcă ...
Pagina se încarcă ...
Pagina se încarcă ...
Pagina se încarcă ...
Pagina se încarcă ...
Pagina se încarcă ...
Pagina se încarcă ...
Pagina se încarcă ...
Pagina se încarcă ...
Pagina se încarcă ...
Pagina se încarcă ...
Pagina se încarcă ...
Pagina se încarcă ...
Pagina se încarcă ...
Pagina se încarcă ...
Pagina se încarcă ...
Pagina se încarcă ...
Pagina se încarcă ...
Pagina se încarcă ...
Pagina se încarcă ...
Pagina se încarcă ...
Pagina se încarcă ...
Pagina se încarcă ...
Pagina se încarcă ...
Pagina se încarcă ...
Pagina se încarcă ...
Pagina se încarcă ...
Pagina se încarcă ...
Pagina se încarcă ...
Pagina se încarcă ...
Pagina se încarcă ...
Pagina se încarcă ...
Pagina se încarcă ...
Pagina se încarcă ...
Pagina se încarcă ...
Pagina se încarcă ...
Pagina se încarcă ...
Pagina se încarcă ...
Pagina se încarcă ...
Pagina se încarcă ...
Pagina se încarcă ...
Pagina se încarcă ...
Pagina se încarcă ...
Pagina se încarcă ...
Pagina se încarcă ...
Pagina se încarcă ...
Pagina se încarcă ...
Pagina se încarcă ...
Pagina se încarcă ...
Pagina se încarcă ...
Pagina se încarcă ...
Pagina se încarcă ...
Pagina se încarcă ...
Pagina se încarcă ...
Pagina se încarcă ...
Pagina se încarcă ...
Pagina se încarcă ...
Pagina se încarcă ...
Pagina se încarcă ...
Pagina se încarcă ...
Pagina se încarcă ...
-
 1
1
-
 2
2
-
 3
3
-
 4
4
-
 5
5
-
 6
6
-
 7
7
-
 8
8
-
 9
9
-
 10
10
-
 11
11
-
 12
12
-
 13
13
-
 14
14
-
 15
15
-
 16
16
-
 17
17
-
 18
18
-
 19
19
-
 20
20
-
 21
21
-
 22
22
-
 23
23
-
 24
24
-
 25
25
-
 26
26
-
 27
27
-
 28
28
-
 29
29
-
 30
30
-
 31
31
-
 32
32
-
 33
33
-
 34
34
-
 35
35
-
 36
36
-
 37
37
-
 38
38
-
 39
39
-
 40
40
-
 41
41
-
 42
42
-
 43
43
-
 44
44
-
 45
45
-
 46
46
-
 47
47
-
 48
48
-
 49
49
-
 50
50
-
 51
51
-
 52
52
-
 53
53
-
 54
54
-
 55
55
-
 56
56
-
 57
57
-
 58
58
-
 59
59
-
 60
60
-
 61
61
-
 62
62
-
 63
63
-
 64
64
-
 65
65
-
 66
66
-
 67
67
-
 68
68
-
 69
69
-
 70
70
-
 71
71
-
 72
72
-
 73
73
-
 74
74
-
 75
75
-
 76
76
-
 77
77
-
 78
78
-
 79
79
-
 80
80
-
 81
81
-
 82
82
-
 83
83
-
 84
84
-
 85
85
-
 86
86
-
 87
87
-
 88
88
-
 89
89
-
 90
90
-
 91
91
-
 92
92
-
 93
93
-
 94
94
-
 95
95
-
 96
96
-
 97
97
-
 98
98
-
 99
99
-
 100
100
-
 101
101
-
 102
102
-
 103
103
-
 104
104
-
 105
105
-
 106
106
-
 107
107
-
 108
108
-
 109
109
-
 110
110
-
 111
111
-
 112
112
-
 113
113
-
 114
114
-
 115
115
-
 116
116
-
 117
117
-
 118
118
-
 119
119
-
 120
120
-
 121
121
-
 122
122
-
 123
123
-
 124
124
-
 125
125
-
 126
126
-
 127
127
-
 128
128
-
 129
129
-
 130
130
-
 131
131
-
 132
132
-
 133
133
-
 134
134
-
 135
135
-
 136
136
-
 137
137
-
 138
138
-
 139
139
-
 140
140
-
 141
141
-
 142
142
-
 143
143
-
 144
144
-
 145
145
-
 146
146
-
 147
147
-
 148
148
-
 149
149
-
 150
150
-
 151
151
-
 152
152
-
 153
153
-
 154
154
-
 155
155
-
 156
156
-
 157
157
-
 158
158
-
 159
159
-
 160
160
-
 161
161
-
 162
162
-
 163
163
-
 164
164
-
 165
165
-
 166
166
-
 167
167
-
 168
168
-
 169
169
-
 170
170
-
 171
171
-
 172
172
-
 173
173
-
 174
174
-
 175
175
-
 176
176
-
 177
177
-
 178
178
-
 179
179
-
 180
180
-
 181
181
-
 182
182
-
 183
183
-
 184
184
-
 185
185
-
 186
186
-
 187
187
-
 188
188
-
 189
189
-
 190
190
-
 191
191
-
 192
192
-
 193
193
-
 194
194
-
 195
195
-
 196
196
-
 197
197
-
 198
198
-
 199
199
-
 200
200
-
 201
201
-
 202
202
-
 203
203
-
 204
204


Saeco HX8911/01 Manual de utilizare
- Categorie
- Periuțe de dinți electrice
- Tip
- Manual de utilizare
în alte limbi
- slovenčina: Saeco HX8911/01 Používateľská príručka
- eesti: Saeco HX8911/01 Kasutusjuhend
Lucrări conexe
-
Sonicare HX6511/50 Manual de utilizare
-
-
-
-
Sonicare HX6631/01 Manual de utilizare
-
Sonicare HX9172/14 Manual de utilizare
-
-
Sonicare HX6804/04 Manual de utilizare
-
Sonicare HX6211/04 Manual de utilizare
Alte documente
-
-
Sonicare HX9362-67 Manual de utilizare
-
Sonicare HX9334/41 Manual de utilizare
-
Sonicare HX6971/33 Manual de utilizare
-
Sonicare HX6972/38 Manual de utilizare
-
-
-
Sonicare HX3110/00 Manual de utilizare
-
Sonicare HX9112/02 Manual de utilizare
-
Sonicare HX6212/87 Manual de utilizare