Master DDMDC61 Manual de utilizare
- Categorie
- Incalzitoare de spatiu
- Tip
- Manual de utilizare

- re
4201.403 Edition 18 Rev. 3
DC 61
USER AND MAINTENANCE BOOK
en
LIBRETTO USO E MANUTENZIONE
it
BEDIENUNGS- UND WARTUNGSANLEITUNG
de
MANUAL DE INSTRUCCIONES PARA EL USO Y MANTENIMIENTO
es
MANUEL D’UTILISATION ET DE MAINTENANCE
fr
HANDLEIDING VOOR GEBRUIK EN ONDERHOUD
nl
MANUAL DE USO E MANUTENÇÃO
pt
VEJLEDNING OM BRUG OG VEDLIGEHOLDELSE
da
KÄYTTÖ- JA HUOLTO-OHJE
HEFTE FOR BRUK OG VEDLIKEHOLD
no
ANVÄNDAR- OCH UNDERHÅLLSHANDBOK
sv
INSTRUKCJA OBSŁUGI I KONSERWACJI
pl
РУКОВОДСТВО ПО ЭКСПЛУАТАЦИИ И ТЕХНИЧЕСКОМУ ОБСЛУЖИВАНИЮ
ru
PŘÍRUČKA PRO POUŽITÍ A ÚDRŽBU
cs
HASZNÁLATI ÉS KARBANTARTÁSI KÉZIKÖNYV
hu
PRIROČNIK Z NAVODILI ZA UPORABO IN VZDRŽEVANJE
sl
KULLANIM VE BAKIM K
i
TAPÇIĞI
tr
KNJIŽICA O UPORABI I ODRŽAVANJU
hr
NAUDOJIMO IR PRIEŽIŪROS KNYGELĖ
lt
LIETOŠANAS UN TEHNISKĀS APKOPES GRĀMATIŅA
lv
KASUTUS- JA HOOLDUSJUHEND
et
MANUAL DE UTILIZARE ŞI ÎNTREŢINERE
ro
PRÍRUČKA PRE POUŽITIE A ÚDRŽBU
sk
НАРЪЧНИК ЗА ИЗПОЛЗВАНЕ И ПОДДРЪЖКА
bg
КЕРІВНИЦТВО З ЕКСПЛУАТАЦІЇ Й ТЕХНІЧНОГО ОБСЛУГОВУВАННЯ
uk
KNJIŽICOM O UPOTREBI I ODRŽAVANJU
bs
ΕΓΧΕΙΡΙΔΙΟ ΧΡΗΣΗΣ ΚΑΙ ΣΥΝΤΗΡΗΣΗΣ
el
使用和维护手册
zh
ПАЙДАЛАНУ ЖӘНЕ ТЕХНИКАЛЫҚ ҚЫЗМЕТ КӨРСЕТУ ЖЕТЕКШІЛІГІ
kk
Dantherm S.p.A.
Via Gardesana 11, -37010-
Pastrengo (VR), Italy
Dantherm S.p.A.
Виа Гардесана 11, 37010
Пастренго (Верона), Италия
Dantherm Sp. z o.o.
ul. Magazynowa 5A,
62-023 Gądki, Poland
Dantherm Sp. z o.o.
ул. Магазинова, 5A,
62-023 Гадки, Польша
Dantherm LLC
ul. Transportnaya - 22 ownership 2,
142802, STUPINO, Moscow region, Russia
ООО «Дантерм»
Ул. Транспортная, владение 22/2,
142802, г.Ступино, Московская обл., РФ
Dantherm China LTD
Unit 2B, 512 Yunchuan Rd.,
Shanghai, 201906, China
Dantherm China LTD
Юньчуань роад, 512, строение 2В,
Шанхай, 201906, Китай
Dantherm SP S.A.
C/Calabozos, 6 Polígono Industrial, 28108
Alcobendas (Madrid) Spain
Dantherm SP S.A.
Ц/Калабозос, 6 Полигоно Индустриал,
28108 Алкобендас (Мадрит) Испания

MODEL DC 61
17 kW-кВт
14.600 kcal/h-ккал/ч
58.000 Btu/h-БТЕ/ч
1,35 kg/h-кг/ч
DIESEL-KEROSENE
дизель-керосин
11 l-л
~110-240 V-В (-15% ÷ +10%) 50-60 Hz-Гц 0,4-0,2 A
--12 V-В (-15% ÷ +10%) 1 A
20 kg-кг
0,40 GpH 80°H LE DANFOSS
950 kPa-кПа
9,5 bar-бар
IMPORTANT: In order to have a correct function you must use an electrical generator in class G3 or more (frequency va-
riation ±1%, tension variation ±2%). The maximum power of electrical generator must be three time the nominal power of device
that you must connect.
TECHNICAL DATA TABLE - TABELLA DATI TECNICI - TECHNISCHE
DATENTABELLE - TABLA DE DATOS TÉCNICOS - TABLEAU DES
DONNÉES TECHNIQUES - TABEL TECHNISCHE GEGEVENS - TA-
BELA DE DADOS TÉCNICOS - TEKNISK DATATABEL - TEKNISTEN
TIETOJEN TAULUKKO - TABELL FOR TEKNISKE DATA - TABELL
MED TEKNISKA EGENSKAPER - TABELA DANYCH TECHNICZNYCH
- ТАБЛИЦЕ ТЕХНИЧЕСКИХ ДАННЫХ - TABULKA TECHNICKÝCH
ÚDAJŮ - MŰSZAKI ADATOK TÁBLÁZATA - TEHNIČNI PODATKI -
TEKNİK VERİLER TABLOSUNDA - TABLICI S TEHNIČKIM PODACI-
MA - TECHNINIŲ DUOMENŲ LENTELĖJE - TEHNISKO DATU TABU-
LA - TEHNILISTE ANDMETE TABEL - TABELUL CU DATE TEHNICE
- TABUĽKA TECHNICKÝCH ÚDAJOV - ТАБЛИЦА ТЕХНИЧЕСКИ
ДАННИ - ТАБЛИЦІ ТЕХНІЧНИХ ДАНИХ - TABELI SA TEHNIČKIM
PODACIMA - ΠΙΝΑΚΙΔΑ ΤΩΝ ΤΕΧΝΙΚΩΝ ΣΤΟΙΧΕΙΩΝ - -
ТЕХНИКАЛЫҚ КӨРСЕТКІШТЕР КЕСТЕСІ

PICTURES - FIGURE - ABBILDUNGEN - FIGURAS - FIGURES - FIGU-
REN - FIGURAS - FIGURER - KUVAT - FIGURER - FIGUR - RYSUNKI
- РИСУНКИ - OBRÁZKY - ÁBRÁK - SLIKE - ŞEKİLLER - SLIKE - PA-
VEIKSLĖLIAI - ATTĒLI - JOONISED - IMAGINI - OBRÁZKY - ФИГУРА
- МАЛЮНКИ - SLIKE - ΕΙΚΟΝΕΣ - - СУРЕТТЕР
1 2
34
5 6
78
910
11
ON
OFF

BATTERY: MCS BAT6
Cell Type: Li-ion 18650
Nominal Voltage: 14,4 V
Nominal Capacity: 6,0 Ah
Weight: 490 g
Charging: 0 °C ÷ 40 °C
Discharging: -20 °C ÷ 40 °C
TECHNICAL DATA - DATI TECNICI - TECHNISCHE DATEN - DATOS
TÉCNICOS - DONNÉES TECHNIQUES - TECHNISCHE GEGEVENS -
DADOS TÉCNICOS - TEKNISKE DATA - TEKNISET TIEDOT - TEKNIS-
KE DATA - TEKNISKA DATA - DANE TECHNICZNE - ТЕХНИЧЕСКИЕ
ДАННЫЕ - TECHNICKÉ ÚDAJE - MŰSZAKI ADATOK - TEHNIČNI PO-
DATKI - TEKNİK VERİLER - TEHNIČKI PODACI - TECHNINIAI DUO-
MENYS - TEHNISKIE DATI - TEHNILISED ANDMED - DATE TEHNI-
CE - TECHNICKÉ ÚDAJE - ТЕХНИЧЕСКИ ДАННИ - ТЕХНІЧНІ ДАНІ
- TEHNIČKI PODACI - ΤΕΧΝΙΚΑ ΔΕΔΟΜΕΝΑ - - ТЕХНИКАЛЫҚ
КӨРСЕТКІШТЕР

CHARGER: MCS CHA
Nominal Input Voltage: ~230 V AC 50-60 Hz
Max. Input Power: 75 W
Charging Volt.: 16,35 V ± 0,25 V
Charging Current: 3,5 A
Temperature Function: -20 °C ÷ 55 °C
CHARGER: MCS CHA
Nominal Input Voltage: ~120 V AC 50-60 Hz
Max. Input Power: 75 W
Charging Volt.: 16,35 V ± 0,25 V
Charging Current: 3,5 A
Temperature Function: -20 °C ÷ 55 °C
TECHNICAL DATA - DATI TECNICI - TECHNISCHE DATEN - DATOS
TÉCNICOS - DONNÉES TECHNIQUES - TECHNISCHE GEGEVENS -
DADOS TÉCNICOS - TEKNISKE DATA - TEKNISET TIEDOT - TEKNIS-
KE DATA - TEKNISKA DATA - DANE TECHNICZNE - ТЕХНИЧЕСКИЕ
ДАННЫЕ - TECHNICKÉ ÚDAJE - MŰSZAKI ADATOK - TEHNIČNI PO-
DATKI - TEKNİK VERİLER - TEHNIČKI PODACI - TECHNINIAI DUO-
MENYS - TEHNISKIE DATI - TEHNILISED ANDMED - DATE TEHNI-
CE - TECHNICKÉ ÚDAJE - ТЕХНИЧЕСКИ ДАННИ - ТЕХНІЧНІ ДАНІ
- TEHNIČKI PODACI - ΤΕΧΝΙΚΑ ΔΕΔΟΜΕΝΑ - - ТЕХНИКАЛЫҚ
КӨРСЕТКІШТЕР

IMPORTANT: READ AND UNDERSTAND THIS OPERATIONAL MANUAL BEFORE PERFORMING
ASSEMBLY, COMMISSIONING OR MAINTENANCE ON THIS HEATER. INCORRECT USE OF THE
HEATER CAN CAUSES SERIOUS INJURY. KEEP THIS MANUAL FOR FURTHER REFERENCE.
►►1. INFORMATION ON SAFETY
(WARNINGS)
IMPORTANT: This appliance is not suitable for use
by persons (including children) with reduced physical,
sensory and mental capacities or with lack of experi-
ence or knowledge unless supervised by a person re-
sponsible for their safety. Children must be supervised
to make sure they do not play with the appliance.
DANGER: Suffocation by carbon monoxide can
be fatal.
The rst symptoms of suffocation by carbon monoxide are
similar to those of u with headache, light-headedness
and/or nausea. These symptoms could be caused by the
faulty functioning of the heater. IF THESE SYMPTOMS
OCCUR, GO OUTDOORS IMMEDIATELY and have the
heater repaired by the technical support centre.
1.1. REFUELLING:
►1.1.1. Personnel appointed to carry out refuelling must
be qualied and fully familiar with the manufacturer’s
instructions and current regulations on how to refuel
heaters safely.
►1.1.2. Only use the type of fuel specied on the heater’s
identication plate.
►1.1.3. Before refuelling, turn off the heater and wait for
it to cool down.
►1.1.4. The tanks used to store the fuel must be stored in
a separate place.
►1.1.5. Fuel tanks must be kept at a minimum distance
from the heater, according to current standards.
►1.1.6. The fuel must be stored in an area where the oor
does not allow it to penetrate or drip onto ames under-
neath it, which may ignite the fuel.
►1.1.7. The fuel must be stored in accordance with cur-
rent regulations.
1.2. SAFETY:
►1.2.1. Never use the heater in areas with petrol, paint
solvents or other highly ammable vapours.
►1.2.2. Comply with all local legislation and current regu-
lations when using the heater.
►1.2.3. Heaters used near tarpaulins, curtains or other
similar covering materials must be a safe distance from
them. It is advised to use re-proof covering material.
►1.2.4. Only use in well-ventilated areas. Set-up a suit-
able opening in line with current standards, with the
purpose of introducing fresh air from outdoors.
►1.2.5. Power on the heater only with a current which
has the voltage and frequency values specied on the
heater’s identication plate.
►1.2.6. Only use suitably earthed 3-wire extension leads.
►1.2.7. Recommended safety distances between the
heater and ammable substances: front output 2.5 m (8
ft); on the side, at the top and at the back = 1.5 m (5 ft).
►1.2.8. Avoid re hazards by placing the hot or function-
ing heater on a steady level surface.
►1.2.9. Keep animals at a safe distance from the heater.
►1.2.10. Disconnect the power supply or battery from the
heater, when not in use.
►1.2.11. When it is controlled by a thermostat, the heater
can turn on at any time.
►1.2.12. Never use the heater in frequently used rooms
nor in bedrooms.
►1.2.13. Never move, handle, refuel or conduct mainte-
nance on the heater when it is hot, connected to the
mains, battery-powered or in operation.
►1.2.14. Keep the hot parts of the heater a suitable dis-
tance from inammable or thermolabile materials (in-
cluding the power supply cable).
►1.2.15. If the power cable or battery is damaged, they
must be replaced by a technical support centre to pre-
vent any risk (dispose of the damaged material accord-
ing to current regulations).
►1.2.16. Make sure that the heater is turned off before
connecting the power cable and/or inserting the re-
chargeable battery, in order to avoid risks.
►1.2.17. Use only the original rechargeable batteries rec-
ommended by the manufacturer. The use of non-origi-
nal rechargeable batteries can cause damage, injuries,
burns, explosions, electric shocks, poisoning, or en-
danger life.
►1.2.18. Keep the disconnected rechargeable battery
at a safe distance from paper clips, coins, keys, nails,
screws and any other small metal objects that could
cause a short-circuit. A short-circuit between the con-
tacts of the rechargeable battery can cause damage,
injuries, burns, explosions or endanger life.
►1.2.19. Incorrect use of the rechargeable battery can
cause the battery uid to leak. Avoid all contact with the
battery. In the event of accidental contact, rinse your-
self thoroughly with water. Seek immediate medical at-
tention if the uid comes into contact with your eyes.
The uid in the rechargeable battery can cause skin
irritation or burns.
►1.2.20. Incorrect use of the rechargeable battery can
cause the battery to release fumes. Avoid inhaling
these fumes at all costs. Ensure a good ow of fresh
air and seek immediate medical attention in the event
of accidental inhalation of fumes. The fumes can irritate
the airways.
►1.2.21. In order to avoid serious risk, do not attempt to
open or disassemble the rechargeable battery.
►1.2.22. In order to avoid serious risk, protect the re-
chargeable battery against heat (for example, constant
direct sunlight or re) water, humidity, etc.
►1.2.23. Use the specic rechargeable battery only for
this heater, in order to avoid hazardous overloading.
►1.2.24. Use only original rechargeable batteries with the
voltage rating indicated on the technical data plate af-
xed to the heater. The use of other types of recharge-
able battery (like imitation batteries, regenerated bat-
teries, batteries from other brands, etc.) poses the risk
of injuries and/or explosions.
►1.2.25. Use only original battery chargers to charge the
rechargeable battery. Each battery must be charged
using its specic charger in order to avoid the risks of
re and explosion.
►1.2.26. Use only the power supply methods recom-
mended in this manual. It is prohibited to change the
power supply method when the heater is running, in
order to avoid serious damage.
en
it
de
es
fr
nl
pt
da
no
sv
pl
ru
cs
hu
sl
tr
hr
lt
lv
et
ro
sk
bg
uk
bs
el
zh

►1.2.27. When the heater is managed by the thermostat
or switches from power supply to battery power cable,
the heater may turn off and go in stand-by mode (the
display shows “[ ]”), pay close attention because the
heater may automatically turn on again at any time and
may cause serious damage to property and people.
►►2. UNPACKING
See Fig. 1
►2.1. Remove all packaging material used to deliver the
heater and dispose of it in compliance with current
standards.
►2.2. Remove all items from the packaging.
►2.3. Check for any damage incurred during transport. If
the heater appears damaged, immediately inform the
dealer from whom it was purchased.
►►3. DESCRIPTION OF ARTICLES
►3.1. POWER CABLE (where present):
THE POWER SUPPLY CABLE DOES NOT CHARGE
THE BATTERY.
(Pic. 5) The heater can be connected to the mains by the
power supply cable. Check the cable regularly for wear, in
order to avoid serious damage. Observe all the warning
messages relating to the power cable in this manual.
►3.2. BATTERY (when applicable):
(Pic. 6)
NOTES: DEPENDING ON THE BATTERY CAPACITY
(MEASURED IN Ah), IT IS NECESSARY TO USE AN
ORIGINAL BATTERY CHARGER AND OF ADEQUATE
POWER.
The heater can operate autonomously using an original Li-
ion rechargeable battery, without a mains connection. The
rechargeable battery is provided only partially charged. It
is advisable, therefore, to fully charge the battery before
initial use. Use only original batteries to power the heater.
Observe all the warning messages relating to the battery
in this manual.
►3.3. BATTERY CHARGER (when applicable):
(Pic. 7) The battery charger is designed to charge orig-
inal lithium-batteries. The operating parameters for the
battery charger (see the data plate afxed on the battery
charger) must be observed. Use the battery charger in
completely dry, dust-free environments to charge only the
original rechargeable batteries used to power this heater.
The battery charger is designed to automatically charge
the rechargeable battery when connected (Pic. 8). A LED
light on the battery charger provides detailed diagnostics
during the charging phase (Pic. 9). Observe all the warn-
ing messages relating to the battery charger in this man-
ual.
►►4. FUEL
WARNING: The heater only works with DIESEL or
KEROSENE.
Only use diesel or kerosene to avoid any re or explosion
hazard. Never use petrol, naphtha, solvents for paints, al-
cohol or other highly inammable fuels.
Use non-toxic, anti-freeze additives in case of very low
temperatures.
►►5. OPERATING PRINCIPLE
See Pic. 2
The air needed to ensure proper combustion is produced
by the rotation of a fan inside the burner. The air ow
comes out from the burner sleeve and mixes with the fuel
that is sprayed at a high pressure by a nozzle. The noz-
zle-sprayed fuel is guaranteed by an electric pump that
sucks the fuel from the tank and pushes it at high pressure
to the nozzle.
►►6. OPERATION
WARNING: Carefully read the “SAFETY INFORMATION”
before switching on the heater.
IMPORTANT: After the rst time the heater does not
switch on, make sure there is fuel in the tank, make
sure the fuel lter is clean and make sure that the
heater is positioned on a at, stable surface.
IMPORTANT: This is a target infrared heater. Heats
objects, not air.
IMPORTANT: To change type of power supply from
battery to cable and vice-versa, turn off the heater by
strictly following the entire procedure to avoid serious
damages.
►6.1. IGNITING THE HEATER:
►6.1.1. Follow all the safety instructions.
►6.1.2. Check if there is any fuel in the tank.
►6.1.3. Close the tank cap.
►6.1.4. Connect the power plug to the mains or charged
battery (SEE VOLTAGE IN “TECHNICAL DATA
TABLE”) (Pic. 10-11).
►6.1.5. Turn the “ON/OFF” switch to “ON” (|) (A Pic.
3). The heater should turn on within a few seconds.
If the heater does not start, see the troubleshooting
paragraph (Par. 10).
PLEASE NOTE: IF THE HEATER SWITCHES OFF DUE
TO LACK OF FUEL, TURN OFF THE HEATER, TOP UP
THE TANK AND TURN IT ON AGAINST (SEE PAR. 5.1.).
►6.2. TURNING OFF THE HEATER:
CAUTION: DO NOT REMOVE VOLTAGE OR
DISCONNECT THE POWER CABLE OR REMOVE
THE BATTERY UNTIL THE HEATER HAS COOLED
COMPLETELY (approx. 5 min.).
►6.2.1. Turn the “ON/OFF” switch to “OFF” (0) (A Pic. 3).
►6.3. CONNECTING THE ROOM THERMOSTAT
(optional):
CAUTION: THE ROOM THERMOSTAT (OPTIONAL)
ONLY WORKS WHEN THE HEATER IS POWERED BY
THE POWER CABLE.
CAUTION: WHEN THE HEATER IS MANAGED BY THE
ROOM THERMOSTAT (OPTIONAL), THE HEATER’S
SWITCH-OFF AND ON IS AUTOMATIC.
Remove the plug connected to the heater and connect the
room thermostat (optional) (C Pic. 3).
en
it
de
es
fr
nl
pt
da
no
sv
pl
ru
cs
hu
sl
tr
hr
lt
lv
et
ro
sk
bg
uk
bs
el
zh

►►9. DISPLAY ERRORS
See B Pic. 3
ERROR CAUSE SOLUTION
F0 OPERATION ERROR
1. The “ON/OFF” switch is turned “ON” (|) when the
heater is plugged in 1. After disconnecting the heater, see that the switch is in
the “OFF” (0) position, plug the heater in and turn the
switch “ON” (|)
F1 PHOTOCELL ERROR
1. No fuel
2. Fuel is contaminated
3. Photocell is dirty or damaged
4. Fuel lter is dirty
5. Ignition error
1. Turn the switch “OFF” (0), rell the fuel tank
2. Turn the switch “OFF” (0) empty and rell the fuel tank.
Clean the lter using clean fuel, do not damage the
lter (SEE PARA. 6)
3. Contact the technical service center
4. SEE PARA. 6
5. Contact the technical service center
F2 TEMPERATURE CONTROL SENSOR ERROR
1. Interrupted cable
2. Sensor is damaged 1. Contact the technical service center
2. Contact the technical service center
F3 THERMOSTAT ERROR
1. Internal heater overheating
2. Antitilting sensor intervent
1. Turn the heater off, wait until it is cooled down
2. Place the heater on a level and stable surface
F4 INCORRECT VOLTAGE
1. Incorrect voltage 1. Check voltage of your electric supply system
FF NO SWITCH-ON AFTER THREE ATTEMPTS
1. No fuel
2. Dirty fuel lter
3. Dirty or defective photocell
4. Dirty or defective nozzle
5. Anti-tilting sensor trip
1. Contact the technical service center
2. Contact the technical service center
3. Contact the technical service center
4. Contact the technical service center
5. Contact the technical service center
PF FLAT BATTERY
1. Flat battery 1. Recharge the battery
[ ] HEATER IN STAND-BY
1. Thermostat connected
2. Switching from cable to battery power supply
1. Thermostat temperature set below the room tempera-
ture
2. Automatic re-ignition
en
it
de
es
fr
nl
pt
da
no
sv
pl
ru
cs
hu
sl
tr
hr
lt
lv
et
ro
sk
bg
uk
bs
el
zh
►►7. FUEL FILTER CLEANING
See Pic. 4
THE FILTER MAY NEED TO BE CLEANED DEPENDING
ON THE QUALITY OF THE FUEL USED.
►7.1. Remove the plug positioned on the tank (A Pic. 4).
►7.2. Remove the lter from the tank.
►7.3. Loosen the nut (B Pic. 4).
►7.4. Remove the lter (C Pic. 4).
►7.5. Clean the lter with clean fuel; make sure you do
not damage it.
►7.6. Put the lter back in the tank.
►►8. STORAGE AND TRANSPORT
I ORDER TO KEEP AND/OR TRANSPORT THE HEATER
IN THE BEST WAY, THE FOLLOWING PROCEDURE
MUST BE FOLLOWED:
►8.1. Empty the fuel from the tank.
►8.2. If you notice any residue, pour clean fuel into the
tank and rinse again.
►8.3. Close the tank cap and dispose of the fuel
appropriately according to the Standards in force.
►8.4. in order to keep the heater in the best way possible,
it must be kept on a level surface to prevent the escape
of fuel and in a dry place away from any possible ex-
ternal threats.

►►10. PREVENTIVE MAINTENANCE SCHEDULE
WARNING: BEFOR INITIATING ANY REPAIR OR MAINTENANCE PROCEDURE UNPLUG THE FEEDER CA-
BLE AND MAKE SURE THAT THE HEATER IS COOLED DOWN.
COMPONENT MAINTENANCE FREQUENCY MAINTENANCE PROCEDURE
Fuel tank Clean every 150-200 hours of operation or when
necessary Empty and rinse with fresh fuel
Nozzle Clean or replace once per season or when ne-
cessary Contact the technical service center
Photocell Clean once per season or when necessary Contact the technical service center
Fuel lter Clean or replace twice per season or when ne-
cessary Clean the fuel lter with clean fuel
Ignition device Clean or replace every 1.000 hours of operation,
or when necessary Contact the technical service center
Fan blades Clean when necessary Contact the technical service center
►►11. PROBLEM IDENTIFICATION
PROBLEM POSSIBLE CAUSE POSSIBLE SOLUTION
Heater doesn’t run 1. Heater blocked
2. The power switch is in the “OFF” (0) position
3. No power
4. Feeder cable unplugged
5. Blocked control card
6. Wrong thermostat setting
7. Temperature sensor override
8. Fuse damaged
1. Restart the heater
2. Turn the switch “ON” (|)
3A. Plug the feeder cable properly into the socket
3B. Check the power supply network
3C. Contact the technical service center
3D. Flat battery
4. Contact the technical service center
5A. Restart the heater
5B. Identify the display error
5C. Contact the technical service center
6. Calibrate the thermostat by setting it higher than
ambient temperature
7A. Wait at least ten minutes then try to run ignition
again
7B. Contact the technical service center
8. Contact the technical service center
Motor/pump runs
but the ame does
not start
1. No fuel
2. Ignition device is dirty
3. Fuel lter is dirty
4. Nozzle is dirty
5. Photocell is dirty, damaged or installed
improperly
6. Foreign substances present in the tank
7. Electrodes are used up or placed at an
improper distance
1. Turn off the heater, rell the fuel tank then restart
the heater
2. Contact the technical service center
3. Clean the lter using clean fuel
4. Contact the technical service center
5. Contact the technical service center
6. Empty and rell the fuel tank with clean fuel
7. Contact the technical service center
Fan blocked or
spins too slowly 1. Engine damaged 1. Contact the technical service center
en
it
de
es
fr
nl
pt
da
no
sv
pl
ru
cs
hu
sl
tr
hr
lt
lv
et
ro
sk
bg
uk
bs
el
zh

IMPORTANTE: LEGGERE E COMPRENDERE QUESTO MANUALE OPERATIVO PRIMA DI
EFFETTUARE L’ASSEMBLAGGIO, LA MESSA IN FUNZIONE O LA MANUTENZIONE DI QUESTO
RISCALDATORE. L’USO ERRATO DEL RISCALDATORE PUÒ CAUSARE LESIONI GRAVI.
CONSERVARE QUESTO MANUALE A TITOLO DI FUTURO RIFERIMENTO.
►►1. INFORMAZIONI SULLA SICUREZZA
(AVVERTENZE)
IMPORTANTE: Questo apparecchio non è adatto
all’uso da parte di persone (incluse bambini) con capa-
cità siche, sensoriali e mentali ridotte, o inesperte, a
meno che non vengano supervisionate da una perso-
na reponsabile per la loro sicurezza. I bambini devono
essere controllati, per assicurarsi che non giochino
con l’apparecchio.
PERICOLO: L’asssia da ossido di carbonio può
risultare fatale.
I primi sintomi di asssia da ossido di carbonio assomigliano a
quelli dell’inuenza, con cefalee, capogiri e/o nausea. Tali sin-
tomi potrebbero essere causati dal funzionamento difettoso
del riscaldatore. NEL CASO SI PRESENTASSERO QUESTI
SINTOMI, USCIRE IMMEDIATAMENTE ALL’APERTO e far
riparare il riscaldatore dal centro assistenza tecnica.
1.1. RIFORNIMENTO:
►1.1.1. Il personale incaricato del rifornimento, deve essere
qualicato ed avere totale dimestichezza con le istruzioni
del fabbricante e con la normativa vigente in merito al ri-
fornimento sicuro dei riscaldatori.
►1.1.2. Usare solamente il tipo di combustibile espressam-
ente specicato sulla targhetta identicativa del riscalda-
tore.
►1.1.3. Prima di effettuare il rifornimento, spegnere il riscal-
datore, ed attendere che si raffreddi.
►1.1.4. Le cisterne di magazzinaggio del carburante devono
trovarsi in una struttura separata.
►1.1.5. Tutti i serbatoi del combustibile, devono trovarsi ad
una distanza minima di sicurezza dal riscaldatore, secon-
do norme vigenti.
►1.1.6. Il combustibile va conservato in locali il cui pavimen-
to non permetta la penetrazione ed il gocciolio dello stesso
su amme sottostanti, che possano causarne l’accensio-
ne.
►1.1.7. La conservazione del combustibile va effettuata in
conformità alla normativa vigente.
1.2. SICUREZZA:
►1.2.1. Non usare mai il riscaldatore in locali nei quali siano
presenti benzina, solventi per vernici o altri vapori alta-
mente inammabili.
►1.2.2. Durante l’uso del riscaldatore, attenersi a tutte le or-
dinanze locali ed alla normativa vigente.
►1.2.3. I riscaldatori usati in prossimità di teloni, tende o
altri materiali simili di copertura, devono essere situati a
distanza di sicurezza da essi. Si consiglia anche di usare
materiali di copertura di tipo ignifugo.
►1.2.4. Usare solamente in aree ben ventilate. Predisporre
un’apertura adeguata secondo le norme vigenti, allo sco-
po di immettere aria fresca dall’esterno.
►1.2.5. Alimentare il riscaldatore solamente con corrente
avente tensione e frequenza specicate sulla targhetta
identicativa del riscaldatore.
►1.2.6. Usare solamente prolunghe a tre li opportunamente
collegate a massa.
►1.2.7. Distanze minime di sicurezza, consigliate, intercor-
rente tra il riscaldatore e le sostanze inammabili sono:
uscita anteriore = 2,5 m (8 ft); di lato, in alto e sul retro =
1,5 m (5 ft).
►1.2.8. Porre il riscaldatore caldo, o in funzione, su una su-
percie stabile e livellata, in modo da evitare i rischi di in-
cendio.
►1.2.9. Tenere gli animali a distanza di sicurezza dal riscal-
datore.
►1.2.10. Togliere l’alimentazione o la batteria dal riscaldato-
re, quando non lo si usa.
►1.2.11. Quando è controllato da un termostato, il riscalda-
tore può accendersi in qualsiasi momento.
►1.2.12. Non usare mai il riscaldatore in stanze frequente-
mente abitate né, in camere da letto.
►1.2.13. Quando il riscaldatore è caldo, collegato alla rete
elettrica, alimentato dalla batteria, in funzione non deve
mai essere spostato, maneggiato, rifornito né soggetto ad
alcun intervento di manutenzione.
►1.2.14. Mantenere una adeguata distanza da materiali in-
ammabili, o termolabili (compreso il cavo di alimentezione)
dalle parti calde del riscaldatore.
►1.2.15. Se il cavo di alimentazione o la batteria divessero
risultare danneggiati, devono essere sostituiti dal centro
assistenza tecnica, in modo da prevenire ogni rischio
(smaltire il materiale danneggiato secondo la normativa
vigente).
►1.2.16. Assicurarsi che il riscaldatore sia spento, prima di
collegare il cavo di alimentazione e/o inserire la batteria
ricaricabile, in modo da prevenire ogni rischio.
►1.2.17. Utilizzare solo ed esclusivamente batterie ricari-
cabili originali esplicitamente previste. L’uso di batterie
ricaricabili non previste può provocare danni o pericolo di
vita a persone, lesioni, ustioni, esplosioni, elettroshock o
avvelenamento.
►1.2.18. Mantenere un adeguata distanza di sicurezza tra la
batteria ricaricabile scollegata e fermagli, monete, chiavi,
chiodi, viti e altri piccoli oggetti metallici che potrebbero
provocare un eventuale cortocircuito. Un eventuale cor-
tocircuito tra i contatti della batteria ricaricabile può pro-
vocare danni o pericolo di vita a persone, lesioni, ustioni,
esplosioni, ecc..
►1.2.19. L’errato impiego della batteria ricaricabile può pro-
vocare fuoriuscita di liquido dalla batteria. Evitarne as-
solutamente il contatto. In caso di contatto accidentale,
sciacquare accuratamente con acqua. Rivolgersi immedi-
atamente al medico, qualora il liquido dovesse entrare in
contatto con gli occhi. Il liquido fuoriuscito dalla batteria
ricaricabile potrà causare irritazioni cutanee o ustioni.
►1.2.20. L’errato impiego della batteria ricaricabile può pro-
vocare fuoriuscita di vapori dalla batteria. Evitarne asso-
lutamente di inalare questi vapori. Far entrare aria fres-
ca e in caso di inalazione accidentale farsi visitare da un
medico in caso di disturbi. I vapori possono irritare le vie
respiratorie.
►1.2.21. Al ne di evitare gravi rischi non tentare di aprire/
smontare la batteria ricaricabile.
►1.2.22. Al ne di evitare gravi rischi proteggere la batteria
ricaricabile dal calore (per esempio dall’irradiamento sola-
re continuo, dal fuoco, dall’acqua, dall’umidita, ecc.).
►1.2.23. Utilizzare la batteria ricaricabile specica esclusi-
vamente con questo riscaldatore al ne di evitare sovrac-
carichi pericolosi.
►1.2.24. Utilizzare esclusivamente batterie ricaricabili ori-
ginali dotate della tensione indicata sulla targhetta dati
tecnici del riscaldatore. In caso di impiego di altre batte-
rie ricaricabili (per esempio batterie d’imitazione, batterie
rigenerate, batterie di concorrenza, ecc.) esiste il pericolo
di lesioni e/o esplosioni.
en
it
de
es
fr
nl
pt
da
no
sv
pl
ru
cs
hu
sl
tr
hr
lt
lv
et
ro
sk
bg
uk
bs
el
zh

►1.2.25. Caricare la batteria ricaricabile solo ed esclusiva-
mente con caricabatteria originali. Ogni batteria necessita
dello specico caricabatteria al ne di evitare rischi d’in-
cendio e di esplosione.
►1.2.26. Utilizzare solo le modalità di alimentazione elettrica
prevista in questo manuale. È vietato cambiare modalità di
alimentazione a riscaldatore in funzione, al ne di evitare
gravi danni.
►1.2.27. Quando il riscaldatore è gestito dal termostato o si
passa dall’alimentazione elettrica a cavo all’alimentazione
a batteria, il riscaldatore si potrebbe spegnere e entrare in
modalità stand-by (nel display compare la segnalazione
“[ ]“), porre la massima attenzione perchè il riscaldatore
potrebbe riaccendersi automaticamente in qualsiasi mo-
mento e potrebbe causare gravi danni a cose e a persone.
►►2. DISIMBALLAGGIO
Vedi Fig. 1
►2.1. Rimuovere tutti i materiali di imballaggio usati per con-
fezionare e spedire il riscaldatore e smaltirli secondo le
norme vigenti.
►2.2. Estrarre tutti gli articoli dall’imballo.
►2.3. Controllare eventuali danni subiti durante il trasporto.
Se il riscaldatore appare danneggiato, informare immedi-
atamente il concessionario presso il quale è stato acquis-
tato.
►►3. DESCRIZIONE ARTICOLI
►3.1. CAVO DI ALIMENTAZIONE (dove presente):
IL CAVO DI ALIMENTAZIONE NON HA FUNZIONE DI CA-
RICABATTERIA.
(Fig. 5) Il riscaldatore può funzionare collegato alla rete elett-
rica tramite il cavo di alimentazione. Vericare periodicamen-
te lo stato del cavo, al ne di evitare gravi danni. Rispettare
tutte le avvertenze relative al cavo di alimentazione riportate
nel presente manuale.
►3.2. BATTERIA (dove presente):
(Fig. 6)
NOTE: A SECONDA DELLA CAPACITÀ DELLA BATTERIA
(MISURATA IN Ah), È NECESSARIO UTILIZZARE UN CA-
RICABATTERIA ORIGINALE E DI ADEGUATA POTENZA.
Il riscaldatore può funzionare in modo autonomo con una
batteria ricaricabile originale al Li-ion, senza dove essere
collegato alla rete elettrica. La batteria ricaricabile è fornita
parzialmente carica e per questo si consiglia di eseguire un
ciclo di ricarica completo prima dell’utilizzo della batteria. Uti-
lizzare solo batterie originali per alimentare il riscaldatore.
Rispettare tutte le avvertenze relative alla batteria riportate
nel presente manuale.
►3.3. CARICABATTERIA (dove presente):
(Fig. 7) Il caricabatteria è progettato per caricale batterie al
Li-ion originali. E’ necessario rispettare i parametri di funzio-
namento del caricabatteria (vedi targhetta dati applicata sul
caricabatteria). Utilizzare il caricabatteria in luoghi completa-
mente asciutti e protetti dalla polvere, per caricare esclusiva-
mente batterie ricaricabili originali utilizzabili per alimentare
questo riscaldatore. Il caricabatteria è predisposto per gestire
in automatico il corretto ciclo di ricarica quando la batteria
ricaricabile viene collegata (Fig. 8). Un indicatore luminoso
posto sul caricabatteria permette di avere una dettagliata di-
agnostica durante la fase di ricerca (Fig. 9). Rispettare tutte
le avvertenze relative alla caricabatteria riportate nel presen-
te manuale.
►►4. COMBUSTIBILE
AVVERTENZA: Il riscaldatore funziona solo con DIE-
SEL o KEROSENE.
Usare solamente diesel o kerosene, per evitare rischi di in-
cendio o di esplosione. Non fare mai uso di benzina, nafta,
solventi per vernici, alcool o altri combustibili altamente in-
ammabili.
Usare additivi antigelo non tossici in caso di temperature mol-
to basse.
►►5. PRINCIPIO DI FUNZIONAMENTO
Vedi Fig. 2
L’aria necessaria per garantire una corretta combustione
viene prodotta dalla rotazione di una ventola interna al
bruciatore. Il usso d’aria esce dal canotto del bruciatore e
si miscela con il combustibile che viene polverizzato da un
ugello ad una elevata pressione. Il combustibile polverizzato
dall’ugello è garantito da una pompa elettrica che aspira
il combustibile dal serbatoio e lo spinge ad alta pressione
all’ugello.
►►6. FUNZIONAMENTO
AVVERTENZA: Leggere attentamente le ”INFORMAZI-
ONI SULLA SICUREZZA”, prima di accendere il riscal-
datore.
IMPORTANTE: Dopo la prima mancata accensione del
riscaldatore, vericare la presenza di combustibile nel
serbatoio, vericare che il ltro del combustibile sia
pulito e vericare che il riscaldatore sia posizionato su
una supercie piana e stabile.
IMPORTANTE: Il presente dispositivo è un riscaldatore
a infrarossi. Riscalda oggetti, non l’aria.
IMPORTANTE: Per cambiare tipologia di alimentazio-
ne elettrica da battaria a cavo e viceversa, spegnere il
riscaldatore seguendo scrupolosamente tutta la pro-
cedura al ne di evitare gravi danni.
►6.1. ACCENSIONE DEL RISCALDATORE:
►6.1.1. Seguire tutte le istruzioni relative alla sicurezza.
►6.1.2. Controllare la presenza di combustibile nel serba-
toio.
►6.1.3. Chiudere il tappo del serbatoio.
►6.1.4. Collegare la spina di alimentazione alla rete elettrica
o la batteria carica (VEDERE TENSIONE IN “TABELLA
DATI TECNICI”) (Fig. 10-11).
►6.1.5. Portare l’interruttore “ON/OFF” in posizione “ON” (|)
(A Fig. 3). Il riscaldatore dovrebbe accendersi entro pochi
secondi. Se il riscaldatore non si avvia consulta il paragra-
fo individuazione problema (Parag. 10).
N.B.: IN CASO DI SPEGNIMENTO DEL RISCALDATO-
RE DOVUTO ALL’ESAURIMENTO DEL COMBUSTIBILE,
SPEGNERE IL RISCALDATORE, RABBOCCARE IL SER-
BATOIO E RIACCENDERLO (VEDI PARAG. 5.1.).
►6.2. SPEGNIMENTO DEL RISCALDATORE:
ATTENZIONE: NON TOGLIERE LA TENSIONE O SCOL-
LEGARE IL CAVO DI ALIMENTAZIONE O RIMUOVERE
LA BATTERIA FINO AL COMPLETO RAFFREDAMEN-
TO DEL RISCALDATORE (circa 5 min.).
►6.2.1. Portare l’interruttore “ON/OFF” in posizione “OFF”
(0) (A Fig. 3).
en
it
de
es
fr
nl
pt
da
no
sv
pl
ru
cs
hu
sl
tr
hr
lt
lv
et
ro
sk
bg
uk
bs
el
zh

►►9. ERRORI DISPLAY
Vedi B Fig. 3
ERRORE CAUSA SOLUZIONE
F0 ERRORE OPERATIVO
1. L’interuttore “ON/OFF” è in posizione “ON” (|)
quando il riscaldatore viene collegato alla rete
elettrica
1. Dopo aver scollegato il riscaldatore dalla rete elettrica
posizionare l’interrutore in posizione “OFF” (0), ricolle-
gare la spina alla rete elettrica e portare l’interuttore in
posizione “ON” (|)
F1 ERRORE FOTOCELLULA
1. Mancanza combustibile
2. Combustibile sporco
3. Fotocellula sporca o diffettosa
4. Filtro combustibile sporco
5. Errore accensione
1. Posizionare l’interrutore in posizione “OFF” (0) e riempi-
re il serbatoio di carburante
2. Posizionare l’interrutore in posizione “OFF” (0), svuo-
tare e riempire il serbatoio di carburante. Pulire il ltro
con combustibile pulito, facendo attenzione a non dan-
neggiarlo (VEDI PARAG. 6)
3. Rivolgersi al centro di assistenza
4. VEDI PARAG. 6
5. Rivolgersi al centro di assistenza
F2 ERRORE SENSORE CONTROLLO TEMPERATURA
1. Terminale interrotto
2. Sensore difettoso 1. Rivolgersi al centro di assistenza
2. Rivolgersi al centro di assistenza
F3 ERRORE TERMOSTATO
1. Riscaldatore in sovratemperatura interna
2. Intervento sensore antitilting
1. Spegnere il riscaldatore, ed attendere il completo raff-
reddamento del riscaldatore
2. Posizionare il riscaldatore su una supercie piana e
stabile
F4 TENSIONE NON ADEGUATA
1. Tensione non adeguata 1. Vericare la corretta tensione del vostro impianto
FF MANCATA ACCENSIONE PER TRE TENTATIVI
1. Mancanza combustibile
2. Filtro combustibile sporco
3. Fotocellula sporca o diffettosa
4. Ugello sporca o diffettosa
5. Intervento sensore antitilting
1. Rivolgersi al centro di assistenza
2. Rivolgersi al centro di assistenza
3. Rivolgersi al centro di assistenza
4. Rivolgersi al centro di assistenza
5. Rivolgersi al centro di assistenza
PF BATTERIA SCARICA
1. Batteria scarica 1. Ricaricare la batteria
[ ] RISCALDATORE IN STAND-BY
1. Termostato collegato
2. Passaggio dall’alimentazione a cavo alla bat-
teria
1. Temperatura del termostato impostata sotto la
temperatura ambiante
2. Riaccensione automatica
en
it
de
es
fr
nl
pt
da
no
sv
pl
ru
cs
hu
sl
tr
hr
lt
lv
et
ro
sk
bg
uk
bs
el
zh
►6.3. COLLEGAMENTO TERMOSTATO AMBIENTE (op-
tional):
ATTENZIONE: IL TERMOSTATO AMBIENTE (OPTIO-
NAL) FUNZIONA SOLO IN QUANDO IL RISCALDATO-
RE È ALIMENTATO DAL CAVO DI ALIMENTAZIONE.
ATTENZIONE: QUANDO IL RISCALDATORE È GESTI-
TO DAL TERMOSTATO AMBIENTE (OPTIONAL), LO
SPEGNIMENTO E LA RIACCENSIONE DEL RISCADA-
TORE È AUTOMATICA.
Rimuovere il tappo collegato al riscaldatore e connettere il
termostato ambiente (optional) (C Fig. 3).
►►7. PULIZIA FILTRO COMBUSTIBILE
Vedi Fig. 4
A SECONDA DELLA QUALITA’ DEL COMBUSTIBILE
CHE VIENE IMPIEGATO, PUO’ RENDERSI NECESSARIA
LA PULIZIA DEL FILTRO.
►7.1. Rimuovere il tappo posizionato sul serbatio (A Fig. 4).
►7.2. Estrarre il ltro dal serbatoio.
►7.3. Svitare il dado (B Fig. 4).
►7.4. Slare il ltro (C Fig. 4).
►7.5. Pulire il ltro con combustibile pulito, facendo attenzio-
ne a non danneggiarlo.
►7.6. Rimontare il ltro nel serbatoio.
►►8. CONSERVAZIONE E TRASPORTO
AL FINE DI CONSERVARE E/O TRASPORTARE AL MEG-
LIO IL RISCALDATORE, SI CONSIGLIA DI SEGUIRE LA
PROCEDURA SEGUENTE:
►8.1. Svuotare il serbatoio dal combustibile.
►8.2. Se si nota la presenza di residui, versare combustibile
pulito nel serbatoio e scaricare nuovamente.
►8.3. Chiudere il tappo del serbatoio e smaltire il combustibi-
le in modo appropriato e secondo le norme vigenti.
►8.4. Al ne di conservare al meglio il riscaldatore, si consig-
lia di mantenerlo in posizione livellata, per evitare la fuori-
uscita del combustibile e di conservalo in un luogo asciut-
to, e al riparo da possibili danni esterni.

►►10. PROGRAMMA DI MANUTENZIONE PREVENTIVA
AVVERTENZA: PRIMA SI EFFETTUARE QUALSIASI MANUTENZIONE O RIPARAZIONE, SCOLLEGARE
IL CAVO DI ALIMENTAZIONE DALLA RETE ELETTRICA, ED ASSICURARSI CHE IL RISCALDATORE SIA
FREDDO.
COMPONENTE FREQUENZA MANUTENZIONE PROCEDURA MANUTEZIONE
Serbatoio del combust-
ibile Pulire ogni 150-200 ore di lavoro o a seconda
delle necessità Svuotare e risciacquare il serbatoio con com-
bustibile pulito
Ugello Pulire o sostituire una volta per stagione di la-
voro o a seconda delle necessità Rivolgersi al centro di assistenza
Fotocellula Pulire una volta per stagione di lavoro o a se-
conda delle necessità Rivolgersi al centro di assistenza
Filtro del combustibile Pulire o sostituire due volte per stagione di la-
voro o a seconda delle necessità Pulire il ltro con del combustibile pulito
Accenditore Pulire o sostituire ogni 1.000 ore di lavoro o a
seconda delle necessità Rivolgersi al centro di assistenza
Pale della ventola Pulire a seconda delle necessità Rivolgersi al centro di assistenza
►►11. INDIVIDUAZIONE PROBLEMA
PROBLEMA POSSIBILE CAUSA POSSIBILE SOLUZIONE
Il riscaldatore non
parte 1. Riscaldatore in blocco
2. Interruttore in posizione “OFF” (0)
3. Mancanza tensione
4. Cavo di alimentazione interrotto
5. Scheda di controllo in blocco
6. Impostazione errata del termostato
ambiente
7. Limite sensore temperatura intervenuto
8. Fusibile guasto
1. Spegnere e riaccendere il riscaldatore
2. Portare l’interruttore in posizione “ON” (|)
3A. Inserire correttamente il cavo di alimentazione alla
presa di rete elettrica
3B. Vericare l’impianto di rete
3C. Rivolgersi al centro di assistenza
3D. Batteria scarica
4. Rivolgersi al centro di assistenza
5A. Spegnere e riaccendere il riscaldatore
5B. Identicare l’errore su display
5C. Rivolgersi al centro di assistenza
6. Agire sul termostato ambiente, portandolo ad una
temperatura superiore a quella dell’ambiente di
lavoro
7A. Attendere almeno dieci minuti e riprovare la fase di
accensione
7B. Rivolgersi al centro di assistenza
8. Rivolgersi al centro di assistenza
Il motore/pompa
parte ma la amma
non si innesca
1. Mancanza combustibile
2. Accenditore sporco
3. Filtro combustibile sporco
4. Ugello sporco
5. Fotocellula sporca, difettosa o non installata
correttamente
6. Presenza di sostanze estranee nel
serbatoio
7. Elettrodi consumati o a distanza errata
1. Spegnere il riscaldatore, rabbocare il serbatoio di
combustibile e riaccenderlo
2. Rivolgersi al centro di assistenza
3. Pulire il ltro con del combustibile pulito
4. Rivolgersi al centro di assistenza
5. Rivolgersi al centro di assistenza
6. Svuotare e riempire il serbatoio con carburante
pulito
7. Rivolgersi al centro di assistenza
La ventola è
bloccata o gira
lentamente
1. Motore guasto 1. Rivolgersi al centro di assistenza
en
it
de
es
fr
nl
pt
da
no
sv
pl
ru
cs
hu
sl
tr
hr
lt
lv
et
ro
sk
bg
uk
bs
el
zh

WICHTIG: DIESE ANLEITUNG IST VOR DEM BEGINN DER MONTAGE, INBETRIEBNAHME ODER
WARTUNGSARBEITEN AN DEM GENERATOR ZU LESEN. UNSACHMÄSSIGE VERWENDUNG
DES GENERATORS KANN ZU SCHWEREN VERLETZUNGEN FÜHREN. DIESE ANLEITUNG IST
GRIFFBEREICH AUFZUBEWAHREN.
►►1. INFORMATIONEN ZUR SICHERHEIT
(WARNHINWEISE)
WICHTIGER HINWEIS: Dieses Gerät ist nicht ge-
eignet für den Gebrauch durch Personen (einschließ-
lich Kindern) mit eingeschränkten körperlichen,
sensorischen und geistigen Fähigkeiten bzw. ohne
ausreichende Fachkenntnis, es sei denn, sie werden
durch eine für ihre Sicherheit verantwortliche Person
beaufsichtigt. Kinder sind zu beaufsichtigen, damit sie
nicht mit dem Gerät spielen.
GFAHR: Ersticken durch Kohlenmonoxid kann
tödlichen Ausgang haben.
Die ersten Anzeichen einer Kohlenmonoxidvergiftung sind de-
nen von Grippe mit Kopfschmerzen, Schwindel bzw. Übelkeit
ähnlich. Diese Symptome können auf eine Betriebsstörung des
Heizgeräts zurückzuführen sein. SOLLTEN DIESE SYMPTO-
ME AUFTRETEN, SOFORT INS FREIE GEHEN und das Heiz-
gerät durch den Kundendienst reparieren lassen.
1.1. NACHFÜLLEN DES BRENNSTOFFS:
►1.1.1. Das Nachfüllen des Brennstoffs ist ausgebildetem Per-
sonal vorbehalten, das mit den Anleitungen des Herstellers
und mit den geltenden Gesetzen bezüglich des sicheren
Nachfüllens der Heizgeräte voll vertraut ist.
►1.1.2. Ausschließlich die Brennstoffsorte verwenden, die auf
dem am Heizgerät angebrachten Typenschild angegeben
ist.
►1.1.3. Vor dem Auffüllen das Heizgerät ausschalten und war-
ten, bis es abgekühlt ist.
►1.1.4. Die Brennstofagerbehälter müssen sich in einem se-
paraten Gebäude benden.
►1.1.5. Alle Brennstofftanks müssen sich gemäß geltenden
Vorschriften in einem sicheren Abstand vom Heizgerät be-
nden.
►1.1.6. Der Brennstoff ist in Räumen zu lagern, deren Fußbö-
den so abgedichtet sind, dass ein Eindringen und Tropfen
des Brennstoffs auf offene Flammen darunter nicht möglich
ist, denn dadurch könnte es zum Entzünden des Brennstoffs
kommen.
►1.1.7. Für Aufbewahrung des Brennstoffes sind die gelten-
den Normen zu befolgen.
1.2. SICHERHEIT:
►1.2.1. Das Heizgerät niemals in Räumen benutzen, in de-
nen sich Benzin, Lösungsmittel für Farben oder andere hoch
entzündliche Dämpfe benden.
►1.2.2. Während des Betriebs des Heizgeräts sind alle örtli-
chen Bestimmungen und geltenden Vorschriften zu beach-
ten.
►1.2.3. Beim Betrieb der Geräte ist ein Sicherheitsabstand von
Planen, Vorhängen oder ähnlichen Materialien einzuhalten.
Es wird auch empfohlen, Abdeckungen aus nicht brennba-
rem Material zu verwenden.
►1.2.4. Ausschließlich in gut belüfteten Räumen verwenden.
Es ist eine nach den geltenden Vorschriften ausreichende
Öffnung für die Zuführung von Frischluft von außen vorzu-
sehen.
►1.2.5. ►Die Stromversorgung des Heizgeräts muss die auf
dessen Typenschild angegebene Spannung und Frequenz
aufweisen.
►1.2.6. Nur dreiadrige, ordnungsgemäß geerdete Verlänge-
rungskabel benutzen.
►1.2.7. Empfohlene Mindest-Sicherheitsabstände zwischen
Heizgerät und brennbaren Stoffen: Vorderseite = 2,5 m (8
ft.); seitlich, oben und hinten = 1,5 m (5 ft).
►1.2.8. Das Heizgerät muss, wenn es heiß oder in Betrieb ist,
auf einer stabilen und ebenen Fläche stehen, um Brandge-
fahr zu vermeiden.
►1.2.9. Halten Sie Haustiere in einem sicheren Abstand vom
Gerät.
►1.2.10. Die Versorgung oder die Batterie vom Heizgerät tren-
nen, wenn es nicht verwendet wird.
►1.2.11. Bei Steuerung durch einen Thermostat kann das
Heizgerät in jedem beliebigen Moment eingeschaltet wer-
den.
►1.2.12. Benutzen Sie das Heizgerät niemals in stark frequen-
tierten Wohnräumen und in Schlafzimmern.
►1.2.13. Wenn das Heizgerät heiß, an das Stromnetz ange-
schlossen oder batteriebetrieben und in Betrieb ist, darf es
niemals bewegt, gehandhabt, aufgefüllt oder gewartet wer-
den.
►1.2.14. Zwischen brennbaren bzw. wärmeempndlichen Stof-
fen (einschließlich des Netzkabels) und den heißen Teilen
des Heizgeräts ist ein ausreichender Abstand einzuhalten.
►1.2.15. Wenn das Stromversorgungskabel oder die Batterie
beschädigt sind, müssen sie von einem Kundendienstzen-
trum ausgetauscht werden, um allen Risiken vorzubeugen
(das beschädigte Material muss den geltenden Normen ge-
mäß entsorgt werden).
►1.2.16. Vor dem Anschluss des Versorgungskabels und/oder
Einschalten der auadbaren Batterie sicherstellen, dass das
Heizgerät ausgeschaltet ist, um Gefahrensituationen vorzu-
beugen.
►1.2.17. Ausschließlich die originalen und eigens vorgese-
henen auadbaren Batterien verwenden. Die Verwendung
anderer als die vorgesehenen Batterien kann zu selbst le-
bensgefährlichen Verletzungen an Personen führen, die
durch Verbrennungen, Abschürfungen, Explosionen, Elekt-
roschocks oder Vergiftungen hervorgerufen werden.
►1.2.18. Klammern, Hartgeld, Schlüssel, Nägel, Schrauben
und andere Metallgegenstände dürfen der auadbaren
Batterie nicht nahe kommen, da sie Kurzschluss bewirken
könnten. Ein eventueller Kurzschluss zwischen den Batte-
riekontakten kann zu selbst lebensgefährlichen Verletzun-
gen an Personen führen, die durch Verbrennungen, Explosi-
onen usw. hervorgerufen werden.
►1.2.19. Eine fehlerhafte Anwendung der auadbaren Batterie
kann Leckagen der Batterieüssigkeit bewirken. Der Kon-
takt mit der Flüssigkeit ist unbedingt zu vermeiden. Im Falle
eines versehentlichen Kontakts reichlich mit Wasser spülen.
Bei Kontakt der Flüssigkeit mit den Augen unverzüglich ei-
nen Arzt rufen Die ausgeossene Batterieüssigkeit kann
Hautreizungen oder Verbrennungen verursachen.
►1.2.20. Eine fehlerhafte Anwendung der auadbaren Batterie
kann Leckagen der Batteriedämpfe bewirken. Diese Dämp-
fe dürfen nicht eingeatmet werden. Bei versehentlichem Ein-
atmen sofort frische Luft eintreten lassen und im Falle von
Beschwerden einen Arzt aufsuchen. Die Dämpfe können die
Atemwege irritieren.
►1.2.21. Um keine schweren Risiken einzugehen die auad-
bare Batterie weder zu öffnen noch zu demontieren versu-
chen.
►1.2.22. Um keine schweren Risiken einzugehen die auad-
bare Batterie vor Hitze schützen (z.B. andauernde Sonne-
neinstrahlung, Feuer, Wasser, Feuchtigkeit usw.).
►1.2.23. Die spezische auadbare Batterie ausschließlich für
dieses Heizgerät verwenden, um gefährliche Überlastungen
zu vermeiden.
►1.2.24. Ausschließlich originale auadbare Batterien verwen-
den, deren Spannung den technischen Daten des Geräte-
schildes entspricht. Bei Verwendung anderer auadbaren
Batterien (z.B. gefälschte Batterien, regenerierte Batterien,
Batterien der Konkurrenz usw) besteht die Möglichkeit von
Verletzungen und/oder Explosionen.
►1.2.25. Die auadbare Batterie ausschließlich unter Verwen-
dung von Original-Ladegeräten auaden. Für jede Batterie
en
it
de
es
fr
nl
pt
da
no
sv
pl
ru
cs
hu
sl
tr
hr
lt
lv
et
ro
sk
bg
uk
bs
el
zh

ist das spezische Ladegerät zu verwenden, um Brand-
oder Explosionsgefahr zu vermeiden.
►1.2.26. Ausschließlich den in diesem Handbuch vorgese-
henen Modus der elektrischen Versorgung anwenden. Der
Wechsel des Versorgungsmodus darf nie bei in Betrieb ste-
hendem Gerät ausgeführt werden, um schwere Schäden zu
vermeiden.
►1.2.27. Wenn das Heizgerät durch einen Thermostat gesteu-
ert wird, oder wenn man von Stromversorgung auf Batte-
rie übergeht, könnte sich das Heizgerät ausschalten oder
auf Standby übergehen (auf dem Display erscheint dann
die Meldung “[]“), sehr gut aufpassen, denn das Heizgerät
könnte sich jederzeit wieder automatisch einschalten und
schwere Schäden an Personen und Sachen bewirken.
►►2. AUSPACKEN
Siehe Abb. 1
►2.1. Alle für Verpackung und Versand des Heizgeräts ver-
wendeten Materialien müssen entfernt und vorschriftsge-
mäß entsorgt werden.
►2.2. Nehmen Sie alle Artikel aus der Verpackung.
►2.3. Kontrollieren, ob Transportschäden vorliegen. Wenn das
Heizgerät beschädigt ist, sofort den Vertragshändler infor-
mieren, bei dem es erworben wurde.
►►3. BESCHREIBUNG DER ARTIKEL
►3.1. NETZKABEL (falls vorhanden):
DAS NETZKABEL DIENT NICHT ALS LADEGERÄT.
(Abb. 5) Das Heizgerät funktioniert auch durch Anschluss des
Versorgungskabels an das Stromnetz. Das Stromversorgungs-
kabel regelmäßig überprüfen, um schwere Schäden zu vermei-
den. Die in diesem Handbuch enthaltenen Hinweise bezüglich
des Stromversorgungskabels beachten.
►3.2. BATTERIE (wo vorhanden):
(Abb. 6)
ANMERKUNGEN: JE NACH DER GRÖSSE DER BATTERIE
(MASSANGABEN IN Ah) MUSS EIN ORIGINALES BATTERI-
ELADEGERÄT MIT ANGEMESSENER LEISTUNG BENUTZT
WERDEN.
Das Heizgerät funktioniert autonom mit einer originalen Li-Ion
Batterie ohne Anschluss an das Stromnetz. Die auadbare
Batterie wird mit einer Teilladung geliefert, es ist daher emp-
fehlenswert, sie vor der Verwendung vollständig zu laden. Zur
Versorgung des Heizgeräts nur Original-Batterien verwenden.
Die in diesem Handbuch enthaltenen Hinweise bezüglich der
Batterie beachten.
►3.3. LADEGERÄT (wo vorhanden):
(Abb. 7) Das Batterieladegerät wurde zum Auaden von ori-
ginalen Li-ion-Batterien entwickelt. Es ist unabdingbar, dass
die Betriebsparameter des Ladegeräts beachtet werden (vgl.
hierzu das Schild am Ladegerät). Das Ladegerät in einer voll-
ständig trockenen und staubfreien Umgebung ausschließlich
zum Laden der auadbaren Original-Batterien benutzen, die
zur Versorgung dieses Heizgeräts verwendbar sind. Das La-
degerät ist so ausgelegt, dass es nach Anschließen an die Bat-
terie einen ordnungsgemäßen Ladezyklus automatisch steuert
(Abb. 8) betätigen. Am Ladegerät ist eine Leuchtanzeige an-
gebracht, die eine genaue Diagnose während des Auadevor-
gangs ermöglicht (Abb. 9). Die in diesem Handbuch enthalte-
nen Hinweise bezüglich des Batterieladegeräts beachten.
►►4. BRENNSTOFF
WARNUNG: Das Heizgerät funktioniert ausschließlich
mit DIESEL oder PETROLEUM.
Nur Diesel oder Petroleum verwenden, um Brand- oder Ex-
plosionsrisiken zu vermeiden. Benutzen Sie niemals Benzin,
Heizöl, Lösungsmittel für Farben, Alkohol oder andere hoch
entzündliche Brennstoffe.
Verwenden Sie bei sehr niedrigen Temperaturen ungiftige
Frostschutzzusätze.
►►5. FUNKTIONSGRUNDSATZ
Siehe Abb. 2
Die für eine korrekte Verbrennung notwendige Luft wird durch
Drehen eines im Brenner bendlichen Flügelrades erzeugt.
Der Luftstrom tritt durch die Pinole des Brenners aus und wird
mit dem Brennstoff vermischt, der durch eine Düse mit hohem
Druck zerstäubt wird. Der durch die Düse zerstäubte Brenn-
stoff wird durch eine Elektropumpe garantiert, die den Brenn-
stoff aus dem Tank ansaugt und ihn mit hohem Druck zur Düse
leitet.
►►6. BETRIEB
WARNUNG: Vor dem Einschalten/Zünden des Heizge-
rätes sind die “SICHERHEITSHINWEISE” aufmerksam
durchzulesen.
WICHTIGER HINWEIS: Nach dem ersten Zündversager
des Heizelements prüfen, ob sich Brennstoff im Be-
hälter bendet. Kontrollieren, ob der Brennstofflter
sauber ist und das Heizelement auf einer ebenen und
stabilen Fläche abgestellt ist.
WICHTIGER HINWEIS: Die vorliegende Vorrichtung ist
ein Infrarot-Heizgerät. Sie heizt Gegenstände, nicht die
Luft.
WICHTIGER HINWEIS: Um die Art der Versorgung von
Batterie auf Netzstrom und umgekehrt zu wechseln,
das Heizgerät ausschalten und dabei alle Verfahren
streng beachten, um schwere Schäden zu vermeiden.
►6.1. INBETRIEBNAHME DES HEIZGERÄTS:
►6.1.1. Beachten Sie sämtliche Sicherheitshinweise.
►6.1.2. Kontrollieren Sie, ob sich Brennstoff im Tank bendet.
►6.1.3. Schließen Sie den Tankdeckel.
►6.1.4. Den Netzversorgungsstecker oder die aufgeladene
Batterie anschließen (SIEHE SPANNUNG IN „TABELLE
DER TECHNISCHEN DATEN“) (Abb. 10-11).
►6.1.5. Den „EIN/AUS“-Schalter auf „EIN“ (|) stellen (A Abb.
3). Das Heizgerät sollte sich innerhalb weniger Sekunden
einschalten. Wenn das Heizgerät nicht startet, den Abschnitt
zur Ermittlung des Problems einsehen (Abschn. 10).
ANM.: SOLLTE DAS HEIZGERÄT AUSGEHEN, WEIL DER
BRENNSTOFF AUFGEBRAUCHT IST, DAS HEIZGERÄT
AUSSCHALTEN, DEN TANK AUFFÜLLEN UND ES DANN
WIEDER EINSCHALTEN (SIEHE ABSCHN. 5.1.).
►6.2. ABSCHALTEN DES HEIZGERÄTS:
ACHTUNG: DIE SPANNUNG ODER DAS STROMVER-
SORGUNGSKABEL NICHT TRENNEN ODER DIE BAT-
TERIE NICHT ENTFERNEN, BEVOR DAS HEIZGERÄT
KOMPLETT ABGEKÜHLT IST 8circa 5 Minuten).
►6.2.1. Den Schalter „EIN/AUS“-Schalter auf „AUS“ (0) stellen
(A Abb. 3).
►6.3. ANSCHLUSS RAUMTHERMOSTAT (optional):
ACHTUNG: DER RAUMTHERMOSTAT (OPTIONAL) FUNK-
TIONIERT NUR, WENN DAS HEIZGERÄT MIT DEM STROM-
VERSORGUNGSKABEL GESPEIST WIRD.
ACHTUNG: WENN DAS HEIZGERÄT ÜBER DEN
RAUMTHERMOSTAT GESTEUERT WIRD (OPTIONAL),
ERFOLGT DAS AUSSCHALTEN UND ERNEUTE EIN-
SCHALTEN DES HEIZGERÄTS AUTOMATISCH.
Den am Heizgerät angebrachten Deckel entfernen und den
Raumthermostat (optional) anschließen (C Abb. 3).
en
it
de
es
fr
nl
pt
da
no
sv
pl
ru
cs
hu
sl
tr
hr
lt
lv
et
ro
sk
bg
uk
bs
el
zh

en
it
de
es
fr
nl
pt
da
no
sv
pl
ru
cs
hu
sl
tr
hr
lt
lv
et
ro
sk
bg
uk
bs
el
zh
►►7. REINIGUNG DES BRENNSTOFFFILTERS
Siehe Abb. 4
JE NACH QUALITÄT DES EINGESETZTEN BRENNSTOFFS
KANN EINE REINIGUNG DES FILTERS NOTWENDIG WERDEN:
►7.1. Den auf dem Tank positionierten Deckel entfernen (A
Abb. 4).
►7.2. Den Filter aus dem Tank herausziehen.
►7.3. Die Mutter aufschrauben (B Abb. 4).
►7.4. Den Filter herausziehen (C Abb. 4).
►7.5. Den Filter mit sauberem Brennstoff reinigen und dabei
aufpassen, dass er nicht beschädigt wird.
►7.6. Den Filter wieder in den Tank montieren.
►►8. UMGANG UND TRANSPORT
UM DAS HEIZGERÄT AM BESTEN ZU LAGERN BZW. ZU
TRANSPORTIEREN, SOLLTE NACH DEM FOLGENDEN
VERFAHREN VORGEGANGEN WERDEN:
►8.1. Den Brennstofftank entleeren.
►8.2. Sollten Reste zurückbleiben, sauberen Brennstoff in den
Tank gießen und erneut abießen lassen.
►8.3. Tankdeckel schließen und Brennstoff in geeigneter Wei-
se und vorschriftsgemäß entsorgen.
►8.4. Das Heizgerät sollte am besten in gerader Stellung ge-
lagert werden, um das Austreten von Brennstoff zu vermei-
den, sowie an einem trockenen Ort, geschützt vor externen
Beschädigungen.
►►9. FEHLER DER ANZEIGE
Siehe B Abb. 3
FEHLER URSACHE LÖSUNG
F0 BETRIEBSFEHLER
1. “ON/OFF”-Schalter ist in der „ON” (I)-Stellung,
wenn der Generator an die Netzversorgung ang-
eschlossen wird
1. Nach Trennung des Generators von der Netzver-
sorgung den Schalter in die “OFF” (0)-Stellung brin-
gen, den Stecker wieder an Netz anschließen und
den Schalter in die “ON” (I)-Stellung bringen
F1 FEHLER FOTOZELLE
1. Kraftstoffmangel
2. Kraftstoff verunreinigt
3. Fotozelle verunreinigt oder beschädigt
4. Kraftstofflter verunreinigt
5. Zündungsfehler
1. Den Schalter in die “OFF” (0)-Stellung bringen, den
Behälter mit Kraftstoff auffüllen
2. Den Schalter in die “OFF” (0)-Stellung bringen, Kraft-
stoff ablassen und dann den Behälter wieder auffül-
len. Den Filter mit sauberem Kraftstoff reinigen, dabei
achten, dass der Filter nicht beschädigt wird (SIEHE
ABSCHNITT 6)
3. Service-Zentrum anrufen
4. SIEHE ABSCHNITT 6
5. Service-Zentrum anrufen
F2 FEHLER TEMPERATURSENSOR
1. Kabel unterbrochen
2. Sensor defekt 1. Service-Zentrum anrufen
2. Service-Zentrum anrufen
F3 FEHLER THERMOSTAT
1. Innere Überhitzung des Generators
2. Sensor Umkippsicherung 1. Generator ausschalten und abwarten, bis er abkühlt
2. Den Ofen auf einer ebenen und stabilen Oberäche
positionieren
F4 UNGEEIGNETE SPANNUNG
1. Ungeeignete spannung 1. Die korrekte Spannung Ihrer Stromanlage überprüfen
FF DREIFACHES ZÜNDVERSAGEN
1. Kein Brennstoff vorhanden
2. Brennstofflter verschmutzt
3. Fotozelle verschmutzt oder defekt
4. Düse verschmutzt oder defekt
5. Antitilting-Sensor ausgelöst
1. Service-Zentrum anrufen
2. Service-Zentrum anrufen
3. Service-Zentrum anrufen
4. Service-Zentrum anrufen
5. Service-Zentrum anrufen
PF BATTERIE LEER
1. Batterie leer 1. Die Batterie laden
[ ] HEIZGERÄT IN STANDBY
1. Thermostat angeschlossen
2. Übergang von Kabelversorgung zu Batteriebe-
trieb
1. Temperatur des Thermostats unterhalb der Raumtem-
peratur eingestellt
2. Automatische erneute Einschaltung

en
it
de
es
fr
nl
pt
da
no
sv
pl
ru
cs
hu
sl
tr
hr
lt
lv
et
ro
sk
bg
uk
bs
el
zh
►►10. TERMINPLAN DER VORSORGEWARTUNG
HINWEIS: VOR DEM BEGINN VON WARTUNGS- ODER INSTANDSETZUNGSTÄTIGKEITEN DIE VERSOR-
GUNGSLEITUNG VOM NETZ TRENNEN UND SICHERSTELLEN, DASS DER GENERATOR ABGEKÜHLT IST.
BAUTEIL MÖGLICHE URSACHE MÖGLICHE LÖSUNG
Kraftstoffbehälter Alle 150-200 Betriebsstunden oder bei Bedarf
reinigen Behälter entleeren und mit sauberen Kraftstoff
spülen
Düse Mindestens einmal pro Betriebssaison oder bei
Bedarf reinigen oder ersetzen Service-Zentrum anrufen
Fotozelle Einmal pro Betriebssaison oder nach Bedarf rei-
nigen Service-Zentrum anrufen
Kraftstofflter Zweimal pro Betriebssaison oder nach Bedarf
reinigen oder ersetzen Kraftstofflter mit sauberen Kraftstoff reinigen
Zündeinrichtung Alle 1.000 Betriebsstunden oder nach Bedarf rei-
nigen oder ersetzen Service-Zentrum anrufen
Rotorschaufel Nach Bedarf reinigen Service-Zentrum anrufen
►►11. STÖRUNGSSUCHE
STÖRUNG MÖGLICHE URSACHE MÖGLICHE LÖSUNG
Generator startet
nicht 1. Generator gesperrt
2. Schalter in der “OFF” (0)-Stellung
3. Keine Spannung
4. Versorgungsleitung getrennt
5. Steuerungskarte gesperrt
6. Falsche Thermostat-Einstellung
7. Ansprechen des Temperatursensors
8. Defekte Sicherung
1. Generator aus- und wieder einschalten
2. Schalter in die “ON” (I)-Stellung bringen
3A. Die Versorgungsleitung korrekt an die Buchse der
Netzversorgung anschließen
3B. Versorgungsnetz prüfen
3C. Service-Zentrum anrufen
3D. Batterie leer
4. Service-Zentrum anrufen
5A.Generator aus- und wieder einschalten
5B. Fehler an der Anzeige feststellen
5C. Service-Zentrum anrufen
6. Thermostat justieren und entsprechend einstellen,
die Höchsttemperatur muss höher als Umgebungs-
temperatur sein.
7A. Abwarten mindestens 10 Minuten und dann erneut
versuchen in die Zündphase zu wechseln
7B. Service-Zentrum anrufen
8. Service-Zentrum anrufen
Motor/Pumpe
startet, aber die
Flamme wird nicht
gezündet
1. Kraftstoffmangel
2. Zündgerät verunreinigt
3. Kraftstoff verunreinigt
4. Düse verunreinigt
5. Fotozelle verunreinigt, defekt oder falsch
eingesetzt
6. Fremdkörper im Behälter
7. Elektroden verbraucht oder im falschen
Abstand
1. Generator ausschalten, Behälter mit Kraftstoff
auffüllen und erneut Generator einschalten
2. Service-Zentrum anrufen
3. Filter mit sauberem Kraftstoff reinigen
4. Service-Zentrum anrufen
5. Service-Zentrum anrufen
6. Behälter entleeren und mit sauberem Kraftstoff
auffüllen
7. Service-Zentrum anrufen
Rotor ist versperrt
oder rotiert zu
langsam
1. Motor defekt 1. Service-Zentrum anrufen

►►1. INFORMACIONES SOBRE LA SEGURIDAD
(ADVERTENCIAS)
IMPORTANTE: Este aparato no es apto para que
lo usen personas (incluidos los niños) con capaci-
dades físicas, sensoriales y mentales reducidas, o
inexpertas, a no ser que estén vigilados por una per-
sona responsable por su seguridad. Los niños deben
estar bajo control, para asegurarse de que no jueguen
con el equipo.
PELIGRO: El monóxido de carbono puede
provocar asxia de forma mortal.
Los primeros síntomas de asxia por óxido de carbono se
asemejan a los de la gripe, con cefaleas, mareos y/o náus-
eas. Estos síntomas podrían ser ocasionados por el funcio-
namiento defectuoso del calentador. SI SE PRESENTAN
ESTOS SÍNTOMAS, SALGA INMEDIATAMENTE AL AIRE LI-
BRE y haga reparar el calentador por el centro de asistencia
técnica.
1.1. ABASTECIMIENTO:
►1.1.1. El personal encargado del abastecimiento debe ser
personal cualicado y estar totalmente familiarizado con
las instrucciones del fabricante y con la normativa vigente
en materia del abastecimiento seguro de los calentadores.
►1.1.2. Use únicamente el tipo de combustible que se espe-
cica expresamente en la placa de identicación del ca-
lentador.
►1.1.3. Antes de efectuar el abastecimiento, apague el ca-
lentador y espere hasta que se enfríe.
►1.1.4. Las cisternas de almacenamiento de carburante de-
ben encontrarse en una estructura separada.
►1.1.5. Todos los depósitos de combustible deben encon-
trarse a una distancia de seguridad mínima del calentador,
según las normas vigentes.
►1.1.6. El combustible debe conservarse en locales cuyo
suelo no permita la penetración y el goteo de dicho com-
bustible sobre llamas subyacentes, capaces de ocasionar
el encendido de estas.
►1.1.7. La conservación del combustible debe efectuarse se-
gún la normativa vigente.
1.2. SEGURIDAD:
►1.2.1. Nunca utilice el calentador en locales con presencia
de gasolina, disolventes para pinturas u otros vapores al-
tamente inamables.
►1.2.2. Durante el uso del calentador, respete todas las orde-
nanzas locales y la normativa vigente.
►1.2.3. Los calentadores utilizados en las cercanías de lo-
nas, cortinas u otros materiales similares de cobertura, de-
ben estar situados a una distancia de seguridad de dichos
materiales. Se aconseja además utilizar materiales de co-
bertura de tipo ignífugo.
►1.2.4. Utilícelo únicamente en áreas bien ventiladas. Pre-
vea una abertura adecuada según las normas vigentes,
para permitir la entrada de aire fresco desde el exterior.
►1.2.5. Alimente el calentador únicamente con corriente con
la tensión y la frecuencia especicadas en la placa de iden-
ticación del calentador.
►1.2.6. Utilice únicamente prolongaciones de tres cables
adecuadamente conectadas a masa.
►1.2.7. Las distancias mínimas de seguridad, aconsejadas,
existentes entre el calentador y las sustancias inamables
son: salida delantera = 2,5 m (8 ft.); de lado, en alto y en la
parte trasera = 1,5 m (5 ft.).
►1.2.8. Coloque el calentador caliente, o en funcionamiento,
sobre una supercie estable y nivelada, para evitar riesgos
de incendio.
►1.2.9. Mantenga los animales a una distancia de seguridad
del calentador.
►1.2.10. Desconecte la alimentación o la batería del calenta-
dor cuando no lo use.
►1.2.11. El calentador puede encenderse en cualquier mo-
mento cuando esté controlado por un termostato.
►1.2.12. Nunca utilice el calentador en habitaciones frecuen-
temente habitadas ni en dormitorios.
►1.2.13. Cuando el calentador esté caliente, conectado a la
red eléctrica conectado a la batería, en funcionamiento,
nunca lo desplace, lo manipule ni lo abastezca, ni tampoco
realice ninguna intervención de mantenimiento sobre este.
►1.2.14. Mantenga una distancia adecuada de las partes
calientes del calentador con los materiales inamables o
termolábiles (incluido el cable de alimentación).
►1.2.15. Si el cable de alimentación o la batería se dañan,
debe sustituirlos el centro de asistencia técnica, para pre-
venir cualquier riesgo (elimine el material dañado en base
a la normativa vigente).
►1.2.16. Asegúrese de que el calentador esté apagado, an-
tes de conectar el cable de alimentación y/o introducir la
batería recargable, para prevenir cualquier tipo de riesgo.
►1.2.17. Utilice única y exclusivamente baterías recargables
originales explícitamente previstas. El uso de baterías re-
cargables no previstas puede provocar daños o peligros
para las personas, lesiones, quemaduras, explosiones,
descargas eléctricas o envenenamientos.
►1.2.18. Mantenga una distancia de seguridad adecuada en-
tre la batería recargable desconectada y pasadores, mo-
nedas, llaves, clavos, tornillos y otros objetos pequeños
metálicos que podrían provocar un cortocircuito. Un corto-
circuito entre los contactos de la batería recargable puede
provocar daños o peligros para la vida de las personas, así
como lesiones, quemaduras, explosiones, etc..
►1.2.19. El uso erróneo de la batería recargable puede pro-
vocar fugas de líquido de la batería. Evite el contacto. En
caso de contacto accidental, lávese abundantemente con
agua. Consulte de inmediato a un médico, si el líquido ha
entrado en contacto con sus ojos. Si la batería pierde líq-
uido, este último puede provocar irritaciones cutáneas o
quemaduras.
►1.2.20. El uso incorrecto de la batería recargable puede
provocar la salida de vapores de la batería. Evite a cual-
quier costa inhalar estos vapores. Deje entrar aire fresco y,
en caso de inhalación accidental, visite a un médico. Los
vapores pueden irritar las vías respiratorias.
►1.2.21. Para evitar riesgos graves, no intente abrir/desmon-
tar la batería recargable.
►1.2.22. Para evitar riesgos graves, proteja la batería recar-
gable del calor (por ejemplo, de la luz solar continua, del
fuego, del agua, de la humedad, etc.).
►1.2.23. Utilice la batería recargable especíca exclusiva-
mente con este calentador para evitar sobrecargas peli-
grosas.
►1.2.24. Utilice exclusivamente baterías recargables origina-
les con la tensión indicada en la placa de datos técnicos
del calentador. Si utiliza otro tipo de baterías recargables
(por ejemplo, baterías de imitación, baterías regeneradas,
baterías de la competencia, etc.) existe el peligro de lesio-
nes y/o explosiones.
►1.2.25. Cargue la batería recargable única y exclusivamen-
te cargadores de baterías originales. Cada batería necesi-
en
de
es
fr
nl
pt
da
no
sv
pl
ru
cs
hu
sl
tr
hr
lt
lv
et
ro
sk
bg
uk
bs
el
zh
IMPORTANTE: HAY QUE LEER EL PRESENTE MANUAL DE INSTRUCCIONES ANTES DE EM-
PEZAR LA INSTALACIÓN, ENCENDIDO O EL MANTENIMIENTO DEL GENERADOR. LA UTI-
LIZACIÓN INCORRECTA DEL GENERADOR PUEDE CAUSAR IMPORTANTES DAÑOS. HAY
QUE GUARDAR ESTE MANUAL PARA SUS FUTURAS CONSULTAS.

ta su cargador especíco para evitar riesgos de incendio
y de explosión.
►1.2.26. Utilice solo las modalidades de alimentación
eléctrica previstas en este manual. Está prohibido cambiar
la modalidad de alimentación con el calentador en funcio-
namiento, para evitar daños graves.
►1.2.27. Cuando el calentador se gestiona con el termostato
o se pasa de la alimentación eléctrica a la de batería, el
calentador se puede apagar y puede entrar en modalidad
stand-by (aparece en la pantalla la señal “[ ]“), ponga la
máxima atención porque puede que el calentador se en-
cienda de nuevo automáticamente en cualquier momento
y esto puede provocar graves daños a cosas y a las per-
sonas.
►►2. DESEMBALAJE
Vea Fig. 1
►2.1. Retire todos los materiales del embalaje utilizados para
embalar y expedir el calentador y elimínelos según las nor-
mas vigentes.
►2.2 Saque todos los artículos del embalaje.
►2.3 Controle posibles daños durante el transporte. Si el
calentador estuviera dañado, informe inmediatamente al
concesionario donde lo ha comprado.
►►3. DESCRIPCIÓN DE LOS ARTÍCULOS
►3.1. CABLE DE ALIMENTACIÓN (donde esté presente):
EL CABLE DE ALIMENTACIÓN NO DEBE SER UTILIZADO
COMO CARGADOR DE BATERÍAS.
(Fig. 5) El calentador puede funcionar conectado a la red
eléctrica mediante el cable de alimentación. Compruebe pe-
riódicamente el estado del cable, para evitar daños graves.
Respete todas las advertencias acerca del cable de alimenta-
ción, referidas en este manual.
►3.2. BATERÍA (de estar presente):
(Fig. 6)
NOTAS: EN BASE A LA CAPACIDAD DE LA BATERÍA (ME-
DIDA EN Ah) ES NECESARIO USA UN CARGADOR DE BA-
TERÍAS ORIGINAL Y CON LA POTENCIA ADECUADA.
El calentador puede funcionar de forma autónoma con una
batería recargable original de Litio-ión, sin necesidad de co-
nectarlo a la red eléctrica. La batería recargable se suministra
parcialmente cargada y por ello, se aconseja ejecutar un ciclo
de recarga completo antes de su uso. Utilice solo baterías
originales para alimentar el calentador. Respete todas las ad-
vertencias acerca de la batería referidas en este manual.
►3.3. CARGADOR DE BATERÍAS (cuando esté presen-
te):
(Fig. 7) El cargador de baterías ha sido proyectado para re-
cargar las baterías de Litio-ión originales. Es necesario re-
spetar los parámetros de funcionamiento del cargador de ba-
terías (véase la placa de datos jada en el cargador). Utilice
el cargador de baterías en lugares completamente secos y
protegidos del polvo, para cargar exclusivamente baterías re-
cargables originales idóneas para alimentar este aparato. El
cargador de baterías está preparado para gestionar de forma
automática el ciclo de carga correcto cuando la batería recar-
gable se conecta (Fig. 8). Un indicador luminoso ubicado en
el cargador de baterías permite disponer de un diagnóstico
detallado durante la fase de búsqueda (Fig. 9). Respete todas
las advertencias acerca del cargador de baterías referidas en
este manual.
►►4. COMBUSTIBLE
ADVERTENCIA: El calentador funciona solo con
DIÉSEL o QUEROSENO.
Use únicamente diésel o queroseno, para evitar riesgos de
incendio o de explosión. Nunca utilice gasolina, nafta, disol-
ventes para pinturas, alcohol u otros combustibles altamente
inamables.
Use aditivos antihielo no tóxicos en caso de temperaturas
muy bajas.
►►5. PRINCIPIOS DE FUNCIONAMIENTO
Vea Fig. 2
El aire necesario para garantizar una combustión correcta,
se produce con la rotación de un ventilador interno que lleva
el quemador. El ujo de aire sale del conducto del quemador
y se mezcla con el combustible, que se rocía con una bo-
quilla a alta presión. El combustible rociado por la boquilla
está asegurado gracias a una bomba eléctrica, que aspira el
combustible desde el depósito y lo empuja a la boquilla, a alta
presión.
►►6. FUNCIONAMIENTO
ADVERTENCIA: Lea atentamente la “INFORMACIÓN
DE SEGURIDAD” antes de encender el calentador.
IMPORTANTE: Después del primer fallo del encendido
del calentador, compruebe la presencia de combustible
en el depósito, compruebe que el ltro del combustible
esté limpio y compruebe que el calefactor esté
colocado en una supercie llana y estable.
IMPORTANTE: El presente dispositivo es un calentador
de rayos infrarrojos. Calienta objetos, no el aire.
IMPORTANTE: Para cambiar de tipo de alimentación
eléctrica, de batería a cable o viceversa, apague
el calentador siguiendo cuidadosamente el
procedimiento para evitar graves daños.
►6.1. ENCENDIDO DEL CALENTADOR:
►6.1.1. Siga todas las instrucciones relativas a la seguridad.
►6.1.2. Controle la presencia de combustible en el depósito.
►6.1.3. Cierre el tapón del depósito.
►6.1.4. Conecte el cable de alimentación a la red eléctrica o
a la batería cargada (VEA LA TENSIÓN EN LA “TABLA DE
DATOS TÉCNICOS”) (Fig. 10-11).
►6.1.5. Sitúe el interruptor “ON/OFF” en la posición “ON”
(l) (A Fig. 3). El calentador debería encenderse pocos
segundos después. Si el calentador no se pone en marcha
consulte el apartado, localización del problema apart. 10).
NOTA: EN EL CASO DE APAGADO DEL CALENTADOR
DEBIDO A QUE SE HA AGOTADO EL COMBUSTIBLE,
APAGUE EL CALENTADOR, ABASTEZCA EL DEPÓSITO
Y RESTABLEZCA (VÉASE EL APARTADO 5.1.).
►6.2. APAGADO DEL CALENTADOR:
ATENCIÓN: NO QUITE LA TENSIÓN NI DESCONECTE
EL CABLE DE ALIMENTACIÓN NI RETIRE LA
BATERÍA HASTA QUE NO SE HAYA ENFRIADO
COMPLETAMENTE EL CALENTADOR (unos 5 min.).
►6.2.1. Sitúe el interruptor “ON/OFF” en la posición “OFF”
(0) (A Fig. 3).
en
it
de
es
fr
nl
pt
da
no
sv
pl
ru
cs
hu
sl
tr
hr
lt
lv
et
ro
sk
bg
uk
bs
el
zh
Pagina se încarcă...
Pagina se încarcă...
Pagina se încarcă...
Pagina se încarcă...
Pagina se încarcă...
Pagina se încarcă...
Pagina se încarcă...
Pagina se încarcă...
Pagina se încarcă...
Pagina se încarcă...
Pagina se încarcă...
Pagina se încarcă...
Pagina se încarcă...
Pagina se încarcă...
Pagina se încarcă...
Pagina se încarcă...
Pagina se încarcă...
Pagina se încarcă...
Pagina se încarcă...
Pagina se încarcă...
Pagina se încarcă...
Pagina se încarcă...
Pagina se încarcă...
Pagina se încarcă...
Pagina se încarcă...
Pagina se încarcă...
Pagina se încarcă...
Pagina se încarcă...
Pagina se încarcă...
Pagina se încarcă...
Pagina se încarcă...
Pagina se încarcă...
Pagina se încarcă...
Pagina se încarcă...
Pagina se încarcă...
Pagina se încarcă...
Pagina se încarcă...
Pagina se încarcă...
Pagina se încarcă...
Pagina se încarcă...
Pagina se încarcă...
Pagina se încarcă...
Pagina se încarcă...
Pagina se încarcă...
Pagina se încarcă...
Pagina se încarcă...
Pagina se încarcă...
Pagina se încarcă...
Pagina se încarcă...
Pagina se încarcă...
Pagina se încarcă...
Pagina se încarcă...
Pagina se încarcă...
Pagina se încarcă...
Pagina se încarcă...
Pagina se încarcă...
Pagina se încarcă...
Pagina se încarcă...
Pagina se încarcă...
Pagina se încarcă...
Pagina se încarcă...
Pagina se încarcă...
Pagina se încarcă...
Pagina se încarcă...
Pagina se încarcă...
Pagina se încarcă...
Pagina se încarcă...
Pagina se încarcă...
Pagina se încarcă...
Pagina se încarcă...
Pagina se încarcă...
Pagina se încarcă...
Pagina se încarcă...
Pagina se încarcă...
Pagina se încarcă...
Pagina se încarcă...
Pagina se încarcă...
Pagina se încarcă...
Pagina se încarcă...
Pagina se încarcă...
Pagina se încarcă...
Pagina se încarcă...
Pagina se încarcă...
Pagina se încarcă...
Pagina se încarcă...
Pagina se încarcă...
Pagina se încarcă...
Pagina se încarcă...
Pagina se încarcă...
Pagina se încarcă...
Pagina se încarcă...
Pagina se încarcă...
Pagina se încarcă...
Pagina se încarcă...
Pagina se încarcă...
Pagina se încarcă...
Pagina se încarcă...
Pagina se încarcă...
Pagina se încarcă...
Pagina se încarcă...
Pagina se încarcă...
Pagina se încarcă...
Pagina se încarcă...
Pagina se încarcă...
Pagina se încarcă...
Pagina se încarcă...
Pagina se încarcă...
Pagina se încarcă...
Pagina se încarcă...
-
 1
1
-
 2
2
-
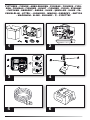 3
3
-
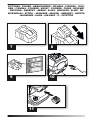 4
4
-
 5
5
-
 6
6
-
 7
7
-
 8
8
-
 9
9
-
 10
10
-
 11
11
-
 12
12
-
 13
13
-
 14
14
-
 15
15
-
 16
16
-
 17
17
-
 18
18
-
 19
19
-
 20
20
-
 21
21
-
 22
22
-
 23
23
-
 24
24
-
 25
25
-
 26
26
-
 27
27
-
 28
28
-
 29
29
-
 30
30
-
 31
31
-
 32
32
-
 33
33
-
 34
34
-
 35
35
-
 36
36
-
 37
37
-
 38
38
-
 39
39
-
 40
40
-
 41
41
-
 42
42
-
 43
43
-
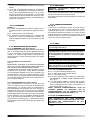 44
44
-
 45
45
-
 46
46
-
 47
47
-
 48
48
-
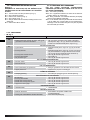 49
49
-
 50
50
-
 51
51
-
 52
52
-
 53
53
-
 54
54
-
 55
55
-
 56
56
-
 57
57
-
 58
58
-
 59
59
-
 60
60
-
 61
61
-
 62
62
-
 63
63
-
 64
64
-
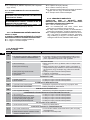 65
65
-
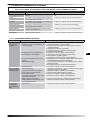 66
66
-
 67
67
-
 68
68
-
 69
69
-
 70
70
-
 71
71
-
 72
72
-
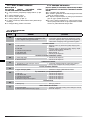 73
73
-
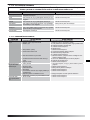 74
74
-
 75
75
-
 76
76
-
 77
77
-
 78
78
-
 79
79
-
 80
80
-
 81
81
-
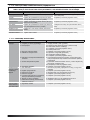 82
82
-
 83
83
-
 84
84
-
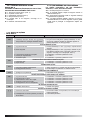 85
85
-
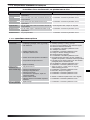 86
86
-
 87
87
-
 88
88
-
 89
89
-
 90
90
-
 91
91
-
 92
92
-
 93
93
-
 94
94
-
 95
95
-
 96
96
-
 97
97
-
 98
98
-
 99
99
-
 100
100
-
 101
101
-
 102
102
-
 103
103
-
 104
104
-
 105
105
-
 106
106
-
 107
107
-
 108
108
-
 109
109
-
 110
110
-
 111
111
-
 112
112
-
 113
113
-
 114
114
-
 115
115
-
 116
116
-
 117
117
-
 118
118
-
 119
119
-
 120
120
-
 121
121
-
 122
122
-
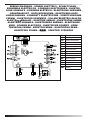 123
123
-
 124
124
-
 125
125
-
 126
126
-
 127
127
-
 128
128
-
 129
129


Master DDMDC61 Manual de utilizare
- Categorie
- Incalzitoare de spatiu
- Tip
- Manual de utilizare
Lucrări înrudite
-
Master DDMXL61 Manual de utilizare
-
-
-
Master XL 61 Infrared Oil/Diesel Heater Manual de utilizare
-
-
Master Master B 150CEG Manualul proprietarului
-
MCS Master BV 471S Manualul proprietarului