Makita DUH507 Cordless Hedge Trimmer Manual de utilizare
- Categorie
- Aparate de tuns gard viu
- Tip
- Manual de utilizare

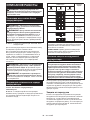
DUH507
DUH607
EN Cordless Hedge Trimmer INSTRUCTION MANUAL 7
SL Brezžični rezalnik za živo
mejo NAVODILA ZA UPORABO 16
SQ Prerës shkurresh me bateri MANUALI I PËRDORIMIT 25
BG Акумулаторен храсторез РЪКОВОДСТВО ЗА
ЕКСПЛОАТАЦИЯ 34
HR Bežični trimer za živicu PRIRUČNIK S UPUTAMA 44
МК Безжична фреза за жива
ограда УПАТСТВО ЗА УПОТРЕБА 53
SR Бежични тример за живу
ограду УПУТСТВО ЗА УПОТРЕБУ 63
RO Maşină de tuns gardul viu
fără cablu MANUAL DE INSTRUCŢIUNI 73
UK Акумуляторна пила для
підрізання живоплоту ІНСТРУКЦІЯ З
ЕКСПЛУАТАЦІЇ 83
RU Аккумуляторный Кусторез РУКОВОДСТВО ПО
ЭКСПЛУАТАЦИИ 93

2
3
2
1
Fig.1
1
2
Fig.2
2
1
3
Fig.3
1
Fig.4
1
Fig.5
1
2
Fig.6
3
1
2
45
Fig.7

3
1
Fig.8
1
Fig.9
1
Fig.10
1
Fig.11
1
1
Fig.12
1 2
Fig.13
1
Fig.14
1
2
3
Fig.15

4
Fig.16
3
3
12
Fig.17
1 2
Fig.18
1
Fig.19
1
2
2
Fig.20
1
2
1
Fig.21

5
1
Fig.22
(1)
(2)
Fig.23
Fig.24
Fig.25
Fig.26
Fig.27
Fig.28
Fig.29

6
Fig.30
Fig.31
1
Fig.32

7ENGLISH
ENGLISH (Original instructions)
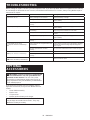
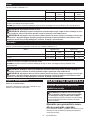
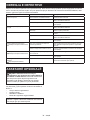
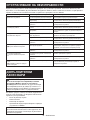
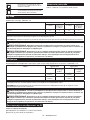
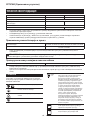
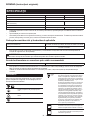
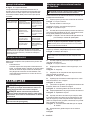
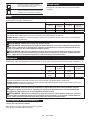
SPECIFICATIONS
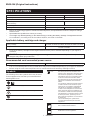
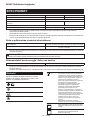
Model: DUH507 DUH607
Blade length 500 mm 600 mm
Strokes per minute 2,700 min-1
Overall length
(Without battery) 872 mm 976 mm
Rated voltage D.C. 18 V
Net weight 2.7 - 3.0 kg 2.8 - 3.1 kg
• Duetoourcontinuingprogramofresearchanddevelopment,thespecicationshereinaresubjecttochange
without notice.
• Specicationsmaydierfromcountrytocountry.
• Theweightmaydierdependingontheattachment(s),includingthebatterycartridge.Thelightestandheavi-
est combination, according to EPTA-Procedure 01/2014, are shown in the table.
Applicable battery cartridge and charger
Battery cartridge BL1815N / BL1820B / BL1830B / BL1840B / BL1850B / BL1860B
Charger DC18RC / DC18RD / DC18RE / DC18SD / DC18SE / DC18SF /
DC18SH / DC18WC
• Some of the battery cartridges and chargers listed above may not be available depending on your region of
residence.
WARNING: Only use the battery cartridges and chargers listed above. Use of any other battery cartridges
andchargersmaycauseinjuryand/orre.
Recommended cord connected power source
Portable power pack PDC01
• The cord connected power source(s) listed above may not be available depending on your region of residence.
• Before using the cord connected power source, read instruction and cautionary markings on them.
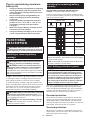
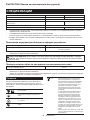
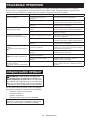
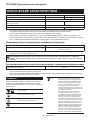
Symbols
The followings show the symbols which may be used
for the equipment. Be sure that you understand their
meaning before use.
Read instruction manual.
Wear eye protection.
DANGER - Keep hands away from blade.
Do not expose to moisture.
Ni-MH
Li-ion Only for EU countries
Due to the presence of hazardous com-
ponents in the equipment, waste electrical
and electronic equipment, accumulators
and batteries may have a negative impact
on the environment and human health.
Do not dispose of electrical and electronic
appliances or batteries with household
waste!
In accordance with the European Directive
on waste electrical and electronic equip-
ment and on accumulators and batteries
and waste accumulators and batteries,
as well as their adaptation to national law,
waste electrical equipment, batteries and
accumulators should be stored separately
and delivered to a separate collection point
for municipal waste, operating in accor-
dance with the regulations on environmen-
tal protection.
This is indicated by the symbol of the
crossed-out wheeled bin placed on the
equipment.
Guaranteed sound power level according
to EU Outdoor Noise Directive.
Sound power level according to Australia
NSW Noise Control Regulation.

8ENGLISH
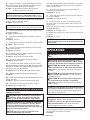
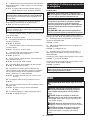
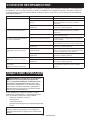
Intended use
The tool is intended for trimming hedges.
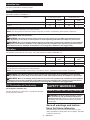
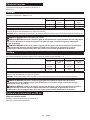
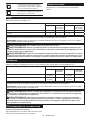
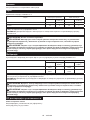
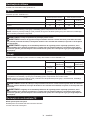
Noise
Applicable standard : EN62841-4-2
Model Sound pressure level Sound power level
LpA(dB(A)) Uncertainty K
(dB(A)) LWA(dB(A)) Uncertainty K
(dB(A))
DUH507 74 385 3
DUH607 73 384 3
NOTE: The declared noise emission value(s) has been measured in accordance with a standard test method and
may be used for comparing one tool with another.
NOTE: The declared noise emission value(s) may also be used in a preliminary assessment of exposure.
WARNING: Wear ear protection.
WARNING: The noise emission during actual use of the power tool can dier from the declared val-
ue(s) depending on the ways in which the tool is used especially what kind of workpiece is processed.
WARNING: Be sure to identify safety measures to protect the operator that are based on an estimation
of exposure in the actual conditions of use (taking account of all parts of the operating cycle such as the
times when the tool is switched o and when it is running idle in addition to the trigger time).
Vibration
The vibration total value (tri-axial vector sum) determined according to EN62841-4-2:
Model Front handle Rear handle
ah (m/s2)Uncertainty K
(m/s2)ah (m/s2)Uncertainty K
(m/s2)
DUH507
2.5 m/s2 or less
1.5
2.5 m/s2 or less
1.5
DUH607
2.5 m/s2 or less
1.5
2.5 m/s2 or less
1.5
NOTE: The declared vibration total value(s) has been measured in accordance with a standard test method and
may be used for comparing one tool with another.
NOTE: The declared vibration total value(s) may also be used in a preliminary assessment of exposure.
WARNING: The vibration emission during actual use of the power tool can dier from the declared
value(s) depending on the ways in which the tool is used especially what kind of workpiece is processed.
WARNING: Be sure to identify safety measures to protect the operator that are based on an estimation
of exposure in the actual conditions of use (taking account of all parts of the operating cycle such as the
times when the tool is switched o and when it is running idle in addition to the trigger time).
EC Declaration of Conformity
For European countries only
The EC declaration of conformity is included as Annex A
to this instruction manual.
SAFETY WARNINGS
General power tool safety warnings
WARNING: Read all safety warnings, instruc-
tions, illustrations and specications provided
with this power tool. Failure to follow all instructions
listedbelowmayresultinelectricshock,reand/or
seriousinjury.
Save all warnings and instruc-
tions for future reference.
The term "power tool" in the warnings refers to your
mains-operated (corded) power tool or battery-operated
(cordless) power tool.

9ENGLISH
Cordless Hedge Trimmer Safety
Warnings
1. Keep all parts of the body away from the blade.
Do not remove cut material or hold material
to be cut when blades are moving. Blades
continuetomoveaftertheswitchisturnedo.A
moment of inattention while operating the hedge
trimmermayresultinseriouspersonalinjury.
2. Carry the hedge trimmer by the handle with the
blade stopped and taking care not to operate
any power switch. Proper carrying of the hedge
trimmer will decrease the risk of inadvertent start-
ingandresultantpersonalinjuryfromtheblades.
3. When transporting or storing the hedge trim-
mer, always t the blade cover. Proper handling
of the hedge trimmer will decrease the risk of
personalinjuryfromtheblades.
4. When clearing jammed material or servicing
the unit, make sure all power switches are o
and the battery pack is removed or discon-
nected. Unexpected actuation of the hedge trim-
merwhileclearingjammedmaterialorservicing
mayresultinseriouspersonalinjury.
5.
Hold the hedge trimmer by insulated gripping
surfaces only, because the blade may contact
hidden wiring. Blades contacting a "live" wire may
make exposed metal parts of the hedge trimmer
"live" and could give the operator an electric shock.
6. Keep all power cords and cables away from
cutting area. Power cords or cables may be hid-
den in hedges or bushes and can be accidentally
cut by the blade.
7. Do not use the hedge trimmer in bad weather
conditions, especially when there is a risk of
lightning. This decreases the risk of being struck
by lightning.
8. When handing the hedge trimmer to other
person, once put the hedge trimmer on the
ground and pick up the hedge trimmer after
you completely take your hand o. Passing the
hedge trimmer by hand causes holding both the
front handle and the rear handle at the same time,
and then the hedge trimmer starts unintentionally.
Unintentionalstartingmaycausesseriousinjury.
Additional Safety Instructions
Preparation
1. Check the hedges and bushes for foreign
objects, such as wire fences or hidden wiring
before operating the tool.
2. The tool must not be used by children or
young persons under 18 years of age. Young
persons over 16 years of age may be exempted
from this restriction if they are undergoing training
under the supervision of an expert.
3. First-time users should have an experienced
user show them how to use the tool.
4. Use the tool only if you are in good physical
condition. If you are tired, your attention will be
reduced. Be especially careful at the end of a
working day. Perform all work calmly and carefully.
The user is responsible for all damages to third
parties.
5. Never use the tool when under the inuence of
alcohol, drugs or medication.
6. Work gloves of stout leather are part of the
basic equipment of the tool and must always
be worn when working with it. Also wear
sturdy shoes with anti-skid soles.
7. Before starting work check to make sure that
the tool is in good and safe working order.
Ensure guards are tted properly. The tool
must not be used unless fully assembled.
Operation
1. Hold the tool rmly with both hands when
using the tool.
2. The tool is intended to be used by the operator
at ground level. Do not use the tool on ladders
or any other unstable support.
3. DANGER - Keep hands away from blade.
Contact with blade will result in serious personal
injury.
4. Do not use the tool in the rain or in wet or
very damp conditions. The electric motor is not
waterproof.
5. Make sure you have a secure footing before
starting operation.
6. Do not operate the tool at no-load
unnecessarily.
7. Immediately switch o the tool and remove the
battery cartridge if the shear blades should
come into contact with a fence or other hard
object. Check the blades for damage, and if
damaged, replace the blades immediately.
8. Before checking the shear blades, taking care
of faults, or removing material caught in the
shear blades, always switch o the tool and
remove the battery cartridge.
9. Never point the shear blades to yourself or
others.
10. If the blades stop moving due to the stuck of
foreign objects between the blades during
operation, switch o the tool and remove the
battery cartridge, and then remove the foreign
objects using tools such as pliers. Removing
theforeignobjectsbyhandmaycauseaninjury
for the reason that the blades may move in reac-
tiontoremovingtheforeignobjects.
Electrical and battery safety
1. Avoid dangerous environment. Don't use the
tool in dump or wet locations or expose it to
rain. Water entering the tool will increase the risk
of electric shock.
2. Do not dispose of the battery(ies) in a re.
The cell may explode. Check with local codes for
possible special disposal instructions.
3. Do not open or mutilate the battery(ies).
Released electrolyte is corrosive and may cause
damage to the eyes or skin. It may be toxic if
swallowed.
4. Do not charge battery in rain, or in wet
locations.
5. Do not charge the battery outdoors.
6. Do not handle charger, including charger plug,
and charger terminals with wet hands.

10 ENGLISH
Maintenance and storage
1. Switch o the tool and remove the battery
cartridge before doing any maintenance work.
2. When moving the tool to another location,
including during work, always remove the
battery cartridge and put the blade cover on
the shear blades. Never carry or transport the
tool with the blades running. Never grasp the
blades with your hands.
3. Clean the tool and especially the shear blades
after use, and before putting the tool into stor-
age for extended periods. Lightly oil the blades
and put on the blade cover.
4. Store the tool with the blade cover on, in a dry
room. Keep it out of reach of children. Never
store the tool outdoors.
5. Do not dispose of the battery(ies) in a re. The
cell may explode. Check with local codes for
possible special disposal instructions.
6. Do not open or mutilate the battery(ies).
Released electrolyte is corrosive and may
cause damage to the eyes or skin. It may be
toxic if swallowed.
7. Do not charge battery in rain, or in wet
locations.
SAVE THESE INSTRUCTIONS.
WARNING: DO NOT let comfort or familiarity
with product (gained from repeated use) replace
strict adherence to safety rules for the subject
product. MISUSE or failure to follow the safety
rules stated in this instruction manual may cause
serious personal injury.
Important safety instructions for
battery cartridge
1. Before using battery cartridge, read all instruc-
tions and cautionary markings on (1) battery
charger, (2) battery, and (3) product using
battery.
2. Do not disassemble or tamper with the battery
cartridge.Itmayresultinare,excessiveheat,
or explosion.
3. If operating time has become excessively
shorter, stop operating immediately. It may
result in a risk of overheating, possible burns
and even an explosion.
4. If electrolyte gets into your eyes, rinse them
out with clear water and seek medical atten-
tion right away. It may result in loss of your
eyesight.
5. Do not short the battery cartridge:
(1) Do not touch the terminals with any con-
ductive material.
(2) Avoid storing battery cartridge in a con-
tainer with other metal objects such as
nails, coins, etc.
(3) Do not expose battery cartridge to water
or rain.
A battery short can cause a large current
ow, overheating, possible burns and even a
breakdown.
6. Do not store and use the tool and battery car-
tridge in locations where the temperature may
reach or exceed 50 °C (122 °F).
7. Do not incinerate the battery cartridge even if
it is severely damaged or is completely worn
out. The battery cartridge can explode in a re.
8. Do not nail, cut, crush, throw, drop the battery
cartridge, or hit against a hard object to the
battery cartridge. Such conduct may result in a
re,excessiveheat,orexplosion.
9. Do not use a damaged battery.
10. The contained lithium-ion batteries are subject
to the Dangerous Goods Legislation require-
ments.
For commercial transports e.g. by third parties,
forwarding agents, special requirement on pack-
aging and labeling must be observed.
For preparation of the item being shipped, consult-
ing an expert for hazardous material is required.
Please also observe possibly more detailed
national regulations.
Tapeormaskoopencontactsandpackupthe
battery in such a manner that it cannot move
around in the packaging.
11. When disposing the battery cartridge, remove
it from the tool and dispose of it in a safe
place. Follow your local regulations relating to
disposal of battery.
12. Use the batteries only with the products
specied by Makita. Installing the batteries to
non-compliantproductsmayresultinare,exces-
sive heat, explosion, or leak of electrolyte.
13. If the tool is not used for a long period of time,
the battery must be removed from the tool.
14. During and after use, the battery cartridge may
take on heat which can cause burns or low
temperature burns. Pay attention to the han-
dling of hot battery cartridges.
15. Do not touch the terminal of the tool imme-
diately after use as it may get hot enough to
cause burns.
16. Do not allow chips, dust, or soil stuck into the
terminals, holes, and grooves of the battery
cartridge.Itmaycauseheating,catchingre,
burst and malfunction of the tool or battery car-
tridge,resultinginburnsorpersonalinjury.
17. Unless the tool supports the use near
high-voltage electrical power lines, do not use
the battery cartridge near high-voltage electri-
cal power lines. It may result in a malfunction or
breakdown of the tool or battery cartridge.
18. Keep the battery away from children.
SAVE THESE INSTRUCTIONS.
CAUTION: Only use genuine Makita batteries.
Use of non-genuine Makita batteries, or batteries that
have been altered, may result in the battery bursting
causingres,personalinjuryanddamage.Itwill
also void the Makita warranty for the Makita tool and
charger.

11 ENGLISH
Tips for maintaining maximum
battery life
1. Charge the battery cartridge before completely
discharged. Always stop tool operation and
charge the battery cartridge when you notice
less tool power.
2. Never recharge a fully charged battery car-
tridge. Overcharging shortens the battery
service life.
3. Charge the battery cartridge with room tem-
perature at 10 °C - 40 °C (50 °F - 104 °F). Let
a hot battery cartridge cool down before
charging it.
4. When not using the battery cartridge, remove
it from the tool or the charger.
5. Charge the battery cartridge if you do not use
it for a long period (more than six months).
FUNCTIONAL
DESCRIPTION
CAUTION: Always be sure that the tool is
switched o and the battery cartridge is removed
before adjusting or checking function on the tool.
Installing or removing battery
cartridge
CAUTION: Always switch o the tool before
installing or removing of the battery cartridge.
CAUTION: Hold the tool and the battery car-
tridge rmly when installing or removing battery
cartridge. Failure to hold the tool and the battery
cartridgermlymaycausethemtoslipoyourhands
and result in damage to the tool and battery cartridge
andapersonalinjury.
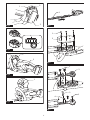
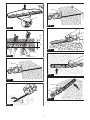
►Fig.1: 1. Red indicator 2. Button 3. Battery cartridge
To remove the battery cartridge, slide it from the tool
while sliding the button on the front of the cartridge.
To install the battery cartridge, align the tongue on the
battery cartridge with the groove in the housing and slip
it into place. Insert it all the way until it locks in place
with a little click. If you can see the red indicator as
showninthegure,itisnotlockedcompletely.
CAUTION: Always install the battery cartridge
fully until the red indicator cannot be seen. If not,
itmayaccidentallyfalloutofthetool,causinginjuryto
you or someone around you.
CAUTION: Do not install the battery cartridge
forcibly. If the cartridge does not slide in easily, it is
not being inserted correctly.
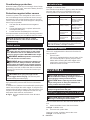
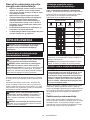
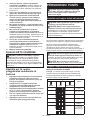
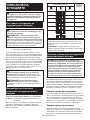
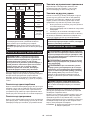
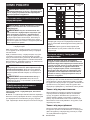
Indicating the remaining battery
capacity
Only for battery cartridges with the indicator
►Fig.2: 1. Indicator lamps 2. Check button
Press the check button on the battery cartridge to indi-
cate the remaining battery capacity. The indicator lamps
light up for a few seconds.
Indicator lamps Remaining
capacity
Lighted O Blinking
75% to 100%
50% to 75%
25% to 50%
0% to 25%
Charge the
battery.
The battery
may have
malfunctioned.
NOTE: Depending on the conditions of use and the
ambienttemperature,theindicationmaydierslightly
from the actual capacity.
NOTE:Therst(farleft)indicatorlampwillblinkwhen
the battery protection system works.
Tool / battery protection system
NOTICE: Depending on the usage conditions,
the tool automatically stops without any indica-
tion if the branches or debris are entangled in the
tool. In this case, switch o the tool and remove
the battery cartridge, and then remove entangled
branches or debris using tools such as pliers.
After removing the branches or debris, install the
battery cartridge and turn on the tool again.
The tool is equipped with a tool/battery protection sys-
tem.Thissystemautomaticallycutsopowertothe
motor to extend tool and battery life. The tool will auto-
matically stop during operation if the tool or battery is
placed under one of the following conditions:
Overload protection
When the tool or battery is operated in a manner that
causes it to draw an abnormally high current, the tool
automaticallystops.Inthissituation,turnthetoolo
and stop the application that caused the tool to become
overloaded. Then turn the tool on to restart.
Overheat protection
When the tool or battery is overheated, the tool stops
automatically. In this case, let the tool and battery cool
before turning the tool on again.

12 ENGLISH
Overdischarge protection
When the battery capacity is not enough, the tool stops
automatically. In this case, remove the battery from the
tool and charge the battery.
Protections against other causes
Protection system is also designed for other causes
that could damage the tool and allows the tool to stop
automatically. Take all the following steps to clear the
causes, when the tool has been brought to a temporary
halt or stop in operation.
1. Turnthetoolo,andthenturnitonagainto
restart.
2. Charge the battery(ies) or replace it/them with
recharged battery(ies).
3. Let the machine and battery(ies) cool down.
If no improvement can be found by restoring protection
system, then contact your local Makita Service Center.
NOTICE: If the tool stops due to a cause
not described above, refer to the section for
troubleshooting.
Switch action
WARNING: NEVER use the tool if it runs when
you simply pull the switch trigger or the switch
lever. Return the tool to our authorized service
center for proper repairs BEFORE further usage.
WARNING: NEVER tape down or defeat pur-
pose and function of switch lever.
WARNING: Before installing the battery car-
tridge on the tool, always check to see that the
switch trigger and switch lever actuate properly
and return to the "OFF" position when released.
Operating a tool with a switch that does not actuate
properly can lead to loss of control and serious per-
sonalinjury.
CAUTION: Never put your nger on the
switch trigger when carrying. The tool may start
unintentionallyandcauseinjury.
For your safety, this tool is equipped with a dual switch-
ing system which prevents the tool from unintended
starting.
To start the tool, hold the front handle while pressing the
switch lever and pull the switch trigger. To stop the tool,
release either the switch trigger or the switch lever. The
sequence of switching is unimportant as the tool only
starts when both switches are activated.
►Fig.3: 1. Front handle 2. Switch lever 3. Switch
trigger
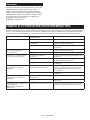
Indication lamp
►Fig.4: 1. Indication lamp
The indication lamp blinks or lights up when the battery
becomes low or the tool is overloaded. Refer to the
following table for the status and action to be taken.
Indication lamp Status Action to be taken
The lamp blinks
in red. The remaining
battery is low. Recharge the
battery, or replace
the battery with a
charged one.
The lamp lights up
in red. The remaining
battery is empty. Recharge the
battery, or replace
the battery with a
charged one.
The tool has
stopped due to
overload.
Turnothetool,
and remove the
cause of overload.
The tool has
stopped due to
overheat.
Turnothetool,
and cool down the
tool and battery.
NOTE: The time at which the indication lamp blinks or
lights up varies by the temperature around the work
area and the battery cartridge conditions.
Electronic function
The tool is equipped with the electronic functions for
easy operation.
• Electric brake
This tool is equipped with an electric brake. If the
tool consistently fails to quickly stop the shear
blades after releasing the switch trigger or the
switch lever, have the tool serviced at Makita
Authorized Service Center.
ASSEMBLY
CAUTION: Always be sure that the tool is
switched o and the battery cartridge is removed
before carrying out any work on the tool.
CAUTION: When replacing the shear blades,
always wear gloves so that your hands do not
directly contact the shear blades.
NOTICE: When replacing the shear blades, do
not wipe o grease from the gear.
Installing or removing the shear blades
CAUTION: Attach the blade cover before
removing or installing the shear blades.
You can install 500 mm or 600 mm shear blades to your
tool.
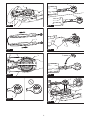
1. Attach the blade cover to the shear blades.
►Fig.5: 1. Blade cover
2. Place the tool upside down.
Remove 6 screws, and then remove the cover.
►Fig.6: 1. Screw 2. Cover

13 ENGLISH
3. Remove the bolts and the shear blades from the
tool. Then remove the dust guard, the metal sleeves
andtheatwasherfromtheshearblades.
►Fig.7: 1. Bolt 2. Shear blades 3. Dust guard
4. Metal sleeve 5. Flat washer
NOTICE:
Be careful not to lose the bolts, the dust
guard, the metal sleeves, and the at washer. These
parts are needed again when installing new shear blades.
4. Check if the resin sleeve remains on the machine,
and if so, remove the resin sleeve.
►Fig.8: 1. Resin sleeve
NOTE: Old resin sleeves are not need to be stored.
The new shear blades include the new resin sleeves.
5. Remove the blade cover, and then attach it to the
new shear blades.
►Fig.9: 1. Blade cover
6. Adjusttheholepositionsbyturningthegearas
illustrated.
►Fig.10: 1. Gear
7.
Make sure the resin sleeves are attached on the shear blades.
►Fig.11: 1. Resin sleeve
8. Apply some grease provided with the new shear
blades as illustrated.
►Fig.12: 1. Grease
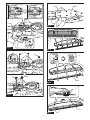
9. Hold the guide bar, and then slide out the shear
bladesasshowninthegure.
►Fig.13: 1. Guide bar 2. Shear blades
10. Attach the dust guard to the shear blades.
►Fig.14: 1. Dust guard
11. Place the new shear blades on the tool so that
theresinsleevestintheholesinthegear.Iftheresin
sleevesonthepinscomeomistakenly,puttheminto
the holes in the gear beforehand.
►Fig.15: 1. Shear blades 2. Resin sleeve 3. Hole
12. Slidetheguidebarasshowninthegure.
►Fig.16
13. Placethemetalsleevesandtheatwasher,then
tighten the bolts.
►Fig.17: 1. Metal sleeve 2. Flat washer 3. Bolt
14. Attach the cover, and then tighten 6 screws.
►Fig.18: 1. Screw 2. Cover
Installing or removing the chip receiver
Optional accessory
CAUTION: When installing or removing the
chip receiver, always wear gloves so that your
hands do not directly contact the shear blades.
NOTICE: The blade cover cannot be installed if
the chip receiver is installed on the tool. Before
carrying or storing the tool, uninstall the chip
receiver, and then install the blade cover to avoid
exposure of the shear blades.
NOTICE: Be sure to remove the blade cover
before installing the chip receiver.
The chip receiver gathers discarded leaves and makes
clean-up afterward much easier. It can be installed on
either side of the tool.
1. Align the holes on the chip receiver with the
screws on the shear blades.
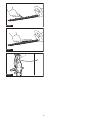
►Fig.19: 1. Screw
2. Hook the claws of the chip receiver to the groove
on the shear blades.
►Fig.20: 1. Claw 2. Groove
3. Press the levers on the chip receiver, and then
hook the claws on the other side to the groove on the
shear blades.
Make sure that all the claws are hocked in the groove of
theguidebarrmly.
►Fig.21: 1. Lever 2. Claw
To remove the chip receiver, press the levers to release
the claws.
►Fig.22: 1. Lever
NOTICE: Never try to remove the chip receiver
by an excessive force with its hooks locked to the
shear blades.
OPERATION
WARNING: Keep hands away from shear
blades.
CAUTION: Avoid operating the tool in very
hot weather as much as practicable. When operat-
ing the tool, be careful of your physical condition.
CAUTION: Be careful not to accidentally
contact a metal fence or other hard objects while
trimming. The shear blades may break and cause
aninjury.
CAUTION: Be careful not to allow the shear
blades to contact the ground. The tool may recoil
andcauseaninjury.
CAUTION: Overreaching with a hedge trim-
mer, particularly from a ladder, is extremely
dangerous. Do not work while standing on anything
wobblyorinrm.
NOTICE: Do not attempt to cut branches thicker
than 10 mm in diameter with the tool. Cut branches
to 10 cm lower than the cutting height using branch
cutters before using the tool.
►Fig.23: (1) Cutting height (2) 10 cm
NOTICE: Do not cut down dead trees or similar
hard objects. Doing so may damage the tool.
NOTICE: Do not trim the grass or weeds while
using the shear blades. The shear blades may
become tangled in the grass or weeds.
Hold the tool with both hands, hold the front handle
while pressing the switch lever and pull the switch trig-
ger, and then move the tool forward.
►Fig.24

14 ENGLISH
For basic operation, tilt the shear blades toward the
trimming direction and move it calmly and slowly at the
speed rate of 3 to 4 seconds per meter.
►Fig.25
To cut a hedge top evenly, tie a string at the desired
height and trim along it.
►Fig.26
If the chip receiver is attached to the shear blades, it
gathers discarded leaves and makes clean-up after-
ward much easier.
►Fig.27
To cut a hedge side evenly, cut from the bottom to top.
►Fig.28
When trimming to make a round shape (trimming box-
wood or rhododendron, etc.), trim from the root to the
topforabeautifulnish.
►Fig.29
MAINTENANCE
CAUTION: Always be sure that the tool is
switched o and the battery cartridge is removed
before attempting to perform inspection or
maintenance.
To maintain product SAFETY and RELIABILITY,
repairs,anyothermaintenanceoradjustmentshould
be performed by Makita Authorized or Factory Service
Centers, always using Makita replacement parts.
Cleaning the tool
Cleanthetoolbywipingodustwithadryclothorone
dipped in soapy water and wrung out.
NOTICE: Never use gasoline, benzine, thinner,
alcohol or the like. Discoloration, deformation or
cracks may result.
Shear blade maintenance
Before the operation or once per hour during operation,
apply low-viscosity oil (machine oil, or spray-type lubri-
cating oil) to the shear blades.
►Fig.30
After operation, remove dust from both sides of the
shearbladeswithawiredbrush,wipeitowithacloth
and then apply low-viscosity oil (machine oil, or spray-
type lubricating oil) to the shear blades.
►Fig.31
NOTICE: Do not wash the shear blades in water.
Doing so may cause rust or damage to the tool.
NOTICE: Dirt and corrosion cause excessive
friction of the shear blades and shorten the oper-
ating time per battery charge.
Storage
The hook hole in the tool bottom is convenient for hang-
ing the tool from a nail or screw on the wall.
Attach the blade cover to the shear blades so that the
shear blades are not exposed. Store the tool out of the
reach of children. Store the tool in a place not exposed
to moisture or rain.
►Fig.32: 1. Hole

15 ENGLISH
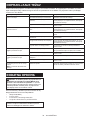
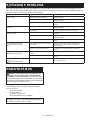
TROUBLESHOOTING
Beforeaskingforrepairs,conductyourowninspectionrst.Ifyoundaproblemthatisnotexplainedinthemanual,
do not attempt to dismantle the tool. Instead, ask Makita Authorized Service Centers, always using Makita replace-
ment parts for repairs.
State of abnormality Probable cause (malfunction) Remedy
Motor does not run. Battery cartridge is not installed. Install the battery cartridge.
Battery problem (under voltage) Rechargethebattery.Ifrechargingisnoteective,
replace battery.
The drive system does not work
correctly. Ask your local authorized service center for repair.
Motor stops running after a little use. Battery's charge level is low. Rechargethebattery.Ifrechargingisnoteective,
replace battery.
Overheating. Stop using of tool to allow it to cool down.
Tool does not reach maximum RPM. Battery is installed improperly. Install the battery cartridge as described in this
manual.
Battery power is dropping. Rechargethebattery.Ifrechargingisnoteective,
replace battery.
The drive system does not work
correctly. Ask your local authorized service center for repair.
Shear blades do not move:
Stop the machine immediately! Foreignobjectsarecaughtbetweenthe
shear blades. Switchothetoolandremovethebatterycartridge,
andthenremovetheforeignobjectsusingtools
such as pliers.
The drive system does not work
correctly. Ask your local authorized service center for repair.
Abnormal vibration:
Stop the machine immediately! Shear blades are broken, bent or worn. Replace the shear blades.
The drive system does not work
correctly. Ask your local authorized service center for repair.
Shear blades and motor cannot stop:
Remove the battery immediately! Electric malfunction. Remove the battery and ask your local authorized
service center for repair.
OPTIONAL
ACCESSORIES
CAUTION: These accessories or attachments
are recommended for use with your Makita tool
specied in this manual. The use of any other
accessories or attachments might present a risk of
injurytopersons.Onlyuseaccessoryorattachment
for its stated purpose.
If you need any assistance for more details regard-
ing these accessories, ask your local Makita Service
Center.
• Shear blade assembly
• Blade cover
• Chip receiver
• Makita genuine battery and charger
NOTE: Some items in the list may be included in the
tool package as standard accessories. They may
dierfromcountrytocountry.

16 SLOVENŠČINA
SLOVENŠČINA (Originalna navodila)
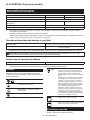
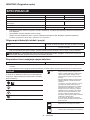
TEHNIČNI PODATKI
Model: DUH507 DUH607
Dolžinarezila 500 mm 600 mm
Hodi na minuto 2.700 min-1
Celotnadolžina
(Brezbaterije) 872 mm 976 mm
Nazivna napetost D.C. 18 V
Netoteža 2,7 – 3,0 kg 2,8 – 3,1 kg
• Kernenehnoopravljamoraziskaveinrazvijamosvojeizdelke,selahkotehničnipodatkivtemdokumentu
spremenijobrezobvestila.
• Tehničnipodatkiselahkorazlikujejooddržavedodržave.
• Težaselahkorazlikujegledenapriključke,vključnozakumulatorskobaterijo.Najlažjainnajtežjakombinacijav
skladu s postopkom EPTA 01/2014 sta prikazani v preglednici.
Uporabna akumulatorska baterija in polnilnik
Baterijskivložek BL1815N / BL1820B / BL1830B / BL1840B / BL1850B / BL1860B
Polnilnik DC18RC / DC18RD / DC18RE / DC18SD / DC18SE / DC18SF /
DC18SH / DC18WC
• Nekaterezgorajnavedeneakumulatorskebaterijeinpolnilnikimordavvašidržaviprebivališčanisonavoljo.
OPOZORILO: Uporabljajte le zgoraj navedene akumulatorske baterije in polnilnike. Uporaba drugih
akumulatorskihbaterijinpolnilnikovlahkopovzročitelesnepoškodbein/alipožar.
Priporočen vir napajanja s kablom
Prenosna polnilna enota PDC01
• Vir(i)napajanjaskablom,navedenizgoraj,mordavvašidržaviprebivališčanisonavoljo.
• Preduporaboviranapajanjaskablompreberitenavodilainopozorilneznakenanjem.
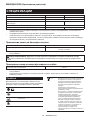
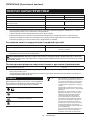
Simboli
Naslednjisimboliselahkouporabljajovpovezavis
strojem.Preduporaboizdelkaseobveznoseznanitez
njihovimpomenom.
Preberite navodila za uporabo.
Uporabljajtezaščitozaoči.
NEVARNOST–zrokaminesegajtev
območjerezila.
Neizpostavljajtevlagi.
Ni-MH
Li-ion SamozadržaveEU
Zaradi prisotnosti nevarnih komponent v
opremiimajolahkouporabljenaelektrična
inelektronskaoprema,akumulatorjiin
baterijenegativenvplivnaokoljeinzdravje
ljudi.
Električnihinelektronskihnapravalibaterij
neodlagajtemedgospodinjskeodpadke!
Skladno z evropsko Direktivo o odpadni
električniinelektronskiopremi,oakumula-
torjihinbaterijahterodpadnihakumulator-
jihinbaterijahternjenouporabovdržavnih
zakonihmoraterabljenoelektričnoin
elektronskoopremo,baterijeinakumula-
torjezbiratiločenoterdostavitinaposebno
zbiralno mesto za komunalne odpadke, ki
delujeskladnospredpisizazaščitookolja.
Tonakazujesimbolprečrtanegasmetnjaka
skolesi,kijenatisnjennaopremi.
Zajamčenaravenzvočnemočivskladuz
direktivo EU o hrupu na prostem.
Ravenzvočnemočivskladuzavstralskim
predpisom o nadzoru hrupa NSW
Predvidena uporaba
Orodjejenamenjenorezanjuživemeje.

17 SLOVENŠČINA
Hrup
Veljavnistandard:EN62841-4-2
Model Ravenzvočnegatlaka Ravenzvočnemoči
LpA(dB(A)) OdstopanjeK
(dB(A)) LWA(dB(A)) OdstopanjeK
(dB(A))
DUH507 74 385 3
DUH607 73 384 3
OPOMBA:Navedenevrednostioddajanjahrupasobileizmerjenevskladusstandardnimimetodamitestiranjain
selahkouporabljajozaprimerjavoorodij.
OPOMBA:Navedenevrednostioddajanjahrupaselahkouporabljajotudipripredhodnioceniizpostavljenosti.
OPOZORILO: Uporabljajte zaščito za sluh.
OPOZORILO: Oddajanje hrupa med dejansko uporabo električnega orodja se lahko razlikuje od nave-
denih vrednosti, odvisno od načina uporabe orodja in predvsem vrste obdelovanca.
OPOZORILO: Upravljavec mora za lastno zaščito poznati varnostne ukrepe, ki temeljijo na oceni izpo-
stavljenosti v dejanskih pogojih uporabe (poleg časa proženja je treba upoštevati celoten delovni cikel,
vključno s časom, ko je orodje izklopljeno, in časom, ko deluje v prostem teku).
Vibracije
Skupnevrednostivibracij(vektorskavsotatrehosi)vskladuzEN62841-4-2:
Model Sprednji ročaj Zadnji ročaj
ah (m/s2)Odstopanje K
(m/s2)ah (m/s2)Odstopanje K
(m/s2)
DUH507
2,5 m/s2alimanj
1,5
2,5 m/s2alimanj
1,5
DUH607
2,5 m/s2alimanj
1,5
2,5 m/s2alimanj
1,5
OPOMBA:Navedeneskupnevrednostioddajanjavibracijsobileizmerjenevskladusstandardnimimetodami
testiranjainselahkouporabljajozaprimerjavoorodij.
OPOMBA:Navedeneskupnevrednostioddajanjavibracijselahkouporabljajotudipripredhodnioceni
izpostavljenosti.
OPOZORILO: Oddajanje vibracij med dejansko uporabo električnega orodja se lahko razlikuje od
navedenih vrednosti, odvisno od načina uporabe orodja in predvsem vrste obdelovanca.
OPOZORILO: Upravljavec mora za lastno zaščito poznati varnostne ukrepe, ki temeljijo na oceni izpo-
stavljenosti v dejanskih pogojih uporabe (poleg časa proženja je treba upoštevati celoten delovni cikel,
vključno s časom, ko je orodje izklopljeno, in časom, ko deluje v prostem teku).
Izjava o skladnosti ES
Samo za evropske države
IzjavaESoskladnostijevključenavdodatkuA,kije
priložentemnavodilomzauporabo.
VARNOSTNA OPOZORILA
Splošna varnostna opozorila za
električno orodje
OPOZORILO: Preberite vsa varnostna opo-
zorila in navodila s slikami in tehničnimi podatki,
ki so dobavljeni skupaj z električnim orodjem.
Obneupoštevanjuspodajnavedenihnavodilobstaja
nevarnostelektričnegaudara,požarain/alihudih
telesnihpoškodb.
Shranite vsa opozorila in navo-
dila za poznejšo uporabo.
Izraz„električnoorodje“vopozorilihsenanašanavaše
električnoorodje(skablom)alibaterijskoelektrično
orodje(brezkabla).

18 SLOVENŠČINA
Varnostna opozorila za brezžični
rezalnik za živo mejo
1. Ne približujte delov telesa rezilu. Ne odstra-
njujte odrezanega materiala in ne držite mate-
riala, ki ga boste rezali, kadar se rezila premi-
kajo.Koizključitestikalo,serezilaševednovrtijo.
Trenuteknepazljivostipridelusškarjamizaživo
mejolahkoprivededohudihtelesnihpoškodb.
2. Škarje za živo mejo nosite za ročaj, rezilo mora
biti ustavljeno, bodite pozorni, da ne vklopite
stikala.Čebosteškarjezaživomejopravilno
nosili,bostezmanjšalitveganjezanehotenizagon
inposledičnotelesnopoškodbozrezili.
3. Kadar prenašate ali shranjujete škarje za živo
mejo, vedno namestite pokrov rezila. Ustrezno
rokovanjesškarjamizaživomejobozmanjšalo
morebitnetelesnepoškodbezaradirezil.
4. Ko odstranjujete zataknjeni material ali
popravljate enoto, se prepričajte, da so vsi
gumbi za vklop/izklop izklopljeni in da je aku-
mulatorska baterija odstranjena ali izklopljena.
Nepričakovanzagonškarijzaživomejomed
čiščenjemzataknjenegamaterialaalipopravlja-
njemlahkopovzročiresnetelesnepoškodbe.
5. Držite škarje za živo mejo na izoliranih držal-
nih površinah, saj lahko rezilo prereže skrito
električno napeljavo. Ob stiku rezil z vodniki pod
napetostjodobijonapetostvsineizoliranikovinski
deliškarijzaživomejo,zaradičesarlahkouporab-
nikutrpielektričniudar.
6. Električne kable odstranite z območja reza-
nja.Meduporabosolahkokabliskritiživimeji
aligrmovjuinjihlahkozrezilomnenamerno
prerežete.
7. Škarij za živo mejo ne uporabljajte ob slabem
vremenu, še posebej, kadar bliska. S tem
zmanjšatetveganje,dabivaszadelastrela.
8. Ko želite predati škarje za živo mejo drugi
osebi, jih položite na tla, primejo jih naj,
ko umaknete roke s škarij za živo mejo.Če
škarjezaživomejopodativroke,sejihdržitako
zasprednjikotzadnjiročajistočasno,karpa
povzroči,daseškarjezaživomejonenamerno
zaženejo.Nenamerenzagonlahkopovzročihude
telesnepoškodbe.
Dodatna varnostna navodila
Priprava
1. Pred uporabo orodja preverite, da v živi meji
in grmičevju ni tujkov, kot so žične ograje ali
skrite žice.
2. Orodja ne smejo uporabljati otroci ali mlajši
od 18 let.Mladoletneosebe,starejšeod16let,
solahkoizvzeteizteomejitve,česeusposabljajo
podnadzoromstrokovnjaka.
3. Uporabnike, ki prvič uporabljajo orodje, naj
izkušeni uporabnik pouči o uporabi orodja.
4. Orodje uporabljajte samo, če ste dobro zično
pripravljeni.Česteutrujeni,bovašazbranost
zmanjšana.Šeposebejboditepozorniobkoncu
delovnegadne.Vsadelaopravljajtemirnoin
zbrano.Uporabnikjeodgovorenzavsepoškodbe,
povzročenetretjimosebam.
5. Nikoli ne uporabljajte orodja pod vplivom
alkohola, drog ali zdravil.
6. Delovne rokavice iz robustnega usnja so del
osnovne opreme orodja in jih je pri delu treba
vedno nositi. Prav tako nosite močne čevlje z
nedrsečim podplatom.
7. Pred začetkom dela se prepričajte, da je
orodje v dobrem stanju in varno za delo.
Zagotovite, da so ščitniki pravilno nameščeni.
Orodja ni dovoljeno uporabljati, če ni v celoti
sestavljeno.
Uporaba
1. Med uporabo trdno držite orodje z obema
rokama.
2. Orodje je namenjeno uporabi na tleh. Orodja
ne uporabljajte na lestvah ali drugih nestabil-
nih oporah.
3. NEVARNOST - Ne približujte rok rezilu. Stik z
rezilompovzročihudetelesnepoškodbe.
4. Orodja ne uporabljajte v dežju ali v zelo vlažnih
pogojih.Električnimotornivodotesen.
5. Pred začetkom uporabe zagotovite trdno
stojišče.
6. Ne uporabljajte orodja brez obremenitve po
nepotrebnem.
7. Če rezila škarij pridejo v stik z ograjo ali dru-
gim trdim predmetom, takoj ugasnite orodje in
odstranite akumulatorsko baterijo. Preverite
rezila, ali so poškodovana, in jih v tem primeru
takoj zamenjajte.
8. Preden rezila škarij pregledate, odpravite
napake ali odstranite material, ki se je ujel v
rezila škarij, vedno izklopite orodje in odstra-
nite akumulatorsko baterijo.
9. Rezil nikoli ne usmerite proti sebi ali drugim
osebam.
10. Če se med delovanjem rezila nehajo premikati,
ker so se med njih zataknili tujki, izklopite
orodje, odstranite akumulatorsko baterijo in
nato odstranite tujke z orodjem, kot so klešče.
Odstranjevanjetujkovzrokamilahkopovzroči
poškodbe,sajsezaradiodstranjevanjatujkov
lahkopremaknejorezila.
Električna zaščita in zaščita akumulatorja
1. Izogibajte se nevarnemu okolju. Orodja ne
uporabljajte na vlažnih ali mokrih mestih in ga
ne izpostavljajte dežju.Voda,kiprodrevorodje,
bopovečalanevarnostelektričnegaudara.
2. Akumulatorja/-ev ni dovoljeno metati v
ogenj. Celica lahko eksplodira. Preverite lokalne
predpise glede morebitnih posebnih navodil za
odstranjevanje.
3. Ne odpirajte ali spreminjajte akumulatorja/-ev.
Sproščenielektrolitjekoroziveninlahkopovzroči
poškodbeočialikože.Prizaužitjujelahko
strupen.
4. Akumulatorja ne polnite v dežju ali na mokrih
mestih.
5. Akumulatorja ne polnite na prostem.
6. Ne dotikajte se polnilnika, vtiča polnilnika in
priključkov polnilnika z mokrimi rokami.

19 SLOVENŠČINA
Vzdrževanje in shranjevanje
1. Pred vzdrževalnimi deli izklopite orodje in
odstranite akumulatorsko baterijo.
2. Kadar prenašate orodje na drugo lokacijo, tudi
med delom, vedno odstranite akumulatorsko
baterijo in namestite pokrov rezila škarij. Nikoli
ne prenašajte ali prevažajte orodja, kadar
deluje. Nikoli ne prijemajte rezil z rokami.
3.
Po uporabi in preden shranite orodje za dlje
časa ga očistite (še posebej rezilo škarij). Rahlo
naoljite rezila in namestite pokrov za rezila.
4. Orodje shranjujte z nameščenim pokrovom za
rezila in v suhem prostoru. Shranjujte nedo-
segljivo otrokom. Orodja nikoli ne shranjujte
na prostem.
5. Akumulatorja/-ev ni dovoljeno metati v ogenj.
Celica lahko eksplodira. Preverite lokalne
predpise glede morebitnih posebnih navodil za
odstranjevanje.
6. Ne odpirajte ali spreminjajte akumulatorja/-
-ev. Sproščeni elektrolit je koroziven in lahko
povzroči poškodbe oči ali kože. Pri zaužitju je
lahko strupen.
7. Akumulatorja ne polnite v dežju ali na mokrih
mestih.
SHRANITE TA NAVODILA.
OPOZORILO: NE dovolite, da bi zaradi udob-
nejšega dela ali znanja o uporabi izdelka (prido-
bljenega z večkratno uporabo) opustili strogo
upoštevanje varnostnih zahtev v okviru pravilne
uporabe orodja. ZLORABA ali neupoštevanje var-
nostnih zahtev v teh navodilih za uporabo lahko
povzroči resne telesne poškodbe.
Pomembna varnostna navodila za
akumulatorsko baterijo
1. Pred uporabo baterijskega vložka preberite
vsa navodila in opozorilne oznake na (1) pol-
nilniku akumulatorja, (2) akumulatorju in (3)
izdelku, ki uporablja akumulator.
2. Ne razstavljajte ali spreminjajte akumulatorske
baterije.Stemlahkopovzročitepožar,preko-
mernovročinoalieksplozijo.
3. Če se je čas delovanja občutno skrajšal, takoj
prenehajte uporabljati orodje. V nasprotnem
primeru lahko pride do pregretja, morebitnih
opeklin in celo eksplozije.
4. Če pride elektrolit v stik z očmi, jih sperite s
čisto vodo in takoj poiščite zdravniško pomoč.
Posledica je lahko izguba vida.
5. Ne povzročite kratkega stika baterijskega
vložka:
(1) Ne dotikajte se priključkov s kakršnim
koli prevodnim materialom.
(2) Izogibajte se shranjevanju baterijskega
vložka v vsebniku z drugimi kovinskimi
predmeti kot so žeblji, kovanci itn.
(3) Ne izpostavljajte baterijskega vložka vodi
ali dežju.
Kratek stik akumulatorja lahko povzroči velik električni
tok, pregrevanje, morebitne opekline in celo okvaro.
6. Ne shranjujte in uporabljajte orodja in akumu-
latorske baterije na mestih, kjer lahko tempera-
tura doseže ali preseže 50 °C (122 °F).
7. Ne sežigajte baterijskega vložka, tudi če je
hudo poškodovan ali v celoti izpraznjen.
Baterijski vložek lahko v ognju eksplodira.
8. Ne pribijajte, režite, drobite, mečite, spuščajte
akumulatorske baterije oziroma ne udarjajte
z akumulatorsko baterijo po trdem predmetu.
Takšnoravnanjelahkopovzročipožar,preko-
mernovročinoalieksplozijo.
9. Ne uporabljajte poškodovanih akumulatorjev.
10. Priložene litij-ionske baterije ustrezajo zahte-
vam zakonodaje v zvezi z nevarnim blagom.
Zakomercialneprevoze,npr.tiste,kijihopravljajo
tretjestrankeincarinskiposredniki,jetrebaupo-
števatiposebnezahtevevzvezizembalažoin
označevanjem.
Med postopkom priprave na odpremo izdelka se
jetrebaposvetovatisstrokovnjakomzanevarne
snovi.Pritemupoštevajtetudipodrobnejšenacio-
nalne predpise.
Odprtestikeoblepitezlepilnimtrakomalijihdru-
gačezaščitite,baterijopazapakirajtetako,dasev
embalažinemorepremikati.
11. Ko odstranjujete akumulatorsko baterijo, jo
vzemite iz orodja in varno zavrzite. Upoštevajte
lokalne uredbe glede odlaganja baterije.
12. Baterije uporabljajte le z izdelki, ki jih določi
Makita.Čenamestitebaterijevneskladneizdelke,
lahkopridedopožara,pregrevanja,eksplozijeali
puščanjaelektrolita.
13. Če orodja dlje časa ne uporabljate, morate iz
njega odstraniti baterijo.
14. Med uporabo in po uporabi lahko akumu-
latorska baterija postane vroča in povzroči
opekline. Z vročimi akumulatorskimi baterijami
ravnajte pazljivo.
15. Ne dotikajte se priključka orodja takoj po upo-
rabi, ker se lahko dovolj segreje, da povzroči
opekline.
16. Ne dovolite, da bi se v priključke, odprtine in
utore akumulatorske baterije zlepili ostružki,
prah ali zemlja.Tolahkopovzročipregrevanje,
požar,razpočenjeinokvaroorodjaaliakumula-
torskebaterijeterprivededoopeklinalidrugih
telesnihpoškodb.
17. Razen če orodje podpira uporabo v bližini
visokonapetostnih električnih vodov, akumula-
torske baterije ne uporabljajte v bližini visoko-
napetostnih električnih vodov.Takšnauporaba
lahkopovzročimotnjevdelovanjualiokvaro
orodjaoziromaakumulatorskebaterije.
18. Baterijo hranite izven dosega otrok.
SHRANITE TA NAVODILA.
POZOR: Uporabljajte le originalne baterije
Makita.ČeuporabljateneoriginalnebaterijeMakita
alibaterije,kisobilespremenjene,lahkopridedo
eksplozijebaterijeinposledičnodopožara,telesnih
poškodbalimaterialneškode.Stakšnouporabo
bostetudirazveljaviligarancijoMakitazaorodjein
polnilnik Makita.

20 SLOVENŠČINA
Nasveti za ohranjanje največje
zmogljivosti akumulatorja
1. Napolnite baterijski vložek, preden se v celoti
izprazni. Ko opazite, da ima orodje manjšo
moč, vedno ustavite delovanje orodja in napol-
nite baterijski vložek.
2. Nikoli znova ne polnite popolnoma napol-
njenega baterijskega vložka. Prenapolnjenje
skrajša življenjsko dobo akumulatorja.
3. Baterijski vložek s sobno temperaturo pol-
nite pri temperaturi okolja od 10 °C do 40 °C.
Počakajte, da se vroč baterijski vložek pred
polnjenjem ohladi.
4. Ko akumulatorske baterije ne uporabljate, jo
odstranite iz orodja ali polnilnika.
5. Če baterijskega vložka ne uporabljate dalj časa
(več kot 6 mesecev), ga napolnite.
OPIS DELOVANJA
POZOR: Pred nastavljanjem ali preizkusom
delovanja orodja se prepričajte, ali je orodje
izključeno in ali je akumulatorska baterija
odstranjena.
Nameščanje ali odstranjevanje
akumulatorske baterije
POZOR: Vedno izklopite orodje, preden name-
stite ali odstranite akumulatorsko baterijo.
POZOR: Kadar nameščate ali odstranjujete
akumulatorsko baterijo, trdno držite orodje in
akumulatorsko baterijo.Čeorodjainakumulatorske
baterijenedržitetrdno,selahkozgodi,davamzdr-
snetaizrok,posledicapajelahkopoškodbaorodjain
akumulatorskebaterijetertelesnapoškodba.
►Sl.1: 1.Rdečiindikator2. Gumb 3.Baterijskivložek
Čeželiteodstranitiakumulatorskobaterijo,jopotisnite
izorodja,pritempapomikajtegumbnasprednjistrani
vložka.
Akumulatorskobaterijovstavitetako,daporavnate
jezičeknabaterijizutoromnaohišjuinjopotisnetev
ležišče.Potisnitejodokonca,dasezaskoči.Čevidite
rdečiindikator,kotjeprikazanonasliki,seakumulator-
skabaterijaniustreznozaskočila.
POZOR: Vedno namestite akumulatorsko
baterijo tako, da rdeči indikator ni več viden.Če
teganeupoštevate,lahkobaterijanepričakovano
padeizorodjainpoškodujevasaliosebevneposre-
dnibližini.
POZOR: Ne nameščajte akumulatorske bate-
rije s silo.Česeakumulatorskabaterijanezaskoči
zlahka,nipravilnovstavljena.
Prikazuje preostalo raven
napolnjenosti akumulatorja
Samo za akumulatorske baterije z indikatorjem
►Sl.2: 1.Indikatorskelučke2.Gumbzapreverjanje
Pritisnitegumbzapreverjanjenabaterijskemvložku,
dapreveriteravennapolnjenostiakumulatorja.
Indikatorskelučkenakratkozasvetijo.
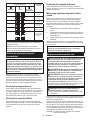
Indikatorske lučke Prikaz pre-
ostale ravni
napolnjenosti
Sveti Ne sveti Utripa
od 75 % do
100 %
od 50 % do
75 %
od 25 % do
50 %
od 0 % do
25 %
Napolnite
akumulator.
Akumulator
jemorda
okvarjen.
OPOMBA:Odvisnoodpogojevuporabeinokoljske
temperatureseoznačbalahkonekolikorazlikujeod
dejanskenapolnjenosti.
OPOMBA:Prvaopozorilnalučka(skrajnolevo)bo
utripala,kosistemzazaščitoakumulatorjadeluje.
Zaščitni sistem orodja/akumulatorja
OBVESTILO: Odvisno od pogojev uporabe se
orodje samodejno zaustavi brez opozorila, če se
v orodje zapletejo vejice ali ostanki. V tem pri-
meru izklopite orodje, odstranite akumulatorsko
baterijo in odstranite zapletene vejice ter druge
ostanke z orodjem, kot so klešče. Ko odstranite
vejice in ostanke, namestite akumulatorsko bate-
rijo in znova vklopite orodje.
Orodjejeopremljenozzaščitnimsistemomzaorodje/
akumulator.Sistemsamodejnoprekinenapajanje
orodja,dapodaljšaživljenjskodoboorodjainakumula-
torja.Orodjesesamodejnozaustavimeddelovanjem,
čeorodjealiakumulatordelujetapodnaslednjimi
pogoji:
Zaščita pred preobremenitvijo
Kadarorodjealiakumulatoruporabljatenanačin,ki
povzročauporaboneobičajnovisokegatoka,seorodje
samodejnoustavi.Vtemprimeruizklopiteorodjein
prekinitedelo,kijepovzročilopreobremenitevorodja.
Natovklopiteorodje,dagaznovazaženete.
Pagina se încarcă ...
Pagina se încarcă ...
Pagina se încarcă ...
Pagina se încarcă ...
Pagina se încarcă ...
Pagina se încarcă ...
Pagina se încarcă ...
Pagina se încarcă ...
Pagina se încarcă ...
Pagina se încarcă ...
Pagina se încarcă ...
Pagina se încarcă ...
Pagina se încarcă ...
Pagina se încarcă ...
Pagina se încarcă ...
Pagina se încarcă ...
Pagina se încarcă ...
Pagina se încarcă ...
Pagina se încarcă ...
Pagina se încarcă ...
Pagina se încarcă ...
Pagina se încarcă ...
Pagina se încarcă ...
Pagina se încarcă ...
Pagina se încarcă ...
Pagina se încarcă ...
Pagina se încarcă ...
Pagina se încarcă ...
Pagina se încarcă ...
Pagina se încarcă ...
Pagina se încarcă ...
Pagina se încarcă ...
Pagina se încarcă ...
Pagina se încarcă ...
Pagina se încarcă ...
Pagina se încarcă ...
Pagina se încarcă ...
Pagina se încarcă ...
Pagina se încarcă ...
Pagina se încarcă ...
Pagina se încarcă ...
Pagina se încarcă ...
Pagina se încarcă ...
Pagina se încarcă ...
Pagina se încarcă ...
Pagina se încarcă ...
Pagina se încarcă ...
Pagina se încarcă ...
Pagina se încarcă ...
Pagina se încarcă ...
Pagina se încarcă ...
Pagina se încarcă ...
Pagina se încarcă ...
Pagina se încarcă ...
Pagina se încarcă ...
Pagina se încarcă ...
Pagina se încarcă ...
Pagina se încarcă ...
Pagina se încarcă ...
Pagina se încarcă ...
Pagina se încarcă ...
Pagina se încarcă ...
Pagina se încarcă ...
Pagina se încarcă ...
Pagina se încarcă ...
Pagina se încarcă ...
Pagina se încarcă ...
Pagina se încarcă ...
Pagina se încarcă ...
Pagina se încarcă ...
Pagina se încarcă ...
Pagina se încarcă ...
Pagina se încarcă ...
Pagina se încarcă ...
Pagina se încarcă ...
Pagina se încarcă ...
Pagina se încarcă ...
Pagina se încarcă ...
Pagina se încarcă ...
Pagina se încarcă ...
Pagina se încarcă ...
Pagina se încarcă ...
Pagina se încarcă ...
Pagina se încarcă ...
-
 1
1
-
 2
2
-
 3
3
-
 4
4
-
 5
5
-
 6
6
-
 7
7
-
 8
8
-
 9
9
-
 10
10
-
 11
11
-
 12
12
-
 13
13
-
 14
14
-
 15
15
-
 16
16
-
 17
17
-
 18
18
-
 19
19
-
 20
20
-
 21
21
-
 22
22
-
 23
23
-
 24
24
-
 25
25
-
 26
26
-
 27
27
-
 28
28
-
 29
29
-
 30
30
-
 31
31
-
 32
32
-
 33
33
-
 34
34
-
 35
35
-
 36
36
-
 37
37
-
 38
38
-
 39
39
-
 40
40
-
 41
41
-
 42
42
-
 43
43
-
 44
44
-
 45
45
-
 46
46
-
 47
47
-
 48
48
-
 49
49
-
 50
50
-
 51
51
-
 52
52
-
 53
53
-
 54
54
-
 55
55
-
 56
56
-
 57
57
-
 58
58
-
 59
59
-
 60
60
-
 61
61
-
 62
62
-
 63
63
-
 64
64
-
 65
65
-
 66
66
-
 67
67
-
 68
68
-
 69
69
-
 70
70
-
 71
71
-
 72
72
-
 73
73
-
 74
74
-
 75
75
-
 76
76
-
 77
77
-
 78
78
-
 79
79
-
 80
80
-
 81
81
-
 82
82
-
 83
83
-
 84
84
-
 85
85
-
 86
86
-
 87
87
-
 88
88
-
 89
89
-
 90
90
-
 91
91
-
 92
92
-
 93
93
-
 94
94
-
 95
95
-
 96
96
-
 97
97
-
 98
98
-
 99
99
-
 100
100
-
 101
101
-
 102
102
-
 103
103
-
 104
104


Makita DUH507 Cordless Hedge Trimmer Manual de utilizare
- Categorie
- Aparate de tuns gard viu
- Tip
- Manual de utilizare