Simplicity MANUAL, OPERATOR'S Manual de utilizare
- Tip
- Manual de utilizare

Operator's Manual
Инструкции за експлоатация
Návod k obsluze
Kasutusjuhend
Priruènik za operatora
Kezelési útmutató
Naudojimo instrukcija
Operatora rokasgrāmata
Instrukcja obsługi
Manual de utilizare
Руководство по эксплуатации
Návod na obsluhu
Priroènik za uporabo
Kullanma Kilavuz
25E300
© 2022 Briggs & Stratton. All rights reserved. 80115712
Revision C
Not for reproduction

1
2
3
4
5
6
7
8
9
10
2
Not for reproduction

11
12
13
14
15
16
17
18
3
Not for reproduction

General Information
This manual contains the safety information about the hazards and risksrelatedto
the engine and how to prevent them.It also containsthe correctoperation and
maintenance of this engine.It is important that you read, understand, and obey these
instructions. Keepthis manual for future reference.
NOTE:The figures and illustrations in this manual are for information only and can be
different from your model. Use the figures thatalign withyour engine configuration. If it is
necessary, speak to an Authorized Service Dealer.
Record the date of purchase, engine model, type, trim, and the engine serial number
for replacement parts. These numbers are on your engine. Refer to the Features and
Controls section.
Date of Purchase
Engine Model - Type - Trim
Engine Serial Number
European Office Contact Information
For questions related to European emissions, contact our European office at:
Max-Born-Straße 2, 68519 Viernheim, Germany.
European Union (EU) Stage V (5): Carbon
Dioxide (CO2) Values
Enter CO2 in the search window on BriggsandStratton.com to find carbon dioxide values
of Briggs & Stratton EU Type-Approval Certificate engines.
Operator Safety
Safety Alert Symbol and Signal Words
The safety alert symbol identifies safety information about hazards that could
result in personal injury. A signal word (DANGER, WARNING, or CAUTION) is used to
indicate the likelihood and the potential severity of injury. In addition, a hazard symbol
is used to represent the type of hazard.
DANGER indicates a hazard which, if not avoided, will result in death or serious injury.
WARNING indicates a hazard which, if not avoided, could result in death or serious
injury.
CAUTION indicates a hazard which, if not avoided, could result in minor or moderate
injury.
NOTICE indicates information considered important but not hazard-related.
Hazard Symbols and Meanings
Safety information about
hazards that can result in
personal injury.
Read and understand the
Operator's Manual before
operating or servicing the
unit.
Fire Hazard Explosion Hazard
Shock Hazard Toxic Fume Hazard
Hot Surface Hazard Kickback Hazard
Amputation Hazard -
Moving Parts
Fuel Level - Maximum
Do Not Overfill
Safety Messages
WARNING
Briggs & Stratton® Engines are not designed for and are not to be used to power:
fun-karts; go-karts; children's, recreational, or sport all-terrain vehicles (ATVs);
motorbikes; hovercraft; aircraft products; or vehicles used in competitive events not
sanctioned by Briggs & Stratton. For information about competitive racing products, see
www.briggsracing.com. For use with utility and side-by-side ATVs, please contact Briggs
& Stratton Power Application Center, 1-866-927-3349. Incorrect engine use could result
in serious injury or death.
Recycling Information
Recycle all cartons, boxes, used oil, and batteries as
specified by government regulations.
Features and Controls
Engine Controls
Compare the callout letters in Figures 1, 2 and 3 to the engine controls1 in the list that
follows:
A. Engine Identification Numbers Model - Type - Trim
B. Fuel Tank and Cap
C. Air Filter, High Mount
D. Air Filter, Low Mount
E. Starter Cord Handle
F. Oil Dipstick, Upper
G. Oil Dipstick, Lower(if installed)
H. Oil Fill
I. Oil Drain Plug
J. Muffler, Muffler Guard (if installed), Spark Arrester (if installed)
K. Electronic Throttle Control(if installed)
L. Check Engine Light(if installed)
M. Blower Housing Cover
N. Key Switch (if installed)
1Some engines and equipment have remote controls. Refer to the equipment manual for
location and operation of remote controls.
Engine Control Symbols and Meanings
Engine Speed - FAST Engine Speed - SLOW
Engine - STOP Engine - START
Engine - ON
4
Not for reproduction

Operation
WARNING
Fuel vapors are flammable and explosive. Fire or explosion could result in burns
or death.
If you smell gas
• Do not start the engine.
• Do not switch on electrical switches.
• Do not use a phone in the vicinity.
• Evacuate the area.
• Contact the fire department.
When you operate the equipment
• Do not tilt the engine or the equipment at an angle which causes fuel to spill.
When you move the location of the equipment
• Make sure that the fuel tank is EMPTY or that the fuel shut-off valve, if installed,
is in the CLOSED position.
Check the Oil Level
Before you check or add oil
• Make sure that the engine is level.
• Clean the oil area ofunwanted material.
• Refer to the Specifications section for oil capacity.
NOTICE
This engine was shipped from Briggs & Stratton without oil. Equipment manufacturers or
dealers could have added oil to the engine. Before you start the engine for the first time,
make sure that the oil is at the correct level. Add oil as specified by the instructions in
this manual. If you start the engine without oil, damage will occur and the engine will not
be repaired under warranty.
1. Remove the dipstick (A, B, C, Figure 4). Use a cloth to remove oil from the dipstick
(A, B, C).
2. Install the dipstick (A, B, C, Figure 4).
a. Low Mount Dipstick, if installed, (B, Figure 4):Make sure that the oil fill marks
on the dipstick (B) point to the top of the engine.
b. Short Dipstick or Dipstick Fill Plug, if installed (C, Figure 4):Turn and tighten
the dipstick (C).
3. Remove the dipstick again (A, B, C, Figure 4).
4. Check the oil level. Make sure that the oil level is at the top of the full indicator (D,
Figure 4).
5. If the oil level is low, slowly add oil into one of the engine oil fills (E, F, Figure 5). Do
not add too much oil.
6. Wait one minute.Check the oil level again. Make sure that the oil level is correct.
7. Install the dipstick (A, B, C, Figure 4).
Oil Recommendations
Oil Capacity: Refer to the Specifications section.
We recommend the use of Briggs & Stratton® Warranty Certified oils for best
performance. Other high-quality detergent oils are permitted if classified for service SF,
SG, SH, SJ or higher. Do not use special additives.
Use the chart to select the best viscosity for the outdoor temperature range expected.
Engines on most outdoor power equipment operategoodwith 5W-30 Synthetic oil. For
equipment operated in hot temperatures, Vanguard® 15W-50 Synthetic oil gives the best
protection.
A SAE 30 - Below 40 °F (4 °C) the use of SAE 30 will result in hard starting.
B 10W-30 - Above 80 °F (27 °C) the use of 10W-30 may cause increased oil
consumption. Checkthe oil level frequently.
C 5W-30
D Synthetic 5W-30
EVanguard® Synthetic 15W-50
Low Oil Protection System (if installed)
A low oil sensor is installed on some engines. If the oil is low, the sensor will show a
warning light or stop the engine. Stop the engine and do the steps that follow before you
start the engine.
• Make sure that the engine is level.
• Do an oil check. Refer to the Check Oil Level section.
• If the oil level is low, add the correct amount of oil. Start the engine and make
sure that the warning light (if installed) does not come on.
• If the oil level is not low, do not start the engine. Contact a Briggs & Stratton
Authorized Service Dealer to correct the oil problem.
Fuel Recommendations
Fuel must meet these requirements:
• Clean, fresh, unleaded gasoline.
• A minimum of 87 octane/87 AKI (91 RON). High altitude use, see below.
• Gasoline with up to 10% ethanol (gasohol) is permitted.
NOTICE
Do not use unapproved gasoline, such as E15 and E85. Do not mix oil in gasoline or
change the engine to operate on alternate fuels. Use of unapproved fuels could result in
damage to engine components, which will not be repaired under the warranty.
To protect the fuel system from gum formation, and corrosion, mix analcohol-free fuel
stabilizer and ethanol treatmentinto the fuel. Refer to the Storage section. All fuel is not
the same. If start or performance problems occur, change fuel providers or brands. This
engine is certified to operate on gasoline. The emissions control system for carbureted
engines is EM (Engine Modifications). The emissions control systems for engines with
electronic fuel injection are ECM (Engine Control Module), MFI (Multiport Fuel Injection),
TBI (Throttle Body Fuel Injection) and if equipped an O2S (Oxygen Sensor).
High Altitude
At altitudes over 5,000 feet (1524 meters), a minimum 85 octane/85 AKI (89 RON)
gasoline is permitted.
For carbureted engines, high altitude adjustment is required to maintain performance.
Operation without this adjustment will cause decreased performance, increased fuel
consumption, and increased emissions. Contact a Briggs & Stratton Authorized Service
Dealer for high altitude adjustment information. Operation of the engine at altitudes
below 2,500 feet (762 meters) with the high altitude adjustment is not recommended.
For Electronic Fuel Injection (EFI) engines, no high altitude adjustment is necessary.
Add Fuel
WARNING
Fuel and its vapors are flammable and explosive. Fire or explosion could result in
burns or death.
When you add fuel
• Stop the engine. Before you remove the fuel cap, wait a minimum of two (2)
minutes to make sure that the engine is cool.
• Fill the fuel tank outdoors or in an area that has good airflow.
• Do not put too much fuel in the tank. For expansion of the fuel, do not fill above
the bottom of the fuel tank neck.
• Keep fuel away from sparks, open flames, pilot lights, heat, and other ignition
sources.
• Frequently examine the fuel lines, fuel tank, fuel cap, and connections for cracks
or leaks. Replace damaged parts.
• If fuel spills, wait until it dries before you start the engine.
1. Clean the fuel cap area of dirt and debris. Remove the fuel cap.
2. Fill the fuel tank (A, Figure 6) with fuel. Because fuel will expand, do not fill above
the bottom of the fuel tank neck (B).
3. Install the fuel cap.
5
Not for reproduction

Start theEngine
WARNING
POISONOUS GAS HAZARD. Engine exhaust contains carbon monoxide, a
poisonous gas that could kill you in minutes. Although you do not smell exhaust
fumes, you could still be exposed to dangerous carbon monoxide gas. If you feel
sick, dizzy, or weak while you use this product, get to fresh air RIGHT AWAY.
See a doctor. You may have carbon monoxide poisoning.
• Carbon monoxide gas can collect in occupied spaces. To reduce the risk of
carbon monoxide gas, ONLY operate this product outdoors and far away from
windows, doors and vents.
• Install battery-operated carbon monoxide alarms or plug-in carbon monoxide
alarms with battery back-up as specified by the manufacturer's instructions.
Smoke alarms cannot sense carbon monoxide gas.
• DO NOT operate this product in homes, garages, basements, crawlspaces,
sheds, or other closed spaces, even if you use fans or open doors and
windows for ventilation. After the operation of this product, carbon monoxide
can quickly collect in these spaces and stay for hours.
• ALWAYS put this product downwind and point the engine exhaust away from
occupied spaces.
WARNING
Fuel and its vapors are flammable and explosive. Fire or explosion could result
in burns or death.
When you start the engine
• Make sure that the spark plug, muffler, fuel cap and air cleaner (if equipped)
are correctly installed.
• Do not crank the engine with the spark plug removed.
• If the engine is flooded, set the choke (if equipped) to the OPEN or RUN
position. Move the throttle (if equipped) to the FAST position and crank until the
engine starts.
• If there is natural or LP gas leakage in the area, do not start the engine.
• Because vapors are flammable, do not use pressurized starter fluids.
WARNING
Rotating parts can entangle hands, feet, hair, clothing, or accessories and result
in traumatic amputation or laceration.
• Operate equipment with the guards correctly installed.
• Keep hands and feet away from rotating parts.
• Remove jewelry and make sure that long hair is away from all rotating parts.
• Do not wear loose clothes or items that could become caught.
WARNING
Fast retraction of the starter cord (kickback) will pull your hand and arm to the
engine faster than you can let go.Broken bones, fractures, bruises or sprains
could result.
• To prevent kickback when you start the engine, pull the starter cord slowly until
resistance is felt and then pull quickly.
• Before you start the engine, disconnect or remove all external equipment and
engine loads.
• Make sure that direct-coupled equipment components, such as, but not limited
to, blades, impellers, pulleys, and sprockets, are correctly attached.
NOTE:Your equipmentcanhave remote controls. Refer to the equipment manual for
location and operation of remote controls.
Electric Start
1. Check the oil level. Refer to the Check the Oil Level section.
2. Disengage the equipment drive controls, if installed.
3. Move the fuel shut-off, if installed, to the OPEN position.
4. Turn the key switch (A, Figure 7) to the START position.
NOTICEWhen you release the key switch (A, Figure 7), the key will move to the ON
position. The engine will continue to crank unless the engine starts.To abort the crank
sequence turn key switch (A) to the OFF position.If the engine does not start, do the
steps that follow.
5. Make sure that the key switch (A, Figure 7) is set to the OFF position. Wait for two
seconds.
6. Turn the key switch (A, Figure 7) to the START position.
7. If the engine does not start, abort the crank sequence andspeak toa Briggs &
Stratton Authorized Service Dealer.
Rewind Start
NOTICEElectric Start is the recommendedmethodto start your engine.
1. Check the engine oil level. Refer to the Check the Oil Level section.
2. Disengage the equipment drive controls, if installed.
3. Make surethatthe engine is connected to a charged 12 volt battery.
4. Move the fuel shut-off, if installed, to the OPEN position.
5. Turn the key switch (A, Figure 8) to the ON position.Then, pull the starter cord
handle (B).
Stop the Engine
1. Turn the key switch (A, Figure 7) to the OFF position.
2. Remove the key. Keep it in a safe location away from children.
3. After the engine stops, move the fuel shut-off, if installed, to the CLOSED position.
Check Engine Light
The check engine light (B, Figure 7) signals of a problem with the engine. If the check
engine light is ON during engine operation, speak to a Briggs & Stratton Authorized
Service Dealer to correct the problem as soon as possible or when your work is done. If
the check engine light is ON and the engine has automatically stopped, do the steps that
follow:
1. Make sure that the engine is level.
2. Do an oil check. Refer to the Check Oil Level section.
3. Start the engine. Refer to the Start the Engine section.
4. If the check engine lightstaysON and the engine continues to automatically stop,
do not use the engine. Speak toa Briggs & Stratton Authorized Service Dealer
immediately to correct the problem.
Maintenance
Maintenance Information
WARNING
Fuel and its vapors are flammable and explosive. Fire or explosion could result in
burns or death.
Duringmaintenanceif it is necessary to tilt the unit, make sure that the fuel tank, if
mounted on the engine, is empty and that the spark plug side is up. If the fuel tank is not
empty, leakage can occur and could result in a fire or an explosion. If the engine is tilted
in a different direction, it will not easily start because of oil or fuel contamination of the air
filter or the spark plug.
WARNING
Accidental engine spark can cause an electric shock, fire or explosion and could
result in entanglement, traumatic amputation or laceration.
Before you make adjustments or repairs:
• Disconnect all spark plug wires and keep them away from the spark plugs.
• Disconnect the battery wire from the negative battery terminal (only engines with
electric start).
• Use only the correct tools.
When you check for spark:
• Use an approved spark plug tester.
• Do not check for spark with the spark plug removed.
WARNING
Replacement parts must be of the same design and installed in the same position as the
original parts. Other parts could result in damage or an injury.
NOTICE
All the components used to build this engine must remain in place for correct operation.
See a Briggs & Stratton Authorized Service Dealer for all maintenance and servicing of
the engine and engine parts.
Emissions Control Service
For maintenance, replacement, or repair of emissions control devices and
systems, contact a qualified off-road engine repair establishment or service
technician. However, for "no charge" emissions control service, the work must be done
by a factory authorized dealer. Refer to the Emissions Control Statements.
6
Not for reproduction

Maintenance Schedule
First 5 Hours
• Change the oil.
Intervals of 8 Hours or Daily
• Check the engine oil level.
• Clean the area around the muffler.
• Clean the air intake grille.
Intervals of 100 Hours or Annually
• Service the exhaust system.
Intervals of 200 Hours or Annually
• Change the engine oil.
•Clean the air filter1
Intervals of 600 Hours or 2 Years
• Replace the air filter.
•Replace the fuel filter1
Annually
• Replace the spark plug.
• Service the fuel system.
•Service the cooling system1.
•Check the valve clearance2.
1Clean more frequently in dusty conditions or when many particles are in the air..
2Not necessary unless engine problems occur.
Electronic Fuel Injection (EFI) System
The EFI System monitors engine temperature, engine speed, and battery voltage for
engine start-up and warm-up. There are no adjustments on the system. If start-up or
operation problems occur, contact a Briggs & Stratton Authorized Service Dealer.
NOTICEMake sure to obey the steps that follow or damage to the EFI system could
occur.
• DO NOT start the engine if the battery cables are loose.
• Turn the key to the OFF position before you disconnect, remove, and / or install
the battery.
• DO NOT use a battery charger to start the engine.
• DO NOT disconnect the battery cables during engine operation.
• When you disconnect the battery cables, first connect the positive (+) cable, and
then connect the negative (-) cable to the battery.
• When you charge the battery, turn the ignition switch to the OFF position,and
disconnect the negative (-) battery cable from the battery.
• DO NOT spray water directly on the Electronic Control Module.
Servicing the Spark Plug
Check the spark plug gap (A, Figure 9) with a wire gauge (B). If necessary, set the
spark plug gap.Install and tighten the spark plug to the correct torque. For gapand
torque specifications, refer to the Specifications section.
To get access to the spark plug, make sure that the engine is set to the OFF position.
Disconnect the spark plug wire (D, Figure 10), and keep it away from the spark plug (E).
On some EFI-ETC Models, you must remove the heat shield to get access to the spark
plug.Use the steps that follow to get access to the spark plug.
1. Unlockthe red tab (A, Figure 11) from the connector (B)
2. Push the black tab (C, Figure 11) while you pull the connector (B) out of the ignition
coil (D).
3. Remove the debris valve (E, Figure 11).
4. Remove the top screw (F, Figure 11) and the side screw (G) from the bracket (H).
5. Remove the heat shield (H, Figure 11).
6. Remove the ignition coil (D, Figure 11).
7. Replace the spark plug (I, Figure 12).
8. Install the ignition coil (D, Figure 11).
9. Install the bracket (H, Figure 11).
10. Install the top screw (F, Figure 11) and side screw (G) in the bracket (H).
11. Install the debris valve (E, Figure 11).
12. Install the connector (B, Figure 11) intothe ignition coil (D).
13. Lock the red tab (A, Figure 11).
Servicing the Exhaust and Cooling Systems
WARNING
During operation, the engine and muffler become hot. If you touch a hot engine,
thermal burns can occur.
Combustible materials, such as leaves, grass and brush, can catch fire.
• Before you touch the engine or muffler, stop the engine and wait two (2)
minutes. Make sure that the engine and muffler are safe to touch.
• Remove debris from the muffler and engine.
It is a violation of California Public Resource Code, Section 4442, to use or operate the
engine on any forest-covered, brush-covered, or grass-covered land unless the exhaust
system is equipped with a spark arrester, as defined in section 4442, maintained in
effective working order. Other states or federal jurisdictions may have similar laws;
reference Federal Regulation 36 CFR Part 261.52. Contact the original equipment
manufacturer, retailer, or dealer to obtain a spark arrester designed for the exhaust
system installed on this engine.
This is an air cooled engine. Dirt orunwanted materialcan prevent air flow and cause
the engineto become too hot. This results inunsatisfactory performance anddecreases
the life of the engine. The cylinder cooling finscan collect unwanted material that cannot
be remove without partial disassembly of the engine.Make sure that a Briggs & Stratton
Authorized Service Dealerexaminesand cleans the air cooling system. Refer to the
Maintenance Schedule.
1. Make sure that no combustible materials are around and behind the muffler.
2. Use a brush or dry cloth to remove all unwanted materialfrom the blower housing
cover,muffler and cylinder area.DO NOT use water to clean the engine.
3. Make sure that the linkage, springs, and controls are clean.
4. Examinethe muffler for cracks, corrosion, or other damage.
5. Remove the deflector or the spark arrester, ifinstalled, and examine for damage or
carbon blockage. Make sure that you clean or install the replacement parts before
you operate the equipment.
6. If Installed, make sure that the oil cooler fins are clean.
Change Engine Oil
WARNING
Fuel and its vapors are flammable and explosive. Fire or explosion could result in
burns or death.
During operation, the engine and muffler become hot. If you touch a hot engine,
thermal burns can occur.
• If you drain the oil from the top oil fill tube, the fuel tank must be empty. If it is not
empty, fuel leakage can occur and cause a fire or an explosion.
• Before you touch the engine or muffler, stop the engine and wait two (2)
minutes. Make sure that the engine and muffler are safe to touch.
Used oil is a hazardous waste product and must be discarded of correctly. Do not
discard with household waste. Contact your local authorities, service center, or dealer
for safe disposal or recycling facilities.
Remove Oil
1. With the engine OFF but warm, disconnect the spark plug wire(D, Figure 10),
and keep it away from the spark plug (E). For engine models that have a heat
shield(Figure 11), disconnect the spark wire as follows:
a. Unlock the red tab (A, Figure 11) from the connector (B).
b. Push the black tab (C, Figure 11)while you pull the connector (B) out of the coil
(D)
2. Remove the dipstick (A, B, C, Figure 4).
3. Remove one of the oil drain plugs(F, G, Figure 13). Drain the oil into an approved
container.
4. Install and tighten the oil drain plug (F, G, Figure 13).
Add Oil
• Make sure that the engine is level.
• Clean the oil fill area of allunwanted material.
• Refer to the Specifications section for oil capacity.
1. Remove the dipstick (A, B, C, Figure 4).
2. Slowly add oil into one of the engine oil fills (E, F, Figure 5).Do not add too much
oil.
7
Not for reproduction

3. Install the dipstick(A, B, C, Figure 4).
a. Extended Dipstick, if installed (B, Figure 4): Make sure that the oil fill marks on
the dipstick (B) point to the top of the engine.
b. Short Dipstick or Dipstick Fill Plug, if installed (C, Figure 4): Turn and tighten
the dipstick (C).
4. Remove the dipstick (A, B, C, Figure 4) again.
5. Check the oil level. Make sure that the correct oil level is at the top of the full
indicator (D, Figure 4).
6. Install the dipstick again (A, B, C, Figure 4).
7. Connect the spark plug wire (D, 10)to the spark plug (E).For engine models that
have a heat shield (Figure 11) connect the spark plug wire as follows:
a. Install the connector (B, Figure 11).
b. Lock the red tab (A, Figure 11).
Servicingthe Air Filter
WARNING
Fuel vapors are flammable and explosive. Fire or explosion could result in burns
or death.
• Do notstart and operate the engine with the air cleaner assembly (if equipped)
or the air filter (if equipped) removed.
NOTICE
Do not use pressurized air or solvents to clean the filter. Pressurized air could result in
damage to the filter and solvents will dissolve the filter.
See the Maintenance Schedule forservicingrequirements.
Different models will use a foam or a paper filter. Some models could also have an
optional pre-cleaner that can becleanedand used again. Compare the illustrations in
this manual with the type installed on your engine and service as follows.
Paper Air Filter
1. Loosen the fastener(s) (C, Figure 14).
2. Remove the cover (A, Figure 14)and the filter (B).
3. To loosen debris, lightly tap the filter (B, Figure 14) on a hard surface. If the filter is
dirty, replace it with a new filter.
4. Install the filter (B, Figure 14).
5. Install the cover (A, Figure 14) with the fastener(s) (C). Make sure that the
fastener(s) is tight.
Paper Air Filter - Low Profile
1. Move the latch (A, Figure 15) to unlock the cover (C).
2. Push in the tabs (B, Figure 15) and remove the cover (C).
3. Remove the filter (D, Figure 15).
4. To loosen debris, lightly tap the filter (D, Figure 15)on a hard surface. If the filter is
dirty, replace it with a new filter.
5. Install the filter (D, Figure 15).
6. Install the cover (C, Figure 15). Move the latch (A) to the locked position.
NOTE:Check the fit of the foam seal (E, Figure 15). Make sure that the perimeter foam
seal is correctly seated in the channel (F).
Servicing the Fuel System
WARNING
Fuel and its vapors are flammable and explosive. Fire or explosion could result in
burns or death.
• Keep fuel away from sparks, open flames, pilot lights, heat, and other ignition
sources.
• Frequently examine the fuel lines, fuel tank, fuel cap, and connections for cracks
or leaks. Replace damaged parts.
• If fuel spills, wait until it dries before you start the engine.
Fuel Filter, if installed
1. Before you replace the fuel filter (A, Figure 16), drain the fuel tank or close the fuel
shut-off valve. If the fuel tank is not drained, fuel leakagecanoccur and cause a fire
or explosion.
2. Squeeze the tabs (B, Figure 16) on the clamps (C) with pliers.Move the clamps
away from the fuel filter (A).
3. Twist and pull the fuel lines (D,Figure 16) off of the fuel filter.
4. Examinethe fuel lines (D, Figure 16) for cracks or leaks. If it is necessary, replace
the fuel lines.
5. Replace the fuel filter (A, Figure 16).
6. Attach the fuel lines (D, Figure 16) with clamps (C).
Fuel Strainer, if installed
1. Remove the fuel cap (A, Figure 17).
2. Remove the fuel strainer (B, Figure 17).
3. If the fuel strainer is dirty, clean or replace it. If you replace the fuel strainer, make
sure to use an original equipment replacement fuel strainer.
Storage
Fuel System
Refer to Figure: 18.
WARNING
Fuel and its vapors are flammable and explosive. Fire or explosion could result in
burns or death.
Fuel Storage
• Because pilot lights or other ignition sources can cause explosions, keep fuel or
equipment away from furnaces, stoves, water heaters or other appliances that
have pilot lights.
Keep the engine level at the correct operating position. Fill the fuel tank (A, Figure 18)
with fuel. For fuel expansion, do not fill above the fuel tank neck (B).
Fuel can become stale when kept in a storage container for more than 30 days.
An alcohol-free fuel stabilizer and ethanol treatment in the fuel storage container
is recommended. This keeps fuel fresh and decreases fuel-related problems or
contamination in the fuel system.
When you fill the container with fuel, addan alcohol-free fuel stabilizer to the specified
instructions.If gasoline in the engine has not been treated with a fuel stabilizer, it must
be drained into an approved container. Operate the engine until it is out of fuel.
Engine Oil
While the engine is still warm, change the engine oil. Refer to Change the Engine Oil
section.
Troubleshooting
Assistance
For assistance, contact your local dealer or go to BRIGGSandSTRATTON.COM or call
1-800-444-7774 (in USA).
Specifications andService Parts
Model: 25E300
Displacement 24.898 ci (408 cc)
Bore 3.465 in (88 mm)
Stroke 2.638 in (67 mm)
Oil Capacity 28-32 oz (,82 - ,95 L)
Spark Plug Gap .030 in (,76 mm)
Spark Plug Torque 170 lb-in (19,2 Nm)
Speed Sensor Air Gap .010 -.015 in (,254 - ,381 mm)
Intake Valve Clearance .004 - .006 in (,10 - ,15 mm)
Exhaust Valve Clearance .006 - .008 in (,15 - ,20 mm)
Engine power will decrease 3.5% for each 1,000 feet (300 meters) above sea level and
1% for each 10 °F (5.6 °C) above 77 °F (25 °C). The engine will operate satisfactorily
at an angle up to 30°. Refer to the equipment Operator's Manual for safe allowable
operating limits on slopes.
Service Parts
To purchase Briggs & Stratton service parts, find an Authorized
Service Dealer at BRIGGSandSTRATTON.COM. You will need your
identification number (model - type - trim). Refer to the Features and
Controls section to find your engine identification number.
Power Ratings
The gross power rating for individual gasoline engine models is labeled in accordance
with SAE (Society of Automotive Engineers) code J1940 Small Engine Power & Torque
Rating Procedure, and is rated in accordance with SAE J1995. Torque values are
8
Not for reproduction

derived at 2600 RPM for those engines with “rpm” called out on the label and 3060 RPM
for all others; horsepower values are derived at 3600 RPM. The gross power curves
can be viewed at www.BRIGGSandSTRATTON.COM. Net power values are taken with
exhaust and air cleaner installed whereas gross power values are collected without
these attachments. Actual gross engine power will be higher than net engine power and
is affected by, among other things, ambient operating conditions and engine-to-engine
variability. Given the wide array of products on which engines are placed, the gasoline
engine may not develop the rated gross power when used in a given piece of power
equipment. This difference is due to a variety of factors including, but not limited to, the
variety of engine components (air cleaner, exhaust, charging, cooling, carburetor, fuel
pump, etc.), application limitations, ambient operating conditions (temperature, humidity,
altitude), and engine-to-engine variability. Due to manufacturing and capacity limitations,
Briggs & Stratton may substitute an engine of higher rated power for this engine.
Warranty
Briggs & Stratton® Engine Warranty
Effective August 2022
Limited Warranty
Briggs & Stratton warrants that, during the warranty period specified below, it will
repair or replace, free of charge, with a new, reconditioned or re-manufactured part,
at the sole discretion of Briggs & Stratton, any part that is defective in material or
workmanship or both. Transportation charges on product submitted for repair or
replacement under this warranty must be borne by purchaser. This warranty is effective
for and is subject to the time periods and conditions stated below. For warranty
service, find the nearest Authorized Service Dealer in our dealer locator map at
BRIGGSandSTRATTON.COM. The purchaser must contact the Authorized Service
Dealer, and then make the product available to the Authorized Service Dealer for
inspection and testing.
There is no other express warranty. Implied warranties, including those of
merchantability and fitness for a particular purpose, are limited to one year
from purchase, or to the extent permitted by law. All other implied warranties
are excluded. Liability for incidental or consequential damages are excluded
to the extent exclusion is permitted by law. Some states or countries do not allow
limitations on how long an implied warranty lasts, and some states or countries donot
allow the exclusion or limitation of incidental or consequential damages, so the above
limitation and exclusion may not apply to you. This warranty gives you specific legal
rights and you may also have other rights which vary from state to state and country to
country*.
Standard Warranty Terms 1, 2
Vanguard®; Commercial Series
Consumer Use - 36 months
Commercial Use - 36 months
XR Series
Consumer Use - 24 months
Commercial Use - 24 months
All Other Engines Featuring Dura-Bore™ Cast Iron Sleeve
Consumer Use - 24 months
Commercial Use - 12 months
All Other Engines
Consumer Use - 24 months
Commercial Use - 3 months
1These are our standard warranty terms, but occasionally there may be additional
warranty coverage that was not determined at time of publication. For a listing of
current warranty terms for your engine, go to BRIGGSandSTRATTON.COM or contact
your Briggs & Stratton Authorized Service Dealer.
2There is no warranty for engines on equipment used for prime power in place of a
utility; standby generators used for commercial purposes, utility vehicles exceeding 25
MPH, or engines used in competitive racing or on commercial or rental tracks.
* In Australia - Our goods come with guarantees that cannot be excluded under the
Australian Consumer Law. You are entitled to a replacement or refund for a major
failure and for compensation for any other reasonably foreseeable loss or damage.
You are also entitled to have the goods repaired or replaced if the goods fail to be of
acceptable quality and the failure does not amount to a major failure. For warranty
service, find the nearest Authorized Service Dealer in our dealer locator map at
BRIGGSandSTRATTON.COM, or by calling 1300 274 447, or by emailing or writing
to [email protected], Briggs & Stratton Australia Pty Ltd, 1
Moorebank Avenue, Moorebank, NSW, Australia, 2170.
The warranty period begins on the date of purchase by the first retail consumer or
commercial end user, and continues for the period of time stated in the table above.
“Consumer use” means personal residential household use by a retail consumer.
“Commercial use” means all other uses, including use for commercial, income
producing or rental purposes. Once an engine has experienced commercial use,
it shall thereafter be considered as a commercial use engine for purposes of this
warranty.
No warranty registration is necessary to obtain warranty on Briggs & Stratton
products. Save your proof of purchase receipt. If you do not provide proof of the
initial purchase date at the time warranty service is requested, the manufacturing
date of the product will be used to determine the warranty period.
About Your Warranty
This limited warranty covers engine-related material and/or workmanship issues only,
and not replacement or refund of the equipment to which the engine may be mounted.
Routine maintenance, tune-ups, adjustments, or normal wear and tear are not covered
under this warranty. Similarly, warranty is not applicable if the engine has been altered
or modified or if the engine serial number has been defaced or removed. This warranty
does not cover engine damage or performance problems caused by:
1. The use of parts that are not original Briggs & Stratton parts;
2. Operating the engine with insufficient, contaminated, or an incorrect grade of
lubricating oil;
3. The use of contaminated or stale fuel, gasoline formulated with ethanol greater
than 10%, or the use of alternative fuels such as liquefied petroleum or natural gas
on engines not originally designed/manufactured by Briggs & Stratton to operate
on such fuels;
4. Dirt which entered the engine because of improper air cleaner maintenance or
reassembly;
5. Striking an object with the cutter blade of a rotary lawn mower, loose or improperly
installed blade adapters, impellers, or other crankshaft coupled devices, or
excessive v-belt tightness;
6. Associated parts or assemblies such as clutches, transmissions, equipment
controls, etc., which are not supplied by Briggs & Stratton;
7. Overheating due to grass clippings, dirt and debris, or rodent nests which plug or
clog the cooling fins or flywheel area, or by operating the engine without sufficient
ventilation;
8. Excessive vibration due to over-speeding, loose engine mounting, loose or
unbalanced cutter blades or impellers, or improper coupling of equipment
components to the crankshaft;
9. Misuse, lack of routine maintenance, shipping, handling, or warehousing of
equipment, or improper engine installation.
Warranty service is available only through Briggs & Stratton Authorized Service
Dealers. Locate your nearest Authorized Service Dealer in our dealer locator map at
BRIGGSandSTRATTON.COM or by calling 1-800-444-7774 (in USA).
80114782(Revision A)
Briggs & Stratton Emissions Warranty
California, U.S. EPA, and Briggs & Stratton, LLC Emissions Control Warranty -
Your Warranty Rights and Obligations
For Briggs & Stratton Engine Models with "F" Trim Designation (Model-Type-
Trim Representation xxxxxx xxxx Fx)
The California Air Resources Board, U.S. EPA, and Briggs & Stratton (B&S) are
pleased to explain the exhaust and evaporative emissions (“emissions”) control system
warranty on your 2022-2024 engine. In California, new equipment that use small off-
road engines must be designed, built, and equipped to meet the State's stringent anti-
smog standards.B&S must warrant the emissions control system on your engine/
equipment for the periods of time listed below provided there has been no abuse,
neglect or improper maintenance of your small off-road engine or equipment leading to
the failure of the emissions control system.
Your emissions control system may include parts such as the carburetor or fuel-
injection system, the ignition system, catalytic converter, fuel tanks, fuel lines (for liquid
fuel and fuel vapors), fuel caps, valves, canisters, filters, clamps and other associated
components.Also included may be hoses, belts, connectors, and other emission-
related assemblies.
Where a warrantable condition exists, B&S will repair your engine/equipment at no cost
to you including diagnosis, parts, and labor.
Manufacturer's Warranty Coverage:
The exhaust and evaporative emissions control system on your engine/equipment
is warranted for two years. If any evaporative emission-related part on your engine/
equipment is defective, the part will be repaired or replaced by B&S.
Owner’s Warranty Responsibilities:
• As the engine/equipment owner, you are responsible for the performance of
the required maintenance listed in your owner’s manual. B&S recommends
that you retain all receipts covering maintenance on your engine, but B&S
cannot deny warranty coverage solely for the lack of receipts or for your failure
to ensure the performance of all scheduled maintenance.
• As the engine/equipment owner, you should however be aware that B&S may
deny you warranty coverage if your engine/equipment or a part has failed due
to abuse, neglect, or improper maintenance or unapproved modifications.
9
Not for reproduction

• You are responsible for presenting your engine/equipment to a B&S
distribution center or service center as soon as the problem exists. The
warranty repairs shall be completed in a reasonable amount of time, not
to exceed 30 days.If you have a question regarding your warranty rights
and responsibilities, you should contact B&S at 1-800-444-7774 (in USA) or
BRIGGSandSTRATTON.COM.
Briggs & Stratton Emissions Control Warranty Provisions
The following are specific provisions relative to your Emissions Control Warranty
Coverage. It is in addition to the B&S engine warranty for non-regulated engines found
in the Operator’s Manual.
1. Warranted Emissions Parts
Coverage under this warranty extends only to the parts listed below (the emissions
control systems parts) to the extent these parts were present on the B&S engine
and/or B&S supplied fuel system.
a. Fuel Metering System
• Cold start enrichment system (soft choke)
• Carburetor or fuel injection system
• Oxygen sensor
• Electronic control unit
• Fuel pump module
• Fuel line (for liquid fuel and fuel vapors), fuel line fittings, clamps
• Fuel tank, cap and tether
• Carbon canister and mounting bracket
• Pressure relief valves
• Liquid/Vapor separator
b. Air Induction System
• Air cleaner
• Intake manifold
• Purge and vent line
c. Ignition System
• Spark plug(s)
• Magneto ignition system
d. Catalyst System
• Catalytic converter
• Exhaust manifold
• Air injection system or pulse value
e. Miscellaneous Items Used in Above Systems
• Vacuum, temperature, position, time sensitive valves and switches
• Connectors and assemblies
• Electronic controls
2. Length of Coverage
Coverage is for a period of two years from the date of delivery to an ultimate
purchaser, or for the time period listed in the respective engine or product warranty
statement, whichever is greater. B&S warrants to the original purchaser and each
subsequent purchaser that the engine is designed, built, and equipped so as to
conform with all applicable regulations adopted by the Air Resources Board; that
it is free from defects in material and workmanship that could cause the failure
of a warranted part; and that it is identical in all material respects to the engine
described in the manufacturer’s application for certification. The warranty period
begins on the date the engine or equipment is delivered to an ultimate purchaser.
The warranty on emissions-related parts is as follows:
• Any warranted part that is not scheduled for replacement as required
maintenance in the Operator’s Manual supplied, is warranted for the warranty
period stated above. If any such part fails during the period of warranty
coverage, the part will be repaired or replaced by B&S at no charge to
the owner. Any such part repaired or replaced under the warranty will be
warranted for the remaining warranty period.
• Any warranted part that is scheduled only for regular inspection in the
Operator’s Manual supplied, is warranted for the warranty period stated
above. Any such part repaired or replaced under warranty will be warranted
for the remaining warranty period.
• Any warranted part that is scheduled for replacement as required
maintenance in the Operator’s Manual supplied, is warranted for the period of
time prior to the first scheduled replacement point for that part. If the part fails
prior to the first scheduled replacement, the part will be repaired or replaced
by B&S at no charge to the owner. Any such part repaired or replaced under
warranty will be warranted for the remainder of the period prior to the first
scheduled replacement point for the part.
• Add-on or modified parts that are not exempted by the Air Resources Board
may not be used. The use of any non-exempted add-on or modified parts by
the owner will be grounds for disallowing a warranty claim. The manufacturer
will not be liable to warrant failures of warranted parts caused by the use of a
non-exempted add-on or modified part.
3. Consequential Coverage
Coverage shall extend to the failure of any engine components caused by the
failure of any warranted emissions parts.
4. Claims and Coverage Exclusions
Warranty claims shall be filed according to the provisions of the B&S engine
warranty policy. Warranty coverage does not apply to failures of emissions
parts that are not original equipment B&S parts or to parts that fail due to abuse,
neglect, or improper maintenance as set forth in the B&S engine warranty policy.
B&S is not liable for warranty coverage of failures of emissions parts caused by
the use of add-on or modified parts.
Look For Relevant Emissions Durability Period and Air Index Information On
Your Small Off-Road Engine Emissions Label
Engines that are certified to meet the California Air Resources Board (CARB) small off-
road Emissions Standard must display information regarding the Emissions Durability
Period and the Air Index. Briggs & Stratton makes this information available to the
consumer on our emissions labels. The engine emissions label will indicate certification
information.
The Emissions Durability Period describes the number of hours of actual running
time for which the engine is certified to be emissions compliant, assuming proper
maintenance in accordance with the Operator’s Manual. The following categories are
used:
Moderate:
Engines at or less than 80 cc displacement are certified to be emissions compliant for
50 hours of actual engine running time. Engines greater than 80 cc displacement are
certified to be emissions compliant for 125 hours of actual engine running time.
Intermediate:
Engines at or less than 80 cc displacement are certified to be emissions compliant for
125 hours of actual engine running time. Engines greater than 80 cc displacement are
certified to be emissions compliant for 250 hours of actual engine running time.
Extended:
Engines at or less than 80 cc displacement are certified to be emissions compliant for
300 hours of actual engine running time. Engines greater than 80 cc displacement are
certified to be emissions compliant for 500 hours of actual engine running time.
For example, a typical walk-behind lawn mower is used 20 to 25 hours per year.
Therefore, the Emissions Durability Period of an engine with an intermediate rating
would equate to 10 to 12 years.
Briggs & Stratton engines are certified to meet the United States Environmental
Protection Agency (USEPA) Phase 2 or Phase 3 emissions standards. The Emissions
Compliance Period referred to on the Emissions Compliance label indicates the
number of operating hours for which the engine has been shown to meet Federal
emissions requirements.
For engines at or less than 80 cc displacement:
10
Not for reproduction

Category C = 50 hours, Category B = 125 hours, Category A = 300 hours
For engines greater than 80 cc displacement and less than 225 cc displacement:
Category C = 125 hours, Category B = 250 hours, Category A = 500 hours
For engines of 225 cc or more displacement:
Category C = 250 hours, Category B = 500 hours, Category A = 1000 hours
80111491(Revision A)
Briggs & Stratton Emissions Warranty
California, U.S. EPA, and Briggs & Stratton, LLC Emissions Control Warranty -
Your Warranty Rights and Obligations
For Briggs & Stratton Engine Models with "B" or "G" Trim Designation (Model-
Type-Trim Representation xxxxxx xxxx Bx or xxxxxx xxxx Gx)
The California Air Resources Board, U.S. EPA, and Briggs & Stratton (B&S) are
pleased to explain the exhaust emissions (“emissions”) control system warranty on
your 2022-2024 engine. In California, new small off-road engines and large spark
ignited engines less than or equal to 1.0 liter must be designed, built, and equipped
to meet the State’s stringent anti-smog standards.B&S must warrant the emissions
control system on your engine for the periods of time listed below provided there has
been no abuse, neglect or improper maintenance of your small off-road engine or
equipment leading to the failure of the emissions control system.
Your emissions control system may include parts such as the carburetor or fuel-
injection system, the ignition system, catalytic converter, fuel tanks, fuel lines (for liquid
fuel and fuel vapors), fuel caps, valves, canisters, filters, clamps and other associated
components.Also included may be hoses, belts, connectors, and other emission-
related assemblies.
Where a warrantable condition exists, B&S will repair your engine at no cost to you
including diagnosis, parts, and labor.
Manufacturer’s Warranty Coverage:
The exhaust emissions control system on your engine is warranted for two years.If any
emissions-related part on your engine is defective, the part will be repaired or replaced
by B&S.
Owner’s Warranty Responsibilities:
• As the engine owner, you are responsible for the performance of the required
maintenance listed in your owner’s manual.B&S recommends that you retain
all receipts covering maintenance on your engine, but B&S cannot deny
warranty coverage solely for the lack of receipts or for your failure to ensure the
performance of all scheduled maintenance.
• As the engine owner, you should however be aware that B&S may deny you
warranty coverage if your engine or a part has failed due to abuse, neglect, or
improper maintenance or unapproved modifications.
• You are responsible for presenting your engine to a B&S distribution center
or service center as soon as the problem exists. The warranty repairs shall
be completed in a reasonable amount of time, not to exceed 30 days.If you
have a question regarding your warranty rights and responsibilities, you should
contact B&S at 1-800-444-7774 (in USA) or BRIGGSandSTRATTON.COM.
Briggs & Stratton Emissions Control Warranty Provisions
The following are specific provisions relative to your Emissions Control Warranty
Coverage. It is in addition to the B&S engine warranty for non-regulated engines found
in the Operator’s Manual.
1. Warranted Emissions Parts
Coverage under this warranty extends only to the parts listed below (the emissions
control systems parts) to the extent these parts were present on the B&S engine.
a. Fuel Metering System
• Cold start enrichment system (soft choke)
• Carburetor or fuel injection system
• Oxygen sensor
• Electronic control unit
• Fuel pump module
b. Air Induction System
• Air cleaner
• Intake manifold
c. Ignition System
• Spark plug(s)
• Magneto ignition system
d. Catalyst System
• Catalytic converter
• Exhaust manifold
• Air injection system or pulse value
e. Miscellaneous Items Used in Above Systems
• Vacuum, temperature, position, time sensitive valves and switches
• Connectors and assemblies
• Electronic controls
2. Length of Coverage
Coverage is for a period of two years from the date of delivery to an ultimate
purchaser, or for the time period listed in the respective engine or product warranty
statement, whichever is greater. B&S warrants to the original purchaser and each
subsequent purchaser that the engine is designed, built, and equipped so as to
conform with all applicable regulations adopted by the Air Resources Board; that
it is free from defects in material and workmanship that could cause the failure
of a warranted part; and that it is identical in allmaterial respects to the engine
described in the manufacturer’s application for certification. The warranty period
begins on the date the engine or equipment is delivered to an ultimate purchaser.
The warranty on emissions-related parts is as follows:
• Any warranted part that is not scheduled for replacement as required
maintenance in the Operator’s Manual supplied, is warranted for the warranty
period stated above. If any such part fails during the period of warranty
coverage, the part will be repaired or replaced by B&S at no charge to
the owner. Any such part repaired or replaced under the warranty will be
warranted for the remaining warranty period.
• Any warranted part that is scheduled only for regular inspection in the
Operator’s Manual supplied, is warranted for the warranty period stated
above. Any such part repaired or replaced under warranty will be warranted
for the remaining warranty period.
• Any warranted part that is scheduled for replacement as required
maintenance in the Operator’s Manual supplied, is warranted for the period of
time prior to the first scheduled replacement point for that part. If the part fails
prior to the first scheduled replacement, the part will be repaired or replaced
by B&S at no charge to the owner. Any such part repaired or replaced under
warranty will be warranted for the remainder of the period prior to the first
scheduled replacement point for the part.
• Add-on or modified parts that are not exempted by the Air Resources Board
may not be used. The use of any non-exempted add-on or modified parts by
the owner will be grounds for disallowing a warranty claim. The manufacturer
will not be liable to warrant failures of warranted parts caused by the use of a
non-exempted add-on or modified part.
3. Consequential Coverage
Coverage shall extend to the failure of any engine components caused by the
failure of any warranted emissions parts.
4. Claims and Coverage Exclusions
Warranty claims shall be filed according to the provisions of the B&S engine
warranty policy. Warranty coverage does not apply to failures of emissions
parts that are not original equipment B&S parts or to parts that fail due to abuse,
neglect, or improper maintenance as set forth in the B&S engine warranty policy.
B&S is not liable for warranty coverage of failures of emissions parts caused by
the use of add-on or modified parts.
Look For Relevant Emissions Durability Period and Air Index Information On
Your Small Off-Road Engine Emissions Label
Engines that are certified to meet the California Air Resources Board (CARB) small off-
road Emissions Standard must display information regarding the Emissions Durability
Period and the Air Index. Briggs & Stratton makes this information available to the
consumer on our emissions labels. The engine emissions label will indicate certification
information.
The Emissions Durability Period describes the number of hours of actual running
time for which the engine is certified to be emissions compliant, assuming proper
maintenance in accordance with the Operator’s Manual. The following categories are
used:
Moderate:
Engines at or less than 80 cc displacement are certified to be emissions compliant for
50 hours of actual engine running time. Engines greater than 80 cc displacement are
certified to be emissions compliant for 125 hours of actual engine running time.
Intermediate:
Engines at or less than 80 cc displacement are certified to be emissions compliant for
125 hours of actual engine running time. Engines greater than 80 cc displacement are
certified to be emissions compliant for 250 hours of actual engine running time.
Extended:
Engines at or less than 80 cc displacement are certified to be emissions compliant for
300 hours of actual engine running time. Engines greater than 80 cc displacement are
certified to be emissions compliant for 500 hours of actual engine running time.
11
Not for reproduction

For example, a typical walk-behind lawn mower is used 20 to 25 hours per year.
Therefore, the Emissions Durability Period of an engine with an intermediate rating
would equate to 10 to 12 years.
Briggs & Stratton engines are certified to meet the United States Environmental
Protection Agency (USEPA) Phase 2 or Phase 3 emissions standards. The Emissions
Compliance Period referred to on the Emissions Compliance label indicates the
number of operating hours for which the engine has been shown to meet Federal
emissions requirements.
For engines at or less than 80 cc displacement:
Category C = 50 hours, Category B = 125 hours, Category A = 300 hours
For engines greater than 80 cc displacement and less than 225 cc displacement:
Category C = 125 hours, Category B = 250 hours, Category A = 500 hours
For engines of 225 cc or more displacement:
Category C = 250 hours, Category B = 500 hours, Category A = 1000 hours
80111486(Revision A)
12
Not for reproduction

Обща информация
Това ръководство съдържа информация за безопасност относно свързаните с
двигателя опасности и рискове, и тяхното предотвратяване. Също така съдържа
информация за правилната работа и поддръжка на двигателя. Важно е да
прочетете, разберете и спазвате тези инструкции. Пазете това ръководство за
бъдещи справки.
ЗАБЕЛЕЖКА:Фигурите и илюстрациите в това ръководство са предоставени
само за информация и може да се различават от модела, който притежавате.
Използвайте фигурите, които съответстват на конфигурацията на вашия двигател.
Ако е необходимо, се свържете с упълномощен сервизен представител.
Запишете датата на покупката, модела, типа, модификацията и серийния номер
на двигателя при необходимост от резервни части. Тези номера се намират върху
двигателя. Вижте раздела Елементи и прибори за управление.
Дата на закупуване
Модел - Тип - Конструкция на
двигателя
Сериен номер на двигателя
Информация за контакт на Европейската
служба
За въпроси относно емисиите в Европейския съюз, се свържете с нашата
Европейска служба на адрес:
Max-Born-Straße 2, 68519 Viernheim, Германия.
Стандарт Euro ниво V (5) на ЕС:
Стойности на въглероден диоксид (CO2)
Въведете „CO2“ в полето за търсене на уебсайта BriggsandStratton.com, за да
намерите стойностите на емисиите въглероден диоксид за двигателите на Briggs &
Stratton, които имат сертификат за типово одобрение от ЕС.
Безопасност на оператора
Предупредителен символ за опасност и
сигнални думи
Предупредителният символ за безопасност обозначава информацията
за безопасност, свързана с опасности, които могат да доведат до нараняване.
Сигнализираща дума (ОПАСНОСТ,ПРЕДУПРЕЖДЕНИЕ или ВНИМАНИЕ)
се поставя, за да посочи вероятността и потенциалната сериозност на
нараняването. Освен това, даден символ за опасност се използва, за да се
представи видът на опасността.
ОПАСНОСТ посочва опасност, която, ако не бъде избегната, ще доведе до смърт
или сериозно нараняване.
ПРЕДУПРЕЖДЕНИЕ посочва опасност, която, ако не бъде избегната, може да
доведе до смърт или сериозно нараняване.
ВНИМАНИЕ посочва опасност, която, ако не бъде избегната, може да доведе до
малка или средна степен на нараняване.
ПРЕДУПРЕЖДЕНИЕпосочва информация, считана за важна, но несвързана с
опасности.
Символи за опасности и техните значения
Информация за
безопасност относно
опасности, които могат
да доведат до телесно
нараняване.
Прочетете и разберете
Ръководството за
оператора, преди да
работите или правите
техническо обслужване
на машината.
Опасност от пожар Опасност от експлозия
Опасност от
електрически удар
Опасност от токсични
пари
Опасност от нагорещена
повърхност
Опасност от откат
Опасност от отрязване
на крайник – Движещи се
части
Ниво на горивото –
Максимално
Не препълвайте
Съобщения за безопасност
ПРЕДУПРЕЖДЕНИЕ
Двигателите на Briggs & Stratton® не са предназначени за и не трябва да се
използват за захранване на: развлекателни картове; състезателни картове;
детски, развлекателни или спортни вседеходни превозни средства (АТВ-
та); мотоциклети; съдове на въздушна възглавница; продукти за авиацията
или превозни средства, използвани в състезания, които не са разрешени
от Briggs & Stratton. За информация относно изделия за състезателни цели,
вижте www.briggsracing.com. При използване на превозни средства с общо
предназначение и такива с повишена проходимост (ATV), моля свържете се с
приложния център за захранване на Briggs & Stratton на тел. 1-866-927-3349.
Неправилната употреба на двигателя може да доведе до сериозни наранявания
или смърт.
Информация за рециклиране
Рециклирайте всички кашони, кутии, използвано масло
и батерии, както е посочено в правителствените
разпоредби.
Елементи и прибори за управление
Управления на двигателя
Сравнете буквените означения на фигури 1, 2 и 3 с компонентите на двигателя1 от
списъка, който следва:
A. Идентификационни номера на двигателя Модел – Тип – Подрязване
B. Резервоар за гориво и капачка
C. Въздушен филтър, висок монтаж
D. Въздушен филтър, нисък монтаж
E. Ръкохватка на въжето за ръчния стартер
F. Щека за масло, горна
G. Щека за масло, долна (ако има)
H. Отвор за наливане на масло
I. Пробка за източване на маслото
J. Шумозаглушител, предпазител на шумозаглушител (ако е монтиран),
искроуловител (ако е монтиран)
K. Електронен регулатор на газта (ако има)
L. Контролна лампа за двигателя (ако има)
M. Кожух на вентилатора
N. Контактен ключ (ако има такъв)
1Някои двигатели и оборудване са снабдени с устройства за дистанционно
управление. Вижте ръководството за работа за разположението и работата с
приборите за дистанционно управление.
Символи за управление на двигателя и техните
значения
Обороти на двигателя –
БЪРЗИ
Обороти на двигателя –
БАВНИ
Двигател - СТОП Двигател - СТАРТ
13
Not for reproduction

Двигател - ВКЛ
Експлоатация
ПРЕДУПРЕЖДЕНИЕ
Изпаренията на горивата са възпламеними и взривоопасни. Пожар или
експлозия може да доведе до изгаряния или смърт.
Ако Ви замирише на газ
• Не стартирайте двигателя.
• Не включвайте електрическите ключове.
• Не използвайте телефон в непосредствена близост.
• Напуснете мястото.
• Свържете се с противопожарната охрана.
Когато работите с оборудването
• Не накланяйте двигателя или машината под ъгъл, при който горивото се
разлива.
Когато сменяте мястото на оборудването
• Уверете се, че резервоарът за гориво е ПРАЗЕН и че кранчето за подаване
на гориво е в позиция ЗАТВОРЕНО.
Проверете нивото на маслото
Преди да проверите или да долеете масло
• Уверете се, че двигателят е разположен хоризонтално.
• Почистете зоната около отвора за масло от нежелани материали.
• Вижте разделТехнически данниотносно вместимостта за маслото.
ПРЕДУПРЕЖДЕНИЕ
Този двигател се доставя от Briggs & Stratton без масло. Производителите на
оборудването или търговците може да са добавили масло в двигателя. Преди
да стартирате двигателя за първи път, уверете се, че маслото е на правилното
ниво. Добавяйте масло, както е посочено в инструкциите в това ръководство. Ако
стартирате двигателя без масло, той ще се повреди и ремонтът няма да бъде
покрит от гаранцията.
1. Извадете щеката за маслото (А, В, С, Фигура4). Избършете с парцал маслото
от щеката (А, В, С).
2. Поставете щеката (А, В, C, Фигура 4).
a. Монтирана ниско щека за масло (ако има) (В, Фигура 4). Маркировките за
ниво на маслото върху щеката (В) трябва да са обърнати нагоре.
b. Къса щека за масло или пробка на отвора за масло (ако има) (С, Фигура
4): Завъртете и затегнете щеката (С).
3. Извадете отново щеката (А, В, С, Фигура 4).
4. Проверете нивото на маслото. Уверете се, че нивото на маслото е до горния
край на маркировката (D, Фигура 4).
5. Ако нивото е ниско, бавно долейте в някой от отворите за моторно масло (E,
F, Фигура 5). Не добавяйте твърде много масло.
6. Изчакайте една минута и отново проверете нивото. Уверете се, че нивото на
маслото е добре.
7. Поставете щеката (А, В, C, Фигура 4).
Препоръки за маслото
Вместимост на масло: Вижте разделТехнически данни.
За най-добра производителност препоръчваме да се използват сертифицирани
с гаранция масла на Briggs & Stratton®. Разрешени са и други висококачествени
почистващи масла от клас SF, SG, SH, SJ или по-висок. Не използвайте специални
добавки.
Използвайте таблицата, за да изберете най-добрия вискозитет за очаквания
диапазон на външна температура. Двигателите на повечето машини за използване
на открито работят добре със синтетично масло 5W-30. Синтетичното масло
Vanguard® 15W-50 осигурява най-добрата защита за оборудване, което се
използва при високи температури.
A SAE30 – Употребата на SAE30 при температури под 40°F (4°C) ще
доведе до трудно стартиране.
B 10W-30– Употребата на 10W-30 при температури над 80°F (27°C) може
да предизвика повишен разход на маслото. Проверявайте често нивото
на маслото.
С 5W-30
D Синтетично масло 5W-30
EСинтетично Vanguard® 15W-50
Система за защита от ниско ниво на маслото (ако
има такава)
На някои двигатели е инсталиран сензор за ниско ниво на маслото. Ако маслото
е малко, сензорът ще изведе предупредителна светлина или ще спре двигателя.
Спрете двигателя и следвайте тези стъпки, преди да стартирате двигателя.
• Уверете се, че двигателят е разположен хоризонтално.
• Проврете маслото. Вижте раздел Проверка нивото на маслото.
• Ако нивото на маслото е ниско, добавете необходимото количество масло.
Стартирайте двигателя и се уверете, че не се включва предупредителната
светлина (ако има такава).
• Ако нивото на маслото не е ниско, не стартирайте двигателя. Свържете
се с упълномощен сервизен представител на Briggs & Stratton, за да
отстраните проблема с маслото.
Препоръки за горивото
Горивото трябва да отговаря на следните изисквания:
• Чист, пресен, безоловен бензин.
• Минимум 87октана/87AKI (91RON). За работа при голяма надморска
височина вижте по-долу.
• Позволен е бензин с до 10% съдържание на етанол (бензоспирт).
ПРЕДУПРЕЖДЕНИЕ
Да не се използват неодобрени марки бензини, като E15 и E85. Не смесвайте
масло с бензина и не променяйте двигателя за работа с алтернативни горива.
Използването на неодобрени горива може да доведе до повреда на елементи от
двигателя, чиито ремонт няма да бъде покрит от гаранцията.
За защита на горивната система от образуване на клей и корозия смесете
стабилизатор на гориво без алкохол и етанолов разредител към горивото.
Вижте раздел Съхранение. Всички горива са различни. Ако започнат да
се появяват проблеми със стартирането или производителността, сменете
доставчиците или марката на горивото. Този двигател е сертифициран за работа
с бензин. Системата за контрол на емисиите за карбураторни двигатели е EM
(Модификации на двигателя). Системите за контрол на емисиите за двигатели с
електронно впръскване на горивото са ECM (модул за управление на двигателя),
MFI (многоточково впръскване на горивото), TBI (впръскване на горивото в
дроселовата клапа) и, ако има монтиран, O2S (кислороден сензор).
Голяма надморска височина
При надморски височини над 5000фута (1524метра), позволеният бензин е
минимум 85октана/85AKI (89RON).
При карбураторни двигатели е необходимо регулиране за големи надморски
височини, за да се запази производителността. Работата без тази настройка ще
доведе до понижена производителност, по-голям разход на гориво и повишени
емисии. Свържете се с упълномощен сервизен представител на Briggs & Stratton
за информация относно регулирането за големи надморски височини. Не се
препоръчва работа на двигателя при надморска височина под 2500 ход (762м) с
направено регулиране за голяма надморска височина.
При двигатели с електронно впръскване на горивото (EFI) не е необходима
настройка за голяма надморска височина.
14
Not for reproduction

Доливане на гориво
ПРЕДУПРЕЖДЕНИЕ
Горивото и неговите пари са възпламеними и взривоопасни. Пожар или
експлозия може да доведе до изгаряния или смърт.
Когато добавяте гориво
• Спрете двигателя. Преди да свалите капачката за гориво, изчакайте най-
малко две (2) минути, за да си гарантирате, че двигателят се е охладил.
• Напълнете резервоара за гориво на открито или в помещение с добра
вентилация.
• Не слагайте твърде много гориво в резервоара. За да оставите възможност
за разширение на горивото, не пълнете над долната част на гърлото на
резервоара за гориво.
• Дръжте горивото далече от искри, открити пламъци, пилотни светлини,
топлина и други източници на запалване.
• Често преглеждайте горивопроводите, резервоара за гориво, капачката
на горивото и връзките за наличие на пукнатини или течове. Подменете
повредените части.
• Ако горивото се разлее, изчакайте, докато се изпари преди да стартирате
двигателя.
1. Почистете пространството около капачката на резервоара за гориво от
мръсотия и остатъци. Свалете капачката на резервоара за гориво.
2. Напълнете резервоара за гориво (A, фигура 6) с гориво. Тъй като горивото се
разширява, не пълнете над долната част на гърлото на резервоара (B).
3. Поставете обратно капачката за гориво.
Стартиране на двигателя
ПРЕДУПРЕЖДЕНИЕ
ОПАСНОСТ ОТ ОТРОВНИ ГАЗОВЕ. Отработените газове от двигателя
съдържат въглероден оксид, отровен газ, който би могъл да Ви убие за
минути. Дори ако не усещате отработените газове, все още можете да
бъдете изложени на въздействието на отровен въглероден оксид. Ако
усетите гадене, замайване или слабост докато използвате този продукт,
ВЕДНАГА излезте на чист въздух. Отидете на лекар. Възможно е да сте
получили отравяне с въглероден окис.
• Въглеродният окис може да се натрупва в затворени помещения.
Работете с този продукт САМО на открито, далече от прозорци, врати
и вентилационни отвори, за да намалите риска от натрупване на
въглероден окис.
• Монтирайте сигнални уредби за наличие на въглероден оксид,
захранвани с батерии или чрез щепсел, според инструкциите на
производителя. Сигналните уредби за дим не могат да засичат
въглероден окис.
• НЕ работете с този продукт в домове, гаражи, мазета, непреходни
коридори, хангари или други затворени помещения, дори при използване
на вентилатори или при отворени врати и прозорци за вентилация. След
работата с този продукт, въглеродният окис може бързо да се натрупа в
тези помещения и да остане с часове.
• ВИНАГИ поставяйте този продукт по посока на въздушното течение
и насочвайте изгорелите газове от двигателя далече от обитаваните
помещения.
ПРЕДУПРЕЖДЕНИЕ
Горивото и неговите пари са възпламеними и взривоопасни. Пожар или
експлозия може да доведе до изгаряния или смърт.
Когато стартирате двигателя
• Уверете се, че запалителната свещ, шумозаглушителят, капачката
на резервоара за гориво и въздушният филтър (ако има такива) са
монтирани правилно.
• Не стартирайте двигателя без запалителна свещ.
• Ако двигателят е задавен, поставете смукача (ако има такъв) в положение
ОТВОРЕНО или РАБОТА. Поставете прибора за управление на
дроселната клапа в положение БЪРЗО (ако има такъв) и въртете, докато
двигателят стартира.
• Ако в областта има изтичане на природен газ или газ LP, не стартирайте
двигателя.
• Не използвайте течности за начално запалване под налягане, защото
парите им са възпламеними.
ПРЕДУПРЕЖДЕНИЕ
Въртящите се части могат да захванат ръце, крака, коса, облекло или
аксесоари и това може да доведе до травматична ампутация или сериозно
нараняване.
• Работете с оборудването с правилно поставени предпазители.
• Дръжте ръцете и краката си на разстояние от въртящите се части.
• Свалете бижутата си и се уверете, че косата Ви е далече от всички
въртящи се части.
• Не носете широки дрехи или аксесоари, които могат да бъдат захванати.
ПРЕДУПРЕЖДЕНИЕ
Бързото изтегляне на въжето на стартера (откат) притегля дланта и ръката
Ви към двигателя по-бързо, отколкото Вие можете да я отдръпнете.
Това може да причини счупване на кости, фрактури, натъртвания или
навяхвания.
• За да избегнете отката, при стартиране на двигателя, издърпайте бавно
въжето на стартера, докато усетите съпротивление, а след това дръпнете
рязко.
• Изключете или премахнете всички външни товари на оборудването/
двигателя, преди да го стартирате.
• Уверете се, че директно прикачените към двигателя елементи, като, но не
само остриета, крилни витла, лебедки и зъбни колела, трябва да бъдат
правилно прикрепени.
ЗАБЕЛЕЖКА:Вашето оборудване може да има прибори за дистанционно
управление. Вижте ръководството за работа за разположението и работата с
приборите за дистанционно управление.
Електрическо стартиране
1. Проверете нивото на маслото. Вижте раздел Проверка нивото на маслото.
2. Поставете органите за управление на задвижваната машина (ако има такива)
в изключено положение.
3. Завъртете кранчето за подаване на гориво, ако има такова, в позиция
ОТВОРЕНО.
4. Завъртете контактния ключ (А, Фигура 7) до позиция СТАРТ.
ПРЕДУПРЕЖДЕНИЕКогато отпуснете ключа (А, Фигура 7), той ще се върне в
позиция ВКЛ. Двигателят ще се завърти от стартера, докато заработи. За да
прекъснете процедурата по стартиране, завъртете ключа (А) в позиция ИЗКЛ. Ако
двигателят не заработи, изпълнете стъпките, които следват.
5. Уверете се, че ключът (А, Фигура 7) е в позиция ИЗКЛ. Изчакайте две секунди.
6. Завъртете контактния ключ (А, Фигура 7) до позиция СТАРТ.
7. Ако двигателят не заработи, прекъснете стартирането и се свържете с
упълномощен сервизен представител на Briggs & Stratton.
Ръчно стартиране
ПРЕДУПРЕЖДЕНИЕЕлектрическото стартиране е препоръчителен метод за
стартиране на Вашия двигател.
1. Проверете нивото на моторното масло. Вижте раздел Проверка нивото на
маслото.
2. Поставете органите за управление на задвижваната машина (ако има такива)
в изключено положение.
3. Уверете се, че двигателят е включен към заредена 12-волтова батерия.
4. Завъртете кранчето за подаване на гориво, ако има такова, в позиция
ОТВОРЕНО.
5. Завъртете контактния ключ (А, Фигура8) в позиция ВКЛ. След това
издърпайте ръкохватката на въжето на стартера (В).
Спрете двигателя
1. Завъртете контактния ключ (A, фигура 7) в позиция ИЗКЛ.
2. Извадете ключа. Съхранявайте го на безопасно място, далеч от деца.
3. След спирането на двигателя завъртете кранчето за гориво, ако има такова, в
позиция ЗАТВОРЕНО.
Индикатор за проблем в двигателя
Този светлинен индикатор (B, фигура7) сигнализира за проблем в двигателя.
Ако индикаторът свети по време на работа на двигателя, се обърнете се към
упълномощен сервизен представител на Briggs & Stratton, за да отстраните
проблема възможно най-скоро или когато приключите работа. Ако двигателят е
спрял автоматично, а индикаторът е останал да свети, изпълнете следващите
стъпки:
1. Уверете се, че двигателят е разположен хоризонтално.
15
Not for reproduction

2. Проврете маслото. Вижте раздел Проверка нивото на маслото.
3. Стартирайте двигателя. Вижте раздела Стартиране на двигателя..
4. Ако индикаторът за проблем остава да свети и двигателят продължава да
спира автоматично, не използвайте двигателя. Свържете се незабавно с
упълномощен сервизен представител на Briggs & Stratton, за да отстраните
проблема.
Техническо обслужване
Информация за техническо обслужване
ПРЕДУПРЕЖДЕНИЕ
Горивото и неговите пари са възпламеними и взривоопасни. Пожар или
експлозия може да доведе до изгаряния или смърт.
По време на поддръжката, ако е необходимо да наклоните уреда, уверете се, че
резервоарът за гориво, ако е монтиран на двигателя, е празен и че е изправен
откъм страната на запалващата свещ. Ако резервоарът за гориво не е празен,
може да изтече гориво и да причини пожар или експлозия. Ако двигателят е
наклонен в друга посока, той няма лесно да се стартира поради замърсяване с
масло или гориво на въздушния филтър или на запалителната свещ.
ПРЕДУПРЕЖДЕНИЕ
Случайна искра от двигателя може да причини токов удар, пожар или
експлозия, и може да доведе до захващане, травматична ампутация или
разкъсни наранявания.
Преди да извършвате настройки или поправки:
• Разкачете кабелите на всички запалителни свещи и ги дръжте далеч от
тях.
• Разкачете кабела от отрицателната клема на акумулатора (само при
двигатели с електрически стартер).
• Използвайте само правилните инструменти.
Когато проверявате за искра:
• Използвайте одобрен тестер за свещи.
• Не проверявайте за искра при извадена запалителна свещ.
ПРЕДУПРЕЖДЕНИЕ
Резервните части трябва да бъдат със същата конструкция и да се монтират в
същото положение, както оригиналните части. Другите части може да се повредят
или да се причини нараняване.
ПРЕДУПРЕЖДЕНИЕ
Всички компоненти, използвани при производството на този двигател, трябва да
бъдат на мястото си за правилната му работа.
За всякакви дейности по поддръжката и сервизното обслужване на двигателя и
негови части се обръщайте към упълномощен сервизен представител на Briggs &
Stratton з.
Сервизно обслужване по контрола на вредните
емисии
За поддръжка, смяна или ремонт на устройствата и системите за контрол
на вредните емисии, се свържете с квалифициран ремонтен цех или техник,
ремонтиращ двигатели, които не се използват за транспортни цели. Все пак,
за „безплатно“ сервизно обслужване по контрола на вредните емисии, работата
трябва да бъде изпълнена от упълномощен представител на завода. Вижте
Отчетите по контрола на вредните емисии.
График за техническо обслужване
След първите 5 часа
• Сменете маслото.
На интервали от 8 часа или ежедневно
• Проверете нивото на моторното масло.
• Почистете зоната около шумозаглушителя.
• Почистете решетката на отвора за въздух.
На интервали от 100 часа или годишно
• Обслужете изпускателната система.
На интервали от 200 часа или годишно
• Сменете моторното масло.
•Почистете въздушния филтър1
На интервали от 600 часа или на 2 години
• Сменете въздушния филтър.
•Сменете горивния филтър1
Ежегодно
• Сменете запалителната свещ.
• Обслужете горивната система.
•Обслужете охлаждащата система1.
•Проверете луфтовете на клапаните2.
1Почиствайте по-често в случай на условия с по-голяма замърсяване или когато
във въздуха има множество частици.
2Не се налага, освен ако не възникнат проблеми в работата на двигателя.
Система за електронно впръскване на горивото
(EFI)
Системата EFI наблюдава температурата и скоростта на двигателя, както
и напрежението на акумулатора, при стартиране и загряване на двигателя.
Системата не се нуждае от регулиране. Ако възникнат проблеми при стартирането
или работата, свържете се с упълномощен сервизен представител на Briggs &
Stratton.
ПРЕДУПРЕЖДЕНИЕУверете се, че следвате стъпките по-долу, в противен случай
системата EFI може да се повреди.
• НЕ стартирайте двигателя при разхлабени кабели на акумулатора.
• Преди да разедините, свалите и/или поставите акумулатора, завъртете
ключа до позиция ИЗКЛ.
• НЕ използвайте зарядно устройство за акумулатора, за да стартирате
двигателя.
• НЕ разкачвайте кабелите на акумулатора по време на работа на машината.
• При разкачване на кабелите на акумулатора, първо свържете
положителния (+), а след това отрицателния (-) кабел.
• Когато зареждате акумулатора, завъртете ключа на запалването до
позиция ИЗКЛ. и откачете отрицателния (-) кабел от акумулатора.
• НЕ пръскайте вода директно върху електронния модул за управление.
Обслужване на запалителната свещ
Проверете хлабината на запалителната свещ (А, Фигура9) с хлабиномер (B).
Ако е необходимо, настройте празнината на запалителната свещ. Монтирайте и
затегнете запалителната свещ до правилния въртящ момент. За спецификации за
междината или въртящия момент, вижте раздел Спецификации.
За достъп до запалителната свещ, уверете се, че двигателят е на позиция ИЗКЛ.
Разкачете кабела на запалителната свещ (D, Фигура 10) и го дръжте далече от нея
(Е).
При някои модели EFI-ETC, трябва да свалите топлинния щит, за да стигнете до
запалителната свещ. За целта следвайте долупосочените стъпки.
1. Освободете червеното езиче (А, Фигура11) от конектора (В).
2. Избутайте черния край (С, Фигура11) докато издърпвате конектора (В) от
бобината на запалването (D).
3. Свалете клапана за защита от едри частици (Е, Фигура11).
4. Свалете горния (F, Фигура11) и страничния (G) винт от конзолата (H).
5. Свалете топлинния щит (Н, Фигура11).
6. Свалете бобината (D, Фигура11).
7. Сменете запалителната свещ (I, Фигура12).
8. Монтирайте бобината (D, Фигура11).
9. Монтирайте конзолата (H, Фигура11).
10. Завийте горния (F, Фигура11) и страничния (G) винт в конзолата (H).
11. Поставете клапана за защита от едри частици (Е, Фигура11).
12. Монтирайте конектора (B, Фигура11) в бобината (D).
13. Заключете червеното езиче (А, Фигура11).
16
Not for reproduction

Сервизно обслужване на изпускателната и
охладителната системи
ПРЕДУПРЕЖДЕНИЕ
По време на работа, двигателят и шумузаглушителят се нагорещяват. Ако
докоснете горещ двигател, може да се изгорите.
Запалимите материали, като листа, трева и сухи клонки, могат да се запалят.
• Преди да докоснете двигателя или шумозаглушителя, спрете двигателя
и изчакайте две (2) минути. Уверете се, че е безопасно да докосвате
двигателя и шумозаглушителя.
• Отстранете отпадъците от шумозаглушителя и двигателя.
Според Правилника на Калифорния за обществените ресурси, раздел 4442,
използването или работата с двигателя по залесени с гори, храсти или с треви
площи представлява нарушение, освен ако системата за отработени газове не
е снабдена с искрогасител, поддържан в ефикасно работно състояние, както е
определено в раздел 4442. Други щати или федерални юрисдикции могат да имат
подобни закони; за справка – Федерален регламент 36CFR, част261.52. Свържете
се с производителя, търговеца или продавача на оригинално оборудване, за да
получите искроуловител, проектиран за системата за отработени газове на този
двигател.
Това е двигател с въздушно охлаждане. Замърсявания или нежелани материали
могат да възпрепятстват въздушния поток и да доведат до прекомерно загряване
на двигателя. Това влошава работните характеристики и съкращава живота
на двигателя. Между ребрата за охлаждане на цилиндъра могат да съберат
нежелани замърсявания, които не могат да бъдат премахнати без частично
разглобяване на двигатела. Системата за въздушно охлаждане трябва да се
проверява и почиства само от упълномощен сервизен представител на Briggs &
Stratton. Вижте Графика за техническо обслужване.
1. Уверете се, че около и зад шумозаглушителя няма запалими материали.
2. Използвайте четка и сух парцал, за да отстраните всички нежелани материали
от зоната на кожуха на вентилатора, на шумозаглушителя и на цилиндъра. НЕ
ИЗПОЛЗВАЙТЕ вода за почистване на двигателя.
3. Уверете се, че лостовите системи, пружините и органите за управление са
чисти.
4. Проверете шумозаглушителя за пукнатини, корозия или друг вид повреда.
5. Свалете дефлектора или искрогасителя, ако има такива, и ги проверете за
повреди или запушване със сажди. Преди да работите отново с оборудването
се уверете, че сте извършили необходимото почистване или монтаж на
резервните части.
6. Ако има монтиран маслен радиатор, уверете се, че ребрата му не са
замърсени.
Смяна на маслото на двигателя
ПРЕДУПРЕЖДЕНИЕ
Горивото и неговите пари са възпламеними и взривоопасни. Пожар или
експлозия може да доведе до изгаряния или смърт.
По време на работа, двигателят и шумузаглушителят се нагорещяват. Ако
докоснете горещ двигател, може да се изгорите.
• Ако източвате маслото от горната тръба за пълнене на масло, резервоарът
за гориво трябва да бъде празен. Ако не е празен, може да изтече гориво и
да причини пожар или експлозия.
• Преди да докоснете двигателя или шумозаглушителя, спрете двигателя
и изчакайте две (2) минути. Уверете се, че е безопасно да докосвате
двигателя и шумозаглушителя.
Отработеното масло е опасен отпадъчен продукт и трябва да се изхвърля
по подходящ начин. Да не се изхвърля с домакинските отпадъци. Свържете
се с местните власти, обслужващият център или представител за безопасно
депониране или рециклиране.
Раздел Източване на маслото
1. При изключен, но все още топъл двигател, разкачете кабела на запалителната
свещ (D, Фигура10) и го дръжте далече от запалителната свещ (E). За
моделите двигатели, които имат топлинен щит (Фигура11), разкачете кабела
на запалителната свещ, както следва:
a. Освободете червеното езиче (А, Фигура11) от конектора (В).
b. Натиснете черното езиче (С, Фигура11) и издърпайте конектора (В) от
бобината (D)
2. Извадете щеката за маслото (А, В, С, Фигура4).
3. Свалете една от пробките за източване на маслото (F, G, Фигура13). Източете
маслото в подходящ контейнер.
4. Поставете и затегнете пробката (F, G, Фигура13).
Доливане на масло
• Уверете се, че двигателят е разположен хоризонтално.
• Почистете зоната около отвора за масло от всякакви нежелани материали.
• Вижте разделТехнически данниотносно вместимостта за маслото.
1. Извадете щеката за маслото (А, В, С, Фигура4).
2. Бавно долейте масло в един от отворите за наливане (E, F, Фигура5). Не
доливайте прекалено много.
3. Вкарайте обратно щеката за маслото (А, В, C, Фигура4).
a. Удължена щека за масло (ако има) (В, Фигура4): Маркировките за ниво на
маслото върху щеката (В) трябва да са обърнати нагоре.
b. Къса щека за масло или пробка на отвора за масло (ако има) (С,
Фигура4): Завъртете и затегнете щеката (С).
4. Извадете отново щеката (А, В, С, Фигура4).
5. Проверете нивото на маслото. Уверете се, че нивото на маслото е до горния
край на маркировката (D, Фигура4).
6. Поставете отново щеката (A, В, С, Фигура4).
7. Свържете кабела на запалителната свещ (D, 10) към запалителната свещ
(E).За моделите двигатели, които имат топлинен щит (Фигура11), свържете
кабела на запалителната свещ, както следва:
a. Поставете конектора (В, Фигура11).
b. Заключете червеното езиче (А, Фигура11).
Обслужване на въздушния филтър
ПРЕДУПРЕЖДЕНИЕ
Изпаренията на горивата са възпламеними и взривоопасни. Пожар или
експлозия може да доведе до изгаряния или смърт.
• Не стартирайте и не работете с двигателя при демонтиран комплект на
въздушния филтър (ако има такъв) или със свален въздушен филтър (ако
има такъв).
ПРЕДУПРЕЖДЕНИЕ
Не използвайте сгъстен въздух или разтворители, за да почиствате филтъра.
Сгъстеният въздух може да причини повреда на филтъра, а разтворителите да го
разтворят.
Вижте Графика за техническото обслужване относно изискванията за
обслужване.
Различните модели използват хартиен филтър или филтър от пенопласт. Някои
модели са оборудвани и с предфилтър (по желание), който може да се почиства
и използва отново. Сравнете илюстрациите в това ръководство с типа филтър,
монтиран на Вашия двигател и го обслужвайте, както следва.
Хартиен въздушен филтър
1. Освободете крепежните елементи (А, фигура 14
2. Демонтирайте капака (А, фигура 14) и филтъра (В).
3. За да освободите наслояванията, леко потупайте въздушния филтър (В,
фигура 14) върху твърда повърхност. Ако филтърът е замърсен, сменете го с
нов.
4. Монтирайте филтъра (В, фигура 14).
5. Монтирайте капака (А, фигура 14) и го закрепете с крепежните елементи (С).
Уверете се, че крепежният (-те) елемент (-и) е/са стегнат (-и).
Въздушен филтър - профил отдолу
1. Преместете палеца (A, Фигура 15), за да отключите капака (C).
2. Бутнете зъбчетата (B, Фигура 15) и махнете капака (C).
3. Демонтирайте филтъра (D, фигура 15).
4. За да освободите наслояванията, леко потупайте филтъра (D, фигура 15)
върху твърда повърхност. Ако филтърът е замърсен, сменете го с нов.
5. Монтирайте филтъра (D, фигура 15).
6. Поставете капака (C, фигура 15). Преместете палеца (А) до заключена
позиция.
ЗАБЕЛЕЖКА:Проверете състоянието на пенопластово уплътнение (E, фигура
15). Уверете се, че пенопластовото уплътнение по периметъра е поставено
правилно в канала (F).
17
Not for reproduction

Обслужване на горивната система
ПРЕДУПРЕЖДЕНИЕ
Горивото и неговите пари са възпламеними и взривоопасни. Пожар или
експлозия може да доведе до изгаряния или смърт.
• Дръжте горивото далече от искри, открити пламъци, пилотни светлини,
топлина и други източници на запалване.
• Често преглеждайте горивопроводите, резервоара за гориво, капачката
на горивото и връзките за наличие на пукнатини или течове. Подменете
повредените части.
• Ако горивото се разлее, изчакайте, докато се изпари преди да стартирате
двигателя.
Горивен филтър, ако има такъв
1. Преди смяна на горивния филтър (А, Фигура16) източете резервоара или
затворете кранчето за подаване на гориво. Ако резервоарът не е източен,
може да изтече гориво и да причини пожар или експлозия.
2. Стиснете с клещи краищата (B, Фигура16) на скобите (C) и свалете скобите от
горивния филтър (A).
3. Извадете (с въртене) горивопроводите (D, Фигура16) от горивния филтър.
4. Проверете горивопроводите (D, Фигура16) за пукнатини или течове. Ако е
необходимо, сменете горивопроводите.
5. Сменете горивния филтър (А, Фигура16).
6. Закачете горивопроводите (D, Фигура16) със скобите (С).
Цедка за гориво, ако има такава
1. Свалете капачката на резервоара за гориво (A, Фигура17).
2. Свалете цедката за горивото (B, Фигура 17).
3. Ако Гориво цедката е замърсена, почистете я или я сменете. Ако сменяте
цедката за гориво, уверете се, че новата цедка е оригинална резервна част.
Складиране
Горивна система
Вижте Фигура 18.
ПРЕДУПРЕЖДЕНИЕ
Горивото и неговите пари са възпламеними и взривоопасни. Пожар или
експлозия може да доведе до изгаряния или смърт.
Съхранение на горивото
• Тъй като сигналните светлини или други източници на запалване могат да
причинят експлозии, дръжте горивото или оборудването далеч от пещи,
печки, бойлери или други уреди, които имат сигнални светлини.
Поддържайте нивото на двигателя в правилно работно положение). Напълнете
резервоара за гориво (A, фигура 18) с гориво. За да се даде възможност за
топлинно разширение на горивото, не пълнете над гърлото на резервоара за
гориво (B).
Горивото може да остарее, ако се съхранява в контейнер повече от 30дни.
Препоръчва се в контейнера за съхранение на горивото да се добави
стабилизатор за гориво, несъдържащ алкохол, и етанолова добавка. Това
запазва свежестта на горивото и намалява свързаните с горивото проблеми или
замърсяване в горивната система.
Когато пълните контейнера с гориво, добавете стабилизатор за гориво,
несъдържащ алкохол, както е посочено в инструкциите. Ако бензинът в двигателя
не е третиран със стабилизатор, трябва да се източи в подходящ контейнер.
Включете двигателя да работи, докато изразходи горивото.
Масло на двигателя
Докато двигателят е все още топъл, сменете маслото. Вижте раздел Смяна на
двигателното масло.
Откриване и отстраняване на
неизправности
Съдействие
За помощ, се свържете с Вашия местен търговец или отидете на
BRIGGSandSTRATTON.COM , или се обадете на 1-800-444-7774 (в САЩ).
Спецификации и резервни части
Модел: 25E300
Работен обем 24.898 куб. инча (408 куб. см)
Отвор 3.465 инча (88 мм)
Работен ход на буталото 2.638 инча (67 мм)
Вместимост за масло 28-32 унции (,82 - ,95 л)
Искрова междина на запалителната
свещ
.030 инча (,76 мм)
Въртящ момент за затягане на
запалителната свещ
170 фунт-инч (19,2 Nm)
Хлабина на сензора за обороти .010 -.015 инча (,254 - ,381 мм)
Междина на всмукателния клапан .004 - .006 инча (,10 - ,15 мм)
Междина на изпускателния клапан .006 - .008 инча (,15 - ,20 мм)
Мощността на двигателя намалява с 3,5% на всеки 1000 фута (300 метра)
увеличение на надморската височина и с 1% на всеки 10 °F (5,6 °C) увеличение
на температурата над 77 °F (25 °C). Двигателят ще работи задоволително
при наклон до 30°. Вижтеръководството за употреба на оборудването за
допустимите, безопасни граници за работа по наклони.
Сервизни части
За да закупите резервни части на Briggs & Stratton,
намерете упълномощен сервизен представител
на BRIGGSandSTRATTON.COM. Ще е необходим
идентификационен номер (модел - тип - модификация). За да
намерите идентификационния номер на двигателя, вижте раздел
Функции и органи за управление.
Номинална мощност
Общата номинална мощност за отделните модели бензинови двигатели се
определя в съответствие с код J1940 от Процедура за оценка на мощността и
въртящия момент на малки двигатели на SAE (Асоциация на автомобилните
инженери) и се оценява в съответствие със SAE J1995. Стойностите на въртящия
момент са отчетени при 2600об./мин. за двигателите, чиито „об./мин.“ са
посочени на етикета, и при 3060об./мин. за всички останали; мощностите в конски
сили са отчетени при 3600об./мин. Кривите на общата мощност могат да се
видят на: www.BRIGGSandSTRATTON.COM. Стойностите на нетната мощност
са отчетени при инсталирани системи за отделяне на изгорели газове и за
очистване на въздуха, докато стойностите на общата мощност се отчитат без тези
прикачни устройства. Действителната обща мощност на двигателя е по-висока
от нетната мощност и зависи, освен всичко друго, от условията на работната
среда, както и от специфичните особености на всеки двигател. Имайки предвид
голямото разнообразие от устройства, на които се инсталират такива двигатели,
бензиновият двигател може да не е в състояние да развива общата номинална
мощност, когато се използва в даден вид оборудване. Тези разлики се дължат
на различни фактори, включително, но без ограничение до разнообразните
компоненти на двигателите (системи за очистване на въздуха, за отделяне на
изгорели газове, за зареждане, за охлаждане, карбуратор, горивна помпа и
др.), ограничения на приложението, условия на работната среда (температура,
влажност, надморска височина), както и от специфичните особености на всеки
двигател. Вследствие на ограниченията за производство и капацитет, Briggs
& Stratton може да замести този двигател с двигател с по-висока номинална
мощност.
Гаранция
Гаранция за двигател Briggs & Stratton ®
В сила от м. август 2022 г.
Ограничена гаранция
Фирма Briggs & Stratton гарантира, че по време на указания по-долу
гаранционен период ще поправя или заменя безплатно всяка част, оказала
се дефектна по отношение на материалите или изработката, или и двете
с нова, възстановена или преработена част, единствено по преценка на
Briggs & Stratton. Транспортните разходи за изпратения за ремонт или за
замяна продукт по тази гаранция трябва да бъдат поети от клиента. Тази
гаранция е валидна за определения срок и се подчинява на изложените по-
долу условия. За гаранционно обслужване намерете най-близкия упълномощен
сервизен представител на картата в нашия указател на представителите в
BRIGGSandSTRATTON.COM. Потребителят трябва да се свърже с упълномощен
сервизен представител, на когото да предостави продукта за оглед и изпитване.
Няма друга изрична гаранция. Подразбиращите се гаранции, включително
такива за годност за продажба или за определено предназначение, са
ограничени до една година от датата на закупуване или до степента,
разрешена от закона. Всички други подразбиращи се гаранции се
изключват. Отговорността за непредвидени или закономерно настъпили
вреди са изключени до степента на изключване, позволена от закона.
Някои щати или държави не допускат ограничения за срока на валидност на
18
Not for reproduction

подразбиращи се гаранции. Също така някои щати или държави не позволяват
изключване или ограничаване на отговорността за случайни или закономерно
настъпили повреди, така че горното ограничение и изключване може да не се
отнася за Вас. Тази гаранция Ви дава определени законови права, а Вие можете
да имате и други такива, които са различни в отделните щати и в отделните
държави *.
Стандартни гаранционни условия1, 2
Vanguard®; Серия за търговска употреба
Лична употреба - 36месеца
Търговска употреба - 36месеца
СерияXR
Лична употреба - 24месеца
Търговска употреба - 24месеца
Всички други двигатели с чугунена риза Dura-Bore™
Лична употреба - 24месеца
Търговска употреба - 12месеца
Всички други двигатели
Лична употреба - 24месеца
Търговска употреба - 3месеца
1 Това са нашите стандартни гаранционни условия, но е възможно понякога
да има допълнително гаранционно покритие, което не е било определено към
момента на публикуване на този документ. За списък на текущите гаранционни
условия за вашия двигател посетете BRIGGSandSTRATTON.com или се
свържете с вашия упълномощен сервизен представител на Briggs & Stratton.
2 Не се предоставя гаранция за двигатели, монтирани на оборудване, което се
ползва като основен енергоизточник вместо централно електрозахранване; за
резервни генератори, ползвани за търговски цели, за специализирани превозни
средства с мощност над 25к.с. или за двигатели, използвани за състезания, за
търговски цели или за отдаване под наем.
*В Австралия – Нашите стоки се доставят с гаранции, които не могат да се
изключват, по силата на австралийското законодателство за потребителите. При
сериозен дефект имате право на замяна или възстановяване на сумата, както
и на компенсация за всяка друга нормално предвидима загуба или повреда.
Също така имате право на ремонт или замяна на стоката, в случай че тя не е
с приемливо качество и повредата не може да се квалифицира като сериозен
дефект. За гаранционно обслужване намерете най-близкия упълномощен
сервизен представител на картата в нашия указател на представителите в
BRIGGSandSTRATTON.COM или се обадете на 1300274447, изпратете имейл
или пишете на [email protected], Briggs & Stratton Australia
Pty Ltd, 1 Moorebank Avenue, Moorebank, NSW, Австралия, 2170.
Гаранционният период започва от датата на закупуване от първия потребител на
дребно или от крайния потребител за търговски цели и продължава за периода,
посочен в горната таблица. „Потребителска употреба“ означава употреба за
лични и домашни цели от краен потребител. „Търговска употреба“ означава всеки
друг вид употреба, включително за търговски цели, за генериране на доходи или
за отдаване под наем. След като веднъж двигателят е бил ползван за търговска
употреба, по-нататък той ще бъде считан като двигател за търговска употреба за
целите на тази гаранция.
За да получите гаранция на продуктите Briggs & Stratton, не е необходима
регистрация. Запазете касовата бележка като доказателство за покупката.
Ако при заявяване на гаранционно обслужване не предоставите
доказателство за датата на първоначално закупуване, за определяне
на гаранционния срок ще бъде използвана датата на производство на
продукта.
Относно Вашата гаранция
Тази ограничена гаранция покрива само употребен в двигателя дефектен
материал и/или изработка, а не замяната или възстановяването на средствата за
оборудването, към което двигателят може да е монтиран. Текущото техническо
обслужване, регулировки, настройки или нормалното износване и изхабяване не
са покрити от тази гаранция. Също така, гаранцията е невалидна, ако двигателят
е видоизменян, преобразуван или серийният му номер е повреден или отстранен.
Тази гаранция не покрива повреди или проблеми с работата на двигателите
причинени от:
1. използването на части, които не са Briggs & Stratton
2. експлоатиране на двигателя с недостатъчно, замърсено или неправилно
избрано масло за смазване;
3. Използване на замърсено или престояло гориво, на бензин, съдържащ
над 10% етанол, или използването на алтернативни горива като втечнен
пропан-бутан или метан за двигатели, които поначало не са проектирани/
произведени от Briggs & Stratton да работят с такива горива;
4. Замърсявания попаднали в двигателя вследствие на неправилно техническо
обслужване или неправилно сглобяване на въздушния филтър;
5. удряне на предмет с режещия нож на ротационната полева косачка,
разхлабени или неправилно поставени адаптери за ножовете, лопатките или
други устройства, свързани към коляновия вал, или от прекомерно натягане
на трапецовидния ремък;
6. Свързани части или сборки, като съединители, трансмисии, органи за
управление и други, които не са доставени от Briggs & Stratton;
7. прегряване, дължащо се на окосена трева, на замърсяване или отломки, или
на гнезда на гризачи, които запушват или задръстват охлаждащите пластини
или кожуха на маховика, или работа на двигателя без достатъчно охлаждане;
8. прекомерна вибрация, причинена от превишени обороти, хлабав монтаж на
двигателя, хлабави или небалансирани ножове или перки, или неправилно
свързване на елементите на оборудването към коляновия вал;
9. неправилна употреба, липса на редовно техническо обслужване, неправилно
транспортиране, маневриране или складиране на оборудването или
неправилен монтаж на двигателя.
Гаранционното обслужване се предоставя само чрез упълномощените сервизни
представители на Briggs & Stratton. Намерете най-близкия упълномощен
сервизен представител на картата в нашия указател на представителите в
BRIGGSandSTRATTON.COM или като се обадите на 1-800-444-7774 (в САЩ).
80114782(Версия A)
19
Not for reproduction

Obecné informace
Tato příručka obsahuje bezpečnostní informace o nebezpečí a rizicích, která souvisí
smotorem, a jak ji předcházet.Obsahuje i pokyny, jak řádně motor používat a jak se něj
starat.Je důležité, abyste si tyto pokyny přečetli, porozuměli jim a dodržovali je. Návod
si uschovejte pro budoucí potřebu.
POZNÁMKA:Obrázky a ilustrace v tomto návodu slouží pouze pro referenční účely
a mohou se lišit od vašeho specifického modelu. Použijte obrázky, které odpovídají
konfiguraci vašeho motoru. V případě nutnosti kontaktujte autorizované servisní
středisko.
Zapište si datum zakoupení, model motoru, typové a kódové číslo a sériové číslo motoru
pro náhradní díly. Tato čísla jsou na motoru. Vizčást Funkce a ovládací prvky.
Datum zakoupení
Model motoru– typ– označení
Sériové číslo motoru
Kontaktní údaje evropské kanceláře
Pokud jde odotazy ohledně emisí vEvropě, obraťte se prosím na naši evropskou
kancelář na adrese:
Max-Born-Straße 2, 68519 Viernheim, Německo.
Emisní norma V (5) evropské unie (EU):
Hodnoty oxidu uhličitého (CO2)
Hodnoty oxidu uhličitého pro motory Briggs & Stratton se schváleným certifikátem EU
najdete tak, že do vyhledávacího okna na webu BriggsandStratton.com zadáte CO2.
Bezpečnost obsluhy
Bezpečností výstražné symboly asignální slova
Bezpečnostní varovná značka uvádí bezpečnostní informace o rizicích, která
mohou vést ke zranění osob. Signální slovo (NEBEZPEČÍ, VAROVÁNÍ nebo POZOR)
upozorňuje na pravděpodobnost a možnost vážnosti poškození. Výstražný symbol se
navíc používá k zobrazení typu rizika.
NEBEZPEČÍ ukazuje riziko, které, jestliže se mu nevyvarujete, povede ke smrti nebo
vážnému poranění.
VAROVÁNÍ ukazuje na riziko, které, jestliže se mu nevyvarujete, může vést ke smrti
nebo vážnému poranění.
POZOR ukazuje na riziko, které, jestliže se mu nevyvarujete, může vést ke menšímu
či středně závažnému poranění.
UPOZORNĚNÍoznačuje informace považované za důležité, ale nesouvisející sriziky.
Výstražné symboly a jejich význam
Bezpečnostní informace o
rizicích, která mohou vést k
poraněním.
Před provozem či
prováděním servisu
jednotky si přečtěte návod
k obsluze.
Riziko požáru Riziko výbuchu
Nebezpečí zásahu
elektrickým proudem
Riziko toxických plynů
Riziko horkého povrchu Nebezpečí zpětného rázu
Riziko amputace –
pohyblivé součásti
Hladina paliva – maximum
Nepřeplňujte
Bezpečnostní upozornění
VAROVÁNÍ
Motory značky Briggs & Stratton® nejsou konstruovány pro pohánění následujících
zařízení a nesmějí být tedy takto používány: vozítka, motokáry, dětská, rekreační nebo
sportovní terénní vozidla (ATV), motocykly, vznášedla, letecké výrobky nebo vozidla
používaná v soutěžích, které společnost Briggs & Stratton neschválila. Informace
o soutěžních a závodních výrobcích naleznete na adrese www.briggsracing.com.
Informace o používání ve čtyřkolkách a ATV vozidlech side-by-side získáte v Power
Application Center, středisku pro aplikaci motorů společnosti Briggs & Stratton,
tel. 1-866-927-3349. Nesprávné použití motoru by mohlo vést ke smrti či vážnému
poranění.
Informace o recyklaci
Veškeré kartony, krabice, použitý olej abaterie recyklujte
vsouladu spříslušnými předpisy.
Funkce a ovládací prvky
Ovládací prvky motoru
Porovnejte písmena štítku na obrázcích 1, 2 a 3 s ovládacími prvky motoru1 v
následujícím seznamu:
A. Identifikační čísla motoru Model - Typ - Kód
B. Palivová nádrž a zátka
C. Vzduchový filtr, vysoká montáž
D. Vzduchový filtr, nízká montáž
E. Držadlo kabelu startéru
F. Měrka oleje, horní
G. Měrka oleje, dolní(je-li nainstalována)
H. Otvor pro plnění oleje
I. Vypouštěcí zátka oleje
J. Tlumič, kryt tlumiče (je-li nainstalován), lapač jisker (je-li nainstalován)
K. Elektronické ovládání akcelerátoru (je-li nainstalováno)
L. Zkontrolujte indikátor motoru (je-li nainstalován)
M. Kryt skříně ventilátoru
N. Spínač s klíčem (je-li ve výbavě)
1 Některé motory a zařízení jsou vybaveny dálkovými ovladači. Popis umístění a funkce
tohoto dálkového ovládání najdete v příručce k zařízení.
Symboly ovládání motoru a jejich význam
Rychlost motoru –
RYCHLE
Rychlost motoru –
POMALU
Motor – ZASTAVIT Motor – SPUSTIT
Motor – ZAPNUTO
20
Not for reproduction
Pagina se încarcă...
Pagina se încarcă...
Pagina se încarcă...
Pagina se încarcă...
Pagina se încarcă...
Pagina se încarcă...
Pagina se încarcă...
Pagina se încarcă...
Pagina se încarcă...
Pagina se încarcă...
Pagina se încarcă...
Pagina se încarcă...
Pagina se încarcă...
Pagina se încarcă...
Pagina se încarcă...
Pagina se încarcă...
Pagina se încarcă...
Pagina se încarcă...
Pagina se încarcă...
Pagina se încarcă...
Pagina se încarcă...
Pagina se încarcă...
Pagina se încarcă...
Pagina se încarcă...
Pagina se încarcă...
Pagina se încarcă...
Pagina se încarcă...
Pagina se încarcă...
Pagina se încarcă...
Pagina se încarcă...
Pagina se încarcă...
Pagina se încarcă...
Pagina se încarcă...
Pagina se încarcă...
Pagina se încarcă...
Pagina se încarcă...
Pagina se încarcă...
Pagina se încarcă...
Pagina se încarcă...
Pagina se încarcă...
Pagina se încarcă...
Pagina se încarcă...
Pagina se încarcă...
Pagina se încarcă...
Pagina se încarcă...
Pagina se încarcă...
Pagina se încarcă...
Pagina se încarcă...
Pagina se încarcă...
Pagina se încarcă...
Pagina se încarcă...
Pagina se încarcă...
Pagina se încarcă...
Pagina se încarcă...
Pagina se încarcă...
Pagina se încarcă...
Pagina se încarcă...
Pagina se încarcă...
Pagina se încarcă...
Pagina se încarcă...
Pagina se încarcă...
Pagina se încarcă...
Pagina se încarcă...
Pagina se încarcă...
Pagina se încarcă...
Pagina se încarcă...
Pagina se încarcă...
Pagina se încarcă...
Pagina se încarcă...
Pagina se încarcă...
Pagina se încarcă...
Pagina se încarcă...
Pagina se încarcă...
Pagina se încarcă...
Pagina se încarcă...
Pagina se încarcă...
Pagina se încarcă...
Pagina se încarcă...
Pagina se încarcă...
Pagina se încarcă...
-
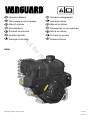 1
1
-
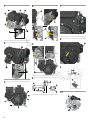 2
2
-
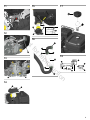 3
3
-
 4
4
-
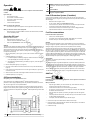 5
5
-
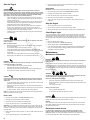 6
6
-
 7
7
-
 8
8
-
 9
9
-
 10
10
-
 11
11
-
 12
12
-
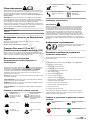 13
13
-
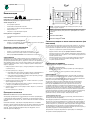 14
14
-
 15
15
-
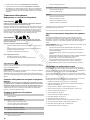 16
16
-
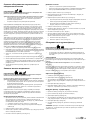 17
17
-
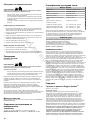 18
18
-
 19
19
-
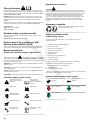 20
20
-
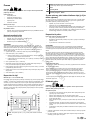 21
21
-
 22
22
-
 23
23
-
 24
24
-
 25
25
-
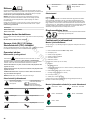 26
26
-
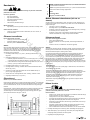 27
27
-
 28
28
-
 29
29
-
 30
30
-
 31
31
-
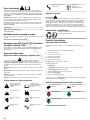 32
32
-
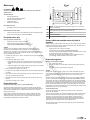 33
33
-
 34
34
-
 35
35
-
 36
36
-
 37
37
-
 38
38
-
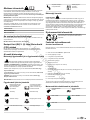 39
39
-
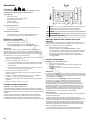 40
40
-
 41
41
-
 42
42
-
 43
43
-
 44
44
-
 45
45
-
 46
46
-
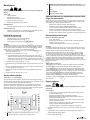 47
47
-
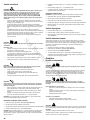 48
48
-
 49
49
-
 50
50
-
 51
51
-
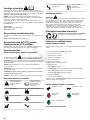 52
52
-
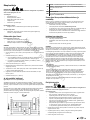 53
53
-
 54
54
-
 55
55
-
 56
56
-
 57
57
-
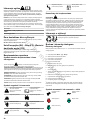 58
58
-
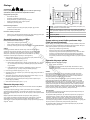 59
59
-
 60
60
-
 61
61
-
 62
62
-
 63
63
-
 64
64
-
 65
65
-
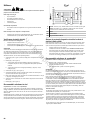 66
66
-
 67
67
-
 68
68
-
 69
69
-
 70
70
-
 71
71
-
 72
72
-
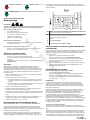 73
73
-
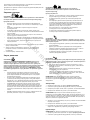 74
74
-
 75
75
-
 76
76
-
 77
77
-
 78
78
-
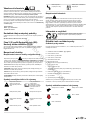 79
79
-
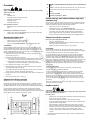 80
80
-
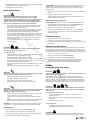 81
81
-
 82
82
-
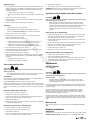 83
83
-
 84
84
-
 85
85
-
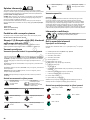 86
86
-
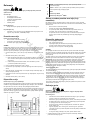 87
87
-
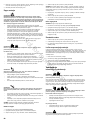 88
88
-
 89
89
-
 90
90
-
 91
91
-
 92
92
-
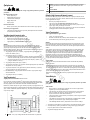 93
93
-
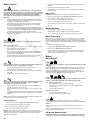 94
94
-
 95
95
-
 96
96
-
 97
97
-
 98
98
-
 99
99
-
 100
100


Simplicity MANUAL, OPERATOR'S Manual de utilizare
- Tip
- Manual de utilizare
în alte limbi
Lucrări înrudite
-
Simplicity MANUAL, OPERATOR'S Manual de utilizare
-
Simplicity 150112-2409-B9 Manual de utilizare
-
Simplicity 130G32-0031-H1 Manual de utilizare
-
Simplicity ENG, MDL 100000 130000 Manual de utilizare
-
-
-
Simplicity 613477-0282-J1 Manual de utilizare
-
Simplicity 126352-0049-B8 Manual de utilizare
-