
EN User manual 1
BG Ръководство за потребителя 11
CS Příručka pro uživatele 23
HU Felhasználói kézikönyv 33
KK Қолданушының нұсқасы 44
MK Упатство за користење 56
PL Instrukcja obsługi 68
RO Manual de utilizare 79
RU Руководство пользователя 90
SK Príručka užívateľa 103
SQ Manuali i përdorimit 114
UK Посібник користувача 125
1 2
A
B
D
F
E
G
H
C
I
J
K
© 2020 Koninklijke Philips N.V.
All rights reserved.
3000 055 05371
AC0819/AC0820
AC0830

CLOSEOPEN
CLOSEOPEN
3
11
5
13
9
6
14
10
4
12
8
77

1EN
English
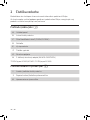
Contents
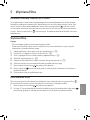
1 Important ���������������������������������������������������������������������������������������2
Safety ������������������������������������������������������������������������������������������������������������������������������2
2 Your air purier �����������������������������������������������������������������������������4
Product overview (g a) ���������������������������������������������������������������������������������������4
Controls overview (g b) ��������������������������������������������������������������������������������������4
3 Using the air purier ��������������������������������������������������������������������5
Understanding the air quality light ���������������������������������������������������������������������5
Installing the lter ������������������������������������������������������������������������������������������������������5
Connecting power ������������������������������������������������������������������������������������������������������5
Turning on and o ������������������������������������������������������������������������������������������������������5
Changing the mode setting ������������������������������������������������������������������������������������6
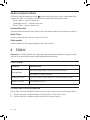
4 Cleaning �����������������������������������������������������������������������������������������6
Cleaning schedule ����������������������������������������������������������������������������������������������������� 6
Cleaning the body of the air purier ������������������������������������������������������������������� 6
Cleaning the air quality sensor ����������������������������������������������������������������������������� 7
Cleaning the surface of the lter �������������������������������������������������������������������������� 7
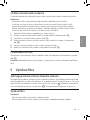
5 Replacing the lter ����������������������������������������������������������������������� 7
Understanding the healthy air protect lock ����������������������������������������������������� 7
Replacing the lter ����������������������������������������������������������������������������������������������������8
Filter reset ��������������������������������������������������������������������������������������������������������������������� 8
6 Storage �������������������������������������������������������������������������������������������8
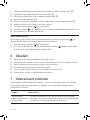
7 Troubleshooting ���������������������������������������������������������������������������9
8 Guarantee and service ��������������������������������������������������������������� 10
Order parts or accessories ������������������������������������������������������������������������������������ 10
9 Notices ������������������������������������������������������������������������������������������10
Electromagnetic elds (EMF) ������������������������������������������������������������������������������� 10
Recycling ���������������������������������������������������������������������������������������������������������������������10

2 EN
1 Important
Safety
Read this user manual carefully before you use the appliance, and save it for future reference�
Danger
• Do not clean the appliance with water, any other liquid, or a
(ammable) detergent to avoid electric shock and/or a re hazard�
• Do not spray any ammable materials such as insecticides or fragrance
around the appliance�
Warning
• Check if the voltage indicated on the appliance corresponds to the local
power voltage before you connect the appliance�
• If the power cord is damaged, you must have it replaced by Philips, a
service center authorized by Philips, or similarly qualied persons in
order to avoid a hazard�
• Do not use the appliance if the adaptor, the power cord, or the
appliance itself is damaged�
• Only use the approved 2-pin plug adapter (KA1801A-2400750EU)
provided with the appliance�
• This appliance can be used by children aged from 8 years and above
and persons with reduced physical, sensory or mental capabilities or
lack of experience and knowledge if they have been given supervision
or instruction concerning use of the appliance in a safe way and
understand the hazards involved�
• Children shall not play with the appliance�
• Do not block the air inlet and outlet�
• Do not place any items on top of the air outlet, or in front of the air
inlet�
• Make sure that foreign objects do not fall into the appliance through
the air outlet�

3EN
English
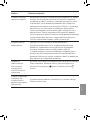
Caution
• This appliance is not a substitute for proper ventilation, regular vacuum
cleaning, or use of an extractor hood or fan while cooking�
• Always place and use the appliance on a dry, stable, level, and
horizontal surface�
• Leave at least 20cm free space around the appliance and leave at least
30cm free space above the appliance�
• Do not sit or stand on the appliance� Do not place anything on top of
the appliance�
• Do not place the appliance directly below an air conditioner to prevent
condensation from dripping onto the appliance�
• Only use the original Philips lters specially intended for this appliance�
Do not use any other lters�
• Combustion of the lter may cause irreversible human hazard and/
or jeopardize other lives� Do not use the lter as fuel or for similar
purpose�
• Avoid knocking against the appliance (the air inlet and outlet in
particular) with hard objects�
• Do not insert your ngers or objects into the air outlet or the air inlet to
prevent physical injury or malfunctioning of the appliance�
• Do not use this appliance when you have used indoor smoke-type
insect repellents or in places with oily residues, burning incense, or
chemical fumes�
• Do not use the appliance near gas appliances, heating devices or
replaces�
• Always turn o the air purier rst, then unplug adapter from wall
outlet, when you want to moving, cleaning appliance, replacing the
lters or carry out other maintenance�
• The appliance is only intended for household use under normal
operating conditions�
• Do not use the appliance in wet surroundings or in surroundings with
high ambient temperatures, such as the bathroom, toilet, or kitchen, or
in a room with major temperature changes�
• The appliance does not remove carbon monoxide (CO) or radon
(Rn)� It cannot be used as a safety device in case of accidents with
combeustion processes and hazardous chemicals�

4 EN
2 Your air purifier
Congratulations on your purchase, and welcome to Philips!
To fully benet from the support that Philips oers, register your product at
www�philips�com/welcome�
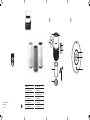
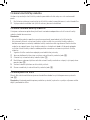
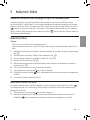
Product overview (g a)
A Control panel
B Air quality sensor
C NanoProtect lter Series 2 (FY0194, FY0293*)
D Base
E Air outlet
F Power on/o button
G Power socket
H 2 Pin plug adapter (KA1801A-2400750EU)
*FY0194 is for AC0819/AC0820, FY0293 is for AC0830�
Controls overview (g b)
I Air quality light
J Mode switch/Filter reset button
K Filter replacement alert

5EN
English
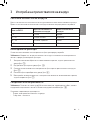
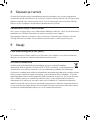
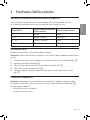
3 Using the air purifier
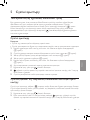
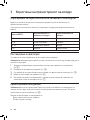
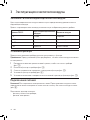
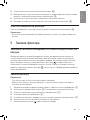
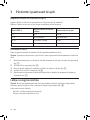
Understanding the air quality light
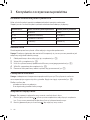
The color of air quality light corresponds to the ambient air quality�
The brightness of air quality light reects the current running mode�
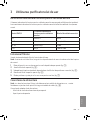
PM2�5 level Air quality light color Air quality level
≤12 Blue Good
13-35 Blue-purple Fair
36-55 Purple-red Poor
>55 Red Very poor
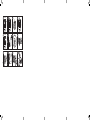
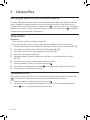
Installing the lter
Remove all packaging of the lter before use�
Note: Make sure the air purier is unplugged from the electrical outlet before installing the
lter�
1 Rotate the base anti-clockwise to remove it from the appliance (g c)�
2 Pull the lter out from the appliance (g d)�
3 Remove all packaging materials of the air purication lter (g e)�
4 Put the lter back into the appliance (g f)�
5 Reattach the base and rotate it clockwise to fasten the base (g g)�
Connecting power
Note: Risk of electric shock! When you unplug the AC power cord, always pull the plug from
the socket� Never pull the cord (g h)�
Connect the power adapter to:
• First, the power socket on the appliance�
• Then, the wall outlet�
Turning on and o
Note: For optimum purication performance, close doors and windows�
1 Press the power button on the back of the air purier to switch on�
» The air purier operates in the auto mode by default�
2 Press the power button again to switch o the air purier�

6 EN
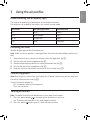
Changing the mode setting
You can choose Auto mode, Turbo mode or the Sleep mode by pressing the mode switch
button (g i)� The brightness of air quality light reects the current running mode:
• Sleep mode-lowest brightness
• Auto mode-mid level brightness
• Turbo mode-highest level brightness
Auto mode
In Auto mode, the appliance selects the fan speed in accordance with the ambient air quality�
Turbo mode
In Turbo mode, the air purier operates on the highest speed�
Sleep mode
In Sleep mode, the air purier operates quietly at a low speed�
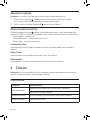
4 Cleaning
Note: Never use abrasive, aggressive, or ammable cleaning agents such as bleach or
alcohol to clean any part of the appliance�
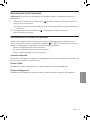
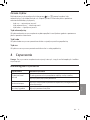
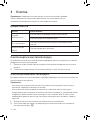
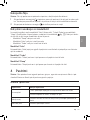
Cleaning schedule
Frequency Cleaning method
When necessary
Wipe the surface of the appliance with a soft dry cloth
Clean the air outlet cover
Every two months Clean the air quality sensor with a dry cotton swab
Every four weeks Clean the surface of the lter
Cleaning the body of the air purier
Regularly clean the inside and outside of the air purier to prevent dust from collecting�
1 Use a soft, dry cloth to clean both the interior and exterior of the air purier�
2 The air outlet can also be cleaned with a dry, soft cloth�

7EN
English
Cleaning the air quality sensor
Clean the air quality sensor every two months for optimal functioning of the appliance�
Note:
• If the air purier is used in a dusty environment, it may need to be cleaned more often�
• If the humidity level in the room is very high, condensation may develop on the air quality
sensor and the air quality light may indicate a poorer air quality even though the air quality
is actually good� If this occurs, clean the air quality sensor or use the air purier on a
manual speed setting�
1 Switch o the air purier and unplug from the power socket�
2 Clean the inlet and outlet of the air quality sensor with a soft brush (g j)�
3 Open the air quality sensor cover (g k)�
4 Clean the air quality sensor, the dust inlet and the dust outlet with a damp cotton swab
(g l)�
5 Dry all parts thoroughly with a dry cotton swab�
6 Reattach the air quality sensor cover (g m)�
Cleaning the surface of the lter
Wipe the surface of the lter with soft wet cloth or clean the surface of the lter with a
vacuum cleaner (g n)�
Note: if you use a high power/ industrial vacuum cleaner, it may damage the lter�
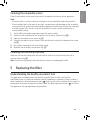
5 Replacing the filter
Understanding the healthy air protect lock
This appliance is equipped with the healthy air protect lock to make sure that the
NanoProtect lter is in optimal condition when the appliance is operating� When the lter is
almost expired, the lter replacement alert ( ) lights up red, which indicates that it needs to
be replaced� If you do not replace the lter in time, the lter replacement alert ( ) will ash�
The appliance will stop operating and get locked�

8 EN
Replacing the lter
Note:
• The lter is not washable or reusable�
• Always turn o the air purier and unplug from the electrical outlet before replacing the
lter�
1 Rotate the base anti-clockwise to remove it from the appliance (g c)�
2 Pull the lter out from the appliance� Discard the used lter (g d)�
3 Remove all packaging materials of the new lter (g e)�
4 Put the lter into the appliance (g f)�
5 Reattach the base and rotate it clockwise to fasten the base (g g)�
6 Put the plug of the air purier in the power socket�
7 Press the power button to switch on the appliance�
8 Press and hold for 3 seconds to reset the lter lifetime counter�
9 Wash your hands thoroughly after replacing the lter�
Filter reset
You can replace the lter even before lter replacement alert ( ) displays on the screen�
After replacing a lter, you need to reset the lter lifetime counter manually�
1 Press the power button to turn on the appliance�
2 Within 10 seconds after power on, press and hold the mode switch button for
5 seconds to reset the lter lifetime counter�
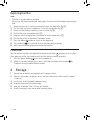
6 Storage
1 Turn o the air purier and unplug from the power socket�
2 Clean the air purier, air quality sensor and the surface of the lter (see the chapter
“Cleaning”)�
3 Let all parts air dry thoroughly before storing�
4 Wrap the lter in air tight plastic bags�
5 Store the air purier, lter in a cool, dry location�
6 Always thoroughly wash hands after handling a lter�

9EN
English
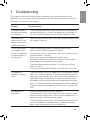
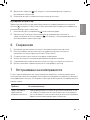
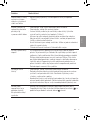
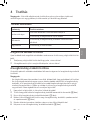
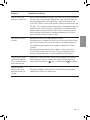
7 Troubleshooting
This chapter summarizes the most common problems you could encounter with the
appliance� If you are unable to solve the problem with the information below, contact the
Consumer Care Center in your country�
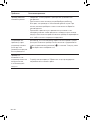
Problem Possible solution
The appliance does
not work even though
it is plugged in�
• The lter replacement alert is on but you have not replaced the
corresponding lter� As a result, the appliance is now locked� In
this case, replace the lter and reset the lter lifetime counter�
The airow that
comes out of the air
outlet is signicantly
weaker than before�
• The surface of the lter is dirty� Clean the surface of the lter (see
the chapter “Cleaning”)�
The air quality does
not improve, even
though the appliance
has been operating
for a long time�
• Check if the packing material is removed from the lter�
• Make sure that the lter is properly installed�
• The air quality sensor is dirty or wet� Clean the air quality sensor
(See the chapter “Cleaning”)�
• Room size is large or the outdoor air quality is poor�
For optimum purication performance, please close the doors
and windows when operating the air purier�
• There are indoor pollution resources� For instances, smoking,
cooking, incense�
• Filter reaches the end of life� Replace the lter with a new one�
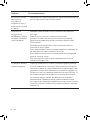
The appliance
produces a strange
smell�
• The rst few times you use the appliance, it may produce a plastic
smell� This is normal� However, if the appliance produces a burnt
smell even if removing the lter, contact your Philips dealer or an
authorized Philips service center� The lter may produce smell
after being used for a while because of the absorption of indoor
gases� It’s recommended that you reactivate the lter by putting it
in direct sunlight for repeated use� If odor still exists, replace the
lter�
The appliance is
extra loud�
• Check if the packing of the lter is removed�
• The appliance will run in high speed when the air quality is poor,
which will causes higher noises� When using the appliance in a
bedroom at night, choose the Sleep speed�
• if anything drops into air outlet, it may also cause abnormal loud
sounds� Immediate turn o appliance, turn appliance upside
down, to get foreign objectives out of appliance�

10 EN
Problem Possible solution
The appliance still
indicates that I need
to replace a lter, but
I already did�
• Perhaps you did not reset the lter lifetime counter� Switch on the
appliance� Then press and hold the mode switch button ( ) for
3 seconds until disappears�
Appliance keeps
o, but air quality
light blinks for one
minute�
• The appliance has malfunctions� Contact the Consumer Care
Center in your country�
8 Guarantee and service
If you need information or if you have a problem, please visit the Philips website at
www�philips�com or contact the Philips Consumer Care Center in your country (you can nd
its phone number in the worldwide guarantee leaet)� If there is no Consumer Care Center in
your country, go to your local Philips dealer�
Order parts or accessories
If you have to replace a part or want to purchase an additional part, go to your Philips dealer
or visit www�philips�com/support�
If you have problems obtaining the parts, please contact the Philips Consumer Care Center in
your country (you can nd its phone number in the worldwide guarantee leaet)�
9 Notices
Electromagnetic elds (EMF)
This Philips appliance complies with all applicable standards and regulations regarding
exposure to electromagnetic elds�
Recycling
This symbol means that this product shall not be disposed of with normal household
waste (2012/19/EU)�
Follow your country’s rules for the separate collection of electrical and electronic products�
Correct disposal helps prevent negative consequences for the environment and human
health�

11BG
Български
Съдържание
1 Важно ��������������������������������������������������������������������������������������������12
Безопасност ��������������������������������������������������������������������������������������������������������������12
2 Вашият пречиствател на въздух ������������������������������������������ 14
Общ преглед на продукта (фиг� a) ��������������������������������������������������������������14
Общ преглед на начина на управление (фиг� b) ����������������������������������14
3 Употреба на пречиствателя на въздух ������������������������������� 15
Светлина за качество на въздуха ������������������������������������������������������������������15
Монтиране на филтъра ���������������������������������������������������������������������������������������15
Свързване към захранването ��������������������������������������������������������������������������15
Включване и изключване ���������������������������������������������������������������������������������� 16
Смяна на настройката за режим �������������������������������������������������������������������� 16
4 Почистване ���������������������������������������������������������������������������������� 17
График за почистване ������������������������������������������������������������������������������������������17
Почистване на корпуса на пречиствателя на въздух ���������������������������17
Почистване на сензора за качество на въздуха ��������������������������������������17
Почистване на повърхността на филтъра ������������������������������������������������� 18
5 Смяна на филтъра �������������������������������������������������������������������� 18
Заключване за защита на здравословния въздух �������������������������������� 18
Смяна на филтъра ������������������������������������������������������������������������������������������������� 18
Нулиране на филтър �������������������������������������������������������������������������������������������� 19
6 Съхранение �������������������������������������������������������������������������������� 19
7 Отстраняване на неизправности ����������������������������������������� 19
8 Гаранция и обслужване �����������������������������������������������������������21
Поръчка на части или принадлежности �����������������������������������������������������21
9 Бележки ��������������������������������������������������������������������������������������22
Електромагнитни полета (EMП) ���������������������������������������������������������������������22
Рециклиране ������������������������������������������������������������������������������������������������������������22

12 BG
1 Важно
Безопасност
Преди да използвате уреда, прочетете внимателно това ръководство за потребителя и
го запазете за справка в бъдеще�
Опасност
• Не почиствайте уреда с вода, друга течност или (запалим)
почистващ препарат, за да избегнете токов удар и/или опасност от
пожар�
• Не пръскайте запалими материали, като например инсектициди
или аромати, около уреда�
Предупреждение
• Преди да включите уреда в електрически контакт, проверете дали
посоченото върху уреда напрежение отговаря на това на местната
електрическа мрежа�
• С оглед предотвратяване на опасност, при повреда в захранващия
кабел той трябва да бъде сменен от Philips, оторизиран от Philips
сервиз или лица с подходяща квалификация�
• Не използвайте уреда, ако адаптера, захранващият кабел или
самият уред е повреден�
• Използвайте само одобрения адаптер с 2 пина
(KA1801A-2400750EU) предоставен с уреда�
• Този уред може да се използва от деца на възраст над 8 години и
от лица с намалени физически възприятия, умствени недостатъци
или без опит и познания, ако са инструктирани за безопасна
употреба с уреда или са под наблюдение с цел гарантиране
на безопасна употреба и ако са им разяснени евентуалните
опасности�
• Не позволявайте на деца да си играят с уреда�
• Не блокирайте отворите за приток на въздух и за изходящ въздух�
• Не поставяйте предмети върху отвора за изходящ въздух или
пред отвора за приток на въздух�
• Уверете се, че външните предмети не попадат в уреда през отвора
за изходящ въздух�

13BG
Български
Внимание
• Този уред не е заместител на добрата вентилация, редовното
почистване с прахосмукачка или използването на аспиратор или
вентилатор по време на готвене�
• Винаги поставяйте и използвайте уреда върху суха, стабилна,
равна и хоризонтална повърхност�
• Осигурете поне 20 см свободно пространство около уреда и поне
30 см свободно пространство над уреда�
• Не сядайте и не стойте върху уреда� Не поставяйте нищо върху
уреда�
• Не поставяйте уреда директно под климатик, за да предотвратите
кондензация от капки върху уреда�
• Използвайте само оригинални филтри на Philips, които са
предназначени специално за този уред� Не използвайте никакви
други филтри�
• Изгарянето на филтъра може да причини необратима опасност за
човека и/или да застраши други животи� Не използвайте филтъра
като гориво или за подобна цел�
• Избягвайте удари с твърди предмети по уреда (особено по
отворите за приток на въздух и за изходящия въздух)�
• Не бъркайте с пръсти или предмети в отвора за изходящ въздух
или в отвора за приток на въздух, за да се предотврати физическо
нараняване или повреда на уреда�
• Не използвайте уреда, когато сте употребили стайни препарати
против насекоми на димна основа или на места с остатъци от
мазнина, горящи смоли или химически изпарения�
• Не използвайте уреда в близост до газови уреди, печки или
камини�
• Винаги първо изключвайте пречиствателя на въздух, след това
изключете адаптера от електрическия контакт, когато искате да
преместите или почистите уреда, да смените филтрите или да
извършите друга поддръжка�
• Уредът е предназначен само за домакински цели при нормални
условия на експлоатация�
• Не използвайте уреда на мокри места или места с висока околна
температура, като например в банята, тоалетната или кухнята, или
в помещение с големи температурни разлики�

14 BG
• Уредът не отстранява въглероден окис (CO) или радон (Rn)� Той не
може да се използва като устройство за безопасност в случай на
злополуки с горивни процеси и опасни химикали�
2 Вашият пречиствател на въздух
Поздравяваме ви за покупката и добре дошли във Philips!
За да се възползвате напълно от предлаганата от Philips поддръжка, регистрирайте
продукта си на www�philips�com/welcome�
Общ преглед на продукта (фиг� a)
A Контролен панел
B Сензор за качеството на въздуха
C Филтър NanoProtect Серия 2 (FY0194, FY0293*)
D База
E Изходяща въздушна струя
F Бутон за вкл�/изкл� на захранването
G Електрически контакт
H Адаптер с 2 пина (KA1801A-2400750EU)
* FY0194 е за AC0819/AC0820, FY0293 е за AC0830�
Общ преглед на начина на управление (фиг� b)
I Светлина за качество на въздуха
J Бутон за смяна на режим/нулиране на филтъра
K Предупреждение за резервен филтър

15BG
Български
3 Употреба на пречиствателя на въздух
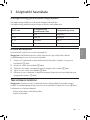
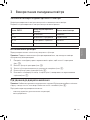
Светлина за качество на въздуха
Цветът на светлината за качество на въздуха показва качеството на околния въздух�
Яркостта на светлината за качество на въздуха показва текущия режим на работа�
Ниво на PM2�5
Цвят на светлината за
качество на въздуха
Ниво на качество на
въздуха
≤ 12 Синьо Добро
13 – 35 Синьо-лилаво Влошено
36 – 55 Лилаво-червено Лошо
> 55 Червено Много лошо
Монтиране на филтъра
Свалете всички опаковъчни материали от филтъра преди употреба�
Забележка: Уверете се, че пречиствателят на въздух е изключен от електрическия
контакт, преди да монтирате филтъра�
1 Завъртете основата обратно на часовниковата стрелка, за да я премахнете от
уреда (фиг� c)�
2 Издърпайте филтъра от уреда (фиг� d)�
3 Свалете всички опаковъчни материали от филтъра за пречистване на въздуха
(фиг� e)�
4 Поставете филтъра обратно в уреда (фиг� f)�
5 Монтирайте отново основата и я завъртете по посока на часовниковата стрелка,
за да я закрепите (фиг� g)�
Свързване към захранването
Забележка: Опасност от токов удар! Когато изключвате захранващия кабел, винаги
издърпвайте щепсела от контакта� Никога не дърпайте кабела (фиг� h)�
Свържете захранващия адаптер към:
• Първо, електрическия контакт на уреда�
• След това – контакта�

16 BG
Включване и изключване
Забележка: За оптимални характеристики на пречистването затворете вратите и
прозорците�
1 Натиснете бутона за захранване на задната част на пречиствателя на въздух, за
да го включите�
» Пречиствателят на въздух работи в автоматичен режим по подразбиране�
2 Натиснете отново бутона за захранване , за да изключите пречиствателя на
въздух�
Смяна на настройката за режим
Можете да изберете Автоматичен режим, Турбо режим или Спящ режим, като
докоснете бутона за смяна на режим (фиг� i)� Яркостта на светлината за
качеството на въздуха отразява текущия режим на работа:
• Спящ режим – най-ниска яркост
• Автоматичен режим – средна яркост
• Турбо режим – най-висока яркост
Автоматичен режим
В Автоматичен режим уредът избира оборотите на вентилатора в съответствие с
качеството на околния въздух�
Турбо режим
В режим турбо пречиствателят на въздуха работи на най-високи обороти�
Спящ режим
В Спящ режим пречиствателят на въздух работи тихо и на ниски обороти�

17BG
Български
4 Почистване
Забележка: Никога не използвайте абразивни, агресивни или запалими почистващи
препарати, като например белина или алкохол, за да почиствате която и да е част на
уреда�
График за почистване
Честота Метод на почистване
Когато е необходимо
Избърсвайте повърхността на уреда с мека и суха кърпа
Почиствайте капака на отвора с изходи за въздух
На всеки два месеца
Почиствайте сензора за качеството на въздуха със сух
памучен тампон
На всеки четири
седмици
Почиствайте повърхността на филтъра
Почистване на корпуса на пречиствателя на въздух
Редовно почиствайте вътрешната и външната част на пречиствателя на въздух, за да
предотвратите натрупването на прах�
1 Използвайте мека и суха кърпа за почистване отвън и отвътре на пречиствателя
на въздух�
2 Отворът за изходящ въздух може също да се почисти със суха и мека кърпа�
Почистване на сензора за качество на въздуха
Почиствайте сензора за качество на въздуха на всеки два месеца за оптимална работа
на уреда�
Забележка:
• Ако пречиствателят на въздух се използва в запрашена среда, може да се наложи да
се почиства по-често�
• Ако нивото на влажност в стаята е много високо, може да се появи кондензация
на сензора за качеството на въздуха и светлината за качеството на въздуха може
да покаже по-лошо качество на въздуха, въпреки че качеството на въздуха в
действителност е добро� Ако това се случи, почистете сензора за качеството на
въздуха или използвайте пречиствателя на въздух на ръчна настройка на скоростта�
1 Изключете пречиствателя на въздух и изключете щепсела от контакта�

18 BG
2 Почистете входа и изхода на сензора за качество на въздуха с мека четка (фиг� j)�
3 Отворете капака на сензора за качество на въздуха (фиг� k)�
4 Почистете сензора за качество на въздуха, входа и изхода за прах с навлажнен
памучен тампон (фиг� l)�
5 Подсушете напълно всички части със сух памучен тампон�
6 Поставете отново капака на сензора за качество на въздуха (фиг� m)�
Почистване на повърхността на филтъра
Избършете повърхността на филтъра с мек и мокър парцал или почистете
повърхността на филтъра с прахосмукачка (фиг� n)�
Забележка: Ако използвате високомощна/индустриална прахосмукачка, тя може да
повреди филтъра�
5 Смяна на филтъра
Заключване за защита на здравословния въздух
Този уред е снабден със защита за здравословен въздух, за да се гарантира, че
филтърът NanoProtect е в оптимално състояние, когато уредът работи� Когато
експлоатационният живот на филтъра за въздух изтича скоро, предупреждението за
смяна на филтър ( ) ще светне в червено, което значи, че трябва да се смени� Ако не
смените филтъра навреме, предупреждението за смяна на филтъра ( ) ще започне
да мига� Уредът ще спре да работи и ще се заключи�
Смяна на филтъра
Забележка:
• Филтърът не може да се мие или да се използва многократно�
• Винаги изключвайте пречиствателя на въздух и изваждайте щепсела от
електрическия контакт, преди да смените филтъра�
1 Завъртете основата обратно на часовниковата стрелка, за да я премахнете от
уреда (фиг� c)�
2 Издърпайте филтъра от уреда� Изхвърлете използвания филтър (фиг� d)�
3 Свалете всички опаковъчни материали на новия филтър (фиг� e)�
4 Поставете новия филтър в уреда (фиг� f)�
5 Монтирайте отново основата и я завъртете по посока на часовниковата стрелка, за
да я закрепите (фиг� g)�
6 Включете щепсела на пречиствателя на въздух в контакта�
7 Натиснете бутона за захранване , за да включите уреда�
Pagina se încarcă...
Pagina se încarcă...
Pagina se încarcă...
Pagina se încarcă...
Pagina se încarcă...
Pagina se încarcă...
Pagina se încarcă...
Pagina se încarcă...
Pagina se încarcă...
Pagina se încarcă...
Pagina se încarcă...
Pagina se încarcă...
Pagina se încarcă...
Pagina se încarcă...
Pagina se încarcă...
Pagina se încarcă...
Pagina se încarcă...
Pagina se încarcă...
Pagina se încarcă...
Pagina se încarcă...
Pagina se încarcă...
Pagina se încarcă...
Pagina se încarcă...
Pagina se încarcă...
Pagina se încarcă...
Pagina se încarcă...
Pagina se încarcă...
Pagina se încarcă...
Pagina se încarcă...
Pagina se încarcă...
Pagina se încarcă...
Pagina se încarcă...
Pagina se încarcă...
Pagina se încarcă...
Pagina se încarcă...
Pagina se încarcă...
Pagina se încarcă...
Pagina se încarcă...
Pagina se încarcă...
Pagina se încarcă...
Pagina se încarcă...
Pagina se încarcă...
Pagina se încarcă...
Pagina se încarcă...
Pagina se încarcă...
Pagina se încarcă...
Pagina se încarcă...
Pagina se încarcă...
Pagina se încarcă...
Pagina se încarcă...
Pagina se încarcă...
Pagina se încarcă...
Pagina se încarcă...
Pagina se încarcă...
Pagina se încarcă...
Pagina se încarcă...
Pagina se încarcă...
Pagina se încarcă...
Pagina se încarcă...
Pagina se încarcă...
Pagina se încarcă...
Pagina se încarcă...
Pagina se încarcă...
Pagina se încarcă...
Pagina se încarcă...
Pagina se încarcă...
Pagina se încarcă...
Pagina se încarcă...
Pagina se încarcă...
Pagina se încarcă...
Pagina se încarcă...
Pagina se încarcă...
Pagina se încarcă...
Pagina se încarcă...
Pagina se încarcă...
Pagina se încarcă...
Pagina se încarcă...
Pagina se încarcă...
Pagina se încarcă...
Pagina se încarcă...
Pagina se încarcă...
Pagina se încarcă...
Pagina se încarcă...
Pagina se încarcă...
Pagina se încarcă...
Pagina se încarcă...
Pagina se încarcă...
Pagina se încarcă...
Pagina se încarcă...
Pagina se încarcă...
Pagina se încarcă...
Pagina se încarcă...
Pagina se încarcă...
Pagina se încarcă...
Pagina se încarcă...
Pagina se încarcă...
Pagina se încarcă...
Pagina se încarcă...
Pagina se încarcă...
Pagina se încarcă...
Pagina se încarcă...
Pagina se încarcă...
Pagina se încarcă...
Pagina se încarcă...
Pagina se încarcă...
Pagina se încarcă...
Pagina se încarcă...
Pagina se încarcă...
Pagina se încarcă...
Pagina se încarcă...
Pagina se încarcă...
Pagina se încarcă...
Pagina se încarcă...
Pagina se încarcă...
Pagina se încarcă...
Pagina se încarcă...
Pagina se încarcă...
Pagina se încarcă...
-
 1
1
-
 2
2
-
 3
3
-
 4
4
-
 5
5
-
 6
6
-
 7
7
-
 8
8
-
 9
9
-
 10
10
-
 11
11
-
 12
12
-
 13
13
-
 14
14
-
 15
15
-
 16
16
-
 17
17
-
 18
18
-
 19
19
-
 20
20
-
 21
21
-
 22
22
-
 23
23
-
 24
24
-
 25
25
-
 26
26
-
 27
27
-
 28
28
-
 29
29
-
 30
30
-
 31
31
-
 32
32
-
 33
33
-
 34
34
-
 35
35
-
 36
36
-
 37
37
-
 38
38
-
 39
39
-
 40
40
-
 41
41
-
 42
42
-
 43
43
-
 44
44
-
 45
45
-
 46
46
-
 47
47
-
 48
48
-
 49
49
-
 50
50
-
 51
51
-
 52
52
-
 53
53
-
 54
54
-
 55
55
-
 56
56
-
 57
57
-
 58
58
-
 59
59
-
 60
60
-
 61
61
-
 62
62
-
 63
63
-
 64
64
-
 65
65
-
 66
66
-
 67
67
-
 68
68
-
 69
69
-
 70
70
-
 71
71
-
 72
72
-
 73
73
-
 74
74
-
 75
75
-
 76
76
-
 77
77
-
 78
78
-
 79
79
-
 80
80
-
 81
81
-
 82
82
-
 83
83
-
 84
84
-
 85
85
-
 86
86
-
 87
87
-
 88
88
-
 89
89
-
 90
90
-
 91
91
-
 92
92
-
 93
93
-
 94
94
-
 95
95
-
 96
96
-
 97
97
-
 98
98
-
 99
99
-
 100
100
-
 101
101
-
 102
102
-
 103
103
-
 104
104
-
 105
105
-
 106
106
-
 107
107
-
 108
108
-
 109
109
-
 110
110
-
 111
111
-
 112
112
-
 113
113
-
 114
114
-
 115
115
-
 116
116
-
 117
117
-
 118
118
-
 119
119
-
 120
120
-
 121
121
-
 122
122
-
 123
123
-
 124
124
-
 125
125
-
 126
126
-
 127
127
-
 128
128
-
 129
129
-
 130
130
-
 131
131
-
 132
132
-
 133
133
-
 134
134
-
 135
135
-
 136
136
-
 137
137
-
 138
138


în alte limbi
- slovenčina: Philips AC0830/10 Používateľská príručka
Lucrări înrudite
-
Philips AC1217/50 Manual de utilizare
-
Philips AC1215/50 Manual de utilizare
-
Philips AC3055/50 Manual de utilizare
-
-
Philips AC3854/50 Manual de utilizare
-
Philips Air Purifier Manual de utilizare
-
-
Philips AC0819/10 Ghid de inițiere rapidă
-
Philips AMF220 3-In-1 Purifier Fan and Heater Manual de utilizare
-