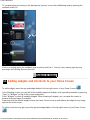
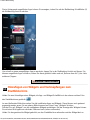
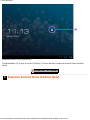
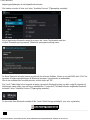
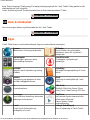
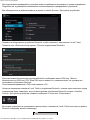
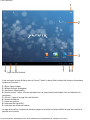
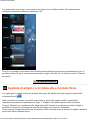
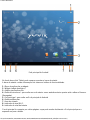
Yarvik TAB09-211 Manual de utilizare
- Categorie
- Comprimate
- Tip
- Manual de utilizare
Acest manual este potrivit și pentru

Yarvik GoTab Manual
file:///Volumes/Product_Data/TAB09-211/Sent_artwork/Manual/internet/Yarvik/Manual/index.html[07-03-13 16:28:32]
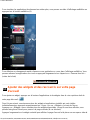
Manual Manuál Наръчник
Handleiding Manuál Manual
Anleitung Manual Руководство
Manuel Manuell Посібник користувача
Manual Håndbok Οδηγίες Χρήσης
Manuale Priročnik
Manual Priručnik
Instrukcja obsługi Leírás

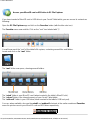
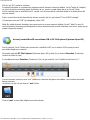
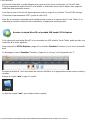
Yarvik Tablet Manual
file:///Volumes/Product_Data/TAB09-211/Sent_artwork/Manual/internet/Yarvik/Manual/manual_en.html[07-03-13 16:28:47]
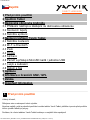
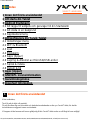
Index
SELECT LANGUAGE
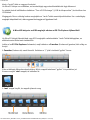
1 Prior to first use
2 Tablet Startup
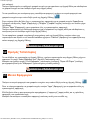
3 Android Home Screen
3.1 Adding widgets and shortcuts to your Home Screen
3.2 Setting a Wallpaper
3.3 Application Menu
4 Setting up your Yarvik Tablet
4.1 Settings Menu
4.2 WiFi & Bluetooth
4.3 Sound
4.4 Display
4.5 Apps
4.6 Storage & MicroSD/USB Drive Access
4.7 Language & input
4.8 Date & time
5 Apps
6 GNU/GPL Licensing Information
7 Warranty Statement
8 Important Information
1 Prior to first use
Dear user,
Thank you for purchasing our product.
To ensure you a quick and convenient use of your new Yarvik Tablet, please read these instructions carefully
prior to use.

Yarvik Tablet Manual
file:///Volumes/Product_Data/TAB09-211/Sent_artwork/Manual/internet/Yarvik/Manual/manual_en.html[07-03-13 16:28:47]
We hope you will absolutely enjoy your Yarvik Tablet for the longest time possible!
Please note: • Your Yarvik Tablet is a high precision electronic product, do not try to disassemble the
Tablet, as this will void your warranty and may result in malfunctioning of the device;
• Avoid strong beating of or to the product;
• Avoid using the Tablet in a high or low temperature environment, or in any environment
where the device can get in contact with moisture, dust or magnetic fields;
• Do not expose the Tablet to strong sunlight for an extended period of time;
• Don’t operate the touch screen of the Tablet with sharp objects, as this may result in
scratching the screen surface;
• Using connected headphones on the Tablet for too long and/or setting the audio volume
up too high when using headphones may cause serious hearing damage;
• Do not cross the road, drive a motor vehicle or bicycle while using the Tablet with
headphones to avoid traffic accidents;
• Only use permitted batteries, chargers and accessories with your Yarvik Tablet. The use
of any other products with the Tablet can be dangerous and may violate the warranty
regulations;
• Only use a slightly wet cotton cloth to clean the Tablet, and only use water to wetten the
cotton cloth. The Tablet should not be cleaned with any sort of (glass) cleaning aid.
You may go ahead and use your Yarvik Tablet right out of the box, without charging the battery first.
It is best for the battery to first run on the charge left in it, and to be fully recharged once it’s completely
drained for the first time.
If the Tablet isn’t switching on right out of the box, the battery is already completely drained and you should
ofcourse recharge it first.
Return to index
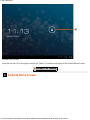
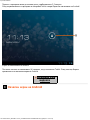
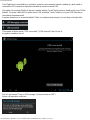
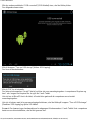
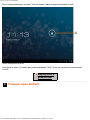
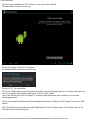
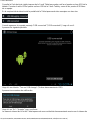
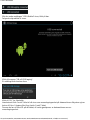
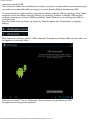
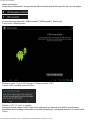
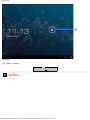
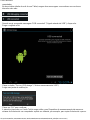
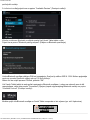
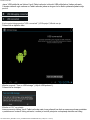
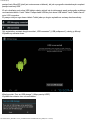
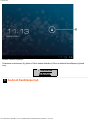
2 Tablet Startup
When you first power on your Yarvik Tablet, you will be presented the startup sequence.
The very first startup may take a while, approximately 2-3 minutes.
After the startup sequence the Tablet has completed starting up and you will be presented the Android Lock
Screen.


Yarvik Tablet Manual
file:///Volumes/Product_Data/TAB09-211/Sent_artwork/Manual/internet/Yarvik/Manual/manual_en.html[07-03-13 16:28:47]
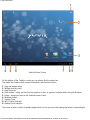
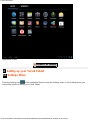
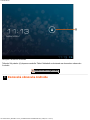
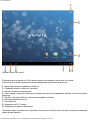
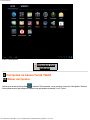
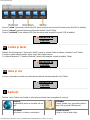
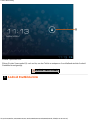
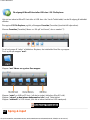
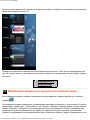
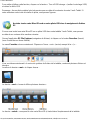
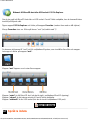
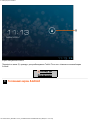
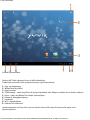
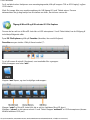
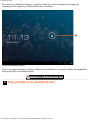
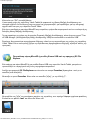
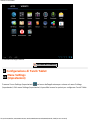
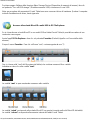
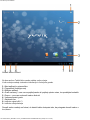
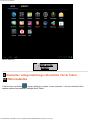
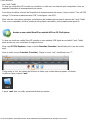
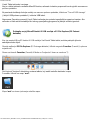
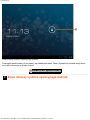
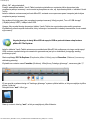
Android Home Screen
On the bottom of the Tablet’s screen you can always find the status bar.
The status bar contains both system information and function buttons.
1 - App and widget menu
2 - Widget (analog clock)
3 - App Shortcuts
4 - Back button - brings you back to the previous screen, or previous website when using the Browser
5 - Home - brings you back to the Android Home Screen
6 - Multitask button
7 - System Time
8 - Wi-Fi Signal Indicator
9 - Battery Level Indicator
The home screen consists of multiple pages which can be accessed by swiping the home screen left/right.

Yarvik Tablet Manual
file:///Volumes/Product_Data/TAB09-211/Sent_artwork/Manual/internet/Yarvik/Manual/manual_en.html[07-03-13 16:28:47]
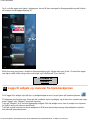
To see what apps are running in the background, you can access the multitasking view by pressing the
multitask button (6).
Click on a running app in the multitask view to quickly switch to it. You can close running apps by long
pressing it and clicking "Remove from list".
Return to index
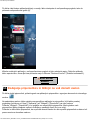
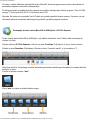
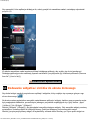
3.1 Adding widgets and shortcuts to your Home Screen
To add a widget, press the app and widget button in the top right corner of your Home Screen:
In the following screen, you can find all the installed apps and widgets, both seperately viewable by pressing
"Apps" or "Widgets" on top of the screen respectively.
Press "Widgets" to view all available widgets. When showing all widgets, you can swipe the screen to
browse to the next page (if available).
Press and hold the desired widget to have the Home Screen show up and release the widget to any empty
spot on the home screen.
To add a shortcut to any app, press the app and widget button in the top right corner of your Home Screen:

Yarvik Tablet Manual
file:///Volumes/Product_Data/TAB09-211/Sent_artwork/Manual/internet/Yarvik/Manual/manual_en.html[07-03-13 16:28:47]
In the following screen, you can find all the installed apps and widgets, both seperately viewable by pressing
"Apps" or "Widgets" on top of the screen respectively.
Press "Apps" to view all installed apps.
Press and hold the desired app to have the home screen show up and release the shortcut to any empty
spot on the Home Screen.
To remove widgets and/or app shortcuts from your Home Screen, press and hold them and drag them to the
appeared "Remove" dustbin icon on top of your Home Screen.
Return to index
3.2 Setting a Wallpaper
To change the Home Screen wallpaper, press and hold the Home Screen until the “Select Wallpaper from”
menu comes up.
You can choose from "Live Wallpapers" (animated wallpapers), "Super-HD Player" (photo/video gallery) or
"Wallpapers" (default static images).
Return to index
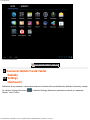
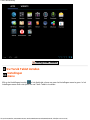
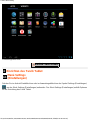
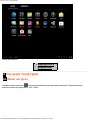
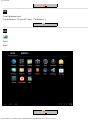
3.3 Application Menu
Press the app and widget button in the top right corner of your Home Screen:
When the system displays the widgets, press "Apps" to view all installed apps.
Here you can find all the pre-installed programs or “apps” as well as additional apps that you install.
You can launch any app by just pressing the corresponding icon.

Yarvik Tablet Manual
file:///Volumes/Product_Data/TAB09-211/Sent_artwork/Manual/internet/Yarvik/Manual/manual_en.html[07-03-13 16:28:47]
Application Screen
Return to index
4 Setting up your Yarvik Tablet
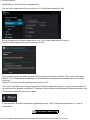
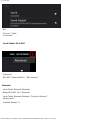
4.1 Settings Menu
Press the Settings icon in the Application Menu to enter the Settings menu. In the Settings menu you
can find the options to set up your Yarvik Tablet.

Yarvik Tablet Manual
file:///Volumes/Product_Data/TAB09-211/Sent_artwork/Manual/internet/Yarvik/Manual/manual_en.html[07-03-13 16:28:47]
Settings Menu
We will go through the most important parts:
Return to index
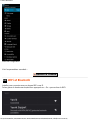
4.2 WiFi & Bluetooth
Wi-Fi
Set up a connection with a wireless Wi-Fi network.
Slide the On/Off button to "On" to activate Wi-Fi.

Yarvik Tablet Manual
file:///Volumes/Product_Data/TAB09-211/Sent_artwork/Manual/internet/Yarvik/Manual/manual_en.html[07-03-13 16:28:47]
The available Wi-Fi networks appear in the network list at the right screen. Tap the network of your choice. If
the network is secured, you’re prompted to enter the network security key.
Press the “Connect” button and the Tablet is connecting to the network.
Once “Connected” appears underneath the network name and the wireless reception icon is shown in the
bottom status bar, you’re successfully connected to the wireless network.
Viewing your Yarvik Tablet's Wi-Fi MAC address
While in the Wi-Fi settings screen, click on the menu button in the top right corner.
Press "Advanced" in the unfolding menu.
Your Wi-Fi MAC address is displayed in the following "Advanced Wi-Fi" screen under "MAC address".
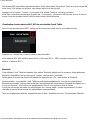
Bluetooth
Your Yarvik Tablet tablet is equipped with a built-in Bluetooth module for connecting with Bluetooth
compatible peripherals, like mice, keyboards, speakers and headphones.
Slide the Bluetooth On/Off button to "On" to activate Bluetooth.
Once activated, your Yarvik Tablet tablet will automatically start searching for nearby Bluetooth devices. You
can always manually search for Bluetooth devices by clicking "Search for Devices" in the top right corner of
the screen.
It may be required for the to be connected peripherals to be put in "pairing mode". Please refer to the
instructions manual of the concerning peripherals for this.

Yarvik Tablet Manual
file:///Volumes/Product_Data/TAB09-211/Sent_artwork/Manual/internet/Yarvik/Manual/manual_en.html[07-03-13 16:28:47]
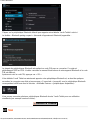
All discovered devices will appear in the "Available Devices" list:
Click on the discovered Bluetooth device to pair your Yarvik Tablet tablet with it.
The "Bluetooth pairing request" window will appear:
Most Bluetooth devices require a pin code to connect. This code usually is 0000 or 1234. Please refer to the
instructions manual of your Bluetooth device if the pin code is different.
After you have entered the correct pin code, press "OK".
Your Yarvik Tablet tablet will now start pairing with your Bluetooth device, and after a few seconds the
connection will be completed, showing a "Connected" message underneath the concerning Bluetooth device
in the "Available Devices" list:
You can connect multiple Bluetooth devices to your Yarvik Tablet tablet for use at the same time (e.g.
mouse and keyboard).
Return to index
4.3 Sound

Yarvik Tablet Manual
file:///Volumes/Product_Data/TAB09-211/Sent_artwork/Manual/internet/Yarvik/Manual/manual_en.html[07-03-13 16:28:47]
Here you can change the audio volume of the Tablet, otherwise possible via the volume buttons on the
Tablet itself and the volume buttons in the top status bar.
Return to index
4.4 Display
Here you can change the brightness of the display, font sizes and the auto sleep time.
Please note that the higher the display brightness, the higher the energy consumption. This will drain your
battery substantially faster.
If you don’t want the display to auto rotate as you tilt the Tablet, you can enable/disable this functionality in
the Auto-rotate screen setting.
Return to index
4.5 Apps
Here you can manage applications that are installed on your Yarvik Tablet.
You can click apps that you have installed to see the app info and uninstall them if needed by using the
“Uninstall” button.
Please note that the preinstalled default applications (like e.g. the calculator) cannot be uninstalled.
Return to index
4.6 Storage & MicroSD/USB Drive Access
Shows you the internal memory information. When a MicroSD card is present, you can also find the memory
information of the inserted card here.
Connecting your Yarvik Tablet to a PC or Mac by USB
You can connect your Yarvik Tablet to a PC or Mac using the provided USB cable.
When connected to a computer, you can access the Tablet's internal memory and, if present, an inserted
MicroSD card as standard USB Mass Storage Device.
Please refer to the printed Quick Start Guide of your Yarvik Tablet to determine the tablet's USB slave port.
Connect the USB cable to the USB slave port of your Yarvik Tablet and to a free USB port on your computer.
In the bottom right of your Tablet's screen, two messages will appear shortly after each other:

Yarvik Tablet Manual
file:///Volumes/Product_Data/TAB09-211/Sent_artwork/Manual/internet/Yarvik/Manual/manual_en.html[07-03-13 16:28:47]
Once the second message "USB connected" appears, click on it.
The following screen will appear:
Click on the button "Turn on USB storage".
A notification window will appear:
Click on "OK" to confirm.
The internal memory of your Yarvik Tablet will now appear as Mass Storage Drive in your computer's file
system, and can be used e.g. to copy files from and to your Yarvik Tablet.
If you have a MicroSD card in your tablet, the card will be recognized by the computer as a second Mass
Storage Drive.
To stop using the Mass Storage Device function, click on the "Turn off USB storage" button and remove the
USB cable.
Note: There are no hardware drivers needed to access the Yarvik Tablet's memory. In the case your
computer prompts for any driver installation, you can simply ignore it.

Yarvik Tablet Manual
file:///Volumes/Product_Data/TAB09-211/Sent_artwork/Manual/internet/Yarvik/Manual/manual_en.html[07-03-13 16:28:47]
Access your MicroSD card or USB drive in ES File Explorer
If you have inserted a MicroSD card or USB drive in your Yarvik Tablet tablet, you can access its contents as
following:
Open the ES File Explorer app and click on the Favorites button (with the blue star icon).
The Favorites menu now unfolds. Click on the "root" icon labeled with "/":
You will now reach the "root" of the tablet's file system, containing several files and folders.
Locate and click on the "mnt" folder:
The "mnt" folder now opens, showing several folders:
The "extsd" folder is your MicroSD card (when inserted in the tablet's MicroSD slot).
The "sdcard" folder is the internal memory of your Yarvik Tablet tablet.
The "usbhost1" folder is your USB drive (when inserted in the tablet's USB host port).
You can, when available, also use the extsd1 and usbhost1 shortcuts in the earlier mentioned Favorites
menu for quick access to your MicroSD card and USB drive respectively.
Return to index

Yarvik Tablet Manual
file:///Volumes/Product_Data/TAB09-211/Sent_artwork/Manual/internet/Yarvik/Manual/manual_en.html[07-03-13 16:28:47]
4.7 Language & input
Use “Select language” to select the display language of your Yarvik Tablet. This applies to all the screen
texts in the entire system.
Under “Android keyboard” you may setup the onscreen keyboard of your Tablet.
Return to index
4.8 Date & time
Here you can setup the date and the time for your Yarvik Tablet.
Return to index
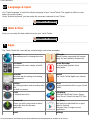
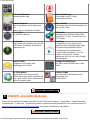
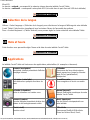
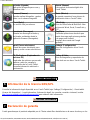
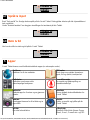
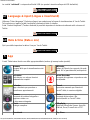
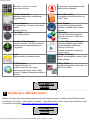
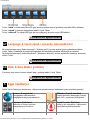
5 Apps
The Yarvik Tablet will come with pre installed Apps (see below examples).
Browser
The webbrowser for viewing web sites.
FBReader
Ebook Reader supporting the formats:
epub, fb2 and (partially) mobipocket.
Calculator
Calculator with some simple scientific
features.
Sound Recorder
To record and playback voice
notes/audio.
Calendar
Calendar app for making and viewing
appointments.
Manual
This Yarvik Tablet digital user manual.
Camera
For making pictures and recording video
with
the built-in camera.
Music
To play music/audio files on your Yarvik
Tablet.
Clock
A simple alarm clock.
OfficeSuite
MobiSoft OfficeSuite Viewer. Opens
Word, Excel, PowerPoint and PDF files.
Downloads
Shows you both current and archived
downloads from the Browser
application.
Play Store
App Market to download free or paid
apps for Android.
Requires (free) Google account
registration.
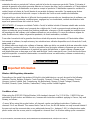
Email Settings

Yarvik Tablet Manual
file:///Volumes/Product_Data/TAB09-211/Sent_artwork/Manual/internet/Yarvik/Manual/manual_en.html[07-03-13 16:28:47]
Email client for sending and receiving
email.
The menu to set up your Yarvik Tablet.
ES File Explorer
File Explorer to browse/open the folders
and documents on your Yarvik Tablet.
Please see below for additional info.
Gallery & Video
The all-in-one photo viewer and video
player of
your Yarvik Tablet.
Return to index
6 GNU/GPL Licensing Information
Please consult the legal information available on your Yarvik Tablet under Settings – About tablet – Legal
information (internet connection required) or visit http://source.android.com/source/licenses.html
for more
information.
Return to index
7 Warranty Statement
Yarvik warrants that the product purchased by Customer shall be free from defects in workmanship or
materials for a period of 2 years from the date of purchase by Customer. If, at any time during the warranty
period, the product has a defect in workmanship or material, Customer should return the product to the
dealer where the product has been purchased. Dealer shall repair or replace it (at Yarvik's sole option) within
a reasonable period of time. An original invoice is required as proof of the purchase date. Yarvik's option with
respect to this matter shall be final.
This warranty does not cover defects or malfunctions resulting from software transfers, misuse, abusive
operation, tampering, negligence, improper use, insufficient care or any act beyond the control of Yarvik.
IMPORTANT:
When you buy a Tablet tablet from Yarvik, your tablet will be provided to you with the latest
stable firmware available for this specific model, at the time the unit was manufactured. Yarvik will not
provide support to products that have otherwise been modified by the end user, nor does Yarvik support
programming modifications to the firmware and software used in its products, and if any such modifications
have been made, all warranties shall be automatically void.
To avoid invalidating the warranty offered hereunder, Customer should use only the official software,
applications and upgrades available from Yarvik's website at www.yarvik.com.
No other software or firmware should be used, as such use will automatically void all warranties and support.
Yarvik does not support the use of any software or firmware other than the software or firmware that was
installed on the product by the manufacturer or that is available from Yarvik's official web site at
www.yarvik.com. Yarvik explicitly declines to respond to any inquiries regarding unauthorized modifications,
unauthorized software, and unauthorized firmware.

Yarvik Tablet Manual
file:///Volumes/Product_Data/TAB09-211/Sent_artwork/Manual/internet/Yarvik/Manual/manual_en.html[07-03-13 16:28:47]
Return to index
8 Important Information
Wireless LAN-Regulatory information
Depending on the model, the wireless LAN built-in into tablet devices can only be used in the following
countries: Austria, Belgium, Bulgaria, Czech Republic, Denmark, Finland, France, Germany, Greece,
Hungary, Iceland, Ireland, Italy, Luxembourg, the Netherlands, Norway, Poland, Portugal, Romania,
Slovakia, Slovenia, Spain, Sweden, Switzerland, Turkey and the United Kingdom.
Conditions of use
When using the IEEE 802.11b/g/n Wireless LAN standard, channels 1 to 13 (2.4 GHz...2.4835 GHz) are
selectable for both indoor and outdoor use, however with restrictive conditions applying in France, Italy and
Norway, as follows:
• France: When using this product indoor, all channels can be used without restrictions. Outdoor only
channels 1 to 6 are allowed. This means that in Peer-to-Peer, the WLAN feature can only be used outside if
the peer sets up the communication on an authorized channel (i.e., between 1 & 6). In infrastructure mode,
please make sure the access point is configured to a channel from 1 to 6 before setting up the connection.
• Italy: Use of the RLAN network is governed: Disposal of Old Electrical & Electronic
- with respect to private use, by the Legislative Decree of 1.8.2003, no. 259 (“Code of Electronic
Communications”). In particular Article 104 indicates when the prior obtainment of a general authorization is
required and Art. 105 indicates when free use is permitted;
- with respect to the supply to the public of the WLAN access to telecom networks and services, by the
Ministerial Decree 28.5.2003, as amended, and Art. 25 (general authorization for electronic communications
networks and services) of the Code of electronic communications.
• Norway: Use of this radio equipment is not allowed in the geographical area within a radius of 20 km from
the centre of Ny-Ålesund, Svalbard.
WEEE Symbol Information
Correct Disposal of This product (Waste Electrical & Electronic Equipment).
(Applicable in the European Union and other European countries with separate collection systems).
This marking shown on the product or its literature indicates that it should not be disposed with other
household wasted at the end of its working life. To prevent possible harm to the environment or human
health from uncontrolled waste disposal, please separate this from other types of wastes and recycle it
responsibly to promote the sustainable reuse of material resources.

Yarvik Tablet Manual
file:///Volumes/Product_Data/TAB09-211/Sent_artwork/Manual/internet/Yarvik/Manual/manual_en.html[07-03-13 16:28:47]
Household users should contact either the retailer where they purchased this product, or their local
government office, for details of where and how they can take this item for environmentally safe recycling.
Business users should contact their supplier and check the terms and conditions of the purchase contract.
This product should not be mixed with other commercial wastes of disposal.
Disposal of waste batteries (applicable in the European Union and other European countries with
separate collection systems)
Either of the symbols shown next may appear on the battery or on the packaging to indicate that the battery
provided with this product shall not be treated as household waste. On certain batteries this symbol might be
used in combination with a chemical symbol. The chemical symbols for mercury (Hg) or lead (Pb) are added
if the battery contains more than 0.0005% mercury or 0.004% lead. By ensuring these batteries are disposed
of correctly, you will help prevent potentially negative consequences for the environment and human health
which could otherwise be caused by inappropriate waste handling of the battery. The recycling of the
materials will help to conserve natural resources. In case of products that for safety, performance or data
integrity reasons require a permanent connection with an incorporated battery, this battery should be
replaced by qualified service staff only. To ensure that the battery will be treated properly, hand over the
product at end-of-life to the applicable collection point for the recycling of electrical and electronic
equipment.
For all other batteries, please view the section on how to remove the battery from the product safely. Hand
the battery over to the applicable collection point for the recycling of waste batteries. For more detailed
information about recycling of this product or battery, please contact your local Local government Office,
your household waste disposal service or the shop where you purchased the product.
When travelling to and within the United States of America, please be aware that the U.S. Department of
Transportation (DOT) recently published new regulations that apply to passengers travelling with lithium
metal batteries and lithium-ion batteries.
For detailed information, visit http://safetravel.dot.gov/whats_new_batteries.html
.
Safety Information
Yarvik Tablet Tablet device
• Yarvik is not responsible for any interference that you may experience or that may be caused when
operating this device.
• Warning: This apparatus must be earthed.

Yarvik Tablet Manual
file:///Volumes/Product_Data/TAB09-211/Sent_artwork/Manual/internet/Yarvik/Manual/manual_en.html[07-03-13 16:28:47]
Opening or dismantling the main unit or any of its accessories, for whatever reason, could lead to damages
that are not covered by the guarantee.
• To avoid electrical shock, do not open the cabinet. Refer servicing to qualified personnel only.
• To prevent fire or shock hazard, do not expose your tablet device or any of its accessories to rain or
moisture.
• Do not use or store your tablet device in a location subject to heat sources, such as radiators or air ducts;
direct sunlight; excessive dust; moisture or rain; mechanical vibration or shock; strong magnets or speakers
that are not magnetically shielded; excessively high and low temperatures; and high humidity.
• Turning off your tablet device with the power button does not disconnect the device completely from mains
voltage. To disconnect it completely, unplug the AC adapter or the power cord from mains. The socket-outlet
shall be installed near the equipment and shall be easily accessible.
• Audio and picture distortion may occur if this equipment is positioned in close proximity to any equipment
emitting electromagnetic radiation.
• This apparatus is also designed for IT power system with phase to phase voltage 230V, for customers in
Norway.
• Observe the following precautions to provide adequate air circulation and to ensure normal reliable
operation:
- Do not use the tablet device and/or the AC adapter while covered or wrapped in cloth. Ensure the AC
adapter operates in a clear environment.
- Turn off the tablet device before putting the device into a bag or a carrying case.
• Do not use your tablet device directly on your lap. The temperature of the base of the unit will rise during
normal operation and over time could result in discomfort or burns.
• Do not use your tablet device while walking. Listening to music with headphones or watching the LCD
screen while walking may lead to an unexpected accident and result in personal injuries.
• Using connected headphones on the tablet device for too long and/or setting the audio volume up too high
when using headphones may cause serious hearing damage.
• Avoid strong beating of or to the product.
• Don’t operate the touch screen of the tablet device with sharp objects, as this may result in scratching the
screen surface.
• Only use permitted batteries, chargers and accessories with your tablet device. The use of any other
products with the device can be dangerous and may violate the warranty regulations.
• Only use a slightly wet cotton cloth to clean the device, and only use water to wetten the cotton cloth. The
tablet device should not be cleaned with any sort of (glass) cleaning aid.
Wireless functionality
• If radio interference with other devices occurs while using your tablet device, do not use the wireless

Yarvik Tablet Manual
file:///Volumes/Product_Data/TAB09-211/Sent_artwork/Manual/internet/Yarvik/Manual/manual_en.html[07-03-13 16:28:47]
functionality. Use of the wireless functionality may cause a malfunction of the devices, resulting in an
accident.
• In some situations or environments, the use of the wireless functionality might be restricted by the
proprietor of the building or responsible representatives of the organization, for example on board airplanes,
in hospitals or in any other environment where the risk of interference with other devices or services is
perceived or identified as harmful. If you are uncertain about the policy applying to the use of wireless
functionality in a specific organization or environment, you are encouraged to first ask for authorization prior
to switching it on. Consult your physician or the manufacturer of personal medical devices (pacemakers,
hearing aids, etc.) regarding any restrictions on the use of wireless functionality.
• If using wireless functionality near a pacemaker, make sure it is at least 19 inches / 50 cm away from the
pacemaker.
• Due to the transmission and reception properties of wireless communications, data can occasionally be lost
or delayed. This can be due to the variation in radio signal strength that results from changes in the
characteristics of the radio transmission path. Yarvik will not be held responsible for damages of any kind
resulting from the delays or errors in data transmitted or received via wireless functionality, or failure of
wireless functionality to transmit or receive such data.
• If the equipment does cause harmful interference to radio/TV reception, which can be determined by turning
the equipment off and on, the user is encouraged to try to correct the interference by one or more of the
following measures: reorient or relocate the receiving antenna, increase the distance between the sender
and the receiver, consult the dealer or an experienced radio/TV technician for help. Yarvik will not be
responsible for any radio/TV interference nor for any other undesired effect.
Wireless LAN Security
Creating security settings for the Wireless LAN is extremely important. Yarvik assumes no responsibility for
any security problems that may arise from the use of the Wireless LAN.
Battery pack
Do not charge the battery pack in any way other than as described in the Start guide or as designated by
Yarvik in writing.
AC adapter
• It is highly recommended that you use a genuine Yarvik AC adapter supplied by Yarvik for your product.
• This AC adapter is intended for use with the tablet device IT products only.
• Do not place the AC adapter in contact with your skin. Remove the AC adapter away from your body if it
becomes warm and causes discomfort.
RoHS
Pagina se încarcă...
Pagina se încarcă...
Pagina se încarcă...
Pagina se încarcă...
Pagina se încarcă...
Pagina se încarcă...
Pagina se încarcă...
Pagina se încarcă...
Pagina se încarcă...
Pagina se încarcă...
Pagina se încarcă...
Pagina se încarcă...
Pagina se încarcă...
Pagina se încarcă...
Pagina se încarcă...
Pagina se încarcă...
Pagina se încarcă...
Pagina se încarcă...
Pagina se încarcă...
Pagina se încarcă...
Pagina se încarcă...
Pagina se încarcă...
Pagina se încarcă...
Pagina se încarcă...
Pagina se încarcă...
Pagina se încarcă...
Pagina se încarcă...
Pagina se încarcă...
Pagina se încarcă...
Pagina se încarcă...
Pagina se încarcă...
Pagina se încarcă...
Pagina se încarcă...
Pagina se încarcă...
Pagina se încarcă...
Pagina se încarcă...
Pagina se încarcă...
Pagina se încarcă...
Pagina se încarcă...
Pagina se încarcă...
Pagina se încarcă...
Pagina se încarcă...
Pagina se încarcă...
Pagina se încarcă...
Pagina se încarcă...
Pagina se încarcă...
Pagina se încarcă...
Pagina se încarcă...
Pagina se încarcă...
Pagina se încarcă...
Pagina se încarcă...
Pagina se încarcă...
Pagina se încarcă...
Pagina se încarcă...
Pagina se încarcă...
Pagina se încarcă...
Pagina se încarcă...
Pagina se încarcă...
Pagina se încarcă...
Pagina se încarcă...
Pagina se încarcă...
Pagina se încarcă...
Pagina se încarcă...
Pagina se încarcă...
Pagina se încarcă...
Pagina se încarcă...
Pagina se încarcă...
Pagina se încarcă...
Pagina se încarcă...
Pagina se încarcă...
Pagina se încarcă...
Pagina se încarcă...
Pagina se încarcă...
Pagina se încarcă...
Pagina se încarcă...
Pagina se încarcă...
Pagina se încarcă...
Pagina se încarcă...
Pagina se încarcă...
Pagina se încarcă...
Pagina se încarcă...
Pagina se încarcă...
Pagina se încarcă...
Pagina se încarcă...
Pagina se încarcă...
Pagina se încarcă...
Pagina se încarcă...
Pagina se încarcă...
Pagina se încarcă...
Pagina se încarcă...
Pagina se încarcă...
Pagina se încarcă...
Pagina se încarcă...
Pagina se încarcă...
Pagina se încarcă...
Pagina se încarcă...
Pagina se încarcă...
Pagina se încarcă...
Pagina se încarcă...
Pagina se încarcă...
Pagina se încarcă...
Pagina se încarcă...
Pagina se încarcă...
Pagina se încarcă...
Pagina se încarcă...
Pagina se încarcă...
Pagina se încarcă...
Pagina se încarcă...
Pagina se încarcă...
Pagina se încarcă...
Pagina se încarcă...
Pagina se încarcă...
Pagina se încarcă...
Pagina se încarcă...
Pagina se încarcă...
Pagina se încarcă...
Pagina se încarcă...
Pagina se încarcă...
Pagina se încarcă...
Pagina se încarcă...
Pagina se încarcă...
Pagina se încarcă...
Pagina se încarcă...
Pagina se încarcă...
Pagina se încarcă...
Pagina se încarcă...
Pagina se încarcă...
Pagina se încarcă...
Pagina se încarcă...
Pagina se încarcă...
Pagina se încarcă...
Pagina se încarcă...
Pagina se încarcă...
Pagina se încarcă...
Pagina se încarcă...
Pagina se încarcă...
Pagina se încarcă...
Pagina se încarcă...
Pagina se încarcă...
Pagina se încarcă...
Pagina se încarcă...
Pagina se încarcă...
Pagina se încarcă...
Pagina se încarcă...
Pagina se încarcă...
Pagina se încarcă...
Pagina se încarcă...
Pagina se încarcă...
Pagina se încarcă...
Pagina se încarcă...
Pagina se încarcă...
Pagina se încarcă...
Pagina se încarcă...
Pagina se încarcă...
Pagina se încarcă...
Pagina se încarcă...
Pagina se încarcă...
Pagina se încarcă...
Pagina se încarcă...
Pagina se încarcă...
Pagina se încarcă...
Pagina se încarcă...
Pagina se încarcă...
Pagina se încarcă...
Pagina se încarcă...
Pagina se încarcă...
Pagina se încarcă...
Pagina se încarcă...
Pagina se încarcă...
Pagina se încarcă...
Pagina se încarcă...
Pagina se încarcă...
Pagina se încarcă...
Pagina se încarcă...
Pagina se încarcă...
Pagina se încarcă...
Pagina se încarcă...
Pagina se încarcă...
Pagina se încarcă...
Pagina se încarcă...
Pagina se încarcă...
Pagina se încarcă...
Pagina se încarcă...
Pagina se încarcă...
Pagina se încarcă...
Pagina se încarcă...
Pagina se încarcă...
Pagina se încarcă...
Pagina se încarcă...
Pagina se încarcă...
Pagina se încarcă...
Pagina se încarcă...
Pagina se încarcă...
Pagina se încarcă...
Pagina se încarcă...
Pagina se încarcă...
Pagina se încarcă...
Pagina se încarcă...
Pagina se încarcă...
Pagina se încarcă...
Pagina se încarcă...
Pagina se încarcă...
Pagina se încarcă...
Pagina se încarcă...
Pagina se încarcă...
Pagina se încarcă...
Pagina se încarcă...
Pagina se încarcă...
Pagina se încarcă...
Pagina se încarcă...
Pagina se încarcă...
Pagina se încarcă...
Pagina se încarcă...
Pagina se încarcă...
Pagina se încarcă...
Pagina se încarcă...
Pagina se încarcă...
Pagina se încarcă...
Pagina se încarcă...
Pagina se încarcă...
Pagina se încarcă...
Pagina se încarcă...
Pagina se încarcă...
Pagina se încarcă...
Pagina se încarcă...
Pagina se încarcă...
Pagina se încarcă...
Pagina se încarcă...
Pagina se încarcă...
Pagina se încarcă...
Pagina se încarcă...
Pagina se încarcă...
Pagina se încarcă...
Pagina se încarcă...
Pagina se încarcă...
Pagina se încarcă...
Pagina se încarcă...
Pagina se încarcă...
Pagina se încarcă...
Pagina se încarcă...
Pagina se încarcă...
Pagina se încarcă...
Pagina se încarcă...
Pagina se încarcă...
Pagina se încarcă...
Pagina se încarcă...
Pagina se încarcă...
Pagina se încarcă...
Pagina se încarcă...
Pagina se încarcă...
Pagina se încarcă...
Pagina se încarcă...
Pagina se încarcă...
Pagina se încarcă...
Pagina se încarcă...
Pagina se încarcă...
Pagina se încarcă...
Pagina se încarcă...
Pagina se încarcă...
Pagina se încarcă...
Pagina se încarcă...
Pagina se încarcă...
Pagina se încarcă...
Pagina se încarcă...
Pagina se încarcă...
Pagina se încarcă...
Pagina se încarcă...
Pagina se încarcă...
Pagina se încarcă...
Pagina se încarcă...
Pagina se încarcă...
Pagina se încarcă...
Pagina se încarcă...
Pagina se încarcă...
Pagina se încarcă...
Pagina se încarcă...
Pagina se încarcă...
Pagina se încarcă...
Pagina se încarcă...
Pagina se încarcă...
Pagina se încarcă...
Pagina se încarcă...
Pagina se încarcă...
Pagina se încarcă...
Pagina se încarcă...
Pagina se încarcă...
Pagina se încarcă...
Pagina se încarcă...
Pagina se încarcă...
Pagina se încarcă...
Pagina se încarcă...
Pagina se încarcă...
Pagina se încarcă...
Pagina se încarcă...
Pagina se încarcă...
Pagina se încarcă...
Pagina se încarcă...
Pagina se încarcă...
Pagina se încarcă...
Pagina se încarcă...
Pagina se încarcă...
Pagina se încarcă...
Pagina se încarcă...
Pagina se încarcă...
Pagina se încarcă...
Pagina se încarcă...
Pagina se încarcă...
Pagina se încarcă...
Pagina se încarcă...
Pagina se încarcă...
Pagina se încarcă...
Pagina se încarcă...
Pagina se încarcă...
Pagina se încarcă...
Pagina se încarcă...
Pagina se încarcă...
Pagina se încarcă...
Pagina se încarcă...
Pagina se încarcă...
Pagina se încarcă...
Pagina se încarcă...
Pagina se încarcă...
Pagina se încarcă...
Pagina se încarcă...
Pagina se încarcă...
Pagina se încarcă...
Pagina se încarcă...
Pagina se încarcă...
Pagina se încarcă...
Pagina se încarcă...
Pagina se încarcă...
Pagina se încarcă...
Pagina se încarcă...
Pagina se încarcă...
Pagina se încarcă...
Pagina se încarcă...
Pagina se încarcă...
Pagina se încarcă...
Pagina se încarcă...
Pagina se încarcă...
Pagina se încarcă...
Pagina se încarcă...
Pagina se încarcă...
Pagina se încarcă...
Pagina se încarcă...
Pagina se încarcă...
Pagina se încarcă...
Pagina se încarcă...
Pagina se încarcă...
Pagina se încarcă...
Pagina se încarcă...
Pagina se încarcă...
Pagina se încarcă...
Pagina se încarcă...
Pagina se încarcă...
Pagina se încarcă...
Pagina se încarcă...
Pagina se încarcă...
Pagina se încarcă...
Pagina se încarcă...
Pagina se încarcă...
Pagina se încarcă...
Pagina se încarcă...
Pagina se încarcă...
Pagina se încarcă...
Pagina se încarcă...
Pagina se încarcă...
Pagina se încarcă...
Pagina se încarcă...
Pagina se încarcă...
Pagina se încarcă...
Pagina se încarcă...
Pagina se încarcă...
Pagina se încarcă...
Pagina se încarcă...
Pagina se încarcă...
Pagina se încarcă...
Pagina se încarcă...
Pagina se încarcă...
Pagina se încarcă...
Pagina se încarcă...
Pagina se încarcă...
Pagina se încarcă...
Pagina se încarcă...
Pagina se încarcă...
Pagina se încarcă...
Pagina se încarcă...
Pagina se încarcă...
Pagina se încarcă...
Pagina se încarcă...
Pagina se încarcă...
Pagina se încarcă...
Pagina se încarcă...
Pagina se încarcă...
Pagina se încarcă...
Pagina se încarcă...
Pagina se încarcă...
Pagina se încarcă...
Pagina se încarcă...
Pagina se încarcă...
Pagina se încarcă...
Pagina se încarcă...
Pagina se încarcă...
Pagina se încarcă...
Pagina se încarcă...
Pagina se încarcă...
Pagina se încarcă...
Pagina se încarcă...
Pagina se încarcă...
Pagina se încarcă...
Pagina se încarcă...
Pagina se încarcă...
Pagina se încarcă...
Pagina se încarcă...
Pagina se încarcă...
Pagina se încarcă...
Pagina se încarcă...
Pagina se încarcă...
Pagina se încarcă...
Pagina se încarcă...
Pagina se încarcă...
Pagina se încarcă...
Pagina se încarcă...
Pagina se încarcă...
Pagina se încarcă...
Pagina se încarcă...
Pagina se încarcă...
Pagina se încarcă...
Pagina se încarcă...
Pagina se încarcă...
Pagina se încarcă...
Pagina se încarcă...
-
 1
1
-
 2
2
-
 3
3
-
 4
4
-
 5
5
-
 6
6
-
 7
7
-
 8
8
-
 9
9
-
 10
10
-
 11
11
-
 12
12
-
 13
13
-
 14
14
-
 15
15
-
 16
16
-
 17
17
-
 18
18
-
 19
19
-
 20
20
-
 21
21
-
 22
22
-
 23
23
-
 24
24
-
 25
25
-
 26
26
-
 27
27
-
 28
28
-
 29
29
-
 30
30
-
 31
31
-
 32
32
-
 33
33
-
 34
34
-
 35
35
-
 36
36
-
 37
37
-
 38
38
-
 39
39
-
 40
40
-
 41
41
-
 42
42
-
 43
43
-
 44
44
-
 45
45
-
 46
46
-
 47
47
-
 48
48
-
 49
49
-
 50
50
-
 51
51
-
 52
52
-
 53
53
-
 54
54
-
 55
55
-
 56
56
-
 57
57
-
 58
58
-
 59
59
-
 60
60
-
 61
61
-
 62
62
-
 63
63
-
 64
64
-
 65
65
-
 66
66
-
 67
67
-
 68
68
-
 69
69
-
 70
70
-
 71
71
-
 72
72
-
 73
73
-
 74
74
-
 75
75
-
 76
76
-
 77
77
-
 78
78
-
 79
79
-
 80
80
-
 81
81
-
 82
82
-
 83
83
-
 84
84
-
 85
85
-
 86
86
-
 87
87
-
 88
88
-
 89
89
-
 90
90
-
 91
91
-
 92
92
-
 93
93
-
 94
94
-
 95
95
-
 96
96
-
 97
97
-
 98
98
-
 99
99
-
 100
100
-
 101
101
-
 102
102
-
 103
103
-
 104
104
-
 105
105
-
 106
106
-
 107
107
-
 108
108
-
 109
109
-
 110
110
-
 111
111
-
 112
112
-
 113
113
-
 114
114
-
 115
115
-
 116
116
-
 117
117
-
 118
118
-
 119
119
-
 120
120
-
 121
121
-
 122
122
-
 123
123
-
 124
124
-
 125
125
-
 126
126
-
 127
127
-
 128
128
-
 129
129
-
 130
130
-
 131
131
-
 132
132
-
 133
133
-
 134
134
-
 135
135
-
 136
136
-
 137
137
-
 138
138
-
 139
139
-
 140
140
-
 141
141
-
 142
142
-
 143
143
-
 144
144
-
 145
145
-
 146
146
-
 147
147
-
 148
148
-
 149
149
-
 150
150
-
 151
151
-
 152
152
-
 153
153
-
 154
154
-
 155
155
-
 156
156
-
 157
157
-
 158
158
-
 159
159
-
 160
160
-
 161
161
-
 162
162
-
 163
163
-
 164
164
-
 165
165
-
 166
166
-
 167
167
-
 168
168
-
 169
169
-
 170
170
-
 171
171
-
 172
172
-
 173
173
-
 174
174
-
 175
175
-
 176
176
-
 177
177
-
 178
178
-
 179
179
-
 180
180
-
 181
181
-
 182
182
-
 183
183
-
 184
184
-
 185
185
-
 186
186
-
 187
187
-
 188
188
-
 189
189
-
 190
190
-
 191
191
-
 192
192
-
 193
193
-
 194
194
-
 195
195
-
 196
196
-
 197
197
-
 198
198
-
 199
199
-
 200
200
-
 201
201
-
 202
202
-
 203
203
-
 204
204
-
 205
205
-
 206
206
-
 207
207
-
 208
208
-
 209
209
-
 210
210
-
 211
211
-
 212
212
-
 213
213
-
 214
214
-
 215
215
-
 216
216
-
 217
217
-
 218
218
-
 219
219
-
 220
220
-
 221
221
-
 222
222
-
 223
223
-
 224
224
-
 225
225
-
 226
226
-
 227
227
-
 228
228
-
 229
229
-
 230
230
-
 231
231
-
 232
232
-
 233
233
-
 234
234
-
 235
235
-
 236
236
-
 237
237
-
 238
238
-
 239
239
-
 240
240
-
 241
241
-
 242
242
-
 243
243
-
 244
244
-
 245
245
-
 246
246
-
 247
247
-
 248
248
-
 249
249
-
 250
250
-
 251
251
-
 252
252
-
 253
253
-
 254
254
-
 255
255
-
 256
256
-
 257
257
-
 258
258
-
 259
259
-
 260
260
-
 261
261
-
 262
262
-
 263
263
-
 264
264
-
 265
265
-
 266
266
-
 267
267
-
 268
268
-
 269
269
-
 270
270
-
 271
271
-
 272
272
-
 273
273
-
 274
274
-
 275
275
-
 276
276
-
 277
277
-
 278
278
-
 279
279
-
 280
280
-
 281
281
-
 282
282
-
 283
283
-
 284
284
-
 285
285
-
 286
286
-
 287
287
-
 288
288
-
 289
289
-
 290
290
-
 291
291
-
 292
292
-
 293
293
-
 294
294
-
 295
295
-
 296
296
-
 297
297
-
 298
298
-
 299
299
-
 300
300
-
 301
301
-
 302
302
-
 303
303
-
 304
304
-
 305
305
-
 306
306
-
 307
307
-
 308
308
-
 309
309
-
 310
310
-
 311
311
-
 312
312
-
 313
313
-
 314
314
-
 315
315
-
 316
316
-
 317
317
-
 318
318
-
 319
319
-
 320
320
-
 321
321
-
 322
322
-
 323
323
-
 324
324
-
 325
325
-
 326
326
-
 327
327
-
 328
328
-
 329
329
-
 330
330
-
 331
331
-
 332
332
-
 333
333
-
 334
334
-
 335
335
-
 336
336
-
 337
337
-
 338
338
-
 339
339
-
 340
340
-
 341
341
-
 342
342
-
 343
343
-
 344
344
-
 345
345
-
 346
346
-
 347
347
-
 348
348
-
 349
349
-
 350
350
-
 351
351
-
 352
352
-
 353
353
-
 354
354
-
 355
355
-
 356
356
-
 357
357
-
 358
358
-
 359
359
-
 360
360
-
 361
361
-
 362
362
-
 363
363
-
 364
364
-
 365
365
-
 366
366
-
 367
367
-
 368
368
-
 369
369
-
 370
370
-
 371
371
-
 372
372
-
 373
373
-
 374
374
-
 375
375
-
 376
376
-
 377
377
-
 378
378
-
 379
379
-
 380
380
-
 381
381
-
 382
382
-
 383
383
-
 384
384
-
 385
385
-
 386
386
-
 387
387
-
 388
388
-
 389
389
-
 390
390
-
 391
391
-
 392
392
-
 393
393
-
 394
394
-
 395
395
-
 396
396
-
 397
397
-
 398
398
-
 399
399
-
 400
400
-
 401
401
-
 402
402
-
 403
403
-
 404
404
-
 405
405
-
 406
406
-
 407
407
-
 408
408
-
 409
409
-
 410
410
-
 411
411
-
 412
412
-
 413
413
-
 414
414
-
 415
415
-
 416
416
-
 417
417
-
 418
418
-
 419
419
-
 420
420
-
 421
421
-
 422
422
-
 423
423
-
 424
424
-
 425
425
-
 426
426
-
 427
427
-
 428
428
-
 429
429
-
 430
430
-
 431
431
-
 432
432
-
 433
433
-
 434
434
-
 435
435
-
 436
436
-
 437
437
-
 438
438
-
 439
439
-
 440
440
-
 441
441
-
 442
442
-
 443
443
-
 444
444
-
 445
445
-
 446
446
-
 447
447
-
 448
448
-
 449
449
-
 450
450
-
 451
451
-
 452
452


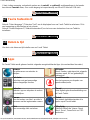
Yarvik TAB09-211 Manual de utilizare
- Categorie
- Comprimate
- Tip
- Manual de utilizare
- Acest manual este potrivit și pentru
în alte limbi
- English: Yarvik TAB09-211 User manual
Lucrări înrudite
-
Yarvik TAB09-410 Manual de utilizare
-
-
-
-
-
-
-
-
-
Yarvik TAB 07-101 Luna 7c Manual de utilizare