
FlexCare Platinum


1


6
Introduction
Congratulations on your purchase and welcome to Philips! To fully benet
from the support that Philips offers, register your product at
www.philips.com/welcome.
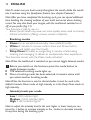
Important
Read this user manual carefully before you use the
appliance and save it for future reference.
Danger
- Keep the charger and/or sanitiser away from
water. Do not place or store it over or near water
contained in a bathtub, washbasin, sink etc. Do not
immerse the charger and/or sanitiser in water or
any other liquid. After cleaning, make sure the
charger and/or sanitiser is completely dry before
you connect it to the mains.
Warning
- The mains cord cannot be replaced. If the mains
cord is damaged, discard the charger and/or sanitiser.
- Always have the charger and/or sanitiser replaced
with one of the original type in order to avoid a
hazard.
- Do not use the charger and/or sanitiser outdoors
or near heated surfaces. Do not operate the
sanitiser where aerosol (spray) products are being
used or where oxygen is being administered.
- The appliance is suitable for mains voltages
ranging from 100 to 240 volts.
ENGLISH

- If the appliance is damaged in any way (brush
head, toothbrush handle, charger and/or sanitiser),
stop using it. This appliance contains no
serviceable parts. If the appliance is damaged,
contact the Consumer Care Centre in your
country (see chapter ‘Guarantee and support’).
- This appliance can be used by children aged from
8 years and above and persons with reduced
physical, sensory or mental capabilities or lack of
experience and knowledge if they have been
given supervision or instruction concerning use of
the appliance in a safe way and understand the
hazards involved. Children shall not play with the
appliance. Cleaning and user maintenance shall
not be made by children unless they are older
than 8 and supervised.
- Discontinue use of the sanitiser if the UV light bulb
remains on when the door is open. UV light can be
harmful to the human eye and skin. Keep the
sanitiser out of the reach of children at all times.
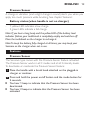
Caution
- Do not clean the brush head, the handle, the
charger and/or the sanitiser in the dishwasher.
- If you have had oral or gum surgery in the
previous 2 months, consult your dentist before
you use the toothbrush.
ENGLISH 7

- Consult your dentist if excessive bleeding occurs
after using this toothbrush or if bleeding continues
to occur after 1 week of use. Also consult your
dentist if you experience discomfort or pain when
you use the Sonicare.
- The Sonicare toothbrush complies with the safety
standards for electromagnetic devices. If you have
a pacemaker or other implanted device, contact
your physician or the device manufacturer of the
implanted device prior to use.
- If you have medical concerns, consult your doctor
before you use the Sonicare.
- This appliance has only been designed for cleaning
teeth, gums and tongue. Do not use it for any
other purpose. Stop using the appliance and
contact your doctor if you experience any
discomfort or pain.
- The Sonicare toothbrush is a personal care device
and is not intended for use on multiple patients in
a dental practice or institution.
- Stop using a brush head with crushed or bent
bristles. Replace the brush head every 3 months
or sooner if signs of wear appear.
- Do not use other brush heads than the ones
recommended by the manufacturer.
- If your toothpaste contains peroxide, baking soda
or bicarbonate (common in whitening
ENGLISH8

toothpastes), thoroughly clean the brush head
with soap and water after each use. This prevents
possible cracking of the plastic.
- Do not insert objects into the air openings of the
sanitiser or block these air openings by placing it on
a soft surface or in a position or location where
objects will block these openings (examples of
objects: magazine, tissue paper and hair).
- The UV light bulb is hot during and immediately
after the sanitising cycle. Do not touch the UV
light bulb when it is hot.
- Do not operate the sanitiser without the protective
screen in place to avoid contact with a hot bulb.
- If the sanitiser has been used for 3 consecutive
UV clean cycles (i.e. 3 times in a row), switch it off
for at least 30 minutes before you start another
UV clean cycle.
Electromagnetic elds (EMF)
This Philips appliance complies with all applicable standards and
regulations regarding exposure to electromagnetic elds.
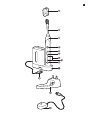
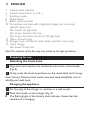
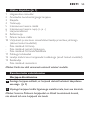
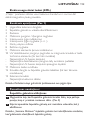
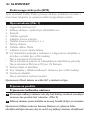
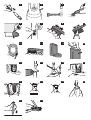
General description (Fig. 1)
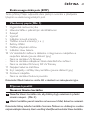
1 Hygienic travel cap
2 Brush head with unique identier
3 Handle
4 Power on/off button
ENGLISH 9

5 Intensity level indicator
6 Intensity level button (+ and -)
7 Brushing modes
8 Mode button
9 Battery level indicator
10 UV sanitiser and base with integrated charger and cord wrap
(specic types only)
- Not shown: UV light bulb
- Not shown: Sanitiser drip tray
- Not shown: Protective screen for UV light bulb
11 Mains cord with plug
12 Charger cover with brush head holders (specic types only)
13 Travel charger
- Not shown: Travel case
Note: The contents of the box may vary based on the type purchased.
Preparing for use
Attaching the brush head
1 Align the brush head so the bristles face the front of the handle.
(Fig. 2)
2 Firmly press the brush head down on the metal shaft until it stops.
Note: Sonicare Platinum brush heads come with easily identiable icons to
identify your brush head.
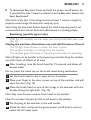
Charging the appliance
1 Put the plug of the charger or sanitiser in a wall socket.
2 Place the handle on the charger (Fig. 3).
, The ashing light of the battery level indicator shows that the
toothbrush is charging.
ENGLISH10

Note: It takes at least 24 hours to fully charge the battery.
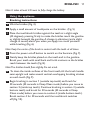
Using the appliance
Brushing instructions
1 Wet the bristles (Fig. 4).
2 Apply a small amount of toothpaste on the bristles. (Fig. 5)
3 Place the toothbrush bristles against the teeth at a slight angle
(45 degrees), pressing rmly to make the bristles reach the gumline
or slightly beneath the gumline. A change in vibration (and a slight
change in sound) alerts you when you apply too much pressure
while brushing (Fig. 6).
Note: Keep the centre of the brush in contact with the teeth at all times.
4 Press the power on/off button to switch on the Sonicare (Fig. 7).
5 Gently keep the bristles placed on the teeth and in the gumline.
Brush your teeth with small back and forth motions so the bristles
reach between the teeth (Fig. 8).
Note: The bristles should are slightly. Do not scrub.
6 To clean the inside surfaces of the front teeth, tilt the brush handle
semi-upright and make several vertical overlapping brushing strokes
on each tooth (Fig. 9).
7 Begin brushing in section 1 (outside top teeth) and brush for
30 seconds (45 seconds in Deep Clean mode) before you move to
section 2 (inside top teeth). Continue brushing in section 3 (outside
bottom teeth) and brush for 30 seconds (45 seconds in Deep
Clean mode) before you move to section 4 (inside bottom teeth).
Brush section 4 for 30 seconds until the toothbrush switches
off (Fig. 10).
ENGLISH 11

Note: To make sure you brush evenly throughout the mouth, divide the mouth
into 4 sections using the Quadpacer feature (see chapter ‘Features’).
Note: After you have completed the brushing cycle, you can spend additional
time brushing the chewing surfaces of your teeth and areas where staining
occurs. You may also brush your tongue, with the toothbrush switched on or
off, as you prefer (Fig. 11).
Your Sonicare is safe to use on:
- Braces (brush heads may wear out more quickly when used on braces).
- Dental restorations (llings, crowns, veneers, implants).
Brushing modes
1 Clean: For an exceptional everyday clean (default mode).
2 White: 2 minutes to remove surface stains and 30 seconds to
brighten and polish your front teeth.
3 Deep Clean: Provides an invigorating 3 minutes of alternating
cleaning and massaging to deliver an exceptionally clean experience.
Your Sonicare comes with the Clean mode activated.
Note: When the toothbrush is switched on, you cannot toggle between modes.
1 Before you switch on the Sonicare, press the mode button to
toggle between modes.
, The selected brushing mode lights up.
, Once a brushing mode has been selected, it remains active until
you select another brushing mode.
Note: When the Sonicare is used in clinical studies, it must be used in the
default 2-minute Clean mode at high intensity or in the Deep Clean mode at
high intensity.
Intensity levels per mode
- Low: 1 LED indicator light.
- Medium: 2 LED indicator lights.
- High: 3 LED indicator lights.
Note: to adjust the intensity level to the next higher or lower level, you can
press the + button to increase intensity or the - button to decrease intensity
at any time during the brushing cycle.
ENGLISH12

Pressure Sensor
A change in vibration (and a slight change in sound) alerts you when you
apply too much pressure while brushing. See chapter ‘Features’.
Battery status (when handle is not on charger)
- 1 yellow LED indicates a low charge.
- 3 green LEDs indicate a full charge.
Note: If you hear a long beep and the yellow LED of the battery level
indicator ashes, your toothbrush is completely empty and switches off.
Place the toothbrush on the charger to recharge it.
Note: To keep the battery fully charged at all times, you may keep your
Sonicare on the charger when not in use.
Features
Pressure Sensor
This Sonicare type comes with the Pressure Sensor feature activated.
The Pressure Sensor works in all 3 modes and at all 3 intensity levels.
To deactivate or reactivate the Pressure Sensor feature:
1 Place the handle with a brush head attached on the plugged-in
charger or sanitiser.
2 Press and hold the power on/off button and the mode button for
2 seconds.
, You hear 1 beep to indicate that the Pressure Sensor has been
deactivated.
, You hear 2 beeps to indicate that the Pressure Sensor has been
activated.
ENGLISH 13

Quadpacer
- The Quadpacer is an interval timer that has a short beep and pause
to remind you to brush the 4 sections of your mouth. Depending on
the brushing mode you have selected, the Quadpacer beeps at
different intervals during the brushing cycle. The Quadpacer works in
all 3 modes and at all 3 intensity levels (Fig. 10).
The Quadpacer feature on this type has been activated. To deactivate or
reactivate the Quadpacer feature:
1 Place the handle with a brush head attached on the plugged-in
charger or sanitiser.
2 Press and hold the mode button for 2 seconds.
, You hear 1 beep to indicate the Quadpacer has been deactivated.
, You hear 2 beeps to indicate the Quadpacer has been activated.
Smartimer
The Smartimer indicates that your brushing cycle is complete when
it automatically switches off the toothbrush at the end of the brushing cycle.
Dental professionals recommend brushing at least 2 minutes twice a day.
Easy-start
The Easy-start feature gently increases power over the rst 14 brushings
to ease into the Sonicare experience. The Easy-start feature only works in
the Clean mode and at the High intensity level.
This Sonicare type comes with the Easy-start feature deactivated.
To activate or deactivate the Easy-start feature:
1 Attach your brush head to the handle.
2 Place the handle on the plugged-in charger or sanitiser.
3 Activate or deactivate Easy-start:
, To activate Easy-start: Press and hold the power on/off button for
2 seconds. You hear 2 beeps to indicate that the Easy-start feature
has been activated.
ENGLISH14

, To deactivate Easy-start: Press and hold the power on/off button for
2 seconds. You hear 1 beep to indicate that the Easy-start feature has
been deactivated.
Note: Each of the rst 14 brushings must be at least 1 minute in length to
properly move through the Easy-start ramp-up cycle.
Note: Using the Easy-start feature beyond the initial ramp-up period is not
recommended and reduces Sonicare’s effectiveness in removing plaque.
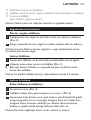
Sanitising (specic types only)
- With the UV sanitiser you can clean your brush head after every use
(Fig. 12).
Unplug the sanitiser, discontinue use and call Consumer Care if:
- The UV light bulb remains on when the door is open.
- The window is broken or missing from the sanitiser.
- The sanitiser gives off smoke or a burning smell while it is operating.
Note: UV light can be harmful to the human eye and skin. Keep the sanitiser
out of the reach of children at all times.
1 After brushing, rinse the brush head for 15 seconds and shake off
excess water.
Do not place the travel cap on the brush head during sanitisation.
2 Let the brush head to dry in open air for 2 minutes.
3 Place your nger in the door recess on top of the sanitiser and pull
open the door (Fig. 13).
4 Place the brush head on one of the 2 pegs in the sanitiser with the
bristles facing the light bulb. (Fig. 14)
Note: Only clean Sonicare snap-on brush heads in the sanitiser.
Note: Do not clean Sonicare for Kids brush heads in the sanitiser.
5 Put the plug of the sanitiser in the wall socket.
6 Close the door and press the green power on/off button once to
select the UV clean cycle.
ENGLISH 15

Note: You can only switch on the sanitiser if the door is closed properly.
Note: The sanitiser stops if you open the door during the sanitising cycle.
Note: The sanitiser cycle runs for 10 minutes and then shuts off automatically.
, The sanitiser is in operation when the light glows through the window.
Cleaning
Do not clean the brush head, the handle, the travel charger, the charger
cover and the UV sanitiser in the dishwasher.
Toothbrush handle
1 Remove the brush head and rinse the metal shaft area with warm
water (Fig. 15).
Do not push on the rubber seal on the metal shaft with sharp objects,
as this may cause damage.
2 Use a damp cloth to wipe the entire surface of the handle.
Do not use isopropyl rubbing alcohol, vinegar, or essential oil based
products to clean the handle or the brush head.
Brush head
1 Rinse the brush head and bristles after each use (Fig. 16).
2 Remove the brush head from the handle and rinse the brush head
connection at least once a week with warm water.
UV sanitiser (specic types only)
Do not immerse the sanitiser in water or rinse it under the tap.
Do not clean the sanitiser when the UV light bulb is hot.
For optimal effectiveness, it is recommended to clean your sanitiser weekly.
1 Unplug the sanitiser.
2 Pull the drip tray straight out of the sanitiser. Rinse the drip tray
and wipe it clean with a damp cloth (Fig. 17).
ENGLISH16

3 Clean all interior surfaces with a damp cloth.
4 Remove the protective screen in front of the UV light bulb. (Fig. 18)
To remove the screen, grasp the edges next to the snaps, gently squeeze
and pull out the protective screen.
5 Remove the UV light bulb.
To remove the light bulb, grasp it and pull it out of the metal clasp.
6 Clean the protective screen and the UV light bulb with a damp cloth.
7 Reinsert the UV light bulb.
To reinsert the light bulb, align the bottom of the light bulb with the metal
clasp and push the bulb into the clasp.
8 Reinsert the protective screen.
To reinsert the screen, align the pegs on the screen with the slots on the
reective surface near the UV light bulb. Push the screen straight into the
slots on the sanitiser.
Storage
If you are not going to use the appliance for an extended period of time,
remove the mains plug from the wall socket. Then clean the appliance and
store it in a cool and dry place away from direct sunlight. You can use the
cord wrap feature to store the mains cord neatly.
Replacement
Brush head
Replace Sonicare brush heads every 3 months to achieve optimal results.
Only use genuine Philips Sonicare replacement brush heads.
Ordering accessories
To buy accessories or spare parts, visit www.shop.philips.com/
service or go to your Philips dealer. You can also contact the Philips
Consumer Care Centre in your country (see the worldwide guarantee
leaet for contact details).
ENGLISH 17

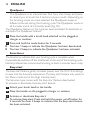
Recycling
- This symbol on a product means that the product is covered by
European Directive 2012/19/EU (Fig. 19).
- This symbol means that the product contains a built-in rechargeable
battery covered by European Directive 2006/66/EC which cannot be
disposed of with normal household waste. Follow the instructions in
section ‘Removing the rechargeable battery’ to remove the battery (Fig. 20).
- Inform yourself about the local separate collection system for
electrical and electronic products and rechargeable batteries. Follow
local rules and never dispose of the product and rechargeable
batteries with normal household waste. Correct disposal of old
products and rechargeable batteries helps prevent negative
consequences for the environment and human health.
Removing the rechargeable battery
Only remove the rechargeable battery when you discard the appliance.
Make sure the battery is completely empty when you remove it.
To remove the rechargeable battery, you need a at-head (standard)
screwdriver. Observe basic safety precautions when you follow the
procedure described below. Be sure to protect your eyes, hands, ngers,
and the surface on which you work.
1 Remove the toothbrush from the charger, switch it on and let it
operate until it stops. Continue to switch on the Sonicare until the
battery is completely empty.
2 Insert a athead (standard) screwdriver into the slot located at the
bottom of the handle. Turn the screwdriver anticlockwise to release
the bottom cap. (Fig. 21)
3 Place the handle on a solid surface with the buttons facing up and
lightly tap the housing 2.5cm from the bottom edge with a hammer.
4 Hold the handle upside down and push down on the shaft to
release the internal components of the handle (Fig. 22).
ENGLISH18

5 Insert the screwdriver under the circuit board, next to the battery
connections, and twist to break the connections. Remove the
circuit board and pry the battery from the plastic carrier (Fig. 23).
Guarantee and support
If you need information or support, please visit www.philips.com/
support or read the separate worldwide guarantee leaet.
Guarantee restrictions
The terms of the international guarantee do not cover the following:
- Brush heads.
- Damage caused by use of unauthorised replacement parts.
- Damage caused by misuse, abuse, neglect, alterations or unauthorised
repair.
- Normal wear and tear, including chips, scratches, abrasions,
discolouration or fading.
- UV light bulb.
ENGLISH 19

Въведение
Поздравления за вашата покупка и добре дошли във Philips! За да се
възползвате изцяло от предлаганата от Philips поддръжка,
регистрирайте продукта си на адрес www.philips.bg/welcome.
Важно
Преди да използвате уреда, прочетете
внимателно това ръководство за потребителя и
го запазете за справка в бъдеще.
Опасност
- Пазете зарядното устройство и/или уреда за
дезинфекция далеч от вода. Не го поставяйте
и не го съхранявайте над или в близост до
вода във вана, мивка, леген и т.н. Не потапяйте
зарядното устройство и/или уреда за
дезинфекция във вода или каквато и да е друга
течност. След почистване се уверете, че
зарядното устройство и/или уредът за
дезинфекция е напълно сух, преди да го
включите в контакта на електрическата мрежа.
Предупреждение
- Захранващият кабел не може да бъде заменян.
При повреда в кабела, зарядното устройство
и/или уредът за дезинфекция следва да се
изхвърли.
- С оглед на предотвратяване на злополука,
винаги заменяйте повреденото зарядно
устройство и/или уред за дезинфекция само с
оригинален такъв.
БЪЛГАРСКИ20
Pagina se încarcă...
Pagina se încarcă...
Pagina se încarcă...
Pagina se încarcă...
Pagina se încarcă...
Pagina se încarcă...
Pagina se încarcă...
Pagina se încarcă...
Pagina se încarcă...
Pagina se încarcă...
Pagina se încarcă...
Pagina se încarcă...
Pagina se încarcă...
Pagina se încarcă...
Pagina se încarcă...
Pagina se încarcă...
Pagina se încarcă...
Pagina se încarcă...
Pagina se încarcă...
Pagina se încarcă...
Pagina se încarcă...
Pagina se încarcă...
Pagina se încarcă...
Pagina se încarcă...
Pagina se încarcă...
Pagina se încarcă...
Pagina se încarcă...
Pagina se încarcă...
Pagina se încarcă...
Pagina se încarcă...
Pagina se încarcă...
Pagina se încarcă...
Pagina se încarcă...
Pagina se încarcă...
Pagina se încarcă...
Pagina se încarcă...
Pagina se încarcă...
Pagina se încarcă...
Pagina se încarcă...
Pagina se încarcă...
Pagina se încarcă...
Pagina se încarcă...
Pagina se încarcă...
Pagina se încarcă...
Pagina se încarcă...
Pagina se încarcă...
Pagina se încarcă...
Pagina se încarcă...
Pagina se încarcă...
Pagina se încarcă...
Pagina se încarcă...
Pagina se încarcă...
Pagina se încarcă...
Pagina se încarcă...
Pagina se încarcă...
Pagina se încarcă...
Pagina se încarcă...
Pagina se încarcă...
Pagina se încarcă...
Pagina se încarcă...
Pagina se încarcă...
Pagina se încarcă...
Pagina se încarcă...
Pagina se încarcă...
Pagina se încarcă...
Pagina se încarcă...
Pagina se încarcă...
Pagina se încarcă...
Pagina se încarcă...
Pagina se încarcă...
Pagina se încarcă...
Pagina se încarcă...
Pagina se încarcă...
Pagina se încarcă...
Pagina se încarcă...
Pagina se încarcă...
Pagina se încarcă...
Pagina se încarcă...
Pagina se încarcă...
Pagina se încarcă...
Pagina se încarcă...
Pagina se încarcă...
Pagina se încarcă...
Pagina se încarcă...
Pagina se încarcă...
Pagina se încarcă...
Pagina se încarcă...
Pagina se încarcă...
Pagina se încarcă...
Pagina se încarcă...
Pagina se încarcă...
Pagina se încarcă...
Pagina se încarcă...
Pagina se încarcă...
Pagina se încarcă...
Pagina se încarcă...
Pagina se încarcă...
Pagina se încarcă...
Pagina se încarcă...
Pagina se încarcă...
Pagina se încarcă...
Pagina se încarcă...
Pagina se încarcă...
Pagina se încarcă...
Pagina se încarcă...
Pagina se încarcă...
Pagina se încarcă...
Pagina se încarcă...
Pagina se încarcă...
Pagina se încarcă...
Pagina se încarcă...
Pagina se încarcă...
Pagina se încarcă...
Pagina se încarcă...
Pagina se încarcă...
Pagina se încarcă...
Pagina se încarcă...
Pagina se încarcă...
Pagina se încarcă...
Pagina se încarcă...
Pagina se încarcă...
Pagina se încarcă...
Pagina se încarcă...
Pagina se încarcă...
Pagina se încarcă...
Pagina se încarcă...
Pagina se încarcă...
Pagina se încarcă...
Pagina se încarcă...
Pagina se încarcă...
Pagina se încarcă...
Pagina se încarcă...
Pagina se încarcă...
Pagina se încarcă...
Pagina se încarcă...
Pagina se încarcă...
Pagina se încarcă...
Pagina se încarcă...
Pagina se încarcă...
Pagina se încarcă...
Pagina se încarcă...
Pagina se încarcă...
Pagina se încarcă...
Pagina se încarcă...
Pagina se încarcă...
Pagina se încarcă...
Pagina se încarcă...
Pagina se încarcă...
Pagina se încarcă...
Pagina se încarcă...
Pagina se încarcă...
Pagina se încarcă...
Pagina se încarcă...
Pagina se încarcă...
Pagina se încarcă...
Pagina se încarcă...
Pagina se încarcă...
Pagina se încarcă...
Pagina se încarcă...
Pagina se încarcă...
Pagina se încarcă...
Pagina se încarcă...
Pagina se încarcă...
Pagina se încarcă...
Pagina se încarcă...
Pagina se încarcă...
Pagina se încarcă...
Pagina se încarcă...
Pagina se încarcă...
Pagina se încarcă...
Pagina se încarcă...
Pagina se încarcă...
Pagina se încarcă...
Pagina se încarcă...
Pagina se încarcă...
Pagina se încarcă...
Pagina se încarcă...
Pagina se încarcă...
Pagina se încarcă...
Pagina se încarcă...
Pagina se încarcă...
Pagina se încarcă...
Pagina se încarcă...
Pagina se încarcă...
Pagina se încarcă...
Pagina se încarcă...
Pagina se încarcă...
Pagina se încarcă...
Pagina se încarcă...
Pagina se încarcă...
Pagina se încarcă...
Pagina se încarcă...
Pagina se încarcă...
Pagina se încarcă...
Pagina se încarcă...
Pagina se încarcă...
Pagina se încarcă...
Pagina se încarcă...
Pagina se încarcă...
Pagina se încarcă...
Pagina se încarcă...
Pagina se încarcă...
Pagina se încarcă...
Pagina se încarcă...
Pagina se încarcă...
Pagina se încarcă...
Pagina se încarcă...
Pagina se încarcă...
Pagina se încarcă...
Pagina se încarcă...
Pagina se încarcă...
Pagina se încarcă...
Pagina se încarcă...
Pagina se încarcă...
Pagina se încarcă...
Pagina se încarcă...
Pagina se încarcă...
Pagina se încarcă...
Pagina se încarcă...
Pagina se încarcă...
Pagina se încarcă...
Pagina se încarcă...
Pagina se încarcă...
Pagina se încarcă...
-
 1
1
-
 2
2
-
 3
3
-
 4
4
-
 5
5
-
 6
6
-
 7
7
-
 8
8
-
 9
9
-
 10
10
-
 11
11
-
 12
12
-
 13
13
-
 14
14
-
 15
15
-
 16
16
-
 17
17
-
 18
18
-
 19
19
-
 20
20
-
 21
21
-
 22
22
-
 23
23
-
 24
24
-
 25
25
-
 26
26
-
 27
27
-
 28
28
-
 29
29
-
 30
30
-
 31
31
-
 32
32
-
 33
33
-
 34
34
-
 35
35
-
 36
36
-
 37
37
-
 38
38
-
 39
39
-
 40
40
-
 41
41
-
 42
42
-
 43
43
-
 44
44
-
 45
45
-
 46
46
-
 47
47
-
 48
48
-
 49
49
-
 50
50
-
 51
51
-
 52
52
-
 53
53
-
 54
54
-
 55
55
-
 56
56
-
 57
57
-
 58
58
-
 59
59
-
 60
60
-
 61
61
-
 62
62
-
 63
63
-
 64
64
-
 65
65
-
 66
66
-
 67
67
-
 68
68
-
 69
69
-
 70
70
-
 71
71
-
 72
72
-
 73
73
-
 74
74
-
 75
75
-
 76
76
-
 77
77
-
 78
78
-
 79
79
-
 80
80
-
 81
81
-
 82
82
-
 83
83
-
 84
84
-
 85
85
-
 86
86
-
 87
87
-
 88
88
-
 89
89
-
 90
90
-
 91
91
-
 92
92
-
 93
93
-
 94
94
-
 95
95
-
 96
96
-
 97
97
-
 98
98
-
 99
99
-
 100
100
-
 101
101
-
 102
102
-
 103
103
-
 104
104
-
 105
105
-
 106
106
-
 107
107
-
 108
108
-
 109
109
-
 110
110
-
 111
111
-
 112
112
-
 113
113
-
 114
114
-
 115
115
-
 116
116
-
 117
117
-
 118
118
-
 119
119
-
 120
120
-
 121
121
-
 122
122
-
 123
123
-
 124
124
-
 125
125
-
 126
126
-
 127
127
-
 128
128
-
 129
129
-
 130
130
-
 131
131
-
 132
132
-
 133
133
-
 134
134
-
 135
135
-
 136
136
-
 137
137
-
 138
138
-
 139
139
-
 140
140
-
 141
141
-
 142
142
-
 143
143
-
 144
144
-
 145
145
-
 146
146
-
 147
147
-
 148
148
-
 149
149
-
 150
150
-
 151
151
-
 152
152
-
 153
153
-
 154
154
-
 155
155
-
 156
156
-
 157
157
-
 158
158
-
 159
159
-
 160
160
-
 161
161
-
 162
162
-
 163
163
-
 164
164
-
 165
165
-
 166
166
-
 167
167
-
 168
168
-
 169
169
-
 170
170
-
 171
171
-
 172
172
-
 173
173
-
 174
174
-
 175
175
-
 176
176
-
 177
177
-
 178
178
-
 179
179
-
 180
180
-
 181
181
-
 182
182
-
 183
183
-
 184
184
-
 185
185
-
 186
186
-
 187
187
-
 188
188
-
 189
189
-
 190
190
-
 191
191
-
 192
192
-
 193
193
-
 194
194
-
 195
195
-
 196
196
-
 197
197
-
 198
198
-
 199
199
-
 200
200
-
 201
201
-
 202
202
-
 203
203
-
 204
204
-
 205
205
-
 206
206
-
 207
207
-
 208
208
-
 209
209
-
 210
210
-
 211
211
-
 212
212
-
 213
213
-
 214
214
-
 215
215
-
 216
216
-
 217
217
-
 218
218
-
 219
219
-
 220
220
-
 221
221
-
 222
222
-
 223
223
-
 224
224
-
 225
225
-
 226
226
-
 227
227
-
 228
228
-
 229
229
-
 230
230
-
 231
231
-
 232
232
-
 233
233
-
 234
234
-
 235
235
-
 236
236
-
 237
237
-
 238
238
-
 239
239
-
 240
240
-
 241
241
-
 242
242
-
 243
243
-
 244
244


Saeco HX9112/12 Manual de utilizare
- Categorie
- Periuțe de dinți electrice
- Tip
- Manual de utilizare
în alte limbi
- slovenčina: Saeco HX9112/12 Používateľská príručka
- eesti: Saeco HX9112/12 Kasutusjuhend
Lucrări înrudite
-
Sonicare HX6511/50 Manual de utilizare
-
-
-
-
Sonicare HX6631/01 Manual de utilizare
-
Sonicare HX6211/04 Manual de utilizare
-
Sonicare HX6311/07 Manual de utilizare
-
Sonicare HX6857/35 Manual de utilizare
Alte documente
-
-
-
Sonicare HX6971/33 Manual de utilizare
-
Sonicare HX6711/02 Manual de utilizare
-
Sonicare HX9112/02 Manual de utilizare
-
Sonicare HX6721/35 Manual de utilizare
-
Sonicare HX6921/06 Manual de utilizare
-
-
Sonicare HX3292/44 Manual de utilizare
-