Declaration of Conformity
Safety Warning
QSG
DoC
Switch
Package Contents
Support Information
Copyright © 2020 Zyxel Communications Corp. All Rights Reserved.
EU Importer
Zyxel Communications A/S
Gladsaxevej 378, 2. th. 2860 Søborg, Denmark
http://www.zyxel.dk
US Importer
Zyxel Communications, Inc
1130 North Miller Street Anaheim, CA 92806-2001
http://www.us.zyxel.com
See the User's Guide at www.zyxel.com for more information,
including customer support and safety warnings.
Quick Start Guide
ČEŠTINA | MAGYAR | POLSKI | ROMÂNĂ
SLOVENČINA
LEDs
PWR/SYS
Green
On - Power on.
Blinking - Starting up.
Off - Switch off.
Ports 1-8
LINK/ACT
Green On - 1000 Mbps connection ready.
Blinking - Data transmitting.
Amber On - 10/100 Mbps connection ready.
Blinking - Data transmitting.
Off - No Connection.
Green On - 1000 Mbps connection ready.
Blinking - Data transmitting.
Skye Blue On - 2.5 Gbps Connection Ready.
Blinking - Data transmitting.
Green On - 1000 Mbps connection ready.
Blinking - Data transmitting.
Blue On - 10 Gbps Connection Ready.
Blinking - Data transmitting.
Amber On - 100 Mbps connection ready.
Blinking - Data transmitting.
Off - No Connection.
Off - No Connection.
Ports 9-10
(Left LED)
(Right LED)
Ports 11-12
(Left LED)
(Right LED)
Kabelem sítě Ethernet připojte počítač nebo notebook k
přepínači. Počítač musí mít stejnou IP adresu ve stejné
podsíti jako přepínač.
Spusťte webový prohlížeč a přejděte na http://192.168.1.3.
Jako heslo zadejte 1234.
Klikněte na možnost SIGN IN (Přihlásit se).
Csatlakoztassa számítógépét a switch-hez egy Ethernet
kábellel. Számítógépének a switch alhálózatához tartozó IP
címmel kell rendelkeznie.
Spusťte webový prohlížeč a přejděte na http://192.168.1.3.
Jako heslo zadejte 1234.
Klikněte na možnost SIGN IN (Přihlásit se).
Podłącz komputer lub notebook do przełącznika, korzysta-
jąc z kabla sieciowego. Komputer musi mieć adres IP w tej
samej podsieci, co przełącznik.
Lansați navigatorul dvs. web și accesați http://192.168.1.3.
Introduceți 1234 ca parolă.
Dați clic pe SIGN IN (AUTENTIFICARE).
Conectați-vă computerul la Comutator cu ajutorul unui
cablu Ethernet. Computerul dvs. trebuie să aibă o adresă IP
în aceeași subrețea ca și Comutatorul.
Indítsa el a webböngészőt és írja be a http://192.168.1.3 címet.
Adja meg az 1234 jelszót.
Kattintson a SIGN IN (bejelentkezés) gombra.
Pomocou kábla siete Ethernet pripojte svoj počítač k
zariadeniu Switch. Adresa IP vášho počítača musí byť v
rámci rovnakej podsiete ako je zariadenie Switch.
Otwórz przeglądarkę internetową i wpisz adres
http://192.168.1.3. Podaj hasło 1234.
Kliknij SIGN IN (zaloguj się).
3
4
3
4
3
4
3
4
3
4
Připojte do odpovídajícího zdroje energie.
Zapojte do modemu nebo směrovače s přístupem k
internetu.
Csatlakoztasson egy megfelelő áramforrást.
Csatlakoztasson egy internetkapcsolattal rendelkező
modemet vagy útválasztót.
Podłącz do odpowiedniego źródła zasilania.
Podłącz do modemu lub routera z dostępem do Internetu.
Conectați la o sursă de alimentare corespunzătoare.
Conectați la un modem sau router care este prevăzut cu
acces la internet.
Pripojte k vhodnému zdroju napájania.
Pripojte k modemu alebo smerovaču s prístupom do
internetu.
1
2
1
2
1
2
1
2
1
2
CZ
PL
RO
SK
HU
CZ
PL
RO
SK
HU
Troubleshooting
I cannot see or access the Login screen in the Web Configurator.
Make sure you are using the correct IP address.
(The default IP address is 192.168.1.3.)
Make sure your computer is in the same subnet as the Switch. If
you haven’t changed the default IP address, your computer IP
address should be in the 192.168.1.4 ~ 192.168.1.254 range.
Make sure you have entered the Password correctly. If you have
changed the Password and have forgotten it, you’ll have to reset
the Switch to its factory default.
(The default Password is 1234.)
A loop is detected.
A loop may happen in the following example situations:
1. The Switch is connected to another device in a loop state.
2. The Switch is connected to another device with two cables.
Loop Prevention is enabled by default. If a loop happens, the
Switch will block the port in a loop state. If a loop happens on
two ports, the Switch will block the higher-numbered port. For
example, if a loop happens on ports 4 and 5, the Switch will block
port 5, and its LED will be off. To restore a port in a loop state,
disconnect it, check the network connections, and reconnect it.
You can log into the Web Configurator. Go to System in the Web
Configurator to check your port status.
EU
https://support.zyxel.eu
XGS1210-12
8-Port Gigabit Web Managed Switch
with 2-Port 2.5G/2-Port SFP+
International Power Adapter
Power Outlet
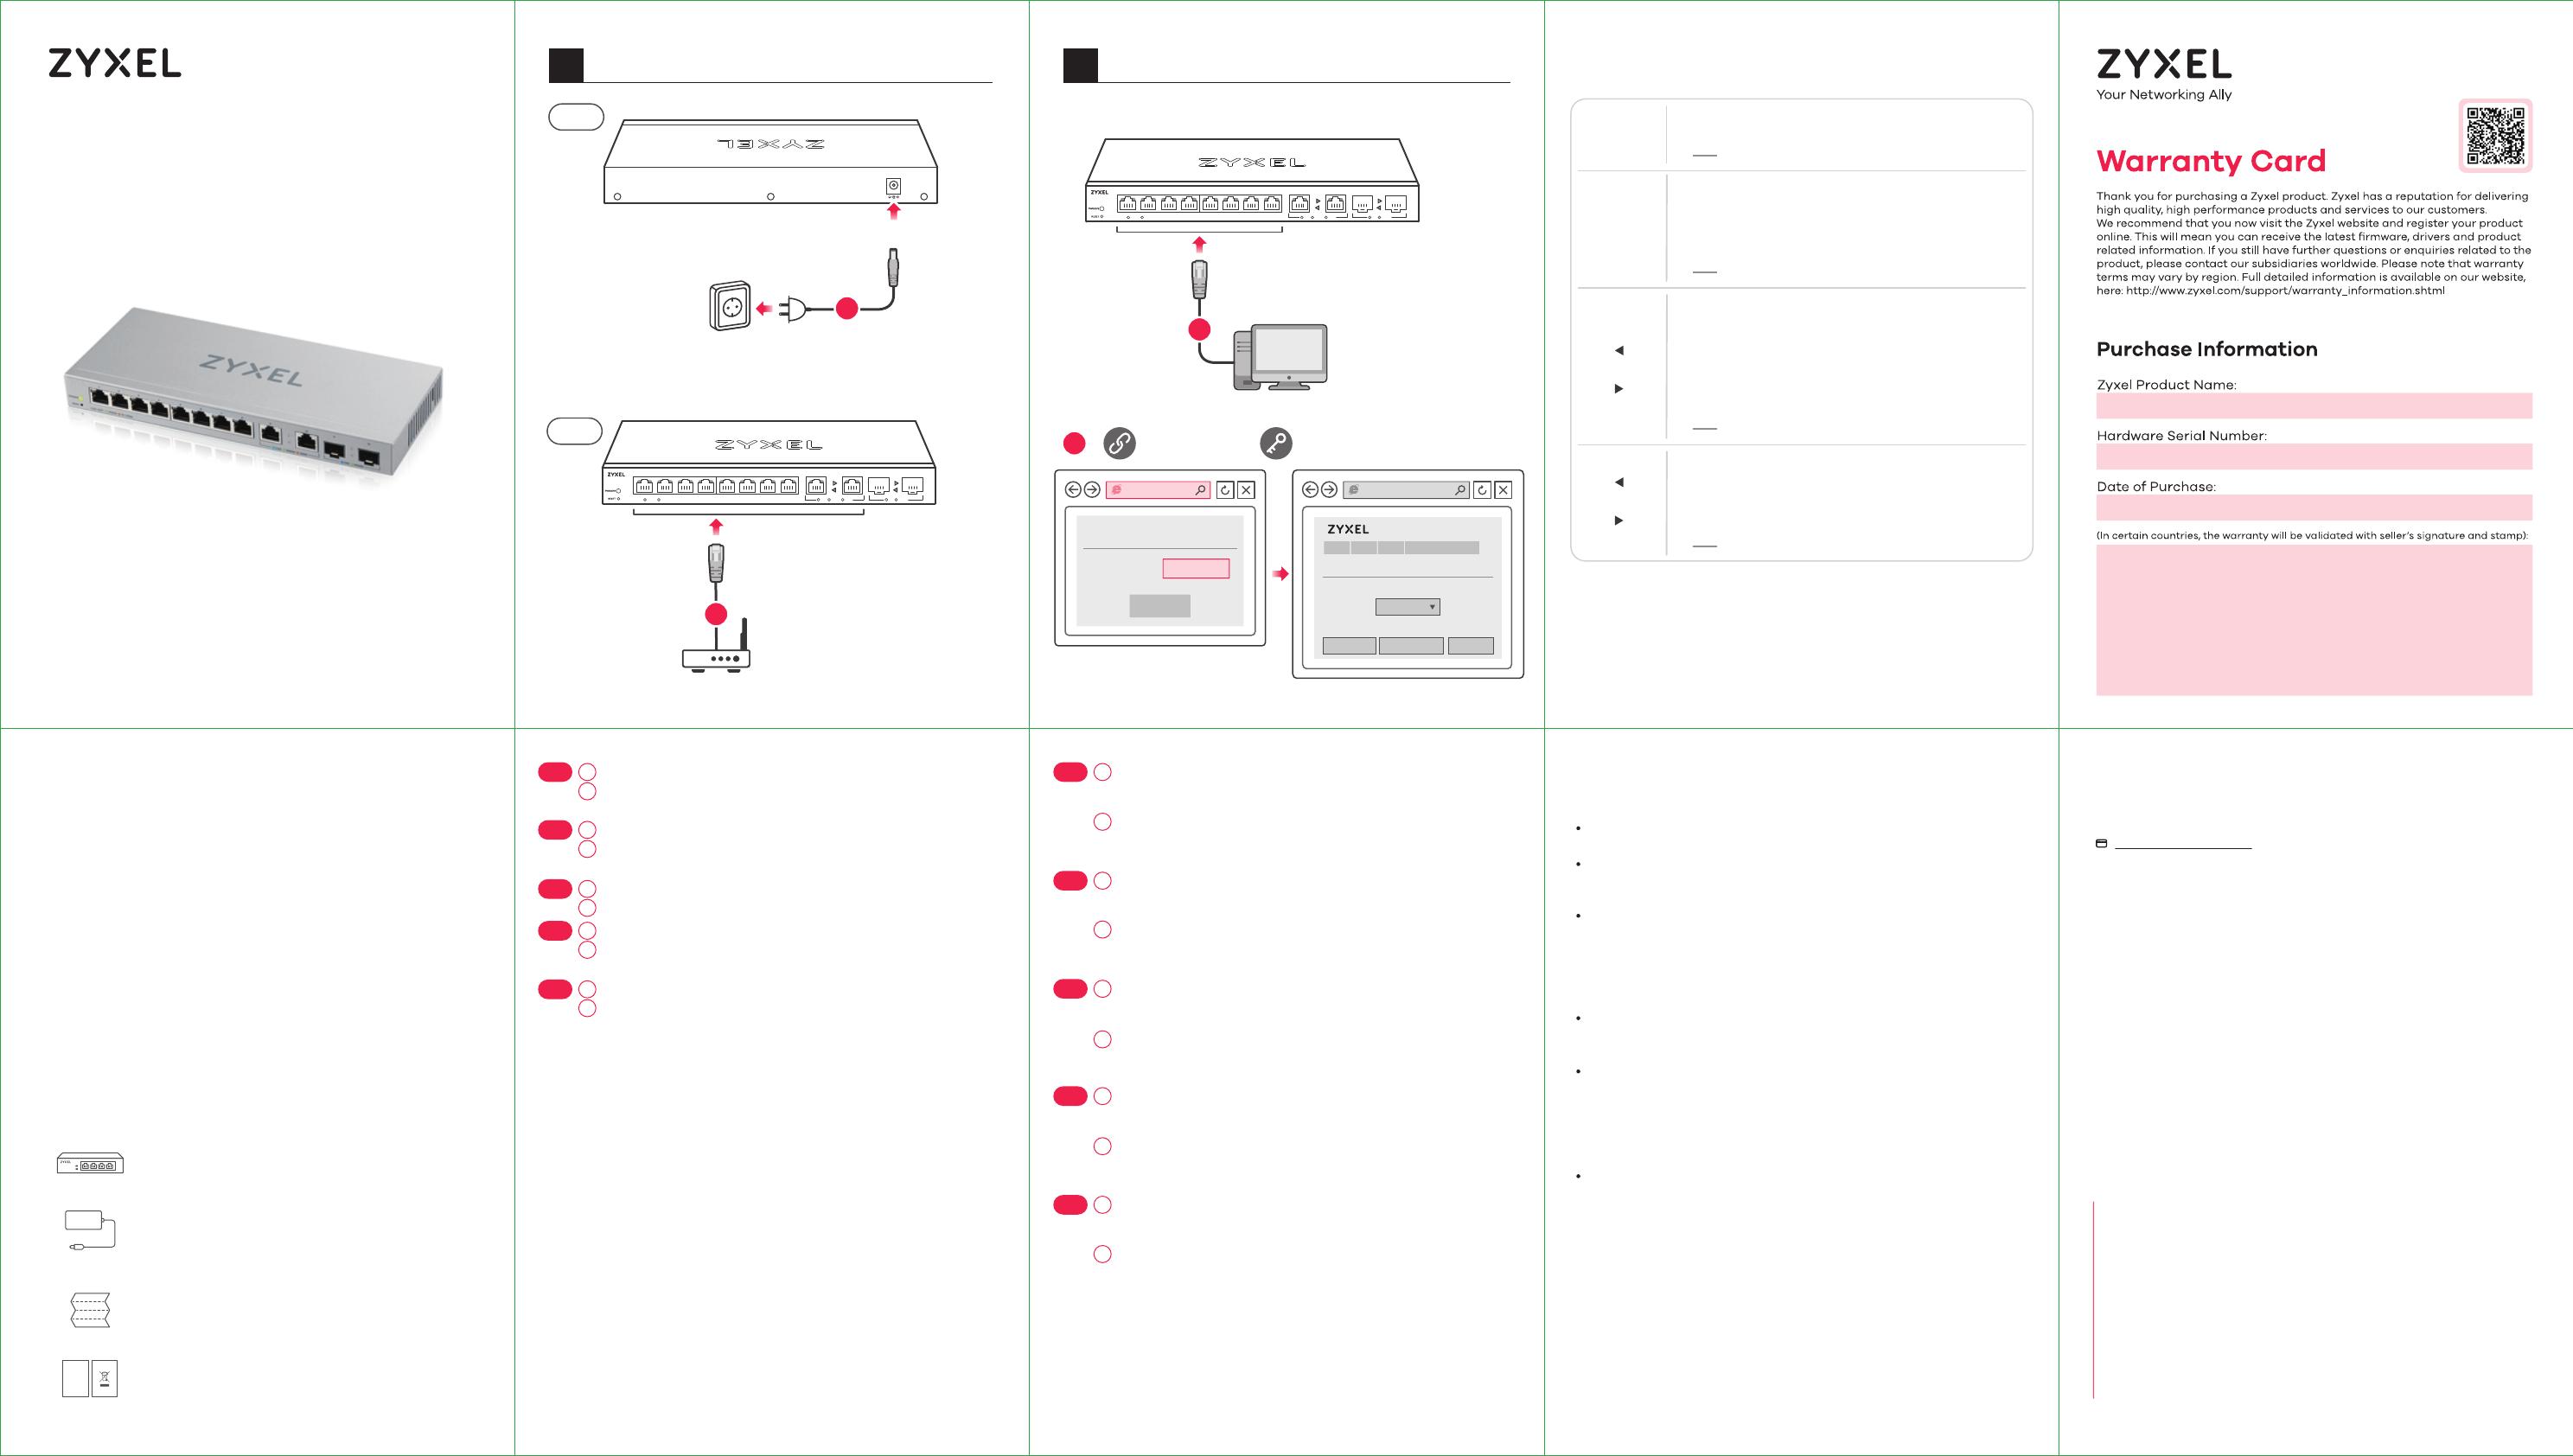
1
Back
11 Hardware Installation1
DC 12V
DC 12V
1
2
3
4
5
6
7 8
99
1100
1111
1122
LLiinn kk // AACC TT
110000 00 MM 1100 // 110000 MM
::
22 ..55GG 110000 00 MM 110000MM
1100GG 11000000MM
GLGI GLGI
Manage Your Device
2
Password : 1234 (default)
http://192.168.1.3
Switch IP:
192.168.1.3
PC IP:
192.168.1.4 ~ 192.168.1.254
Device Setting
3
4
Management
IP Address
Subnet Mask
DHCP client
Gateway
2
Front
Modem / Router
1
2
3
4
5
6
7 8
99
1100
1111
1122
LLiinn kk // AACC TT
110000 00 MM 1100 // 110000 MM
::
22 ..55GG 110000 00 MM 110000MM
1100GG 11000000MM
GLGI GLGI
SIGN IN
Log in
Password 1234


