ULTIMATE SPEED ULSP 2 A1 Operating Instructions Manual
- Tip
- Operating Instructions Manual

PAINT THICKNESS GAUGE ULSP 2 A1
IAN 91055
PAINT THICKNESS GAUGE
Operating instructions
TESTER STRATURI DE
VOPSEA
Instrucţiuni de utilizare
LACKSCHICHTENPRÜFGERÄT
Bedienungsanleitung
PRÍSTROJ NA MERANIE
HRÚBKY LAKU
Návod na obsluhu
CV_91055_ULSP2A1_SK_RO_OS.indd 2CV_91055_ULSP2A1_SK_RO_OS.indd 2 19.07.13 13:2519.07.13 13:25

GB Operating instructions Page 1
SK Návod na obsluhu Strana 11
RO Instrucţiuni de utilizare Pagina 21
DE Bedienungsanleitung Seite 31
Before reading, unfold the page containing the illustrations and
familiarise yourself with all functions of the device.
Pred čítaním si odklopte stranu s obrázkami a potom sa oboznámte
so všetkými funkciami prístroja.
Înainte de a citi instrucţiunile, priviţi imaginile şi familiarizaţi-vă cu toate
funcţiile aparatului.
Klappen Sie vor dem Lesen die Seite mit den Abbildungen aus und
machen Sie sich anschließend mit allen Funktionen des Gerätes
vertraut.
CV_91055_ULSP2A1_SK_RO_OS.indd 3CV_91055_ULSP2A1_SK_RO_OS.indd 3 19.07.13 13:2519.07.13 13:25

CV_91055_ULSP2A1_SK_RO_OS.indd 4CV_91055_ULSP2A1_SK_RO_OS.indd 4 19.07.13 13:2519.07.13 13:25

1
ULSP 2 A1
GB
Table of Contents
Introduction . . . . . . . . . . . . . . . . . . . . . . . . . . . . .2
Information concerning these operating instructions . . . . 2
Intended use . . . . . . . . . . . . . . . . . . . . . . . . . . . . . . . . . . . 2
Package contents . . . . . . . . . . . . . . . . . . . . . . . . . . . . . . . 2
Technical details . . . . . . . . . . . . . . . . . . . . . . . . . . . . . . . . 3
Safety instructions . . . . . . . . . . . . . . . . . . . . . . . . . . . . . . . 3
Information on using batteries . . . . . . . . . . . . . . . . . . . . . 4
Device description . . . . . . . . . . . . . . . . . . . . . . . . . . . . . . 4
Initial operation . . . . . . . . . . . . . . . . . . . . . . . . . .5
Inserting/replacing the battery . . . . . . . . . . . . . . . . . . . . . 5
Switching the device on and off . . . . . . . . . . . . . . . . . . . . 5
Measuring procedure . . . . . . . . . . . . . . . . . . . . . . . . . . . . 6
Cleaning . . . . . . . . . . . . . . . . . . . . . . . . . . . . . . . .8
Storage . . . . . . . . . . . . . . . . . . . . . . . . . . . . . . . .8
Disposal . . . . . . . . . . . . . . . . . . . . . . . . . . . . . . . .9
Disposal of the device . . . . . . . . . . . . . . . . . . . . . . . . . . . 9
Disposing of the batteries . . . . . . . . . . . . . . . . . . . . . . . . . 9
Service . . . . . . . . . . . . . . . . . . . . . . . . . . . . . . . .10
Importer . . . . . . . . . . . . . . . . . . . . . . . . . . . . . . .10
IB_91055_ULSP2A1_SK_RO_OS.indb 1IB_91055_ULSP2A1_SK_RO_OS.indb 1 22.07.13 11:5322.07.13 11:53

GB
2
ULSP 2 A1
Introduction
Information concerning these operating
instructions
Congratulations on the purchase of your new device.
You have selected a high-quality product. The operating
instructions are part of this product. They contain important
information on safety, use and disposal. Before using the
product, familiarise yourself with all operating and safety
instructions. Use this product only as described and only for
the specifi ed areas of application. Retain these instructions
for future reference. Please also pass these operating instruc-
tions on to any future owner(s).
Intended use
This device is exclusively intended for the determination
of paint layer thicknesses on steel surfaces such as cars.
This product is not intended for commercial or industrial use.
The warranty does not provide compensation for damage
caused by improper use of the device!
Package contents
▯ Paint thickness gauge
▯ CR2032 button cell
▯ This operating manual
IB_91055_ULSP2A1_SK_RO_OS.indb 2IB_91055_ULSP2A1_SK_RO_OS.indb 2 22.07.13 11:5322.07.13 11:53

3
ULSP 2 A1
GB
Technical details
Operating voltage 1 x 3 V battery, type CR2032
Operating temperature
0°C–40°C,
< 80% relative humidity
Dimensions (W x H x D) approx. 4.2 x 6.8 x 1.7 cm
Weight approx. 25 g
Safety instructions
■ Before use, check the device for visible external damage.
Do not use a device that has been damaged or dropped.
■ This device is not intended for use by persons (including
childr
en) with limited physical, physiological or intellectual
abilities or lack of experience and/or knowledge unless
they are supervised by a person who is responsible for
their safety, or receive instructions from this person on
how to use the device.
■ Children should be supervised to ensure that they do not
play with the de
vice.
■ Do not make any unauthorised modifi cations or alterations
to the de
vice.
■ Repairs to the device during the warranty period may only
be carried out b
y a customer service department author-
ised by the manufacturer. Otherwise no additional war-
ranty claims can be considered for subsequent damage.
■ Protect the device from moisture and liquid penetration.
■ The device may not be used in potentially explosive
en
vironments, on surfaces carrying live current or on hot
surfaces (> 70°C).
IB_91055_ULSP2A1_SK_RO_OS.indb 3IB_91055_ULSP2A1_SK_RO_OS.indb 3 22.07.13 11:5322.07.13 11:53

GB
4
ULSP 2 A1
Information on using batteries
CAUTION
► Do not throw the batteries into a fi re.
► Do not short-circuit the batteries.
► Do not attempt to recharge the batteries.
► Regularly check the condition of the batteries.
Leaking batter
y acid can cause permanent damage
to the device.
► Special care should be taken when handling a damaged
or leaking batter
y. Risk of acid burns! Wear protective
gloves.
► Store batteries out of reach of children. If a battery
should be sw
allowed, seek medical attention
IMMEDIATELY.
► If you do not intend to use the device for a long time,
r
emove the batteries.
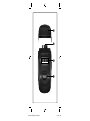
Device description
Protective cap
Measurement sensor
LED display
TEST button
IB_91055_ULSP2A1_SK_RO_OS.indb 4IB_91055_ULSP2A1_SK_RO_OS.indb 4 22.07.13 11:5322.07.13 11:53

5
ULSP 2 A1
GB
Initial operation
Inserting/replacing the battery
♦ Remove the protective cap and undo the four screws
on the rear of the device.
♦ Remove the rear part of the housing.
♦ Insert a battery of type CR2032 in the battery holder.
Ensur
e that the polarity is correct: the battery’s positive
terminal should face upwards.
♦ Replace the rear of the housing again using the screws
y
ou previously removed.
NOTE
► When all three LEDs start fl ashing, the battery needs to
be r
eplaced.
Switching the device on and off
♦ Remove the protective cap and press the TEST button
for around 3 seconds. The LEDs
fl ash briefl y in
succession (RED >> YELLOW >> GREEN). When only the
red LED is fl ashing, the device is in standby mode.
♦ If no measurement takes place within 20 seconds, the
de
vice switches itself off automatically. The LEDs
simultaneously fl ash three times.
♦ Alternatively, you can press the TEST button
for
around 3 seconds to switch the device off manually.
IB_91055_ULSP2A1_SK_RO_OS.indb 5IB_91055_ULSP2A1_SK_RO_OS.indb 5 22.07.13 11:5322.07.13 11:53

GB
6
ULSP 2 A1
Measuring procedure
Normal measuring mode
CAUTION
► Place the device carefully on the surface to be meas-
ur
ed, and do not move it during measuring. Remove
the device carefully from the surface after measuring,
otherwise you could cause scratches on the paintwork.
♦ Remove the protective cap
and switch the device on
(standby mode).
♦ Keep the device away from any surfaces and then press
the TEST button
. The red LED will illuminate perma-
nently and the device is now in normal measuring mode.
♦ Place the measuring sensor
at right angles to the
surface to be measured. The measured paint thickness
will be signalised by one of the three LEDs illuminating
(see table).
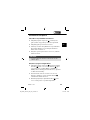
LED colour Paint thickness
Red > approx. 1.8 mm
Yellow approx. 1.0–1.8 mm
Green < approx. 1.0 mm
♦ Press the TEST button
again to return to standby mode.
The red LED fl ashes.
IB_91055_ULSP2A1_SK_RO_OS.indb 6IB_91055_ULSP2A1_SK_RO_OS.indb 6 22.07.13 11:5322.07.13 11:53

7
ULSP 2 A1
GB
Reference measuring mode
In this mode, you can compare the paint thicknesses on
various surfaces: for example, on one particular vehicle.
This is useful for determining diff erences in paint thicknesses.
For example, you can quickly fi nd out whether a surface has
been repainted or fi lled.
♦ When the device is in normal measuring mode, place the
measuring sensor
at right angles to the surface to be
measured.
NOTE
► The best place to start is the roof of a car, which nor-
mally will not hav
e been repainted or fi lled. The paint
coat to be measured must be thinner than 1.8 mm. The
reference measuring mode only works if the yellow or
the green LED is illuminated.
♦ Press the TEST button
during the measuring process.
The measured paint thickness is now used as a reference
value. The red and green LEDs will fl ash alternately.
♦ As soon as you remove the measuring sensor
from the
reference surface, the red and the yellow LEDs will fl ash
alternately.
♦ Now place the measuring sensor
on the surface to
be compared: for example, the wing. The LEDs will now
fl ash in two possible combinations:
IB_91055_ULSP2A1_SK_RO_OS.indb 7IB_91055_ULSP2A1_SK_RO_OS.indb 7 22.07.13 11:5322.07.13 11:53

GB
8
ULSP 2 A1
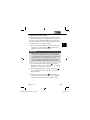
LED colour Result
Red + yellow
Paint thicknesses on target
and reference surfaces are
diff erent.
Red + green
Paint thicknesses on target
and reference surfaces are
the same.
♦ Press the TEST button
again to return to standby mode.
The red LED fl ashes.
Cleaning
CAUTION
Damage to the device!
► To avoid irreparable damage, ensure that no moisture
penetr
ates into the device whilst it is being cleaned.
■ Clean the device surface and the measuring sensor
with a clean, lint-free, dry cloth.
Storage
■ If you do not intend to use the device for a long time,
remove the battery and store it in a clean, dry place.
IB_91055_ULSP2A1_SK_RO_OS.indb 8IB_91055_ULSP2A1_SK_RO_OS.indb 8 22.07.13 11:5322.07.13 11:53

9
ULSP 2 A1
GB
Disposal
Disposal of the device
Never dispose of the device in the
normal domestic waste. This product
is subject to the provisions of European
Directive 2012/19/EU WEEE (Waste
Electrical and Electronic Equipment).
Dispose of the device through an approved disposal centre
or at your community waste facility. Please observe the
currently applicable regulations. Please contact your waste
disposal centre if you are in any doubt.
Disposing of the batteries
Do not dispose of the batteries in the domestic
waste. Every consumer is statutorily obliged to
dispose of used batteries at a collecting point
in his town/district or at a retail outlet. This
obligation is intended to ensure that batteries
are disposed of in an environmentally responsible manner.
Dispose of batteries only when they are fully discharged.
IB_91055_ULSP2A1_SK_RO_OS.indb 9IB_91055_ULSP2A1_SK_RO_OS.indb 9 22.07.13 11:5322.07.13 11:53

GB
10
ULSP 2 A1
Service
Service Great Britain
Tel.: 0871 5000 720 (£ 0.10/Min.)
E-Mail: [email protected]
IAN 91055
Hotline availability: Monday to Friday 08:00 - 20:00 (CET)
Importer
KOMPERNASS HANDELS GMBH
BURGSTRASSE 21
44867 BOCHUM
GERMANY
www.kompernass.com
IB_91055_ULSP2A1_SK_RO_OS.indb 10IB_91055_ULSP2A1_SK_RO_OS.indb 10 22.07.13 11:5322.07.13 11:53

11
ULSP 2 A1
SK
Obsah
Úvod . . . . . . . . . . . . . . . . . . . . . . . . . . . . . . . . . .12
Informácie k tomuto návodu na obsluhu . . . . . . . . . . . . 12
Používanie v súlade surčením . . . . . . . . . . . . . . . . . . . . 12
Rozsah dodávky . . . . . . . . . . . . . . . . . . . . . . . . . . . . . . . 12
Technické údaje . . . . . . . . . . . . . . . . . . . . . . . . . . . . . . . 13
Bezpečnostné upozornenia . . . . . . . . . . . . . . . . . . . . . . 13
Pokyny pre zaobchádzanie s batériami . . . . . . . . . . . . . 14
Popis prístroja . . . . . . . . . . . . . . . . . . . . . . . . . . . . . . . . . 14
Uvedenie do prevádzky . . . . . . . . . . . . . . . . . .15
Vkladanie/výmena batérie. . . . . . . . . . . . . . . . . . . . . . . 15
Zapnutie avypnutie prístroja . . . . . . . . . . . . . . . . . . . . . 15
Spôsob merania . . . . . . . . . . . . . . . . . . . . . . . . . . . . . . . 16
Čistenie . . . . . . . . . . . . . . . . . . . . . . . . . . . . . . . .18
Skladovanie . . . . . . . . . . . . . . . . . . . . . . . . . . . .18
Zneškodnenie . . . . . . . . . . . . . . . . . . . . . . . . . .19
Zneškodnenie prístroja . . . . . . . . . . . . . . . . . . . . . . . . . . 19
Zneškodnenie batérií . . . . . . . . . . . . . . . . . . . . . . . . . . . 19
Servis . . . . . . . . . . . . . . . . . . . . . . . . . . . . . . . . .20
Dovozca . . . . . . . . . . . . . . . . . . . . . . . . . . . . . . .20
IB_91055_ULSP2A1_SK_RO_OS.indb 11IB_91055_ULSP2A1_SK_RO_OS.indb 11 22.07.13 11:5322.07.13 11:53

SK
12
ULSP 2 A1
Úvod
Informácie k tomuto návodu na obsluhu
Srdečne vám gratulujeme ku kúpe tohto nového prístroja.
Rozhodli ste sa tým pre vysokokvalitný výrobok. Návod na
obsluhu je súčasťou tohto výrobku. Obsahuje dôležité upo-
zornenia týkajúce sa bezpečnosti, používania azneškod-
nenia. Pred používaním výrobku sa oboznámte so všetkými
pokynmi na obsluhu abezpečnostnými upozorneniami.
Výrobok používajte iba tak, ako je to popísané aiba vtých
oblastiach použitia, ktoré sú tu uvedené. Tento návod na
obsluhu dobre uschovajte. Pri postúpení výrobku tretej osobe
odovzdajte sním aj všetky podklady.
Používanie v súlade surčením
Prístroj je výlučne určený pre stanovenie hrúbok vrstiev lakov
na oceľových povrchoch, napr, na automobiloch. Tento výro-
bok nie je určený na podnikateľské a priemyselné využívanie.
Za škody, ktoré vzniknú nesprávnym použitím prístroja,
nepreberáme zodpovednosť!
Rozsah dodávky
▯ Prístroj na meranie hrúbky laku
▯ Gombíková batéria CR2032
▯ Tento návod na obsluhu
IB_91055_ULSP2A1_SK_RO_OS.indb 12IB_91055_ULSP2A1_SK_RO_OS.indb 12 22.07.13 11:5322.07.13 11:53

13
ULSP 2 A1
SK
Technické údaje
Prevádzkové napätie 1 x 3 V batéria typu CR2032
Prevádzková teplota
0°C - 40°C, < 80 % relatívna
vlhkosť vzduchu
Rozmery (šxvxh) cca 4,2 x 6,8 x 1,7 cm
Hmotnosť cca 25 g
Bezpečnostné upozornenia
■ Pred používaním prekontrolujte prípadné viditeľné
poškodenia prístroja. Poškodený alebo spadnutý prístroj
neuvádzajte do prevádzky.
■ Tento prístroj nie je určený na to, aby ho používali osoby
(vr
átane detí) sobmedzenými fyzickými, zmyslovými alebo
duševnými schopnosťami, alebo snedostatkom skúseností
alebo nedostatkom znalostí, len za predpokladu, že budú
pod dohľadom osoby zodpovednej za ich bezpečnosť,
alebo od nej dostanú inštrukcie, ako sa má prístroj používať.
■ Na deti treba dohliadať, aby sa zabezpečilo, že sa
s prístr
ojom nebudú hrať.
■ Na prístroji nevykonávajte žiadne zmeny ani prestavby.
■ Opravy prístroja vpriebehu záručnej doby smie vykonávať
len výr
obcom autorizovaný zákaznícky servis, inak pri
následných škodách záruka stráca platnosť.
■ Chráňte prístroj pred vlhkosťou avniknutím kvapalín
do
vnútra.
■ Zariadenie nesmiete používať v prostredí znebezpečen-
stv
om výbuchu alebo na miestach vedúcich elektrický
prúd alebo na horúcich povrchoch.
IB_91055_ULSP2A1_SK_RO_OS.indb 13IB_91055_ULSP2A1_SK_RO_OS.indb 13 22.07.13 11:5322.07.13 11:53

SK
14
ULSP 2 A1
Pokyny pre zaobchádzanie s batériami
POZOR
► Nevhadzujte batérie do ohňa.
► Batérie neskratujte.
► Nepokúšajte sa batérie znova dobíjať.
► Batérie pravidelne kontrolujte. Žieraviny uniknuté
zbatérií môžu spôsobiť tr
valé poškodenia prístroja.
► Pri zaobchádzaní s poškodenými alebo vytečenými
batériami postupujte mimoriadne opatrne. Nebezpe-
č
enstvo poleptania! Noste ochranné rukavice.
► Batérie skladujte tak, aby boli deťom neprístupné.
Vprípade pr
ehltnutia batérie ihneď vyhľadajte lekár-
sku pomoc.
► Ak prístroj dlhšiu dobu nepoužívate, vyberte z neho
batérie.
Popis prístroja
Ochranný kryt
Merací senzor
Indikácia LED
Tlačidlo TEST
IB_91055_ULSP2A1_SK_RO_OS.indb 14IB_91055_ULSP2A1_SK_RO_OS.indb 14 22.07.13 11:5322.07.13 11:53

15
ULSP 2 A1
SK
Uvedenie do prevádzky
Vkladanie/výmena batérie
♦ Odoberte ochranný kryt a uvoľnite štyri skrutky
na zadnej strane prístroja.
♦ Odoberte zadnú stranu telesa.
♦ Zasuňte batériu typu CR2032 do uchytenia batérie.
Dodr
žte pritom správnu polaritu. Kladný pól batérie musí
smerovať hore.
♦ Zadnú stranu telesa zasa upevnite predtým povolenými
skrutk
ami.
UPOZORNENIE
► Keď blikajú všetky tri LEDky, musíte batériu vymeniť.
Zapnutie avypnutie prístroja
♦ Odstráňte ochranný kryt a tlačidlo TEST podržte
stlačené približne 3sekundy. LEDky krátko za sebou
zablikajú (ČERVENÁ >> ŽLTÁ >> ZELENÁ). Ako náhle
bliká len červená LEDka, nachádza sa prístroj v pohoto-
vostnom režime (Standby).
♦ Ak sa počas 20 sekúnd nezrealizuje meranie, prístroj sa
automatic
ky vypne. LEDky začnú súčasne blikať trikrát.
♦ Alternatívne môžete tlačidlo TEST
podržať stlačené
po dobu cca 3 sekúnd, aby ste prístroj manuálne vypli.
IB_91055_ULSP2A1_SK_RO_OS.indb 15IB_91055_ULSP2A1_SK_RO_OS.indb 15 22.07.13 11:5322.07.13 11:53

SK
16
ULSP 2 A1
Spôsob merania
Normálny režim merania
POZOR
► Prístroj opatrne položte na meranú plochu a počas
mer
ania ním nehýbte. Po ukončení merania prístroj
opatrne odoberte z povrchu, pretože v opačnom
prípade môžu vzniknúť na povrchu škrabance.
♦ Odoberte ochranný kryt
a prístroj zapnite (pohoto-
vostný režim - Standby).
♦ Prístroj podržte mimo akýchkoľvek povrchov a stlačte
tlačidlo TEST
. Červená LEDka sa rozsvieti trvalo a
prístroj sa nachádza teraz v normálnom režime merania.
♦ Nastavte merací senzor
v pravom uhle na meranú
plochu. Meraná hrúbka laku sa signalizuje svietením
jednej z troch LEDiek (pozri tabuľka).
Farba LEDky Hrúbka laku
červená > cca 1,8 mm
žltá cca 1,0 - 1,8 mm
zelená < cca 1,0 mm
♦ Pre vrátenie sa do pohotovostného režimu - Standby,
opak
ovane stlačte tlačidlo TEST . Bliká červená LEDka.
IB_91055_ULSP2A1_SK_RO_OS.indb 16IB_91055_ULSP2A1_SK_RO_OS.indb 16 22.07.13 11:5322.07.13 11:53

17
ULSP 2 A1
SK
Referenčný režim merania
V tomto režime môžete navzájom medzi sebouporovnať
hrúbky laku rôznych plôch napr. na vozidle. To je výhodné,
aby sa zistili rozdiely hrúbok laku. Takto môžete rýchlo a
jednoducho zistiť dodatočne prelakované a pretmelené plochy.
♦ Keď sa prístroj nachádza v normálnom režime merania,
nastavte mer
ací senzor v pravom uhle na kontrolova-
nú plochu.
UPOZORNENIE
► Ponúka sa plocha, napr. strechy vozidla, ktorá za bež-
ných ok
olností nie je pretmelená alebo prelakovaná.
Hrúbka laku určená k meraniu musí byť preto tenšia
ako 1,8 mm. Referenčný režim merania je funkčný len
ak svieti žltá alebo zelená LEDka.
♦ V priebehu merania stlačte tlačidlo TEST
. Zmeraná
hrúbka laku slúži teraz ako referenčná hodnota.
Striedavo bliká červená a zelená LEDka.
♦ Ako náhle odoberiete merací senzor
od referenčnej
plochy, striedavo blikajú červená a žltá LEDka.
♦ Nastavte merací senzor
na porovnávanú plochu,
napr. blatník. LEDky blikajú len v kombinácii dvoch
možností:
IB_91055_ULSP2A1_SK_RO_OS.indb 17IB_91055_ULSP2A1_SK_RO_OS.indb 17 22.07.13 11:5322.07.13 11:53
Pagina se încarcă...
Pagina se încarcă...
Pagina se încarcă...
Pagina se încarcă...
Pagina se încarcă...
Pagina se încarcă...
Pagina se încarcă...
Pagina se încarcă...
Pagina se încarcă...
Pagina se încarcă...
Pagina se încarcă...
Pagina se încarcă...
Pagina se încarcă...
Pagina se încarcă...
Pagina se încarcă...
Pagina se încarcă...
Pagina se încarcă...
Pagina se încarcă...
Pagina se încarcă...
Pagina se încarcă...
Pagina se încarcă...
Pagina se încarcă...
Pagina se încarcă...
Pagina se încarcă...
-
 1
1
-
 2
2
-
 3
3
-
 4
4
-
 5
5
-
 6
6
-
 7
7
-
 8
8
-
 9
9
-
 10
10
-
 11
11
-
 12
12
-
 13
13
-
 14
14
-
 15
15
-
 16
16
-
 17
17
-
 18
18
-
 19
19
-
 20
20
-
 21
21
-
 22
22
-
 23
23
-
 24
24
-
 25
25
-
 26
26
-
 27
27
-
 28
28
-
 29
29
-
 30
30
-
 31
31
-
 32
32
-
 33
33
-
 34
34
-
 35
35
-
 36
36
-
 37
37
-
 38
38
-
 39
39
-
 40
40
-
 41
41
-
 42
42
-
 43
43
-
 44
44


ULTIMATE SPEED ULSP 2 A1 Operating Instructions Manual
- Tip
- Operating Instructions Manual
în alte limbi
- English: ULTIMATE SPEED ULSP 2 A1
- slovenčina: ULTIMATE SPEED ULSP 2 A1
- Deutsch: ULTIMATE SPEED ULSP 2 A1
Alte documente
-
Silvercrest SND 3600 D3 Ghid de inițiere rapidă
-
Microlife IR 200 Manual de utilizare
-
Microlife IR 150 Manual de utilizare
-
Microlife IR 210 Manual de utilizare
-
Microlife NC 150 Manual de utilizare
-
Microlife NC 200 Manual de utilizare
-
-
-
-
Microlife NC 400 Manual de utilizare