ELICA Super Plat BL/F/80 Manual de utilizare
- Categorie
- Hote pentru aragaz
- Tip
- Manual de utilizare
Acest manual este potrivit și pentru

IT Istruzioni di montaggio e d'uso
EN Instruction on mounting and use
DE Montage- und Gebrauchsanweisung
FR Prescriptions de montage et mode d’emploi
NL Montagevoorschriften en gebruiksaanwijzingen
ES Montaje y modo de empleo
PT Instruções para montagem e utilização
EL ΟΔΗΓΙΕΣ ΣΥΝΑΡΜΟΛΟΓΗΣΗΣ ΚΑΙ ΧΡΗΣΗΣ
SV Monterings- och bruksanvisningar
FI Asennus- ja käyttöohjeet
NO Instrukser for montering og bruk
DA Bruger- og monteringsvejledning
PL Instrukcja montażu i obsługi
CS Návod na montáž a používání
SK Návod k montáži a užití
HU Felszerelési és használati utasítás
BG Инструкции за монтаж и употреба
RO Instrucțiuni de montaj și utilizare
RU Инструкция по монтажу и эксплуатации
UK Інструкція з монтажу і експлуатації
KK Монтаждау мен пайдалану нұсқауы
ET Paigaldus- ja kasutusjuhend
LT Montavimo ir naudojimosi instrukcija
LV Ierīkošanas un izmantošanas instrukcija
SR Uputstva za montažu i upotrebu
SL Navodila za montažo in uporabo
HR Uputstva za montažu i za uporabu
TR Montaj ve kullanım talimatları
AR ﻝﺎﻣﻌﺗﺳﻻﺍﻭ ﺏﻳﻛﺭﺗﻟﺍ ﻕﺭﻁ

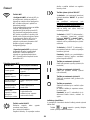
2

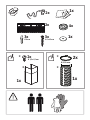
1x
2x
1x
Ø 8 mm
3x
Ø 5 x 45 mm
3x
1x
2x
4x
2x
Ø 3,5 x 6,5 mm
1x
2x
Ø 150 mm
*
*
*
*
LIB0164982

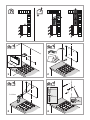
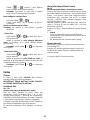
3 x Ø 8mm
= =
= =
5mm
3x
Ø8x40mm
2 x
Ø5x45mm
1 2
3 4
LIB0164865
LIB0164982
*

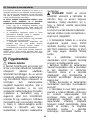
OK!
1x
1x
Ø5x45mm
5 6
7 8
9 10
LIB0164865
LIB0164982

11
12
32
1
90°
LIB0164982
2x

12.1
12
13
5
4
7
6
LIB0164982
4x
9
8
10

13
1
6
7
LIB0164982
2
4
3
5
90°
8 9
10

14
LIB0164982
15

10
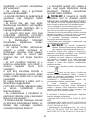
IT - Istruzioni di montaggio e d'uso
Attenersi strettamente alle istruzioni riportate in questo
manuale. Si declina ogni responsabilità per eventuali
inconvenienti, danni o incendi provocati all'apparecchio derivati
dall'inosservanza delle istruzioni riportate in questo manuale. La
cappa è concepita per l'aspirazione dei fumi e vapori della cottura
ed è destinata al solo uso domestico.
La cappa può avere estetiche differenti rispetto a quanto
illustrato nei disegni di questo libretto, comunque le istruzioni
per l'uso, la manutenzione e l'installazione rimangono le
stesse.
• E' importante conservare tutti i manuali che accompagnano il
prodotto per poterli consultare in ogni momento. In caso di
vendita, di cessione o di trasloco, assicurarsi che restino
insieme al prodotto.
• Leggere attentamente le istruzioni: ci sono importanti
informazioni sull'installazione, sull'uso e sulla sicurezza.
• Non effettuare variazioni elettriche o meccaniche sul prodotto
o sulle condotte di scarico.
• Verificare l'integrità della cappa prima di procedere con
l’installazione. In caso contrario contattare il rivenditore e non
proseguire con l'installazione.
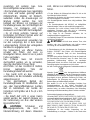
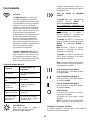
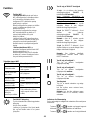
Nota: I particolari contrassegnati con il simbolo "(*)" sono
accessori opzionali forniti solo in alcuni modelli o particolari non
forniti, da acquistare.
Avvertenze
Collegamento Elettrico
La tensione di rete deve corrispondere alla
tensione riportata sull’etichetta
caratteristiche situata all’interno della
cappa. Se provvista di spina allacciare la
cappa ad una presa conforme alle norme
vigenti posta in zona accessibile anche
dopo l’installazione. Se sprovvista di spina
(collegamento diretto alla rete) o la spina
non è posta in zona accessibile, anche
dopo installazione, applicare un interruttore
bipolare a norma che assicuri la
disconnessione completa della rete nelle
condizioni della categoria di sovratensione
III, conformemente alle regole di
installazione.
ATTENZIONE! Prima di ricollegare il
circuito della cappa all’alimentazione di rete
e di verificarne il corretto funzionamento,
controllare sempre che il cavo di rete sia
stato montato correttamente.
La cappa è provvista di un cavo
alimentazione speciale; in caso di
danneggiamento del cavo, richiederlo al
servizio assistenza tecnica.
• La distanza minima fra la superficie di
supporto dei recipienti sul dispositivo di
cottura e la parte più bassa della cappa da
cucina deve essere non inferiore a 50 cm
in caso di cucine elettriche e di 65 cm in
caso di cucine a gas o miste.
Se le istruzioni di installazione del
dispositivo di cottura a gas specificano una
distanza maggiore, bisogna tenerne conto.
• Prima di qualsiasi operazione di pulizia o
manutenzione, disinserire la cappa dalla
rete elettrica togliendo la spina o staccando
l’interruttore generale dell’abitazione.
• Per tutte le operazioni di installazione e
manutenzione utilizzare guanti da lavoro.
• L’apparecchio può essere utilizzato da
bambini di età non inferiore a 8 anni e da
persone con ridotte capacità fisiche,
sensoriali o mentali, o prive di esperienza o
della necessaria conoscenza, purché sotto
sorveglianza oppure dopo che le stesse
abbiano ricevuto istruzioni relative all’uso
sicuro dell’apparecchio e alla
comprensione dei pericoli ad esso inerenti.
• I bambini devono essere controllati
affinché non giochino con l’apparecchio.
• La pulizia e la manutenzione non deve
essere effettuata da bambini senza
sorveglianza.
• Il locale deve disporre di sufficiente
ventilazione, quando la cappa da cucina

11
viene utilizzata contemporaneamente ad
altri apparecchi a combustione di gas o altri
combustibili.
• La cappa va frequentemente pulita sia
internamente che esternamente (ALMENO
UNA VOLTA AL MESE), rispettare
comunque quanto espressamente indicato
nelle istruzioni di manutenzione.
L’inosservanza delle norme di pulizia della
cappa e della sostituzione e pulizia dei filtri
comporta rischi di incendi.
• E’ severamente vietato fare cibi alla
fiamma sotto la cappa.
• Per la sostituzione della lampada
utilizzare solo il tipo lampada indicato nella
sezione manutenzione /sostituzione
lampada di questo manuale.
L’impiego di fiamma libera è dannoso ai
filtri e può dar luogo ad incendi, pertanto
deve essere evitato in ogni caso.
La frittura deve essere fatta sotto controllo
onde evitare che l’olio surriscaldato prenda
fuoco.
ATTENZIONE: Quando il piano di cottura è
in funzione le parti accessibili della cappa
possono diventare calde.
• Non collegare l’apparecchio alla rete
elettrica finché l’installazione non è
totalmente completata.
• Per quanto riguarda le misure tecniche e
di sicurezza da adottare per lo scarico dei
fumi attenersi strettamente a quanto
previsto dai regolamenti delle autorità locali
competenti.
• L’aria aspirata non deve essere
convogliata in un condotto usato per lo
scarico dei fumi prodotti da apparecchi a
combustione di gas o di altri combustibili.
ATTENZIONE! La mancata
installazione di viti e dispositivi di fissaggio
in conformità di queste istruzioni può
comportare rischi di natura elettrica.
• Non utilizzare o lasciare la cappa priva di lampade correttamente
montate per possibile rischio di scossa elettrica.
• Mai utilizzare la cappa senza griglia correttamente montata!
• La cappa non va MAI utilizzata come piano di appoggio a meno
che non sia espressamente indicato.
• Utilizzare solo le viti di fissaggio in dotazione con il prodotto per
l'installazione o, se non in dotazione, acquistare il tipo di viti
corretto.
• Utilizzare la lunghezza corretta per le viti che sono identificati
nella Guida all'installazione.
• In caso di dubbio, consultare il centro di assistenza autorizzato o
personale qualificato similare.
ATTENZIONE! Non utilizzare con un
programmatore, timer, telecomando separato o qualsiasi altro
dispositivo che si attiva automaticamente.
Questo apparecchio è contrassegnato in conformità alla Direttiva
Europea 2012/19/EC, Waste Electrical and Electronic Equipment
(WEEE). Assicurandosi che questo prodotto sia smaltito in modo
corretto, l'utente contribuisce a prevenire le potenziali
conseguenze negative per l'ambiente e la salute.
Il simbolo
sul prodotto o sulla documentazione di
accompagnamento indica che questo prodotto non deve essere
trattato come rifiuto domestico ma deve essere consegnato presso
l'idoneo punto di raccolta per il riciclaggio di apparecchiature
elettriche ed elettroniche. Disfarsene seguendo le normative locali
per lo smaltimento dei rifiuti. Per ulteriori informazioni sul
trattamento, recupero e riciclaggio di questo prodotto, contattare
l'idoneo ufficio locale, il servizio di raccolta dei rifiuti domestici o il
negozio presso il quale il prodotto è stato acquistato.
Apparecchiatura progettata, testata e realizzata nel rispetto delle
norme sulla:
• Sicurezza: EN/IEC 60335-1; EN/IEC 60335-2-31, EN/IEC 62233.
• Prestazione: EN/IEC 61591; ISO 5167-1; ISO 5167-3; ISO 5168;
EN/IEC 60704-1; EN/IEC 60704-2-13; EN/IEC 60704-3; ISO 3741;
EN 50564; IEC 62301.
• EMC: EN 55014-1; CISPR 14-1; EN 55014-2; CISPR 14-2;
EN/IEC 61000-3-2; EN/IEC 61000-3-3; ETSI EN 301 489-1; ETSI
EN 301 489-17; ETSI EN 300 328; IEC 62311:2019.
Suggerimenti per un corretto utilizzo al fine di ridurre l’impatto
ambientale: Quando iniziate a cucinare, accendere la cappa alla
velocità minima, lasciandola accesa per alcuni minuti anche dopo il
termine della cottura. Aumentare la velocità solo in caso di grandi
quantità di fumo e vapore, utilizzando la funzione booster solo in
casi estremi. Per mantenere ben efficiente il sistema di riduzione
degli odori, sostituire, quando è necessario, il/i filtro/i carbone. Per
mantenere ben efficiente il filtro del grasso, pulirlo in caso di
necessità. Per ottimizzare l’efficienza e minimizzare i rumori,
utilizzare il diametro massimo del sistema di canalizzazione
indicato in questo manuale.

12
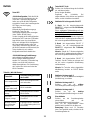
Utilizzazione
La cappa è realizzata per essere utilizzata in versione
aspirante ad evacuazione esterna o filtrante a ricircolo interno.
Versione aspirante
I vapori vengono evacuati verso l’esterno tramite un tubo di
scarico fissato alla flangia di raccordo.
ATTENZIONE!
Il tubo di evacuazione non è fornito e va acquistato.
Il diametro del tubo di scarico deve essere equivalente al
diametro dell'anello di connessione.
ATTENZIONE!
Se la cappa è provvista di filtro/i a carbone, questo/i
deve/devono essere rimosso/i.
Collegare la cappa a tubi e fori di scarico a parete con
diametro equivalente all'uscita d'aria (flangia di raccordo).
L'utilizzo di tubi e fori di scarico a parete con diametro inferiore
determinerà una diminuzione delle prestazioni di aspirazione
ed un drastico aumento della rumorosità.
Si declina perciò ogni responsabilità in merito.
! Usare un condotto lungo il minimo indispensabile.
! Usare un condotto con minor numero di curve possibile
(angolo massimo della curva: 90°).
! Evitare cambiamenti drastici di sezione del condotto.
Versione filtrante
L’aria aspirata verrà sgrassata e deodorata prima di essere
riconvogliata nella stanza. Per utilizzare la cappa in questa
versione è necessario installare un sistema di filtraggio
aggiuntivo a base di carboni attivi.
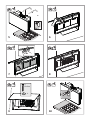
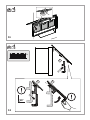
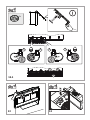
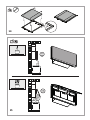
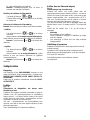
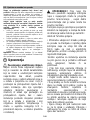
Installazione
Montaggio
Prima di iniziare con l'installazione:
• Verificare che il prodotto acquistato sia di dimensioni
idonee alla zona di installazione prescelta.
• Togliere il/i filtro/i al carbone attivo se forniti (vedi anche
paragrafo relativo). Questo/i va/nno rimontato/i solo se si
vuole utilizzare la cappa in versione filtrante.
• Verificare che all'interno della cappa non vi sia (per motivi
di trasporto) materiale di corredo (ad esempio buste con
viti, garanzie etc) , eventualmente va tolto e conservato.
La cappa è dotata di tasselli di fissaggio adatti alla maggior
parte di pareti/soffitti. È tuttavia necessario interpellare un
tecnico qualificato per accertarVi sull’idoneità dei materiali a
seconda del tipo di parete/soffitto. La/il parete/soffitto deve
essere sufficientemente robusto da sostenere il peso della
cappa.
Elica Connect
La cappa è dotata di funzionalità WiFi per la connessione
remota tramite l’app Elica Connect.
Requisiti minimi di sistema:
• Router wireless 2.4GHz WiFi b/g/n
• Smartphone Android o iOs. Verificare sugli store la
compatibilità dell'app con la versione del sistema
operativo del proprio smartphone.
Nota: Il fabbricante ELICA dichiara che questo modello di
elettrodomestico con apparecchiatura radio modulo WiFi è
conforme alla direttiva 2014/53/UE.
L'apparecchiatura radio opera nella banda di frequenza ISM a
2.4GHz, la massima potenza a radiofrequenza trasmessa non
eccede 20 dBm (e.i.r.p.).
Avvertenze:
• Tutela dei dati. I dati che l’apparecchio connesso rileva
sono raccolti per consentire l’utilizzo di tutti i servizi
dell’elettrodomestico connesso. Ulteriori informazioni
sulle modalità del trattamento dei dati raccolti e sulla
informativa privacy sono disponibili sul sito
www.elica.com.
• Disponibilità nei paesi. Il servizio Elica Connect è
disponibile in specifici paesi. Per ulteriori informazioni
visitare la sezione dedicata del sito www.elica.com.
• Modifiche future. Elica si riserva di apportare tutte le
modifiche che riterrà utili al miglioramento del servizio
Elica Connect. Di conseguenza le descrizioni contenute
in questo manuale non sono impegnative ed hanno un
valore indicativo.

13
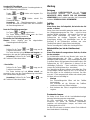
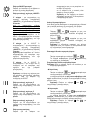
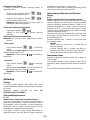
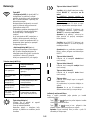
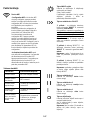
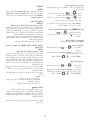
Funzionamento
Tasto WiFi
• Configurazione WiFi: se la funzionalità
WiFi non è configurata, premere per circa
2 secondi per entrare in modalità
configurazione WiFi e seguire le istruzioni
sulla App per completare la procedura.
Durante la procedura di configurazione il
tasto si illumina indicando lo stato della
connettività (vedi Tabella stato WiFi)
Per interrompere la procedura di
configurazione WiFi, premere per circa 2
secondi quando il tasto è acceso a luce
pulsante veloce.
Una volta configurata la funzionalità WiFi,
se si desidera modificarla premere per
circa 6 secondi per resettare i parametri
WiFi (il tasto si spegne) e ripetere la
procedura di configurazione.
• Attivazione/disattivazione WiFi: dopo
aver effettuato la configurazione, è
possibile disattivare/attivare la funzionalità
WiFi. Premere per circa 2 secondi per
disattivare/attivare la funzionalità WiFi. La
disattivazione della funzionalità non
comporta la perdita dei parametri WiFi.
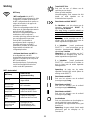
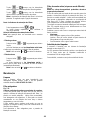
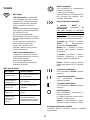
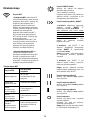
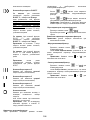
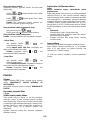
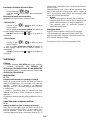
Tabella stato WiFi
Tasto WiFi
Stato connessione
dispositivo
Luce spenta
WiFi non configurato o
spento
Luce accesa fissa
bianca
WiFi connesso
Luce pulsante
veloce arancio
Tentativo di connessione al
router WiFi
Luce pulsante lento
arancio
Tentativo di connessione al
cloud Elica
Luce accesa
bianca con breve
luce pulsante
Ricezione di un comando da
remoto (es. accensione
motore o luce)
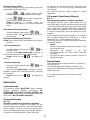
Tasto ON/OFF luce
Premere per accendere o spegnere
l'illuminazione del piano di cottura.
Solo in alcuni modelli:
Regolazione intensità:
A
luce accesa
premere e mantenere premuto per regolare
l'intensità della luce.
Tasto di selezione velocità “BOOST”
1° pressione : per attivare la velocità di
aspirazione intensiva “BOOST 1”,
temporizzata per 30 minuti
questa temporizzazione prolungata è stata
concepita per garantire un tempo utile per
cotture ad alto contenuto di fumi
Nota : trascorsi i 30 minuti, la cappa
tornerà alla velocità di aspirazione
precedentemente impostata
2° pressione (da “BOOST 1” attivato) :
per attivare la velocità di aspirazione
intensiva “BOOST 2”, temporizzata per 7
minuti
Nota : trascorsi i 7 minuti la cappa tornerà
alla velocità di aspirazione
precedentemente impostata
3° pressione (da “BOOST 2” attivato) :
per uscira dalla funzione, e tornare alla
velocità precedentemente impostata.
Nota: il tasto della velocità
precedentemente impostata rimane
illuminato durante il funzionamento dei
BOOST
Tasto di selezione velocità 3
Premere per attivare la velocità (potenza di
aspirazione) alta
Tasto di selezione velocità 2
Premere per attivare la velocità (potenza di
aspirazione) media
Tasto di selezione velocità 1
Premere per attivare la velocità (potenza di
aspirazione) bassa
Tasto accensione
Premere per accendere la cappa e
permettere la selezione delle velocità;
se premuto da motore acceso, il motore si
spegne
Nota: se non si interviene su nessuna
funzione dopo 10 secondi la cappa si
spegne.

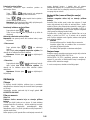
14
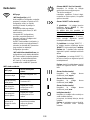
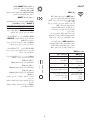
Indicatori di Saturazione filtri
Ad intervalli regolari la cappa segnala la necessità di eseguire
la manutenzione dei filtri.
Tasti "
" e " " accesi a luce lampeggiante molto
lenta : eseguire la manutenzione del filtro grassi.
Tasti "
" e " " accesi a luce lampeggiante veloce
: eseguire la manutenzione del filtro odori.
Nota: La segnalazione di saturazione dei filtri è visibile
entro i primi 10 secondi dall’accensione della cappa
Reset indicatori saturazione filtri:
Premere a lungo i tasti "
" e " "
I tasti lampeggeranno velocemente a conferma
dell’avvenuto reset
Attivazione indicatori saturazione filtri
Nota: questa operazione va eseguita a cappa spenta.
- Filtro grassi
Premere i tasti "
" e " " a lungo per attivare la
funzione
i tasti si illuminano a luce lampeggiante molto lenta, ad
indicare che si può attivare l’indicatore filtro grassi
Nota: Premere i tasti "
" e " " per attivare o disattivare
- Filtro odori
Premere i tasti "
" e " " a lungo per attivare la
funzione
i tasti si illuminano a luce lampeggiante veloce, ad
indicare che si può attivare l’indicatore filtro odori
(normalmente disattivato)
Nota: Premere i tasti "
" e " " per attivare o disattivare.
Manutenzione
Pulizia
Per la pulizia usare ESCLUSIVAMENTE un panno inumidito
con detersivi liquidi neutri. NON UTILIZZARE UTENSILI O
STRUMENTI PER LA PULIZIA! Evitare l’uso di prodotti
contenenti abrasivi. NON UTILIZZARE ALCOOL!
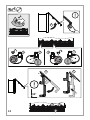
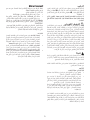
Filtro antigrasso
Fig. 7-11
Trattiene le particelle di grasso derivanti dalla cottura.
Deve essere pulito una volta al mese (o quando il sistema di
indicazione di saturazione dei filtri - se previsto sul modello in
possesso- indica questa necessità), con detergenti non
aggressivi, manualmente oppure in lavastoviglie a basse
temperature ed a ciclo breve.
Con il lavaggio in lavastoviglie il filtro antigrasso metallico può
scolorirsi ma le sue caratteristiche di filtraggio non cambiano
assolutamente.
Per smontare il filtro grassi tirare la maniglia di sgancio a
molla.
Filtro ai carboni attivi (Solo per Versione Filtrante)
Fig. 14
Trattiene gli odori sgradevoli derivanti dalla cottura.
Il filtro al carbone può essere lavato ogni due mesi (o quando
il sistema di indicazione di saturazione dei filtri - se previsto
sul modello in possesso- indica questa necessità) in acqua
calda e detergenti idonei o in lavastoviglie a 65°C (in caso di
lavaggio in lavastoviglie eseguire il ciclo di lavaggio completo
senza stoviglie all'interno).
Togliere l'acqua in eccesso senza rovinare il filtro, dopodiché
riporlo nel forno per 10 minuti a 100°C per asciugarlo
definitivamente.
Sostituire il materassino ogni 3 anni e ogni volta che il panno
risulta danneggiato.
• Montaggio
Aprire lo schermo vapori e togliere il filtro grassi.
Installare il filtro al carbone sul retro del filtro grassi e
fissare con due bacchette.
• Per smontare il filtro procedere in senso inverso.
Sostituzione Lampade
La cappa è dotata di un sistema di illuminazione basato sulla
tecnologia LED.
I LED garantiscono una illuminazione ottimale, una durata fino
a 10 volte maggiore delle lampade tradizionali e consentono
di risparmiare il 90% di energia elettrica.
Per la sostituzione rivolgersi al servizio assistenza tecnica.

15
EN - Instruction on mounting and use
Closely follow the instructions set out in this manual. All
responsibility, for any eventual inconveniences, damages or
fires caused by not complying with the instructions in this
manual, is declined. This appliance is intended to be used in
household and similar application such as: - staff kitchen
areas in shop, offices and other working environments; - farm
houses; - by clients in hotels, motels and other residential type
environments; - bed and breakfast type environments.
The hood can look different to that illustrated in the
drawings in this booklet. The instructions for use,
maintenance and installation, however, remain the same.
• It is important to conserve this booklet for consultation at
any moment. In the case of sale, cession or move, make
sure it is together with the product.
• Read the instructions carefully: there is important
information about installation, use and safety.
• Do not carry out electrical or mechanical variations on the
product or on the discharge conduits.
• Before proceeding with the installation of the appliance
verify that there are no damaged all components.
Otherwise contact your dealer and do not proceed with
the installation.
Note: The parts marked with the symbol "(*)" are optional
accessories supplied only with some models or otherwise not
supplied, but available for purchase.
Caution
Electrical connection
The mains power supply must
correspond to the rating indicated on the
plate situated inside the hood. If provided
with a plug connect the hood to a socket
in compliance with current regulations
and positioned in an accessible area,
after installation. If it not fitted with a plug
(direct mains connection) or if the plug is
not located in an accessible area, after
installation, apply a double pole switch in
accordance with standards which
assures the complete disconnection of
the mains under conditions relating to
over-current category III, in accordance
with installation instructions.
WARNING! Before re-connecting the
hood circuit to the mains supply and
checking the efficient function, always
check that the mains cable is correctly
assembled.
The hood is provided with a special
power cable ; if the cable is damaged,
request a new one from Technical
Service.
• The minimum distance between the
supporting surface for the cooking
equipment on the hob and the lowest part
of the range hood must be not less than
50cm from electric cookers and 65cm
from gas or mixed cookers.
If the instructions for installation for the
gas hob specify a greater distance, this
must be adhered to.
• Before any cleaning or maintenance
operation, disconnect hood from the
mains by removing the plug or
disconnecting the mains electrical supply.
• Always wear work gloves for all
installation and maintenance operations.
• This appliance can be used by children
aged from 8 years and above and
persons with reduced physical, sensory
or mental capabilities or lack of
experience and knowledge if they have
been given supervision or instruction
concerning use of the appliance in a safe
way and understand the hazards
involved.
• Children shall not be allowed to tamper
with the controls or play with the
appliance.
• Cleaning and user maintenance shall
not be made by children without
supervision.
• The premises where the appliance is
installed must be sufficiently ventilated,

16
when the kitchen hood is used together
with other gas combustion devices or
other fuels.
• The hood must be regularly cleaned on
both the inside and outside (AT LEAST
ONCE A MONTH).
• This must be completed in accordance
with the maintenance instructions
provided. Failure to follow the instructions
provided regarding the cleaning of the
hood and filters will lead to the risk of
fires.
• Do not flambé under the range hood.
• Do not remove filters during cooking.
• For lamp replacement use only lamp
type indicated in the
Maintenance/Replacing lamps section of
this manual.
The use of exposed flames is detrimental
to the filters and may cause a fire risk,
and must therefore be avoided in all
circumstances.
Any frying must be done with care in
order to make sure that the oil does not
overheat and ignite.
CAUTION: Accessible parts of the hood
may become hot when used with cooking
appliances.
• Do not connect the appliance to the mains
until the installation is fully complete.
• With regards to the technical and safety
measures to be adopted for fume
discharging it is important to closely
follow the regulations provided by the
local authorities.
• The air must not be discharged into a
flue that is used for exhausting fumes
from appliance burning gas or other
fuels.
WARNING! Failure to install the
screws or fixing device in accordance
with these instructions may result in
electrical hazards.
• Do not use or leave the hood without the lamp correctly
mounted due to the possible risk of electric shocks.
• Never use the hood without effectively mounted grids.
• The hood must NEVER be used as a support surface unless
specifically indicated.
• Use only the fixing screws supplied with the product for
installation or, if not supplied, purchase the correct screws
type.
• Use the correct length for the screws which are identified in
the Installation Guide.
• In case of doubt, consult an authorized service assistance
center or similar qualified person.
WARNING! Do not use with a programmer, timer,
separate remote control system or any other device that
switches on automatically.
• This appliance is marked according to the European
directive 2012/19/EC on Waste Electrical and Electronic
Equipment (WEEE).
• By ensuring this product is disposed of correctly, you will
help prevent potential negative consequences for the
environment and human health, which could otherwise be
caused by inappropriate waste handling of this product.
• The symbol
on the product, or on the documents
accompanying the product, indicates that this appliance may
not be treated as household waste. Instead it should be taken
to the appropriate collection point for the recycling of electrical
and electronic equipment. Disposal must be carried out in
accordance with local environmental regulations for waste
disposal.
• For further detailed information regarding the process,
collection and recycling of this product, please contact the
appropriate department of your local authorities or the local
department for household waste or the shop where you
purchased this product.
Appliance designed, tested and manufactured according to:
• Safety: EN/IEC 60335-1; EN/IEC 60335-2-31, EN/IEC
62233.
• Performance: EN/IEC 61591; ISO 5167-1; ISO 5167-3; ISO
5168; EN/IEC 60704-1; EN/IEC 60704-2-13; EN/IEC 60704-3;
ISO 3741; EN 50564; IEC 62301.
• EMC: EN 55014-1; CISPR 14-1; EN 55014-2; CISPR 14-2;
EN/IEC 61000-3-2; EN/IEC 61000-3-3; ETSI EN 301 489-
1;ETSI EN 301 489-17; ETSI EN 300 328; IEC 62311:2019.
Suggestions for a correct use in order to reduce the
environmental impact: Switch ON the hood at minimum
speed when you start cooking and kept it running for few
minutes after cooking is finished. Increase the speed only in
case of large amount of smoke and vapor and use boost
speed(s) only in extreme situations. Replace the charcoal
filter(s) when necessary to maintain a good odor reduction
efficiency. Clean the grease filter(s) when necessary to
maintain a good grease filter efficiency. Use the maximum
diameter of the ducting system indicated in this manual to
optimize efficiency and minimize noise.

17
Use
The hood is designed to be used either for exhausting or filter
version.
Extraction version
In this case the fumes are conveyed outside of the building by
means of a special pipe connected with the connection ring
located on top of the hood.
CAUTION!
The exhausting pipe is not supplied and must be purchased
apart.
Diameter of the exhausting pipe must be equal to that of the
connection ring.
CAUTION!
If the hood is supplied with active charcoal filter, then it must
be removed.
Connect the hood and discharge holes on the walls with a
diameter equivalent to the air outlet (connection flange).
Using the tubes and discharge holes on walls with smaller
dimensions will cause a diminution of the suction performance
and a drastic increase in noise.
Any responsibility in the matter is therefore declined.
! Use a duct of the minimum indispensable length.
! Use a duct with as few elbows as possible (maximum
elbow angle: 90°).
! Avoid drastic changes in the duct cross-section.
Filtration version
The aspirated air will be degreased and deodorised before
being fed back into the room.
In order to use the hood in this version, you have to install a
system of additional filtering based on activated charcoal.
Installation
Mounting
Before beginning installation:
• Check that the product purchased is of a suitable size for
the chosen installation area.
• Remove the charcoal (*) filter/s if supplied (see also
relative paragraph). This/these is/are to be mounted only
if you want lo use the hood in the filtering version.
• Check (for transport reasons) that there is no other
supplied material inside the hood (e.g. packets with
screws (*), guarantees (*), etc.), eventually removing
them and keeping them.
Expansion wall plugs are provided to secure the hood to most
types of walls/ceilings. However, a qualified technician must
verify suitability of the materials in accordance with the type of
wall/ceiling. The wall/ceiling must be strong enough to take
the weight of the hood.
Do not tile, grout or silicone this appliance to the wall.
Surface mounting only.
Elica Connect
The hood features a WiFi function for remote connection via
the Elica Connect app.
Minimum system requirements:
• 2.4GHz WiFi b/g/n wireless router
• Android or iOs Smartphone. Via the stores, check that
the app is compatible with the operating system your
Smartphone is running.
Note: The ELICA manufacturer declares that this model of
household appliance with WiFi module radio equipment
complies with Directive 2014/53/EU.
The radio equipment operates within the 2.4GHz ISM
frequency band, the maximum radio frequency power
transmitted does not exceed 20 dBm (e.i.r.p.).
Warnings:
• Data protection. The data that the connected device
detects is collected to allow for all the services of the
connected appliance to be used. Further information on
how the collected data is processed and on the privacy
policy is available at www.elica.com.
• Availability in different countries. The Elica Connect
service is available in specific countries. For further
information, see the dedicated section at www.elica.com.
• Future changes. Elica reserves the right to make any
changes deemed useful to improve the Elica Connect
service. As a result, the descriptions contained in this
manual are not binding and should be treated as purely
indicative.

18
Operation
WiFi button
WiFi configuration: if the WiFi function is
not configured, press for about 2 seconds
to enter WiFi configuration mode and
follow the instructions on the App to
complete the procedure.
During the configuration procedure, the
button will light up indicating the
connectivity status (see WiFi status table)
To interrupt the WiFi configuration
procedure, press for about 2 seconds
when the button is lit up and is flashing
fast.
Once the WiFi function has been
configured, if you want to change it, press
for about 6 seconds to reset the WiFi
parameters (the button will turn off) and
repeat the configuration procedure.
• WiFi activation/deactivation: after the
configuration, it is possible to
deactivate/activate the WiFi function.
Press for about 2 seconds to
deactivate/activate the WiFi function.
Deactivating the function does not cause
the loss of the WiFi parameters
WiFi status table
WiFi button Device connection status
Light off WiFi not configured or off
White light on
steady
WiFi connected
Orange light
flashing fast
A
ttempt to connect to the
WiFi router
Orange light
flashing slowly
A
ttempt to connect to the
Elica cloud
White light on with
short flashing
orange light
Remote command being
received (e.g. engine
ignition or light turned on)
ON/OFF light button
Press to turn the cooktop light on or off.
In selected models only:
Intensity regulation: With the light on,
press and hold to adjust the light intensity.
"BOOST" speed selection key
1st push : to enable the intensive suction
speed “BOOST 1”, timed for 30 minutes
this prolonged timing has been designed
to guarantee a suitable cooking time for
preparations that release high amounts of
smoke during cooking
Note : after 30 minutes, the hood will
return to the suction speed previously set
2nd push ("BOOST 1" activated): to
activate the intensive suction speed
“BOOST 2”, timed for 7 minutes
Note: after 7 minutes, the hood will return
to the previously set suction speed
3rd push ("BOOST 2" activated): to exit
the function and return to the speed
previously set.
Note: the speed key previously set
remains lit during BOOST operation.
Speed selection key 3
Push to activate the high speed (suction
power)
Speed selection key 2
Push to activate the average speed
(suction power)
Speed selection key 1
Push to enable the low speed (suction
power)
Power button
Push to switch on the hood and enable
speed selection;
if pushed while the motor is running, the
latter will stop
Note: if no function is activated within 10
seconds, the hood turns off.

19
Filter Saturation indicator lights
The hood signals at regular intervals that the filters must be
serviced.
Keys "
" and " " lit and flashing very slowly:
service the grease filter.
Keys "
" and " " lit and flashing quickly: service
the odour filter.
Note: The filter saturation warning signal is visible within
the first 10 seconds after the hood is switched on.
Reset filter saturation indicator:
Press and hold the keys "
" and " "
The keys will flash quickly to confirm that reset has been
completed
Activation of filter saturation indicators
Note: this operation must be performed with the hood off.
- Grease filter
Push and hold down the keys "
" and " " to
activate the function
the keys light up flashing very slowly, indicating that the
grease filter indicator can be activated
Note: Push the keys "
" and " " to activate or deactivate
- Odour filter
Push and hold down the keys "
" and " " to
activate the function
the keys light up flashing quickly, indicating that the
odour filter indicator can be activated (normally deactivated)
Note: Push the keys "
" and " " to activate or deactivate
Maintenance
Cleaning
Clean using ONLY a cloth dampened with neutral liquid
detergent. DO NOT CLEAN WITH TOOLS OR
INSTRUMENTS. Do not use abrasive products. DO NOT USE
ALCOHOL!
Grease filter
Fig. 7-11
Traps cooking grease particles.
This must be cleaned once a month (or when the filter
saturation indication system – if envisaged on the model in
possession – indicates this necessity) using non aggressive
detergents, either by hand or in the dishwasher, which must
be set to a low temperature and a short cycle.
When washed in a dishwasher, the grease filter may discolor
slightly, but this does not affect its filtering capacity.
To remove the grease filter, pull the spring release handle.
Charcoal filter (filter version only)
Fig. 14
It absorbs unpleasant odors caused by cooking.
The charcoal filter can be washed once every two months (or
when the filter saturation indication system – if envisaged on
the model in possession – indicates this necessity) using hot
water and a suitable detergent, or in a dishwasher at 65°C (if
the dishwasher is used, select the full cycle function and leave
dishes out).
Eliminate excess water without damaging the filter, then put it
in the oven for 10 minutes at 100° C to dry completely.
Replace the mattress every 3 years and when the cloth is
damaged.
• Montage
Open the steam screen and remove the grease filter.
Install the carbon filter on the back of the grease filter and
fix with two rods.
• To dismantle the filter act in the reverse manner.
Replacing lamps
The hood is equipped with a lighting system based on LED
technology.
The LEDs guarantee an optimum lighting, a duration up to 10
times longer than the traditional lamps and allow to save 90%
electrical energy.
For replacement, contact the technical service.

20
DE - Montage- und Gebrauchsanweisung
Die Anweisungen, die in diesem Handbuch gegeben werden,
müssen strikt eingehalten werden. Es wird keinerlei Haftung
übernommen für mögliche Mängel, Schäden oder Brände der
Dunstabzugshaube, die auf die Nichtbeachtung der Vorschriften in
diesem Handbuch zurückzuführen sind. Die Dunstabzugshaube
wurde für die Absaugung der beim Kochen entstehenden Dünste
und Dämpfe entwickelt. Sie ist nur für den Hausgebrauch
geeignet.
Die Dunstabzugshaube kann anders aussehen als auf den
Abbildungen in der vorliegenden Bedienungsanleitung. Die
Bedienungsanleitungen, die Wartung und die Installation sind
aber gleich.
• Die Bedienungsanleitung muss aufbewahrt werden, damit
jederzeit ein Nachschlagen möglich ist. Bei Verkauf,
Abtretung oder Umzug muss die Bedienungsanleitung immer
beim Produkt bleiben.
• Die Bedienungsanleitung muss aufmerksam gelesen
werden, da sie wichtige Informationen über Installation,
Gebrauch und Sicherheit enthält.
• Es dürfen keine elektrischen oder mechanischen
Änderungen am Gerät oder an den Abluftleitungen
vorgenommen werden.
• Vergewissern Sie sich vor der Installation, dass das Gerät
keine Transportschäden aufweist. Bei auftretenden
Problemen setzen Sie sich bitte mit Ihrem Händler in
Verbindung.
Anmerkung: Die mit "(*)" gekennzeichnete Details sind
Optionszubehöre, die nur mit einigen Modellen mitgeliefert
werden, oder die nicht mitgeliefert und gekauft werden müssen.
Warnung
Elektrischer Anschluss
Die Netzspannung muss der Spannung
entsprechen, die auf dem Typenschild im
Innern der Haube angegeben ist. Sofern
die Haube einen Netzstecker hat, ist dieser
an zugänglicher Stelle an eine den
geltenden Vorschriften entsprechende
Steckdose nach der Montage
anzuschließen. Bei einer Haube ohne
Stecker (direkter Netzanschluss) oder falls
der Stecker nicht zugänglich ist, ist ein
normgerechter zweipoliger Schalter nach
der Montage anzubringen, der unter
Umständen der Überspannung Kategorie
III entsprechend den Installationsregeln ein
vollständiges Trennen vom Netz garantiert.
HINWEIS! Vor der Inbetriebnahme
muss sichergestellt werden, dass die
Netzversorgungleitung (Steckdose)
ordnungsgemäß montiert wurde.
Die Dunstabzugshaube ist mit einem
Spezialkabel ausgestattet. Sollte das Kabel
beschädigt werden, muss beim
Kundendienst Ersatz angefordert werden.
• Der Abstand zwischen der Abstellfläche
auf dem Kochfeld und der Unterseite der
Dunstabzugshaube darf 50 cm im Fall von
elektrischen Kochfeldern und 65 cm im Fall
von Gas- oder kombinierten Herden nicht
unterschreiten.
Wenn die Installationsanweisungen des
Gaskochgeräts einen größeren Abstand
vorgeben, ist dieser zu berücksichtigen.
• Vor jeglicher Reinigung bzw. Wartung
muss das Gerät vom Stromnetz getrennt
werden, indem man den Stecker
herauszieht bzw. den Hauptschalter
ausschaltet.
• Alle Installations- und Wartungarbeiten sind
mit Arbeitshandschuhen durchzuführen.
• Das Gerät kann von Kindern ab 8 Jahren,
sowie von Menschen mit verringerten
physischen, sinnlichen oder psychischen
Fähigkeiten (oder ohne Erfahrung und
Kenntnisse) benutzt werden, sofern sie
entsprechend überwacht werden bzw. in
die Benutzung des Geräts sicher
eingewiesen wurden und sich der damit
verbundenen Gefahren bewusst sind.
• Darauf achten, dass Kinder mit dem
Gerät nicht spielen. Kinder dürfen bei
Reinigung und Wartung nur dann helfen,
wenn sie dabei beaufsichtigt werden.
• Der Raum muss ausreichend belüftet
sein, wenn die Dunstabzugshaube
Pagina se încarcă...
Pagina se încarcă...
Pagina se încarcă...
Pagina se încarcă...
Pagina se încarcă...
Pagina se încarcă...
Pagina se încarcă...
Pagina se încarcă...
Pagina se încarcă...
Pagina se încarcă...
Pagina se încarcă...
Pagina se încarcă...
Pagina se încarcă...
Pagina se încarcă...
Pagina se încarcă...
Pagina se încarcă...
Pagina se încarcă...
Pagina se încarcă...
Pagina se încarcă...
Pagina se încarcă...
Pagina se încarcă...
Pagina se încarcă...
Pagina se încarcă...
Pagina se încarcă...
Pagina se încarcă...
Pagina se încarcă...
Pagina se încarcă...
Pagina se încarcă...
Pagina se încarcă...
Pagina se încarcă...
Pagina se încarcă...
Pagina se încarcă...
Pagina se încarcă...
Pagina se încarcă...
Pagina se încarcă...
Pagina se încarcă...
Pagina se încarcă...
Pagina se încarcă...
Pagina se încarcă...
Pagina se încarcă...
Pagina se încarcă...
Pagina se încarcă...
Pagina se încarcă...
Pagina se încarcă...
Pagina se încarcă...
Pagina se încarcă...
Pagina se încarcă...
Pagina se încarcă...
Pagina se încarcă...
Pagina se încarcă...
Pagina se încarcă...
Pagina se încarcă...
Pagina se încarcă...
Pagina se încarcă...
Pagina se încarcă...
Pagina se încarcă...
Pagina se încarcă...
Pagina se încarcă...
Pagina se încarcă...
Pagina se încarcă...
Pagina se încarcă...
Pagina se încarcă...
Pagina se încarcă...
Pagina se încarcă...
Pagina se încarcă...
Pagina se încarcă...
Pagina se încarcă...
Pagina se încarcă...
Pagina se încarcă...
Pagina se încarcă...
Pagina se încarcă...
Pagina se încarcă...
Pagina se încarcă...
Pagina se încarcă...
Pagina se încarcă...
Pagina se încarcă...
Pagina se încarcă...
Pagina se încarcă...
Pagina se încarcă...
Pagina se încarcă...
Pagina se încarcă...
Pagina se încarcă...
Pagina se încarcă...
Pagina se încarcă...
Pagina se încarcă...
Pagina se încarcă...
Pagina se încarcă...
Pagina se încarcă...
Pagina se încarcă...
Pagina se încarcă...
Pagina se încarcă...
Pagina se încarcă...
Pagina se încarcă...
Pagina se încarcă...
Pagina se încarcă...
Pagina se încarcă...
Pagina se încarcă...
Pagina se încarcă...
Pagina se încarcă...
Pagina se încarcă...
Pagina se încarcă...
Pagina se încarcă...
Pagina se încarcă...
Pagina se încarcă...
Pagina se încarcă...
Pagina se încarcă...
Pagina se încarcă...
Pagina se încarcă...
Pagina se încarcă...
Pagina se încarcă...
Pagina se încarcă...
Pagina se încarcă...
Pagina se încarcă...
Pagina se încarcă...
Pagina se încarcă...
Pagina se încarcă...
Pagina se încarcă...
Pagina se încarcă...
Pagina se încarcă...
Pagina se încarcă...
Pagina se încarcă...
Pagina se încarcă...
Pagina se încarcă...
Pagina se încarcă...
Pagina se încarcă...
Pagina se încarcă...
Pagina se încarcă...
Pagina se încarcă...
Pagina se încarcă...
Pagina se încarcă...
Pagina se încarcă...
Pagina se încarcă...
Pagina se încarcă...
Pagina se încarcă...
Pagina se încarcă...
Pagina se încarcă...
Pagina se încarcă...
Pagina se încarcă...
Pagina se încarcă...
Pagina se încarcă...
-
 1
1
-
 2
2
-
 3
3
-
 4
4
-
 5
5
-
 6
6
-
 7
7
-
 8
8
-
 9
9
-
 10
10
-
 11
11
-
 12
12
-
 13
13
-
 14
14
-
 15
15
-
 16
16
-
 17
17
-
 18
18
-
 19
19
-
 20
20
-
 21
21
-
 22
22
-
 23
23
-
 24
24
-
 25
25
-
 26
26
-
 27
27
-
 28
28
-
 29
29
-
 30
30
-
 31
31
-
 32
32
-
 33
33
-
 34
34
-
 35
35
-
 36
36
-
 37
37
-
 38
38
-
 39
39
-
 40
40
-
 41
41
-
 42
42
-
 43
43
-
 44
44
-
 45
45
-
 46
46
-
 47
47
-
 48
48
-
 49
49
-
 50
50
-
 51
51
-
 52
52
-
 53
53
-
 54
54
-
 55
55
-
 56
56
-
 57
57
-
 58
58
-
 59
59
-
 60
60
-
 61
61
-
 62
62
-
 63
63
-
 64
64
-
 65
65
-
 66
66
-
 67
67
-
 68
68
-
 69
69
-
 70
70
-
 71
71
-
 72
72
-
 73
73
-
 74
74
-
 75
75
-
 76
76
-
 77
77
-
 78
78
-
 79
79
-
 80
80
-
 81
81
-
 82
82
-
 83
83
-
 84
84
-
 85
85
-
 86
86
-
 87
87
-
 88
88
-
 89
89
-
 90
90
-
 91
91
-
 92
92
-
 93
93
-
 94
94
-
 95
95
-
 96
96
-
 97
97
-
 98
98
-
 99
99
-
 100
100
-
 101
101
-
 102
102
-
 103
103
-
 104
104
-
 105
105
-
 106
106
-
 107
107
-
 108
108
-
 109
109
-
 110
110
-
 111
111
-
 112
112
-
 113
113
-
 114
114
-
 115
115
-
 116
116
-
 117
117
-
 118
118
-
 119
119
-
 120
120
-
 121
121
-
 122
122
-
 123
123
-
 124
124
-
 125
125
-
 126
126
-
 127
127
-
 128
128
-
 129
129
-
 130
130
-
 131
131
-
 132
132
-
 133
133
-
 134
134
-
 135
135
-
 136
136
-
 137
137
-
 138
138
-
 139
139
-
 140
140
-
 141
141
-
 142
142
-
 143
143
-
 144
144
-
 145
145
-
 146
146
-
 147
147
-
 148
148
-
 149
149
-
 150
150
-
 151
151
-
 152
152
-
 153
153
-
 154
154
-
 155
155
-
 156
156
-
 157
157
-
 158
158
-
 159
159
-
 160
160


ELICA Super Plat BL/F/80 Manual de utilizare
- Categorie
- Hote pentru aragaz
- Tip
- Manual de utilizare
- Acest manual este potrivit și pentru
în alte limbi
- slovenčina: ELICA Super Plat BL/F/80 Používateľská príručka
Lucrări înrudite
-
ELICA Getup BL MAT/A/90 Manual de utilizare
-
ELICA 1001 Touch Sensor Island Kitchen Chimney Wall Mounted Instrucțiuni de utilizare
-
-
-
-
-