


emtypageinsideco
ver


English
6English
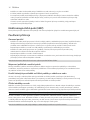
Introduction
Thanks for buying this Philips product! To fully benefit from the support that Philips offers, register your
product at www.philips.com/register-speedpro-aqua
Important safety information
Read this important information carefully before you use the appliance and its accessories and save it for
future reference. The accessories supplied may vary for different products.
Danger
-Never vacuum up water or any other liquid. Never vacuum up flammable substances and do not vacuum
up ashes until they are cold.
-Never immerse the appliance or the adapter in water or any other liquid, nor rinse it under the tap.
Warning
-Check if the voltage indicated on the adapter corresponds to the local mains voltage before you connect
the appliance.
-Always check the appliance before you use it. Do not use the appliance or the adapter if it is damaged.
Always replace a damaged part with one of the original type.
-The adapter contains a transformer. Do not cut off the adapter to replace it with another plug, as this
causes a hazardous situation.
-This appliance can be used by children aged from 8 years and above and persons with reduced physical,
sensory or mental capabilities or lack of experience and knowledge if they have been given supervision
or instruction concerning use of the appliance in a safe way and understand the hazards involved.
Children shall not play with the appliance. Cleaning and user maintenance shall not be made by children
without supervision.
-Always keep the magnetic charging disc away from very small children.
-The plug must be removed from the socket-outlet before cleaning or maintaining the appliance.
-Unplug the adapter if you are not going to use the appliance for some time.
-When storing the appliance for more than a month (without usage or charging), make sure that the
battery is charged to at least 50%. Storing the appliance with an empty battery may lead to irreversible
damage to the battery.
-Also make sure that the adapter is unplugged when the appliance is stored.
-Do not let the motorized brush move over the mains cords of other appliances or other cables as this
may cause a hazard.
-Keep loose clothing, hair and body parts away from the motorized brushes.
-Do not cover or block the ventilation openings when the appliance is operating.
-This vacuum cleaner is designed for household use only. Do not use this vacuum cleaner to vacuum up
building waste, cement dust, ashes, fine sand, lime and similar substances. Never use the vacuum cleaner
without any of the filters. This could damage the motor and shorten the life of the vacuum cleaner.
Always clean all parts of the vacuum cleaner as shown in the user manual. Do not clean any parts with
water and/or cleaning agents if this is not specifically shown in the user manual.
-Only charge the appliance with the adapter supplied. Only use 25V adapter ZD12D250050 or 29V
adapter ZD12D290050. The corresponding adapter number can be found on the adapter.
-Charge, use and store the product at a temperature between 5°C and 40°C.
-Do not open, modify, pierce, damage or dismantle the product or battery to prevent batteries from
heating up or releasing toxic or hazardous substances. Do not short-circuit, overcharge or reverse charge
batteries.

7
English
-Keep product and batteries away from fire and do not expose them to direct sunlight or high
temperatures.
-If the product becomes abnormally hot or smelly, changes color or if charging takes longer than usual,
stop using and charging the product and contact Philips.
-Do not place products and their batteries in microwave ovens or on induction cookers.
-If batteries are damaged or leaking, avoid contact with the skin or eyes. If this occurs, immediately rinse
well with water and seek medical care.
-This product contains a rechargeable battery. The battery may only be replaced by a qualified service
engineer.
-Take the appliance to an authorized Philips service center when you can no longer recharge it or when it
runs out of power quickly.
Caution
-During charging, the adapter becomes warm to the touch. This is normal.
-Do not plug in, unplug or operate the appliance with wet hands.
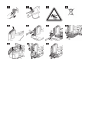
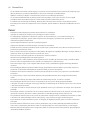
-Do not remove the adapter from the wall socket by pulling at the cord (Fig. 1). When you do not use the
charging station for charging, always unplug the appliance by first detaching the magnetic charging disc
from the underside of the appliance (Fig. 2).
-Always switch off the appliance after use and before you charge it.
-Never block the exhaust air openings during vacuuming.
-Do not clean the dust container and the dust container lid in the dishwasher. They are not dishwasher-
proof.
-Make sure to wash the filter at least once every two weeks by hand only, to ensure best performance.
Squeeze until the water is clean. Let the filter dry for 24 hours before reuse.
-Do not clean the filter with scouring pads or abrasive cleaning agents.
-Always use the vacuum cleaner with the filter assembled.
-If you clean the filter with water, make sure that it is completely dry before you put it back into the dust
container. Do not dry the filter in direct sunlight, on the radiator or in the tumble dryer.
-Replace the filter if it can no longer be cleaned properly or if it is damaged (see 'Ordering accessories').
-Never use any accessories or parts from other manufacturers or that Philips does not specifically
recommend. If you use such accessories or parts, your warranty becomes invalid.
-Make sure that the appliance is installed with the charging station attached to the wall according to the
instructions in the user manual.
-Be careful when you drill holes in the wall to attach the charging station, to avoid the risk of electric
shock.
-As this appliance uses water to clean, the floor may remain wet and slippery for a while (Fig. 3).
-To prevent damage, do not use liquid floor cleaners that are not transparent or even milky.
-To prevent damage, never put wax, oil, floor maintenance products or liquid floor cleaners that are not
water-dilutable in the water tank.
-To prevent damage, never put ethereal oils or similar substances in the water tank or let the appliance
pick them up.
-Do not mix different types of liquid floor cleaner. When you have used one liquid floor cleaner, first
empty and rinse the water tank before you add another liquid floor cleaner to the water in the water
tank.
-Never exceed the maximum quantities mentioned on the bottle when you use a liquid floor cleaner. Do
not add more than a few drops to the water in the water tank, as this tank has a capacity of 200ml.
-Do not lift or tilt the nozzle when the water tank is assembled and full, as water may spray out of the
water tank.

8English
-Do not clean the metal wetting strip with a sharp object, as this may damage the strip. Only clean the
wetting strip by rinsing it under the tap. Replace the wetting strip when you can no longer clean it.
-Replace the wetting strip only with an original strip. For ordering a new strip, see chapter 'Ordering
accessories'.
-Clean the water tank according to the instructions. The water tank is not dishwasher-proof.
-Do not use aggressive cleaning agents or tools to clean the Aqua Boost pedal.
-After mopping the floors, do not store the appliance with the water tank attached on the charging
station. If you do this, the wet mopping pad will touch the wall and this may damage the wall. Always
remove the water tank before you store the appliance.
-To guarantee good cleaning results and proper functioning of the appliance and water tank, always use
original Philips cleaning pads.
Electromagnetic fields (EMF)
This Philips appliance complies with all applicable standards and regulations regarding exposure to
electromagnetic fields.
Using the appliance
Usage restrictions
-Only use the water tank on hard floors with a water-resistant top coat (such as linoleum, enameled tiles
and varnished parquet) and stone floors (such as marble). If your floor has not been treated to make it
water-resistant, check with the manufacturer if you can use water to clean it. Do not use the water tank
on hard floors of which the water-resistant top coat is damaged.
-Only use the water tank on linoleum floors that are properly affixed to prevent linoleum from being
drawn into the mopping nozzle.
-Do not use the water tank to clean carpets.
-Do not move the appliance with water tank assembled sideways, as this leaves water traces. Only move
forwards and backwards.
Note: The operating time depends on the power level used during cleaning.
Mopping pad and wetting strip
The appliance comes with one wetting strip and two identical microfiber mopping pads. With the water
tank, wetting strip and microfiber mopping pad attached to the standard floor nozzle, you can clean hard
floors.
Using liquid floor cleaner in the water tank
If you want to add a liquid floor cleaner to the water in the water tank, make sure that you use a low-
foaming or non-foaming liquid floor cleaner that can be diluted in water. As the water tank has a capacity
of 200ml, you only have to add a few drops of liquid floor cleaner to the water.
Cleaning the water tank
To clean the water tank, mix one part vinegar with three parts water. Pour this mixture into the water tank
and close the cap. Shake the water tank and put the water tank on a water-resistant surface. Leave the
water-vinegar mixture in the water tank overnight. Then empty the water tank, rinse it thoroughly with
fresh water, and use it normally again.
Caution: Water will leak from the water tank during cleaning, with and without the wetting strip
attached to the nozzle.

9
English
To empty the water tank, hold the water tank over a sink, remove the cap and tilt the water tank to the side
of the filling hole. Then turn the water tank over to let the water flow into the sink. To remove the
remaining water from the water tank, turn the water tank on its long side with the filling hole pointing
towards the sink. Then tilt the water tank forwards to let the remaining water flow out of the water tank.
Note: Always store the water tank with the cap removed from the filling hole.
Ordering accessories
To buy accessories or spare parts, visit www.philips.com/parts-and-accessories or go to your Philips
dealer. You can also contact the Philips Consumer Care Center in your country (see the international
warranty leaflet for contact details).
Warranty and support
If you need information or support, please visit www.philips.com/support or read the international
warranty leaflet.
Recycling
-This symbol means that electrical products and batteries shall not be disposed of with normal household
waste (Fig. 4).
-Follow your country’s rules for the separate collection of electrical products and batteries.
Removal of built-in rechargeable battery
The built-in rechargeable battery must only be removed by a qualified professional when the appliance is
discarded. Before removing the battery, make sure that the appliance is disconnected from the wall socket
and that the battery is completely empty.
Take any necessary safety precautions when you handle tools to open the appliance and
when you dispose of the rechargeable battery.
When you handle batteries, make sure that your hands, the product and the batteries are
dry.
To avoid accidental short-circuiting of batteries after removal, do not let battery terminals
come into contact with metal objects (e.g. coins, hairpins, rings). Do not wrap batteries in
aluminum foil. Tape battery terminals or put batteries in a plastic bag before you discard
them.
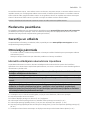
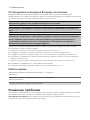
1Disconnect the appliance from the wall socket and let it run until the motor stops.
2Remove the dust container from the appliance.
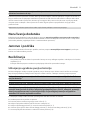
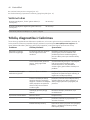
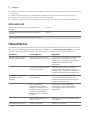
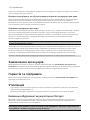
3Pull the display cover from the top of the handgrip (Fig. 5).
4Undo the screw of the handle cover and pull the handle cover off the appliance (Fig. 6).
5Undo the bottom cover screw (1) and then remove the side panels. (Fig. 7)
6Remove the bottom cover screws on the left and right side (1). Then remove the bottom cover (2) (Fig. 8).
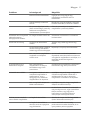
7Disconnect the battery connector and the display connector from the printed circuit board (Fig. 9).
8Undo the battery frame screws (Fig. 10).

10 English
9Remove the battery from the appliance and dispose of it according to the rules (Fig. 11).
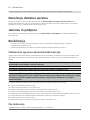
Operating time
Using the appliance with Turbo power mode
(Setting 2)
22 minutes*
Using the appliance with regular power mode
(Setting 1)
50 minutes*
* Based on use of the appliance with the Aqua Nozzle
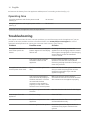
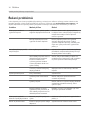
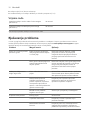
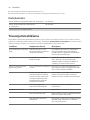
Troubleshooting
This chapter summarizes the most common problems you could encounter with the appliance. If you are
unable to solve the problem with the information below, visit www.philips.com/support for a list of
frequently asked questions or contact the Consumer Care Center in your country.
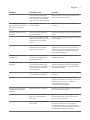
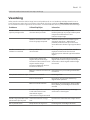
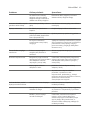
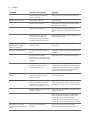
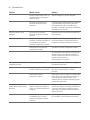
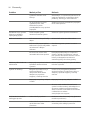
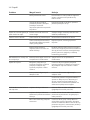
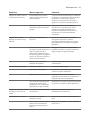
Problem Possible cause Solution
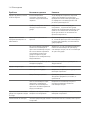
The appliance does not
work when I push the
button.
When the battery is empty,the
bottom segment of the display
flashes red.
To charge the battery, connect the
appliance to the charging station or attach
the magnetic charging disc of the charging
station directly to the the handheld
vacuum cleaner.
You have to push the slider
forward to switch on the
appliance.
Push the slider forward to setting 1 to
switch on. Increase the suction power
further by pushing the slider to setting 2 to
clean dirty surfaces.
The appliance has a lower
suction power than usual.
The filter and the cyclone are
dirty.
Clean the filter and the cyclone. Make sure
that you wash the sponge filter at least
once every two weeks if you use the
appliance regularly.
You have not attached the
dust container lid properly to
the dust container. You have
not attached the dust
container to the appliance
properly. In both cases, there
will be a loss of suction power.
Make sure that you attach the dust
container lid to the dust container and the
dust container to the appliance properly.
An object may be stuck inside
the tube.
Remove the tube and check for blockages.
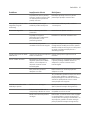
Dust escapes from the
appliance.
The filter is dirty. Clean the filter.
The filter is not present in the
appliance.
Make sure that the filter is in the appliance
and assembled correctly.
Something blocks the cyclone. Check the cyclone for objects stuck in it
and remove any object that blocks the
cyclone.

11
English
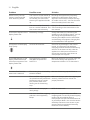
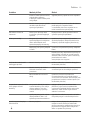
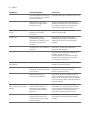
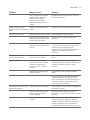
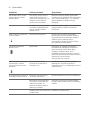
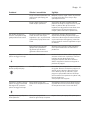
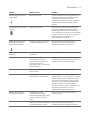
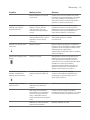
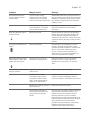
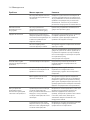
Problem Possible cause Solution
If dust falls out of the dust
container, the dust container
lid is probably not attached
properly to the dust container.
Empty the dust container and attach the
dust container lid correctly.
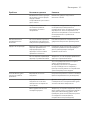
The appliance does not
move smoothly across the
floor when cleaning a
carpet.
You selected a too high
suction power.
Reduce the suction power by choosing
setting 1.
The brush does not turn
anymore.
The brush encounters too
much resistance.
Clean the brush with a pair of scissors or by
hand.
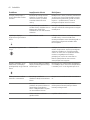
The brush may stop turning
when it encounters too much
resistance from high-pile
carpet.
Switch off the appliance and then switch it
back on again.
You have not installed the
roller brush in the nozzle
properly after cleaning.
Follow the instructions in the cleaning
chapter of the user manual to slide the
roller brush into the nozzle properly and
secure it inside the nozzle by snapping
home the locking lever.
The LEDs in the nozzle do
not come on.
You have not attached the
nozzle to the appliance or
handheld properly.
Attach the nozzle to the appliance or
handheld properly.
The appliance is not
charging.
The magnetic connector is not
connected correctly to the
charging disk or the adapter is
not inserted into the wall
socket properly.
Make sure that the magnetic connector is
connected properly to the charging disk
and that the adapter is inserted into the
wall socket properly.
You have not connected the
correct adapter and cord.
Make sure that you use the correct adapter
and cord.
If you have checked the above and the
appliance still does not charge, take it to a
Philips service center or contact the
Consumer Care Center via
www.philips.com/support.
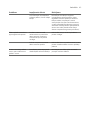
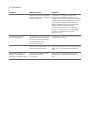
FC6729: The mini turbo
brush does not function
properly.
The roller brush is blocked. Remove hairs from the brush with a pair of
scissors (see user manual).
The roller brush is blocked by
fabric or surfaces during
cleaning.
Keep the mini turbo brush aligned with
the surface and do not push the turbo
brush into soft surfaces.
The mini turbo brush is not
fully closed.
Make sure that the top and bottom parts
of the mini turbo brush are properly
connected and there is no gap between
the two parts. Check if the locking ring is in
closed position (see user manual).

12 English
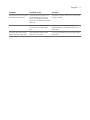
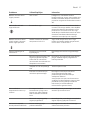
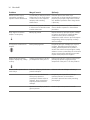
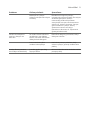
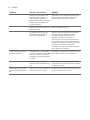
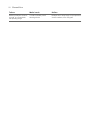
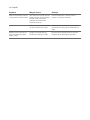
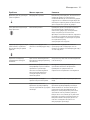
Problem Possible cause Solution
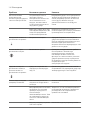
When I use my vacuum
cleaner I sometimes feel
static electricity shocks.
Your vacuum cleaner builds up
static electricity. The lower the
air humidity, the more static
electricity the appliance builds
up.
Discharge the appliance by frequently
holding the tube against other metal
objects in the room (for example the legs
of a table or chair, etc.). You can also raise
the air humidity level in the room.
You vacuumed up fine sand,
lime or a similar substance. This
also causes static electricity.
Empty the dust container and clean the
filter according to the instructions in the
user manual.
The bottom segment of the
display flashes red.
The battery is empty. Charge the battery by connecting the
appliance to the charging station. You can
also charge the appliance directly by
inserting the adapter into the wall socket
and attaching the magnetic charging disc
to the underside of the appliance.
All segments of the display
flash quickly.
An error has occurred. Check for any blockages in the tube or
nozzle. Try recharging the appliance,
emptying the dust container and cleaning
the filter. If this does not help, take the
appliance to a Philips service center or
contact the Consumer Care Center via
www.philips.com/support.
The middle segment of the
display flashes white and
the bottom segment of the
display flashes red.
The appliance is stored or
charged at temperatures
below 5 °C.
Move the appliance to a warmer room. Do
not store or charge the appliance at
temperatures below 5 °C or above 40 °C.
The water flow from the
water tank is reduced.
The wetting strip is blocked by
excessive residue.
Remove the wetting strip and clean it.
The microfiber mopping pad is
not placed correctly and blocks
the wetting strip as a result.
This prevents water from
flowing out of the wetting
strip.
Make sure that you place the mopping pad
correctly. Check the user manual for
proper placement.
The water tank is empty or
nearly empty.
Refill the water tank.
You use a microfiber mopping
pad that is not supplied by
Philips.
Only use an original Philips microfiber
mopping pad. You can buy these mopping
pads in the online Philips shop at
www.philips.com/parts-and-accessories or
at your Philips dealer. You can also contact
the Philips Consumer Care Center in your
country (see the international warranty
leaflet for contact details).

13
English
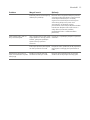
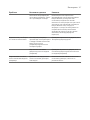
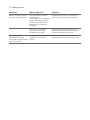
Problem Possible cause Solution
The output of water is faster
and larger than normal.
If the water tank produces an
uncontrolled and too large
amount of water, the cap of
the tank is probably not closed
properly.
Check the cap and make sure it is fully and
properly closed.
The strip is not placed properly
in the bottom of the water
tank.
Check the strip and make sure that it is
fitted properly in the bottom plate of the
water tank.
The floor dries with stripes
when I use the water tank.
You added too much liquid
cleaner to the water.
Use only a few drops or use a cleaner that
foams less.

Čeština
14 Čeština
Úvod
Děkujeme za zakoupení tohoto výrobku Philips. Chcete-li využívat všech výhod podpory nabízené
společností Philips, zaregistrujte svůj výrobek na stránkách www.philips.com/register-speedpro-aqua
Důležité bezpečnostní informace
Před použitím přístroje ajeho příslušenství si pečlivě přečtěte tuto příručku sdůležitými informacemi
auschovejte ji pro budoucí použití. Dodané příslušenství se může pro různé výrobky lišit.
Nebezpečí
-Nikdy nevysávejte vodu ani jinou tekutinu. Nikdy nevysávejte hořlavé látky a rovněž nevysávejte popel,
dokud je žhavý.
-Přístroj ani adaptér nikdy neponořujte do vody či jiné kapaliny, ani je neoplachujte proudem kapaliny.
Varování
-Dříve než přístroj připojíte k síti, zkontrolujte, zda napětí uvedené na adaptéru souhlasí snapětím
vmístní elektrické síti.
-Před použitím přístroj vždy zkontrolujte. Přístroj ani adaptér nepoužívejte, pokud jsou poškozené.
Poškozenou součástku vždy nahraďte součástkou původního typu.
-Adaptér obsahuje transformátor. Adaptér nikdy nenahrazujte jinou zástrčkou. Mohlo by tak dojít
knebezpečné situaci.
-Tento přístroj mohou používat děti od 8let věku aosoby somezenými fyzickými, smyslovými nebo
duševními schopnostmi nebo nedostatkem zkušeností aznalostí, pokud jsou pod dohledem nebo byly
poučeny obezpečném používání přístroje apokud chápou související rizika. Děti si spřístrojem nesmí
hrát. Děti nesmí provádět čištění auživatelskou údržbu bez dozoru.
-Magnetický nabíjecí disk uchovávejte mimo dosah velmi malých dětí.
-Před čištěním nebo údržbou přístroje je nutné odpojit zástrčku od síťové zásuvky.
-Pokud přístroj nebudete delší dobu používat, odpojte adaptér.
-Jestliže plánujete přístroj uložit na déle než měsíc (bez používání nebo nabíjení), musí být baterie dobitá
alespoň z50%. Pokud přístroj uložíte svybitou baterií, můžete ji nezvratně poškodit.
-Při uložení přístroje také zkontrolujte, zda je adaptér odpojený ze sítě.
-Zabraňte motorizovanému kartáči vpohybu přes napájecí kabely nebo jiné přístroje či kabely, protože to
může vést ke vzniku nebezpečných situací.
-Volné oblečení, vlasy ačásti těla udržujte mimo dosah motorizovaných kartáčů.
-Během provozu přístroj nezakrývejte aneblokujte jeho ventilační otvory.
-Tento vysavač je určen pouze kpoužití vdomácnosti. Nepoužívejte tento vysavač kvysávání stavebního
odpadu, cementového prachu, sazí, jemného písku, vápna nebo podobných látek. Vysavač nikdy
nepoužívejte bez filtru. Mohlo by dojít kpoškození motoru azkrácení životnosti vysavače. Jednotlivé díly
vysavače čistěte vždy tak, jak je vyobrazeno vuživatelské příručce. Nečistěte žádné díly vodou nebo
čisticími prostředky, není-li tento způsob čištění výslovně uveden vuživatelské příručce.
-Přístroj nabíjejte pouze pomocí dodávaného adaptéru. Používejte pouze 25V adaptér ZD12D250050
nebo 29V adaptér ZD12D290050. Na adaptéru naleznete příslušné číslo adaptéru.
-Výrobek nabíjejte, uchovávejte a používejte při teplotě mezi 5°C a 40°C.
-Výrobek ani baterie nesmíte otevírat, upravovat, propíchnout, poškodit ani demontovat. Mohli byste tak
způsobit přehřívání baterií nebo uvolnění toxických či nebezpečných látek. Baterie nezkratujte; dobíjecí
baterie nenabíjejte přes limit ani je nenabíjejte vobrácené polaritě.
-Výrobek abaterie uchovávejte mimo dosah ohně anevystavujte je přímému slunečnímu záření ani
vysokým teplotám.

15
Čeština
-Pokud se výrobek nenormálně zahřeje, vydává zápach, změní barvu nebo pokud nabíjení trvá mnohem
déle než obvykle, přestaňte výrobek používat nebo nabíjet aobraťte se na společnost Philips.
-Nedávejte výrobky ani jejich baterie do mikrovlnné trouby ani na indukční sporáky.
-Pokud jsou baterie poškozené nebo znich uniká jakákoli látka, vyhněte se kontaktu takové baterie skůží
nebo očima. Pokud by kněčemu takovému došlo, příslušné místo oplachujte vodou avyhledejte
lékařskou pomoc.
-Výrobek obsahuje nabíjecí akumulátor. Výměnu akumulátoru smí provádět pouze odborně kvalifikovaný
pracovník.
-Pokud akumulátor nelze nabít nebo se příliš rychle vybíjí, odneste přístroj do autorizovaného servisního
střediska Philips, kde si ho můžete nechat vyměnit.
Upozornění
-Adaptér se při nabíjení zahřívá. To je normální jev.
-Nezapojujte ani neodpojujte přístroj anemanipulujte sním, máte-li mokré ruce.
-Nevypojujte adaptér vytažením kabelu ze zásuvky (obr. 1). Pokud vnabíjecí stanici přístroj právě
nenabíjíte, vždy ho vypojte odpojením magnetického nabíjecího disku ze spodní části přístroje (obr. 2).
-Po použití a před nabíjením přístroj vždy vypněte.
-Při vysávání nikdy neblokujte výstupní otvory vzduchu.
-Nádobu na prach ani její víko nemyjte vmyčce na nádobí. Nejsou pro mytí vmyčce na nádobí určeny.
-Abyste zajistili optimální výkon, pěnový filtr umývejte ručně alespoň jednou za dva týdny. Filtr mačkejte,
dokud zněj nevytéká čistá voda. Před opětovným použitím nechte filtr schnout 24 hodin.
-Kčištění filtru nepoužívejte drátěnky ani abrazivní čisticí prostředky.
-Vysavač používejte vždy snasazenou jednotkou filtru.
-Pokud čistíte filtr vodou, dbejte, aby před jeho opětovným vložením do nádoby na prach byl zcela suchý.
Filtr nesušte na přímém slunci, na topení ani vsušičce na prádlo.
-Pokud již filtr nelze řádně vyčistit nebo je poškozený, vyměňte ho (viz 'Objednávání příslušenství').
-Nikdy nepoužívejte příslušenství nebo díly od jiných výrobců nebo takové, které nebyly doporučeny
společností Philips. Pokud takové díly či příslušenství použijete, pozbývá záruka platnosti.
-Ujistěte se, že je nabíjecí stanice přístroje upevněna ke zdi podle pokynů vuživatelské příručce.
-Při vrtání otvorů do stěny při instalaci nabíjecí stanice může dojít kúrazu elektrickým proudem, buďte
proto opatrní.
-Přístroj používá kčištění vodu, proto může být podlaha určitou dobu (obr. 3) mokrá a kluzká.
-Abyste zabránili poškození, nepoužívejte neprůhledné nebo dokonce mléčně zbarvené tekuté
prostředky na čištění podlahy.
-Do nádržky na vodu nikdy nedávejte vosk, olej ani jiné tekuté, ve vodě nerozpustné prostředky na čištění
podlahy. Předejdete tak poškození přístroje.
-Abyste předešli poškození, nikdy nedávejte do nádržky na vodu éterické oleje nebo podobné látky, ani
takové látky přístrojem nevysávejte.
-Nemíchejte různé druhy tekutých prostředků na čištění podlahy. Chcete-li změnit typ čisticího
prostředku, nejprve nádržku na vodu vylijte a vypláchněte a teprve poté do ní nalijte čistou vodu snovým
prostředkem.
-Při používání tekutých prostředků na čištění podlahy nikdy nepřekračujte maximální množství uvedené
na lahvičce. Do vody vnádržce nepřidávejte více než několik kapek, jelikož nádržka má kapacitu 200ml.
-Nezvedejte a nenaklánějte hubici, pokud je nádržka na vodu sestavena a je plná. Mohlo by dojít
kvystříknutí vody znádržky.
-Kovový smáčecí pásek nečistěte ostrými předměty. Mohlo by dojít kjeho poškození. Smáčecí pásek
čistěte pouze opláchnutím pod tekoucí vodou. Když smáčecí pásek již není možné vyčistit, vyměňte ho.
-Smáčecí pásek nahrazujte pouze originálním páskem. Informace o objednání nového pásku naleznete
vkapitole „Objednávání příslušenství“.

16 Čeština
-Nádržku na vodu čistěte podle pokynů. Nádržku na vodu nelze mýt vmyčce na nádobí.
-Kčištění pedálu Aqua Boost nepoužívejte agresivní čističe ani pomůcky.
-Po mopování podlah neukládejte přístroj spřipojenou nádržkou do nabíjecí stanice. Pokud to uděláte,
mokrý mopovací polštářek se bude dotýkat stěny amůže ji tím poničit. Před uložením přístroje vždy
odstraňte nádržku na vodu.
-Chcete-li zaručit optimální výsledky čistění ařádné fungování přístroje anádržky, vždy používejte
originální čisticí polštářky Philips.
Elektromagnetická pole (EMP)
Tento přístroj Philips odpovídá všem platným normám apředpisům týkajícím se elektromagnetických polí.
Používání přístroje
Omezení použití
-Nádržku na vodu používejte pouze k čištění tvrdých podlah svoděodolným povrchem (například linolea,
dlažby nebo lakovaných parket) a kamenných podlah (například mramorové podlahy). Pokud vaše
podlaha nemá voděodolnou úpravu, informujte se u výrobce, zda je možné kčištění použít vodu.
Nepoužívejte nádržku na vodu na tvrdé podlahy spoškozeným voděodolným povrchem.
-Nádržku na vodu používejte pouze na ty podlahy zlinolea, které jsou správně upevněné, aby
nedocházelo knasávání linolea do mopovací hubice.
-Nepoužívejte nádržku na vodu kčištění koberců.
-Nepohybujte přístrojem se sestavenou nádržkou na vodu do stran, jinak zanechá mokré stopy. Pohybujte
přístrojem pouze směrem dopředu a dozadu.
Poznámka: Provozní doba závisí na úrovni výkonu použité během čištění.
Mopovací polštářek a smáčecí pásek
Přístroj se dodává sjedním smáčecím páskem advěma stejnými mopovacími polštářky zmikrovláken.
Snádržkou, smáčecím páskem amopovacím polštářkem zmikrovláken připevněnými na standardní hubici
na podlahu můžete čistit tvrdé podlahy.
Použití tekutých prostředků na čištění podlahy vnádržce na vodu
Chcete-li do vody vnádržce přidat tekutý prostředek na čištění podlah, používejte výhradně takový
prostředek, který pění málo nebo vůbec aje rozpustný ve vodě. Objem nádržky na vodu je 200ml. Do vody
proto stačí přidat pouze několik kapek tekutého prostředku na čištění podlah.
Čištění nádržky na vodu
Nádržku na vodu vyčistíte takto: na tři díly vody přidejte jeden díl octa. Roztok nalijte do nádržky auzavřete
víčko. Nádržku protřepejte a položte ji na voděodolný povrch. Roztok vody soctem ponechejte vnádržce
přes noc. Potom nádržku vylijte a důkladně vypláchněte čistou vodou. Nyní je připravena pro další používání.
Upozornění: Při čištění bude znádržky unikat voda, ať je smáčecí pásek připevněn k hubici, či nikoli.
Chcete-li nádržku na vodu vyprázdnit, podržte ji nad dřezem, odstraňte uzávěr anádržku nakloňte na
stranu, kde je plnicí otvor. Následně nádržku na vodu převraťte, aby mohla voda vytéct do dřezu. Chcete-li
znádržky odstranit zbývající vodu, převraťte ji na delší stranu aplnicí otvor ať přitom směřuje do dřezu.
Následně nádržku nakloňte dopředu, aby zní mohla zbývající voda vytéct.
Poznámka: Nádržku na vodu vždy skladujte sodstraněným uzávěrem zplnicího otvoru.

17
Čeština
Objednávání příslušenství
Chcete-li koupit příslušenství nebo náhradní díly, navštivte adresu www.philips.com/parts-and-
accessories nebo se obraťte na prodejce výrobků Philips. Můžete se také obrátit na středisko péče
ozákazníky společnosti Philips ve své zemi (kontaktní údaje naleznete na mezinárodním záručním listu).
Záruka apodpora
Potřebujete-li další informace či podporu, navštivte web www.philips.com/support nebo si prostudujte
záruční list s mezinárodní platností.
Recyklace
-Tento symbol znamená, že elektrické výrobky abaterie nesmí být likvidovány společně sběžným
domácím odpadem (obr. 4).
-Dodržujte předpisy vaší země týkající se odděleného sběru odpadních elektrických výrobků abaterií.
Vyjmutí vestavěného dobíjecího akumulátoru
Vestavěný dobíjecí akumulátor smí vpřípadě likvidace výrobku vyjmout pouze kvalifikovaný odborník. Před
vyjmutím akumulátoru ověřte, zda je přístroj odpojen zelektrické zásuvky azda je akumulátor zcela vybitý.
Při manipulaci snářadím potřebným kotevření přístroje apři likvidaci akumulátoru
dbejte všech nezbytných bezpečnostních opatření.
Při manipulaci sbateriemi se ujistěte, že máte suché ruce aže výrobek ibaterie jsou suché.
Zabraňte nezáměrnému zkratování baterií po jejich vyjmutí zvýrobku: nedovolte, aby se
póly baterie dostaly do kontaktu skovovými předměty (mince, sponky, prsteny).
Nezabalujte baterie do hliníkové fólie. Před likvidací póly baterií přelepte páskou nebo je
umístěte do plastového sáčku.
1Odpojte přístroj od sítě anechte motor vchodu, dokud se sám nezastaví.
2Zpřístroje vyjměte nádobu na prach.
3Vhorní části rukojeti odklopte kryt displeje (obr. 5).
4Povolte šroub na krytu rukojeti a sejměte kryt zpřístroje (obr. 6).
5Povolte šroub na spodním krytu (1) a sejměte boční panely (obr. 7).
6Povolte šrouby na levé i pravé straně spodního krytu (1). Pak sundejte spodní kryt (2) (obr. 8).
7Odpojte konektor baterie a konektor displeje od desky splošnými spoji (obr. 9).
8Odšroubujte šroubky (obr. 10) rámu pro baterii.
9Vyjměte zpřístroje baterii a zlikvidujte ji řádným způsobem (obr. 11).
Doba používání
Použití přístroje v režimu Turbo výkonu (Nastavení
2)
22 minut*
Použití přístroje v běžném režimu výkonu (Nastavení
1)
50 minut*

18 Čeština
* Podle použití přístroje s Aqua hubicí.
Řešení problémů
Vtéto kapitole jsou shrnuty nejběžnější problémy, se kterými se můžete upřístroje setkat. Pokud se vám
nepodaří problém vyřešit podle následujících informací, navštivte web www.philips.com/support, kde
najdete odpovědi na nejčastější dotazy. Případně kontaktujte středisko péče ozákazníky ve své zemi.
Problém Možná příčina Řešení
Přístroj se po stisknutí
vypínače nespustí.
Když je baterie vybitá, spodní
segment displeje bliká červeně.
Chcete-li baterii nabít, připojte přístroj
knabíjecí stanici nebo připojte magnetický
nabíjecí disk nabíjecí stanice přímo k
ručnímu vysavači.
Přístroj zapnete posunutím
vypínače směrem dopředu.
Přístroj zapnete posunutím vypínače
směrem dopředu do polohy1. Když
vysáváte zašpiněné povrchy, můžete ještě
zvýšit sací výkon posunutím vypínače do
polohy 2.
Sací výkon přístroje je nižší,
než je obvyklé.
Filtr acyklon jsou znečištěné. Vyčistěte filtr a cyklon. Používáte-li přístroj
pravidelně, nezapomeňte pěnový filtr mýt
alespoň jednou za dva týdny.
Víko nádoby na prach není na
nádobě správně nasazené.
Prachová nádoba není
vpřístroji správně vložená.
Vobou případech bude sací
výkon snížený.
Ověřte, zda je víko nádoby na prach na
nádobě správně nasazené azda je nádoba
na prach správně vložená do přístroje.
Vtrubici je možná zachycený
nějaký předmět.
Odpojte trubici a zkontrolujte, zda není
ucpaná.
Zpřístroje uniká prach. Filtr je znečištěný. Vyčistěte filtr.
Vpřístroji není nainstalován
filtr.
Ověřte, zda je filtr správně sestaven
avložen do přístroje.
Cyklon je ucpán. Ověřte, zda není vcyklonu nějaký předmět
aodstraňte případné nečistoty, které
cyklon ucpaly.
Pokud znádoby na prach
vypadává prach, je možné, že
víko nádoby na prach není na
nádobě správně nasazené.
Nádobu na prach vyprázdněte ajejí víko
správným způsobem nasaďte.
Přístroj se při vysávání
koberce nepohybuje hladce.
Nastavili jste příliš vysoký sací
výkon.
Snižte sací výkon přepnutím vypínače do
polohy1.
Kartáč se přestal otáčet. Kartáč se potýká spříliš velkým
odporem.
Vyčistěte kartáč nůžkami nebo rukou.

19
Čeština
Problém Možná příčina Řešení
Kartáč se může přestat otáčet,
pokud vlákna koberce
sdlouhým vlasem kladou příliš
velký odpor.
Vypněte přístroj apoté ho znovu zapněte.
Rotační kartáč jste po vyčištění
nevložili zpět do hubice
správným způsobem.
Rotační kartáč správně zasuňte do hubice
podle pokynů vkapitole čištění
vuživatelské příručce azajistěte ho na
místě zacvaknutím upínací páky.
LED světla vhubici se
nerozsvítí.
Hubici jste kpřístroji nebo
kručnímu vysavači nepřipojili
správně.
Připojte hubici kpřístroji nebo ručnímu
vysavači správným způsobem.
Přístroj se nenabíjí. Magnetický konektor není
správně připojen k nabíjecímu
disku nebo adaptér není
správně zapojený do zásuvky.
Ujistěte se, že je magnetický konektor
správně připojen k nabíjecímu disku a že
adaptér je správně zapojený do zásuvky.
Nepřipojili jste správný adaptér
a kabel.
Ujistěte se, že používáte správný adaptér a
kabel.
Pokud tyto kroky nepomohou apřístroj se
stále nenabíjí, obraťte se na naše servisní
středisko nebo centrum péče ozákazníky
prostřednictvím webu
www.philips.com/support.
FC6729: Miniturbokartáč
nefunguje správně.
Rotační kartáč je zablokovaný. Nůžkami odstraňte zkartáče chlupy (viz
uživatelská příručka).
Rotační kartáč je při čištění
blokován tkaninou nebo
povrchem.
Udržujte miniturbokartáč vúrovni povrchu
anezatlačujte ho do měkkých povrchů.
Miniturbokartáč není zcela
těsný.
Ujistěte se, že horní aspodní část
miniturbokartáče jsou správně spojeny
anení mezi nimi mezera. Zkontrolujte, zda
je zajišťovací kroužek vzavřené pozici (viz
uživatelská příručka).
Při používání vysavače občas
cítím výboje statické
elektřiny.
Ve vysavači dochází ke vzniku
statické elektřiny. Čím nižší je
vlhkost vzduchu, tím více
statické elektřiny vpřístroji
vzniká.
Vybíjejte přístroj tak, že trubici často
přiložíte kjiným kovovým předmětům
vmístnosti (například nohám stolu nebo
židle atd.). Také můžete zvýšit vlhkost
vzduchu vmístnosti.
Vysáli jste jemný písek, vápno
nebo podobnou látku. Ito
způsobuje statickou elektřinu.
Vyprázdněte nádobu na prach aočistěte
filtr podle pokynů vuživatelské příručce.
Spodní segment displeje
bliká červeně.
Baterie je vybitá. Nabijte baterii připojením přístroje do
nabíjecí stanice. Přístroj lze také nabít
přímým zapojením adaptéru do zásuvky a
připevněním magnetického nabíjecího
disku na spodní část přístroje.

20 Čeština
Problém Možná příčina Řešení
Všechny segmenty displeje
rychle blikají.
Došlo kchybě. Zkontrolujte, zda není trubice nebo hubice
ucpaná. Nejprve zkuste přístroj znovu
nabít, vyprázdněte prachovou nádobu a
vyčistěte filtr. Pokud tyto kroky
nepomohou, obraťte se na naše servisní
středisko nebo centrum péče ozákazníky
prostřednictvím webu
www.philips.com/support.
Střední segment displeje
bliká bíle a spodní segment
displeje bliká červeně.
Přístroj je skladován nebo
nabíjen při teplotách nižších
než 5 °C.
Přemístěte přístroj do teplejší místnosti.
Neskladujte ani nenabíjejte přístroj při
teplotách nižších než 5 °C nebo vyšších než
40 °C.
Něco blokuje průtok vody
znádržky na vodu.
Smáčecí pásek je ucpán
nadměrným množstvím
usazenin.
Vyjměte smáčecí pásek a zbavte ho
nečistot.
Mopovací polštářek
zmikrovláken není správně
umístěn, čímž blokuje smáčecí
pásek. To zabraňuje vytékání
vody ze smáčecího pásku.
Ujistěte se, že mopovací polštářek je
správně umístěn. Postup pro správné
umístění naleznete vpříručceuživatele.
Nádržka na vodu je prázdná
nebo téměř prázdná.
Doplňte nádržku na vodu.
Používáte mopovací polštářek
zmikrovláken, který není
dodáván společností Philips.
Používejte pouze originální mopovací
polštářek zmikrovláken značky Philips.
Tyto mopovací polštářky můžete zakoupit
ve-shopu společnosti Philips na adrese
www.philips.cz/obchod nebo uprodejce
výrobků Philips. Můžete se také obrátit na
středisko péče ozákazníky společnosti
Philips ve své zemi (kontaktní údaje
naleznete na mezinárodním záručním
listu).
Množství používané vody je
vyšší než obvykle.
Pokud nádržka na vodu
dávkuje vodu nepravidelně
nebo vpříliš vysokém množství,
pravděpodobně není správně
uzavřeno víčko nádržky.
Zkontrolujte víčko aujistěte se, že je
správně uzavřeno adotaženo.
Pásek není správně umístěn na
dně nádržky.
Zkontrolujte pásek aujistěte se, že je
správně umístěn na desce dna nádržky na
vodu.
Když používám nádržku na
vodu, jsou na podlaze po
uschnutí pruhy.
Dali jste do vody příliš mnoho
tekutého čisticího prostředku.
Použijte pouze pár kapek nebo použijte
čisticí prostředek, který méně pění.
Pagina se încarcă...
Pagina se încarcă...
Pagina se încarcă...
Pagina se încarcă...
Pagina se încarcă...
Pagina se încarcă...
Pagina se încarcă...
Pagina se încarcă...
Pagina se încarcă...
Pagina se încarcă...
Pagina se încarcă...
Pagina se încarcă...
Pagina se încarcă...
Pagina se încarcă...
Pagina se încarcă...
Pagina se încarcă...
Pagina se încarcă...
Pagina se încarcă...
Pagina se încarcă...
Pagina se încarcă...
Pagina se încarcă...
Pagina se încarcă...
Pagina se încarcă...
Pagina se încarcă...
Pagina se încarcă...
Pagina se încarcă...
Pagina se încarcă...
Pagina se încarcă...
Pagina se încarcă...
Pagina se încarcă...
Pagina se încarcă...
Pagina se încarcă...
Pagina se încarcă...
Pagina se încarcă...
Pagina se încarcă...
Pagina se încarcă...
Pagina se încarcă...
Pagina se încarcă...
Pagina se încarcă...
Pagina se încarcă...
Pagina se încarcă...
Pagina se încarcă...
Pagina se încarcă...
Pagina se încarcă...
Pagina se încarcă...
Pagina se încarcă...
Pagina se încarcă...
Pagina se încarcă...
Pagina se încarcă...
Pagina se încarcă...
Pagina se încarcă...
Pagina se încarcă...
Pagina se încarcă...
Pagina se încarcă...
Pagina se încarcă...
Pagina se încarcă...
Pagina se încarcă...
Pagina se încarcă...
Pagina se încarcă...
Pagina se încarcă...
Pagina se încarcă...
Pagina se încarcă...
Pagina se încarcă...
Pagina se încarcă...
Pagina se încarcă...
Pagina se încarcă...
Pagina se încarcă...
Pagina se încarcă...
Pagina se încarcă...
Pagina se încarcă...
Pagina se încarcă...
Pagina se încarcă...
Pagina se încarcă...
Pagina se încarcă...
Pagina se încarcă...
Pagina se încarcă...
Pagina se încarcă...
Pagina se încarcă...
Pagina se încarcă...
Pagina se încarcă...
Pagina se încarcă...
Pagina se încarcă...
Pagina se încarcă...
Pagina se încarcă...
Pagina se încarcă...
Pagina se încarcă...
Pagina se încarcă...
Pagina se încarcă...
Pagina se încarcă...
Pagina se încarcă...
Pagina se încarcă...
Pagina se încarcă...
Pagina se încarcă...
Pagina se încarcă...
Pagina se încarcă...
Pagina se încarcă...
Pagina se încarcă...
Pagina se încarcă...
Pagina se încarcă...
Pagina se încarcă...
Pagina se încarcă...
Pagina se încarcă...
Pagina se încarcă...
Pagina se încarcă...
Pagina se încarcă...
Pagina se încarcă...
Pagina se încarcă...
Pagina se încarcă...
Pagina se încarcă...
Pagina se încarcă...
Pagina se încarcă...
Pagina se încarcă...
Pagina se încarcă...
Pagina se încarcă...
Pagina se încarcă...
Pagina se încarcă...
Pagina se încarcă...
Pagina se încarcă...
-
 1
1
-
 2
2
-
 3
3
-
 4
4
-
 5
5
-
 6
6
-
 7
7
-
 8
8
-
 9
9
-
 10
10
-
 11
11
-
 12
12
-
 13
13
-
 14
14
-
 15
15
-
 16
16
-
 17
17
-
 18
18
-
 19
19
-
 20
20
-
 21
21
-
 22
22
-
 23
23
-
 24
24
-
 25
25
-
 26
26
-
 27
27
-
 28
28
-
 29
29
-
 30
30
-
 31
31
-
 32
32
-
 33
33
-
 34
34
-
 35
35
-
 36
36
-
 37
37
-
 38
38
-
 39
39
-
 40
40
-
 41
41
-
 42
42
-
 43
43
-
 44
44
-
 45
45
-
 46
46
-
 47
47
-
 48
48
-
 49
49
-
 50
50
-
 51
51
-
 52
52
-
 53
53
-
 54
54
-
 55
55
-
 56
56
-
 57
57
-
 58
58
-
 59
59
-
 60
60
-
 61
61
-
 62
62
-
 63
63
-
 64
64
-
 65
65
-
 66
66
-
 67
67
-
 68
68
-
 69
69
-
 70
70
-
 71
71
-
 72
72
-
 73
73
-
 74
74
-
 75
75
-
 76
76
-
 77
77
-
 78
78
-
 79
79
-
 80
80
-
 81
81
-
 82
82
-
 83
83
-
 84
84
-
 85
85
-
 86
86
-
 87
87
-
 88
88
-
 89
89
-
 90
90
-
 91
91
-
 92
92
-
 93
93
-
 94
94
-
 95
95
-
 96
96
-
 97
97
-
 98
98
-
 99
99
-
 100
100
-
 101
101
-
 102
102
-
 103
103
-
 104
104
-
 105
105
-
 106
106
-
 107
107
-
 108
108
-
 109
109
-
 110
110
-
 111
111
-
 112
112
-
 113
113
-
 114
114
-
 115
115
-
 116
116
-
 117
117
-
 118
118
-
 119
119
-
 120
120
-
 121
121
-
 122
122
-
 123
123
-
 124
124
-
 125
125
-
 126
126
-
 127
127
-
 128
128
-
 129
129
-
 130
130
-
 131
131
-
 132
132
-
 133
133
-
 134
134
-
 135
135
-
 136
136
-
 137
137
-
 138
138


în alte limbi
Lucrări înrudite
-
Philips XC8347/01 8000 Series Aqua Plus Cordless Vacuum Cleaner Manual de utilizare
-
Philips FC6901/01 Informații importante
-
Philips FC6401 - PowerPro Aqua Manualul proprietarului
-
-
-
-
-