Philips QT4085/70 Manual de utilizare
- Categorie
- Aparate de tuns
- Tip
- Manual de utilizare

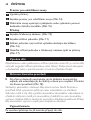
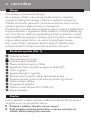
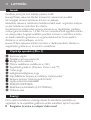
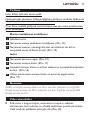
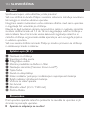
Vacuum Trimmer
QT4085

2

3
1

4

QT4085
ENGLISH 6
14
23
EESTI 31
39
47
55
64
72
80
89
97
106
114
122
130

6
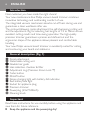
Introduction
Dear customer, you have made the right choice!
Your new maintenance-free Philips vacuum beard trimmer combines
innovative technology and outstanding comfort of use.
The integrated vacuum mechanism absorbs cut-off hairs during use and
guarantees a clean washbasin after use.
The contour-following comb attachment, the self-sharpening cutting unit
and the adjustment ring for selecting hair lengths of 1.5 to 18mm ensure
excellent cutting results and time-saving operation. The high-quality
precision trimmer guarantees a precise and dened cut and the
ergonomic shape of the appliance allows pleasant and comfortable
handling.
Your new Philips vacuum beard trimmer is excellently suited for cutting
and contouring your beard and sideburns.
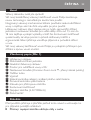
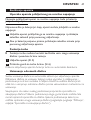
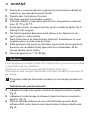
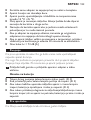
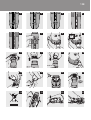
General description (Fig. 1)
A Comb attachment
B Detachable cutting unit
C Flexible hair guide
D Hair-collection chamber & lter
E Adjustment ring (Precision Zoom Lock `)
F Turbo button
G On/off button
H Green charging light with battery-full indication
I Red battery-low light
J Socket for appliance plug
K Precision trimmer
L Powerplug (2.5V/1500mA)
M Cleaning brush
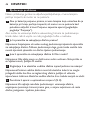
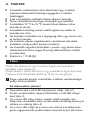
Important
Read these instructions for use carefully before using the appliance and
save them for future reference.
Keep the appliance and the powerplug dry!,
ENGLISH

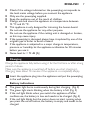
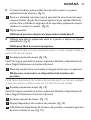
Check if the voltage indicated on the powerplug corresponds to
the local mains voltage before you connect the appliance.
Only use the powerplug supplied.
Keep the appliance out of the reach of children.
Charge, use and store the appliance at a temperature between
15 cC and 35 cC.
This appliance is only designed for trimming the human beard.
Do not use the appliance for any other purpose.
Do not use the appliance if the cutting unit is damaged or broken,
as this may cause injury.
If the powerplug is damaged, always have it replaced by one of the
original type in order to avoid a hazard.
If the appliance is subjected to a major change in temperature,
pressure or humidity, let the appliance acclimatise for 30 minutes
before you use it.
Noise level: Lc = 73 dB [A]
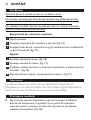
Charging
Charge the appliance fully before using it for the rst time or after a long
period of disuse.
Make sure the appliance is switched off before you start charging it.
Charging takes about 70 minutes if the appliance is completely empty.
1 Insert the appliance plug into the appliance and put the powerplug
in the wall socket.
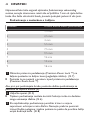
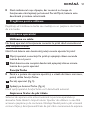
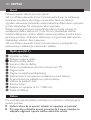
Battery indications
The green light burns continuously during fast charging. (Fig. 2)
The green light starts blinking when the battery is full. (Fig. 3)
If the red light blinks when you switch the appliance off after
cordless use, the battery is low and needs to be charged. (Fig. 4)
If the red light blinks but the motor does not start running when
you press the on/off button, the battery is empty and needs to be
charged.
,
,
,
,
,
,
,
,
,
,
,
,
,
ENGLISH 7

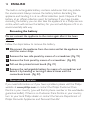
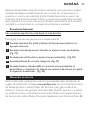
Preparing for use
Always comb your beard or moustache with a ne comb before you
start trimming.
Using the appliance
Corded trimming
Do not run the appliance from the mains when the battery is fully
charged.
Note: If the battery is low, you can also use the appliance from the mains:
1 Switch the trimmer off, connect it to the mains and wait a few
seconds before switching it on.
2 If the battery is completely empty, wait a few minutes before
switching the appliance on.
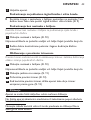
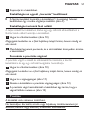
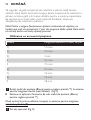
Turbo function
You can use the turbo function for greater suction power and
increased cutting speed.
1 Switch the appliance on. (Fig. 5)
2 Press the turbo button (Fig. 6)
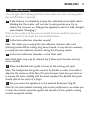
When you switch the appliance off, the turbo function will automatically
be deactivated.
The suction system is activated automatically as soon as you switch the
appliance on. It absorbs cut hairs during every kind of use, i.e. trimming
with and without comb attachment and contouring. The exible hair
guide follows the contours of the face and directs cut hairs towards the
nozzle of the vacuum mechanism.
We advise you to empty the hair-collection chamber after each trimming
session. When trimming long, dense beards it may also be necessary to
empty the hair-collection chamber during the trimming session in order
,
ENGLISH8

to maintain optimal suction performance (see chapter ‘Cleaning’, section
‘Hair-collection chamber’).
Note: To ensure optimal functioning of the vacuum system, do not cut off
more than approx. 7mm of your overall beard length at a time. If you want to
cut your beard shorter, repeat the process one or more times.
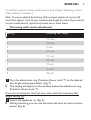
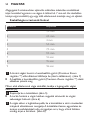
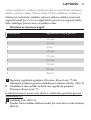
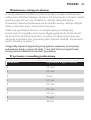
Trimming with comb attachment
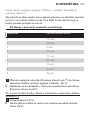
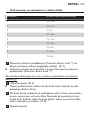
Setting Resulting hair length
1 1.5 mm
2 2.5 mm
3 4 mm
4 5.5 mm
5 7.5 mm
6 9.5 mm
7 12 mm
8 15 mm
9 18 mm
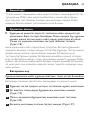
1 Turn the adjustment ring (Precision Zoom Lock `) to the desired
hair length setting (see table). (Fig. 7)
The setting will appear in the window below the adjustment ring
(Precision Zoom Lock `).
If you are trimming for the rst time, start with the maximum hair
length setting (9).
2 Switch the appliance on. (Fig. 5)
During trimming, you can use the turbo function for extra suction
power. (Fig. 6)
,
,
ENGLISH 9

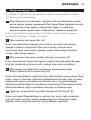
3 To trim in the most effective way, move the trimmer against the
direction of hair growth. Do not move the trimmer too fast. Make
smooth and gentle movements and make sure the surface of the
comb attachment always stays in contact with the skin. (Fig. 8)
4 Switch the appliance off.
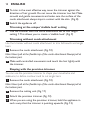
Trimming at the unique ‘stubble look’ setting
Use the trimmer with the comb attachment set to hair length
setting 1. This allows you to create a ‘stubble look’. (Fig. 9)
Trimming without comb attachment
Use the trimmer without comb attachment to trim full beards and single
hairs.
1 Remove the comb attachment. (Fig. 10)
Note: Never pull at the exible top of the comb attachment. Always pull at
the bottom part.
2 Make well-controlled movements and touch the hair lightly with
the trimmer.
Shaping with the precision trimmer
You can use the precision trimmer to shape your moustache and
sideburns, to dene contours and to cut single hairs.
1 Remove the comb attachment. (Fig. 10)
Note: Never pull at the exible top of the comb attachment. Always pull at
the bottom part.
2 Remove the cutting unit. (Fig. 11)
3 Attach the precision trimmer. (Fig. 12)
4 When you are using the precision trimmer, hold the appliance in
such a way that the trimmer is pointing upwards. (Fig. 13)
,
ENGLISH10

Cleaning
The appliance may only be cleaned dry.
Do not use abrasives, scourers or liquids such as alcohol, petrol or
acetone to clean the appliance.
Never use sharp or hard objects to clean the lter to avoid damaging it.
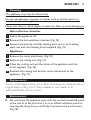
Hair-collection chamber
1 Switch the appliance off.
2 Remove the hair-collection chamber. (Fig. 14)
3 Remove the hairs by carefully shaking them out or by brushing
them out with the cleaning brush supplied. (Fig. 15)
1 Remove the comb attachment. (Fig. 10)
2 Remove the cutting unit. (Fig. 11)
3 Clean the cutting unit and the inside of the appliance with the
brush supplied. (Fig. 16)
4 Reattach the cutting unit and the comb attachment to the
appliance. (Fig. 17)
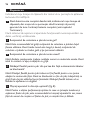
Replacement
A worn or damaged cutting unit or lter must always be replaced with an
original Philips cutting unit or lter, available at your dealer or at
authorised Philips service centres.
Environment
Do not throw the appliance away with the normal household waste
at the end of its life, but hand it in at an ofcial collection point for
recycling. By doing this you will help to preserve the environment.
(Fig. 18)
,
ENGLISH 11

The built-in rechargeable battery contains substances that may pollute
the environment. Always remove the battery before discarding the
appliance and handing it in at an ofcial collection point. Dispose of the
battery at an ofcial collection point for batteries. If you have trouble
removing the battery, you can also take the appliance to a Philips service
centre, which will remove the battery for you and will dispose of it in an
environmentally safe way.
Removing the battery
Do not connect the appliance to the mains again after it has been
opened.
Follow the steps below to remove the battery.
1 Disconnect the appliance from the mains and let the appliance run
until the motor stops.
2 Remove the two side panels by means of a screwdriver. (Fig. 19)
3 Remove the front panel by means of a screwdriver. (Fig. 20)
4 Pull out the printed circuit board. (Fig. 21)
5 Remove the rechargeable battery by means of a screwdriver and
detach it by bending or turning it several times until the
connections break. (Fig. 22)
Guarantee & service
If you need information or if you have a problem, please visit the Philips
website at www.philips.com or contact the Philips Customer Care
Centre in your country (you will nd its phone number in the worldwide
guarantee leaet). If there is no Customer Care Centre in your country,
turn to your local Philips dealer or contact the Service Department of
Philips Domestic Appliances and Personal Care BV.
ENGLISH12

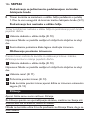
Troubleshooting
The red light. starts blinking but the motor does not start running when
the on/off button is pressed.
1 If the battery is completely empty, the red battery-low light. starts
blinking but the motor will not start running when you try to
switch the trimmer on. Charge the appliance until it is fully charged
(see chapter ‘Charging’).
If the suction system of the vacuum beard trimmer performs poorly or
does not work at all, check the points listed below.
2 Is the hair-collection chamber empty?
Note: We advise you to empty the hair-collection chamber after each
trimming session. When cutting long, dense beards, it may also be necessary
to empty the hair-collection chamber during the trimming session.
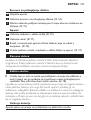
3 Is the hair-collection chamber or the lter wet?
Note: Both parts may only be cleaned dry. If these parts become wet, dry
them carefully.
4 Does the exible hair guide in front of the cutting unit jam?
Note: The transparent hair guide needs to be exible in order to be able to
adjust to the contours of the face. If it jams because hairs have got stuck in
it, remove the hairs carefully with the brush supplied. The exible hair guide
should yield at the touch of a nger.
5 Do you move the appliance in the optimal direction? (Fig. 8)
Note: For the best possible trimming and suction performance, we advise you
to move the trimmer upwards, against the direction of hair growth, making
smooth and gentle strokes.
ENGLISH 13

14
Уважаеми клиенти, вие направихте правилен избор!
Вашата нова машинка Philips за подстригване на брада с вакуумно
действие и без нужда от поддръжка съчетава иновационна
технология и изключително удобство при употреба.
Вграденият вакуумен механизъм събира отрязаните при
подстригването косми и ви гарантира чиста мивка след
подстригване.
Гребенът за следване на контура, самонаточващият се режещ
елемент и регулиращият пръстен за избор на дължина на косъма от
1,5 до 18 мм осигуряват отлични резултати и пестене на време при
употреба. Висококачествената приставка за фино подстригване
гарантира прецизно и управляемо подрязване, а ергономичната
форма на уреда дава възможност за приятно и удобно боравене.
Новата ви машинка Philips за подстригване на брада с вакуумен
механизъм е отлично пригодена за подстригване и оформяне на
брадата и бакенбардите ви.
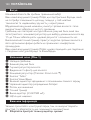
A Приспособление гребен
B Подвижен режещ блок
C Гъвкав водач за косми
D Отделение за събиране на косми с филтър
E Регулиращ пръстен (Precision Zoom Lock `)
F Бутон “турбо”
G Бутон вкл./изкл.
H Зелен индикатор за зареждане с индикация за заредена батерия
I Червен индикатор за изтощена батерия
J Гнездо за жака за уреда
K Приставка за фино подстригване
L Захранващ щепсел (2.5V/1500mA)
M Четка за почистване

Преди да използвате уреда, прочетете внимателно това
ръководство за експлоатация и го запазете за справка в бъдеще.
Пазете уреда и щепсела сухи!
Преди да свържете уреда, проверете дали напрежението,
посочено на щепсела за захранване, отговаря на напрежението
в местната електрическа мрежа.
Използвайте само доставения с комплекта щепсел.
Дръжте уреда извън обсега на деца.
Зареждайте, използвайте и съхранявайте уреда при температура
между 15 cC и 35 cC.
Този уред е предназначен само за подстригване на брада.
Не го използвайте за други цели.
Не използвайте уреда, ако режещият блок е повреден или
счупен, тъй като това може да доведе до нараняване.
Ако щепселът се повреди, винаги трябва да осигурявате
замяната му с такъв от оригиналния тип, за да се избегне
опасност.
Ако устройството е било подложено на значителни промени в
температурата, налягането или влажността, оставете го да се
аклиматизира за 30 минути, преди да го използвате.
Ниво на шум: Lc = 73 dB [A]
Преди да използвате уреда за пръв път или след продължителен
период на бездействие, заредете напълно уреда.
Проверете дали уредът е изключен, преди да започнете да го
зареждате.
Зареждането отнема около 70 минути, ако уредът е напълно
изтощен.
1 Поставете жака на уреда в гнездото му и щепсела за
захранване - в контакта.
,
,
,
,
,
,
,
,
,
,
15

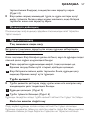
При бързото зареждане зеленият индикатор свети
непрекъснато. (фиг. 2)
Когато батерията е заредена, зеленият индикатор започва да
мига. (фиг. 3)
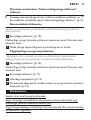
Ако при изключване на уреда след използване без кабел мига
червеният индикатор, то батерията е изтощена и се нуждае от
зареждане. (фиг. 4)
Ако червеният индикатор мига, но моторът не се задейства с
натискането на бутона вкл./изкл., то батерията е изтощена и се
нуждае от зареждане.
Преди да започнете подстригването, винаги сресвайте брадата или
мустаците си с фин гребен.
Не работете с уреда със захранване от мрежата при напълно
заредена батерия.
Забележка:Ако батерията е изтощена, можете да използвате уреда
със захранване от мрежата:
1 Изключете машинката за подстригване, свържете я с мрежата и
изчакайте няколко секунди, преди да я включите.
2 Ако батерията е напълно изтощена, изчакайте няколко минути,
преди да включите уреда.
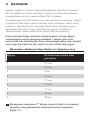
Можете да използвате функцията “турбо” за по-голяма
смукателна мощност и по-висока скорост.
1 Включете уреда. (фиг. 5)
,
,
,
,
,
16

2 Натиснете бутона “турбо” (фиг. 6)
Когато изключите уреда, функцията “турбо” ще се деактивира
автоматично.
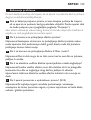
Системата за всмукване се задейства автоматично веднага щом
включите уреда. Тя поема отрязаните косми при всякаква употреба,
т. е. подстригване с или без приспособлението гребен и при
оформяне на контур. Гъвкавият водач на космите следва контурите
на лицето и насочва отрязаните косми към дюзата на вакуумния
механизъм.
Съветваме ви да изпразвате отделението за събиране на косми след
всяко подстригване. При подстригване на дълги, гъсти бради е
необходимо да се изпразва отделението за събиране на косми и по
време на подстригването, за да се поддържа оптимално всмукване
(вж. също глава “Почистване”, раздел “Отделение за събиране на
косми”).
Забележка: За да се осигури оптимална работа на вакуумната
система, не отрязвайте наведнъж повече от приблизително 7 мм от
цялата дължина на брадата. Ако желаете да подстрижете брадата
си по-късо, повторете процеса още веднъж или няколко пъти.
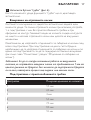
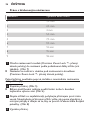
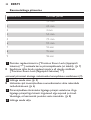
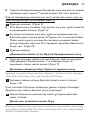
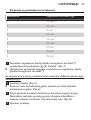
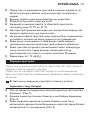
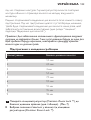
Настройка Получена дължина на космите
1 1,5 мм
2 2,5 мм
3 4 мм
4 5,5 мм
5 7,5 мм
6 9,5 мм
7 12 мм
17

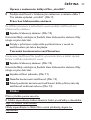
Настройка Получена дължина на космите
8 15 мм
9 18 мм
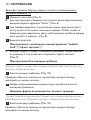
1 Завъртете регулиращия пръстен (Precision Zoom Lock `) до
желаната настройка за дължина на подстригване (вж.
таблицата). (фиг. 7)
Настройката се появява в прозорчето под регулиращия
пръстен (Precision Zoom Lock `).
Ако подстригвате за пръв път, започнете с настройка за максимална
дължина на подстригване (9).
2 Включете уреда. (фиг. 5)
При подстригване можете да използвате функцията “турбо” за
по-голяма смукателна мощност. (фиг. 6)
3 За да подстригвате възможно най-ефективно, движете
машинката срещу посоката на растежа на космите. Не движете
машинката твърде бързо. Правете плавни и нежни движения,
като внимавате повърхността на гребена винаги да е в допир с
кожата. (фиг. 8)
4 Изключете уреда.
Използвайте машинката за подстригване с приспособлението
гребен при настройка 1. Това ви дава възможност да придадете
вид на “набола брада”. (фиг. 9)
Използвайте машинката без приспособлението гребен за
подстригване на цялата брада и за отделни косми.
1 Свалете приспособлението гребен. (фиг. 10)
,
,
,
18

Забележка: Никога не дърпайте гъвкавата горна част на гребена.
Винаги дърпайте за долната част.
2 Правете добре контролирани движения и леко докосвайте
космите с машинката.
Можете да използвате приставката за фино подстригване за
оформяне на мустаците и бакенбардите, за очертаване на контури и
за подстригване на отделни косми.
1 Свалете приспособлението гребен. (фиг. 10)
Забележка:Никога не дърпайте гъвкавата горна част на гребена.
Винаги дърпайте за долната част.
2 Свалете подстригващия блок. (фиг. 11)
3 Поставете приставката за фино подстригване. (фиг. 12)
4 Когато използвате приставката за фино подстригване, дръжте
уреда така, че машинката да сочи нагоре. (фиг. 13)
Уредът подлежи само на сухо почистване.
Не използвайте абразивни или стържещи миещи препарати, нито
течности от рода на спирт, петролни продукти или ацетон за
почистване на уреда.
Никога не използвайте остри или твърди предмети за почистване
на филтъра, за да не го повредите.
1 Изключете уреда.
2 Свалете отделението за събиране на косми. (фиг. 14)
3 Изчистете космите, като внимателно ги изтръскате или ги
изчеткате с приложената четка. (фиг. 15)
19

1 Свалете приспособлението гребен. (фиг. 10)
2 Свалете подстригващия блок. (фиг. 11)
3 Почистете подстригващия блок и вътрешността на уреда с
приложената четка. (фиг. 16)
4 Поставете режещия блок и приспособлението гребен отново
на уреда. (фиг. 17)
Износен или повреден подстригващ блок или филтър да се заменя
само с оригинален подстригващ блок или филтър на Philips, които се
предлагат от местния търговец на уреди на Philips или от
упълномощен от Philips сервизен център.
След края на срока на експлоатация на уреда не го изхвърляйте
заедно с нормалните битови отпадъци, а го предайте в
официален пункт за събиране, където да бъде рециклиран.
По този начин вие помагате за опазването на околната среда.
(фиг. 18)
Вградената акумулаторна батерия съдържа вещества, които
замърсяват околната среда. Винаги изваждайте батерията, преди да
изхвърлите уреда или да го предадете в официален пункт за
събиране. Изхвърляйте батерията в официален пункт за събиране на
батерии. Ако имате проблеми при изваждане на батерията, можете
също да занесете уреда в сервизен център на Philips, където ще
извадят батерията и ще я изхвърлят по начин, опазващ околната
среда.
Не свързвайте уреда към мрежата, когато е отворен.
За да свалите батерията, следвайте стъпките по-долу.
,
20
Pagina se încarcă...
Pagina se încarcă...
Pagina se încarcă...
Pagina se încarcă...
Pagina se încarcă...
Pagina se încarcă...
Pagina se încarcă...
Pagina se încarcă...
Pagina se încarcă...
Pagina se încarcă...
Pagina se încarcă...
Pagina se încarcă...
Pagina se încarcă...
Pagina se încarcă...
Pagina se încarcă...
Pagina se încarcă...
Pagina se încarcă...
Pagina se încarcă...
Pagina se încarcă...
Pagina se încarcă...
Pagina se încarcă...
Pagina se încarcă...
Pagina se încarcă...
Pagina se încarcă...
Pagina se încarcă...
Pagina se încarcă...
Pagina se încarcă...
Pagina se încarcă...
Pagina se încarcă...
Pagina se încarcă...
Pagina se încarcă...
Pagina se încarcă...
Pagina se încarcă...
Pagina se încarcă...
Pagina se încarcă...
Pagina se încarcă...
Pagina se încarcă...
Pagina se încarcă...
Pagina se încarcă...
Pagina se încarcă...
Pagina se încarcă...
Pagina se încarcă...
Pagina se încarcă...
Pagina se încarcă...
Pagina se încarcă...
Pagina se încarcă...
Pagina se încarcă...
Pagina se încarcă...
Pagina se încarcă...
Pagina se încarcă...
Pagina se încarcă...
Pagina se încarcă...
Pagina se încarcă...
Pagina se încarcă...
Pagina se încarcă...
Pagina se încarcă...
Pagina se încarcă...
Pagina se încarcă...
Pagina se încarcă...
Pagina se încarcă...
Pagina se încarcă...
Pagina se încarcă...
Pagina se încarcă...
Pagina se încarcă...
Pagina se încarcă...
Pagina se încarcă...
Pagina se încarcă...
Pagina se încarcă...
Pagina se încarcă...
Pagina se încarcă...
Pagina se încarcă...
Pagina se încarcă...
Pagina se încarcă...
Pagina se încarcă...
Pagina se încarcă...
Pagina se încarcă...
Pagina se încarcă...
Pagina se încarcă...
Pagina se încarcă...
Pagina se încarcă...
Pagina se încarcă...
Pagina se încarcă...
Pagina se încarcă...
Pagina se încarcă...
Pagina se încarcă...
Pagina se încarcă...
Pagina se încarcă...
Pagina se încarcă...
Pagina se încarcă...
Pagina se încarcă...
Pagina se încarcă...
Pagina se încarcă...
Pagina se încarcă...
Pagina se încarcă...
Pagina se încarcă...
Pagina se încarcă...
Pagina se încarcă...
Pagina se încarcă...
Pagina se încarcă...
Pagina se încarcă...
Pagina se încarcă...
Pagina se încarcă...
Pagina se încarcă...
Pagina se încarcă...
Pagina se încarcă...
Pagina se încarcă...
Pagina se încarcă...
Pagina se încarcă...
Pagina se încarcă...
Pagina se încarcă...
Pagina se încarcă...
Pagina se încarcă...
Pagina se încarcă...
Pagina se încarcă...
Pagina se încarcă...
Pagina se încarcă...
Pagina se încarcă...
Pagina se încarcă...
Pagina se încarcă...
Pagina se încarcă...
-
 1
1
-
 2
2
-
 3
3
-
 4
4
-
 5
5
-
 6
6
-
 7
7
-
 8
8
-
 9
9
-
 10
10
-
 11
11
-
 12
12
-
 13
13
-
 14
14
-
 15
15
-
 16
16
-
 17
17
-
 18
18
-
 19
19
-
 20
20
-
 21
21
-
 22
22
-
 23
23
-
 24
24
-
 25
25
-
 26
26
-
 27
27
-
 28
28
-
 29
29
-
 30
30
-
 31
31
-
 32
32
-
 33
33
-
 34
34
-
 35
35
-
 36
36
-
 37
37
-
 38
38
-
 39
39
-
 40
40
-
 41
41
-
 42
42
-
 43
43
-
 44
44
-
 45
45
-
 46
46
-
 47
47
-
 48
48
-
 49
49
-
 50
50
-
 51
51
-
 52
52
-
 53
53
-
 54
54
-
 55
55
-
 56
56
-
 57
57
-
 58
58
-
 59
59
-
 60
60
-
 61
61
-
 62
62
-
 63
63
-
 64
64
-
 65
65
-
 66
66
-
 67
67
-
 68
68
-
 69
69
-
 70
70
-
 71
71
-
 72
72
-
 73
73
-
 74
74
-
 75
75
-
 76
76
-
 77
77
-
 78
78
-
 79
79
-
 80
80
-
 81
81
-
 82
82
-
 83
83
-
 84
84
-
 85
85
-
 86
86
-
 87
87
-
 88
88
-
 89
89
-
 90
90
-
 91
91
-
 92
92
-
 93
93
-
 94
94
-
 95
95
-
 96
96
-
 97
97
-
 98
98
-
 99
99
-
 100
100
-
 101
101
-
 102
102
-
 103
103
-
 104
104
-
 105
105
-
 106
106
-
 107
107
-
 108
108
-
 109
109
-
 110
110
-
 111
111
-
 112
112
-
 113
113
-
 114
114
-
 115
115
-
 116
116
-
 117
117
-
 118
118
-
 119
119
-
 120
120
-
 121
121
-
 122
122
-
 123
123
-
 124
124
-
 125
125
-
 126
126
-
 127
127
-
 128
128
-
 129
129
-
 130
130
-
 131
131
-
 132
132
-
 133
133
-
 134
134
-
 135
135
-
 136
136
-
 137
137
-
 138
138
-
 139
139
-
 140
140


Philips QT4085/70 Manual de utilizare
- Categorie
- Aparate de tuns
- Tip
- Manual de utilizare
în alte limbi
- slovenčina: Philips QT4085/70 Používateľská príručka
- eesti: Philips QT4085/70 Kasutusjuhend
Lucrări înrudite
-
Philips QT4020/10 Manual de utilizare
-
Philips QT4019/15 Manual de utilizare
-
Philips BT7085/15 Manual de utilizare
-
Philips BT7210/15 Manual de utilizare
-
Philips QC5099 Manual de utilizare
-
Philips QG3371/16 Manual de utilizare
-
-
Philips MG3730/15 Manual de utilizare
-
Philips QT4005/13 Manual de utilizare
-
Philips MG5720/15 Manual de utilizare